change time CHEVROLET COLORADO 2006 1.G User Guide
[x] Cancel search | Manufacturer: CHEVROLET, Model Year: 2006, Model line: COLORADO, Model: CHEVROLET COLORADO 2006 1.GPages: 434, PDF Size: 2.57 MB
Page 185 of 434
XM™ Satellite Radio Service
XM™ is a satellite radio service that is based in the
48 contiguous United States and in Canada (if available).
XM™ offers over 100 coast-to-coast channels including
music, news, sports, talk, and children’s programming.
XM™ provides digital quality audio and text information
that includes song title and artist name. A service fee is
required in order to receive the XM™ service. For more
information, contact XM™ at www.xmradio.com or
call 1-800-852-XMXM (9696).
Playing the Radio
PWR (Power):Press this knob to turn the system
on and off.
oVOLp(Volume):Turn this knob to increase or
to decrease the volume.
DISPL (Display):When the ignition is turned off, press
this knob to display the time.
For RDS, press the DISPL knob to change what
appears on the display while using RDS. The display
options are station name, RDS station frequency,
PTY, and the name of the program (if available).For XM™ (if equipped), press the DISPL knob
while in XM™ mode to retrieve four different
categories of information related to the current song
or channel: Artist, Song Title, Category or PTY,
Channel Number/Channel Name.
To change the default on the display, press the
DISPL knob until you see the display you want, then
press and hold this knob for two seconds. The radio
will produce one beep and the selected display will
now be the default.
AUTO VOL (Automatic Volume):With automatic
volume, the audio system adjusts automatically to
make up for road and wind noise as you drive.
Set the volume at the desired level. Press this button
to select LOW, MEDIUM, or HIGH. AVOL will appear
on the display. Each higher setting will allow for
more volume compensation at faster vehicle speeds.
Then as you drive, automatic volume increases
the volume, as necessary, to overcome noise at any
speed. The volume level should always sound the
same to you as you drive. NONE will appear on the
display if the radio cannot determine the vehicle speed.
To turn automatic volume off, press this button until
OFF appears on the display.
3-51
Page 193 of 434
4 FWD (Forward):Press and hold this pushbutton to
advance quickly within a track. Press and hold this
pushbutton for less than two seconds to advance at
six times the normal playing speed. Press and hold it
for more than two seconds to advance at 17 times
the normal playing speed. Release this pushbutton to
play the passage. ET and the elapsed time of the track
will appear on the display.
6 RDM (Random):Press this pushbutton to hear the
tracks in random, rather than sequential, order. RDM ON
will appear on the display. RDM and the track number
will appear on the display when each track starts to play.
Press RDM again to turn off random play. RDM OFF
will appear on the display.
qSEEKr:Press the left arrow to go to the start
of the current or the previous track. Press the right arrow
to go to the start of the next track. Pressing either
arrow for more than two seconds will scan the next
tracks, playing the rst eight seconds of each track until
all of the tracks have been previewed. Press the
button again to stop scanning and to play the track.
oTUNEp:Turning the TUNE knob will fast
track reverse or advance through tracks. The track
number will appear on the display for each track.DISPL (Display):Press this knob to see how long the
current track has been playing. ET and the elapsed
time of the track will appear on the display. To change
the default on the display (track or elapsed time),
press this knob until you see the display you want, then
press and hold the knob for two seconds. The radio
will produce one beep and the selected display will now
be the default.
BAND:Press this button to listen to the radio when
a CD is playing. The inactive CD will remain safely
inside the radio for future listening.
CD AUX (Auxiliary):Press this button to play a CD
when listening to the radio. The CD symbol will appear
on the display when a CD is loaded.
Z(Eject):Press this button to eject a CD. Eject may
be activated with either the ignition or radio off. CDs
may be loaded with the ignition and radio off if this
button is pressed rst.
3-59
Page 198 of 434
DISPL (Display):Press this knob to switch between
track mode, folder/playlist mode, and time of day mode.
The display will show only eight characters, but there
can be up to four pages of text. If there are more
than eight characters in the song, folder, or playlist
name, pressing this knob within two seconds will take
you to the next page of text. If there are no other pages
to be shown, pressing this knob within two seconds
will take you to the next display mode.
Track mode will display the current track number
and the ID3 tag song name.
Folder/playlist mode will display the current folder
or playlist number and the folder/playlist name.
Time of day mode will display the time of day and
the ID3 tag song name.
To change the default on the display, press the DISPL
knob until you see the display you want, then press
and hold this knob for two seconds. The radio will
produce one beep and the selected display will now
be the default.INFO (Information):INFO will appear on the display
whenever a current track has ID3 tag information.
Press this button to display the artist name and album
contained in the tag. INFO will disappear from the
display when the information in the ID3 tag has nished.
BAND:Press this button to listen to the radio when
a CD is playing. The inactive CD will remain safely
inside the radio for future listening.
CD AUX (Auxiliary):Press this button to play a CD
when listening to the radio. The CD symbol will be
illuminated on the display when a CD is loaded.
Z(Eject):Press this button to eject a CD. Eject may
be activated with either the ignition or radio off. CDs
may be loaded with the ignition and radio off if this
button is pressed rst.
3-64
Page 207 of 434
To use repeat, do the following:
To repeat the track you are listening to, press and
release the RPT button. RPT will appear on the
display. Press RPT again to turn off repeat play.
To repeat the CD you are listening to, press and
hold the RPT button for two seconds. RPT will
appear on the display. Press RPT again to turn
off repeat play.
RDM (Random):With random, you can listen to
the tracks in random, rather than sequential, order,
on one CD or on all of the CDs. To use random,
do one of the following:
To play the tracks on the CD you are listening to in
random order, press and release the RDM button.
RANDOM ONE will appear on the display. Press
RDM again to turn off random play.
To play the tracks on all of the CDs that are loaded
in random order, press and hold RDM for more
than two seconds. You will hear a beep and
RANDOM ALL will appear on the display. Press
RDM again to turn off random play.
AUTO EQ (Automatic Equalization):Press AUTO EQ
to select the equalization setting while playing a CD.
The equalization will be stored whenever a CD is played.
For more information on AUTO EQ, see “AUTO EQ”
listed previously in this section.
©SEEK¨:Press the left arrow to go to the start of
the current track (if more than 10 seconds have played),
or to go to the previous track (if less than 10 seconds
have played). Press the right arrow to go to the
next track. If either arrow is held or pressed more than
once, the player will continue moving backward or
forward through the CD.
©SCAN¨:To scan one CD, press and hold either
SCAN arrow for more than two seconds until SCAN
appears on the display and you hear a beep. The radio
will go to the next track, play for 10 seconds, then go
on to the next track. Press either SCAN arrow again,
to stop scanning.
To scan all loaded CDs, press and hold either SCAN
arrow for more than four seconds until CD SCAN
appears on the display and you hear a beep. Use this
feature to listen to 10 seconds of the rst track of
each loaded CD. Press either SCAN arrow again,
to stop scanning.
INFO (Information):Press this knob to see how long
the current track has been playing. To change the
default on the display, track or elapsed time, press the
knob until you see the display you want, then press
and hold the knob until the radio beeps. The selected
display will now be the default.
BAND:Press this button to listen to the radio when
a CD is playing. The inactive CD(s) will remain safely
inside the radio for future listening.
3-73
Page 212 of 434
XM™ Satellite Radio Antenna
System
The XM™ Satellite Radio antenna is located on the roof
of your vehicle. Keep this antenna clear of snow and
ice build up for clear radio reception.
If your vehicle has a sunroof, the performance of the
XM™ system may be affected if the sunroof is open.
Loading items onto the roof of your vehicle can interfere
with the performance of the XM™ system. Make sure
the XM™ Satellite Radio antenna is not obstructed.
Chime Level Adjustment
The radio is used to adjust the vehicle’s chime level.
To change the volume level of the chime, press and hold
pushbutton 6 with the ignition on and the radio power
off. The volume level will change from the normal
level to loud, and LOUD will appear on the radio display.
To change back to the default or normal setting,
press and hold pushbutton 6 again. The volume level
will change from the loud level to normal, and NORMAL
will appear on the radio display. Each time the chime
volume is changed, three chimes will sound as an
example of the new volume selected. Removing the
radio and not replacing it with a factory radio or chime
module will disable vehicle chimes.
3-78
Page 220 of 434
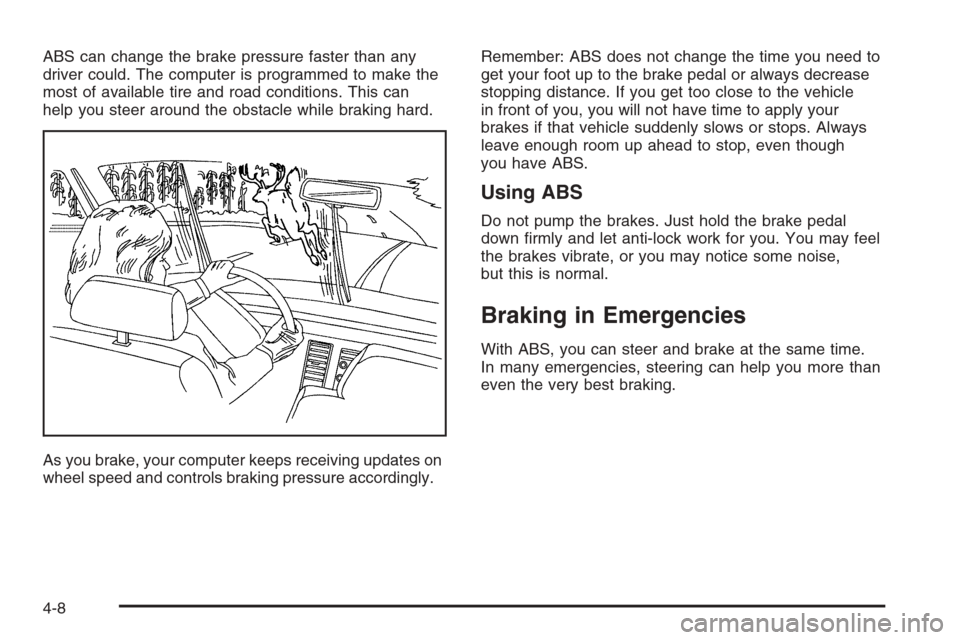
ABS can change the brake pressure faster than any
driver could. The computer is programmed to make the
most of available tire and road conditions. This can
help you steer around the obstacle while braking hard.
As you brake, your computer keeps receiving updates on
wheel speed and controls braking pressure accordingly.Remember: ABS does not change the time you need to
get your foot up to the brake pedal or always decrease
stopping distance. If you get too close to the vehicle
in front of you, you will not have time to apply your
brakes if that vehicle suddenly slows or stops. Always
leave enough room up ahead to stop, even though
you have ABS.
Using ABS
Do not pump the brakes. Just hold the brake pedal
down rmly and let anti-lock work for you. You may feel
the brakes vibrate, or you may notice some noise,
but this is normal.
Braking in Emergencies
With ABS, you can steer and brake at the same time.
In many emergencies, steering can help you more than
even the very best braking.
4-8
Page 225 of 434
Do not get too close to the vehicle you want to
pass while you are awaiting an opportunity. For
one thing, following too closely reduces your area
of vision, especially if you are following a larger
vehicle. Also, you will not have adequate space
if the vehicle ahead suddenly slows or stops. Keep
back a reasonable distance.
When it looks like a chance to pass is coming up,
start to accelerate but stay in the right lane and
do not get too close. Time your move so you will
be increasing speed as the time comes to move into
the other lane. If the way is clear to pass, you will
have a running start that more than makes up
for the distance you would lose by dropping back.
And if something happens to cause you to
cancel your pass, you need only slow down and
drop back again and wait for another opportunity.
If other vehicles are lined up to pass a slow vehicle,
wait your turn. But take care that someone is not
trying to pass you as you pull out to pass the slow
vehicle. Remember to glance over your shoulder
and check the blind spot.
Check your mirrors, glance over your shoulder,
and start your left lane change signal before moving
out of the right lane to pass. When you are far
enough ahead of the passed vehicle to see its
front in your inside mirror, activate your right lane
change signal and move back into the right
lane. Remember that your passenger side outside
mirror is convex. The vehicle you just passed
may seem to be farther away from you than it
really is.
Try not to pass more than one vehicle at a time
on two-lane roads. Reconsider before passing
the next vehicle.
Do not overtake a slowly moving vehicle too rapidly.
Even though the brake lamps are not ashing, it
may be slowing down or starting to turn.
If you are being passed, make it easy for the
following driver to get ahead of you. Perhaps
you can ease a little to the right.
4-13
Page 230 of 434
Getting Familiar with Off-Road Driving
It is a good idea to practice in an area that is safe
and close to home before you go into the wilderness.
Off-road driving does require some new and different
skills. Here is what we mean.
Tune your senses to different kinds of signals. Your
eyes, for example, need to constantly sweep the terrain
for unexpected obstacles. Your ears need to listen
for unusual tire or engine sounds. With your arms,
hands, feet, and body, you will need to respond to
vibrations and vehicle bounce.
Controlling your vehicle is the key to successful off-road
driving. One of the best ways to control your vehicle
is to control your speed. Here are some things to
keep in mind. At higher speeds:
You approach things faster and you have less time
to scan the terrain for obstacles.
You have less time to react.
You have more vehicle bounce when you drive
over obstacles.
You will need more distance for braking, especially
since you are on an unpaved surface.
{CAUTION:
When you are driving off-road, bouncing and
quick changes in direction can easily throw
you out of position. This could cause you to
lose control and crash. So, whether you are
driving on or off the road, you and your
passengers should wear safety belts.
Scanning the Terrain
Off-road driving can take you over many different kinds
of terrain. You need to be familiar with the terrain
and its many different features. Here are some things
to consider.
Surface Conditions:Off-roading can take you over
hard-packed dirt, gravel, rocks, grass, sand, mud, snow,
or ice. Each of these surfaces affects the steering,
acceleration, and braking of your vehicle in different
ways. Depending upon the kind of surface you are on,
you may experience slipping, sliding, wheel spinning,
delayed acceleration, poor traction, and longer braking
distances.
4-18
Page 231 of 434
Surface Obstacles:Unseen or hidden obstacles can
be hazardous. A rock, log, hole, rut, or bump can startle
you if you are not prepared for them. Often these
obstacles are hidden by grass, bushes, snow, or even
the rise and fall of the terrain itself. Here are some
things to consider:
Is the path ahead clear?
Will the surface texture change abruptly up ahead?
Does the travel take you uphill or downhill?
There is more discussion of these subjects later.
Will you have to stop suddenly or change direction
quickly?
When you drive over obstacles or rough terrain, keep
a rm grip on the steering wheel. Ruts, troughs, or other
surface features can jerk the wheel out of your hands
if you are not prepared.
When you drive over bumps, rocks, or other obstacles,
your wheels can leave the ground. If this happens,
even with one or two wheels, you cannot control the
vehicle as well or at all.Because you will be on an unpaved surface, it is
especially important to avoid sudden acceleration,
sudden turns, or sudden braking.
In a way, off-road driving requires a different kind of
alertness from driving on paved roads and highways.
There are no road signs, posted speed limits, or signal
lights. You have to use your own good judgment
about what is safe and what is not.
Drinking and driving can be very dangerous on any
road. And this is certainly true for off-road driving.
At the very time you need special alertness and driving
skills, your reexes, perceptions, and judgment can
be affected by even a small amount of alcohol.
You could have a serious — or even fatal — accident
if you drink and drive or ride with a driver who has
been drinking. SeeDrunken Driving on page 4-3.
4-19
Page 268 of 434
6. Release the parking brake only after the vehicle
being towed is rmly attached to the tow vehicle.
7. Turn the ignition to LOCK.
If the tow vehicle will not be started or driven for
six weeks or more, remove the battery cable from the
negative terminal (post) of the battery to prevent your
battery from draining while towing.
After towing, see “Shifting Out of NEUTRAL” under
Four-Wheel Drive on page 2-26.
Towing a Trailer
{CAUTION:
If you do not use the correct equipment and
drive properly, you can lose control when you
pull a trailer. For example, if the trailer is too
heavy, the brakes may not work well — or even
at all. You and your passengers could be
seriously injured. Pull a trailer only if you have
followed all the steps in this section. Ask your
dealer for advice and information about towing
a trailer with your vehicle.Notice:Pulling a trailer improperly can damage
your vehicle and result in costly repairs that would
not be covered by your warranty. Always follow
the instructions in this section and check with your
dealer for more information about towing a trailer
with your vehicle.
To identify the trailering capacity of your vehicle, you
should read the information in “Weight of the Trailer” that
appears later in this section.
Trailering is different than just driving your vehicle by
itself. Trailering means changes in handling, acceleration,
braking, durability and fuel economy. Successful, safe
trailering takes correct equipment, and it has to be used
properly.
That’s the reason for this part. In it are many time-tested,
important trailering tips and safety rules. Many of these
are important for your safety and that of your passengers.
So please read this section carefully before you pull a
trailer.
4-56