oil level CHEVROLET COLORADO 2009 1.G Owners Manual
[x] Cancel search | Manufacturer: CHEVROLET, Model Year: 2009, Model line: COLORADO, Model: CHEVROLET COLORADO 2009 1.GPages: 420, PDF Size: 2.49 MB
Page 172 of 420
CHANGE OIL
This message displays when the oil needs to be
changed. Check the oil in your vehicle as soon as
possible and have your vehicle serviced by your
dealer/retailer. SeeEngine Oil on page 5-15and
Scheduled Maintenance on page 6-4for more
information. Press and release the reset stem to
acknowledge the message and clear it from the
display.
DOORS
This message displays when one or more of the doors
is ajar. Check all the doors on your vehicle to make
sure they are closed. The message clears from
the display after all of the doors are closed.
ENG (Engine) HOT
This message displays when the engine coolant
temperature is hot. Check the engine coolant
temperature gage. SeeEngine Coolant Temperature
Gage on page 3-29. Have your vehicle serviced by
your dealer/retailer as soon as possible if you suspect
the engine is overheating. SeeEngine Overheating
on page 5-34for more information.
FLUID
This message displays if the brake �uid is low.
Check the brake �uid as soon as possible and have
your vehicle serviced by your dealer/retailer. SeeBrakes
on page 5-38for more information. Press and release the
reset stem to acknowledge the message and clear it from
the display.
FUEL CAP
This message displays if the vehicle’s fuel cap is either
off or loose. Pull over as soon as possible and check to
see if the fuel cap is secure. You may also see the check
engine light on the instrument panel cluster. If the check
engine light does come on when the fuel cap was loose,
it may take a few driving trips before the light turns off.
SeeMalfunction Indicator Lamp on page 3-30for more
information if the light still remains on. Press and release
the reset stem to acknowledge the message and clear it
from the display.
LOW FUEL
This message displays if the level of fuel in the vehicle
is low. Also check the fuel gage. SeeFuel Gage on
page 3-34for more information. Re�ll the fuel tank
as soon as possible.
3-40
Page 221 of 420
Before Leaving on a Long Trip
To prepare your vehicle for a long trip, consider having
it serviced by your dealer/retailer before departing.
Things to check on your own include:
Windshield Washer Fluid:Reservoir full? Windows
clean — inside and outside?
Wiper Blades:In good shape?
Fuel, Engine Oil, Other Fluids:All levels checked?
Lamps:Do they all work and are lenses clean?
Tires:Are treads good? Are tires in�ated to
recommended pressure?
Weather and Maps:Safe to travel? Have
up-to-date maps?
Highway Hypnosis
Always be alert and pay attention to your surroundings
while driving. If you become tired or sleepy, �nd a
safe place to park your vehicle and rest.
Other driving tips include:
Keep the vehicle well ventilated.
Keep interior temperature cool.
Keep your eyes moving — scan the road ahead
and to the sides.
Check the rearview mirror and vehicle instruments
often.
4-27
Page 250 of 420
When towing at high altitude on steep uphill grades,
consider the following: Engine coolant will boil at a lower
temperature than at normal altitudes. If the engine is
turned off immediately after towing at high altitude on
steep uphill grades, the vehicle may show signs similar to
engine overheating. To avoid this, let the engine run while
parked, preferably on level ground, with an automatic
transmission in P (Park) or a manual transmission in
N (Neutral) with the parking brake applied, for a few
minutes before turning the engine off. If the overheat
warning comes on, seeEngine Overheating on
page 5-34.
Parking on Hills
{CAUTION:
Parking the vehicle on a hill with the trailer attached
can be dangerous. If something goes wrong, the rig
could start to move. People can be injured, and
both the vehicle and the trailer can be damaged.
When possible, always park the rig on a �at
surface.If parking the rig on a hill:
1. Press the brake pedal, but do not shift into P (Park)
yet for vehicles with an automatic transmission, or
into gear for vehicles with a manual transmission.
Turn the wheels into the curb if facing downhill
or into traffic if facing uphill.
2. Have someone place chocks under the trailer
wheels.
3. When the wheel chocks are in place, release the
brake pedal until the chocks absorb the load.
4. Reapply the brake pedal. Then apply the parking
brake and shift into P (Park) for vehicles with an
automatic transmission or into gear for vehicles with
a manual transmission.
5. If the vehicle has four-wheel-drive, be sure
the transfer case is in a drive gear and not in
N (Neutral). SeeFour-Wheel Drive on page 2-28
for more information.
6. Release the brake pedal.
4-56
Page 265 of 420
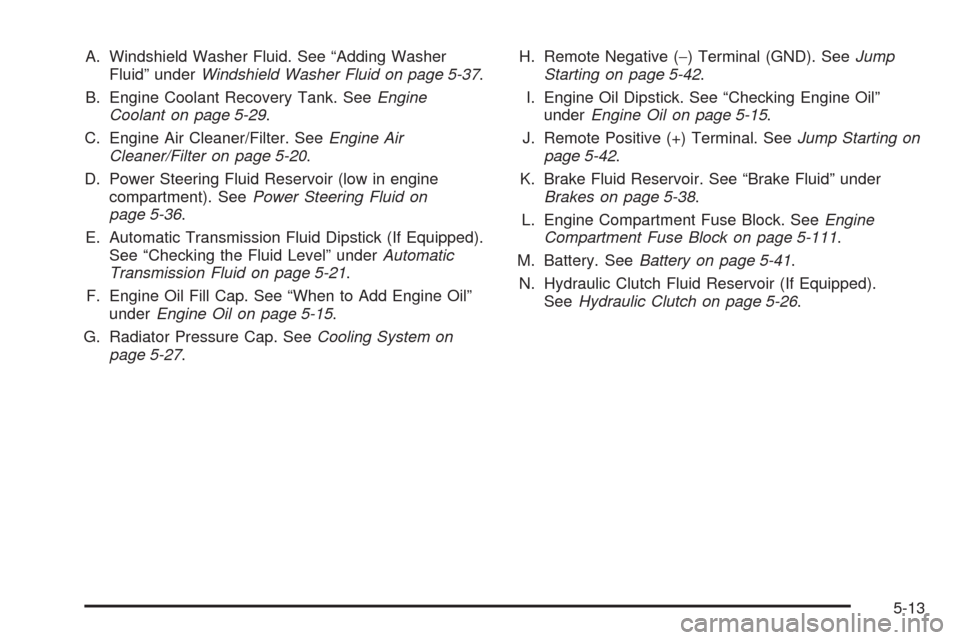
A. Windshield Washer Fluid. See “Adding Washer
Fluid” underWindshield Washer Fluid on page 5-37.
B. Engine Coolant Recovery Tank. SeeEngine
Coolant on page 5-29.
C. Engine Air Cleaner/Filter. SeeEngine Air
Cleaner/Filter on page 5-20.
D. Power Steering Fluid Reservoir (low in engine
compartment). SeePower Steering Fluid on
page 5-36.
E. Automatic Transmission Fluid Dipstick (If Equipped).
See “Checking the Fluid Level” underAutomatic
Transmission Fluid on page 5-21.
F. Engine Oil Fill Cap. See “When to Add Engine Oil”
underEngine Oil on page 5-15.
G. Radiator Pressure Cap. SeeCooling System on
page 5-27.H. Remote Negative (−) Terminal (GND). SeeJump
Starting on page 5-42.
I. Engine Oil Dipstick. See “Checking Engine Oil”
underEngine Oil on page 5-15.
J. Remote Positive (+) Terminal. SeeJump Starting on
page 5-42.
K. Brake Fluid Reservoir. See “Brake Fluid” under
Brakes on page 5-38.
L. Engine Compartment Fuse Block. SeeEngine
Compartment Fuse Block on page 5-111.
M. Battery. SeeBattery on page 5-41.
N. Hydraulic Clutch Fluid Reservoir (If Equipped).
SeeHydraulic Clutch on page 5-26.
5-13
Page 267 of 420
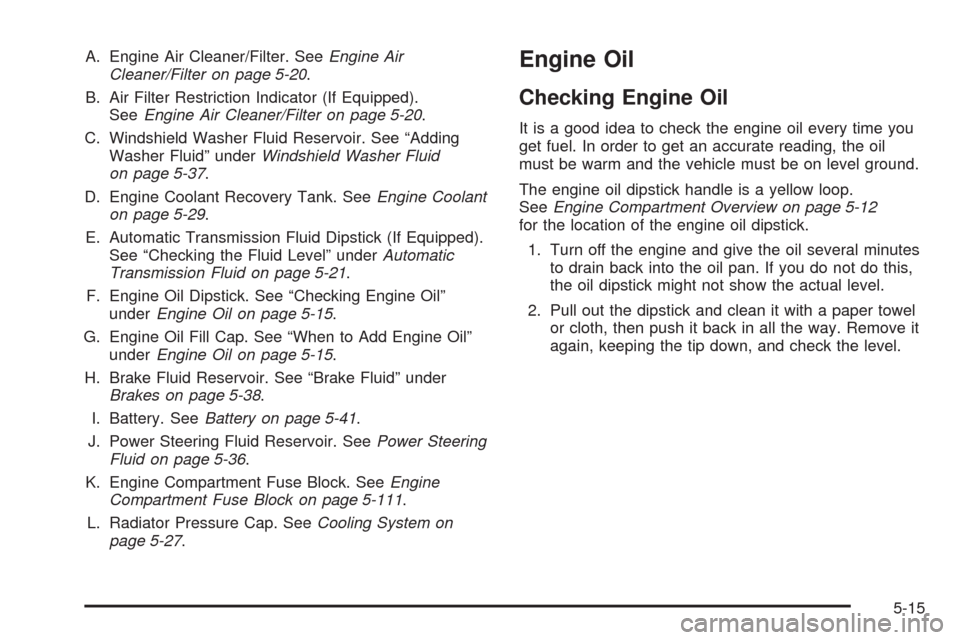
A. Engine Air Cleaner/Filter. SeeEngine Air
Cleaner/Filter on page 5-20.
B. Air Filter Restriction Indicator (If Equipped).
SeeEngine Air Cleaner/Filter on page 5-20.
C. Windshield Washer Fluid Reservoir. See “Adding
Washer Fluid” underWindshield Washer Fluid
on page 5-37.
D. Engine Coolant Recovery Tank. SeeEngine Coolant
on page 5-29.
E. Automatic Transmission Fluid Dipstick (If Equipped).
See “Checking the Fluid Level” underAutomatic
Transmission Fluid on page 5-21.
F. Engine Oil Dipstick. See “Checking Engine Oil”
underEngine Oil on page 5-15.
G. Engine Oil Fill Cap. See “When to Add Engine Oil”
underEngine Oil on page 5-15.
H. Brake Fluid Reservoir. See “Brake Fluid” under
Brakes on page 5-38.
I. Battery. SeeBattery on page 5-41.
J. Power Steering Fluid Reservoir. SeePower Steering
Fluid on page 5-36.
K. Engine Compartment Fuse Block. SeeEngine
Compartment Fuse Block on page 5-111.
L. Radiator Pressure Cap. SeeCooling System on
page 5-27.Engine Oil
Checking Engine Oil
It is a good idea to check the engine oil every time you
get fuel. In order to get an accurate reading, the oil
must be warm and the vehicle must be on level ground.
The engine oil dipstick handle is a yellow loop.
SeeEngine Compartment Overview on page 5-12
for the location of the engine oil dipstick.
1. Turn off the engine and give the oil several minutes
to drain back into the oil pan. If you do not do this,
the oil dipstick might not show the actual level.
2. Pull out the dipstick and clean it with a paper towel
or cloth, then push it back in all the way. Remove it
again, keeping the tip down, and check the level.
5-15
Page 268 of 420
When to Add Engine Oil
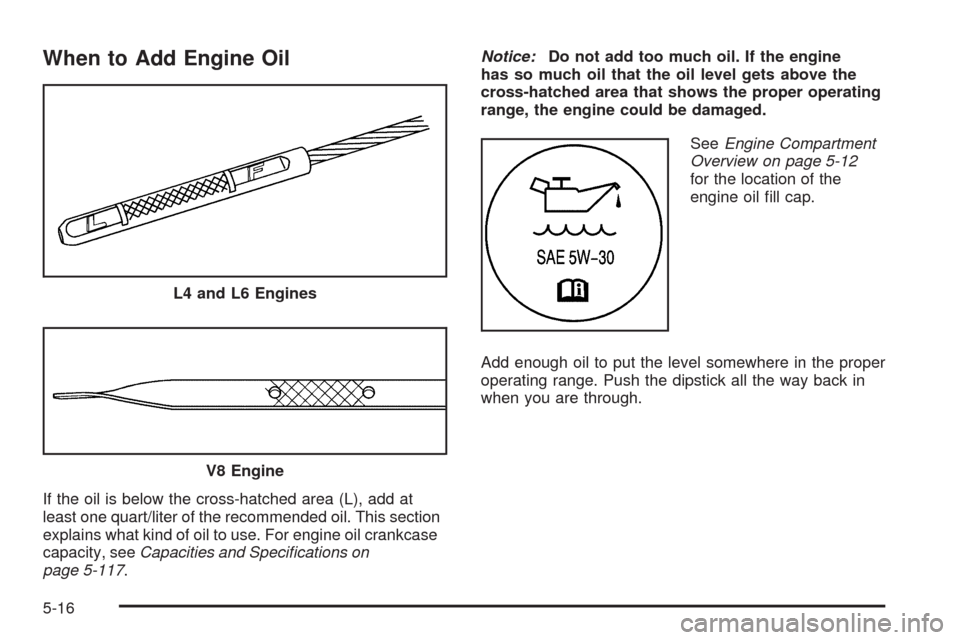
If the oil is below the cross-hatched area (L), add at
least one quart/liter of the recommended oil. This section
explains what kind of oil to use. For engine oil crankcase
capacity, seeCapacities and Specifications on
page 5-117.Notice:Do not add too much oil. If the engine
has so much oil that the oil level gets above the
cross-hatched area that shows the proper operating
range, the engine could be damaged.
SeeEngine Compartment
Overview on page 5-12
for the location of the
engine oil �ll cap.
Add enough oil to put the level somewhere in the proper
operating range. Push the dipstick all the way back in
when you are through. L4 and L6 Engines
V8 Engine
5-16
Page 270 of 420
Engine Oil Additives / Engine Oil
Flushes
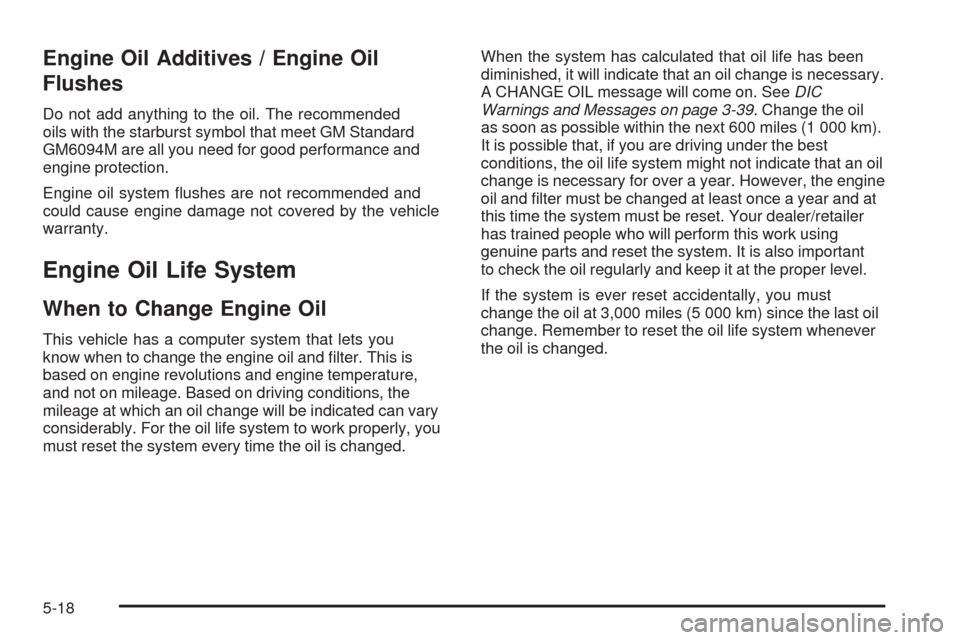
Do not add anything to the oil. The recommended
oils with the starburst symbol that meet GM Standard
GM6094M are all you need for good performance and
engine protection.
Engine oil system �ushes are not recommended and
could cause engine damage not covered by the vehicle
warranty.
Engine Oil Life System
When to Change Engine Oil
This vehicle has a computer system that lets you
know when to change the engine oil and �lter. This is
based on engine revolutions and engine temperature,
and not on mileage. Based on driving conditions, the
mileage at which an oil change will be indicated can vary
considerably. For the oil life system to work properly, you
must reset the system every time the oil is changed.When the system has calculated that oil life has been
diminished, it will indicate that an oil change is necessary.
A CHANGE OIL message will come on. SeeDIC
Warnings and Messages on page 3-39. Change the oil
as soon as possible within the next 600 miles (1 000 km).
It is possible that, if you are driving under the best
conditions, the oil life system might not indicate that an oil
change is necessary for over a year. However, the engine
oil and �lter must be changed at least once a year and at
this time the system must be reset. Your dealer/retailer
has trained people who will perform this work using
genuine parts and reset the system. It is also important
to check the oil regularly and keep it at the proper level.
If the system is ever reset accidentally, you must
change the oil at 3,000 miles (5 000 km) since the last oil
change. Remember to reset the oil life system whenever
the oil is changed.
5-18
Page 273 of 420
{CAUTION:
Operating the engine with the air cleaner/�lter
off can cause you or others to be burned. The air
cleaner not only cleans the air; it helps to stop
�ames if the engine back�res. If it is not there and
the engine back�res, you could be burned. Do not
drive with it off, and be careful working on the
engine with the air cleaner/�lter off.
Notice:If the air cleaner/�lter is off, a back�re can
cause a damaging engine �re. And, dirt can easily get
into the engine, which will damage it. Always have
the air cleaner/�lter in place when you are driving.
Automatic Transmission Fluid
When to Check and Change Automatic
Transmission Fluid
A good time to check the automatic transmission �uid
level is when the engine oil is changed.
Change the �uid and �lter at the intervals listed in
Additional Required Services on page 6-6, and be sure
to use the transmission �uid listed inRecommended
Fluids and Lubricants on page 6-12.
5-21
Page 276 of 420
How to Add Automatic
Transmission Fluid
Refer to the Maintenance Schedule to determine what
kind of transmission �uid to use. SeeRecommended
Fluids and Lubricants on page 6-12.
Add �uid only after checking the transmission �uid
while it is hot. A cold check is used only as a reference.
If the �uid level is low, add only enough of the proper
�uid to bring the level up to the HOT area for a hot
check. It does not take much �uid, generally less than
one pint (0.5 L). Do not over�ll.
Notice:Use of the incorrect automatic transmission
�uid may damage the vehicle, and the damages
may not be covered by the vehicle’s warranty.
Always use the automatic transmission �uid listed in
Recommended Fluids and Lubricants on page 6-12.
After adding �uid, recheck the �uid level as described
under “How to Check Automatic Transmission Fluid,”
earlier in this section.
When the correct �uid level is obtained, push the
dipstick back in all the way; then �ip the handle down
to lock the dipstick in place.
Manual Transmission Fluid
When to Check
A good time to check the manual transmission �uid is
when the engine oil is changed. However, the �uid in the
manual transmission does not require changing.
How to Check
Because this operation can be a little difficult, you may
choose to have this done at your GM dealer/retailer
service department.
If doing it yourself, be sure to follow all the instructions
here, or there could be a false reading.
Notice:Too much or too little �uid can damage
your transmission. Too little �uid could cause the
transmission to overheat. Be sure to get an accurate
reading if you check your transmission �uid.
Check the �uid level only when the engine is off, the
vehicle is parked on a level place and the transmission
is cool enough to touch the transmission case.
5-24
Page 283 of 420
Checking Coolant
The vehicle must be on a level surface when checking
the coolant level.
The coolant recovery tank
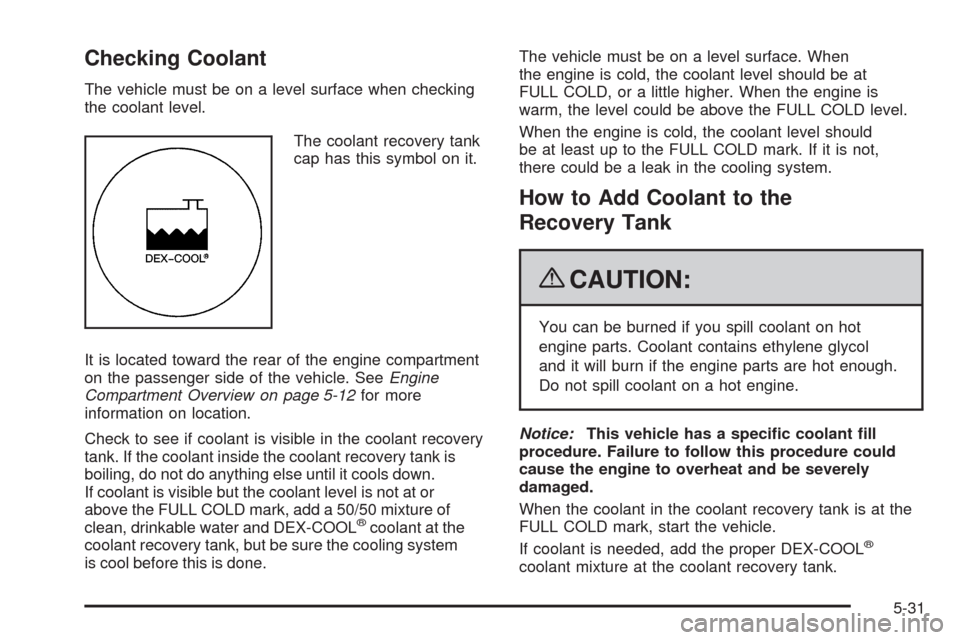
cap has this symbol on it.
It is located toward the rear of the engine compartment
on the passenger side of the vehicle. SeeEngine
Compartment Overview on page 5-12for more
information on location.
Check to see if coolant is visible in the coolant recovery
tank. If the coolant inside the coolant recovery tank is
boiling, do not do anything else until it cools down.
If coolant is visible but the coolant level is not at or
above the FULL COLD mark, add a 50/50 mixture of
clean, drinkable water and DEX-COOL
®coolant at the
coolant recovery tank, but be sure the cooling system
is cool before this is done.The vehicle must be on a level surface. When
the engine is cold, the coolant level should be at
FULL COLD, or a little higher. When the engine is
warm, the level could be above the FULL COLD level.
When the engine is cold, the coolant level should
be at least up to the FULL COLD mark. If it is not,
there could be a leak in the cooling system.
How to Add Coolant to the
Recovery Tank
{CAUTION:
You can be burned if you spill coolant on hot
engine parts. Coolant contains ethylene glycol
and it will burn if the engine parts are hot enough.
Do not spill coolant on a hot engine.
Notice:This vehicle has a speci�c coolant �ll
procedure. Failure to follow this procedure could
cause the engine to overheat and be severely
damaged.
When the coolant in the coolant recovery tank is at the
FULL COLD mark, start the vehicle.
If coolant is needed, add the proper DEX-COOL
®
coolant mixture at the coolant recovery tank.
5-31