wheel CHEVROLET COLORADO 2011 1.G Workshop Manual
[x] Cancel search | Manufacturer: CHEVROLET, Model Year: 2011, Model line: COLORADO, Model: CHEVROLET COLORADO 2011 1.GPages: 392, PDF Size: 6.37 MB
Page 220 of 392
Black plate (46,1)Chevrolet Colorado Owner Manual - 2011
9-46 Driving and Operating
Ride Control Systems
Traction Control
System (TCS)
The Traction Control System (TCS)
is part of StabiliTrak. TCS limits
wheel slip which is especially useful
in slippery road conditions. The
system operates only if it senses
that any of the wheels are spinning
or beginning to lose traction. When
this happens, TCS applies the
brakes to limit wheel spin and also
reduces engine power. The system
may be heard or felt while it is
working. This is normal and does
not mean there is a problem with
the vehicle.
Notice:If the wheel(s) of one axle
is allowed to spin excessively
while the StabiliTrak
®, ABS, brake
warning lights, and any relevant
DIC messages are displayed, the
transfer case could be damaged.
The repairs would not be covered
by the vehicle warranty. Reduce
engine power and do not spin the wheel(s) excessively while these
lights and messages are
displayed.
TCS can operate on dry roads
under some conditions. When
this happens, the system may be
heard working or a reduction in
acceleration may be noticed. This
is normal and does not mean there
is a problem with the vehicle.
Examples of these conditions
include hard acceleration in a turn,
an abrupt upshift or downshift of the
transmission or driving on rough
roads.
If cruise control is being used when
TCS begins to limit wheel spin, the
cruise control automatically
disengages. The cruise control can
be re-engaged when road
conditions allow. See
Cruise Control
on page 9‑49.
The message TRACTION FAULT
appears in the Driver Information
Center (DIC) when a TCS or
Antilock Brake System (ABS)
problem has been detected and the vehicle needs service. When this
message is on, the system will not
limit wheel spin. Adjust your driving
accordingly. See
Ride Control
System Messages on page 5‑25.
The StabiliTrak/TCS light will flash
on the instrument panel cluster
when the TCS system or StabiliTrak
is both on and activated.
The StabiliTrak/TCS button is
located on the instrument panel.
Page 221 of 392
Black plate (47,1)Chevrolet Colorado Owner Manual - 2011
Driving and Operating 9-47
To turn off TCS, press and release
the StabiliTrak/TCS button. The
StabiliTrak/TCS light comes on in
the instrument panel cluster, and
TRAC OFF comes on the DIC. To
turn TCS back on, press and
release the StabiliTrak/TCS button.
Adding non-dealer/non-retailer
accessories can affect the vehicle's
performance. SeeAccessories and
Modifications on page 10‑4.
StabiliTrak®System
The vehicle has an electronic
stability control system called
StabiliTrak. It is an advanced
computer controlled system that
assists the driver with directional
control of the vehicle in difficult
driving conditions.
StabiliTrak activates when the
computer senses a discrepancy
between the intended path and the
direction the vehicle is actually
traveling. StabiliTrak selectively
applies braking pressure at any one of the vehicle's brakes to assist the
driver with keeping the vehicle on
the intended path.
When the vehicle is started and
begins to move, the system
performs several diagnostic checks
to insure there are no problems.
The system may be heard or felt
while it is working. This is normal
and does not mean there is a
problem with the vehicle. The
system should initialize before the
vehicle reaches 32 km/h (20 mph).
In some cases, it may take
approximately two miles of driving
before the system initializes.
If cruise control is being used when
StabiliTrak activates, the cruise
control automatically disengages.
The cruise control can be
re-engaged when road conditions
allow. See
Cruise Control on
page 9‑49. If there is a problem detected with
StabiliTrak, a SERVICE STAB SYS
message displays on the Driver
Information Center (DIC). See
Ride
Control System Messages on
page 5‑25 for more information.
When this message is displayed,
the system is not working. Adjust
your driving accordingly.
StabiliTrak and Traction Control
(TCS) come on automatically
whenever the vehicle is started and
the systems are reset with each
ignition cycle. However, when the
transfer case is placed in
Four-Wheel-Low mode, StabiliTrak
is automatically disabled. See
Four-Wheel Drive on page 10‑30
for more information. It is
recommended to leave the system
on for normal driving conditions, but
it may be necessary to turn the TCS
portion of the system off if the
vehicle is stuck in sand, mud, ice,
or snow, and it is necessary to
“rock” the vehicle to attempt to free
it. If traction control is turned off,
only the brake-traction control
Page 222 of 392
Black plate (48,1)Chevrolet Colorado Owner Manual - 2011
9-48 Driving and Operating
portion of traction control will work.
The engine speed management will
be disabled. In this mode, engine
power is not reduced automatically
and the drive wheels can spin more
freely. This can cause the
brake-traction control to activate
constantly. SeeIf the Vehicle is
Stuck on page 9‑19.
The StabiliTrak/TCS light will flash
on the instrument panel cluster
when the TCS system or StabiliTrak
is both on and activated.
The StabiliTrak/TCS button is
located on the instrument panel.
To turn off TCS, press and release
the StabiliTrak/TCS button. The
StabiliTrak/TCS light comes on in
the instrument panel cluster, and
TRAC OFF comes on the DIC. To
turn TCS back on, press and
release the StabiliTrak/TCS button.
To turn off TCS and StabiliTrak,
press and hold the StabiliTrak/TCS
button until the TRAC OFF and
STAB SYS OFF messages come on
the DIC and the StabiliTrak/TCS
light comes on the instrument panel.
To turn TCS and StabiliTrak back
on, press and release the
StabiliTrak/TCS button. When the TCS or StabiliTrak system
is turned off, the StabiliTrak/TCS
light and the appropriate TRAC OFF
or STAB SYS OFF message will be
displayed on the DIC. The vehicle
will still have brake-traction control
when TCS or StabiliTrak is off, but
will not be able to use the engine
speed management system. The
StabiliTrak/TCS light flashes when
either system is actively working.
See
Traction Control System (TCS)
on page 9‑46 for more information.
Limited-Slip Rear Axle
Vehicles with a limited-slip rear axle
can give more traction on snow,
mud, ice, sand or gravel. It works
like a standard axle most of the
time, but when traction is low, this
feature allows the drive wheel with
the most traction to move the
vehicle.
Page 223 of 392
Black plate (49,1)Chevrolet Colorado Owner Manual - 2011
Driving and Operating 9-49
Cruise Control
With cruise control, a speed of
about 40 km/h (25 mph) or more can
be maintained without keeping your
foot on the accelerator. Cruise
control does not work at speeds
below about 40 km/h (25 mph).
If the brakes are applied, the cruise
control shuts off.
{WARNING
Cruise control can be dangerous
where you cannot drive safely at
a steady speed. So, do not use
the cruise control on winding
roads or in heavy traffic.
Cruise control can be dangerous
on slippery roads. On such roads,
fast changes in tire traction can
cause excessive wheel slip, and
you could lose control. Do not use
cruise control on slippery roads.If the vehicle's StabiliTrak
®/Traction
Control System (TCS) begins to limit
wheel spin while the cruise control
is on, the cruise control
automatically disengages. See
StabiliTrak
®System on page 9‑47 or
Traction Control System (TCS) on
page 9‑46. When road conditions
allow you to safely use it again, the
cruise control can be turned
back on.
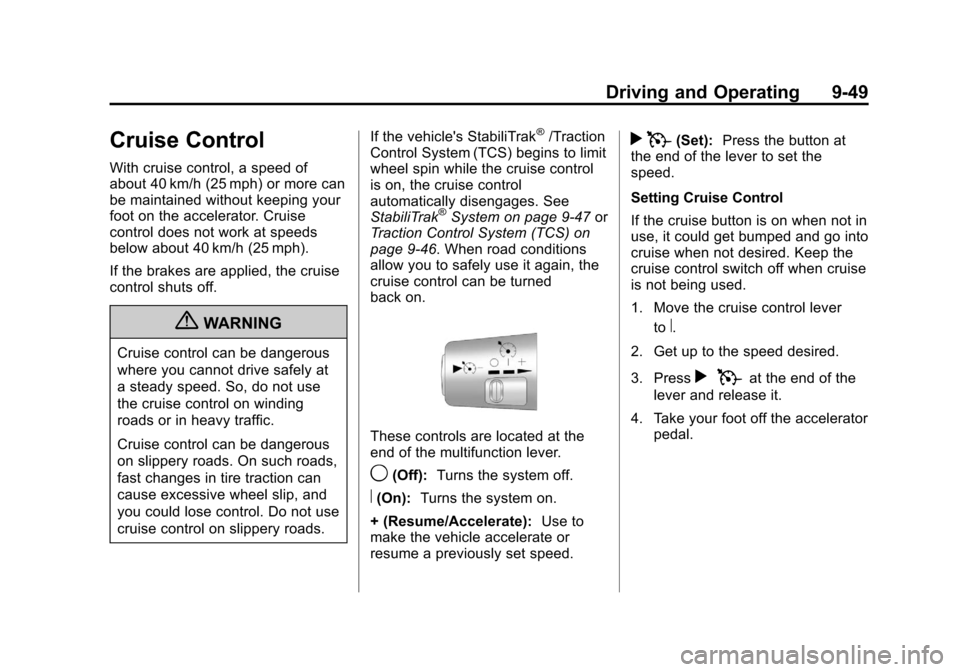
These controls are located at the
end of the multifunction lever.
9(Off): Turns the system off.
R(On):Turns the system on.
+ (Resume/Accelerate): Use to
make the vehicle accelerate or
resume a previously set speed.
r T(Set): Press the button at
the end of the lever to set the
speed.
Setting Cruise Control
If the cruise button is on when not in
use, it could get bumped and go into
cruise when not desired. Keep the
cruise control switch off when cruise
is not being used.
1. Move the cruise control lever
to
R.
2. Get up to the speed desired.
3. Press
r Tat the end of the
lever and release it.
4. Take your foot off the accelerator pedal.
Page 232 of 392
Black plate (58,1)Chevrolet Colorado Owner Manual - 2011
9-58 Driving and Operating
Following Distance
Stay at least twice as far behind the
vehicle ahead as you would when
driving the vehicle without a trailer.
This can help to avoid situations
that require heavy braking and
sudden turns.
Passing
More passing distance is needed
when towing a trailer. Because the
rig is longer, it is necessary to go
much farther beyond the passed
vehicle before returning to the lane.
Backing Up
Hold the bottom of the steering
wheel with one hand. Then, to move
the trailer to the left, move that hand
to the left. To move the trailer to the
right, move your hand to the right.
Always back up slowly and,
if possible, have someone
guide you.
Making Turns
Notice:Making very sharp turns
while trailering could cause the
trailer to come in contact with the
vehicle. The vehicle could be
damaged. Avoid making very
sharp turns while trailering.
When turning with a trailer, make
wider turns than normal. Do this so
the trailer will not strike soft
shoulders, curbs, road signs, trees
or other objects. Avoid jerky or
sudden maneuvers. Signal well in
advance.
Turn Signals When Towing a
Trailer
The arrows on the instrument panel
flash whenever signaling a turn or
lane change. Properly hooked up,
the trailer lamps also flash, telling
other drivers the vehicle is turning,
changing lanes or stopping.
When towing a trailer, the arrows on
the instrument panel flash for turns
even if the bulbs on the trailer are
burned out. For this reason you may think other drivers are seeing the
signal when they are not. It is
important to check occasionally to
be sure the trailer bulbs are still
working.
Driving On Grades
Reduce speed and shift to a lower
gear
before starting down a long
or steep downgrade. If the
transmission is not shifted down, the
brakes might have to be used so
much that they would get hot and no
longer work well.
Vehicles with automatic
transmissions can tow in D (Drive),
but you may want to shift to a lower
gear selection if the transmission
shifts too often (e.g., under heavy
loads and/or hilly conditions). If the
vehicle has a manual transmission it
is better not to use the highest gear.
When towing at high altitude on
steep uphill grades, consider the
following: Engine coolant will boil at
a lower temperature than at normal
altitudes. If the engine is turned off
immediately after towing at high
Page 233 of 392
Black plate (59,1)Chevrolet Colorado Owner Manual - 2011
Driving and Operating 9-59
altitude on steep uphill grades, the
vehicle may show signs similar to
engine overheating. To avoid this,
let the engine run while parked,
preferably on level ground, with an
automatic transmission in P (Park)
or a manual transmission in
N (Neutral) with the parking brake
applied, for a few minutes before
turning the engine off. If the
overheat warning comes on, see
Engine Overheating on page 10‑23.
Parking on Hills
{WARNING
Parking the vehicle on a hill with
the trailer attached can be
dangerous. If something goes
wrong, the rig could start to move.
People can be injured, and both
the vehicle and the trailer can be
damaged. When possible, always
park the rig on a flat surface.If parking the rig on a hill:
1. Press the brake pedal, but do
not shift into P (Park) yet for
vehicles with an automatic
transmission, or into gear for
vehicles with a manual
transmission. Turn the wheels
into the curb if facing downhill or
into traffic if facing uphill.
2. Have someone place chocks under the trailer wheels.
3. When the wheel chocks are in place, release the brake pedal
until the chocks absorb the load.
4. Reapply the brake pedal. Then apply the parking brake and shift
into P (Park) for vehicles with an
automatic transmission or into
gear for vehicles with a manual
transmission. 5. If the vehicle has
four-wheel-drive, be sure the
transfer case is in a drive gear
and not in N (Neutral). See
Four-Wheel Drive on page 10‑30
for more information.
6. Release the brake pedal.
Leaving After Parking on a Hill
1. Apply and hold the brake pedal while you:
.Start the engine
.Shift into a gear
.Release the parking brake
2. Let up on the brake pedal.
3. Drive slowly until the trailer is clear of the chocks.
4. Stop and have someone pick up and store the chocks.
Page 241 of 392
Black plate (1,1)Chevrolet Colorado Owner Manual - 2011
Vehicle Care 10-1
Vehicle Care
General Information
General Information . . . . . . . . . . 10-3
California Proposition 65Warning . . . . . . . . . . . . . . . . . . . . 10-3
California Perchlorate Materials Requirements . . . . 10-3
Accessories and Modifications . . . . . . . . . . . . . . . 10-4
Vehicle Checks
Doing Your OwnService Work . . . . . . . . . . . . . . . 10-4
Hood . . . . . . . . . . . . . . . . . . . . . . . . 10-5
Engine Compartment Overview . . . . . . . . . . . . . . . . . . . 10-6
Engine Oil . . . . . . . . . . . . . . . . . . . 10-9
Engine Oil Life System . . . . . 10-12 Automatic Transmission
Fluid . . . . . . . . . . . . . . . . . . . . . . 10-13
Manual Transmission Fluid . . . . . . . . . . . . . . . . . . . . . . 10-16
Hydraulic Clutch . . . . . . . . . . . . 10-17
Engine Air Cleaner/Filter . . . . 10-17
Cooling System . . . . . . . . . . . . 10-18
Engine Coolant . . . . . . . . . . . . . 10-19
Engine Overheating . . . . . . . . 10-23
Engine Fan . . . . . . . . . . . . . . . . . 10-25
Power Steering Fluid . . . . . . . 10-25
Washer Fluid . . . . . . . . . . . . . . . 10-26
Brakes . . . . . . . . . . . . . . . . . . . . . 10-27
Brake Fluid . . . . . . . . . . . . . . . . . 10-28
Battery . . . . . . . . . . . . . . . . . . . . . 10-30
Four-Wheel Drive . . . . . . . . . . . 10-30
Front Axle . . . . . . . . . . . . . . . . . . 10-31
Rear Axle . . . . . . . . . . . . . . . . . . 10-31
Starter Switch Check . . . . . . . 10-32
Automatic Transmission Shift
Lock Control Function
Check . . . . . . . . . . . . . . . . . . . . . 10-33 Ignition Transmission Lock
Check . . . . . . . . . . . . . . . . . . . . . 10-33
Park Brake and P (Park) Mechanism Check . . . . . . . . 10-33
Wiper Blade
Replacement . . . . . . . . . . . . . . 10-34
Headlamp Aiming
Headlamp Aiming . . . . . . . . . . 10-35
Bulb Replacement
Bulb Replacement . . . . . . . . . . 10-36
Halogen Bulbs . . . . . . . . . . . . . . 10-36
Headlamps . . . . . . . . . . . . . . . . . 10-36
Front Turn Signal, Parking,and Daytime Running
Lamps (DRL) . . . . . . . . . . . . . 10-37
Taillamps, Turn Signal, Stoplamps, and Back-Up
Lamps . . . . . . . . . . . . . . . . . . . . 10-37
Center High-Mounted Stoplamp (CHMSL) . . . . . . . 10-38
License Plate Lamp . . . . . . . . 10-39
Replacement Bulbs . . . . . . . . . 10-39
Page 242 of 392
Black plate (2,1)Chevrolet Colorado Owner Manual - 2011
10-2 Vehicle Care
Electrical System
Electrical SystemOverload . . . . . . . . . . . . . . . . . . 10-40
Fuses and Circuit Breakers . . . . . . . . . . . . . . . . . . 10-40
Engine Compartment Fuse
Block . . . . . . . . . . . . . . . . . . . . . 10-41
Wheels and Tires
Tires . . . . . . . . . . . . . . . . . . . . . . . . 10-46
Tire Sidewall Labeling . . . . . . 10-47
Tire Designations . . . . . . . . . . . 10-49
Tire Terminology andDefinitions . . . . . . . . . . . . . . . . 10-50
Tire Pressure . . . . . . . . . . . . . . . 10-53
Tire Pressure for High-Speed Operation . . . . . . . . . . . . . . . . . 10-54
Tire Pressure Monitor
System . . . . . . . . . . . . . . . . . . . 10-55
Tire Pressure Monitor Operation . . . . . . . . . . . . . . . . . 10-56
Tire Inspection . . . . . . . . . . . . . . 10-59
Tire Rotation . . . . . . . . . . . . . . . 10-60 When It Is Time for New
Tires . . . . . . . . . . . . . . . . . . . . . . 10-61
Buying New Tires . . . . . . . . . . . 10-62
Different Size Tires and Wheels . . . . . . . . . . . . . . . . . . . 10-64
Uniform Tire Quality Grading . . . . . . . . . . . . . . . . . . . 10-64
Wheel Alignment and Tire Balance . . . . . . . . . . . . . . . . . . . 10-66
Wheel Replacement . . . . . . . . 10-66
Tire Chains . . . . . . . . . . . . . . . . . 10-68
If a Tire Goes Flat . . . . . . . . . . 10-69
Tire Changing . . . . . . . . . . . . . . 10-71
Secondary Latch System . . . 10-82
Compact Spare Tire . . . . . . . . 10-84
Full-Size Spare Tire . . . . . . . . 10-85
Jump Starting
Jump Starting . . . . . . . . . . . . . . 10-86
Towing
Towing the Vehicle . . . . . . . . . 10-90
Recreational Vehicle Towing . . . . . . . . . . . . . . . . . . . . 10-90
Appearance Care
Exterior Care . . . . . . . . . . . . . . . 10-95
Interior Care . . . . . . . . . . . . . . . 10-100
Floor Mats . . . . . . . . . . . . . . . . 10-103
Page 267 of 392
Black plate (27,1)Chevrolet Colorado Owner Manual - 2011
Vehicle Care 10-27
.Fill the washer fluid tank only
three-quarters full when it is
very cold. This allows for
fluid expansion if freezing
occurs, which could damage
the tank if it is
completely full.
.Do not use engine coolant
(antifreeze) in the windshield
washer. It can damage the
windshield washer system
and paint.
Brakes
This vehicle has front disc brakes
and rear drum brakes.
Disc brake pads have built-in wear
indicators that make a high-pitched
warning sound when the brake pads
are worn and new pads are needed.
The sound can come and go or be
heard all the time the vehicle is
moving, except when applying the
brake pedal firmly.
{WARNING
The brake wear warning sound
means that soon the brakes will
not work well. That could lead to
a crash. When the brake wear
warning sound is heard, have the
vehicle serviced.
Notice: Continuing to drive with
worn-out brake pads could result
in costly brake repair.
Some driving conditions or climates
can cause a brake squeal when the
brakes are first applied or lightly
applied. This does not mean
something is wrong with the brakes.
Properly torqued wheel nuts are
necessary to help prevent brake
pulsation. When tires are rotated,
inspect brake pads for wear and
evenly tighten wheel nuts in the
proper sequence to torque
specifications in Capacities and
Specifications on page 12‑2. Rear drum brakes do not have wear
indicators, but if a rear brake
rubbing noise is heard, have the
rear brake linings inspected
immediately. Rear brake drums
should be removed and inspected
each time the tires are removed for
rotation or changing. Drum brakes
have an inspection hole to inspect
lining wear during scheduled
maintenance. When the front brake
pads are replaced, have the rear
brakes inspected, too.
Brake linings should always be
replaced as complete axle sets.
Brake Pedal Travel
See your dealer if the brake pedal
does not return to normal height,
or if there is a rapid increase in
pedal travel. This could be a sign
that brake service might be
required.
Brake Adjustment
Every time the brakes are applied,
with or without the vehicle moving,
the brakes adjust for wear.
Page 270 of 392
Black plate (30,1)Chevrolet Colorado Owner Manual - 2011
10-30 Vehicle Care
Battery
Refer to the replacement number
shown on the original battery label
when a new battery is needed. See
Engine Compartment Overview on
page 10‑6for battery location.
{DANGER
Battery posts, terminals, and
related accessories contain lead
and lead compounds, chemicals
known to the State of California to
cause cancer and reproductive
harm. Wash hands after handling.
Vehicle Storage
{WARNING
Batteries have acid that can burn
you and gas that can explode.
You can be badly hurt if you are
not careful. See Jump Starting on
(Continued)
WARNING (Continued)
page 10‑86 for tips on working
around a battery without
getting hurt.
Infrequent Usage: Remove the
black, negative (−) cable from the
battery to keep the battery from
running down.
Extended Storage: Remove the
black, negative (−) cable from the
battery or use a battery trickle
charger.
Four-Wheel Drive
Transfer Case
When to Check Lubricant
Refer to the Maintenance Schedule
to determine how often to check the
lubricant. See Scheduled
Maintenance on page 11‑2. How to Check Lubricant
To get an accurate reading, the
vehicle should be on a level
surface.
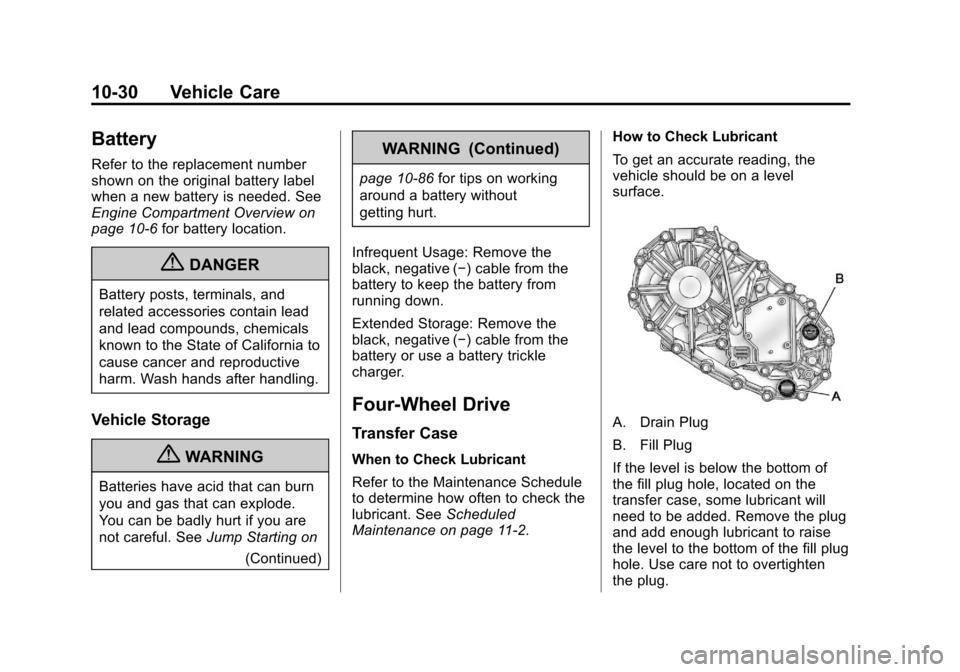
A. Drain Plug
B. Fill Plug
If the level is below the bottom of
the fill plug hole, located on the
transfer case, some lubricant will
need to be added. Remove the plug
and add enough lubricant to raise
the level to the bottom of the fill plug
hole. Use care not to overtighten
the plug.