service schedule CHEVROLET COLORADO 2011 1.G Owners Manual
[x] Cancel search | Manufacturer: CHEVROLET, Model Year: 2011, Model line: COLORADO, Model: CHEVROLET COLORADO 2011 1.GPages: 392, PDF Size: 6.37 MB
Page 2 of 392
Black plate (2,1)Chevrolet Colorado Owner Manual - 2011
2011 Chevrolet Colorado Owner ManualM
Driving and Operating. . . . . . . . 9-1
Driving Information . . . . . . . . . . . . . 9-2
Starting and Operating . . . . . . . 9-26
Engine Exhaust . . . . . . . . . . . . . . 9-33
Automatic Transmission . . . . . . 9-35
Manual Transmission . . . . . . . . . 9-37
Drive Systems . . . . . . . . . . . . . . . . 9-39
Brakes . . . . . . . . . . . . . . . . . . . . . . . 9-43
Ride Control Systems . . . . . . . . 9-46
Cruise Control . . . . . . . . . . . . . . . . 9-49
Fuel . . . . . . . . . . . . . . . . . . . . . . . . . . 9-51
Towing . . . . . . . . . . . . . . . . . . . . . . . 9-56
Conversions and Add-Ons . . . 9-66 Vehicle Care
. . . . . . . . . . . . . . . . . 10-1
General Information . . . . . . . . . . 10-3
Vehicle Checks . . . . . . . . . . . . . . . 10-4
Headlamp Aiming . . . . . . . . . . . 10-35
Bulb Replacement . . . . . . . . . . 10-36
Electrical System . . . . . . . . . . . . 10-40
Wheels and Tires . . . . . . . . . . . 10-46
Jump Starting . . . . . . . . . . . . . . . 10-86
Towing . . . . . . . . . . . . . . . . . . . . . . 10-90
Appearance Care . . . . . . . . . . . 10-95
Service and Maintenance . . . 11-1
General Information . . . . . . . . . . 11-1
Scheduled Maintenance . . . . . . 11-2
Recommended Fluids,
Lubricants, and Parts . . . . . . . 11-6
Maintenance Records . . . . . . . 11-10 Technical Data
. . . . . . . . . . . . . . . 12-1
Vehicle Identification . . . . . . . . . 12-1
Vehicle Data . . . . . . . . . . . . . . . . . . 12-2
Customer Information . . . . . . . 13-1
Customer Information . . . . . . . . 13-1
Reporting Safety Defects . . . . 13-14
Vehicle Data Recording and
Privacy . . . . . . . . . . . . . . . . . . . . 13-16
Index . . . . . . . . . . . . . . . . . . . . . i-1
Page 82 of 392
Black plate (38,1)Chevrolet Colorado Owner Manual - 2011
3-38 Seats and Restraints
Q: Because I have a disability,I have to get my vehicle
modified. How can I find out
whether this will affect my
airbag system?
A: If you have questions, call
Customer Assistance. The
phone numbers and addresses
for Customer Assistance are in
Step Two of the Customer
Satisfaction Procedure in this
manual. See Customer
Satisfaction Procedure (U.S. and
Canada) on page 13‑1 or
Customer Satisfaction
Procedure (Mexico) on
page 13‑3.
In addition, your dealer and the
service manual have information
about the location of the airbag
sensors, sensing and diagnostic
module and airbag wiring.
Airbag System Check
The airbag system does not need
regularly scheduled maintenance or
replacement. Make sure the airbag readiness light is working. See
Airbag Readiness Light on
page 5‑10
for more information.
Notice: If an airbag covering is
damaged, opened, or broken, the
airbag may not work properly. Do
not open or break the airbag
coverings. If there are any
opened or broken airbag covers,
have the airbag covering and/or
airbag module replaced. For the
location of the airbag modules,
see What Makes an Airbag
Inflate? on page 3‑30. See your
dealer for service.
Replacing Airbag System
Parts After a Crash
{WARNING
A crash can damage the airbag
systems in your vehicle.
A damaged airbag system may
not work properly and may not
protect you and your
(Continued)
WARNING (Continued)
passenger(s) in a crash, resulting
in serious injury or even death. To
help make sure your airbag
systems are working properly
after a crash, have them
inspected and any necessary
replacements made as soon as
possible.
If an airbag inflates, you will need to
replace airbag system parts. See
your dealer for service.
If the airbag readiness light stays on
after the vehicle is started or comes
on when you are driving, the airbag
system may not work properly. Have
the vehicle serviced right away. See
Airbag Readiness Light on
page 5‑10 for more information.
Page 130 of 392
Black plate (18,1)Chevrolet Colorado Owner Manual - 2011
5-18 Instruments and Controls
When the Light Flashes First and
Then is On Steady
This indicates that there may be a
problem with the Tire Pressure
Monitor System. The light flashes
for about a minute and stays on
steady for the remainder of the
ignition cycle. This sequence
repeats with every ignition cycle.
SeeTire Pressure Monitor
Operation on page 10‑56 for more
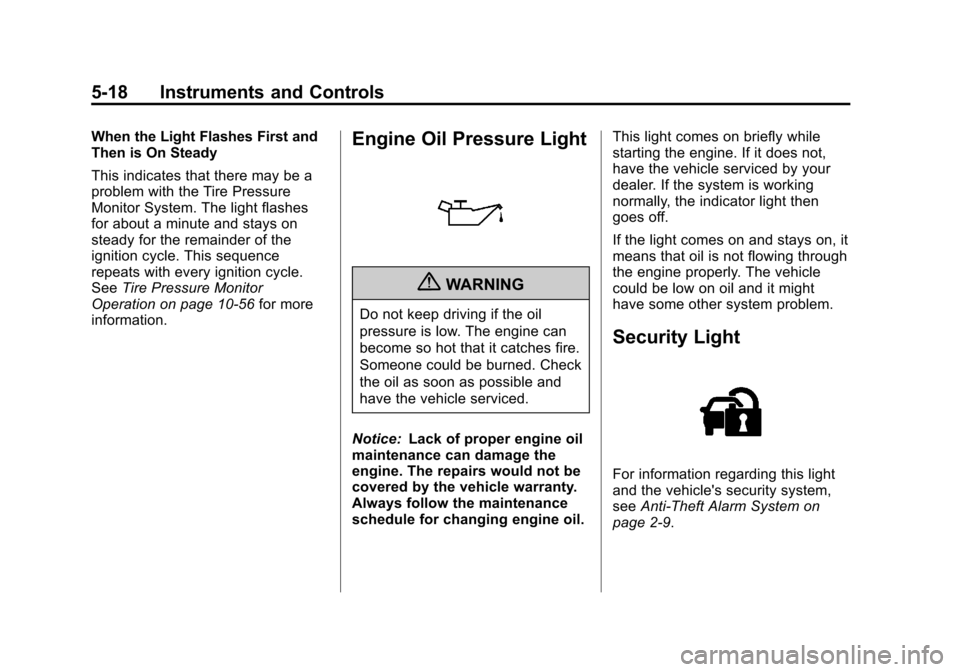
information.Engine Oil Pressure Light
{WARNING
Do not keep driving if the oil
pressure is low. The engine can
become so hot that it catches fire.
Someone could be burned. Check
the oil as soon as possible and
have the vehicle serviced.
Notice: Lack of proper engine oil
maintenance can damage the
engine. The repairs would not be
covered by the vehicle warranty.
Always follow the maintenance
schedule for changing engine oil. This light comes on briefly while
starting the engine. If it does not,
have the vehicle serviced by your
dealer. If the system is working
normally, the indicator light then
goes off.
If the light comes on and stays on, it
means that oil is not flowing through
the engine properly. The vehicle
could be low on oil and it might
have some other system problem.
Security Light
For information regarding this light
and the vehicle's security system,
see
Anti-Theft Alarm System on
page 2‑9.
Page 136 of 392
Black plate (24,1)Chevrolet Colorado Owner Manual - 2011
5-24 Instruments and Controls
Door Ajar Messages
DOORS
This message displays when one or
more of the doors is ajar. Check all
the doors on your vehicle to make
sure they are closed. The message
clears from the display after all of
the doors are closed.
Engine Cooling System
Messages
AC (Air Conditioning) OFF
This message displays when the
engine coolant temperature is too
high and the air conditioning in your
vehicle needs to be turned off. See
Engine Overheating on page 10‑23
andClimate Control Systems on
page 8‑1 for more information. This
message displays along with the
ENG HOT message.
ENG (Engine) HOT
This message displays when the
engine coolant temperature is hot.
Check the engine coolant
temperature gauge. See Engine
Coolant Temperature Gauge on
page 5‑9. Have your vehicle
serviced by your dealer as soon as
possible if you suspect the engine is
overheating. See Engine
Overheating on page 10‑23 for more
information.
Engine Oil Messages
CHANGE OIL
This message displays when the oil
needs to be changed. Check the oil
in your vehicle as soon as possible
and have your vehicle serviced by
your dealer. See Engine Oil on
page 10‑9 andScheduled
Maintenance on page 11‑2 for more
information. Press and release the
reset stem to acknowledge the
message and clear it from the
display.
OIL
This message displays when the oil
pressure is low. See Engine Oil
Pressure Light on page 5‑18 and
Engine Oil on page 10‑9 for more
information.
Engine Power Messages
REDUCED POWER
This message displays when the
vehicle's engine power is reduced.
Reduced engine power can affect
the vehicle's ability to accelerate.
If this message is on, but there
is no reduction in performance,
proceed to your destination. The
performance may be reduced the
next time the vehicle is driven. The
vehicle may be driven at a reduced
speed while this message is on, but
acceleration and speed may be
reduced. Anytime this message
stays on, the vehicle should be
taken to your dealer for service as
soon as possible. Press and release
Page 190 of 392
Black plate (16,1)Chevrolet Colorado Owner Manual - 2011
9-16 Driving and Operating
The vehicle requires more frequent
service due to off-road use. Refer to
the Maintenance Schedule for
additional information.
Driving on Wet Roads
Rain and wet roads can reduce
vehicle traction and affect your
ability to stop and accelerate.
Always drive slower in these types
of driving conditions and avoid
driving through large puddles and
deep‐standing or flowing water.
{WARNING
Wet brakes can cause crashes.
They might not work as well in a
quick stop and could cause
pulling to one side. You could
lose control of the vehicle.(Continued)
WARNING (Continued)
After driving through a large
puddle of water or a car/vehicle
wash, lightly apply the brake
pedal until the brakes work
normally.
Flowing or rushing water creates
strong forces. Driving through
flowing water could cause your
vehicle to be carried away. If this
happens, you and other vehicle
occupants could drown. Do not
ignore police warnings and be
very cautious about trying to drive
through flowing water.
Hydroplaning
Hydroplaning is dangerous. Water
can build up under the vehicle's
tires so they actually ride on the
water. This can happen if the road is
wet enough and you are going fast
enough. When the vehicle is
hydroplaning, it has little or no
contact with the road. There is no hard and fast rule about
hydroplaning. The best advice is to
slow down when the road is wet.
Other Rainy Weather Tips
Besides slowing down, other wet
weather driving tips include:
.Allow extra following distance.
.Pass with caution.
.Keep windshield wiping
equipment in good shape.
.Keep the windshield washer fluid
reservoir filled.
.Have good tires with proper
tread depth. See
Tires on
page 10‑46.
.Turn off cruise control.
Highway Hypnosis
Always be alert and pay attention to
your surroundings while driving.
If you become tired or sleepy, find a
safe place to park the vehicle
and rest.
Page 234 of 392
Black plate (60,1)Chevrolet Colorado Owner Manual - 2011
9-60 Driving and Operating
Maintenance When Trailer
Towing
The vehicle needs service more
often when pulling a trailer. See
Scheduled Maintenance on
page 11‑2or the Index for more
information. Things that are
especially important in trailer
operation are automatic
transmission fluid, engine oil, axle
lubricant, belts, cooling system and
brake system. It is a good idea to
inspect these before and during
the trip.
Check periodically to see that all
hitch nuts and bolts are tight.
Trailer Towing
{WARNING
The driver can lose control when
pulling a trailer if the correct
equipment is not used or the
vehicle is not driven properly. For
(Continued)
WARNING (Continued)
example, if the trailer is too
heavy, the brakes may not work
well—or even at all. The driver
and passengers could be
seriously injured. The vehicle may
also be damaged; the resulting
repairs would not be covered by
the vehicle warranty. Pull a trailer
only if all the steps in this section
have been followed. Ask your
dealer for advice and information
about towing a trailer with the
vehicle.
Notice: Pulling a trailer
improperly can damage the
vehicle and result in costly
repairs not covered by the vehicle
warranty. To pull a trailer
correctly, follow the advice in this
section and see your dealer for
important information about
towing a trailer with the vehicle. To identify the trailering capacity of
the vehicle, read the information in
“Weight of the Trailer”
that appears
later in this section.
Trailering is different than just
driving the vehicle by itself.
Trailering means changes in
handling, acceleration, braking,
durability and fuel economy.
Successful, safe trailering takes
correct equipment, and it has to be
used properly.
The following information has many
time-tested, important trailering tips
and safety rules. Many of these are
important for your safety and that of
your passengers. So please read
this section carefully before pulling a
trailer.
Page 253 of 392
Black plate (13,1)Chevrolet Colorado Owner Manual - 2011
Vehicle Care 10-13
If the system is ever reset
accidentally, the oil must be
changed at 5 000 km (3,000 miles)
since the last oil change.
Remember to reset the oil life
system whenever the oil is changed.
How to Reset the Engine Oil
Life System
Reset the system whenever the
engine oil is changed so that the
system can calculate the next
engine oil change. To reset the
system:
1. Turn the ignition to ON/RUN,with the engine off.
2. Press and release the stem in the lower center of the
instrument cluster until the OIL
LIFE message is displayed.
3. Once the alternating OIL LIFE and RESET messages appear,
press and hold the stem until
several beeps sound. This
confirms that the oil life system
has been reset.
4. Turn the key to LOCK/OFF. If the CHANGE OIL message
comes back on when the vehicle is
started, the engine oil life system
has not been reset. Repeat the
procedure.
Automatic Transmission
Fluid
When to Check and Change
Automatic Transmission Fluid
A good time to check the automatic
transmission fluid level is when the
engine oil is changed.
Change the fluid and filter at the
intervals listed in
Scheduled
Maintenance on page 11‑2, and be
sure to use the transmission fluid
listed in Recommended Fluids and
Lubricants on page 11‑6.
How to Check Automatic
Transmission Fluid
Because this operation can be a
little difficult, it may be decided to
have this done at the dealer service
department. If not taken to the dealer, be sure to
follow all the instructions here, or a
false reading on the dipstick could
result.
Notice:
Too much or too little
fluid can damage the
transmission. Too much can
mean that some of the fluid could
come out and fall on hot engine
parts or exhaust system parts,
starting a fire. Too little fluid
could cause the transmission to
overheat. Be sure to get an
accurate reading if checking the
transmission fluid.
Wait at least 30 minutes before
checking the transmission fluid level
if the vehicle has been driven:
.When outside temperatures are
above 32°C (90°F).
.At high speed for quite a while.
.In heavy traffic —especially in
hot weather.
.While pulling a trailer.
Page 256 of 392

Black plate (16,1)Chevrolet Colorado Owner Manual - 2011
10-16 Vehicle Care
Manual Transmission
Fluid
When to Check
A good time to check the manual
transmission fluid is when the
engine oil is changed. However, the
fluid in the manual transmission
does not require changing.
How to Check
Because this operation can be a
little difficult, it may be decided to
have this done at the dealer service
department.
If not taken to the dealer, be sure to
follow all the instructions here, or a
false reading on the dipstick could
result.
Notice:Too much or too little
fluid can damage the
transmission. Too little fluid could
cause the transmission to
overheat. Be sure to get an
accurate reading if checking the
transmission fluid. Check the fluid level only when the
engine is off, the vehicle is parked
on a level place and the
transmission is cool enough to
touch the transmission case.
After this is done:
1. Remove the fill plug.
2. Check that the lubricant level is
up to the bottom of the fill
plug hole. 3. If the fluid level is good, install
the plug and be sure it is fully
seated. If the fluid level is low,
add more fluid as described in
the next steps.
How to Add Fluid
Here is how to add fluid. Refer to
the Maintenance Schedule to
determine what kind of fluid to use.
See Recommended Fluids and
Lubricants on page 11‑6.
1. Remove the fill plug.
2. Add fluid at the fill plug hole.
Add only enough fluid to bring
the fluid level up to the bottom of
the fill plug hole.
3. Install the fill plug. Be sure the plug is fully seated.
Page 267 of 392
Black plate (27,1)Chevrolet Colorado Owner Manual - 2011
Vehicle Care 10-27
.Fill the washer fluid tank only
three-quarters full when it is
very cold. This allows for
fluid expansion if freezing
occurs, which could damage
the tank if it is
completely full.
.Do not use engine coolant
(antifreeze) in the windshield
washer. It can damage the
windshield washer system
and paint.
Brakes
This vehicle has front disc brakes
and rear drum brakes.
Disc brake pads have built-in wear
indicators that make a high-pitched
warning sound when the brake pads
are worn and new pads are needed.
The sound can come and go or be
heard all the time the vehicle is
moving, except when applying the
brake pedal firmly.
{WARNING
The brake wear warning sound
means that soon the brakes will
not work well. That could lead to
a crash. When the brake wear
warning sound is heard, have the
vehicle serviced.
Notice: Continuing to drive with
worn-out brake pads could result
in costly brake repair.
Some driving conditions or climates
can cause a brake squeal when the
brakes are first applied or lightly
applied. This does not mean
something is wrong with the brakes.
Properly torqued wheel nuts are
necessary to help prevent brake
pulsation. When tires are rotated,
inspect brake pads for wear and
evenly tighten wheel nuts in the
proper sequence to torque
specifications in Capacities and
Specifications on page 12‑2. Rear drum brakes do not have wear
indicators, but if a rear brake
rubbing noise is heard, have the
rear brake linings inspected
immediately. Rear brake drums
should be removed and inspected
each time the tires are removed for
rotation or changing. Drum brakes
have an inspection hole to inspect
lining wear during scheduled
maintenance. When the front brake
pads are replaced, have the rear
brakes inspected, too.
Brake linings should always be
replaced as complete axle sets.
Brake Pedal Travel
See your dealer if the brake pedal
does not return to normal height,
or if there is a rapid increase in
pedal travel. This could be a sign
that brake service might be
required.
Brake Adjustment
Every time the brakes are applied,
with or without the vehicle moving,
the brakes adjust for wear.
Page 274 of 392
Black plate (34,1)Chevrolet Colorado Owner Manual - 2011
10-34 Vehicle Care
.To check the P (Park)
mechanism's holding ability:
With the engine running, shift to
P (Park). Then release the
parking brake followed by the
regular brake.
Contact your dealer if service is
required.
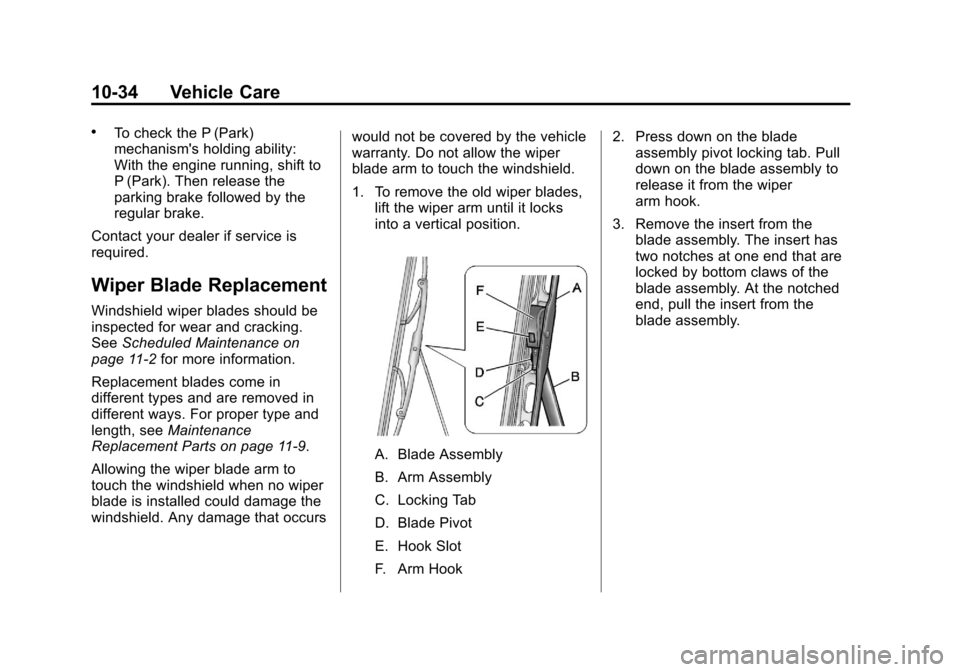
Wiper Blade Replacement
Windshield wiper blades should be
inspected for wear and cracking.
See Scheduled Maintenance on
page 11‑2 for more information.
Replacement blades come in
different types and are removed in
different ways. For proper type and
length, see Maintenance
Replacement Parts on page 11‑9.
Allowing the wiper blade arm to
touch the windshield when no wiper
blade is installed could damage the
windshield. Any damage that occurs would not be covered by the vehicle
warranty. Do not allow the wiper
blade arm to touch the windshield.
1. To remove the old wiper blades,
lift the wiper arm until it locks
into a vertical position.
A. Blade Assembly
B. Arm Assembly
C. Locking Tab
D. Blade Pivot
E. Hook Slot
F. Arm Hook 2. Press down on the blade
assembly pivot locking tab. Pull
down on the blade assembly to
release it from the wiper
arm hook.
3. Remove the insert from the blade assembly. The insert has
two notches at one end that are
locked by bottom claws of the
blade assembly. At the notched
end, pull the insert from the
blade assembly.