headlamp CHEVROLET COLORADO 2012 1.G Owners Manual
[x] Cancel search | Manufacturer: CHEVROLET, Model Year: 2012, Model line: COLORADO, Model: CHEVROLET COLORADO 2012 1.GPages: 394, PDF Size: 6.38 MB
Page 1 of 394

Black plate (1,1)Chevrolet Colorado Owner Manual - 2012
2012 Chevrolet Colorado Owner ManualM
In Brief. . . . . . . . . . . . . . . . . . . . . . . . 1-1
Instrument Panel . . . . . . . . . . . . . . 1-2
Initial Drive Information . . . . . . . . 1-3
Vehicle Features . . . . . . . . . . . . . 1-15
Performance and Maintenance . . . . . . . . . . . . . . . . 1-17
Keys, Doors, and Windows . . . . . . . . . . . . . . . . . . . . 2-1
Keys and Locks . . . . . . . . . . . . . . . 2-2
Doors . . . . . . . . . . . . . . . . . . . . . . . . . . 2-7
Vehicle Security . . . . . . . . . . . . . . . . 2-9
Exterior Mirrors . . . . . . . . . . . . . . . 2-12
Interior Mirrors . . . . . . . . . . . . . . . . 2-13
Windows . . . . . . . . . . . . . . . . . . . . . 2-15
Seats and Restraints . . . . . . . . . 3-1
Head Restraints . . . . . . . . . . . . . . . 3-2
Front Seats . . . . . . . . . . . . . . . . . . . . 3-3
Rear Seats . . . . . . . . . . . . . . . . . . . . 3-8
Safety Belts . . . . . . . . . . . . . . . . . . 3-10
Airbag System . . . . . . . . . . . . . . . . 3-20
Child Restraints . . . . . . . . . . . . . . 3-34 Storage
. . . . . . . . . . . . . . . . . . . . . . . 4-1
Storage Compartments . . . . . . . . 4-1
Instruments and Controls . . . . 5-1
Controls . . . . . . . . . . . . . . . . . . . . . . . 5-2
Warning Lights, Gauges, and Indicators . . . . . . . . . . . . . . . . . . . . 5-6
Information Displays . . . . . . . . . . 5-19
Vehicle Messages . . . . . . . . . . . . 5-22
Lighting . . . . . . . . . . . . . . . . . . . . . . . 6-1
Exterior Lighting . . . . . . . . . . . . . . . 6-1
Interior Lighting . . . . . . . . . . . . . . . . 6-6
Lighting Features . . . . . . . . . . . . . . 6-7
Infotainment System . . . . . . . . . 7-1
Introduction . . . . . . . . . . . . . . . . . . . . 7-1
Radio . . . . . . . . . . . . . . . . . . . . . . . . . . 7-7
Audio Players . . . . . . . . . . . . . . . . 7-15
Phone . . . . . . . . . . . . . . . . . . . . . . . . 7-21
Climate Controls . . . . . . . . . . . . . 8-1
Climate Control Systems . . . . . . 8-1
Air Vents . . . . . . . . . . . . . . . . . . . . . . . 8-3 Driving and Operating
. . . . . . . . 9-1
Driving Information . . . . . . . . . . . . . 9-2
Starting and Operating . . . . . . . 9-22
Engine Exhaust . . . . . . . . . . . . . . 9-30
Automatic Transmission . . . . . . 9-31
Manual Transmission . . . . . . . . . 9-34
Drive Systems . . . . . . . . . . . . . . . . 9-36
Brakes . . . . . . . . . . . . . . . . . . . . . . . 9-40
Ride Control Systems . . . . . . . . 9-42
Cruise Control . . . . . . . . . . . . . . . . 9-46
Fuel . . . . . . . . . . . . . . . . . . . . . . . . . . 9-48
Towing . . . . . . . . . . . . . . . . . . . . . . . 9-53
Conversions and Add-Ons . . . 9-63
Vehicle Care . . . . . . . . . . . . . . . . . 10-1
General Information . . . . . . . . . . 10-2
Vehicle Checks . . . . . . . . . . . . . . . 10-4
Headlamp Aiming . . . . . . . . . . . 10-35
Bulb Replacement . . . . . . . . . . 10-35
Electrical System . . . . . . . . . . . . 10-38
Wheels and Tires . . . . . . . . . . . 10-46
Jump Starting . . . . . . . . . . . . . . . 10-84
Towing . . . . . . . . . . . . . . . . . . . . . . 10-89
Appearance Care . . . . . . . . . . . 10-94
Page 5 of 394
Black plate (5,1)Chevrolet Colorado Owner Manual - 2012
Introduction v
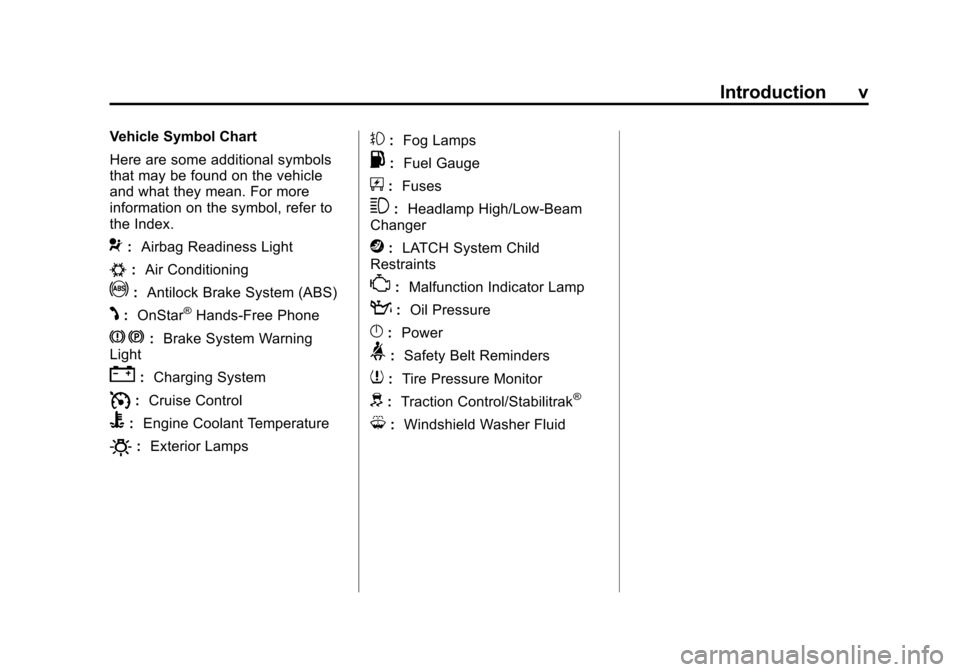
Vehicle Symbol Chart
Here are some additional symbols
that may be found on the vehicle
and what they mean. For more
information on the symbol, refer to
the Index.
9:Airbag Readiness Light
#:Air Conditioning
!:Antilock Brake System (ABS)
J:OnStar®Hands-Free Phone
J:Brake System Warning
Light
": Charging System
I:Cruise Control
B: Engine Coolant Temperature
O:Exterior Lamps
#:Fog Lamps
.: Fuel Gauge
+:Fuses
3: Headlamp High/Low-Beam
Changer
j: LATCH System Child
Restraints
*: Malfunction Indicator Lamp
::Oil Pressure
}:Power
>:Safety Belt Reminders
7:Tire Pressure Monitor
d:Traction Control/Stabilitrak®
M:Windshield Washer Fluid
Page 16 of 394
Black plate (10,1)Chevrolet Colorado Owner Manual - 2012
1-10 In Brief
3. Return the selector switch to thecenter position once the mirrors
are adjusted.
See Power Mirrors on page 2‑13.
Vehicles with manual outside
mirrors can be adjusted by pressing
the mirror up and down and left and
right so that you can see a clear
view behind you.
Manually fold the mirrors inward
to prevent damage when going
through an automatic car wash.
To fold, push the mirror toward the
vehicle. Push the mirror outward, to
return to its original position.
See Manual Mirrors on page 2‑12.Interior Mirror
On vehicles with a manual inside
rearview mirror, the mirror can be
adjusted by holding it in the center
to move it for a clear view behind
you. To avoid glare from the
headlamps behind you, push the
tab forward for daytime use and
pull it for nighttime use.
SeeManual Rearview Mirror on
page 2‑13.
The automatic dimming inside
rearview mirror will automatically
reduce the glare of lights from
behind the vehicle.
See Automatic Dimming Rearview
Mirror on page 2‑14.
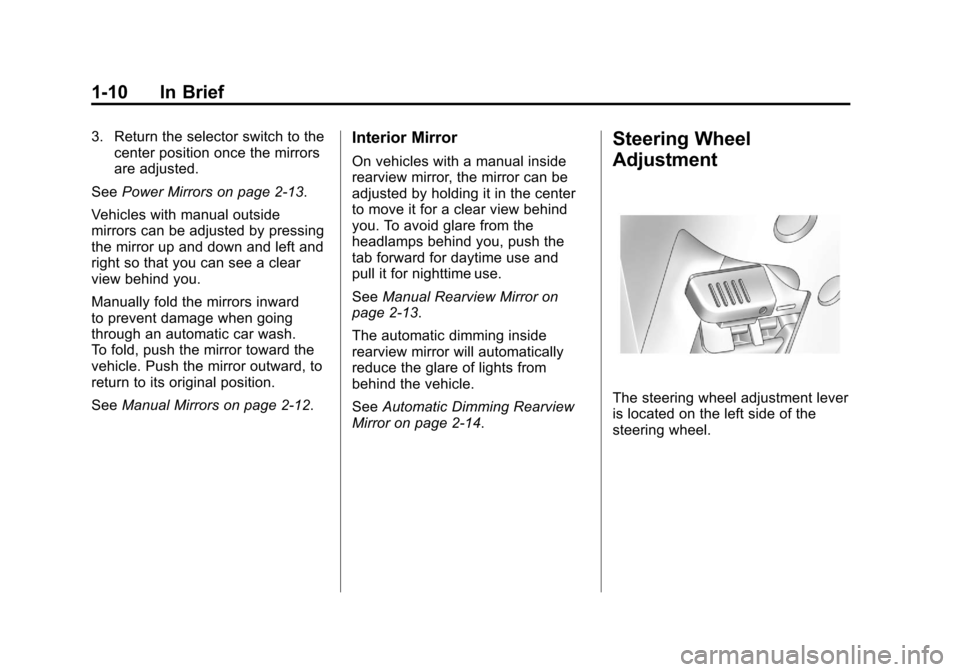
Steering Wheel
Adjustment
The steering wheel adjustment lever
is located on the left side of the
steering wheel.
Page 18 of 394
Black plate (12,1)Chevrolet Colorado Owner Manual - 2012
1-12 In Brief
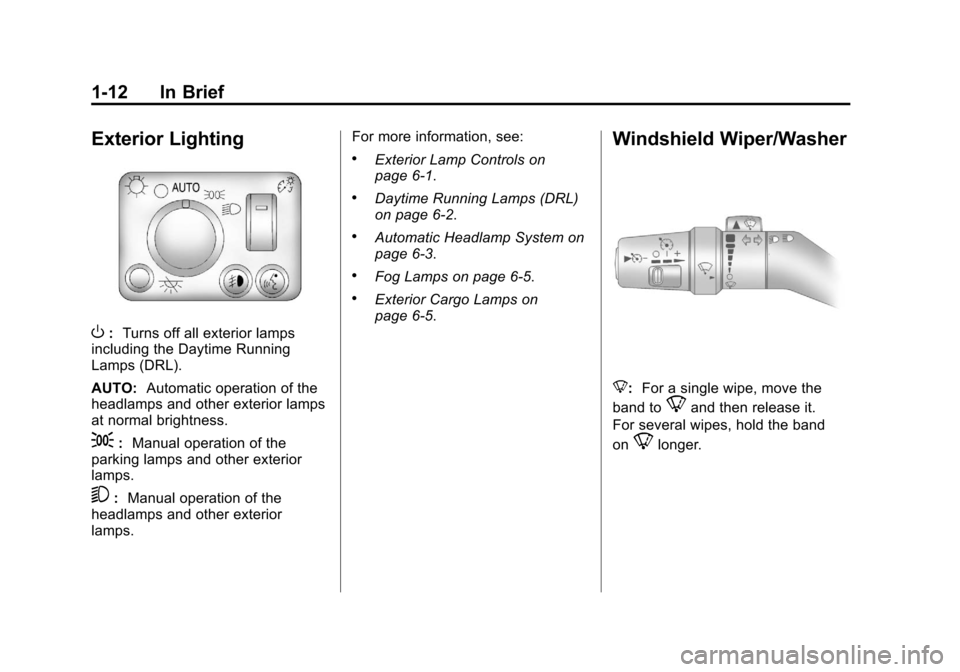
Exterior Lighting
O:Turns off all exterior lamps
including the Daytime Running
Lamps (DRL).
AUTO: Automatic operation of the
headlamps and other exterior lamps
at normal brightness.
;: Manual operation of the
parking lamps and other exterior
lamps.
5: Manual operation of the
headlamps and other exterior
lamps. For more information, see:
.Exterior Lamp Controls on
page 6‑1.
.Daytime Running Lamps (DRL)
on page 6‑2.
.Automatic Headlamp System on
page 6‑3.
.Fog Lamps on page 6‑5.
.Exterior Cargo Lamps on
page 6‑5.
Windshield Wiper/Washer
8:
For a single wipe, move the
band to
8and then release it.
For several wipes, hold the band
on
8longer.
Page 31 of 394
Black plate (3,1)Chevrolet Colorado Owner Manual - 2012
Keys, Doors, and Windows 2-3
.Check the transmitter's battery.
See“Battery Replacement” later
in this section.
.If the transmitter is still not
working correctly, see your
dealer or a qualified technician
for service.
Remote Keyless Entry
(RKE) System Operation
Vehicles with Remote Keyless
Entry (RKE), transmitter functions
work up to 9 m (30 ft) away from the
vehicle.
There are other conditions which
can affect the performance of the
transmitter. See Remote Keyless
Entry (RKE) System on page 2‑2.
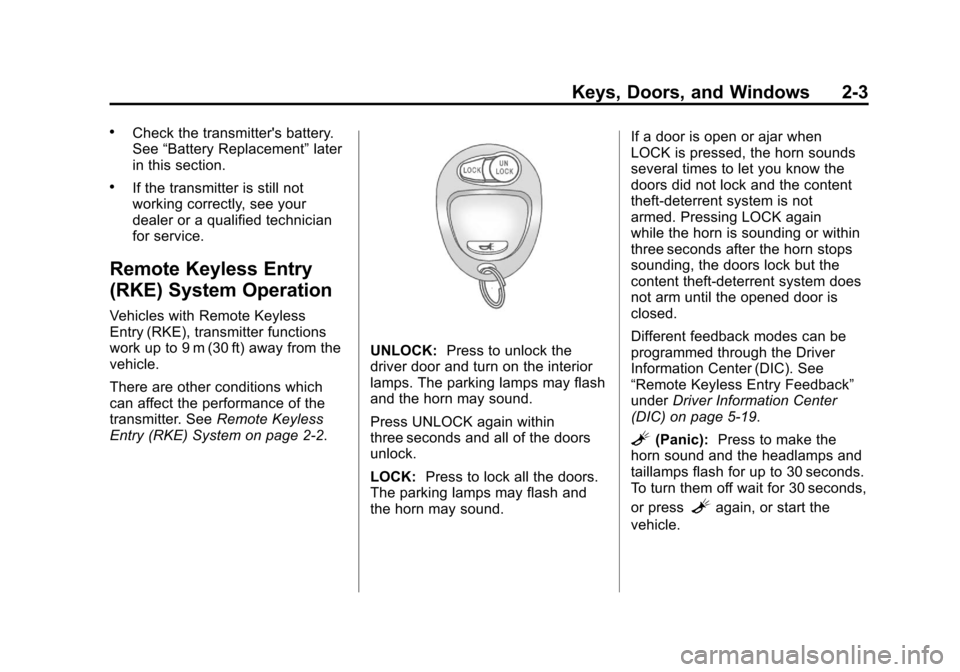
UNLOCK: Press to unlock the
driver door and turn on the interior
lamps. The parking lamps may flash
and the horn may sound.
Press UNLOCK again within
three seconds and all of the doors
unlock.
LOCK: Press to lock all the doors.
The parking lamps may flash and
the horn may sound. If a door is open or ajar when
LOCK is pressed, the horn sounds
several times to let you know the
doors did not lock and the content
theft‐deterrent system is not
armed. Pressing LOCK again
while the horn is sounding or within
three seconds after the horn stops
sounding, the doors lock but the
content theft‐deterrent system does
not arm until the opened door is
closed.
Different feedback modes can be
programmed through the Driver
Information Center (DIC). See
“Remote Keyless Entry Feedback”
under
Driver Information Center
(DIC) on page 5‑19.
L(Panic): Press to make the
horn sound and the headlamps and
taillamps flash for up to 30 seconds.
To turn them off wait for 30 seconds,
or press
Lagain, or start the
vehicle.
Page 41 of 394
Black plate (13,1)Chevrolet Colorado Owner Manual - 2012
Keys, Doors, and Windows 2-13
Manually fold the mirrors inward
to prevent damage when going
through an automatic car wash. To
fold, push the mirrors toward the
vehicle. Push outward, to return the
mirrors to their original position.
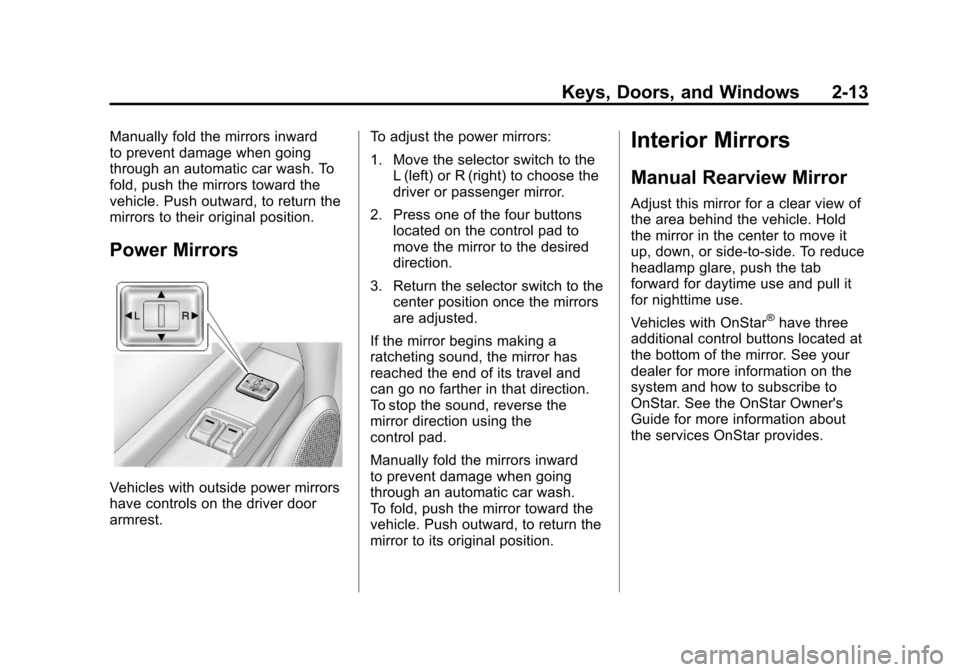
Power Mirrors
Vehicles with outside power mirrors
have controls on the driver door
armrest.To adjust the power mirrors:
1. Move the selector switch to the
L (left) or R (right) to choose the
driver or passenger mirror.
2. Press one of the four buttons located on the control pad to
move the mirror to the desired
direction.
3. Return the selector switch to the center position once the mirrors
are adjusted.
If the mirror begins making a
ratcheting sound, the mirror has
reached the end of its travel and
can go no farther in that direction.
To stop the sound, reverse the
mirror direction using the
control pad.
Manually fold the mirrors inward
to prevent damage when going
through an automatic car wash.
To fold, push the mirror toward the
vehicle. Push outward, to return the
mirror to its original position.
Interior Mirrors
Manual Rearview Mirror
Adjust this mirror for a clear view of
the area behind the vehicle. Hold
the mirror in the center to move it
up, down, or side-to-side. To reduce
headlamp glare, push the tab
forward for daytime use and pull it
for nighttime use.
Vehicles with OnStar
®have three
additional control buttons located at
the bottom of the mirror. See your
dealer for more information on the
system and how to subscribe to
OnStar. See the OnStar Owner's
Guide for more information about
the services OnStar provides.
Page 126 of 394
Black plate (18,1)Chevrolet Colorado Owner Manual - 2012
5-18 Instruments and Controls
When the Light Flashes First and
Then Is On Steady
If the light flashes for about a minute
and then stays on, there may be
a problem with the TPMS. If the
problem is not corrected, the light
will come on at every ignition
cycle. SeeTire Pressure Monitor
Operation on page 10‑56 for more
information.
Engine Oil Pressure Light
{WARNING
Do not keep driving if the oil
pressure is low. The engine can
become so hot that it catches fire.
(Continued)
WARNING (Continued)
Someone could be burned. Check
the oil as soon as possible and
have the vehicle serviced.
Notice: Lack of proper engine
oil maintenance can damage the
engine. The repairs would not be
covered by the vehicle warranty.
Always follow the maintenance
schedule for changing engine oil.
This light comes on briefly while
starting the engine. If it does not,
have the vehicle serviced by your
dealer. If the system is working
normally, the indicator light then
goes off.
If the light comes on and stays on, it
means that oil is not flowing through
the engine properly. The vehicle
could be low on oil and it might
have some other system problem.
Security Light
For information regarding this light
and the vehicle's security system,
see Anti-theft Alarm System on
page 2‑9.
High-Beam On Light
This light comes on when the
high-beam headlamps are in use.
See Headlamp High/Low-Beam
Changer on page 6‑2 for more
information.
Page 135 of 394
Black plate (1,1)Chevrolet Colorado Owner Manual - 2012
Lighting 6-1
Lighting
Exterior Lighting
Exterior Lamp Controls . . . . . . . . 6-1
Exterior Lamps OffReminder . . . . . . . . . . . . . . . . . . . . 6-2
Headlamp High/Low-Beam Changer . . . . . . . . . . . . . . . . . . . . . 6-2
Flash-to-Pass . . . . . . . . . . . . . . . . . 6-2
Daytime Running Lamps (DRL) . . . . . . . . . . . . . . . . 6-2
Automatic Headlamp System . . . . . . . . . . . . . . . . . . . . . . 6-3
Hazard Warning Flashers . . . . . 6-4
Turn and Lane-Change Signals . . . . . . . . . . . . . . . . . . . . . . 6-4
Fog Lamps . . . . . . . . . . . . . . . . . . . . 6-5
Exterior Cargo Lamps . . . . . . . . . 6-5
Interior Lighting
Instrument Panel Illumination Control . . . . . . . . . . . . . . . . . . . . . . 6-6
Dome Lamps . . . . . . . . . . . . . . . . . 6-6
Lighting Features
Exit Lighting . . . . . . . . . . . . . . . . . . . 6-7
Battery Load Management . . . . 6-7
Battery Power Protection . . . . . . 6-7
Exterior Lighting
Exterior Lamp Controls
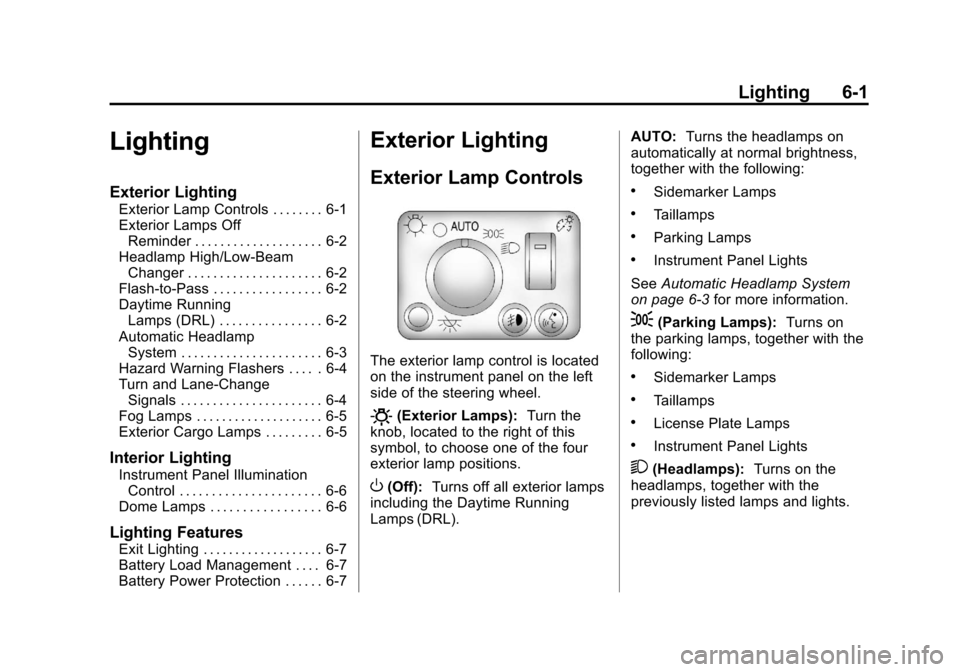
The exterior lamp control is located
on the instrument panel on the left
side of the steering wheel.
O(Exterior Lamps): Turn the
knob, located to the right of this
symbol, to choose one of the four
exterior lamp positions.
O(Off): Turns off all exterior lamps
including the Daytime Running
Lamps (DRL). AUTO:
Turns the headlamps on
automatically at normal brightness,
together with the following:
.Sidemarker Lamps
.Taillamps
.Parking Lamps
.Instrument Panel Lights
See Automatic Headlamp System
on page 6‑3 for more information.
;(Parking Lamps): Turns on
the parking lamps, together with the
following:
.Sidemarker Lamps
.Taillamps
.License Plate Lamps
.Instrument Panel Lights
2(Headlamps): Turns on the
headlamps, together with the
previously listed lamps and lights.
Page 136 of 394
Black plate (2,1)Chevrolet Colorado Owner Manual - 2012
6-2 Lighting
Exterior Lamps Off
Reminder
If a door is open, a reminder chime
sounds when the headlamps or
parking lamps are manually turned
on and the key is out of the ignition.
To turn off the chime, turn the
headlamp switch to off and then
back on. In the automatic mode, the
headlamps turn off once the ignition
is in LOCK/OFF.
For vehicles first sold in Canada,
if the parking lamps are turned on
manually, the Daytime Running
Lamps (DRL) will stay on.
Headlamp High/
Low-Beam Changer
2 3
Headlamp High/Low Beam
Changer: Push the turn signal/
multifunction lever away from you
to turn the high beams on.
Pull the lever towards you to return
to low beams.
This indicator light turns on in the
instrument panel cluster when the
high beam headlamps are on.
Flash-to-Pass
This feature lets you use the
high-beam headlamps to signal
a driver in front of you that you
want to pass. It works even if the
headlamps are in the automatic
position.
To use it, pull the turn signal lever
toward you, then release it.
If the headlamps are in the
automatic position or on low
beam, the high-beam headlamps
will turn on. They will stay on as
long as the lever is held toward you. The high-beam indicator on the
instrument panel cluster will come
on. Release the lever to return to
normal operation.
Daytime Running
Lamps (DRL)
Daytime Running Lamps (DRL) can
make it easier for others to see the
front of your vehicle during the day.
Fully functional daytime running
lamps are required on all vehicles
first sold in Canada.
The DRL system will come on when
the following conditions are met:
.The ignition is on.
.The exterior lamps control is
in AUTO.
.The transmission is not in
P (Park) if you have an
automatic transmission.
.The light sensor determines it is
daytime.
Page 137 of 394
Black plate (3,1)Chevrolet Colorado Owner Manual - 2012
Lighting 6-3
When the DRL are on, only the
parking lamps or reduced intensity
low beam headlamps will be on.
The taillamps, sidemarkers, and
other lamps will not be on. The
instrument panel will not be lit up
either.
When it begins to get dark, the
headlamps will automatically switch
from DRL to the regular headlamps.
The regular headlamp system
should be turned on when needed.
Automatic Headlamp
System
When it is dark enough outside,
the automatic headlamp system
will turn on after the transmission
has been shifted from P (Park) to
D (Drive). The headlamps, taillamps,
sidemarker, parking lamps, roof
marker lamps, and the instrumentpanel lights turn on at normal
brightness. The radio lights will
become dimmer when the
headlights are off compared to
when the headlights are on.
The vehicle has a light sensor
located on the top of the instrument
panel. Do not cover the sensor,
or the system will be on whenever
the ignition is on.
The system can turn on the
headlamps when driving in a
parking garage, through a tunnel or
when there is overcast weather.
This is normal.
There is a delay in the transition
between the daytime and nighttime
operation of the Daytime Running
Lamps (DRL) and the automatic
headlamp system so that driving
under bridges or bright overhead
street lights does not affect the
system. The DRL and automatic
headlamp system will only be
affected when the light sensor
detects a change in lighting lasting
longer than the delay.
If the vehicle is started in a dark
garage, the automatic headlamp
system will come on immediately.
Once the vehicle leaves the garage,
it will take about 1 minute for the
automatic headlamp system to
change to DRL if it is light outside.
During that delay, the instrument
panel cluster may not be as bright
as usual. Make sure the instrument
panel brightness control is in the
full bright position. See
Instrument
Panel Illumination Control on
page 6‑6.