buttons CHEVROLET COLORADO 2019 Owner's Manual
[x] Cancel search | Manufacturer: CHEVROLET, Model Year: 2019, Model line: COLORADO, Model: CHEVROLET COLORADO 2019Pages: 387, PDF Size: 5.69 MB
Page 12 of 387
Chevrolet Colorado Owner Manual (GMNA-Localizing-U.S./Canada/Mexico-
12460274) - 2019 - CRC - 10/1/18
In Brief 11
3. Push and pull on the seatbackto make sure it is locked.
To return the seatback to the upright
position: 1. Lift the lever fully without applying pressure to the
seatback.
2. Push and pull on the seatback to make sure it is locked.
See Reclining Seatbacks 047.
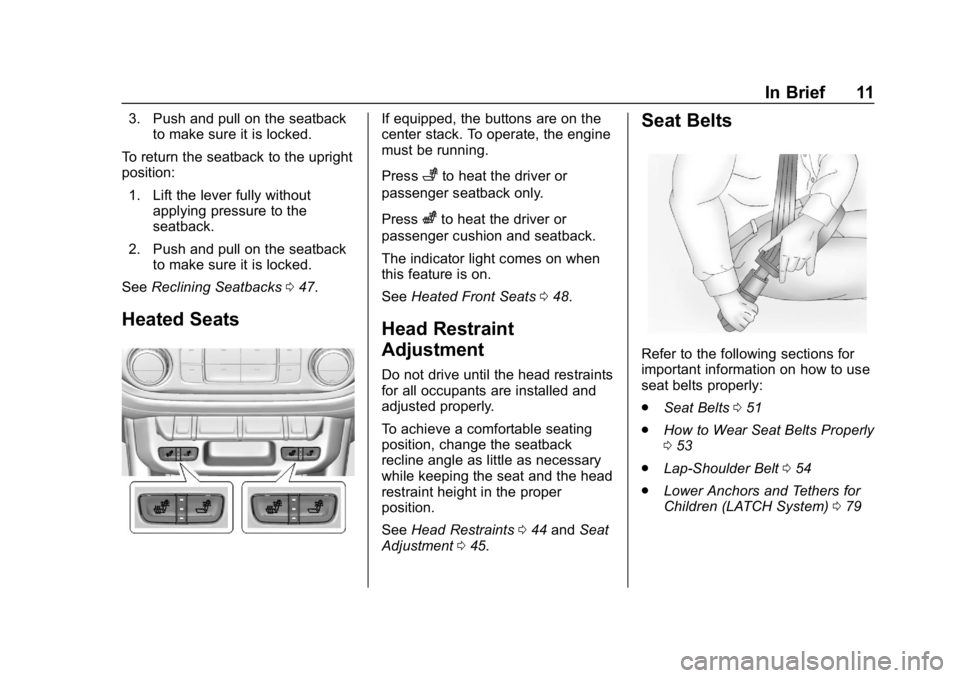
Heated Seats
If equipped, the buttons are on the
center stack. To operate, the engine
must be running.
Press
+to heat the driver or
passenger seatback only.
Press
zto heat the driver or
passenger cushion and seatback.
The indicator light comes on when
this feature is on.
See Heated Front Seats 048.
Head Restraint
Adjustment
Do not drive until the head restraints
for all occupants are installed and
adjusted properly.
To achieve a comfortable seating
position, change the seatback
recline angle as little as necessary
while keeping the seat and the head
restraint height in the proper
position.
See Head Restraints 044 and Seat
Adjustment 045.
Seat Belts
Refer to the following sections for
important information on how to use
seat belts properly:
.
Seat Belts 051
. How to Wear Seat Belts Properly
053
. Lap-Shoulder Belt 054
. Lower Anchors and Tethers for
Children (LATCH System) 079
Page 25 of 387
Chevrolet Colorado Owner Manual (GMNA-Localizing-U.S./Canada/Mexico-
12460274) - 2019 - CRC - 10/1/18
24 In Brief
Resetting the Oil Life System
To reset the engine oil life system:1. Display OIL LIFE REMAINING on the DIC. See Driver
Information Center (DIC) (Base
Level) 0129 orDriver
Information Center (DIC)
(Uplevel) 0131. If the vehicle
does not have DIC buttons, the
vehicle must be in P (Park) to
access this display.
2. Press and hold
Von the DIC,
or SET/CLR on the turn signal
lever if the vehicle does not
have DIC buttons, for several
seconds. The oil life will
change to 100%.
The oil life system can also be reset
as follows:
1. Display OIL LIFE REMAINING on the DIC. See Driver
Information Center (DIC) (Base
Level) 0129 orDriver
Information Center (DIC)
(Uplevel) 0131. 2. Fully press the accelerator
pedal slowly three times within
five seconds. If the display
shows 100%, the system is
reset.
See Engine Oil Life System 0248.
Driving for Better Fuel
Economy
Driving habits can affect fuel
mileage. Here are some driving tips
to get the best fuel economy
possible:
.
Set the climate controls to the
desired temperature after the
engine is started, or turn them
off when not required.
. Avoid fast starts and accelerate
smoothly.
. Brake gradually and avoid
abrupt stops.
. Avoid idling the engine for long
periods of time.
. When road and weather
conditions are appropriate, use
cruise control. .
Always follow posted speed
limits or drive more slowly when
conditions require.
. Keep vehicle tires properly
inflated.
. Combine several trips into a
single trip.
. Replace the vehicle's tires with
the same TPC Spec number
molded into the tire's sidewall
near the size.
. Follow recommended scheduled
maintenance.
Roadside Assistance
Program
U.S.: 1-800-243-8872
TTY Users (U.S. Only):
1-888-889-2438
Canada: 1-800-268-6800
New Chevrolet owners are
automatically enrolled in the
Roadside Assistance Program.
See Roadside Assistance Program
0 353.
Page 40 of 387
Chevrolet Colorado Owner Manual (GMNA-Localizing-U.S./Canada/Mexico-
12460274) - 2019 - CRC - 10/1/18
Keys, Doors, and Windows 39
Interior Mirrors
Interior Rearview Mirrors
Adjust the rearview mirror for a clear
view of the area behind your
vehicle.
If equipped with OnStar, the vehicle
may have three control buttons at
the bottom of the mirror. SeeOnStar
Overview 0363.
To avoid accidental OnStar calls,
clean the mirror with the ignition off.
Do not spray glass cleaner directly
on the mirror. Use a soft towel
dampened with water.
Manual Rearview Mirror
If equipped, push the tab forward for
daytime use and pull it rearward for
nighttime use to avoid glare from
the headlamps from behind.
Automatic Dimming
Rearview Mirror
If equipped, the mirror will
automatically reduce the glare of the
headlamps from behind. The
dimming feature comes on each
time the vehicle is started.
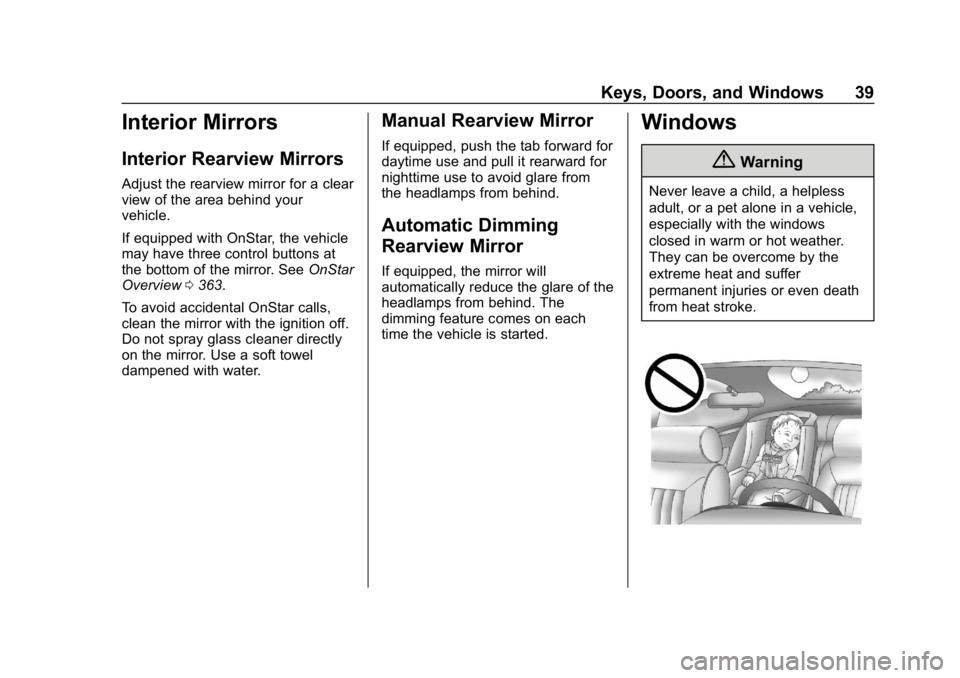
Windows
{Warning
Never leave a child, a helpless
adult, or a pet alone in a vehicle,
especially with the windows
closed in warm or hot weather.
They can be overcome by the
extreme heat and suffer
permanent injuries or even death
from heat stroke.
Page 49 of 387
Chevrolet Colorado Owner Manual (GMNA-Localizing-U.S./Canada/Mexico-
12460274) - 2019 - CRC - 10/1/18
48 Seats and Restraints
2. Move the seatback to thedesired position, and then
release the lever to lock the
seatback in place.
3. Push and pull on the seatback to make sure it is locked.
To return the seatback to the upright
position: 1. Lift the lever fully without applying pressure to the
seatback.
2. Push and pull on the seatback to make sure it is locked.
Heated Front Seats
{Warning
If temperature change or pain to
the skin cannot be felt, the seat
heater may cause burns. To
reduce the risk of burns, use care
when using the seat heater,
especially for long periods of
time. Do not place anything on
the seat that insulates against
(Continued)
Warning (Continued)
heat, such as a blanket, cushion,
cover, or similar item. This may
cause the seat heater to
overheat. An overheated seat
heater may cause a burn or may
damage the seat.
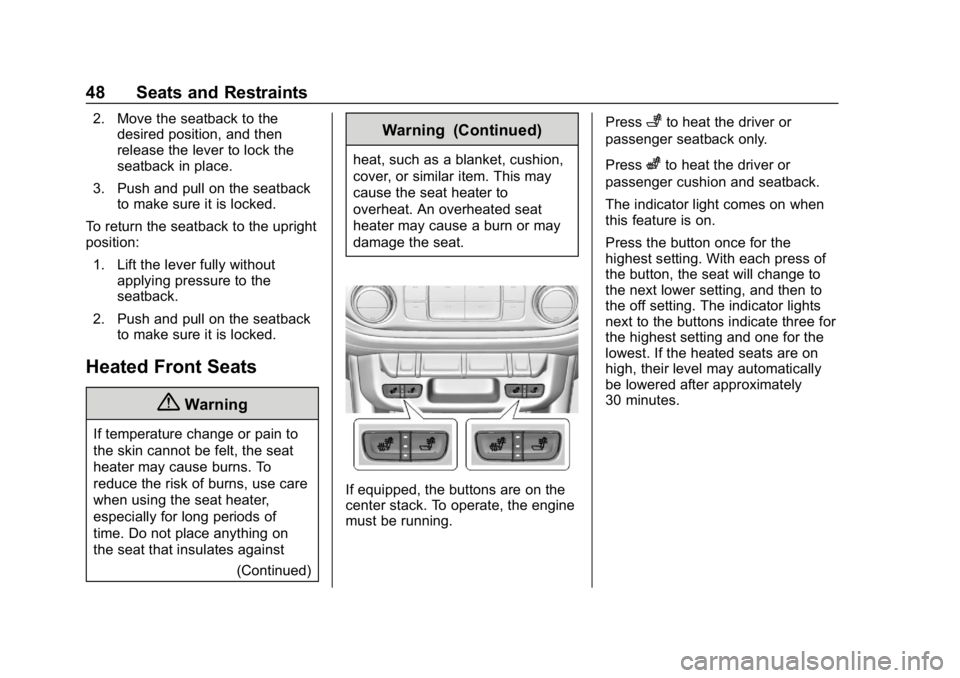
If equipped, the buttons are on the
center stack. To operate, the engine
must be running. Press
+to heat the driver or
passenger seatback only.
Press
zto heat the driver or
passenger cushion and seatback.
The indicator light comes on when
this feature is on.
Press the button once for the
highest setting. With each press of
the button, the seat will change to
the next lower setting, and then to
the off setting. The indicator lights
next to the buttons indicate three for
the highest setting and one for the
lowest. If the heated seats are on
high, their level may automatically
be lowered after approximately
30 minutes.
Page 94 of 387
Chevrolet Colorado Owner Manual (GMNA-Localizing-U.S./Canada/Mexico-
12460274) - 2019 - CRC - 10/1/18
Seats and Restraints 93
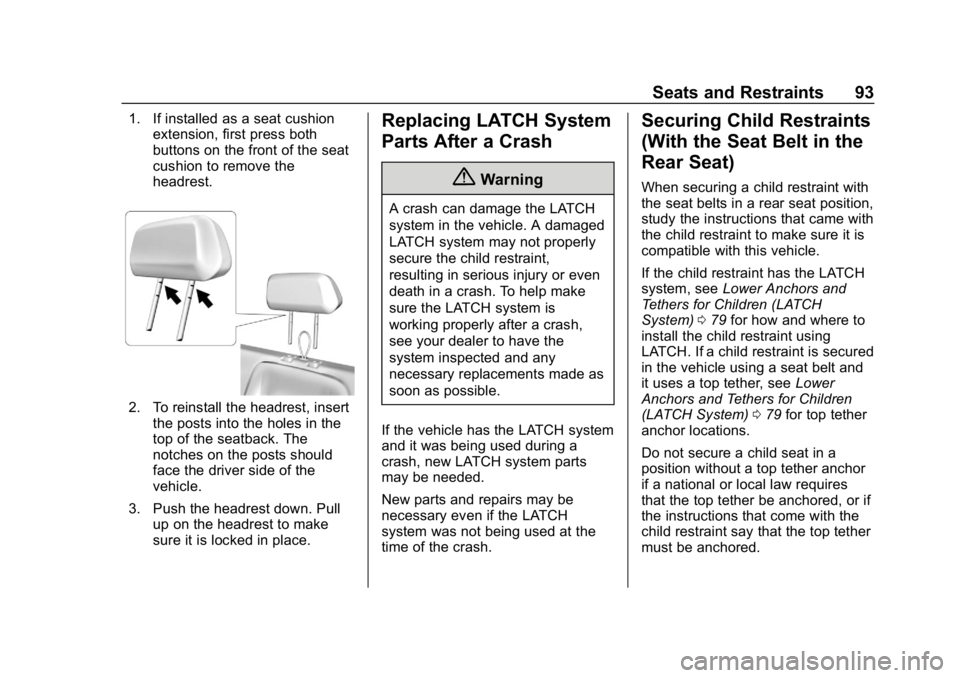
1. If installed as a seat cushionextension, first press both
buttons on the front of the seat
cushion to remove the
headrest.
2. To reinstall the headrest, insert
the posts into the holes in the
top of the seatback. The
notches on the posts should
face the driver side of the
vehicle.
3. Push the headrest down. Pull up on the headrest to make
sure it is locked in place.
Replacing LATCH System
Parts After a Crash
{Warning
A crash can damage the LATCH
system in the vehicle. A damaged
LATCH system may not properly
secure the child restraint,
resulting in serious injury or even
death in a crash. To help make
sure the LATCH system is
working properly after a crash,
see your dealer to have the
system inspected and any
necessary replacements made as
soon as possible.
If the vehicle has the LATCH system
and it was being used during a
crash, new LATCH system parts
may be needed.
New parts and repairs may be
necessary even if the LATCH
system was not being used at the
time of the crash.
Securing Child Restraints
(With the Seat Belt in the
Rear Seat)
When securing a child restraint with
the seat belts in a rear seat position,
study the instructions that came with
the child restraint to make sure it is
compatible with this vehicle.
If the child restraint has the LATCH
system, see Lower Anchors and
Tethers for Children (LATCH
System) 079 for how and where to
install the child restraint using
LATCH. If a child restraint is secured
in the vehicle using a seat belt and
it uses a top tether, see Lower
Anchors and Tethers for Children
(LATCH System) 079 for top tether
anchor locations.
Do not secure a child seat in a
position without a top tether anchor
if a national or local law requires
that the top tether be anchored, or if
the instructions that come with the
child restraint say that the top tether
must be anchored.
Page 130 of 387
Chevrolet Colorado Owner Manual (GMNA-Localizing-U.S./Canada/Mexico-
12460274) - 2019 - CRC - 10/1/18
Instruments and Controls 129
Information Displays
Driver Information Center
(DIC) (Base Level)
The DIC displays information about
your vehicle. It also displays
warning messages if a system
problem is detected. SeeVehicle
Messages 0135. All messages
appear in the DIC display in the
center of the instrument cluster.
DIC Operation and Displays
The DIC has different displays
which can be accessed by using the
DIC buttons on the turn signal lever.
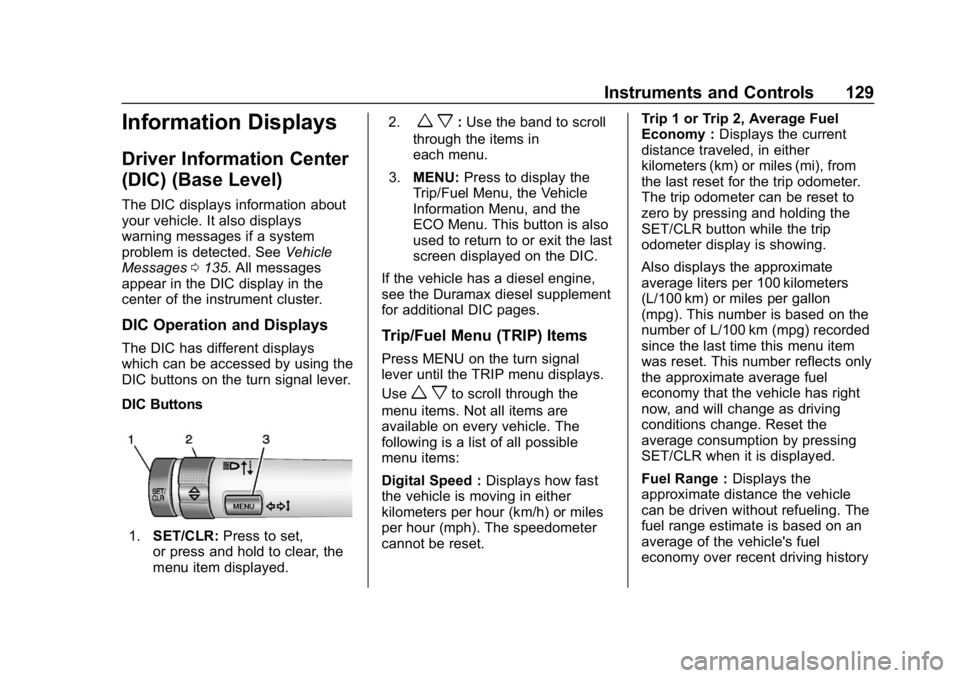
DIC Buttons
1. SET/CLR: Press to set,
or press and hold to clear, the
menu item displayed. 2.
w x:
Use the band to scroll
through the items in
each menu.
3. MENU: Press to display the
Trip/Fuel Menu, the Vehicle
Information Menu, and the
ECO Menu. This button is also
used to return to or exit the last
screen displayed on the DIC.
If the vehicle has a diesel engine,
see the Duramax diesel supplement
for additional DIC pages.
Trip/Fuel Menu (TRIP) Items
Press MENU on the turn signal
lever until the TRIP menu displays.
Use
w xto scroll through the
menu items. Not all items are
available on every vehicle. The
following is a list of all possible
menu items:
Digital Speed : Displays how fast
the vehicle is moving in either
kilometers per hour (km/h) or miles
per hour (mph). The speedometer
cannot be reset. Trip 1 or Trip 2, Average Fuel
Economy :
Displays the current
distance traveled, in either
kilometers (km) or miles (mi), from
the last reset for the trip odometer.
The trip odometer can be reset to
zero by pressing and holding the
SET/CLR button while the trip
odometer display is showing.
Also displays the approximate
average liters per 100 kilometers
(L/100 km) or miles per gallon
(mpg). This number is based on the
number of L/100 km (mpg) recorded
since the last time this menu item
was reset. This number reflects only
the approximate average fuel
economy that the vehicle has right
now, and will change as driving
conditions change. Reset the
average consumption by pressing
SET/CLR when it is displayed.
Fuel Range : Displays the
approximate distance the vehicle
can be driven without refueling. The
fuel range estimate is based on an
average of the vehicle's fuel
economy over recent driving history
Page 203 of 387
Chevrolet Colorado Owner Manual (GMNA-Localizing-U.S./Canada/Mexico-
12460274) - 2019 - CRC - 10/1/18
202 Driving and Operating
Off lightiand StabiliTrak/ESC Off
light
gin the instrument cluster
turn off.
StabiliTrak/ESC will automatically
turn on if the vehicle exceeds
56 km/h (35 mph). TCS will remain
off until
gis pressed or until the
ignition is turned off and then
back on.
Adding accessories can affect the
vehicle performance. See
Accessories and Modifications
0 241.
Stability Control Interaction
with Off-Road Mode (ZR2 Only)
The TCS and StabiliTrak/ESC
calibrations are different while in
Off-Road Mode. They provide
optimum performance in an off-road
environment.
Pressing and releasing
gwhile in
Off-Road Mode disables TCS and
changes the StabiliTrak/ESC
calibration to allow a greater
difference between vehicle path and
intended path. This reduces the amount of correction StabiliTrak/
ESC will provide in the event the
vehicle is not traveling on the
intended path.
To turn off both TCS and StabiliTrak/
ESC, press and hold
guntil a
StabiliTrak/ESC off message
displays in the instrument cluster. To
turn TCS and StabiliTrak/ESC on
again, press and release
g.i
andgin the instrument cluster will
turn off.
StabiliTrak/ESC will not
automatically turn on while in
Off-Road Mode. TCS and
StabiliTrak/ESC will remain off in
Off-Road Mode until
gis pressed or
the ignition is turned off and then
back on.
Hill Descent
Control (HDC)
If equipped, HDC can be used when
driving downhill. It sets and
maintains vehicle speed while
descending a very steep incline in a
forward or reverse gear. The HDC switch is on the center
stack, below the climate controls.
Press
5to enable or disable HDC.
Vehicle speed must be below
60 km/h (37 mph).
The HDC light displays on the
instrument cluster when enabled.
HDC can maintain vehicle speeds
between 4 and 30 km/h (3 and
19 mph) on an incline greater than
or equal to a 10% grade. A blinking
HDC light indicates that the system
is actively applying the brakes to
maintain vehicle speed.
When HDC is set, that is the initial
set speed. It can be increased or
decreased by applying the
accelerator or brake pedal. Smaller
HDC speed control adjustments are
accomplished using the cruise up or
down buttons. Each tap of the
Page 233 of 387
Chevrolet Colorado Owner Manual (GMNA-Localizing-U.S./Canada/Mexico-
12460274) - 2019 - CRC - 10/1/18
232 Driving and Operating
This symbol is on the Trailer Brake
Control Panel on vehicles with an
ITBC system. The power output to
the trailer brakes is proportional to
the amount of vehicle braking. This
available power output to the trailer
brakes can be adjusted to a wide
range of trailering situations.
The ITBC system is integrated with
the vehicle’s brake, antilock brake,
and StabiliTrak/Electronic Stability
Control (ESC) systems. In trailering
conditions that cause the vehicle’s
antilock brake or StabiliTrak/ESC
systems to activate, power sent to
the trailer's brakes will be
automatically adjusted to minimize
trailer wheel lock-up. This does not
imply that the trailer has
StabiliTrak/ESC.
If the vehicle’s brake, anti-lock
brake, or StabiliTrak/ESC systems
are not functioning properly, the ITBC system may not function fully
or at all. Make sure all of these
systems are fully operational to
allow the ITBC system to function
properly.
The ITBC system is powered
through the vehicle's electrical
system. Turning the ignition off will
also turn off the ITBC system. The
ITBC system is fully functional only
when the ignition is in ON/RUN.
{Warning
Connecting a trailer that has an
air brake system may result in
reduced or complete loss of trailer
braking, including increased
stopping distance or trailer
instability which could result in
serious injury, death, or property
damage. Only use the ITBC
system with electric or electric
over hydraulic trailer brake
systems.
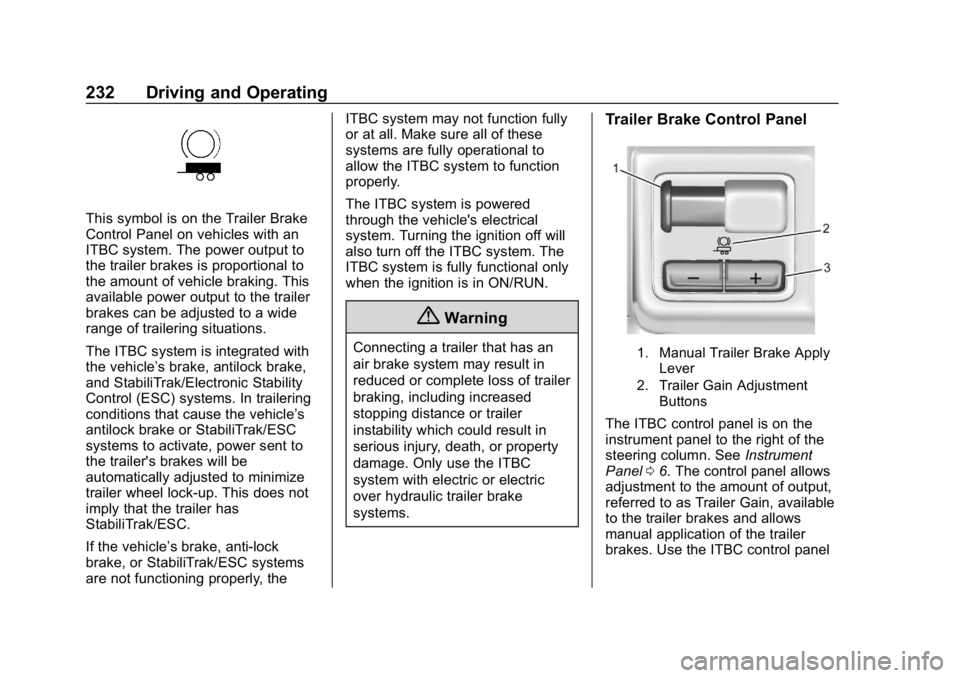
Trailer Brake Control Panel
1. Manual Trailer Brake Apply
Lever
2. Trailer Gain Adjustment Buttons
The ITBC control panel is on the
instrument panel to the right of the
steering column. See Instrument
Panel 06. The control panel allows
adjustment to the amount of output,
referred to as Trailer Gain, available
to the trailer brakes and allows
manual application of the trailer
brakes. Use the ITBC control panel
Page 234 of 387
Chevrolet Colorado Owner Manual (GMNA-Localizing-U.S./Canada/Mexico-
12460274) - 2019 - CRC - 10/1/18
Driving and Operating 233
and the DIC trailer brake display
page to adjust and display power
output to the trailer brakes.
Trailer Brake DIC Display Page
The ITBC display page indicates:
.Trailer Gain setting
. Output to the trailer brakes
. Trailer connection
. System operational status
To display:
. Scroll through the DIC menu
pages
. Press a Trailer Gain (+) or (−)
button
. Activate the Manual Trailer
Brake Apply Lever
TRAILER GAIN: Press a Trailer
Gain button to recall the current
Trailer Gain setting. Each press and
release of the gain buttons will then
change the Trailer Gain setting.
Press the Trailer Gain (+) or (−) to
adjust. Press and hold to
continuously adjust the Trailer Gain.
To turn the output to the trailer off, adjust the Trailer Gain setting to 0.0.
This setting can be adjusted from
0.0 to 10.0 with a trailer connected
or disconnected.
TRAILER OUTPUT: This displays
anytime a trailer with electric brakes
is connected. Output to the trailer
brakes is based on the amount of
vehicle braking present and relative
to the Trailer Gain setting. Output is
displayed from 0 to 100% for each
gain setting.
The Trailer Output will indicate
“- - - - - -”
on the Trailer Brake
Display Page whenever the
following occur:
. No trailer is connected.
. A trailer without electric brakes
is connected, no DIC message
displays.
. A trailer with electric brakes has
become disconnected, a CHECK
TRAILER WIRING message
displays on the DIC. .
There is a fault present in the
wiring to the trailer brakes, a
CHECK TRAILER WIRING
message displays on the DIC.
. The ITBC system is not working
due to a fault, a SERVICE
TRAILER BRAKE SYSTEM
message displays in the DIC.
Manual Trailer Brake Apply
Lever
Slide this lever right to apply the
trailer ’s electric brakes independent
of the vehicle’s brakes. Use this
lever to adjust Trailer Gain to
achieve proper power output to the
trailer brakes. The trailer's and the
vehicle's brake lamps will come on
when either vehicle brakes or
manual trailer brakes are applied
and properly connected.
Trailer Gain Adjustment
Procedure
Trailer Gain should be set for a
specific trailering condition and it
must be readjusted anytime vehicle
loading, trailer loading, or road
surface conditions change.
Page 235 of 387
Chevrolet Colorado Owner Manual (GMNA-Localizing-U.S./Canada/Mexico-
12460274) - 2019 - CRC - 10/1/18
234 Driving and Operating
{Warning
Trailer brakes that are
over-gained or under-gained may
not stop the vehicle and the trailer
as intended and can result in a
crash. Always follow the
instructions to set the Trailer Gain
for the proper trailer stopping
performance.
To adjust Trailer Gain for each
towing condition: 1. Drive the vehicle with the trailer attached on a level road
surface representative of the
towing condition and free of
traffic at about 32 - 40 km/h
(20 - 25 mph) and fully apply
the Manual Trailer Brake Apply
Lever.
Adjusting Trailer Gain at
speeds lower than 32 to
40 km/h (20 to 25 mph) may
result in an incorrect gain
setting. 2. Adjust the Trailer Gain, using
the Trailer Gain (+) or (-)
adjustment buttons, to just
below the point of trailer wheel
lock-up, indicated by trailer
wheel squeal or tire smoke
when a trailer wheel locks.
Trailer wheel lock-up may not
occur if towing a heavily loaded
trailer. Adjust the Trailer Gain
to the highest allowable setting
for the towing condition.
3. Readjust Trailer Gain anytime vehicle loading, trailer loading,
or road surface conditions
change or if trailer wheel
lock-up is noticed at any time
while towing.
Other ITBC-Related DIC
Messages
TRAILER CONNECTED: This
message will briefly display when a
trailer with electric brakes is first
connected to the vehicle. This
message will automatically turn off
in about 10 seconds. This message
can be acknowledged before it
automatically turns off. CHECK TRAILER WIRING: This
message will display if:
.
The ITBC system first
determines connection to a
trailer with electric brakes and
then the trailer harness becomes
disconnected from the vehicle.
If the disconnect occurs while
the vehicle is stationary, this
message will automatically turn
off in about 30 seconds. This
message will also turn off if it is
acknowledged or if the trailer
harness is reconnected.
If the disconnect occurs while
the vehicle is moving, this
message will continue until the
ignition is turned off. This
message will also turn off if it is
acknowledged or if the trailer
harness is reconnected.
. There is an electrical fault in the
wiring to the trailer brakes. This
message will continue as long
as there is an electrical fault in
the trailer wiring. This message
will also turn off if it is
acknowledged.