sensor CHEVROLET COLORADO 2020 User Guide
[x] Cancel search | Manufacturer: CHEVROLET, Model Year: 2020, Model line: COLORADO, Model: CHEVROLET COLORADO 2020Pages: 368, PDF Size: 5.67 MB
Page 197 of 368
Chevrolet Colorado Owner Manual (GMNA-Localizing-U.S./Canada/Mexico-
13566640) - 2020 - CRC - 9/30/19
196 Driving and Operating
display green. Vehicles may not be
detected on curves, highway exit
ramps, or hills, due to poor visibility;
or if a vehicle ahead is partially
blocked by pedestrians or other
objects. FCA will not detect another
vehicle ahead until it is completely
in the driving lane.
{Warning
FCA does not provide a warning
to help avoid a crash, unless it
detects a vehicle. FCA may not
detect a vehicle ahead if the FCA
sensor is blocked by dirt, snow,
or ice, or if the windshield is
damaged. It may also not detect a
vehicle on winding or hilly roads,
or in conditions that can limit
visibility such as fog, rain,
or snow, or if the headlamps or
windshield are not cleaned or in
proper condition. Keep the
windshield, headlamps, and FCA
sensors clean and in good repair.Collision Alert
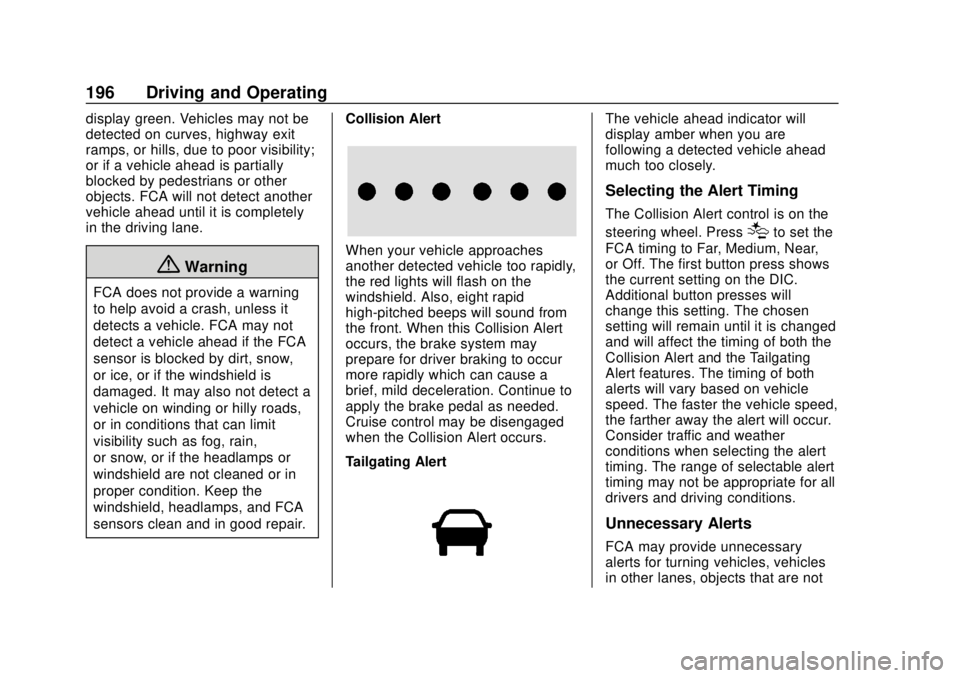
When your vehicle approaches
another detected vehicle too rapidly,
the red lights will flash on the
windshield. Also, eight rapid
high-pitched beeps will sound from
the front. When this Collision Alert
occurs, the brake system may
prepare for driver braking to occur
more rapidly which can cause a
brief, mild deceleration. Continue to
apply the brake pedal as needed.
Cruise control may be disengaged
when the Collision Alert occurs.
Tailgating Alert
The vehicle ahead indicator will
display amber when you are
following a detected vehicle ahead
much too closely.
Selecting the Alert Timing
The Collision Alert control is on the
steering wheel. Press
[to set the
FCA timing to Far, Medium, Near,
or Off. The first button press shows
the current setting on the DIC.
Additional button presses will
change this setting. The chosen
setting will remain until it is changed
and will affect the timing of both the
Collision Alert and the Tailgating
Alert features. The timing of both
alerts will vary based on vehicle
speed. The faster the vehicle speed,
the farther away the alert will occur.
Consider traffic and weather
conditions when selecting the alert
timing. The range of selectable alert
timing may not be appropriate for all
drivers and driving conditions.
Unnecessary Alerts
FCA may provide unnecessary
alerts for turning vehicles, vehicles
in other lanes, objects that are not
Page 198 of 368
Chevrolet Colorado Owner Manual (GMNA-Localizing-U.S./Canada/Mexico-
13566640) - 2020 - CRC - 9/30/19
Driving and Operating 197
vehicles, or shadows. These alerts
are normal operation and the
vehicle does not need service.
Cleaning the System
If the FCA system does not seem to
operate properly, this may correct
the issue:
.Clean the outside of the
windshield in front of the
rearview mirror.
. Clean the entire front of the
vehicle.
. Clean the headlamps.
Lane Departure
Warning (LDW)
If equipped, LDW may help avoid
crashes due to unintentional lane
departures. It may provide an alert if
the vehicle is crossing a lane
marking without using a turn signal
in that direction. LDW uses a
camera sensor to detect the lane
markings at speeds of 56 km/h
(35 mph) or greater.
{Warning
The LDW system does not steer
the vehicle. The LDW system
may not:
. Provide enough time to
avoid a crash.
. Detect lane markings under
poor weather or visibility
conditions. This can occur if
the windshield or
headlamps are blocked by
dirt, snow, or ice; if they are
not in proper condition; or if
the sun shines directly into
the camera.
. Detect road edges.
. Detect lanes on winding or
hilly roads.
If LDW only detects lane
markings on one side of the road,
it will only warn you when
departing the lane on the side
where it has detected a lane
marking. Always keep your (Continued)
Warning (Continued)
attention on the road and
maintain proper vehicle position
within the lane, or vehicle
damage, injury, or death could
occur. Always keep the
windshield, headlamps, and
camera sensors clean and in
good repair. Do not use LDW in
bad weather conditions.
How the System Works
The LDW camera sensor is on the
windshield ahead of the rearview
mirror.
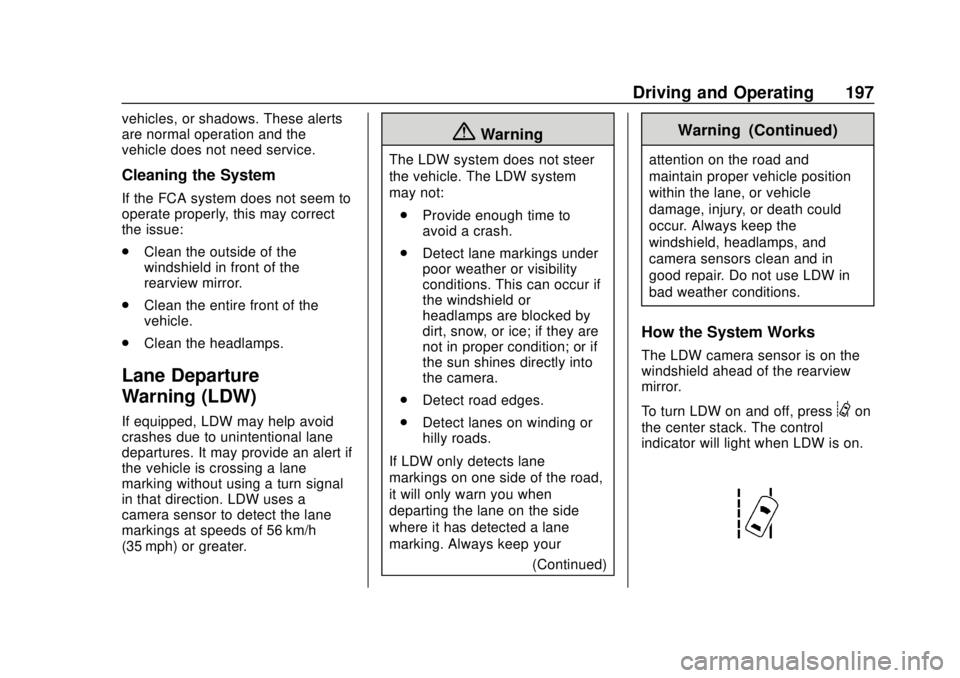
To turn LDW on and off, press
@on
the center stack. The control
indicator will light when LDW is on.
Page 248 of 368

Chevrolet Colorado Owner Manual (GMNA-Localizing-U.S./Canada/Mexico-
13566640) - 2020 - CRC - 10/4/19
Vehicle Care 247
pressure from the regular brake
pedal. Do this until the vehicle is
held by the parking brake only.
. To check the P (Park)
mechanism's holding ability:
With the engine running, shift to
P (Park). Then release the
parking brake followed by the
regular brake.
Contact your dealer if service is
required.
Wiper Blade Replacement
Windshield wiper blades should be
inspected for wear or cracking.
Replacement blades come in
different types and are removed in
different ways. For proper
windshield wiper blade length and
type, see Maintenance
Replacement Parts 0326.
Caution
Allowing the wiper arm to touch
the windshield when no wiper
blade is installed could damage
the windshield. Any damage that
occurs would not be covered by
the vehicle warranty. Do not allow
the wiper arm to touch the
windshield.
To replace the windshield wiper
blade: 1. Pull the windshield wiper assembly away from the
windshield.
2. Press the release lever in themiddle of the wiper blade
where the wiper blade
attaches.
3. Remove the wiper blade.
4. Reverse Steps 1–3 for wiper blade replacement.
Windshield Replacement
Driver Assistance Systems
If the windshield needs to be
replaced and the vehicle is
equipped with a front camera sensor
for the Driver Assistance Systems, a
GM replacement windshield is
Page 257 of 368
Chevrolet Colorado Owner Manual (GMNA-Localizing-U.S./Canada/Mexico-
13566640) - 2020 - CRC - 10/4/19
256 Vehicle Care
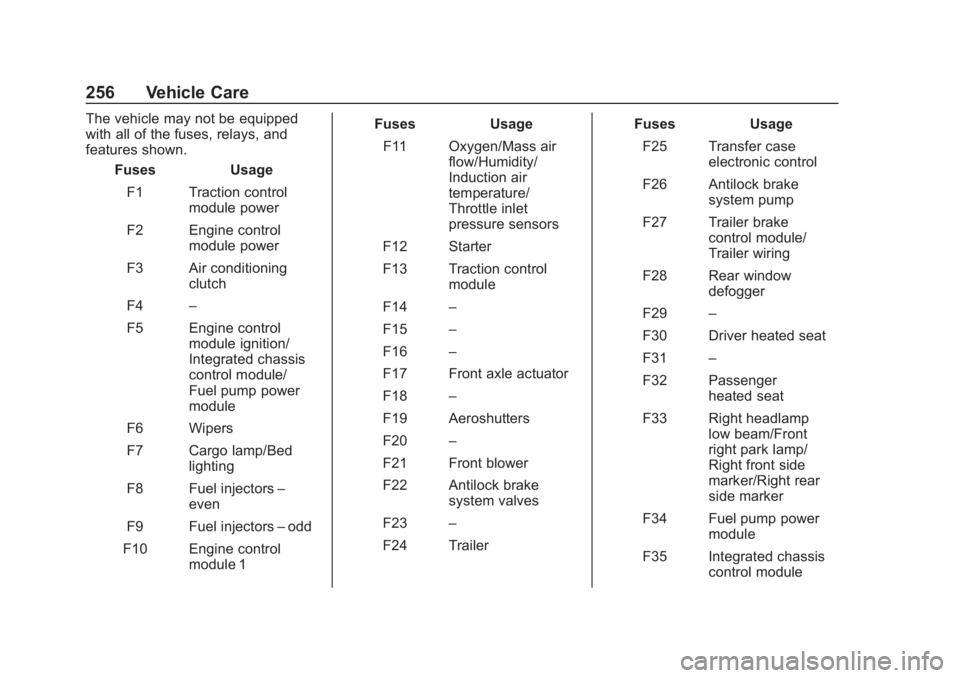
The vehicle may not be equipped
with all of the fuses, relays, and
features shown.Fuses Usage
F1 Traction control module power
F2 Engine control module power
F3 Air conditioning clutch
F4 –
F5 Engine control module ignition/
Integrated chassis
control module/
Fuel pump power
module
F6 Wipers
F7 Cargo lamp/Bed lighting
F8 Fuel injectors –
even
F9 Fuel injectors –odd
F10 Engine control module 1 Fuses Usage
F11 Oxygen/Mass air flow/Humidity/
Induction air
temperature/
Throttle inlet
pressure sensors
F12 Starter
F13 Traction control module
F14 –
F15 –
F16 –
F17 Front axle actuator
F18 –
F19 Aeroshutters
F20 –
F21 Front blower
F22 Antilock brake system valves
F23 –
F24 Trailer Fuses Usage
F25 Transfer case electronic control
F26 Antilock brake system pump
F27 Trailer brake control module/
Trailer wiring
F28 Rear window defogger
F29 –
F30 Driver heated seat
F31 –
F32 Passenger heated seat
F33 Right headlamp low beam/Front
right park lamp/
Right front side
marker/Right rear
side marker
F34 Fuel pump power module
F35 Integrated chassis control module
Page 258 of 368
Chevrolet Colorado Owner Manual (GMNA-Localizing-U.S./Canada/Mexico-
13566640) - 2020 - CRC - 10/4/19
Vehicle Care 257
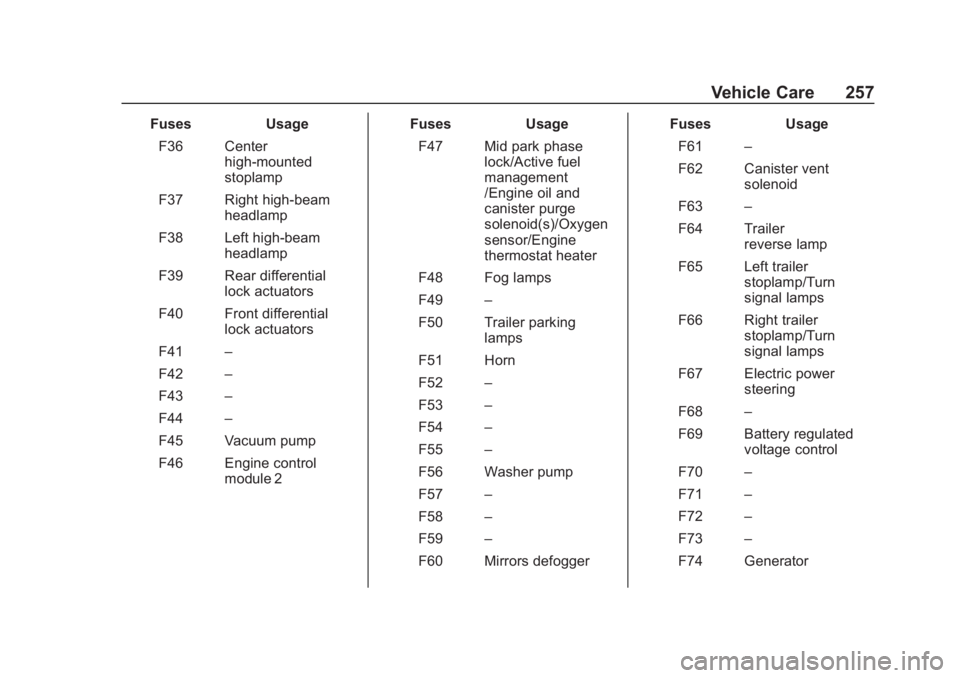
FusesUsage
F36 Center high-mounted
stoplamp
F37 Right high-beam headlamp
F38 Left high-beam headlamp
F39 Rear differential lock actuators
F40 Front differential lock actuators
F41 –
F42 –
F43 –
F44 –
F45 Vacuum pump
F46 Engine control module 2 Fuses
Usage
F47 Mid park phase lock/Active fuel
management
/Engine oil and
canister purge
solenoid(s)/Oxygen
sensor/Engine
thermostat heater
F48 Fog lamps
F49 –
F50 Trailer parking lamps
F51 Horn
F52 –
F53 –
F54 –
F55 –
F56 Washer pump
F57 –
F58 –
F59 –
F60 Mirrors defogger Fuses
Usage
F61 –
F62 Canister vent solenoid
F63 –
F64 Trailer reverse lamp
F65 Left trailer stoplamp/Turn
signal lamps
F66 Right trailer stoplamp/Turn
signal lamps
F67 Electric power steering
F68 –
F69 Battery regulated voltage control
F70 –
F71 –
F72 –
F73 –
F74 Generator
Page 261 of 368
Chevrolet Colorado Owner Manual (GMNA-Localizing-U.S./Canada/Mexico-
13566640) - 2020 - CRC - 10/4/19
260 Vehicle Care
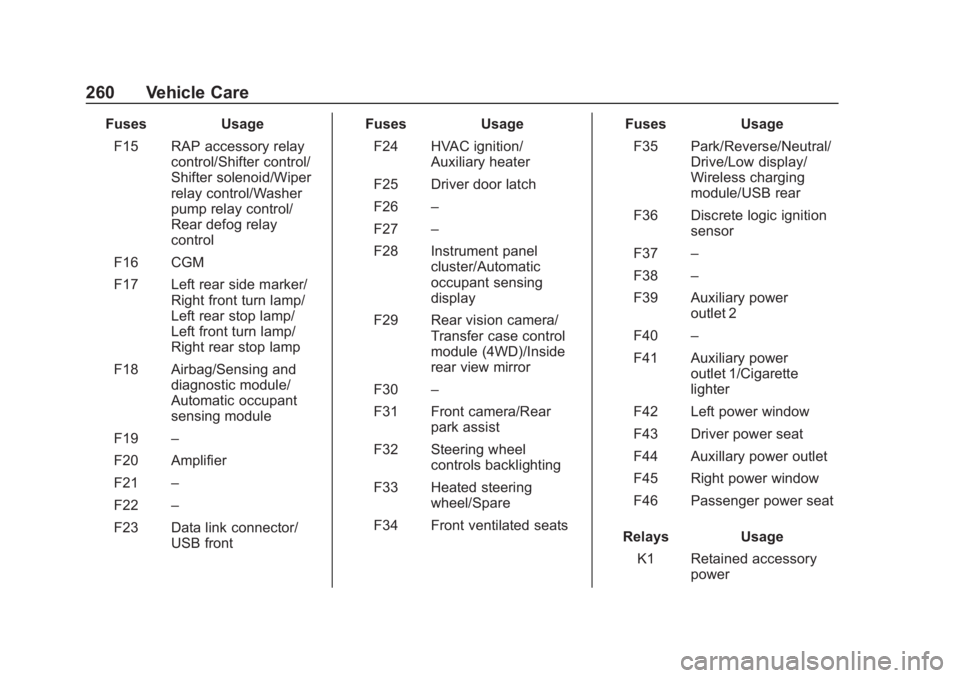
FusesUsage
F15 RAP accessory relay control/Shifter control/
Shifter solenoid/Wiper
relay control/Washer
pump relay control/
Rear defog relay
control
F16 CGM
F17 Left rear side marker/ Right front turn lamp/
Left rear stop lamp/
Left front turn lamp/
Right rear stop lamp
F18 Airbag/Sensing and diagnostic module/
Automatic occupant
sensing module
F19 –
F20 Amplifier
F21 –
F22 –
F23 Data link connector/ USB front Fuses
Usage
F24 HVAC ignition/ Auxiliary heater
F25 Driver door latch
F26 –
F27 –
F28 Instrument panel cluster/Automatic
occupant sensing
display
F29 Rear vision camera/ Transfer case control
module (4WD)/Inside
rear view mirror
F30 –
F31 Front camera/Rear park assist
F32 Steering wheel controls backlighting
F33 Heated steering wheel/Spare
F34 Front ventilated seats Fuses
Usage
F35 Park/Reverse/Neutral/ Drive/Low display/
Wireless charging
module/USB rear
F36 Discrete logic ignition sensor
F37 –
F38 –
F39 Auxiliary power outlet 2
F40 –
F41 Auxiliary power outlet 1/Cigarette
lighter
F42 Left power window
F43 Driver power seat
F44 Auxillary power outlet
F45 Right power window
F46 Passenger power seat
Relays Usage
K1 Retained accessory power
Page 270 of 368
Chevrolet Colorado Owner Manual (GMNA-Localizing-U.S./Canada/Mexico-
13566640) - 2020 - CRC - 10/4/19
Vehicle Care 269
Warning (Continued)
.Poor handling.
.Rough ride.
.Needless damage from
road hazards.
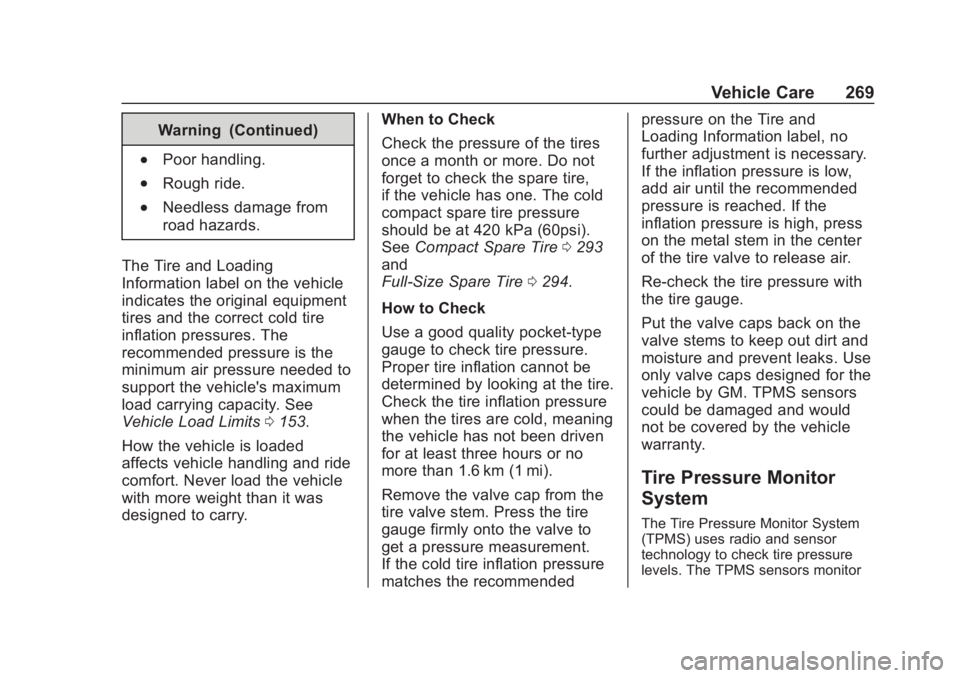
The Tire and Loading
Information label on the vehicle
indicates the original equipment
tires and the correct cold tire
inflation pressures. The
recommended pressure is the
minimum air pressure needed to
support the vehicle's maximum
load carrying capacity. See
Vehicle Load Limits 0153.
How the vehicle is loaded
affects vehicle handling and ride
comfort. Never load the vehicle
with more weight than it was
designed to carry. When to Check
Check the pressure of the tires
once a month or more. Do not
forget to check the spare tire,
if the vehicle has one. The cold
compact spare tire pressure
should be at 420 kPa (60psi).
See
Compact Spare Tire 0293
and
Full-Size Spare Tire 0294.
How to Check
Use a good quality pocket-type
gauge to check tire pressure.
Proper tire inflation cannot be
determined by looking at the tire.
Check the tire inflation pressure
when the tires are cold, meaning
the vehicle has not been driven
for at least three hours or no
more than 1.6 km (1 mi).
Remove the valve cap from the
tire valve stem. Press the tire
gauge firmly onto the valve to
get a pressure measurement.
If the cold tire inflation pressure
matches the recommended pressure on the Tire and
Loading Information label, no
further adjustment is necessary.
If the inflation pressure is low,
add air until the recommended
pressure is reached. If the
inflation pressure is high, press
on the metal stem in the center
of the tire valve to release air.
Re-check the tire pressure with
the tire gauge.
Put the valve caps back on the
valve stems to keep out dirt and
moisture and prevent leaks. Use
only valve caps designed for the
vehicle by GM. TPMS sensors
could be damaged and would
not be covered by the vehicle
warranty.
Tire Pressure Monitor
System
The Tire Pressure Monitor System
(TPMS) uses radio and sensor
technology to check tire pressure
levels. The TPMS sensors monitor
Page 271 of 368
Chevrolet Colorado Owner Manual (GMNA-Localizing-U.S./Canada/Mexico-
13566640) - 2020 - CRC - 10/4/19
270 Vehicle Care
the air pressure in your tires and
transmit tire pressure readings to a
receiver located in the vehicle.
Each tire, including the spare (if
provided), should be checked
monthly when cold and inflated to
the inflation pressure recommended
by the vehicle manufacturer on the
vehicle placard or tire inflation
pressure label. (If your vehicle has
tires of a different size than the size
indicated on the vehicle placard or
tire inflation pressure label, you
should determine the proper tire
inflation pressure for those tires.)
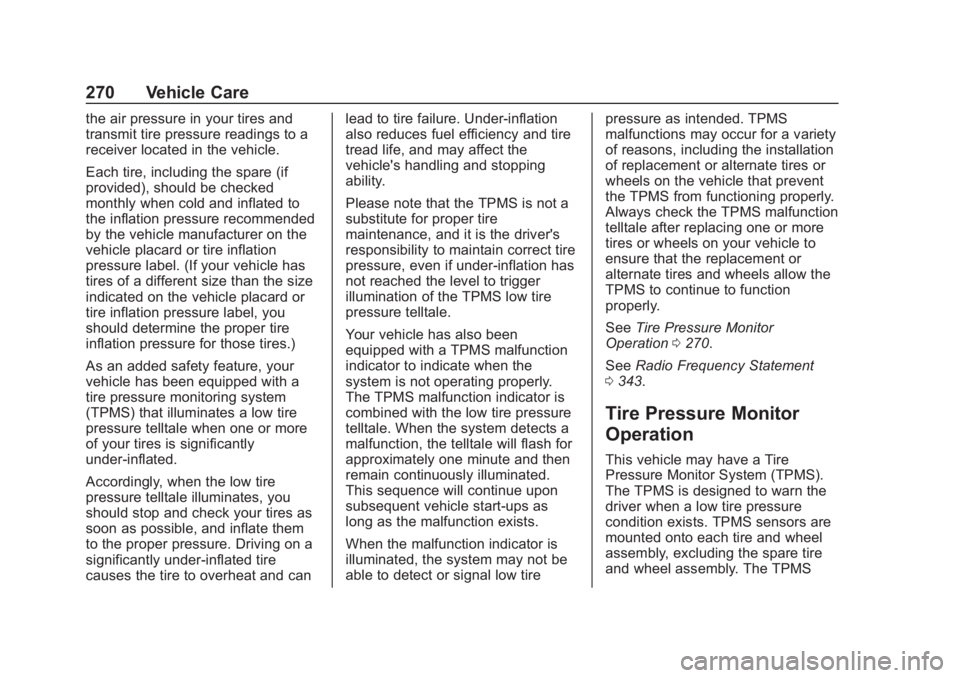
As an added safety feature, your
vehicle has been equipped with a
tire pressure monitoring system
(TPMS) that illuminates a low tire
pressure telltale when one or more
of your tires is significantly
under-inflated.
Accordingly, when the low tire
pressure telltale illuminates, you
should stop and check your tires as
soon as possible, and inflate them
to the proper pressure. Driving on a
significantly under-inflated tire
causes the tire to overheat and canlead to tire failure. Under-inflation
also reduces fuel efficiency and tire
tread life, and may affect the
vehicle's handling and stopping
ability.
Please note that the TPMS is not a
substitute for proper tire
maintenance, and it is the driver's
responsibility to maintain correct tire
pressure, even if under-inflation has
not reached the level to trigger
illumination of the TPMS low tire
pressure telltale.
Your vehicle has also been
equipped with a TPMS malfunction
indicator to indicate when the
system is not operating properly.
The TPMS malfunction indicator is
combined with the low tire pressure
telltale. When the system detects a
malfunction, the telltale will flash for
approximately one minute and then
remain continuously illuminated.
This sequence will continue upon
subsequent vehicle start-ups as
long as the malfunction exists.
When the malfunction indicator is
illuminated, the system may not be
able to detect or signal low tirepressure as intended. TPMS
malfunctions may occur for a variety
of reasons, including the installation
of replacement or alternate tires or
wheels on the vehicle that prevent
the TPMS from functioning properly.
Always check the TPMS malfunction
telltale after replacing one or more
tires or wheels on your vehicle to
ensure that the replacement or
alternate tires and wheels allow the
TPMS to continue to function
properly.
See
Tire Pressure Monitor
Operation 0270.
See Radio Frequency Statement
0 343.
Tire Pressure Monitor
Operation
This vehicle may have a Tire
Pressure Monitor System (TPMS).
The TPMS is designed to warn the
driver when a low tire pressure
condition exists. TPMS sensors are
mounted onto each tire and wheel
assembly, excluding the spare tire
and wheel assembly. The TPMS
Page 272 of 368
Chevrolet Colorado Owner Manual (GMNA-Localizing-U.S./Canada/Mexico-
13566640) - 2020 - CRC - 10/4/19
Vehicle Care 271
sensors monitor the air pressure in
the tires and transmit the tire
pressure readings to a receiver
located in the vehicle.
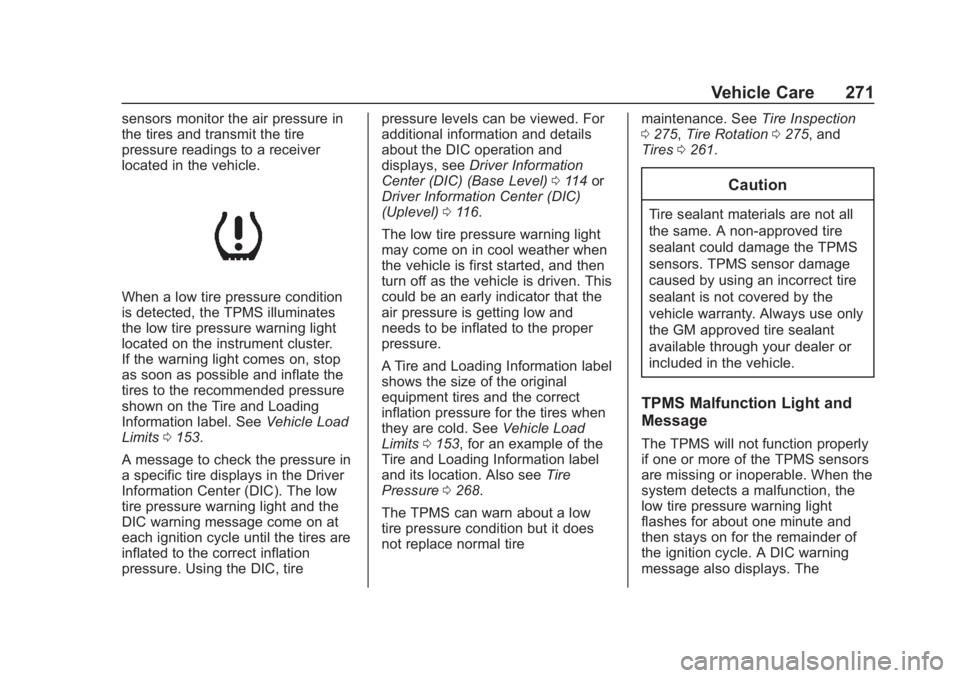
When a low tire pressure condition
is detected, the TPMS illuminates
the low tire pressure warning light
located on the instrument cluster.
If the warning light comes on, stop
as soon as possible and inflate the
tires to the recommended pressure
shown on the Tire and Loading
Information label. SeeVehicle Load
Limits 0153.
A message to check the pressure in
a specific tire displays in the Driver
Information Center (DIC). The low
tire pressure warning light and the
DIC warning message come on at
each ignition cycle until the tires are
inflated to the correct inflation
pressure. Using the DIC, tire pressure levels can be viewed. For
additional information and details
about the DIC operation and
displays, see
Driver Information
Center (DIC) (Base Level) 0114 or
Driver Information Center (DIC)
(Uplevel) 0116.
The low tire pressure warning light
may come on in cool weather when
the vehicle is first started, and then
turn off as the vehicle is driven. This
could be an early indicator that the
air pressure is getting low and
needs to be inflated to the proper
pressure.
A Tire and Loading Information label
shows the size of the original
equipment tires and the correct
inflation pressure for the tires when
they are cold. See Vehicle Load
Limits 0153, for an example of the
Tire and Loading Information label
and its location. Also see Tire
Pressure 0268.
The TPMS can warn about a low
tire pressure condition but it does
not replace normal tire maintenance. See
Tire Inspection
0 275, Tire Rotation 0275, and
Tires 0261.
Caution
Tire sealant materials are not all
the same. A non-approved tire
sealant could damage the TPMS
sensors. TPMS sensor damage
caused by using an incorrect tire
sealant is not covered by the
vehicle warranty. Always use only
the GM approved tire sealant
available through your dealer or
included in the vehicle.
TPMS Malfunction Light and
Message
The TPMS will not function properly
if one or more of the TPMS sensors
are missing or inoperable. When the
system detects a malfunction, the
low tire pressure warning light
flashes for about one minute and
then stays on for the remainder of
the ignition cycle. A DIC warning
message also displays. The
Page 273 of 368
Chevrolet Colorado Owner Manual (GMNA-Localizing-U.S./Canada/Mexico-
13566640) - 2020 - CRC - 10/4/19
272 Vehicle Care
malfunction light and DIC warning
message come on at each ignition
cycle until the problem is corrected.
Some of the conditions that can
cause these to come on are:
.One of the road tires has been
replaced with the spare tire. The
spare tire does not have a
TPMS sensor. The malfunction
light and the DIC message
should go off after the road tire
is replaced and the sensor
matching process is performed
successfully. See “TPMS Sensor
Matching Process” later in this
section.
. The TPMS sensor matching
process was not done or not
completed successfully after
rotating the tires. The
malfunction light and the DIC
message should go off after
successfully completing the
sensor matching process. See
“TPMS Sensor Matching
Process” later in this section.
. One or more TPMS sensors are
missing or damaged. The
malfunction light and the DIC message should go off when the
TPMS sensors are installed and
the sensor matching process is
performed successfully. See
your dealer for service.
. Replacement tires or wheels do
not match the original equipment
tires or wheels. Tires and wheels
other than those recommended
could prevent the TPMS from
functioning properly. See Buying
New Tires 0277.
. Operating electronic devices or
being near facilities using radio
wave frequencies similar to the
TPMS could cause the TPMS
sensors to malfunction.
If the TPMS is not functioning
properly, it cannot detect or signal a
low tire pressure condition. See
your dealer for service if the TPMS
malfunction light and DIC message
come on and stay on.Tire Fill Alert (If Equipped)
This feature provides visual and
audible alerts outside the vehicle to
help when inflating an underinflated
tire to the recommended cold tire
pressure.
When the low tire pressure warning
light comes on: 1. Park the vehicle in a safe, level place.
2. Set the parking brake firmly.
3. Place the vehicle in P (Park).
4. Add air to the tire that is underinflated. The turn signal
lamp will flash.
When the recommended
pressure is reached, the horn
sounds once and the turn
signal lamp will stop flashing
and briefly turn solid.
Repeat these steps for all
underinflated tires that have
illuminated the low tire pressure
warning light.