release parking brake CHEVROLET COLORADO 2022 Owners Manual
[x] Cancel search | Manufacturer: CHEVROLET, Model Year: 2022, Model line: COLORADO, Model: CHEVROLET COLORADO 2022Pages: 362, PDF Size: 13.62 MB
Page 6 of 362
Chevrolet Colorado Owner Manual (GMNA-Localizing-U.S./Canada/Mexico-
15274222) - 2022 - CRC - 11/2/21
Introduction 5
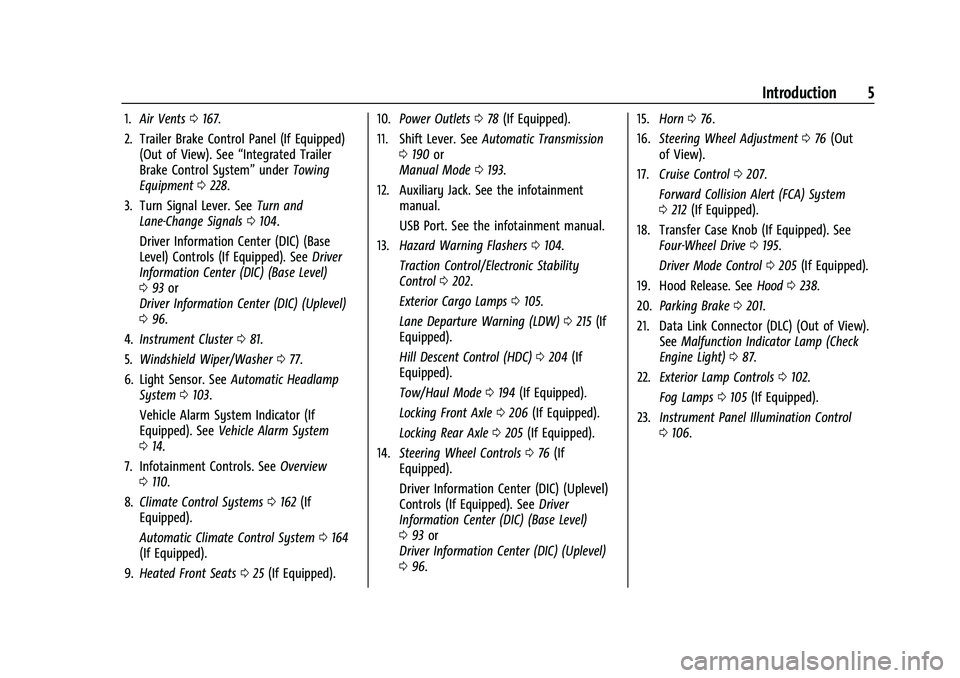
1.Air Vents 0167.
2. Trailer Brake Control Panel (If Equipped) (Out of View). See “Integrated Trailer
Brake Control System” underTowing
Equipment 0228.
3. Turn Signal Lever. See Turn and
Lane-Change Signals 0104.
Driver Information Center (DIC) (Base
Level) Controls (If Equipped). See Driver
Information Center (DIC) (Base Level)
0 93 or
Driver Information Center (DIC) (Uplevel)
0 96.
4. Instrument Cluster 081.
5. Windshield Wiper/Washer 077.
6. Light Sensor. See Automatic Headlamp
System 0103.
Vehicle Alarm System Indicator (If
Equipped). See Vehicle Alarm System
0 14.
7. Infotainment Controls. See Overview
0 110.
8. Climate Control Systems 0162 (If
Equipped).
Automatic Climate Control System 0164
(If Equipped).
9. Heated Front Seats 025 (If Equipped). 10.
Power Outlets 078 (If Equipped).
11. Shift Lever. See Automatic Transmission
0 190 or
Manual Mode 0193.
12. Auxiliary Jack. See the infotainment manual.
USB Port. See the infotainment manual.
13. Hazard Warning Flashers 0104.
Traction Control/Electronic Stability
Control 0202.
Exterior Cargo Lamps 0105.
Lane Departure Warning (LDW) 0215 (If
Equipped).
Hill Descent Control (HDC) 0204 (If
Equipped).
Tow/Haul Mode 0194 (If Equipped).
Locking Front Axle 0206 (If Equipped).
Locking Rear Axle 0205 (If Equipped).
14. Steering Wheel Controls 076 (If
Equipped).
Driver Information Center (DIC) (Uplevel)
Controls (If Equipped). See Driver
Information Center (DIC) (Base Level)
0 93 or
Driver Information Center (DIC) (Uplevel)
0 96. 15.
Horn 076.
16. Steering Wheel Adjustment 076 (Out
of View).
17. Cruise Control 0207.
Forward Collision Alert (FCA) System
0 212 (If Equipped).
18. Transfer Case Knob (If Equipped). See Four-Wheel Drive 0195.
Driver Mode Control 0205 (If Equipped).
19. Hood Release. See Hood0238.
20. Parking Brake 0201.
21. Data Link Connector (DLC) (Out of View). SeeMalfunction Indicator Lamp (Check
Engine Light) 087.
22. Exterior Lamp Controls 0102.
Fog Lamps 0105 (If Equipped).
23. Instrument Panel Illumination Control
0106.
Page 90 of 362
Chevrolet Colorado Owner Manual (GMNA-Localizing-U.S./Canada/Mexico-
15274222) - 2022 - CRC - 11/2/21
Instruments and Controls 89
This light should come on briefly when the
vehicle is turned on. If it does not come on
then, have it fixed so it will be ready to
warn you if there is a problem.
When the vehicle is on, the brake system
warning light also comes on when the
parking brake is set. The light stays on if
the parking brake does not fully release. If it
stays on after the parking brake is fully
released, there is a brake problem. Have the
brake system inspected right away.
If the light comes on while driving, pull off
the road and stop carefully. The brake pedal
might be harder to push, or the brake pedal
may go closer to the floor. It could take
longer to stop. If the light is still on, have
the vehicle towed for service. SeeTowing
the Vehicle 0300.
{Warning
The brake system might not be working
properly if the brake system warning
light is on. Driving with the brake system
warning light on can lead to a crash.
If the light is still on after the vehicle has
been pulled off the road and carefully
stopped, have the vehicle towed for
service.
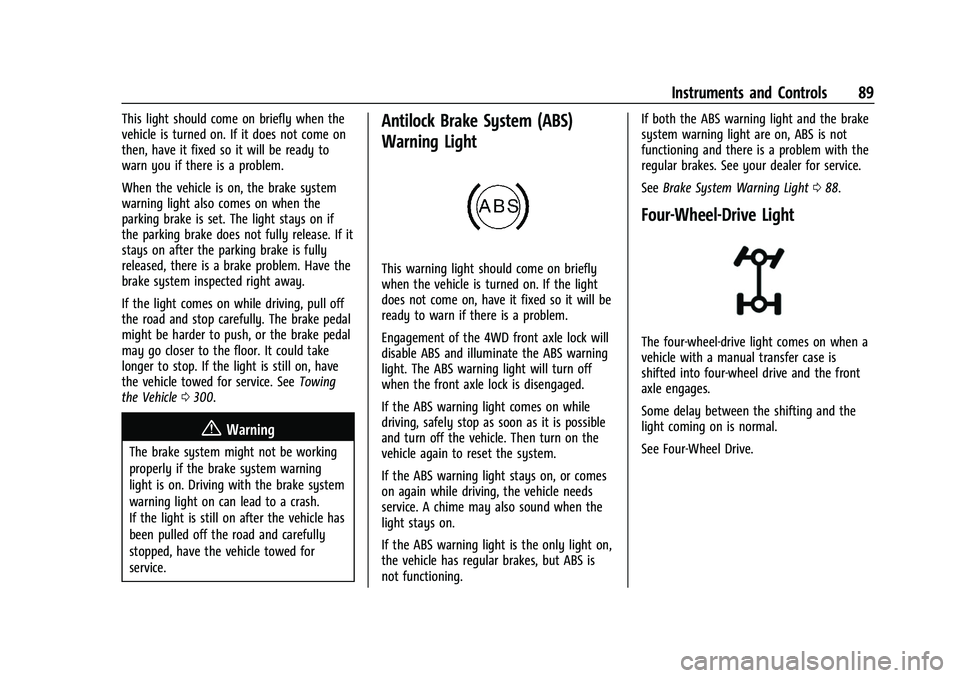
Antilock Brake System (ABS)
Warning Light
This warning light should come on briefly
when the vehicle is turned on. If the light
does not come on, have it fixed so it will be
ready to warn if there is a problem.
Engagement of the 4WD front axle lock will
disable ABS and illuminate the ABS warning
light. The ABS warning light will turn off
when the front axle lock is disengaged.
If the ABS warning light comes on while
driving, safely stop as soon as it is possible
and turn off the vehicle. Then turn on the
vehicle again to reset the system.
If the ABS warning light stays on, or comes
on again while driving, the vehicle needs
service. A chime may also sound when the
light stays on.
If the ABS warning light is the only light on,
the vehicle has regular brakes, but ABS is
not functioning. If both the ABS warning light and the brake
system warning light are on, ABS is not
functioning and there is a problem with the
regular brakes. See your dealer for service.
See
Brake System Warning Light 088.
Four-Wheel-Drive Light
The four-wheel-drive light comes on when a
vehicle with a manual transfer case is
shifted into four-wheel drive and the front
axle engages.
Some delay between the shifting and the
light coming on is normal.
See Four-Wheel Drive.
Page 104 of 362
Chevrolet Colorado Owner Manual (GMNA-Localizing-U.S./Canada/Mexico-
15274222) - 2022 - CRC - 11/2/21
Lighting 103
for an additional 10 minutes. To keep the
lamps on for more than 10 minutes, the
ignition must be on or in ACC/ACCESSORY.
#:If equipped, this turns on the fog
lamps. See Fog Lamps0105.
Exterior Lamps Off Reminder
A reminder chime sounds when the
headlamps or parking lamps are manually
turned on, the ignition is off, and a door is
open. To disable the chime, turn the
lamps off.
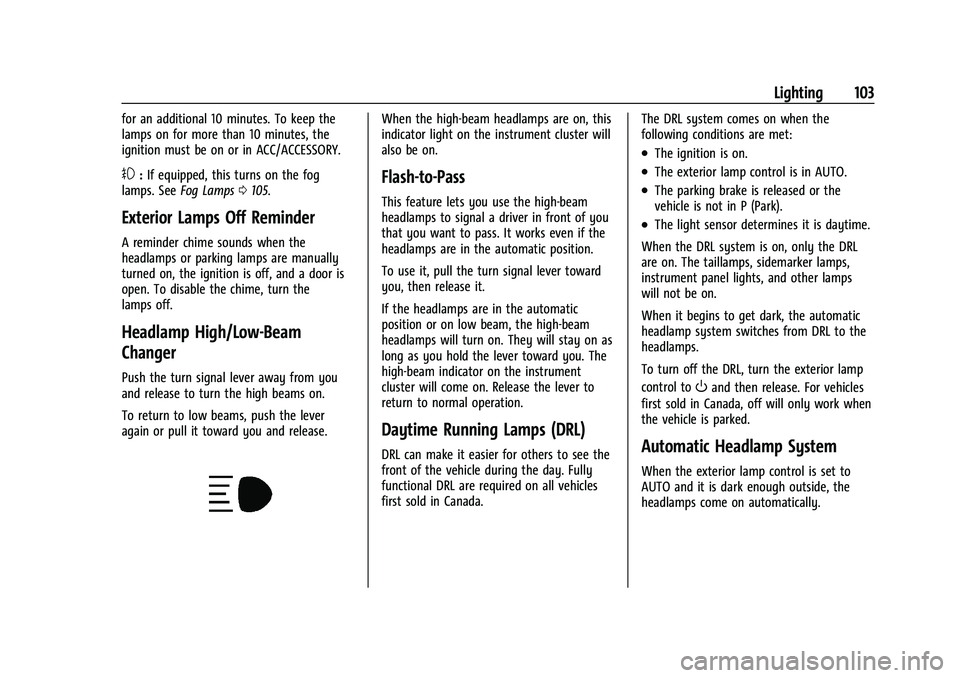
Headlamp High/Low-Beam
Changer
Push the turn signal lever away from you
and release to turn the high beams on.
To return to low beams, push the lever
again or pull it toward you and release.
When the high-beam headlamps are on, this
indicator light on the instrument cluster will
also be on.
Flash-to-Pass
This feature lets you use the high-beam
headlamps to signal a driver in front of you
that you want to pass. It works even if the
headlamps are in the automatic position.
To use it, pull the turn signal lever toward
you, then release it.
If the headlamps are in the automatic
position or on low beam, the high-beam
headlamps will turn on. They will stay on as
long as you hold the lever toward you. The
high-beam indicator on the instrument
cluster will come on. Release the lever to
return to normal operation.
Daytime Running Lamps (DRL)
DRL can make it easier for others to see the
front of the vehicle during the day. Fully
functional DRL are required on all vehicles
first sold in Canada. The DRL system comes on when the
following conditions are met:
.The ignition is on.
.The exterior lamp control is in AUTO.
.The parking brake is released or the
vehicle is not in P (Park).
.The light sensor determines it is daytime.
When the DRL system is on, only the DRL
are on. The taillamps, sidemarker lamps,
instrument panel lights, and other lamps
will not be on.
When it begins to get dark, the automatic
headlamp system switches from DRL to the
headlamps.
To turn off the DRL, turn the exterior lamp
control to
Oand then release. For vehicles
first sold in Canada, off will only work when
the vehicle is parked.
Automatic Headlamp System
When the exterior lamp control is set to
AUTO and it is dark enough outside, the
headlamps come on automatically.
Page 175 of 362
Chevrolet Colorado Owner Manual (GMNA-Localizing-U.S./Canada/Mexico-
15274222) - 2022 - CRC - 11/2/21
174 Driving and Operating
.When driving down a hill, keep the
vehicle headed straight down. Use a low
gear because the engine will work with
the brakes to slow the vehicle and help
keep the vehicle under control.
{Warning
Heavy braking when going down a hill
can cause your brakes to overheat and
fade. This could cause loss of control and
you or others could be injured or killed.
Apply the brakes lightly when descending
a hill and use a low gear to keep vehicle
speed under control.
If the vehicle stalls on a hill: 1. Apply the brakes to stop the vehicle, and then apply the parking brake.
2. Shift into P (Park) and then restart the engine.
.If driving uphill when the vehicle
stalls, shift to R (Reverse), release the
parking brake, and back
straight down.
.Never try to turn the vehicle around.
If the hill is steep enough to stall the
vehicle, it is steep enough to cause it
to roll over.
.If you cannot make it up the hill,
back straight down the hill.
.Never back down a hill in N (Neutral)
using only the brake. The vehicle can
roll backward quickly and you could
lose control.
.If driving downhill when the vehicle
stalls, shift to a lower gear, release
the parking brake, and drive straight
down the hill.
3. If the vehicle cannot be restarted after stalling, set the parking brake, shift into
P (Park), and turn the vehicle off.
3.1. Leave the vehicle and seek help.
3.2. Stay clear of the path the vehicle would take if it rolled downhill.
.Avoid turns that take the vehicle across
the incline of the hill. A hill that can be
driven straight up or down might be too
steep to drive across. Driving across an
incline puts more weight on the downhill
wheels, which could cause a downhill
slide or a rollover.
.Surface conditions can be a problem.
Loose gravel, muddy spots, or even wet
grass can cause the tires to slip sideways,
downhill. If the vehicle slips sideways, it
can hit something that will trip it —a
rock, a rut, etc. —and roll over.
.Hidden obstacles can make the steepness
of the incline more severe. If a rock is
driven across with the uphill wheels, or if
the downhill wheels drop into a rut or
depression, the vehicle can tilt even more.
.If an incline must be driven across, and
the vehicle starts to slide, turn downhill.
This should help straighten out the
vehicle and prevent the side slipping.
{Warning
Getting out of the vehicle on the
downhill side when stopped across an
incline is dangerous. If the vehicle rolls
over, you could be crushed or killed.
Always get out on the uphill side of the
vehicle and stay well clear of the
rollover path.
Driving in Mud, Sand, Snow, or Ice
Use a low gear when driving in mud —the
deeper the mud, the lower the gear. Keep
the vehicle moving to avoid getting stuck.
Traction changes when driving on sand. On
loose sand, such as on beaches or sand
dunes, the tires tend to sink into the sand.
Page 186 of 362
Chevrolet Colorado Owner Manual (GMNA-Localizing-U.S./Canada/Mexico-
15274222) - 2022 - CRC - 11/2/21
Driving and Operating 185
4. Push the key all the way in toward thesteering column, then turn the key to
LOCK/OFF.
5. Remove the key.
6. Release the brake pedal.
See your dealer if the key can be removed
in any other position.
Retained Accessory Power (RAP) will remain
active. See Retained Accessory Power (RAP)
0 188.
A warning chime will sound when the driver
door is opened and the key is in the
ignition.
If equipped with a locking steering column,
the steering can bind with the front wheels
turned off center, which may prevent key
rotation out of LOCK/OFF. If this happens,
move the steering wheel from right to left
while turning the key to ACC/ACCESSORY.
If this does not work, then the vehicle needs
service.{Warning
Turning off the vehicle while moving may
cause loss of power assist in the brake
and steering systems and disable the
airbags. While driving, turn off the
vehicle only in an emergency.
In an emergency, if the vehicle cannot be
pulled over and must be turned off while
driving: 1. Push the key all the way in toward the steering column, then turn the key to
ACC/ACCESSORY.
2. Brake using firm and steady pressure. Do not pump the brakes repeatedly. This
may deplete power assist, requiring
increased brake pedal force.
3. Shift the vehicle to N (Neutral). This can be done while the vehicle is moving.
Continue braking and steer the vehicle to
a safe location.
4. Come to a complete stop.
5. Shift to P (Park).
6. Push the key all the way in toward the steering column (1), then turn the
ignition to LOCK/OFF (2). 7. Set the parking brake. See
Parking Brake
0 201.
8. Remove the key.
9. Release the brake pedal.
Caution
Use the correct key, make sure it is all
the way in —or pushed all the way in
toward the steering column when turning
off the vehicle —and turn it only with
your hand.
1 (ACC/ACCESSORY) : This position allows
features such as the infotainment system to
operate while the vehicle is off. It also
unlocks the steering column, if equipped
with a locking steering column. Use this
position if the vehicle must be pushed or
towed. See Retained Accessory Power (RAP)
0 188.
From ON/RUN, push the key all the way in
toward the steering column, then turn the
key to ACC/ACCESSORY.
If the key is left in ACC/ACCESSORY with the
engine off, the battery could drain and the
vehicle may not start.
Page 190 of 362
Chevrolet Colorado Owner Manual (GMNA-Localizing-U.S./Canada/Mexico-
15274222) - 2022 - CRC - 11/2/21
Driving and Operating 189
Warning (Continued)
If you have four-wheel drive and the
transfer case is in N (Neutral), the vehicle
will be free to roll, even if the shift lever
is in P (Park). So be sure the transfer case
is in a drive gear–not in N (Neutral).
And, if you leave the vehicle with the
engine running, it could overheat and
even catch fire. You or others could be
injured. Do not leave the vehicle with the
engine running unless you have to.
If you have to leave the vehicle with the
engine running, be sure the vehicle is in
P (Park) and the parking brake is firmly set
before you leave it. After you move the
shift lever into P (Park), hold the regular
brake pedal down. Then, see if you can
move the shift lever away from P (Park)
without pressing the button on the shift
lever. If you can, it means that the shift
lever was not fully locked into P (Park).
Torque Lock
If you are parking on a hill and you do not
shift the transmission into P (Park) properly,
the weight of the vehicle may put too much
force on the parking pawl in the transmission. You may find it difficult to pull
the shift lever out of P (Park). This is called
torque lock. To prevent torque lock, set the
parking brake and then shift into P (Park)
properly before you leave the driver seat. To
find out how, see
Shifting Into Park0188.
When you are ready to drive, move the
shift lever out of P (Park) before you release
the parking brake.
If torque lock does occur, you may need to
have another vehicle push yours a little
uphill to take some of the pressure from the
parking pawl in the transmission. You will
then be able to pull the shift lever out of
P (Park).
Shifting out of Park
This vehicle is equipped with an electronic
shift lock release system. The shift lock
release is designed to:
.Prevent ignition key removal unless the
shift lever is in P (Park).
.Prevent movement of the shift lever out
of P (Park), unless the ignition is on and
the regular brake pedal is applied.
To shift out of P (Park): 1. Apply the brake pedal.
2. Press the button on the shift lever. 3. Move the shift lever to the desired
position.
If you still are unable to shift out of
P (Park): 1. Ease the pressure on the shift lever.
2. While holding down the brake pedal and pressing the shift lever button, move the
shift lever all the way into P (Park).
3. While holding the shift lever button, move the shift lever to the desired
position.
If you are still having a problem shifting,
then have the vehicle serviced soon.
This vehicle may have the Seat Belt
Assurance System, which may prevent the
vehicle from shifting out of P (Park). See
Seat Belts 027.
Parking over Things That Burn
{Warning
Things that can burn could touch hot
exhaust parts under the vehicle and
ignite. Do not park over papers, leaves,
dry grass, or other things that can burn.
Page 198 of 362
Chevrolet Colorado Owner Manual (GMNA-Localizing-U.S./Canada/Mexico-
15274222) - 2022 - CRC - 11/2/21
Driving and Operating 197
Shifting Into 2m
Turn the knob to 2mat any speed, except
when shifting from 4
n.
Shifting Into 4
n
When 4nis engaged, vehicle speed should
be kept below 72 km/h (45 mph).
1. The ignition must be on and the vehicle must be stopped or moving less than
5 km/h (3 mph) with the transmission in
N (Neutral). It is best for the vehicle to
be moving 1.6 to 3.2 km/h (1 to 2 mph).
2. Turn the knob to 4
n. Wait for the 4n
indicator light to stop flashing before
shifting the transmission into gear.
If the transmission is in gear and/or moving
more than 5 km/h (3 mph), the 4
nindicator
light will flash for 30 seconds, but will not
complete the shift. After 30 seconds the
transfer case will shift to 4
m. Turn the knob
to 4
mto see the indicator. With the vehicle
moving less than 5 km/h (3 mph), and the
transmission in N (Neutral), attempt the shift
again. Shifting Out of 4
n
1. To shift out of 4nthe vehicle must be
stopped or moving less than 5 km/h
(3 mph) with the transmission in
N (Neutral) and the ignition on. It is best
for the vehicle to be moving
1.6 to 3.2 km/h (1 to 2 mph).
2. Turn the knob to 4
mor 2m. Wait for the
4
mor 2mindicator light to stop flashing
before shifting the transmission
into gear.
If the transmission is in gear and/or moving
more than 5 km/h (3 mph), the 4
mor 2m
indicator light will flash for 30 seconds, but
will not complete the shift. With the vehicle
moving less than 5 km/h (3 mph), and the
transmission in N (Neutral), attempt the shift
again.
Shifting Into N (Neutral)
To shift: 1. Park the vehicle on a level surface.
2. Set the parking brake and press and hold the brake pedal. See Parking Brake
0 201.
3. Start the vehicle or turn the ignition on.
4. Shift the transmission to N (Neutral). 5. Shift the transfer case to 2
m.
6. Turn the transfer case knob clockwise past the 4
ndetent to N (Neutral) until it
stops and hold it there until the
N (Neutral) light starts flashing. This will
take at least 10 seconds. Then slowly
release the knob to the 4
nposition. The
N (Neutral) light will come on when the
transfer case shift to N (Neutral) is
complete.
7. With the engine running, verify that the transfer case is in N (Neutral) by shifting
the transmission to R (Reverse), then to
D (Drive). There should be no movement
of the vehicle while shifting the
transmission.
8. Turn the engine off, and the ignition to ACC/ACCESSORY.
9. Place the transmission shift lever in P (Park). See Recreational Vehicle Towing
0 301.
Shifting Out of N (Neutral)
To shift: 1. Set the parking brake.
2. Turn the ignition on with the engine off.
3. Shift the transmission to N (Neutral).
Page 199 of 362
Chevrolet Colorado Owner Manual (GMNA-Localizing-U.S./Canada/Mexico-
15274222) - 2022 - CRC - 11/2/21
198 Driving and Operating
4. Turn the transfer case shift knob to 2m.
After the transfer case has shifted out of
N (Neutral), the N (Neutral) light will
go out.
5. Shift to P (Park).
Caution
Shifting the transmission into gear before
the requested mode indicator light has
stopped flashing could damage the
transfer case.
6. Release the parking brake.
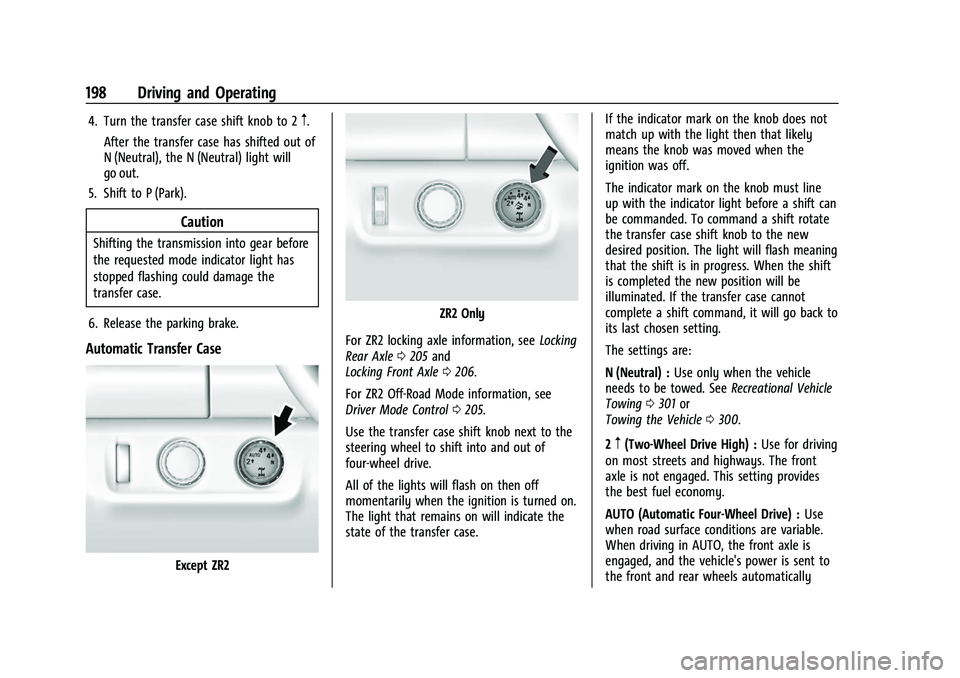
Automatic Transfer Case
Except ZR2
ZR2 Only
For ZR2 locking axle information, see Locking
Rear Axle 0205 and
Locking Front Axle 0206.
For ZR2 Off-Road Mode information, see
Driver Mode Control 0205.
Use the transfer case shift knob next to the
steering wheel to shift into and out of
four-wheel drive.
All of the lights will flash on then off
momentarily when the ignition is turned on.
The light that remains on will indicate the
state of the transfer case. If the indicator mark on the knob does not
match up with the light then that likely
means the knob was moved when the
ignition was off.
The indicator mark on the knob must line
up with the indicator light before a shift can
be commanded. To command a shift rotate
the transfer case shift knob to the new
desired position. The light will flash meaning
that the shift is in progress. When the shift
is completed the new position will be
illuminated. If the transfer case cannot
complete a shift command, it will go back to
its last chosen setting.
The settings are:
N (Neutral) :
Use only when the vehicle
needs to be towed. See Recreational Vehicle
Towing 0301 or
Towing the Vehicle 0300.
2
m(Two-Wheel Drive High) : Use for driving
on most streets and highways. The front
axle is not engaged. This setting provides
the best fuel economy.
AUTO (Automatic Four-Wheel Drive) : Use
when road surface conditions are variable.
When driving in AUTO, the front axle is
engaged, and the vehicle's power is sent to
the front and rear wheels automatically
Page 201 of 362
Chevrolet Colorado Owner Manual (GMNA-Localizing-U.S./Canada/Mexico-
15274222) - 2022 - CRC - 11/2/21
200 Driving and Operating
Caution
Shifting the transmission into gear before
the requested mode indicator light has
stopped flashing could damage the
transfer case.
If the transmission is in gear and/or moving
more than 5 km/h (3 mph), the 4
m, AUTO,
or 2
mindicator light will flash for
30 seconds but will not complete the shift.
With the vehicle moving less than 5 km/h
(3 mph), and the transmission in N (Neutral),
attempt the shift again.
Shifting Into N (Neutral)
To shift:
1. Park the vehicle on a level surface.
2. Set the parking brake and press and hold the brake pedal. See Parking Brake
0 201.
3. Start the vehicle or turn the ignition on.
4. Shift the transmission to N (Neutral).
5. Shift the transfer case to 2
m.
6. Turn the transfer case shift knob clockwise past the 4
ndetent to
N (Neutral) until it stops and hold it
there until the N (Neutral) light starts flashing. This will take at least
10 seconds. Then slowly release the knob
to the 4
nposition. The N (Neutral) light
will come on when the transfer case
shift to N (Neutral) is complete.
7. With the engine running, verify that the transfer case is in N (Neutral) by shifting
the transmission to R (Reverse), then
shift the transmission to D (Drive). There
should be no movement of the vehicle
while shifting the transmission.
8. Turn the engine off, and the ignition to ACC/ACCESSORY.
9. Place the transmission shift lever in P (Park).
Shifting Out of N (Neutral)
To shift: 1. Set the parking brake.
2. Turn the ignition on with the engine off.
3. Shift the transmission to N (Neutral).
4. Turn the transfer case shift knob to 2
m.
After the transfer case has shifted out of
N (Neutral), the N (Neutral) light will
go out and the new 2
mstate will be
displayed. 5. Place the transmission shift lever in
P (Park).
6. Release the parking brake.
Brakes
Antilock Brake System (ABS)
The Antilock Brake System (ABS) helps
prevent a braking skid and maintain steering
while braking hard.
ABS performs a system check when the
vehicle is first driven. A momentary motor
or clicking noise may be heard while this
test is going on, and the brake pedal may
move slightly. This is normal.
If there is a problem with ABS, this warning
light stays on. See Antilock Brake System
(ABS) Warning Light 089.
ABS does not change the time needed to
get a foot on the brake pedal and does not
always decrease stopping distance. If you
Page 202 of 362
Chevrolet Colorado Owner Manual (GMNA-Localizing-U.S./Canada/Mexico-
15274222) - 2022 - CRC - 11/2/21
Driving and Operating 201
get too close to the vehicle ahead, there will
not be enough time to apply the brakes if
that vehicle suddenly slows or stops. Always
leave enough room ahead to stop, even
with ABS.
Using ABS
Do not pump the brakes. Just hold the brake
pedal down firmly. Hearing or feeling ABS
operate is normal.
Braking in Emergencies
ABS allows steering and braking at the same
time. In many emergencies, steering can
help even more than braking.
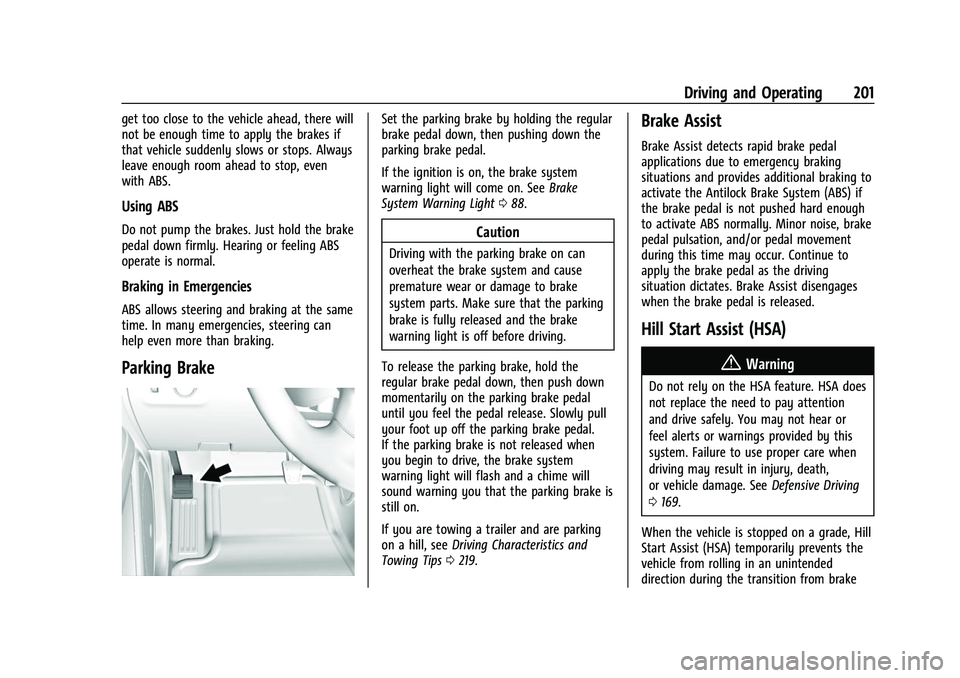
Parking Brake
Set the parking brake by holding the regular
brake pedal down, then pushing down the
parking brake pedal.
If the ignition is on, the brake system
warning light will come on. SeeBrake
System Warning Light 088.
Caution
Driving with the parking brake on can
overheat the brake system and cause
premature wear or damage to brake
system parts. Make sure that the parking
brake is fully released and the brake
warning light is off before driving.
To release the parking brake, hold the
regular brake pedal down, then push down
momentarily on the parking brake pedal
until you feel the pedal release. Slowly pull
your foot up off the parking brake pedal.
If the parking brake is not released when
you begin to drive, the brake system
warning light will flash and a chime will
sound warning you that the parking brake is
still on.
If you are towing a trailer and are parking
on a hill, see Driving Characteristics and
Towing Tips 0219.
Brake Assist
Brake Assist detects rapid brake pedal
applications due to emergency braking
situations and provides additional braking to
activate the Antilock Brake System (ABS) if
the brake pedal is not pushed hard enough
to activate ABS normally. Minor noise, brake
pedal pulsation, and/or pedal movement
during this time may occur. Continue to
apply the brake pedal as the driving
situation dictates. Brake Assist disengages
when the brake pedal is released.
Hill Start Assist (HSA)
{Warning
Do not rely on the HSA feature. HSA does
not replace the need to pay attention
and drive safely. You may not hear or
feel alerts or warnings provided by this
system. Failure to use proper care when
driving may result in injury, death,
or vehicle damage. See Defensive Driving
0 169.
When the vehicle is stopped on a grade, Hill
Start Assist (HSA) temporarily prevents the
vehicle from rolling in an unintended
direction during the transition from brake