change wheel CHEVROLET COLORADO 2023 Owner's Manual
[x] Cancel search | Manufacturer: CHEVROLET, Model Year: 2023, Model line: COLORADO, Model: CHEVROLET COLORADO 2023Pages: 362, PDF Size: 13.62 MB
Page 233 of 362
Chevrolet Colorado Owner Manual (GMNA-Localizing-U.S./Canada/Mexico-
15274222) - 2022 - CRC - 11/2/21
232 Driving and Operating
2. Adjust the Trailer Gain, using the TrailerGain (+) or (-) adjustment buttons, to
just below the point of trailer wheel
lock-up, indicated by trailer wheel squeal
or tire smoke when a trailer wheel locks.
Trailer wheel lock-up may not occur if
towing a heavily loaded trailer. Adjust
the Trailer Gain to the highest allowable
setting for the towing condition.
3. Readjust Trailer Gain anytime vehicle loading, trailer loading, or road surface
conditions change or if trailer wheel
lock-up is noticed at any time while
towing.
Other ITBC-Related DIC Messages
TRAILER CONNECTED: This message will
briefly display when a trailer with electric
brakes is first connected to the vehicle. This
message will automatically turn off in about
10 seconds. This message can be
acknowledged before it automatically
turns off.
CHECK TRAILER WIRING: This message will
display if:
.The ITBC system first determines
connection to a trailer with electric brakes
and then the trailer harness becomes
disconnected from the vehicle. If the disconnect occurs while the vehicle
is stationary, this message will
automatically turn off in about
30 seconds. This message will also turn
off if it is acknowledged or if the trailer
harness is reconnected.
If the disconnect occurs while the vehicle
is moving, this message will continue
until the ignition is turned off. This
message will also turn off if it is
acknowledged or if the trailer harness is
reconnected.
.There is an electrical fault in the wiring to
the trailer brakes. This message will
continue as long as there is an electrical
fault in the trailer wiring. This message
will also turn off if it is acknowledged.
To determine whether the electrical fault is
on the vehicle side or trailer side of the
trailer wiring harness connection: 1. Disconnect the trailer wiring harness from the vehicle.
2. Turn the ignition off.
3. Wait 10 seconds, then turn the ignition back to RUN.
4. If the CHECK TRAILER WIRING message reappears, the electrical fault is on the
vehicle side. If the CHECK TRAILER WIRING message only
reappears when connecting the trailer wiring
harness to the vehicle, the electrical fault is
on the trailer side.
SERVICE TRAILER BRAKE SYSTEM: This
message will display when there is a
problem with the ITBC system. If this
message continues over multiple ignition
cycles, have the vehicle serviced.
If either the CHECK TRAILER WIRING or
SERVICE TRAILER BRAKE SYSTEM message
displays while driving, the ITBC system may
not be fully functional or may not function
at all. When traffic conditions allow,
carefully pull the vehicle over to the side of
the road and turn the ignition off. Check the
wiring connection to the trailer and turn the
ignition back on. If either of these messages
continues, either the vehicle or trailer needs
service.
A GM dealer may be able to diagnose and
repair problems with the trailer. However,
any diagnosis and repair of the trailer is not
covered under the vehicle warranty. Contact
your trailer dealer for assistance with trailer
repairs and trailer warranty information.
Page 253 of 362
Chevrolet Colorado Owner Manual (GMNA-Localizing-U.S./Canada/Mexico-
15274222) - 2022 - CRC - 11/2/21
252 Vehicle Care
{Warning
The brake wear warning sound means
that soon the brakes will not work well.
That could lead to a crash. When the
brake wear warning sound is heard, have
the vehicle serviced.
Caution
Continuing to drive with worn-out brake
linings could result in costly brake
repairs.
Some driving conditions or climates can
cause a brake squeal when the brakes are
first applied, clearing up following several
applications. This does not mean something
is wrong with the brakes.
Properly torqued wheel nuts are necessary
to help prevent brake pulsation. When tires
are rotated, inspect brake linings for wear
and evenly tighten wheel nuts in the proper
sequence to torque specifications. See
Capacities and Specifications 0328.
Brake pads should be replaced as complete
axle sets.
Brake Pedal Travel
See your dealer if the brake pedal does not
return to normal height, or if there is a
rapid increase in pedal travel. This could be
a sign that brake service may be required.
Replacing Brake System Parts
Always replace brake system parts with
new, approved replacement parts. If this is
not done, the brakes may not work
properly. The braking performance can
change in many ways if the wrong brake
parts are installed or if parts are improperly
installed.
Brake Fluid
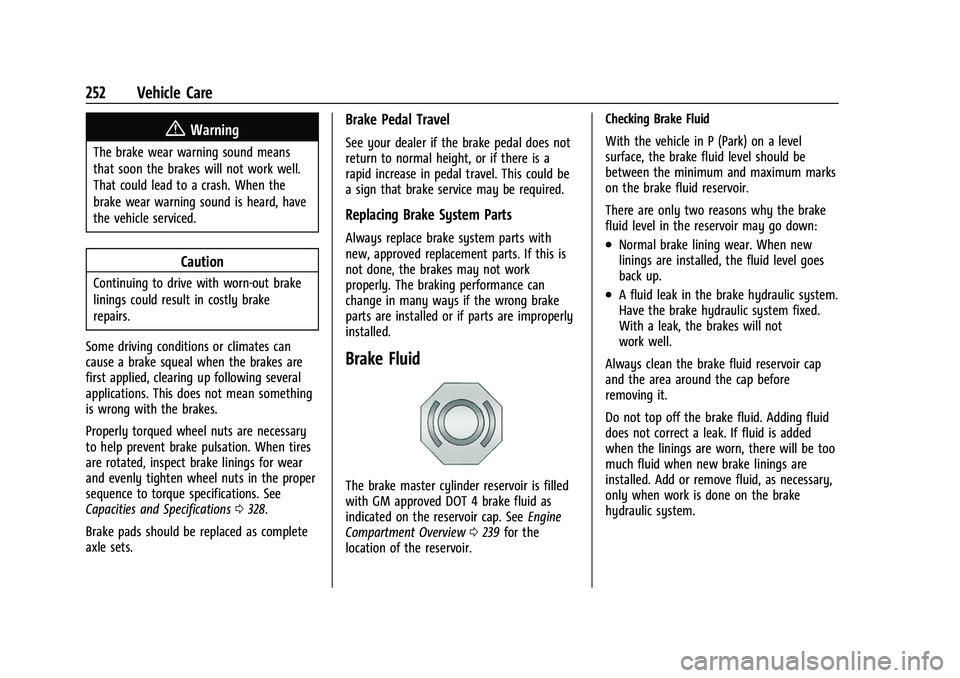
The brake master cylinder reservoir is filled
with GM approved DOT 4 brake fluid as
indicated on the reservoir cap. See Engine
Compartment Overview 0239 for the
location of the reservoir. Checking Brake Fluid
With the vehicle in P (Park) on a level
surface, the brake fluid level should be
between the minimum and maximum marks
on the brake fluid reservoir.
There are only two reasons why the brake
fluid level in the reservoir may go down:
.Normal brake lining wear. When new
linings are installed, the fluid level goes
back up.
.A fluid leak in the brake hydraulic system.
Have the brake hydraulic system fixed.
With a leak, the brakes will not
work well.
Always clean the brake fluid reservoir cap
and the area around the cap before
removing it.
Do not top off the brake fluid. Adding fluid
does not correct a leak. If fluid is added
when the linings are worn, there will be too
much fluid when new brake linings are
installed. Add or remove fluid, as necessary,
only when work is done on the brake
hydraulic system.
Page 255 of 362
Chevrolet Colorado Owner Manual (GMNA-Localizing-U.S./Canada/Mexico-
15274222) - 2022 - CRC - 11/2/21
254 Vehicle Care
Extended Storage: Remove the black,
negative (−) cable from the battery or use a
battery trickle charger.
Four-Wheel Drive
Transfer Case
When to Check Lubricant
Refer toMaintenance Schedule 0314 to
determine when to check the lubricant.
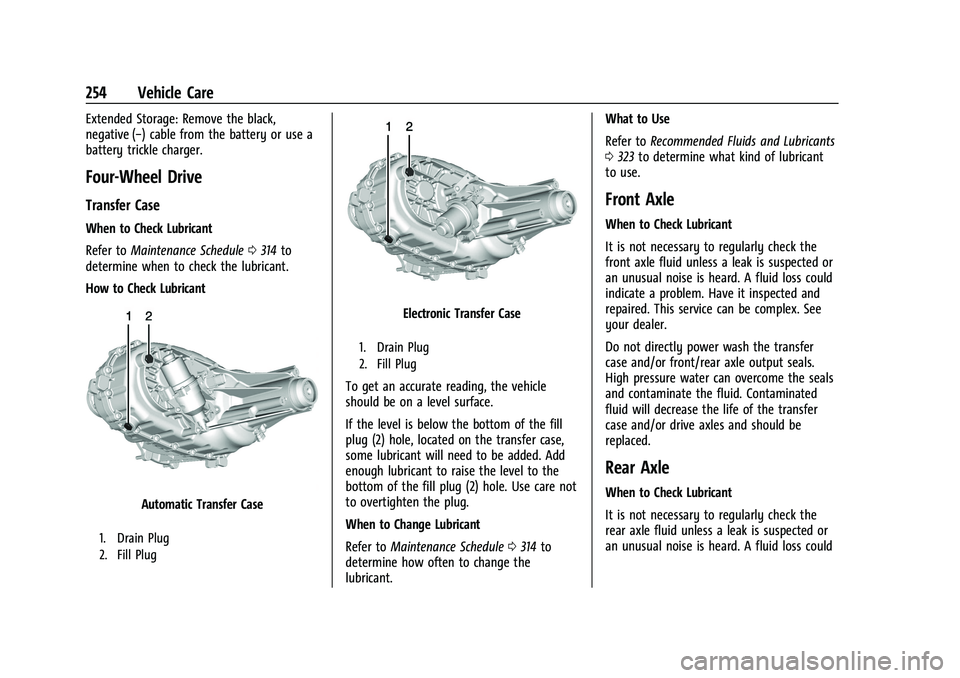
How to Check Lubricant
Automatic Transfer Case
1. Drain Plug
2. Fill Plug
Electronic Transfer Case
1. Drain Plug
2. Fill Plug
To get an accurate reading, the vehicle
should be on a level surface.
If the level is below the bottom of the fill
plug (2) hole, located on the transfer case,
some lubricant will need to be added. Add
enough lubricant to raise the level to the
bottom of the fill plug (2) hole. Use care not
to overtighten the plug.
When to Change Lubricant
Refer to Maintenance Schedule 0314 to
determine how often to change the
lubricant. What to Use
Refer to
Recommended Fluids and Lubricants
0 323 to determine what kind of lubricant
to use.
Front Axle
When to Check Lubricant
It is not necessary to regularly check the
front axle fluid unless a leak is suspected or
an unusual noise is heard. A fluid loss could
indicate a problem. Have it inspected and
repaired. This service can be complex. See
your dealer.
Do not directly power wash the transfer
case and/or front/rear axle output seals.
High pressure water can overcome the seals
and contaminate the fluid. Contaminated
fluid will decrease the life of the transfer
case and/or drive axles and should be
replaced.
Rear Axle
When to Check Lubricant
It is not necessary to regularly check the
rear axle fluid unless a leak is suspected or
an unusual noise is heard. A fluid loss could
Page 282 of 362
Chevrolet Colorado Owner Manual (GMNA-Localizing-U.S./Canada/Mexico-
15274222) - 2022 - CRC - 11/2/21
Vehicle Care 281
Check that all wheel nuts are properly
tightened. See“Wheel Nut Torque”
under Capacities and Specifications
0 328.
{Warning
Rust or dirt on a wheel, or on the
parts to which it is fastened, can
cause wheel nuts to become loose
over time. The wheel could come off
and cause a crash. When changing a
wheel, remove any rust or dirt from
places where the wheel attaches to
the vehicle. In an emergency, a cloth
or paper towel can be used; however,
use a scraper or wire brush later to
remove all rust or dirt.
Lightly coat the inner diameter of the
wheel hub opening with wheel bearing
grease after a wheel change or tire
rotation to prevent corrosion or rust
buildup.
{Warning
Do not apply grease to the wheel
mounting surface, wheel conical
seats, or the wheel nuts or bolts.
Grease applied to these areas could
cause a wheel to become loose or
come off, resulting in a crash.
When It Is Time for New Tires
Factors, such as maintenance, temperatures,
driving speeds, vehicle loading, and road
conditions affect the wear rate of the tires.
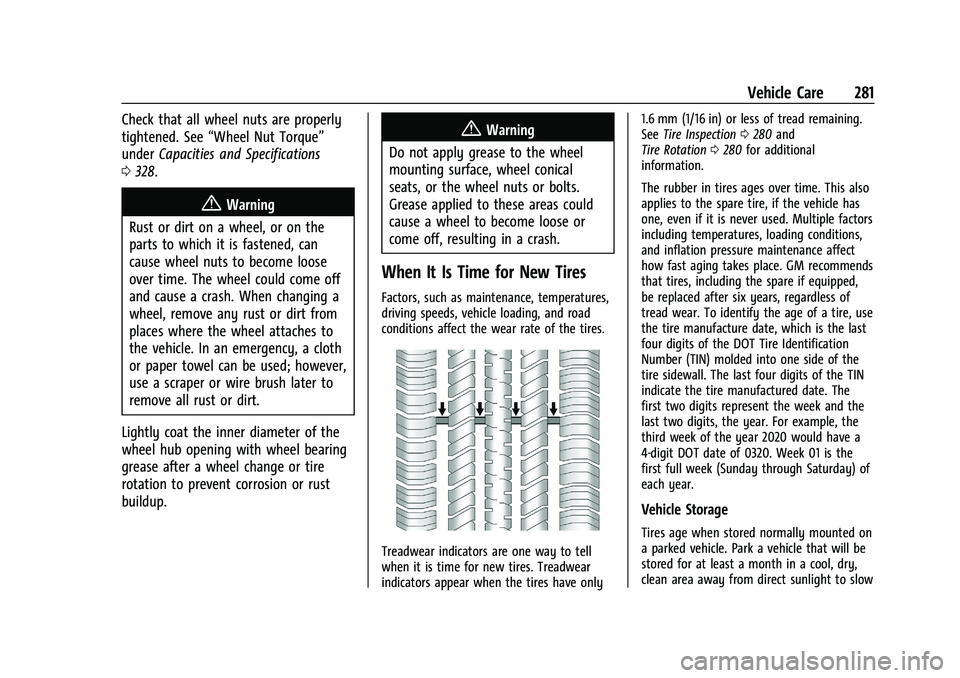
Treadwear indicators are one way to tell
when it is time for new tires. Treadwear
indicators appear when the tires have only 1.6 mm (1/16 in) or less of tread remaining.
See
Tire Inspection 0280 and
Tire Rotation 0280 for additional
information.
The rubber in tires ages over time. This also
applies to the spare tire, if the vehicle has
one, even if it is never used. Multiple factors
including temperatures, loading conditions,
and inflation pressure maintenance affect
how fast aging takes place. GM recommends
that tires, including the spare if equipped,
be replaced after six years, regardless of
tread wear. To identify the age of a tire, use
the tire manufacture date, which is the last
four digits of the DOT Tire Identification
Number (TIN) molded into one side of the
tire sidewall. The last four digits of the TIN
indicate the tire manufactured date. The
first two digits represent the week and the
last two digits, the year. For example, the
third week of the year 2020 would have a
4-digit DOT date of 0320. Week 01 is the
first full week (Sunday through Saturday) of
each year.
Vehicle Storage
Tires age when stored normally mounted on
a parked vehicle. Park a vehicle that will be
stored for at least a month in a cool, dry,
clean area away from direct sunlight to slow
Page 287 of 362
Chevrolet Colorado Owner Manual (GMNA-Localizing-U.S./Canada/Mexico-
15274222) - 2022 - CRC - 11/2/21
286 Vehicle Care
If a Tire Goes Flat
It is unusual for a tire to blow out while
driving, especially if the tires are maintained
properly. If air goes out of a tire, it is much
more likely to leak out slowly. But if there
ever is a blowout, here are a few tips about
what to expect and what to do:
If a front tire fails, the flat tire creates a
drag that pulls the vehicle toward that side.
Take your foot off the accelerator pedal and
grip the steering wheel firmly. Steer to
maintain lane position, and then gently
brake to a stop, well off the road,
if possible.
A rear blowout, particularly on a curve, acts
much like a skid and may require the same
correction as used in a skid. Stop pressing
the accelerator pedal and steer to straighten
the vehicle. It may be very bumpy and
noisy. Gently brake to a stop, well off the
road, if possible.
{Warning
Driving on a flat tire will cause
permanent damage to the tire.
Re-inflating a tire after it has been driven
on while severely underinflated or flat(Continued)
Warning (Continued)
may cause a blowout and a serious crash.
Never attempt to re-inflate a tire that has
been driven on while severely
underinflated or flat. Have your dealer or
an authorized tire service center repair or
replace the flat tire as soon as possible.
{Warning
Lifting a vehicle and getting under it to
do maintenance or repairs is dangerous
without the appropriate safety equipment
and training. If a jack is provided with
the vehicle, it is designed only for
changing a flat tire. If it is used for
anything else, you or others could be
badly injured or killed if the vehicle slips
off the jack. If a jack is provided with the
vehicle, only use it for changing a
flat tire.
If a tire goes flat, avoid further tire and
wheel damage by driving slowly to a level
place, well off the road, if possible. Turn on
the hazard warning flashers. See Hazard
Warning Flashers 0104.
{Warning
Changing a tire can be dangerous. The
vehicle can slip off the jack and roll over
or fall causing injury or death. Find a
level place to change the tire. To help
prevent the vehicle from moving:
1. Set the parking brake firmly.
2. Put the shift lever in P (Park).
3. For vehicles with four-wheel drive with an N (Neutral) transfer case
position, be sure the transfer case is
in a drive gear —not in N (Neutral).
4. Turn off the engine and do not restart while the vehicle is raised.
5. Do not allow passengers to remain in the vehicle.
6. Place wheel blocks, if equipped, on both sides of the tire at the opposite
corner of the tire being changed.
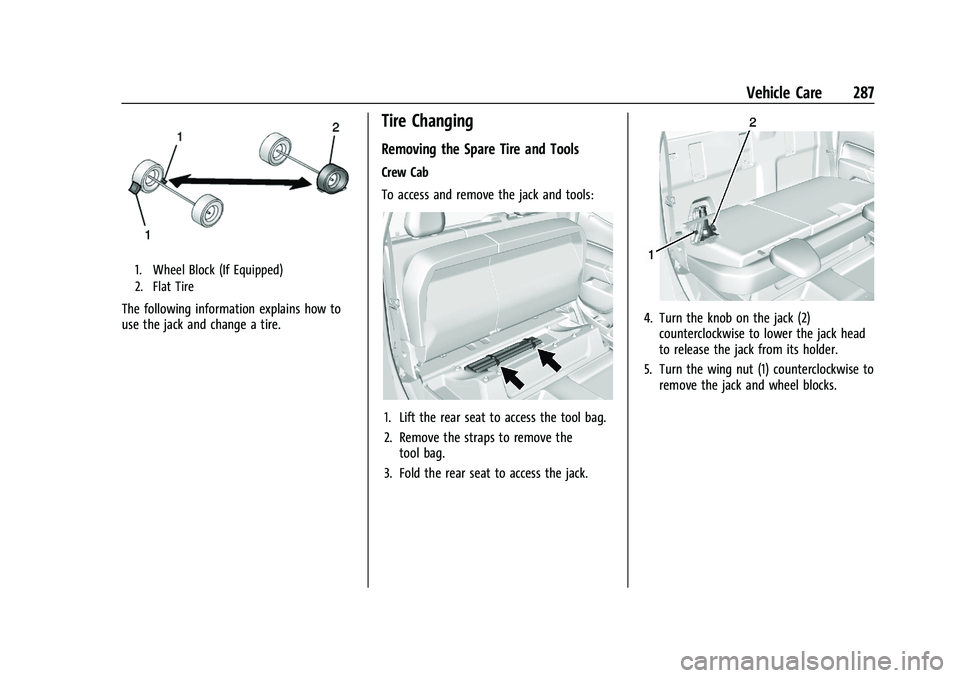
When the vehicle has a flat tire (2), use the
following example as a guide to assist in the
placement of the wheel blocks (1),
if equipped.
Page 288 of 362
Chevrolet Colorado Owner Manual (GMNA-Localizing-U.S./Canada/Mexico-
15274222) - 2022 - CRC - 11/2/21
Vehicle Care 287
1. Wheel Block (If Equipped)
2. Flat Tire
The following information explains how to
use the jack and change a tire.
Tire Changing
Removing the Spare Tire and Tools
Crew Cab
To access and remove the jack and tools:
1. Lift the rear seat to access the tool bag.
2. Remove the straps to remove thetool bag.
3. Fold the rear seat to access the jack.
4. Turn the knob on the jack (2) counterclockwise to lower the jack head
to release the jack from its holder.
5. Turn the wing nut (1) counterclockwise to remove the jack and wheel blocks.
Page 335 of 362
Chevrolet Colorado Owner Manual (GMNA-Localizing-U.S./Canada/Mexico-
15274222) - 2022 - CRC - 11/2/21
334 Customer Information
J:View active recalls by Vehicle
Identification Number (VIN). See Vehicle
Identification Number (VIN) 0327.
H:Manage your profile and payment
information. View your GM Rewards Card
earnings and My Chevrolet Rewards points.
F: Chat with online help representatives.
Visit my.chevrolet.com and create an
account today.
Chevrolet Owner Centre (Canada)
mychevrolet.ca
Visit the Chevrolet Owner Centre at
mychevrolet.ca (English) or my.chevrolet.ca
(French) to access similar benefits to the
U.S. site.
GM Mobility Reimbursement
Program
This program is available to qualified
applicants for cost reimbursement, up to
certain limits, of eligible aftermarket
adaptive equipment required for the vehicle,
such as hand controls or a wheelchair/
scooter lift for the vehicle.
To learn about the GM Mobility program,
see www.gmmobility.com or call the GM
Mobility Assistance Center at 1-800-323-9935.
Text Telephone (TTY) users, call
1-800-833-9935.
General Motors of Canada also has a
Mobility program. See www.gm.ca, or call
1-800-GM-DRIVE (800-463-7483) for details.
TTY users call 1-800-263-3830.
Roadside Assistance Program
For U.S.-purchased vehicles, call
1-800-243-8872. (Text Telephone (TTY):
1-888-889-2438.)
For Canadian-purchased vehicles, call
1-800-268-6800.
Service is available 24 hours a day, 365 days
a year.
Calling for Assistance
When calling Roadside Assistance, have the
following information ready:
.Your name, home address, and home
telephone number
.Telephone number of your location
.Location of the vehicle
.Model, year, color, and license plate
number of the vehicle
.Odometer reading, Vehicle Identification
Number (VIN), and delivery date of the
vehicle
.Description of the problem
Coverage
Services are provided for the duration of the
vehicle’s powertrain warranty.
In the U.S., anyone driving the vehicle is
covered. In Canada, a person driving the
vehicle without permission from the owner
is not covered.
Roadside Assistance is not a part of the New
Vehicle Limited Warranty. General Motors
North America and Chevrolet reserve the
right to make any changes or discontinue
the Roadside Assistance program at any
time without notification.
Page 355 of 362
Chevrolet Colorado Owner Manual (GMNA-Localizing-U.S./Canada/Mexico-
15274222) - 2022 - CRC - 11/2/21
354 Index
Fuses (cont'd)Fuses and Circuit Breakers . . . . . . . . . . . . . 262
Instrument Panel Fuse Block . . . . . . . . . . . 267
G
Gas Strut(s) . . . . . . . . . . . . . . . . . . . . . . . . . . . . . . 256
Gauges
Engine Coolant Temperature . . . . . . . . . . . . 85
Fuel . . . . . . . . . . . . . . . . . . . . . . . . . . . . . . . . . . . . . 84
Odometer . . . . . . . . . . . . . . . . . . . . . . . . . . . . . . 83
Speedometer . . . . . . . . . . . . . . . . . . . . . . . . . . . 83
Tachometer . . . . . . . . . . . . . . . . . . . . . . . . . . . . . 84
Trip Odometer . . . . . . . . . . . . . . . . . . . . . . . . . . 84
Warning Lights and Indicators . . . . . . . . . . 81
General Information Service and Maintenance . . . . . . . . . . . . . . 313
Towing . . . . . . . . . . . . . . . . . . . . . . . . . . . . . . . . 219
Vehicle Care . . . . . . . . . . . . . . . . . . . . . . . . . . . 237
Global Positioning System (GPS) . . . . . . . . . . 133
Glove Box . . . . . . . . . . . . . . . . . . . . . . . . . . . . . . . . .73
GM Mobility Reimbursement Program . . . . . . . . . . . . . . . . . . . . . . . . . . . . . . . 334
Guidance Problems with the Route . . . . . . . . . . . . . . 133
H
Halogen Bulbs . . . . . . . . . . . . . . . . . . . . . . . . . . . 258
Hazard Warning Flashers . . . . . . . . . . . . . . . . 104
HD Radio Technology . . . . . . . . . . . . . . . . . . . . . 117 Head Restraints . . . . . . . . . . . . . . . . . . . . . . . . . . . . 21
Headlamps
Aiming . . . . . . . . . . . . . . . . . . . . . . . . . . . . . . . . 257
Automatic . . . . . . . . . . . . . . . . . . . . . . . . . . . . . 103
Bulb Replacement . . . . . . . . . . . . . . . . . . . . . . 257
Daytime Running Lamps (DRL) . . . . . . . . . 103
Flash-to-Pass . . . . . . . . . . . . . . . . . . . . . . . . . . . 103
Headlamps, Front Turn Signal,Sidemarker, and Parking Lamps . . . . . . 258
High-Beam On Light . . . . . . . . . . . . . . . . . . . . 93
High/Low Beam Changer . . . . . . . . . . . . . . 103
Lamps On Reminder . . . . . . . . . . . . . . . . . . . . 93
Heated Steering Wheel . . . . . . . . . . . . . . . . . . . . . . . . . 76
Heated Front Seats . . . . . . . . . . . . . . . . . . . . . . . .25
Heated Mirrors . . . . . . . . . . . . . . . . . . . . . . . . . . . . 17
Heater Engine . . . . . . . . . . . . . . . . . . . . . . . . . . . . . . . . . 187
Heating . . . . . . . . . . . . . . . . . . . . . . . . . . . . . .162, 164
High-Beam On Light . . . . . . . . . . . . . . . . . . . . . . 93
Hill and Mountain Roads . . . . . . . . . . . . . . . . 176
Hill Descent Control (HDC) . . . . . . . . . . . . . . . 204
Hill Descent Control Light . . . . . . . . . . . . . . . . . 90
Hill Start Assist (HSA) . . . . . . . . . . . . . . . . . . . . 201
Hood . . . . . . . . . . . . . . . . . . . . . . . . . . . . . . . . . . . . 238
Horn . . . . . . . . . . . . . . . . . . . . . . . . . . . . . . . . . . . . . . 76
How to Wear Seat Belts Properly . . . . . . . . . 28
HVAC . . . . . . . . . . . . . . . . . . . . . . . . . . . . . . . .162, 164
I
If the System Needs Service . . . . . . . . . . . . . .134
Ignition Positions . . . . . . . . . . . . . . . . . . . . . . . . 184
Ignition Transmission Lock Check . . . . . . . . 255
Immobilizer . . . . . . . . . . . . . . . . . . . . . . . . . . . . . . . . 15
Indicator Vehicle Ahead . . . . . . . . . . . . . . . . . . . . . . . . . . 90
Infants and Young Children, Restraints . . . . 45
Information Publication Ordering . . . . . . . . . . . . . . . . . . . 338
Infotainment System . . . . . . . . . . . . . . . . . . . . .341
Instrument Cluster . . . . . . . . . . . . . . . . . . . . . . . . .81
Instrument Panel Overview . . . . . . . . . . . . . . . . 4
Interior Rearview Mirrors . . . . . . . . . . . . . . . . . .18
Introduction . . . . . . . . . . . . . . . . . . . . . . . . . . . 1, 109
J
Jack Auxiliary . . . . . . . . . . . . . . . . . . . . . . . . . . . . . . . 122
Jump Starting - North America . . . . . . . . . . . 297
K
Keyless Entry
Remote (RKE) System . . . . . . . . . . . . . . . . . . . . 9
Keys . . . . . . . . . . . . . . . . . . . . . . . . . . . . . . . . . . . . . . . 6
L
Labeling, Tire Sidewall . . . . . . . . . . . . . . . . . . . . 271
Page 356 of 362
Chevrolet Colorado Owner Manual (GMNA-Localizing-U.S./Canada/Mexico-
15274222) - 2022 - CRC - 11/2/21
Index 355
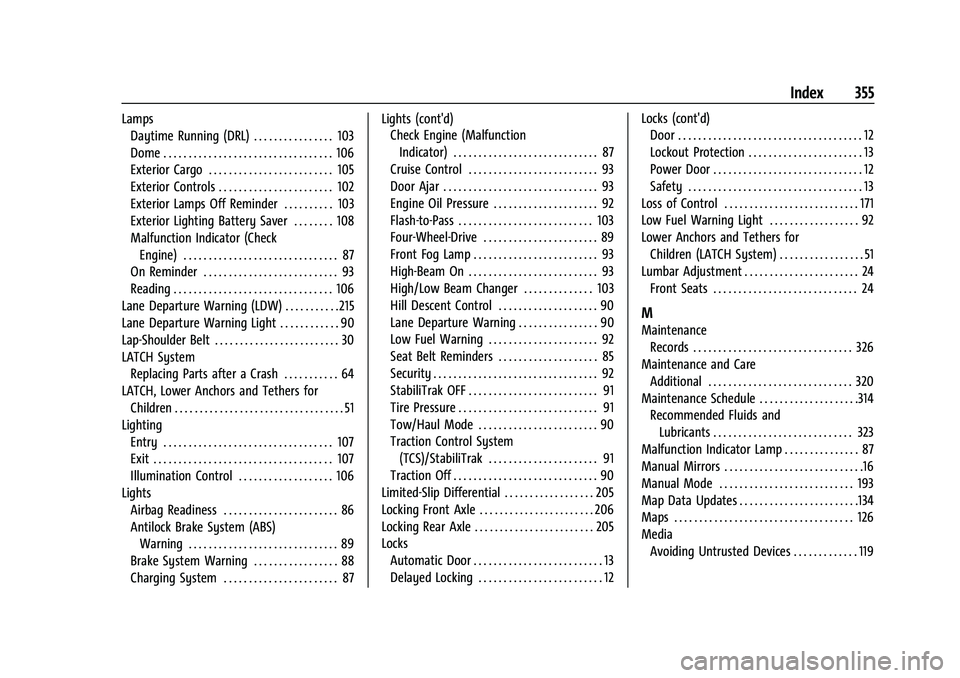
LampsDaytime Running (DRL) . . . . . . . . . . . . . . . . 103
Dome . . . . . . . . . . . . . . . . . . . . . . . . . . . . . . . . . . 106
Exterior Cargo . . . . . . . . . . . . . . . . . . . . . . . . . 105
Exterior Controls . . . . . . . . . . . . . . . . . . . . . . . 102
Exterior Lamps Off Reminder . . . . . . . . . . 103
Exterior Lighting Battery Saver . . . . . . . . 108
Malfunction Indicator (Check
Engine) . . . . . . . . . . . . . . . . . . . . . . . . . . . . . . . 87
On Reminder . . . . . . . . . . . . . . . . . . . . . . . . . . . 93
Reading . . . . . . . . . . . . . . . . . . . . . . . . . . . . . . . . 106
Lane Departure Warning (LDW) . . . . . . . . . . . 215
Lane Departure Warning Light . . . . . . . . . . . . 90
Lap-Shoulder Belt . . . . . . . . . . . . . . . . . . . . . . . . . 30
LATCH System Replacing Parts after a Crash . . . . . . . . . . . 64
LATCH, Lower Anchors and Tethers for Children . . . . . . . . . . . . . . . . . . . . . . . . . . . . . . . . . . 51
Lighting Entry . . . . . . . . . . . . . . . . . . . . . . . . . . . . . . . . . . 107
Exit . . . . . . . . . . . . . . . . . . . . . . . . . . . . . . . . . . . . 107
Illumination Control . . . . . . . . . . . . . . . . . . . 106
Lights Airbag Readiness . . . . . . . . . . . . . . . . . . . . . . . 86
Antilock Brake System (ABS)Warning . . . . . . . . . . . . . . . . . . . . . . . . . . . . . . 89
Brake System Warning . . . . . . . . . . . . . . . . . 88
Charging System . . . . . . . . . . . . . . . . . . . . . . . 87 Lights (cont'd)
Check Engine (Malfunction
Indicator) . . . . . . . . . . . . . . . . . . . . . . . . . . . . . 87
Cruise Control . . . . . . . . . . . . . . . . . . . . . . . . . . 93
Door Ajar . . . . . . . . . . . . . . . . . . . . . . . . . . . . . . . 93
Engine Oil Pressure . . . . . . . . . . . . . . . . . . . . . 92
Flash-to-Pass . . . . . . . . . . . . . . . . . . . . . . . . . . . 103
Four-Wheel-Drive . . . . . . . . . . . . . . . . . . . . . . . 89
Front Fog Lamp . . . . . . . . . . . . . . . . . . . . . . . . . 93
High-Beam On . . . . . . . . . . . . . . . . . . . . . . . . . . 93
High/Low Beam Changer . . . . . . . . . . . . . . 103
Hill Descent Control . . . . . . . . . . . . . . . . . . . . 90
Lane Departure Warning . . . . . . . . . . . . . . . . 90
Low Fuel Warning . . . . . . . . . . . . . . . . . . . . . . 92
Seat Belt Reminders . . . . . . . . . . . . . . . . . . . . 85
Security . . . . . . . . . . . . . . . . . . . . . . . . . . . . . . . . . 92
StabiliTrak OFF . . . . . . . . . . . . . . . . . . . . . . . . . . 91
Tire Pressure . . . . . . . . . . . . . . . . . . . . . . . . . . . . 91
Tow/Haul Mode . . . . . . . . . . . . . . . . . . . . . . . . 90
Traction Control System (TCS)/StabiliTrak . . . . . . . . . . . . . . . . . . . . . . 91
Traction Off . . . . . . . . . . . . . . . . . . . . . . . . . . . . . 90
Limited-Slip Differential . . . . . . . . . . . . . . . . . . 205
Locking Front Axle . . . . . . . . . . . . . . . . . . . . . . . 206
Locking Rear Axle . . . . . . . . . . . . . . . . . . . . . . . . 205
Locks Automatic Door . . . . . . . . . . . . . . . . . . . . . . . . . . 13
Delayed Locking . . . . . . . . . . . . . . . . . . . . . . . . . 12 Locks (cont'd)
Door . . . . . . . . . . . . . . . . . . . . . . . . . . . . . . . . . . . . . 12
Lockout Protection . . . . . . . . . . . . . . . . . . . . . . . 13
Power Door . . . . . . . . . . . . . . . . . . . . . . . . . . . . . . 12
Safety . . . . . . . . . . . . . . . . . . . . . . . . . . . . . . . . . . . 13
Loss of Control . . . . . . . . . . . . . . . . . . . . . . . . . . . 171
Low Fuel Warning Light . . . . . . . . . . . . . . . . . . 92
Lower Anchors and Tethers for Children (LATCH System) . . . . . . . . . . . . . . . . . 51
Lumbar Adjustment . . . . . . . . . . . . . . . . . . . . . . . 24 Front Seats . . . . . . . . . . . . . . . . . . . . . . . . . . . . . 24
M
MaintenanceRecords . . . . . . . . . . . . . . . . . . . . . . . . . . . . . . . . 326
Maintenance and Care Additional . . . . . . . . . . . . . . . . . . . . . . . . . . . . . 320
Maintenance Schedule . . . . . . . . . . . . . . . . . . . .314 Recommended Fluids andLubricants . . . . . . . . . . . . . . . . . . . . . . . . . . . . 323
Malfunction Indicator Lamp . . . . . . . . . . . . . . . 87
Manual Mirrors . . . . . . . . . . . . . . . . . . . . . . . . . . . .16
Manual Mode . . . . . . . . . . . . . . . . . . . . . . . . . . . 193
Map Data Updates . . . . . . . . . . . . . . . . . . . . . . . .134
Maps . . . . . . . . . . . . . . . . . . . . . . . . . . . . . . . . . . . . 126
Media Avoiding Untrusted Devices . . . . . . . . . . . . . 119
Page 359 of 362
Chevrolet Colorado Owner Manual (GMNA-Localizing-U.S./Canada/Mexico-
15274222) - 2022 - CRC - 11/2/21
358 Index
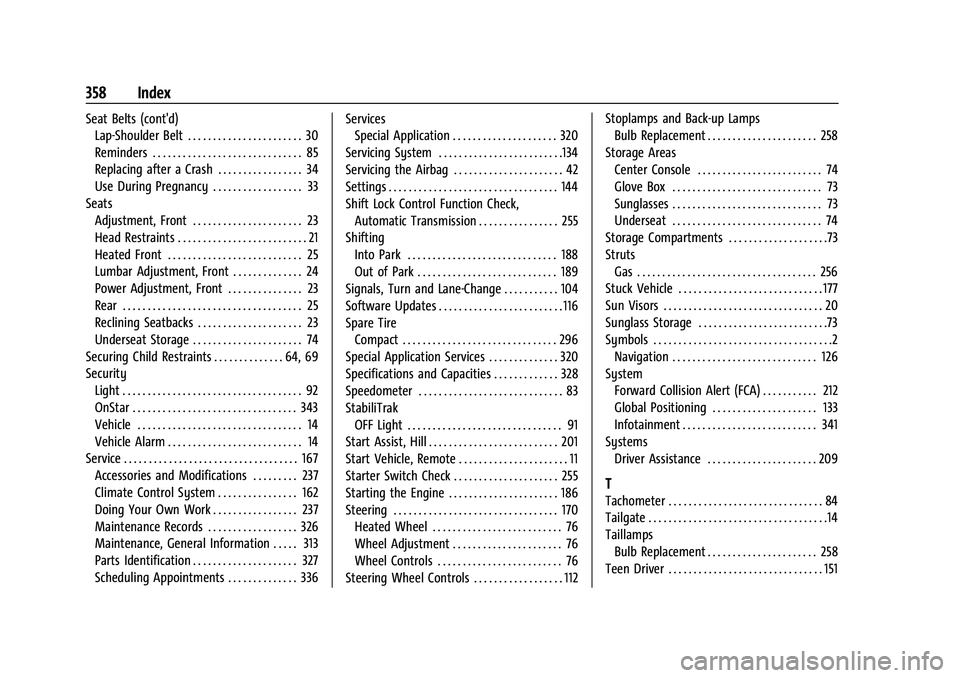
Seat Belts (cont'd)Lap-Shoulder Belt . . . . . . . . . . . . . . . . . . . . . . . 30
Reminders . . . . . . . . . . . . . . . . . . . . . . . . . . . . . . 85
Replacing after a Crash . . . . . . . . . . . . . . . . . 34
Use During Pregnancy . . . . . . . . . . . . . . . . . . 33
Seats Adjustment, Front . . . . . . . . . . . . . . . . . . . . . . 23
Head Restraints . . . . . . . . . . . . . . . . . . . . . . . . . . 21
Heated Front . . . . . . . . . . . . . . . . . . . . . . . . . . . 25
Lumbar Adjustment, Front . . . . . . . . . . . . . . 24
Power Adjustment, Front . . . . . . . . . . . . . . . 23
Rear . . . . . . . . . . . . . . . . . . . . . . . . . . . . . . . . . . . . 25
Reclining Seatbacks . . . . . . . . . . . . . . . . . . . . . 23
Underseat Storage . . . . . . . . . . . . . . . . . . . . . . 74
Securing Child Restraints . . . . . . . . . . . . . . 64, 69
Security Light . . . . . . . . . . . . . . . . . . . . . . . . . . . . . . . . . . . . 92
OnStar . . . . . . . . . . . . . . . . . . . . . . . . . . . . . . . . . 343
Vehicle . . . . . . . . . . . . . . . . . . . . . . . . . . . . . . . . . 14
Vehicle Alarm . . . . . . . . . . . . . . . . . . . . . . . . . . . 14
Service . . . . . . . . . . . . . . . . . . . . . . . . . . . . . . . . . . . 167
Accessories and Modifications . . . . . . . . . 237
Climate Control System . . . . . . . . . . . . . . . . 162
Doing Your Own Work . . . . . . . . . . . . . . . . . 237
Maintenance Records . . . . . . . . . . . . . . . . . . 326
Maintenance, General Information . . . . . 313
Parts Identification . . . . . . . . . . . . . . . . . . . . . 327
Scheduling Appointments . . . . . . . . . . . . . . 336 Services
Special Application . . . . . . . . . . . . . . . . . . . . . 320
Servicing System . . . . . . . . . . . . . . . . . . . . . . . . .134
Servicing the Airbag . . . . . . . . . . . . . . . . . . . . . . 42
Settings . . . . . . . . . . . . . . . . . . . . . . . . . . . . . . . . . . 144
Shift Lock Control Function Check, Automatic Transmission . . . . . . . . . . . . . . . . 255
Shifting Into Park . . . . . . . . . . . . . . . . . . . . . . . . . . . . . . 188
Out of Park . . . . . . . . . . . . . . . . . . . . . . . . . . . . 189
Signals, Turn and Lane-Change . . . . . . . . . . . 104
Software Updates . . . . . . . . . . . . . . . . . . . . . . . . . 116
Spare Tire
Compact . . . . . . . . . . . . . . . . . . . . . . . . . . . . . . . 296
Special Application Services . . . . . . . . . . . . . . 320
Specifications and Capacities . . . . . . . . . . . . . 328
Speedometer . . . . . . . . . . . . . . . . . . . . . . . . . . . . . 83
StabiliTrak OFF Light . . . . . . . . . . . . . . . . . . . . . . . . . . . . . . . 91
Start Assist, Hill . . . . . . . . . . . . . . . . . . . . . . . . . . 201
Start Vehicle, Remote . . . . . . . . . . . . . . . . . . . . . . 11
Starter Switch Check . . . . . . . . . . . . . . . . . . . . . 255
Starting the Engine . . . . . . . . . . . . . . . . . . . . . . 186
Steering . . . . . . . . . . . . . . . . . . . . . . . . . . . . . . . . . 170 Heated Wheel . . . . . . . . . . . . . . . . . . . . . . . . . . 76
Wheel Adjustment . . . . . . . . . . . . . . . . . . . . . . 76
Wheel Controls . . . . . . . . . . . . . . . . . . . . . . . . . 76
Steering Wheel Controls . . . . . . . . . . . . . . . . . . 112 Stoplamps and Back-up Lamps
Bulb Replacement . . . . . . . . . . . . . . . . . . . . . . 258
Storage Areas Center Console . . . . . . . . . . . . . . . . . . . . . . . . . 74
Glove Box . . . . . . . . . . . . . . . . . . . . . . . . . . . . . . 73
Sunglasses . . . . . . . . . . . . . . . . . . . . . . . . . . . . . . 73
Underseat . . . . . . . . . . . . . . . . . . . . . . . . . . . . . . 74
Storage Compartments . . . . . . . . . . . . . . . . . . . .73
Struts Gas . . . . . . . . . . . . . . . . . . . . . . . . . . . . . . . . . . . . 256
Stuck Vehicle . . . . . . . . . . . . . . . . . . . . . . . . . . . . . 177
Sun Visors . . . . . . . . . . . . . . . . . . . . . . . . . . . . . . . . 20
Sunglass Storage . . . . . . . . . . . . . . . . . . . . . . . . . .73
Symbols . . . . . . . . . . . . . . . . . . . . . . . . . . . . . . . . . . . .2
Navigation . . . . . . . . . . . . . . . . . . . . . . . . . . . . . 126
System
Forward Collision Alert (FCA) . . . . . . . . . . . 212
Global Positioning . . . . . . . . . . . . . . . . . . . . . 133
Infotainment . . . . . . . . . . . . . . . . . . . . . . . . . . . 341
Systems Driver Assistance . . . . . . . . . . . . . . . . . . . . . . 209
T
Tachometer . . . . . . . . . . . . . . . . . . . . . . . . . . . . . . . 84
Tailgate . . . . . . . . . . . . . . . . . . . . . . . . . . . . . . . . . . . .14
Taillamps
Bulb Replacement . . . . . . . . . . . . . . . . . . . . . . 258
Teen Driver . . . . . . . . . . . . . . . . . . . . . . . . . . . . . . . 151