engine auto stop CHEVROLET COLORADO 2023 Owners Manual
[x] Cancel search | Manufacturer: CHEVROLET, Model Year: 2023, Model line: COLORADO, Model: CHEVROLET COLORADO 2023Pages: 362, PDF Size: 13.62 MB
Page 20 of 362
Chevrolet Colorado Owner Manual (GMNA-Localizing-U.S./Canada/Mexico-
15274222) - 2022 - CRC - 11/2/21
Keys, Doors, and Windows 19
Using the window switch, press to open or
pull to close the window.
The windows may be temporarily disabled if
they are used repeatedly within a
short time.
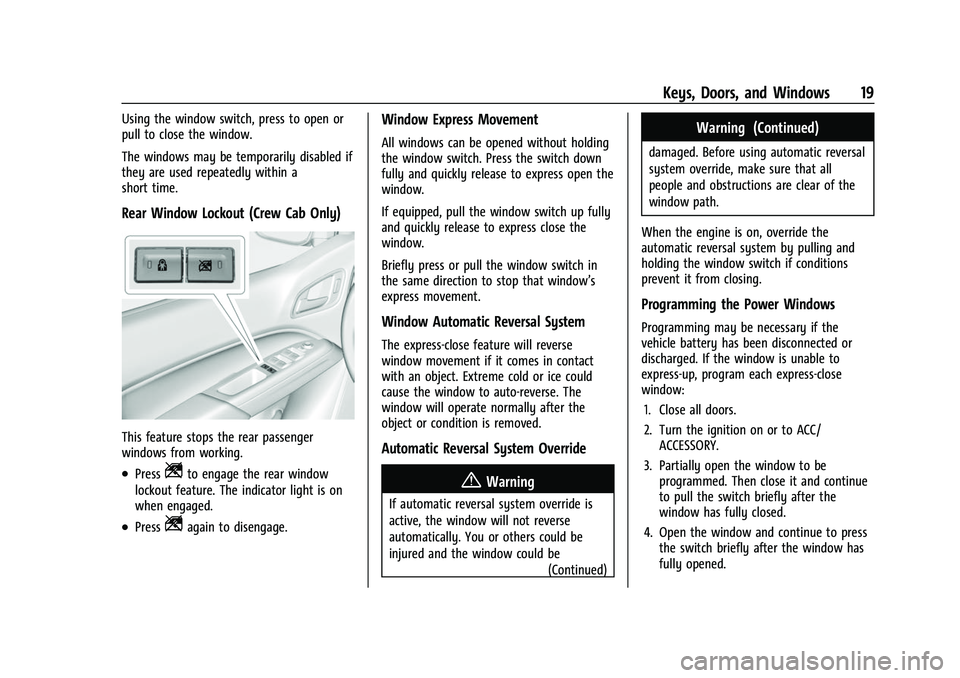
Rear Window Lockout (Crew Cab Only)
This feature stops the rear passenger
windows from working.
.PressZto engage the rear window
lockout feature. The indicator light is on
when engaged.
.PressZagain to disengage.
Window Express Movement
All windows can be opened without holding
the window switch. Press the switch down
fully and quickly release to express open the
window.
If equipped, pull the window switch up fully
and quickly release to express close the
window.
Briefly press or pull the window switch in
the same direction to stop that window’s
express movement.
Window Automatic Reversal System
The express-close feature will reverse
window movement if it comes in contact
with an object. Extreme cold or ice could
cause the window to auto-reverse. The
window will operate normally after the
object or condition is removed.
Automatic Reversal System Override
{Warning
If automatic reversal system override is
active, the window will not reverse
automatically. You or others could be
injured and the window could be
(Continued)
Warning (Continued)
damaged. Before using automatic reversal
system override, make sure that all
people and obstructions are clear of the
window path.
When the engine is on, override the
automatic reversal system by pulling and
holding the window switch if conditions
prevent it from closing.
Programming the Power Windows
Programming may be necessary if the
vehicle battery has been disconnected or
discharged. If the window is unable to
express-up, program each express-close
window: 1. Close all doors.
2. Turn the ignition on or to ACC/ ACCESSORY.
3. Partially open the window to be programmed. Then close it and continue
to pull the switch briefly after the
window has fully closed.
4. Open the window and continue to press the switch briefly after the window has
fully opened.
Page 152 of 362
Chevrolet Colorado Owner Manual (GMNA-Localizing-U.S./Canada/Mexico-
15274222) - 2022 - CRC - 11/2/21
Infotainment System 151
Touch Vehicle Key 1 and/or Vehicle Key 2.
If the Remote Keyless Entry (RKE)
transmitter is lost or stolen, see your dealer.
Security
Touch to have your profile secured with
a PIN.
Touch No or Yes.
Vehicle Name
Touch to edit your vehicle name.
Vehicle Account
Touch to view the vehicle account
information and to change the account
password.
Delete Profile
Touch to remove the profile from the
vehicle.
Touch Remove or Cancel.
Teen Driver
If equipped, this allows multiple keys to be
registered for beginner drivers to encourage
safe driving habits. When the vehicle is
started with a Teen Driver key, it will
automatically activate certain safety
systems, allow setting of some features, andlimit the use of others. The Report Card will
record vehicle data about driving behavior
that can be viewed later. When the vehicle
is started with a registered key, the Driver
Information Center (DIC) displays a message
that Teen Driver is active.
To access:
1. Touch Settings on the Home Page, then touch Vehicle, and then Teen Driver.
2. Create a Personal Identification Number (PIN) by choosing a four-digit PIN.
Re-enter the PIN to confirm. To change
the PIN, touch Change PIN.
The PIN is required to:
.Register or unregister keys.
.Change Teen Driver settings.
.Change or clear the Teen Driver PIN.
.Access or delete Report Card data.
Register keys to activate Teen Driver and
assign restrictions to the key:
Any vehicle key can be registered, up to a
maximum of eight keys. Label the key to
tell it apart from the other keys.
For a pushbutton start system: 1. Start the engine. 2. For automatic transmissions, the vehicle
must be in P (Park). For manual
transmissions, the vehicle must be
stopped with the parking brake set.
3. From the Settings menu, touch Vehicle and then Teen Driver.
4. Enter the PIN.
5. Place the Remote Keyless Entry (RKE) transmitter key you wish to register in
the transmitter pocket. The key does not
need to be the one that started the
vehicle. See Remote Keyless Entry (RKE)
System Operation 09for transmitter
pocket location.
6. From the Teen Driver menu, touch Setup Keys.
.If the transmitter key has not
previously been registered, the option
to add the key displays. Touch Add
and a confirmation message displays.
Teen Driver restrictions will be
applied whenever this key is used to
operate the vehicle.
.If the transmitter key has already
been registered, the option to
remove the key displays. If Remove is
touched, the transmitter key is no
longer registered. A confirmation
message displays, and Teen Driver
Page 153 of 362
Chevrolet Colorado Owner Manual (GMNA-Localizing-U.S./Canada/Mexico-
15274222) - 2022 - CRC - 11/2/21
152 Infotainment System
restrictions will not be applied if this
transmitter key is used to operate
the vehicle.
In vehicles with a pushbutton start system,
if a Teen Driver and a non-Teen Driver key
are both present at start up, the vehicle will
recognize the non-Teen Driver key to start
the vehicle. The Teen Driver settings will not
be active.
For a keyed ignition system: 1. Start the engine.
2. For automatic transmissions, the vehicle must be in P (Park). For manual
transmissions, the vehicle must be
stopped with the parking brake set.
3. From the Settings menu, touch Vehicle and then Teen Driver.
4. Enter the PIN.
5. Touch Setup Keys. The system displays instructions for registering or
unregistering a key. A confirmation
message displays.
Manage Settings
Audio Volume Limit : Allows the audio
volume limit to be turned on or off. Touch
Set Audio Volume Limit to choose the
maximum allowable audio volume level. Set Audio Volume Limit :
Allows a
maximum radio volume to be set. Use the
arrows to choose the maximum allowable
level for the audio volume.
Teen Driver Speed Limiter : Limits the
maximum speed of the vehicle. When the
speed limiter is turned on and the vehicle is
started with a Teen Driver key, the DIC
displays a message that the top speed is
limited.
On certain vehicles, when the Speed Limiter
is turned ON, the vehicle’s maximum
acceleration will be limited. The DIC will
display a message that the acceleration is
limited.
Teen Driver Speed Warning : Allows the
speed warning to be turned on or off. Touch
Set Teen Driver Speed Warning to set the
warning speed.
Set Teen Driver Speed Warning : Displays a
warning in the DIC when exceeding a
selectable speed. Choose the desired speed
warning level. The speed warning does not
limit the speed of the vehicle.
SiriusXM Explicit Content Filter (if
equipped) : Allows the SiriusXM Explicit
Content Filter to be turned ON or OFF.
When ON, the teen driver will not be able to listen to SiriusXM stations that contain
explicit content, and the Explicit Content
Filter selection in the Audio Settings will be
unavailable for change.
When Teen Driver is Active:
.If equipped with Buckle to Drive, shifting
out of P (Park) will be prevented if the
driver seat belt, and in some vehicles the
front passenger seat belt, is not buckled.
.The radio will mute when the driver seat
belt, and in some vehicles the front
passenger seat belt, is not buckled. The
audio from any device paired to the
vehicle will also be muted.
.An object placed on the front passenger
seat, such as a briefcase, handbag,
grocery bag, laptop, or other electronic
device, could cause the passenger sensing
system to falsely sense an unbuckled
front passenger and mute the radio.
If this happens, remove the object from
the seat. See
Passenger Sensing System
0 39.
.Some safety systems, such as Forward
Collision Alert, if equipped, cannot be
turned off.
.The gap setting for the Forward Collision
Alert and Adaptive Cruise Control,
if equipped, cannot be changed.
Page 191 of 362
Chevrolet Colorado Owner Manual (GMNA-Localizing-U.S./Canada/Mexico-
15274222) - 2022 - CRC - 11/2/21
190 Driving and Operating
Active Fuel Management
This vehicle's engine may be equipped with
Active Fuel Management, which allows the
engine to operate on either all of its
cylinders, or in reduced cylinder operation
mode, depending on the driving conditions.
When less power is required, such as
cruising at a constant vehicle speed, the
system will operate in reduced cylinder
operation mode, allowing the vehicle to
achieve better fuel economy. When greater
power demands are required, such as
accelerating from a stop, passing,
or merging onto a freeway, the system will
maintain full-cylinder operation. If the
vehicle has an Active Fuel Management
indicator, see Driver Information Center (DIC)
for more information on using this display.
Engine Exhaust{
Warning
Engine exhaust contains carbon monoxide
(CO), which cannot be seen or smelled.
Exposure to CO can cause
unconsciousness and even death. (Continued)
Warning (Continued)
Exhaust may enter the vehicle if:
.The vehicle idles in areas with poor
ventilation (parking garages, tunnels,
deep snow that may block underbody
airflow or tail pipes).
.The exhaust smells or sounds strange
or different.
.The exhaust system leaks due to
corrosion or damage.
.The vehicle exhaust system has been
modified, damaged, or improperly
repaired.
.There are holes or openings in the
vehicle body from damage or
aftermarket modifications that are not
completely sealed.
If unusual fumes are detected or if it is
suspected that exhaust is coming into the
vehicle:
.Drive it only with the windows
completely down.
.Have the vehicle repaired immediately. (Continued)
Warning (Continued)
Never park the vehicle with the engine
running in an enclosed area such as a
garage or a building that has no fresh air
ventilation.
Running the Vehicle While Parked
It is better not to park with the engine
running.
If the vehicle is left with the engine running,
follow the proper steps to be sure the
vehicle will not move. SeeShifting Into Park
0 188 and
Engine Exhaust 0190.
If parking on a hill and pulling a trailer, see
Driving Characteristics and Towing Tips
0 219.
Automatic Transmission
If equipped, there is an electronic shift lever
position indicator within the instrument
cluster. This display comes on when the
ignition key is in ACC/ACCESSORY or
ON/RUN.
Page 193 of 362
Chevrolet Colorado Owner Manual (GMNA-Localizing-U.S./Canada/Mexico-
15274222) - 2022 - CRC - 11/2/21
192 Driving and Operating
Caution
Shifting out of P (Park) or N (Neutral) with
the engine running at high speed may
damage the transmission. The repairs
would not be covered by the vehicle
warranty. Be sure the engine is not
running at high speed when shifting the
vehicle.
Caution
A transmission hot message may display
if the automatic transmission fluid is too
hot. Driving under this condition can
damage the vehicle. Stop and idle the
engine to cool the automatic
transmission fluid. This message clears
when the transmission fluid has cooled
sufficiently.
D : This position is for normal driving.
If more power is needed for passing, press
the accelerator pedal down. D (Drive) can be used when towing a trailer,
carrying a heavy load, driving on steep hills,
or driving off-road. Shift the transmission to
a lower gear range selection if the
transmission shifts too often. See
Manual
Mode 0193.
Downshifting the transmission in slippery
road conditions could result in skidding. See
“Skidding” underLoss of Control 0171.
The vehicle has a shift stabilization feature
that adjusts the transmission shifting to the
current driving conditions in order to reduce
rapid upshifts and downshifts. This shift
stabilization feature is designed to
determine, before making an upshift, if the
engine is able to maintain vehicle speed by
analyzing things such as vehicle speed,
throttle position, and vehicle load. If the
shift stabilization feature determines that a
current vehicle speed cannot be maintained,
the transmission does not upshift and
instead holds the current gear. In some
cases, this could appear to be a delayed
shift, however the transmission is operating
normally. The transmission uses adaptive shift
controls. The adaptive shift control process
continually compares key shift parameters
to pre-programmed ideal shifts stored in the
transmission’s computer. The transmission
constantly makes adjustments to improve
vehicle performance according to how the
vehicle is being used, such as with a heavy
load or when the temperature changes.
During this adaptive shift control process,
shifting might feel different as the
transmission determines the best settings.
When temperatures are very cold, the
transmission's gear shifting could be delayed
providing more stable shifts until the engine
warms up. Shifts could be more noticeable
with a cold transmission. This difference in
shifting is normal.
L :
This position allows selection of a range
of gears appropriate for current driving
conditions. See Manual Mode0193.
Page 194 of 362
Chevrolet Colorado Owner Manual (GMNA-Localizing-U.S./Canada/Mexico-
15274222) - 2022 - CRC - 11/2/21
Driving and Operating 193
Caution
Spinning the tires or holding the vehicle
in one place on a hill using only the
accelerator pedal may damage the
transmission. The repair will not be
covered by the vehicle warranty. If the
vehicle is stuck, do not spin the tires.
When stopping on a hill, use the brakes
to hold the vehicle in place.
Normal Mode Grade Braking
Normal Mode Grade Braking is enabled
when the vehicle is started, but is not
enabled in Range Selection Mode. It assists
in maintaining desired vehicle speeds when
driving on downhill grades by using the
engine and transmission to slow the vehicle.
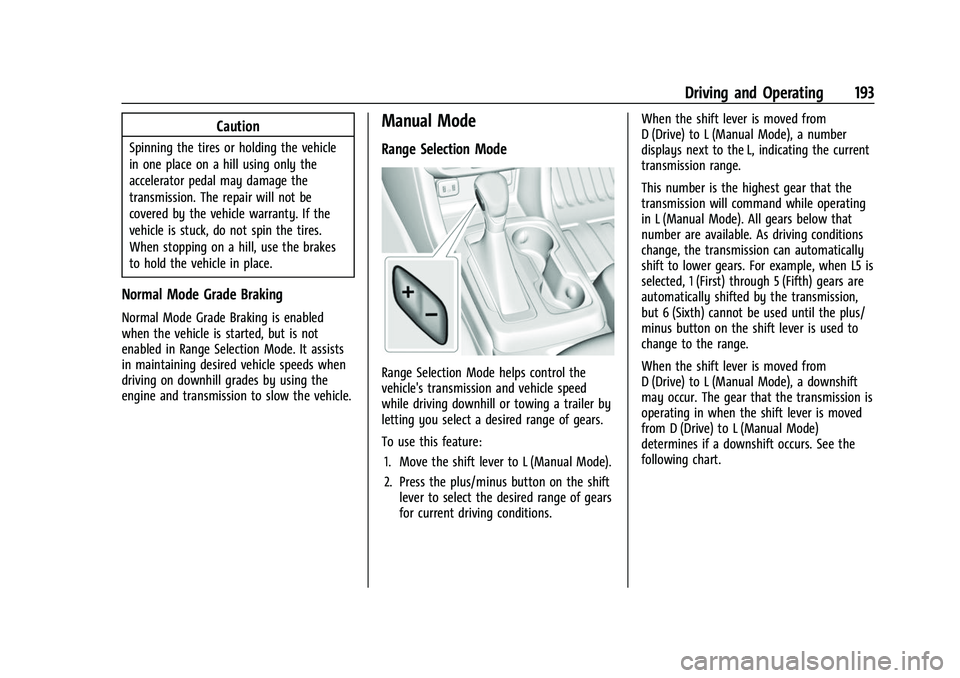
Manual Mode
Range Selection Mode
Range Selection Mode helps control the
vehicle's transmission and vehicle speed
while driving downhill or towing a trailer by
letting you select a desired range of gears.
To use this feature:1. Move the shift lever to L (Manual Mode).
2. Press the plus/minus button on the shift lever to select the desired range of gears
for current driving conditions. When the shift lever is moved from
D (Drive) to L (Manual Mode), a number
displays next to the L, indicating the current
transmission range.
This number is the highest gear that the
transmission will command while operating
in L (Manual Mode). All gears below that
number are available. As driving conditions
change, the transmission can automatically
shift to lower gears. For example, when L5 is
selected, 1 (First) through 5 (Fifth) gears are
automatically shifted by the transmission,
but 6 (Sixth) cannot be used until the plus/
minus button on the shift lever is used to
change to the range.
When the shift lever is moved from
D (Drive) to L (Manual Mode), a downshift
may occur. The gear that the transmission is
operating in when the shift lever is moved
from D (Drive) to L (Manual Mode)
determines if a downshift occurs. See the
following chart.
Page 201 of 362
Chevrolet Colorado Owner Manual (GMNA-Localizing-U.S./Canada/Mexico-
15274222) - 2022 - CRC - 11/2/21
200 Driving and Operating
Caution
Shifting the transmission into gear before
the requested mode indicator light has
stopped flashing could damage the
transfer case.
If the transmission is in gear and/or moving
more than 5 km/h (3 mph), the 4
m, AUTO,
or 2
mindicator light will flash for
30 seconds but will not complete the shift.
With the vehicle moving less than 5 km/h
(3 mph), and the transmission in N (Neutral),
attempt the shift again.
Shifting Into N (Neutral)
To shift:
1. Park the vehicle on a level surface.
2. Set the parking brake and press and hold the brake pedal. See Parking Brake
0 201.
3. Start the vehicle or turn the ignition on.
4. Shift the transmission to N (Neutral).
5. Shift the transfer case to 2
m.
6. Turn the transfer case shift knob clockwise past the 4
ndetent to
N (Neutral) until it stops and hold it
there until the N (Neutral) light starts flashing. This will take at least
10 seconds. Then slowly release the knob
to the 4
nposition. The N (Neutral) light
will come on when the transfer case
shift to N (Neutral) is complete.
7. With the engine running, verify that the transfer case is in N (Neutral) by shifting
the transmission to R (Reverse), then
shift the transmission to D (Drive). There
should be no movement of the vehicle
while shifting the transmission.
8. Turn the engine off, and the ignition to ACC/ACCESSORY.
9. Place the transmission shift lever in P (Park).
Shifting Out of N (Neutral)
To shift: 1. Set the parking brake.
2. Turn the ignition on with the engine off.
3. Shift the transmission to N (Neutral).
4. Turn the transfer case shift knob to 2
m.
After the transfer case has shifted out of
N (Neutral), the N (Neutral) light will
go out and the new 2
mstate will be
displayed. 5. Place the transmission shift lever in
P (Park).
6. Release the parking brake.
Brakes
Antilock Brake System (ABS)
The Antilock Brake System (ABS) helps
prevent a braking skid and maintain steering
while braking hard.
ABS performs a system check when the
vehicle is first driven. A momentary motor
or clicking noise may be heard while this
test is going on, and the brake pedal may
move slightly. This is normal.
If there is a problem with ABS, this warning
light stays on. See Antilock Brake System
(ABS) Warning Light 089.
ABS does not change the time needed to
get a foot on the brake pedal and does not
always decrease stopping distance. If you
Page 203 of 362
Chevrolet Colorado Owner Manual (GMNA-Localizing-U.S./Canada/Mexico-
15274222) - 2022 - CRC - 11/2/21
202 Driving and Operating
pedal release to accelerator pedal apply. The
brakes release when the accelerator pedal is
applied or automatically release after a few
seconds. The brakes may also release under
other conditions. Do not rely on HSA to hold
the vehicle.
HSA is available when the vehicle is facing
uphill in a forward gear, or when facing
downhill in R (Reverse). The vehicle must
come to a complete stop on a grade for HSA
to activate.
Ride Control Systems
Traction Control/Electronic
Stability Control
System Operation
The vehicle has a Traction Control System
(TCS) and StabiliTrak/Electronic Stability
Control (ESC), an electronic stability control
system. These systems help limit wheel spin
and assist the driver in maintaining control,
especially on slippery road conditions.
TCS activates if it senses that any of the
drive wheels are spinning or beginning to
lose traction. When this happens, TCSapplies the brakes to the spinning wheels
and reduces engine power to limit
wheel spin.
StabiliTrak/ESC activates when the vehicle
senses a difference between the intended
path and the direction the vehicle is actually
traveling. StabiliTrak/ESC selectively applies
braking pressure to any one of the vehicle
wheel brakes to assist the driver in keeping
the vehicle on the intended path.
If cruise control is being used and TCS or
StabiliTrak/ESC begins to limit wheel spin,
cruise control will disengage. Cruise control
may be turned back on when road
conditions allow.
Both systems come on automatically when
the vehicle is started and begins to move.
The systems may be heard or felt while
they are operating or while performing
diagnostic checks. This is normal and does
not mean there is a problem with the
vehicle.
It is recommended to leave both systems on
for normal driving conditions, but it may be
necessary to turn TCS off if the vehicle gets
stuck in sand, mud, ice, or snow. See
If the
Vehicle Is Stuck 0177 and “Turning the
Systems Off and On” later in this section. When the transfer case (if equipped) is in 4
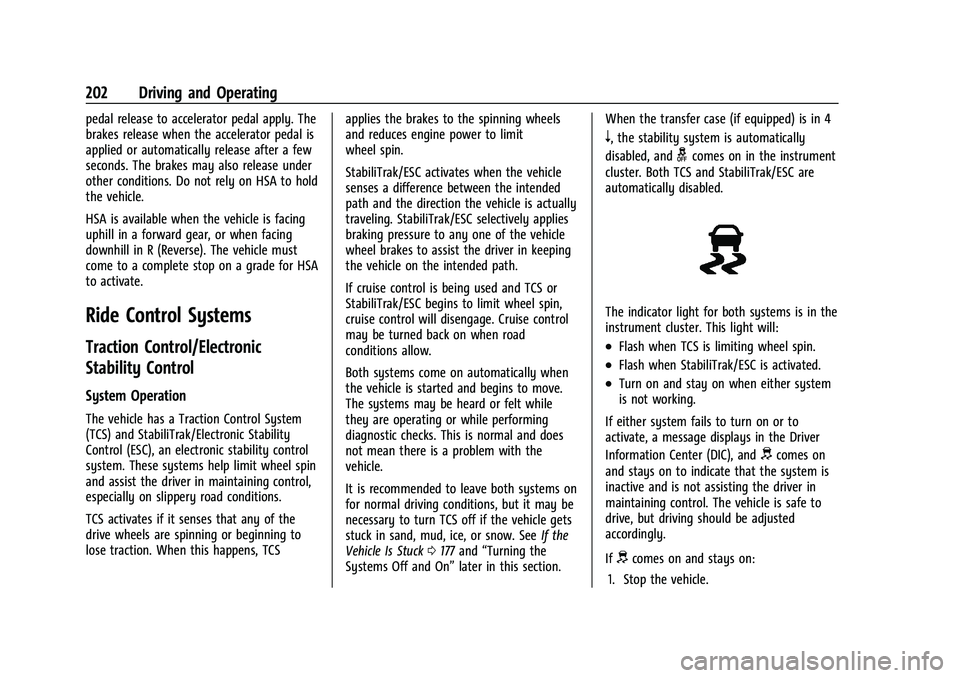
n, the stability system is automatically
disabled, and
gcomes on in the instrument
cluster. Both TCS and StabiliTrak/ESC are
automatically disabled.
The indicator light for both systems is in the
instrument cluster. This light will:
.Flash when TCS is limiting wheel spin.
.Flash when StabiliTrak/ESC is activated.
.Turn on and stay on when either system
is not working.
If either system fails to turn on or to
activate, a message displays in the Driver
Information Center (DIC), and
dcomes on
and stays on to indicate that the system is
inactive and is not assisting the driver in
maintaining control. The vehicle is safe to
drive, but driving should be adjusted
accordingly.
If
dcomes on and stays on:
1. Stop the vehicle.
Page 204 of 362
Chevrolet Colorado Owner Manual (GMNA-Localizing-U.S./Canada/Mexico-
15274222) - 2022 - CRC - 11/2/21
Driving and Operating 203
2. Turn the engine off and wait 15 seconds.
3. Start the engine.
Drive the vehicle. If
dcomes on and stays
on, the vehicle may need more time to
diagnose the problem. If the condition
persists, see your dealer.
Turning the Systems Off and On
(Except ZR2)
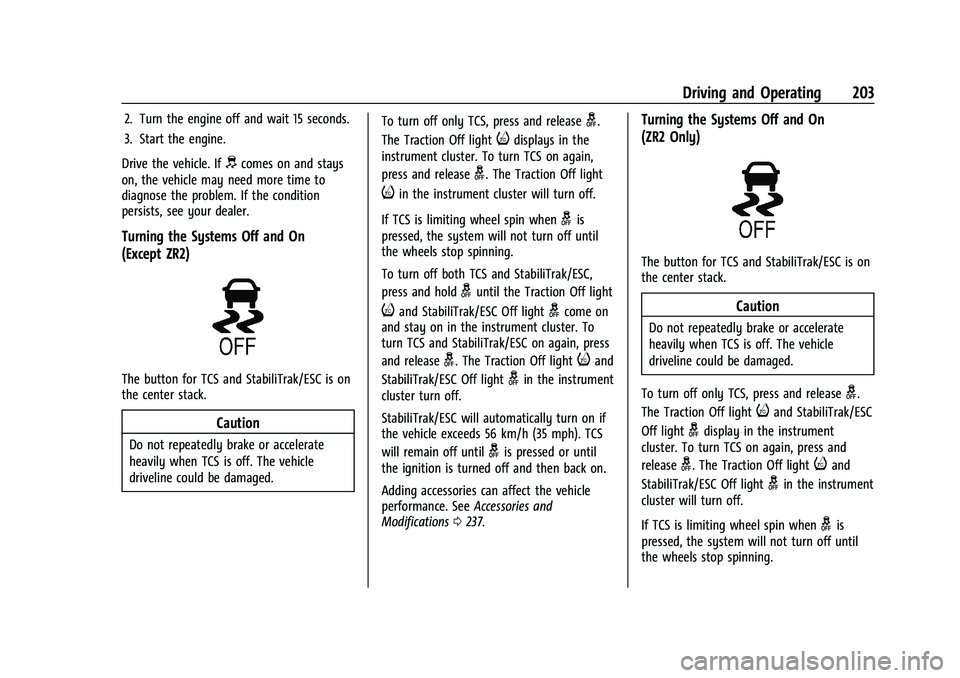
The button for TCS and StabiliTrak/ESC is on
the center stack.
Caution
Do not repeatedly brake or accelerate
heavily when TCS is off. The vehicle
driveline could be damaged. To turn off only TCS, press and release
g.
The Traction Off light
idisplays in the
instrument cluster. To turn TCS on again,
press and release
g. The Traction Off light
iin the instrument cluster will turn off.
If TCS is limiting wheel spin when
gis
pressed, the system will not turn off until
the wheels stop spinning.
To turn off both TCS and StabiliTrak/ESC,
press and hold
guntil the Traction Off light
iand StabiliTrak/ESC Off lightgcome on
and stay on in the instrument cluster. To
turn TCS and StabiliTrak/ESC on again, press
and release
g. The Traction Off lightiand
StabiliTrak/ESC Off light
gin the instrument
cluster turn off.
StabiliTrak/ESC will automatically turn on if
the vehicle exceeds 56 km/h (35 mph). TCS
will remain off until
gis pressed or until
the ignition is turned off and then back on.
Adding accessories can affect the vehicle
performance. See Accessories and
Modifications 0237.
Turning the Systems Off and On
(ZR2 Only)
The button for TCS and StabiliTrak/ESC is on
the center stack.
Caution
Do not repeatedly brake or accelerate
heavily when TCS is off. The vehicle
driveline could be damaged.
To turn off only TCS, press and release
g.
The Traction Off light
iand StabiliTrak/ESC
Off light
gdisplay in the instrument
cluster. To turn TCS on again, press and
release
g. The Traction Off lightiand
StabiliTrak/ESC Off light
gin the instrument
cluster will turn off.
If TCS is limiting wheel spin when
gis
pressed, the system will not turn off until
the wheels stop spinning.
Page 224 of 362
Chevrolet Colorado Owner Manual (GMNA-Localizing-U.S./Canada/Mexico-
15274222) - 2022 - CRC - 11/2/21
Driving and Operating 223
Disconnect the wiring to the trailer before
backing the trailer into the water to prevent
damage to the electrical circuits on the
trailer. Reconnect the wiring to the trailer
after removing the trailer from the water.
If the trailer has electric brakes that can
function when the trailer is submerged, it
might help to leave the electrical trailer
connector attached to maintain trailer brake
functionality while on the boat ramp.
To back the trailer into the water:1. If equipped, place the vehicle in four-wheel-drive high.
2. Slowly back down the boat ramp until the boat is floating, but no further than
necessary.
3. Press and hold the brake pedal, but do not shift into P (Park) yet.
4. Have someone place chocks under the front wheels of the vehicle.
5. Gradually release the brake pedal to allow the chocks to absorb the load of
the trailer.
6. Reapply the brake pedal. Then apply the parking brake and shift into P (Park).
7. Release the brake pedal. Pulling the Trailer from the Water
To pull the trailer of the water:
1. Press and hold the brake pedals.
2. Start the engine and shift into gear.
3. Release the parking brake.
4. Let up on the brake pedal.
5. Drive slowly until the tires are clear of the chocks.
6. Stop and have someone pick up and store the chocks.
7. Slowly pull the trailer from the water.
8. Once the vehicle and trailer have been driven from the sloped part of the boat
ramp, the vehicle can be shifted from
four-wheel-drive high. Shift into the drive
mode that is appropriate for the road
conditions.
Caution
If the vehicle tires begin to spin and the
vehicle begins to slide toward the water,
remove your foot from the accelerator
pedal and apply the brake pedal. Seek
help to have the vehicle towed up
the ramp.
Maintenance when Trailer Towing
The vehicle needs service more often when
used to tow trailers. See Maintenance
Schedule 0314. It is especially important to
check the automatic transmission fluid,
engine oil, axle lubricant, belts, cooling
system, and brake system before and during
each trip.
Check periodically to see that all nuts and
bolts on the trailer hitch are tight.
Engine Cooling When Trailer Towing
The cooling system may temporarily
overheat during severe operating conditions.
See Engine Overheating 0249.
Trailer Towing
If equipped with a diesel engine, see the
Duramax diesel supplement.
Caution
Towing a trailer improperly can damage
the vehicle and result in costly repairs
not covered by the vehicle warranty. To
tow a trailer correctly, follow the
directions in this section and see your
dealer for important information about
towing a trailer with the vehicle.