four wheel drive CHEVROLET COLORADO Z71 2016 User Guide
[x] Cancel search | Manufacturer: CHEVROLET, Model Year: 2016, Model line: COLORADO Z71, Model: CHEVROLET COLORADO Z71 2016Pages: 396, PDF Size: 6.57 MB
Page 227 of 396
Chevrolet Colorado Owner Manual (GMNA-Localizing-U.S/Canada/Mexico-
9159327) - 2016 - crc - 8/28/15
226 Driving and Operating
Caution
Shifting to R (Reverse) while the
vehicle is moving forward could
damage the transmission. The
repairs would not be covered by
the vehicle warranty. Shift to
R (Reverse) only after the vehicle
is stopped.
Use R (Reverse), along with the
parking brake, for parking the
vehicle.
Shift Speeds
{Warning
If you skip a gear when
downshifting, you could lose
control of the vehicle. You could
injure yourself or others. Do not
shift down more than one gear at
a time when downshifting.
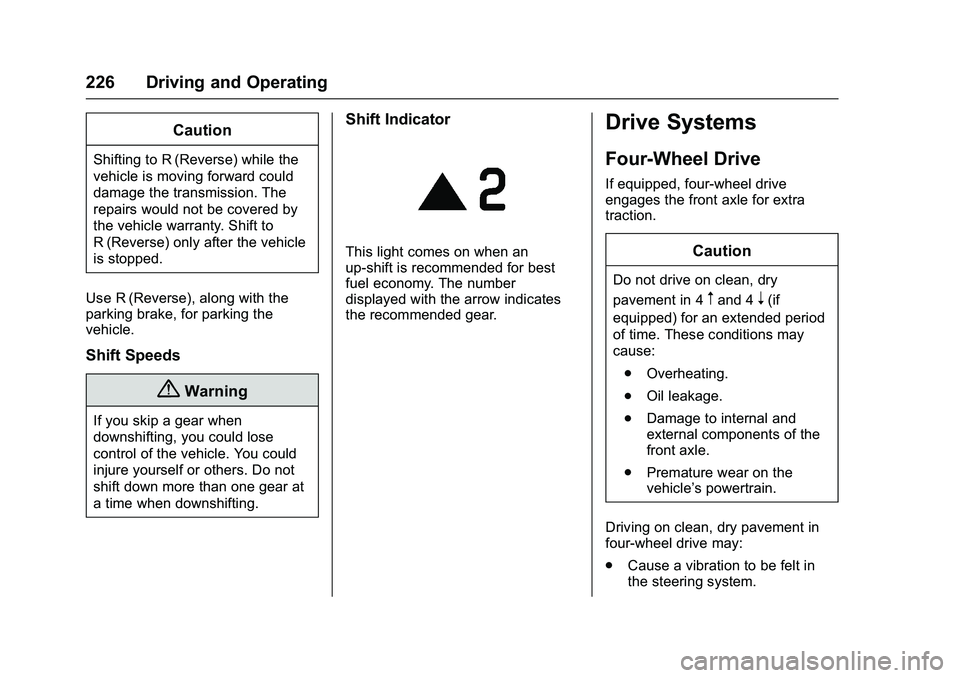
Shift Indicator
This light comes on when an
up-shift is recommended for best
fuel economy. The number
displayed with the arrow indicates
the recommended gear.
Drive Systems
Four-Wheel Drive
If equipped, four-wheel drive
engages the front axle for extra
traction.
Caution
Do not drive on clean, dry
pavement in 4
mand 4n(if
equipped) for an extended period
of time. These conditions may
cause:
. Overheating.
. Oil leakage.
. Damage to internal and
external components of the
front axle.
. Premature wear on the
vehicle’s powertrain.
Driving on clean, dry pavement in
four-wheel drive may:
. Cause a vibration to be felt in
the steering system.
Page 228 of 396
Chevrolet Colorado Owner Manual (GMNA-Localizing-U.S/Canada/Mexico-
9159327) - 2016 - crc - 8/28/15
Driving and Operating 227
.Cause tires to wear faster.
. Cause additional driveline noise.
{Warning
Shifting the transfer case to
N (Neutral) can cause the vehicle
to roll even if the transmission is
in P (Park). You or someone else
could be seriously injured. Be
sure to set the parking brake
before placing the transfer case in
N (Neutral). See Parking Brake
0 233
ii.
Caution
Extended high-speed operation in
4
nmay damage or shorten the
life of the drivetrain.
Engagement noise and bump when
shifting between 4
nand 4mor from
N (Neutral), with the engine running,
is normal. Shifting into 4
nwill turn Traction
Control and StabiliTrak®off. See
Traction Control/Electronic Stability
Control 0235
ii.
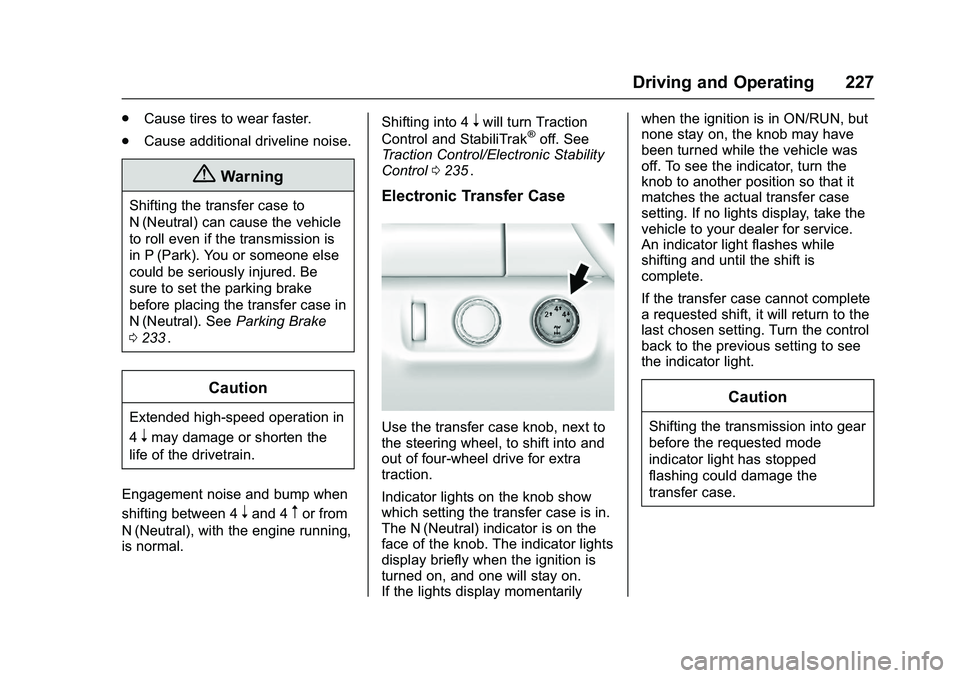
Electronic Transfer Case
Use the transfer case knob, next to
the steering wheel, to shift into and
out of four-wheel drive for extra
traction.
Indicator lights on the knob show
which setting the transfer case is in.
The N (Neutral) indicator is on the
face of the knob. The indicator lights
display briefly when the ignition is
turned on, and one will stay on.
If the lights display momentarily when the ignition is in ON/RUN, but
none stay on, the knob may have
been turned while the vehicle was
off. To see the indicator, turn the
knob to another position so that it
matches the actual transfer case
setting. If no lights display, take the
vehicle to your dealer for service.
An indicator light flashes while
shifting and until the shift is
complete.
If the transfer case cannot complete
a requested shift, it will return to the
last chosen setting. Turn the control
back to the previous setting to see
the indicator light.
Caution
Shifting the transmission into gear
before the requested mode
indicator light has stopped
flashing could damage the
transfer case.
Page 229 of 396
Chevrolet Colorado Owner Manual (GMNA-Localizing-U.S/Canada/Mexico-
9159327) - 2016 - crc - 8/28/15
228 Driving and Operating
The settings are:
N (Neutral) :Use only when the
vehicle needs to be towed. See
Recreational Vehicle Towing 0330
iior Towing the Vehicle 0329ii.
2
m(Two-Wheel Drive High) : Use
for driving on most streets and
highways. The front axle is not
engaged. This setting provides the
best fuel economy.
4
n(Four-Wheel Drive Low) : This
setting engages the front axle and
delivers extra torque. Choose 4
nif
driving off-road in deep sand, deep
mud, or deep snow, and while
climbing or descending steep hills.
When engaged, keep vehicle speed
below 72 km/h (45 mph).
Shifting into 4
nwill turn Traction
Control and StabiliTrak off. See
Traction Control/Electronic Stability
Control 0235
ii.
4
m(Four-Wheel Drive High) : Use
when extra traction is needed. The
front axle engages and helps when
driving on snowy or icy roads, and when off-roading. The vehicle can
be shifted from 2
mto 4mwhile the
vehicle is moving.
Shifting Into 4
m
Turn the knob to 4mat any speed
up to 121 km/h (75 mph), except
from 4
n. The indicator light will flash
while shifting and will remain on the
selected setting.
Shifting Into 2
m
Turn the knob to 2mat any speed,
except when shifting from 4
n.
Shifting Into 4
n
When 4nis engaged, vehicle speed
should be kept below 72 km/h
(45 mph).
1. The ignition must be in ON/ RUN and the vehicle must be
stopped or moving less than
5 km/h (3 mph) with the
transmission in N (Neutral). It is
best for the vehicle to be
moving 1.6 to 3.2 km/h
(1 to 2 mph). 2. Turn the knob to 4
n. Wait for
the 4
nindicator light to stop
flashing before shifting the
transmission into gear.
If the transmission is in gear and/or
moving more than 5 km/h (3 mph),
the 4
nindicator light will flash for
30 seconds and not complete the
shift. After 30 seconds the transfer
case will shift to 4
m. Turn the knob
to 4
mto see the indicator. With the
vehicle moving less than 5 km/h
(3 mph), and the transmission in
N (Neutral), attempt the shift again.
Shifting Out of 4
n
1. To shift out of 4nthe vehicle
must be stopped or moving
less than 5 km/h (3 mph) with
the transmission in N (Neutral)
and the ignition in ON/RUN.
It is best for the vehicle to be
moving 1.6 to 3.2 km/h
(1 to 2 mph).
Page 231 of 396
Chevrolet Colorado Owner Manual (GMNA-Localizing-U.S/Canada/Mexico-
9159327) - 2016 - crc - 8/28/15
230 Driving and Operating
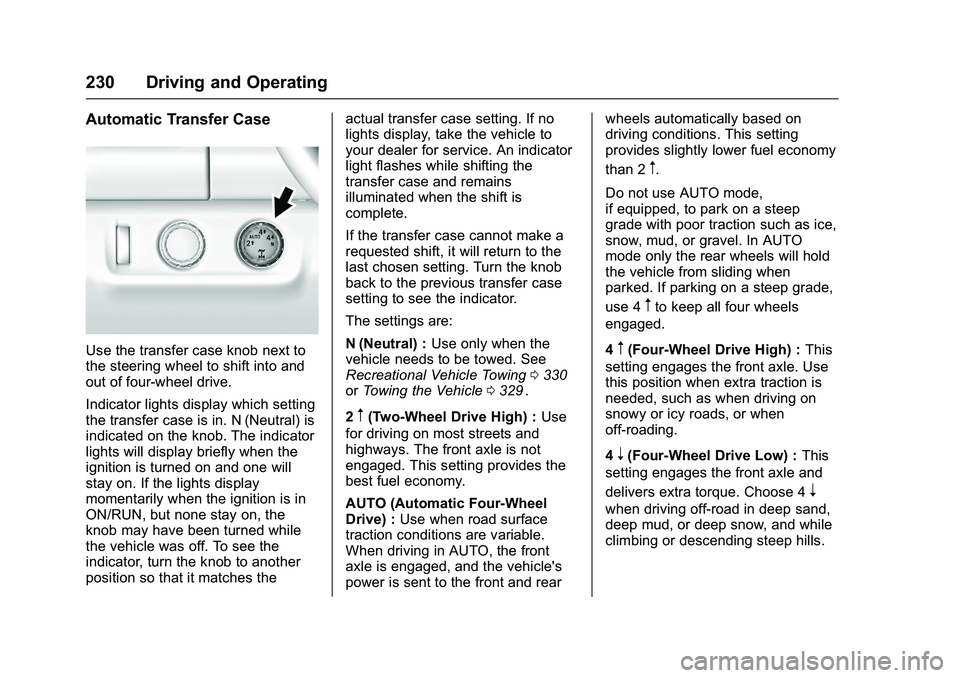
Automatic Transfer Case
Use the transfer case knob next to
the steering wheel to shift into and
out of four-wheel drive.
Indicator lights display which setting
the transfer case is in. N (Neutral) is
indicated on the knob. The indicator
lights will display briefly when the
ignition is turned on and one will
stay on. If the lights display
momentarily when the ignition is in
ON/RUN, but none stay on, the
knob may have been turned while
the vehicle was off. To see the
indicator, turn the knob to another
position so that it matches theactual transfer case setting. If no
lights display, take the vehicle to
your dealer for service. An indicator
light flashes while shifting the
transfer case and remains
illuminated when the shift is
complete.
If the transfer case cannot make a
requested shift, it will return to the
last chosen setting. Turn the knob
back to the previous transfer case
setting to see the indicator.
The settings are:
N (Neutral) :
Use only when the
vehicle needs to be towed. See
Recreational Vehicle Towing 0330
iior Towing the Vehicle 0329ii.
2
m(Two-Wheel Drive High) : Use
for driving on most streets and
highways. The front axle is not
engaged. This setting provides the
best fuel economy.
AUTO (Automatic Four-Wheel
Drive) : Use when road surface
traction conditions are variable.
When driving in AUTO, the front
axle is engaged, and the vehicle's
power is sent to the front and rear wheels automatically based on
driving conditions. This setting
provides slightly lower fuel economy
than 2
m.
Do not use AUTO mode,
if equipped, to park on a steep
grade with poor traction such as ice,
snow, mud, or gravel. In AUTO
mode only the rear wheels will hold
the vehicle from sliding when
parked. If parking on a steep grade,
use 4
mto keep all four wheels
engaged.
4
m(Four-Wheel Drive High) : This
setting engages the front axle. Use
this position when extra traction is
needed, such as when driving on
snowy or icy roads, or when
off-roading.
4
n(Four-Wheel Drive Low) : This
setting engages the front axle and
delivers extra torque. Choose 4
n
when driving off-road in deep sand,
deep mud, or deep snow, and while
climbing or descending steep hills.
Page 236 of 396
Chevrolet Colorado Owner Manual (GMNA-Localizing-U.S/Canada/Mexico-
9159327) - 2016 - crc - 8/28/15
Driving and Operating 235
During the transition period between
when the driver releases the brake
pedal and starts to accelerate to
drive off on a grade, HSA holds the
braking pressure for a maximum of
two seconds to ensure that there is
no rolling. The brakes will
automatically release when the
accelerator pedal is applied within
the two-second window. It will not
activate if the vehicle is in a drive
gear and facing downhill, or if the
vehicle is facing uphill and in
R (Reverse).Ride Control Systems
Traction Control/
Electronic Stability
Control
System Operation
The vehicle has a Traction Control
System (TCS) and StabiliTrak®, an
electronic stability control system.
These systems help limit wheel slip
and assist the driver in maintaining
control, especially on slippery road
conditions.
TCS activates if it senses that any
of the drive wheels are spinning or
beginning to lose traction. When this
happens, TCS applies the brakes to
the spinning wheels and reduces
engine power to limit wheel spin.
StabiliTrak activates when the
vehicle senses a difference between
the intended path and the direction
the vehicle is actually traveling.
StabiliTrak selectively applies
braking pressure to any one of the vehicle wheel brakes to assist the
driver in keeping the vehicle on the
intended path.
If cruise control is being used and
traction control or StabiliTrak begins
to limit wheel spin, cruise control will
disengage. Cruise control may be
turned back on when road
conditions allow.
Both systems come on
automatically when the vehicle is
started and begins to move. The
systems may be heard or felt while
they are operating or while
performing diagnostic checks. This
is normal and does not mean there
is a problem with the vehicle.
It is recommended to leave both
systems on for normal driving
conditions, but it may be necessary
to turn TCS off if the vehicle gets
stuck in sand, mud, ice, or snow.
See
If the Vehicle Is Stuck 0204
iiand “Turning the Systems Off and
On” later in this section.
When the transfer case (if equipped)
is in Four-Wheel Drive Low, the
stability system is automatically
disabled, and
gcomes on in the
Page 250 of 396
Chevrolet Colorado Owner Manual (GMNA-Localizing-U.S/Canada/Mexico-
9159327) - 2016 - crc - 8/28/15
Driving and Operating 249
Trailer Towing
General Towing
Information
Only use towing equipment that has
been designed for the vehicle.
Contact your dealer or trailering
dealer for assistance with preparing
the vehicle for towing a trailer. Read
the entire section before towing a
trailer.
For towing a disabled vehicle, see
Towing the Vehicle0329
ii. For
towing the vehicle behind another
vehicle such as a motor home, see
Recreational Vehicle Towing 0330
ii.
Driving Characteristics
and Towing Tips
Driving with a Trailer
When towing a trailer:
.
Become familiar with the state
and local laws that apply to
trailer towing. .
Do not tow a trailer during the
first 800 km (500 mi) to prevent
damage to the engine, axle,
or other parts.
. Then during the first 800 km
(500 mi) of trailer towing, do not
drive over 80 km/h (50 mph) and
do not make starts at full throttle.
. Vehicles can tow in D (Drive).
Shift the transmission to a lower
gear if the transmission shifts
too often under heavy loads and/
or hilly conditions.
. If equipped with 4WD, see
Four-Wheel Drive 0226
iibefore
pulling a trailer.
{Warning
When towing a trailer, exhaust
gases may collect at the rear of
the vehicle and enter if the
liftgate, trunk/hatch, or rear-most
window is open.
(Continued)
Warning (Continued)
When towing a trailer:
. Do not drive with the
liftgate, trunk/hatch,
or rear-most window open.
. Fully open the air outlets on
or under the instrument
panel.
. Also adjust the climate
control system to a setting
that brings in only outside
air. See “Climate Control
Systems” in the Index.
For more information about
carbon monoxide, see Engine
Exhaust 0219
ii.
Towing a trailer requires a certain
amount of experience. The
combination you are driving is
longer and not as responsive as the
vehicle itself. Get acquainted with
the handling and braking of the rig
before setting out for the open road.
Page 259 of 396
Chevrolet Colorado Owner Manual (GMNA-Localizing-U.S/Canada/Mexico-
9159327) - 2016 - crc - 8/28/15
258 Vehicle Care
Vehicle Care
General Information
General Information . . . . . . . . . . 259
California Proposition65 Warning . . . . . . . . . . . . . . . . . 259
California Perchlorate Materials Requirements . . . . . 259
Accessories and Modifications . . . . . . . . . . . . . . . . 259
Vehicle Checks
Doing Your OwnService Work . . . . . . . . . . . . . . . 260
Hood . . . . . . . . . . . . . . . . . . . . . . . . . 261
Engine Compartment Overview . . . . . . . . . . . . . . . . . . . . 262
Engine Oil . . . . . . . . . . . . . . . . . . . . 265
Engine Oil Life System . . . . . . . 267
Automatic Transmission Fluid . . . . . . . . . . . . . . . . . . . . . . . . 268
Manual Transmission Fluid . . . 269
Hydraulic Clutch . . . . . . . . . . . . . . 269
Engine Air Cleaner/Filter . . . . . . 269
Cooling System . . . . . . . . . . . . . . 271
Engine Coolant . . . . . . . . . . . . . . . 272
Engine Overheating . . . . . . . . . . 274
Engine Fan . . . . . . . . . . . . . . . . . . . 276
Washer Fluid . . . . . . . . . . . . . . . . . 276
Brakes . . . . . . . . . . . . . . . . . . . . . . . 277 Brake Fluid . . . . . . . . . . . . . . . . . . . 278
Battery - North America . . . . . . 279
Four-Wheel Drive . . . . . . . . . . . . . 279
Front Axle . . . . . . . . . . . . . . . . . . . . 280
Rear Axle . . . . . . . . . . . . . . . . . . . . 280
Starter Switch Check . . . . . . . . . 281
Automatic Transmission Shift
Lock Control Function
Check . . . . . . . . . . . . . . . . . . . . . . . 282
Ignition Transmission Lock Check . . . . . . . . . . . . . . . . . . . . . . . 282
Park Brake and P (Park) Mechanism Check . . . . . . . . . . 282
Wiper Blade Replacement . . . . 283
Headlamp Aiming
Headlamp Aiming . . . . . . . . . . . . 284
Bulb Replacement
Bulb Replacement . . . . . . . . . . . . 284
Halogen Bulbs . . . . . . . . . . . . . . . . 284
Headlamps, Front Turn Signal, Sidemarker, and Parking
Lamps . . . . . . . . . . . . . . . . . . . . . . 284
Taillamps, Turn Signal, Stoplamps, and Back-Up
Lamps . . . . . . . . . . . . . . . . . . . . . . 285
Center High-Mounted Stoplamp (CHMSL) and
Cargo Lamp . . . . . . . . . . . . . . . . . 286
Replacement Bulbs . . . . . . . . . . . 286
Electrical System
Electrical System Overload . . . 287
Fuses . . . . . . . . . . . . . . . . . . . . . . . . 287
Engine Compartment Fuse Block . . . . . . . . . . . . . . . . . . . . . . . . 288
Instrument Panel Fuse
Block . . . . . . . . . . . . . . . . . . . . . . . . 292
Wheels and Tires
Tires . . . . . . . . . . . . . . . . . . . . . . . . . . 295
All-Season Tires . . . . . . . . . . . . . . 296
Winter Tires . . . . . . . . . . . . . . . . . . 296
All-Terrain Tires . . . . . . . . . . . . . . . 297
Tire Sidewall Labeling . . . . . . . . 297
Tire Designations . . . . . . . . . . . . . 299
Tire Terminology andDefinitions . . . . . . . . . . . . . . . . . . 300
Tire Pressure . . . . . . . . . . . . . . . . . 302
Tire Pressure Monitor
System . . . . . . . . . . . . . . . . . . . . . . 303
Tire Pressure Monitor Operation . . . . . . . . . . . . . . . . . . . 304
Tire Inspection . . . . . . . . . . . . . . . . 307
Tire Rotation . . . . . . . . . . . . . . . . . 308
When It Is Time for New Tires . . . . . . . . . . . . . . . . . . . . . . . . 309
Buying New Tires . . . . . . . . . . . . . 310
Different Size Tires and Wheels . . . . . . . . . . . . . . . . . . . . . . 311
Uniform Tire Quality Grading . . . . . . . . . . . . . . . . . . . . . 312
Page 280 of 396
Chevrolet Colorado Owner Manual (GMNA-Localizing-U.S/Canada/Mexico-
9159327) - 2016 - crc - 8/28/15
Vehicle Care 279
Caution
If brake fluid is spilled on the
vehicle's painted surfaces, the
paint finish can be damaged.
Immediately wash off any painted
surface.
Battery - North America
For diesel engine vehicles, see
“Battery”in the Duramax diesel
supplement.
The original equipment battery is
maintenance free. Do not remove
the cap and do not add fluid.
Refer to the replacement number
shown on the original battery label
when a new battery is needed. See
Engine Compartment Overview
0 262
iifor battery location.
{Warning
WARNING: Battery posts,
terminals, and related
accessories contain lead and lead
(Continued)
Warning (Continued)
compounds, chemicals known to
the State of California to cause
cancer and birth defects or other
reproductive harm. Batteries also
contain other chemicals known to
the State of California to cause
cancer.WASH HANDS AFTER
HANDLING. SeeCalifornia
Proposition 65 Warning 0259
ii.
Vehicle Storage
{Warning
Batteries have acid that can burn
you and gas that can explode.
You can be badly hurt if you are
not careful. See Jump Starting -
North America 0327
iifor tips on
working around a battery without
getting hurt.
Infrequent Usage: Remove the
black, negative (−) cable from the
battery to keep the battery from
running down. Extended Storage: Remove the
black, negative (−) cable from the
battery or use a battery trickle
charger.
Four-Wheel Drive
Transfer Case
When to Check Lubricant
Refer to
Maintenance Schedule
0 344
iito determine when to check
the lubricant.
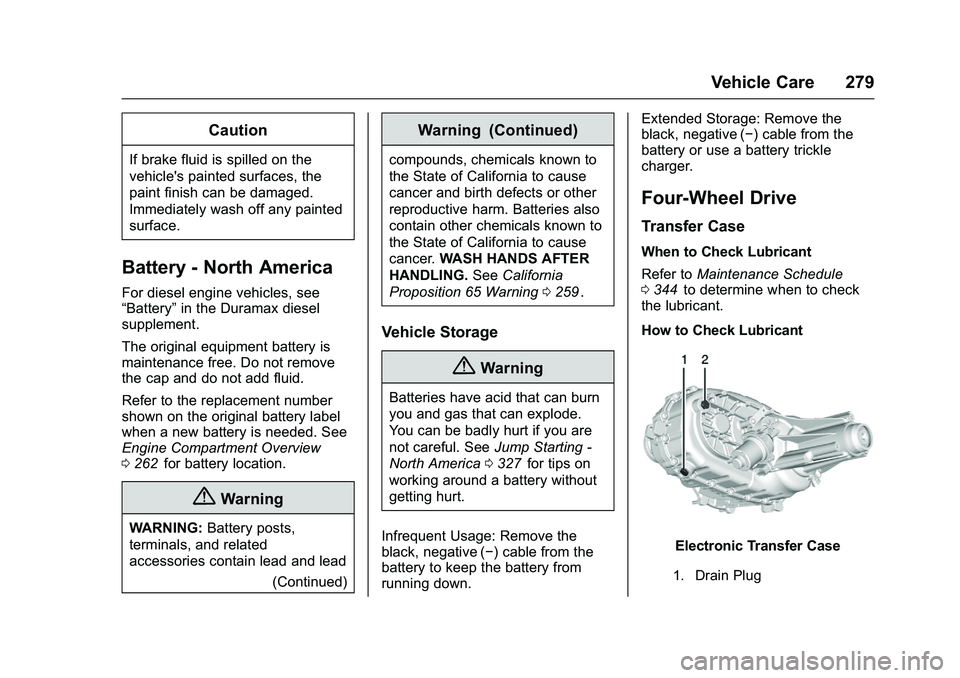
How to Check Lubricant
Electronic Transfer Case
1. Drain Plug
Page 307 of 396
Chevrolet Colorado Owner Manual (GMNA-Localizing-U.S/Canada/Mexico-
9159327) - 2016 - crc - 8/28/15
306 Vehicle Care
.The TPMS sensor matching
process was not done or not
completed successfully after
rotating the tires. The
malfunction light and the DIC
message should go off after
successfully completing the
sensor matching process. See
“TPMS Sensor Matching
Process” later in this section.
. One or more TPMS sensors are
missing or damaged. The
malfunction light and the DIC
message should go off when the
TPMS sensors are installed and
the sensor matching process is
performed successfully. See
your dealer for service.
. Replacement tires or wheels do
not match the original equipment
tires or wheels. Tires and wheels
other than those recommended
could prevent the TPMS from
functioning properly. See Buying
New Tires 0310
ii. .
Operating electronic devices or
being near facilities using radio
wave frequencies similar to the
TPMS could cause the TPMS
sensors to malfunction.
If the TPMS is not functioning
properly, it cannot detect or signal a
low tire condition. See your dealer
for service if the TPMS malfunction
light and DIC message come on
and stay on.
TPMS Sensor Matching
Process
Each TPMS sensor has a unique
identification code. The identification
code needs to be matched to a new
tire/wheel position after rotating the
vehicle’s tires or replacing one or
more of the TPMS sensors. Also,
the TPMS sensor matching process
should be performed after replacing
a spare tire with a road tire
containing the TPMS sensor. The
malfunction light and the DIC
message should go off at the next
ignition cycle. The sensors are
matched to the tire/wheel positions,
using a TPMS relearn tool, in the
following order: driver side front tire, passenger side front tire, passenger
side rear tire, and driver side rear.
See your dealer for service or to
purchase a relearn tool. A TPMS
relearn tool can also be purchased.
See Tire Pressure Monitor Sensor
Activation Tool at
www.gmtoolsandequipment.com or
call 1-800-GM TOOLS
(1-800-468-6657).
There are two minutes to match the
first tire/wheel position, and
five minutes overall to match all four
tire/wheel positions. If it takes
longer, the matching process stops
and must be restarted.
The TPMS sensor matching
process is:
1. Set the parking brake.
2. Turn the ignition to ON/RUN with the engine off.
3. If the vehicle has an uplevel DIC, make sure the Tire
Pressure info page option is
turned on. The info pages on
the DIC can be turned on and
off through the Settings menu.
Page 308 of 396

Chevrolet Colorado Owner Manual (GMNA-Localizing-U.S/Canada/Mexico-
9159327) - 2016 - crc - 8/28/15
Vehicle Care 307
SeeDriver Information Center
(DIC) (Base Level) 0123iior
Driver Information Center (DIC)
(Uplevel) 0126
ii.
4. If the vehicle has an uplevel DIC, use the DIC controls on
the right side of the steering
wheel to scroll to the Tire
Pressure screen under the DIC
info page.
If the vehicle has a base level
DIC, use the MENU button to
select the Vehicle Information
menu in the DIC. Use the
thumbwheel to scroll to the Tire
Pressure Menu item screen.
5. If the vehicle has an uplevel DIC, press and hold the
V
(Set/Reset) button located in
the center of the DIC controls.
If the vehicle has a base level
DIC, press the SET/CLR button
to begin the sensor matching
process. A message asking if the
process should begin should
appear. Press the SET/CLR
button again to confirm the
selection.
The horn sounds twice to
signal the receiver is in relearn
mode and the TIRE
LEARNING ACTIVE message
displays on the DIC screen.
6. Start with the driver side front tire.
7. Place the relearn tool against the tire sidewall, near the valve
stem. Then press the button to
activate the TPMS sensor.
A horn chirp confirms that the
sensor identification code has
been matched to this tire and
wheel position.
8. Proceed to the passenger side front tire, and repeat the
procedure in Step 7.
9. Proceed to the passenger side rear tire, and repeat the
procedure in Step 7. 10. Proceed to the driver side rear
tire, and repeat the procedure
in Step 7. The horn sounds two
times to indicate the sensor
identification code has been
matched to the driver side rear
tire, and the TPMS sensor
matching process is no longer
active. The TIRE LEARNING
ACTIVE message on the DIC
display screen goes off.
11. Turn the ignition switch to LOCK/OFF.
12. Set all four tires to the recommended air pressure
level as indicated on the Tire
and Loading Information label.Tire Inspection
We recommend that the tires,
including the spare tire, if the
vehicle has one, be inspected
for signs of wear or damage at
least once a month.