cooling CHEVROLET CORVETTE 1964 Owners Manual
[x] Cancel search | Manufacturer: CHEVROLET, Model Year: 1964, Model line: CORVETTE, Model: CHEVROLET CORVETTE 1964Pages: 52, PDF Size: 11.2 MB
Page 22 of 52
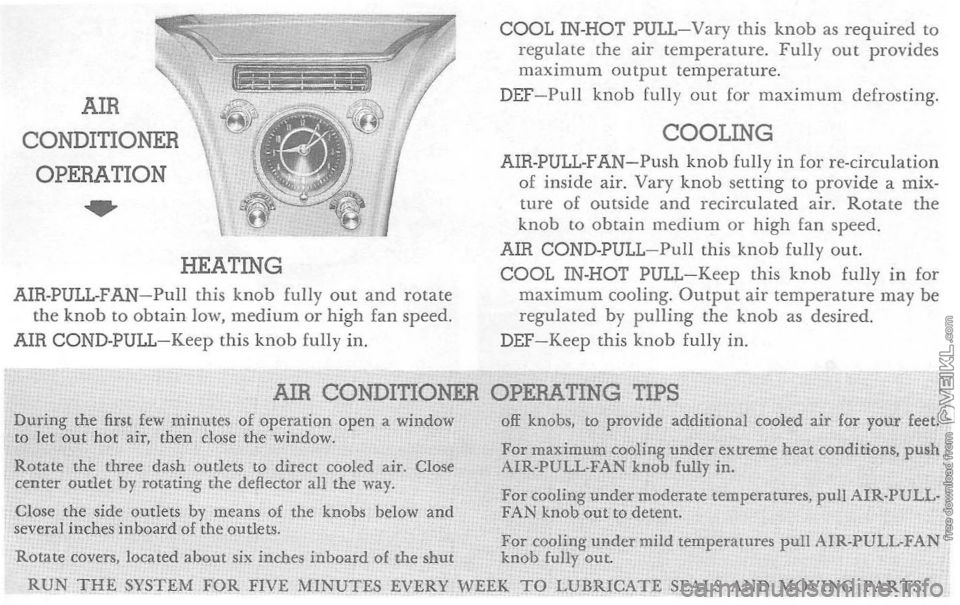
AIR
CONDITIONER OPERATION
..
HEATING
AIR-PULL -FAN-Pull this knob fully out and rotate the knob to obtain low, medium or high fan speed.
AIR COND- PULL -Keep this knob fully in.
COOL IN-HOT PULL-Vary this knob as required to regulate the air temperature. Fully out provides maximum output temperature.
DEF-Pull knob fully out for maximum defrosting.
COOLING AIR-PULL-FAN-Push knob fully in for re-circulation of inside air. Vary knob setting to provide a mixture of outside and recirculated air. Rotate the knob to obtain medium or high fan speed.
AIR COND-PULL-Pull this knob fully out. COOL IN -HOT PULL-Keep this knob fully in for maximum cooling. Output air temperature may be regulated b y pulling the knob as desired. DEF-Keep this knob fully in.
AIR CONDITIONER OPERATING
TIPS During the first few minutes of operation open a window to Jet out hot air, then close the window.
Rotate the three dash outlets to direct cooled air. Close center outlet by rotating the deflector all the way.
Close the side outlets by means
of the knobs below and several inches inboard of the outlets.
off knobs, to provide additional cooled ai.r for your feet.
For maximum cooling under extreme heat conditions, push AIR-PULL-FAN knob fully in.
For cooling under moderate temperatures, pull AIR·PULL· FAN knob out to detent.
For cooling under mild temperatures pull AIR·PULL·FAN Rotate covers, located about six inches inboard of the shut knob fully out.
RUN T!iE SYSTEM FOR FIVE MINUTES EVERY WEEK TO LUBR.JCATE SSALS AND MOVING PARTS.
Page 32 of 52
Cooling System Care
Your C hevrolet engine cooling system is equipped with a 180 0 thermostat and is designed to operate on permanent type
(ethyle n e glycol) anti·freeze. Non· Perm anent type coolants are not recommended since
t hey are not sat isfactory for year around use and may not effect ive ly inhibit corrosio n of the engine cool· ing system when used with the quality of water found in some a reas.
If the a nti·freeze was installed at the factory or if it meets the require ments of Gener a l Motors Standard GIVe 1899-1'v1 whi ch contains adequate corros ion pro
t ec tion, i t may be left in the cooling system for 24 months or 24,000 miles, which eve r occurs first.
C h eck th e
coolant leve l regularly and add water or permanent anti-f reeze as required to maintain supply tank h alf fulL Concentration of coolant should b e to 0 0 F . or b e low to insure sufficient corros ion protection.
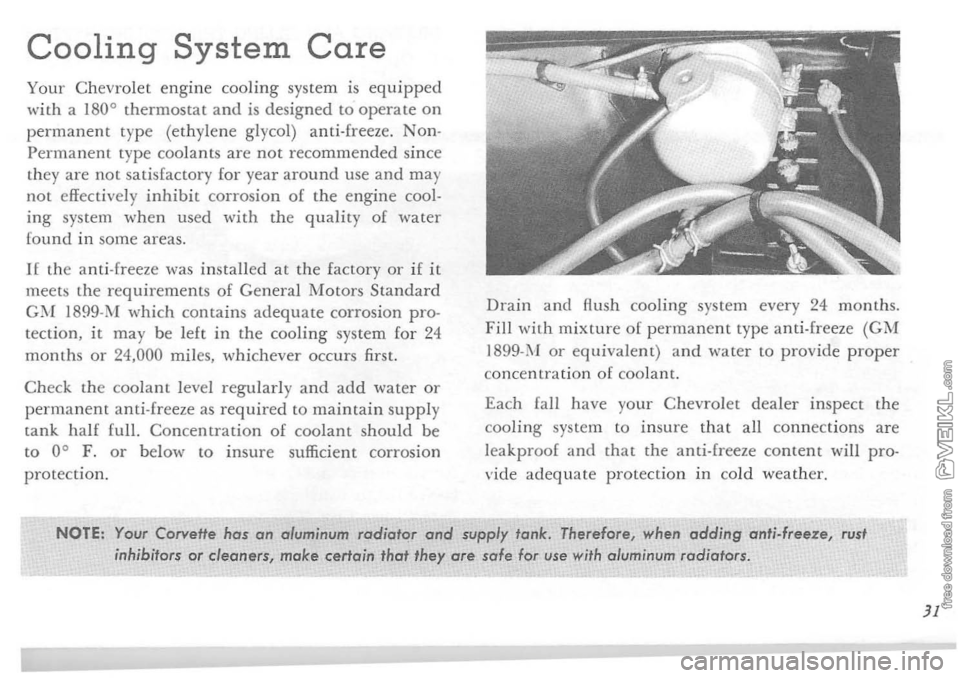
Drain and Rush cooling system ever y 24 months. F ill with mixture o f p erma n ent type anti- fr eeze (G1\1 1899-1\'[ or equivalent) and wa te r to provide proper concentrati o n of coolant.
Each Call have your C h evrolet dealer inspect the
cooling syst e m to insure that all connections are leakproof and that the anti-freeze content will pro
vide adequate protection in cold weather.
NOTE: Your Corvette has on aluminum radiator and supply tank. Therefore, when adding anti-freeze, rust inhibitors or cleaners, make ceria in that they are sale lor use with aluminum radiators .
JI
Page 33 of 52
Check the front of the radiator core occasionally for
insects and leaves. Flush them out from the back
sid e of the radiator using a water hose and city water
pressure.
RADIATOR CAP
The Corvette cooling system is equipped with a 13 lb. pressure cap. To remove the cap, carefully turn ~ turn to allow exces s system pressure to escape, then turn the cap all the way off. If the engine is
ov erh eated, wait for several minutes before removing
the
radiator cap.
Tire
Care
To enjoy maximum service from your tires, keep
them inflated to the pressures recommended on
page
46.
Regular Corvette tires should not be used for ex
treme vehicle operation. Special purpose tires are
available,
if needed, from major tire manufacturers. DRAINING
AND FILLING
THE COOLING SYSTEM
I. Open the drain cock at the bottom of the
radiator.
2. Remove the drain plug located on each side of the engine block just above the oil pan and be· hind the spark plug wire shields. 3. Replace the engine drain plugs and close the
radiator drain cock before refilling the radiator.
4.
To refill , add coolant until supply tank remains
one -half full. Then start engine and add coolant as necessary to maintain normal one-half- full level in supply tank. Recheck when cool and fill to
normal level.
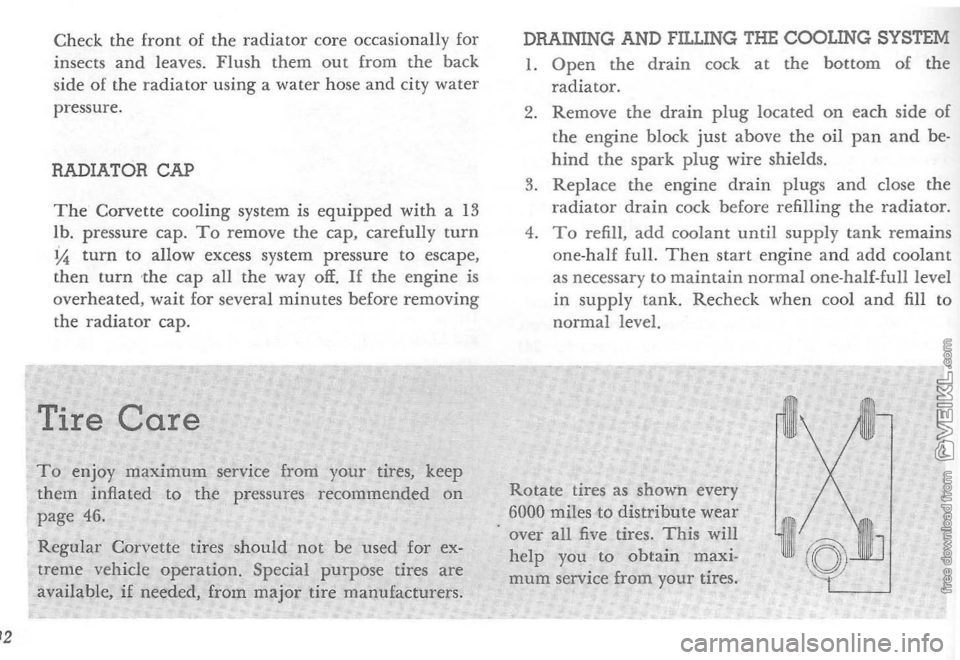
Rotate tires
as shown every
6000 miles to distribute wear
. over all five tires. This will help you to obtain maxi
mum service from your tires.
Page 44 of 52
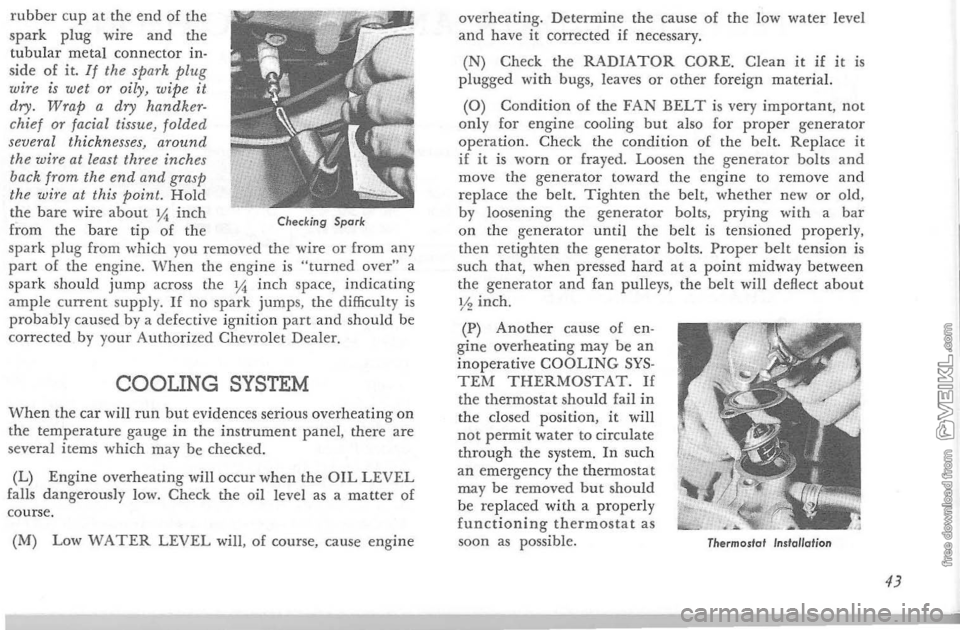
rubber cup at the end of the
spark plug wire and the tubular metal connector inside of it. If the spark plug wire is wet or oily, wipe it
dry . Wrap a dry handker·
chief or facial tissue, folded
several thicknesses, around
the wire at least three inches
back from the end and grasp
the wire at this point. Hold the bare wire about Yi inch from the bare tip of the Checking Spork
spark plug fro m whidl you removed the wire or from any part of the engine. When the engine is "turned over" a
spark should jump ac ross the y.;, inch space , indicating ample current supply. If no spa rk jumps, th e d ifficult y is probably caused b y a defective ignition part and should be
cor rect ed b y you r Authorized Chevrolet Dealer.
COOUNG SYSTEM
'When the car will run but evidences serious overheating on the temp erature gauge in the instrument panel, there are
seve r al i tem s which may be check ed.
(L)
Engine overheating wjll occur when the OIL LEVEL falls dangerousl y l ow. Check the oil lev e l as a matter of
course.
(M) Low
WATER LEVEL will, of course, cause engi ne over
heating.
De termine the cause of the low water level and have it correc ted if necessary. (N) Check the RADIATOR CORE. Clean it if it is plugged with bugs, leaves or other foreign material.
(0) Condition o f the FAN BELT is very important, not only for engine cooling but also for proper generator operation. Check the condition of the belt. Replace it if i t is wor n or frayed. Loosen the generator bolts and move the generator toward the engine to remove and replace the belt. Tighten the belt, whethe r n ew or old ,
by loosening the generator bolts, prying with a bar on the generator until the belt is tensioned properly,
then re t ighten the generator bolts. Proper belt tension is
such that, when pressed hard at a point midway between
th e ge nerato r and fan pulleys, the belt will deflect about ~4 inch.
(P) Another ca use of en
gine overheating ma y be an inoperative COOLING SYSTEM THERMOSTAT. II the thermostat sh ould fail in the closed position, it will not permit wa ter to circulate through the system. In such an emergency the thermostat may be removed but should be replaced with a properly functioning thermostat as
soon as possible .
Thermostot Instal/ot;on
43
Page 47 of 52
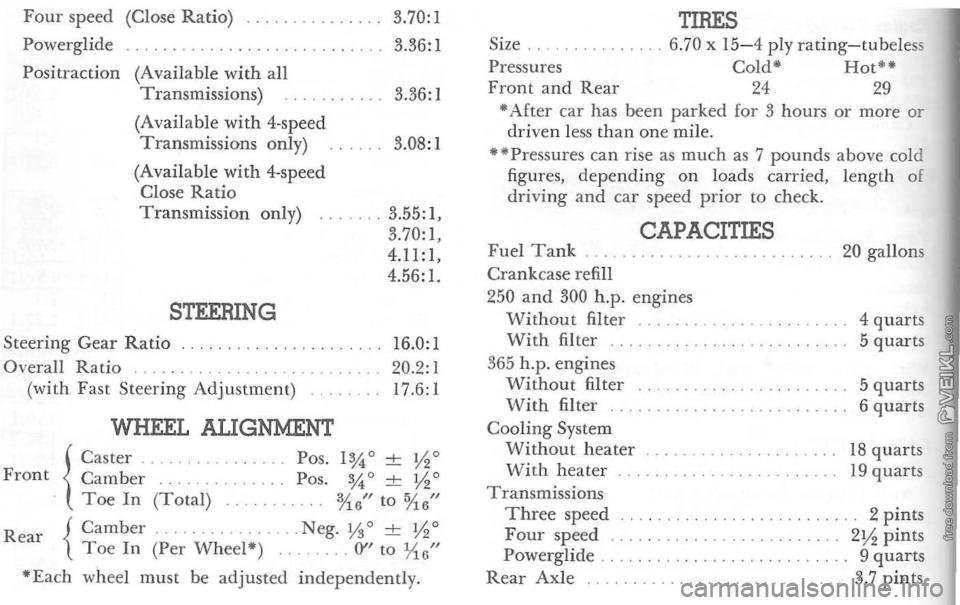
Four speed (Close Ratio)
Powerglide Positraction (Available
with all
Transmissions)
(Available
with 4-speed
Transmissions only)
(Available
with 4- speed
Close Ratio Transmission only)
STEERING
Steering Gear Ratio Overall Ratio (with Fast Steering Adjustment)
WHEEL ALIGNMENT
3.70:1
3.36:1
3.36:1
3.08:1
3.55:1,
3.70:1,
4.11:1, 4.56:1.
16.0:1
20.2:1 17.6: I
{ Caster
.
Front Camber
Toe In (Total)
Rear
{Camber. . . . Toe In (Per Wheel")
Pos. 1%0 ± y.o Pas. %' ± y.' %6" to %6" . Neg. y.0 ± y.o (y'to JAG'" "Each whee l must be adjusted independently . Size
Pressures
Front and Rear
TIRES 6.70 x 15-4 ply rating-tubeless Cold" Hot" 24 29 • After car has been parked for 3 hours or mOTe or driven less than one mile. ··Pressures can rise as much as 7 pounds above cold
figures, depending on loads carried, length of
driving and car speed prior to check.
Fuel Tank Crankcase refill
CAPACITIES
250 and 300 h.p. engines Without filter With filter
365 h.p_ engines Without filter With filter Cooling System Without heater With heater Transmissions Three speed Four speed
Powerglide
Rear Axle
20 gallons
4
quarts 5 quarts
5 quarts 6 quarts
18 quarts 19 quarts
2 pints 2Y. pints 9 quarts 3.7 pints
Page 49 of 52
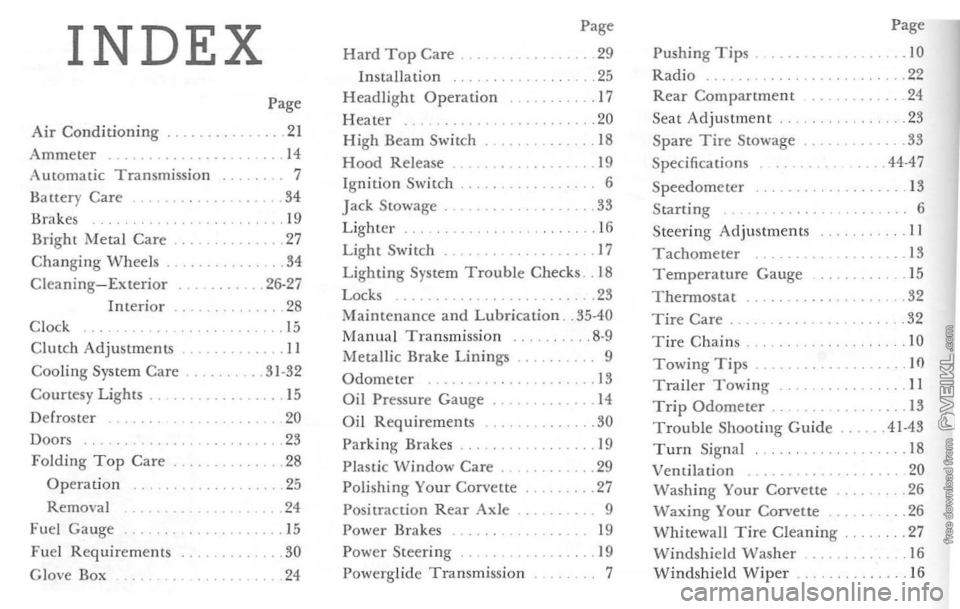
INDEX Page
Page Hard Top Care
. 29 Pushing Tips. .10 Installation .25 Radio .22
Headlight Operation .17 Rear Compartment 24
Page
Heater .20
Seat
Adjustment .23
Air
Conditioning . .21 High Beam Switch .... 18 Spare Tire Stowage .
33
Ammeter 14 Hood Release . 19 Specificat ions .44-47 Automatic Transmission 7
Ignition Switch . 6 Speedometer 13
Batter y Care .. 34
Jack Stowage . .... 33 Starting 6 Brakes . 19
Lighter 16 Steering Adjustments II Bright Metal Care . .... 27 Light Switch . .. 17 Tachometer .13 Changing
Wheels .34 Lighting System Trouble Checks. 18 Temperature Gauge . 15 Cleaning-Exterior .26-27 Locks . .... 23 T h ermostac .32 Interior
.28 Maintenance and Lubrication . .
35-40 Tire Care .
32
C l ock . 15
Manual Transmission .8-9 10 Tire Chains Cililch Adjustments . .... 11 Metallic Brake Linings 9
. . 10 Towing Tips . Cooling System Care . . 31-32 Odometer 13 Trailer Towing II Courtesy Lights. ... 15 Oil Pressure Gauge. . .. 14 Trip Odometer . .13 D e f
roster
20 Oil Requirements .... 30 Troubl e Shooting Guide .41·43
Doors ... 23 Parking Brakes 19 Turn Signal .18 Folding Top Care .... 28
Plastic \oVindow Care . .. 29 Ventilation 20 Operation ... 25 Polishing Your Corvette . .27 Washing Your Corvette .
26
Removal ... 24 Positraction Rear Axle. Waxing Your Corvette .26
Fuel Gauge ... 15 Power Brakes 19 Whitewall Tire Cleaning .27
Fuel Requirements . 30 Power
Steering . . 19 Windshield Washer .
. 16 G love Box
.24 Powerglide Transmission
7 Windshield Wiper 16