key CHEVROLET CORVETTE 1964 Owners Manual
[x] Cancel search | Manufacturer: CHEVROLET, Model Year: 1964, Model line: CORVETTE, Model: CHEVROLET CORVETTE 1964Pages: 52, PDF Size: 11.2 MB
Page 20 of 52
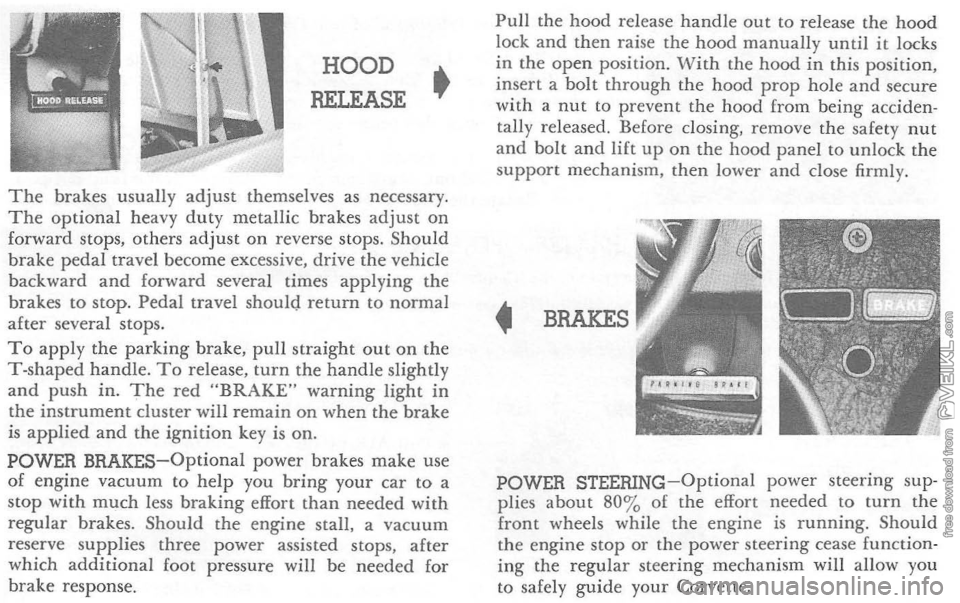
HOOD
RELEASE •
The brakes usually adjust themselves as necessary. The optional heavy duty metallic brakes adjust on forward stops, others adjust on reverse stops. Should
brake pedal travel become excessive, drive the vehicle
back ward
and forward several times applying the
brakes to stop. Pedal travel should return to normal after several stops. To apply the parking brake, pull straight out on the T-shaped handle. To release, turn the handle slightly and push in. The red "BRAKE" warning light in the instrument cluster will remain on when the brake is applied and the ignition key is on. POWER BRAKES-Optional power brakes make use of engine vacuum to help you bring your car to a stop with much less braking effort than needed with regular brakes. Should the engine stall. a vacuum
reserve supplies three power assisted stops, after
which additional foot pressure will be needed for
brake response.
Pull the hood release handle out to release the hood lock and then raise the hood manually until it locks
in the open position . With the hood in this position, insert a bolt through the hood prop hole and secure
with a nut to prevent the hood from being acciden
tally released. Before closing, remove the safety nut
and bolt and lift up on the hood panel to unlock the
support mechanism . then lower and close firmly.
• BRAKES
POWER STEERING-Optional power steering sup
plies about 80 % of the effort needed to turn the front wheels while the engine is running. Should the engine stop or the power steering cease function ing the regular steering mechanism will allow you
to safely guide your Corvette.
Page 24 of 52
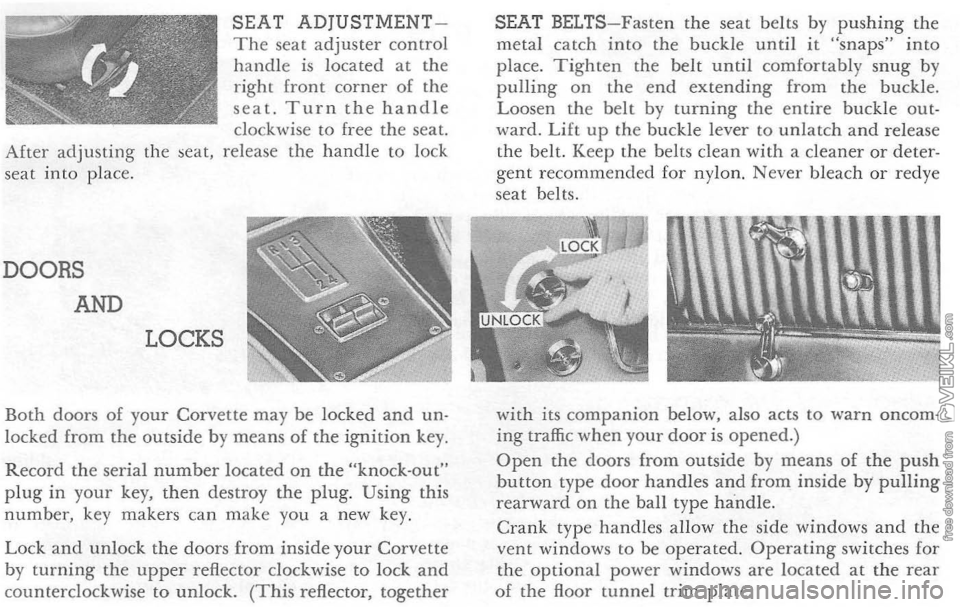
SEAT ADjUSTMENTThe seat adjuster control handle is located at the right front corner of the seat. Turn the handle clockwise to free the seat. After adjusting the seat, release the handle to lock
seat into place.
DOORS
AND
LOCKS
Both doors of your Corvette may be locked and un· locked from the outside by means of the ignition key.
Record the serial number located on the "knock·out" plug in your key, then destroy the plug. Using this number, key makers can make you a new key.
Lock and unlock the doors from inside your Corvette by turning the upper reflector clockwise to lock and counterclockwise to unlock. (This reflector, together
SEAT BELTS-Fasten the seat belts by pushing the metal catch into the buckle until it "snaps" into place. Tighten the belt until comfortably snug by pulling on the end extending from the buckle.
Loosen the belt by turning the entire buckle out· ward. Lift up the buckle lever to unlatch and release
the belt. Keep the belts clean with a cleaner or deter· gent recommended for nylon. Never bleach or redye
seat belts.
w
ith its companion below, also acts to warn oncoming traffic when your door is opened.) Open the doors from outside by means of the push bu tton type door handles and from inside by pulling rearward on the ball type handle .
Crank type handles allow the side windows and the vent windows to be operated. Operating switches for
the optional power windows are located at the rear o f the floor tunnel trim plate.
Page 25 of 52
REAR
COMPARTMENT •
Lock and unlock the glove box door with the igni
tion key. Press and release button to open the door. When open, the door provides a convenient table for cups or glasses. A cutout portion in the glove box
hood forms a convenient assist handle.
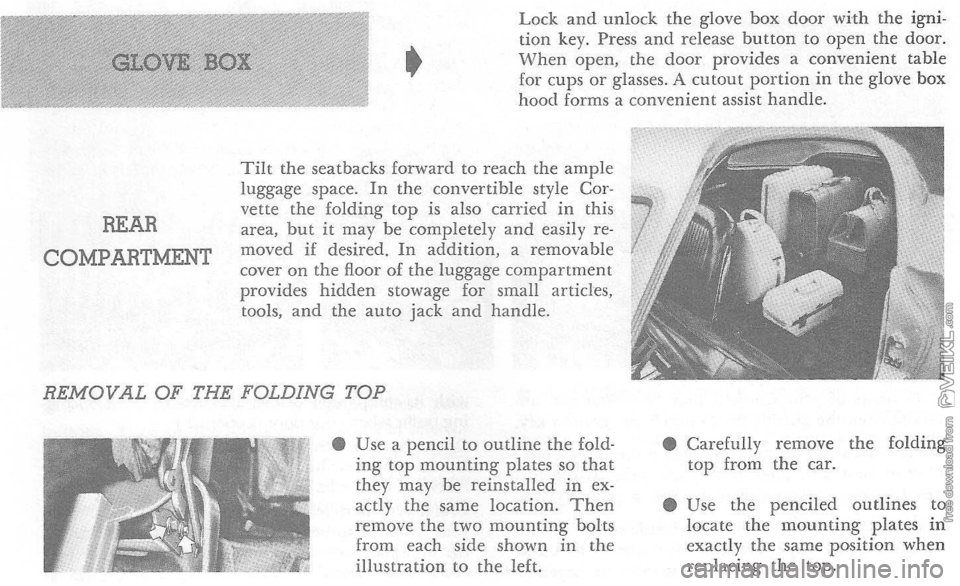
Tilt the seatbacks forward to reach the ample
luggage space_ In the convertible style Cor
vette the folding top is also carried in this
area, but it may be completely and easily removed if desired. In addition, a removable
cover on the floor of the luggage compartment
provides hidden stowage for small articles,
tools,
and the auto jack and handle-
REMOVAL OF THE FOLDING TOP
• Use a pencil to outline the folding top mounting plates so that they may be reinstalled in ex
actly the same location. Then remove the two mounting bolts
from each side shown in the
illustration to the left. •
Carefully remove the folding top from the caL
• Use
the penciled outlines to locate the mounting plates in exactly the same position when replacing the top.
Page 34 of 52
CORVETTE JACK
STOWAGE
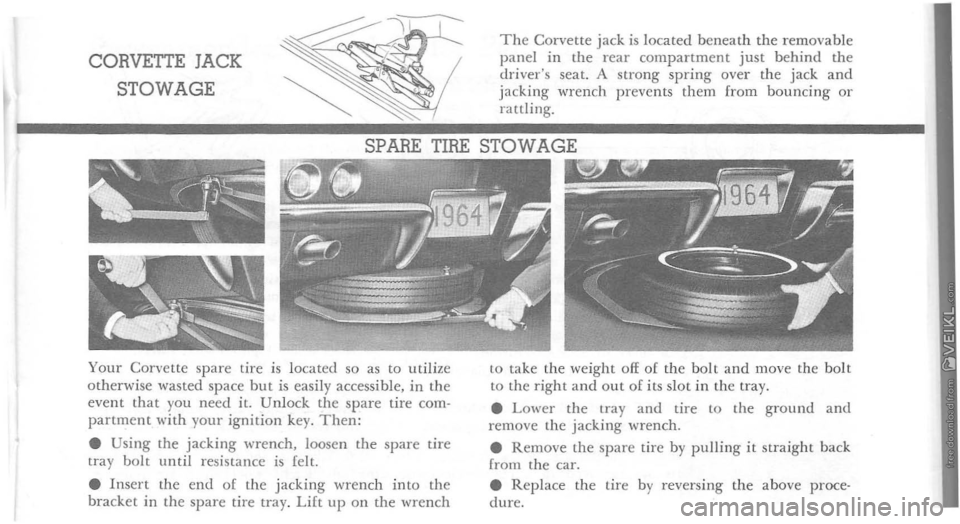
The Corvette jack is located beneath the removable panel in the rear compartment just behind the driver's seat. A strong spring over the jack and jacking ·wrench prevents them from bouncing or rattling.
SPARE TIRE STOWAGE
Your Corvette spare tire is located so as to utilize otherwise wasted space but is easily accessible, in the event that you need it. Unlock the spare tire com· partn:tent with your ignition key. Then: • Using the jacking wrench, loosen the spare tire tTay bolt until resistance is felt.
• Insert the end of the jacking wrench into the bracket in the spare tire tray. Lift up o n the wrench
E.&1~1I,lI;II
to take the weight off of the bolt and move the bol t to the right and out of its slot i n t h e tray.
•
Lower the tray and tire to the ground and remove the jacking wrench .
• Remove the spare tire by pulling it straight back
(rom the car.
• Replace the tire by reversing the above procedure.
Page 43 of 52
(E) If the car will start but sta lls w h e n hot or has a roug h idle, you can sus pect a f aulty IDLE ADJUSTMENT, a malfunctioning AUTOMATIC CHOKE or an extremely
dirty and blocked AIR CLEANER ELEMENT. Clean
your air cleaner element if necessary. If the above Fuel Syste m checks and the checks suggested under the Electr ica l System followi ng do not corre ct the malfunction , i t is recommended that you turTI to your Authorized Chevrolet Dealer for further checks, adjust
ments or repairs.
ELECTRICAL SYSTEM If, when the ignition key is turned to "Star t," the engine
will not turn over, you have good reason to sus pec t elec
trical trouble.
(F) '
Vhen there is
no response at all to attempts to star t
the car , check the obv ious-your AUTOMATIC TRANS· M ISSION SELECTOR LEVER mus t be in Neutral or Park position befor e the engine can be started. Turning
the IGNITION SvVITCH rapidly back and forth several
times will sometimes correct a poor internal switch contact.
(G) The BATTER Y may be discha rged. If so, lights will
be dim and the horn will have a poor tone if it will blow a t
all. Usually a
garage recharge will be nece ssary to return the battery to operation. Occasiona lly, however, a p u sh start and long driv e will recharge the battery .
POOR BATTERY CONNECTIONS may be suspec ted if
th e car has operated prope rly a short time befor e and now not eve n the horn will operate. Check both ends o f both battery cables. If the connections are corroded, a car ma y
som etimes be restore d to operation by removing all cab le
e n ds, scraping all contacting surfaces clean with a pen
knife, and reassembling. If the cables a r e broken, they
must be replaced. The power supply should now b e restored
unless the battery is dead.
(H)
If, however, the lights and horn work properly but
th e starter will still not turn ove r , c heck the STARTER connections. A "click " from the starter soleno id indicates
th a t the wirin g to the starter is properly install ed. If the
wiring seems to be clean and tightly installed, the trouble
is proba bly in the starter itself and sho uld be referred to
your Authorized Chevr olet Dealer.
When the e ngine will "turn ove r " but will not start, [h e
foll owin g items may b e checked along with the Fuel Syst em
Checks listed previous ly.
(I) With a clean dry cloth wipe the ceramic portions o f
t he spark plugs dry. In particul arly damp or rainy weather dampness may be the cause of not starting, espec ially when the e ngin e is cold.
0) C heck the cables
at the top of the distributor and coil as well as eac h spark plug cable for tightness.
(K)
If the car w ill stilI not st art. ch eck for spark at the
spark plugs in th e foll owing manner:
Pull o n e of the spark plug wi res off its spark plug. Insert a
short piece of bare wir e (such as a bobby pin) between the