lock CHEVROLET CORVETTE 1964 Owners Manual
[x] Cancel search | Manufacturer: CHEVROLET, Model Year: 1964, Model line: CORVETTE, Model: CHEVROLET CORVETTE 1964Pages: 52, PDF Size: 11.2 MB
Page 7 of 52
Starting the Engine
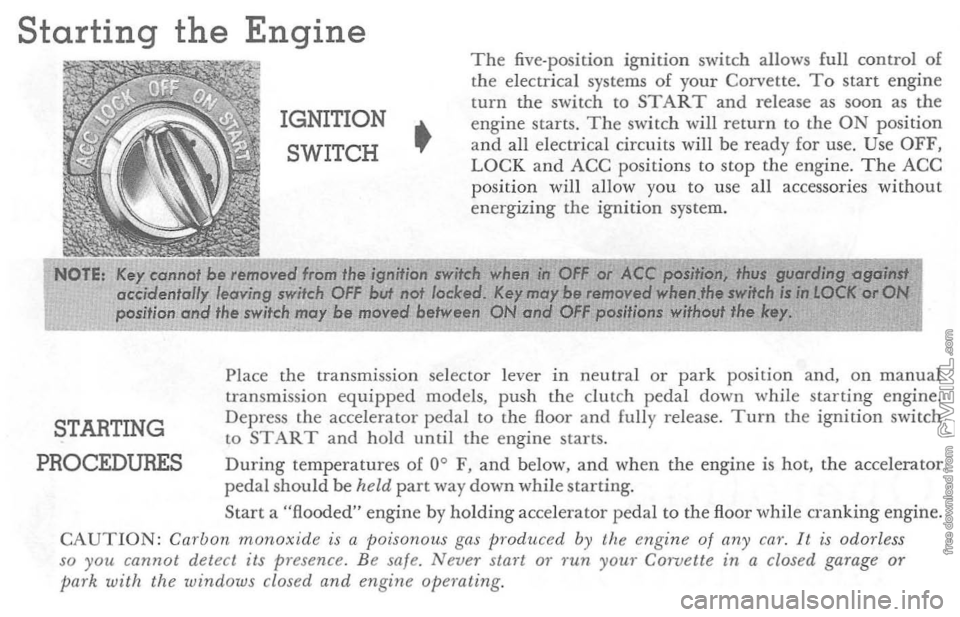
IGNITION SWITCH
•
The five-position ignition switch allows full control of the electrical systems of your Corvette. To start engine turn the switch to START and release as soon as the engine starts. The switch will r eturn to the ON position and all electrical circuits will be ready for use. Use OFF, LOCK and ACC positio ns to stop the engi ne. The ACC position will anow you to use all accessories without e n ergizi ng the ignition system.
NOTE, /(ey cannot
be ,emoved from the ignition ..... itch . ';f;;;.#fi';;'..;;a.;:" i;h~'i4i;C't:;o:N:' accidentally leaving IWifeh OFF but IlOl ladeed. /(fl' 111(" b. nollllOVed 11 position and the switch may be moved between
STARTING
PROCEDURES
Place the transmission selector lever in neutral or park position and, on manual transmission equipped models, push the clutch pedal down while starting engine.
Depress the accelerator pedal to the floor and fully release. Turn the ignition switch to START and hold until the engine starts. During temperatures of 0 ° F, and below, and when the engine is hot, the acce lerator pedal should be held part way down while starting. Start a "flooded" engine by holding accelerator pedal to the floor while o'anking engine. CAUTION: Carbon monoxide is a poisonous gas produced by the engine of any ca?'. It is odorless
so you cannot detect its presence. B e safe. Never Sial"t or run YOW" C01"Velte in a closed garage or park with the windows closed and engine operating.
Page 16 of 52
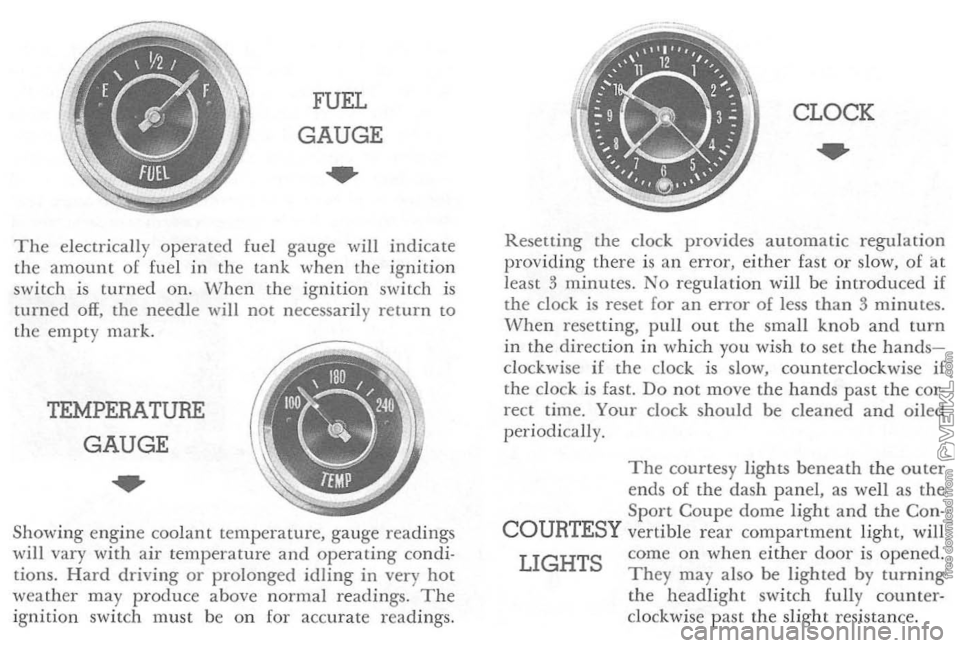
FUEL
GAUGE
..
The ele ctr ically o p erated fuel gauge will indicate
th e amoun t o f fuel in the lan k when th e ig nition
switc h i s turned on. W hen the ignition switch is
turned off, the nee dle will not necessar ily retur n to the em pty mark.
TEMPERATURE
GAUGE
..
Showing engin e coo lant temperature, gauge readings w ill vary with air temp eratur e and operating condi
tions. Hard driving or prolonged idling in very hot
weather may produc e above normal readings. The ignitio n swit ch must be o n [or accur ate r eadings.
CLOCK
..
Resetting the dock provides a utomatic regulat io n
providing ther e is an error, either fast o r slow, of at
lea st 3 minu tes. No regulat ion will be introd uced if
the clock is reset for an error of less than 3 minutes. When resetting, pull out the small knob and turn in the direction in whi ch you wi sh to set the handsclockwise if the clock is slow, counterclockwi se if the clo ck is fast. Do not move the hand s pas t the cor
rect time. Your clock should be cleaned and oiled periodi cally.
The courtesy lights beneath the o u ter
en ds of the dash p a nel, as well as the Sport Coupe dome light and the Con-
COURTESY vertible r ear compartment light, will
LIGHTS come on when eithe r door is opened. They may a lso be lighted by turning the headlight switch fully counterclockwise past the slight resi stan ce.
Page 17 of 52
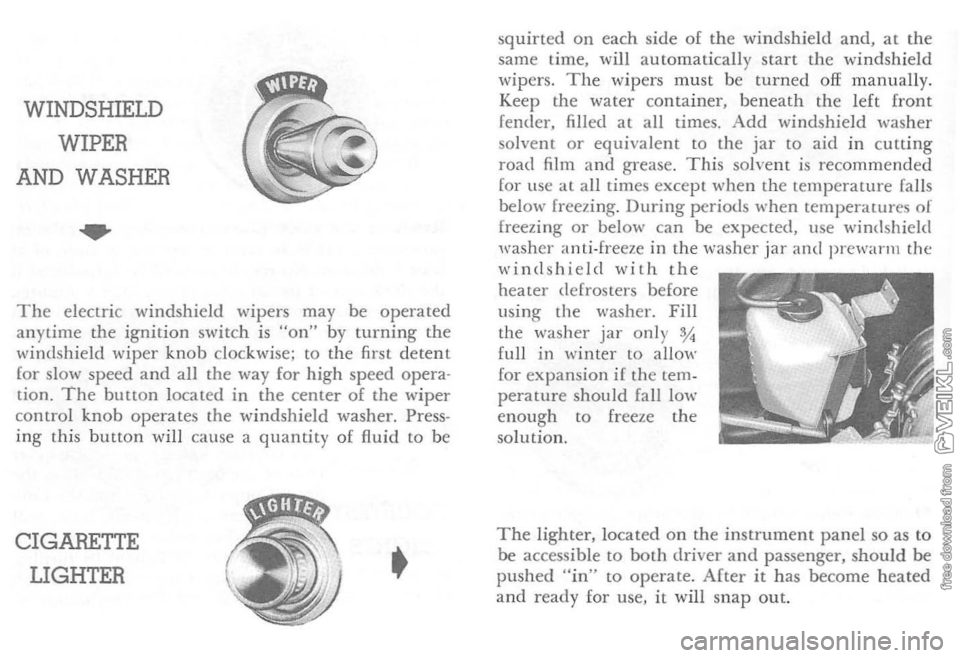
WINDSHIELD
WIPER
AND WASHER
..
The electric windshield wipers may be operated
anytime the ignition switch is "on" by turni ng the
\-vindshield wip er knob clockwise; to the first detent
for slow speed
and all the way for high speed opera
tion. 'The button located in the center of the wiper
contro l knob operates the windshield washer. Press
ing this button will cause a quantity of fluid to be
CIGARETTE
LIGHTER • squ
irted on ea
ch sid e of the windshield and, at the
same time, will autom atically star t the windshi eld
w ipers. The wipers must be turned off manually.
Keep the water container , beneath the l eft front
fender, filled
at all times. Add windshield washer solvent or equ ivalent to the jar to aid in c utting
road film and grease . This so lve nt is recomm ended for lise at all times except when th e temperature falls
below freezing. During periods when temperawres of freezing or below can be expected, use windshield
washer anti-freeze in the washer jar and prewarm the windshield with the heater defrosters before
us ing the washer. Fill
the was her jar on l), %
full in win ter to allow for expa nsion if the temperature should fall low enou gh to freeze the
so lution.
The light e r. located on the instrument panel so as to
be accessible to both dri
ver and passenger, should be pushed "in" to operate. After it has become hea ted and ready for use, it will snap out.
Page 18 of 52
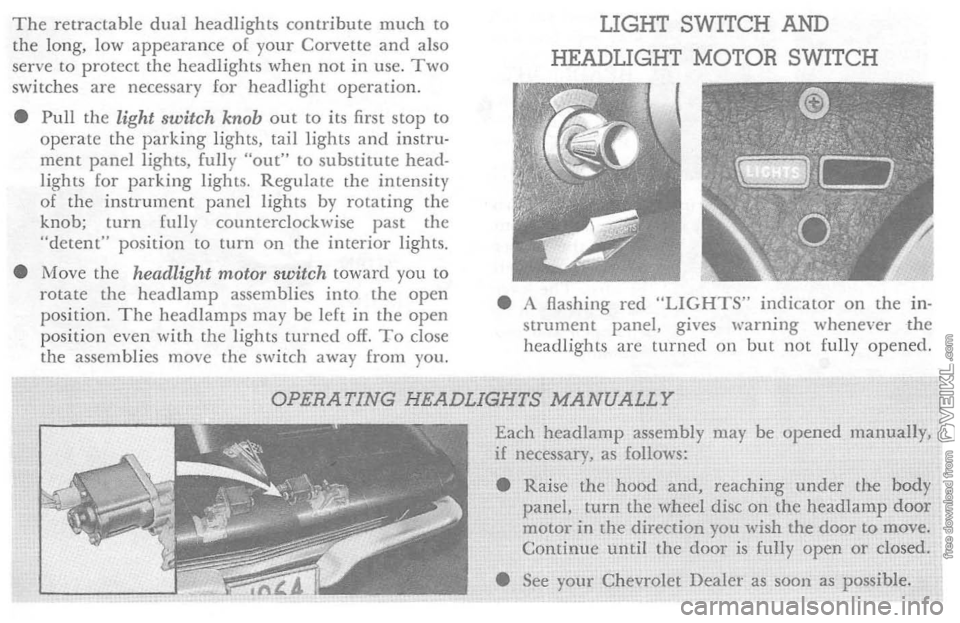
The retractable dual headlights contribute much to the long, low appearance 01 your Corvette and also
serve to protect the headlights when not in use . Two switches are necessary for headlight operation.
• Pull
the light switch knob out to its first stop to operate the parking lights, tail lights and instru· ment panel lights, fully "out" to substitute head·
lights lor parking lights. Regulate th e intensity 01 the instrument panel lights by rotating the
knob; turn fully counterclockwise past the
"detent" position
to turn on the interior lights.
• Move
the headlight motor switch toward you to
rotate the head lamp assemblies into the open
position. The headlamps may be lelt in the open
position even WiLh the lights turned off. To close
the assemblies move the switch away from you.
LIGHT SWITCH AND
HEADLIGHT MOTOR SWITCH
• A flashing red "LIGHTS" indicator on the in·
strument panel, gives warning whenever the
headlights are
turned on but not fully opened.
OPERATING HEADLIGHTS MANUALLY
Each headlamp assembly may be opened manuaJly, if necessary, as follows:
• Raise
the hood and, reaching under the body panel, turn the wheel disc on the headlamp door motor in the direction you wish the door to move. Continue until the door is fully open or closed .
• See
your Chevrolet Dealer as sOOn as possible.
Page 20 of 52
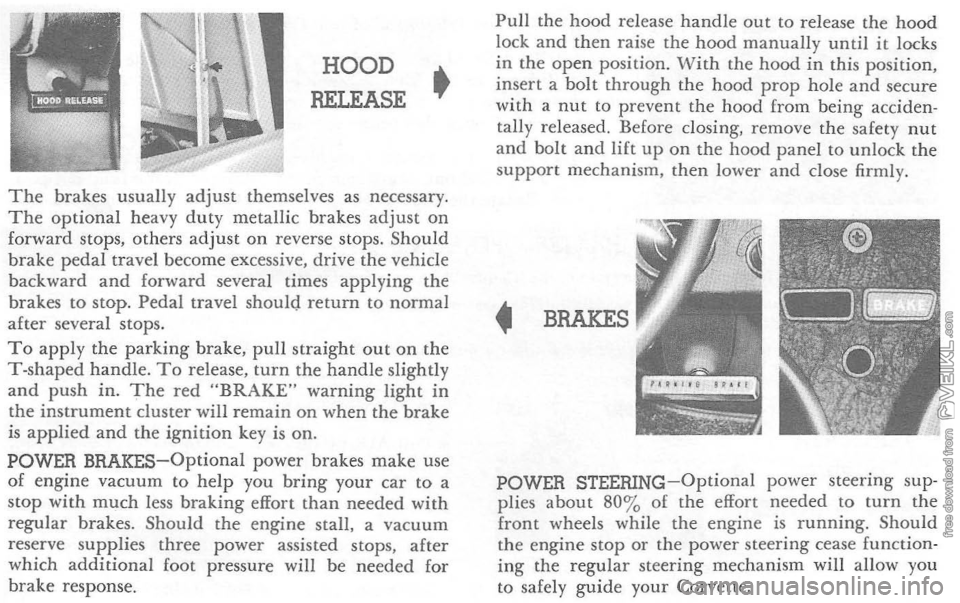
HOOD
RELEASE •
The brakes usually adjust themselves as necessary. The optional heavy duty metallic brakes adjust on forward stops, others adjust on reverse stops. Should
brake pedal travel become excessive, drive the vehicle
back ward
and forward several times applying the
brakes to stop. Pedal travel should return to normal after several stops. To apply the parking brake, pull straight out on the T-shaped handle. To release, turn the handle slightly and push in. The red "BRAKE" warning light in the instrument cluster will remain on when the brake is applied and the ignition key is on. POWER BRAKES-Optional power brakes make use of engine vacuum to help you bring your car to a stop with much less braking effort than needed with regular brakes. Should the engine stall. a vacuum
reserve supplies three power assisted stops, after
which additional foot pressure will be needed for
brake response.
Pull the hood release handle out to release the hood lock and then raise the hood manually until it locks
in the open position . With the hood in this position, insert a bolt through the hood prop hole and secure
with a nut to prevent the hood from being acciden
tally released. Before closing, remove the safety nut
and bolt and lift up on the hood panel to unlock the
support mechanism . then lower and close firmly.
• BRAKES
POWER STEERING-Optional power steering sup
plies about 80 % of the effort needed to turn the front wheels while the engine is running. Should the engine stop or the power steering cease function ing the regular steering mechanism will allow you
to safely guide your Corvette.
Page 24 of 52
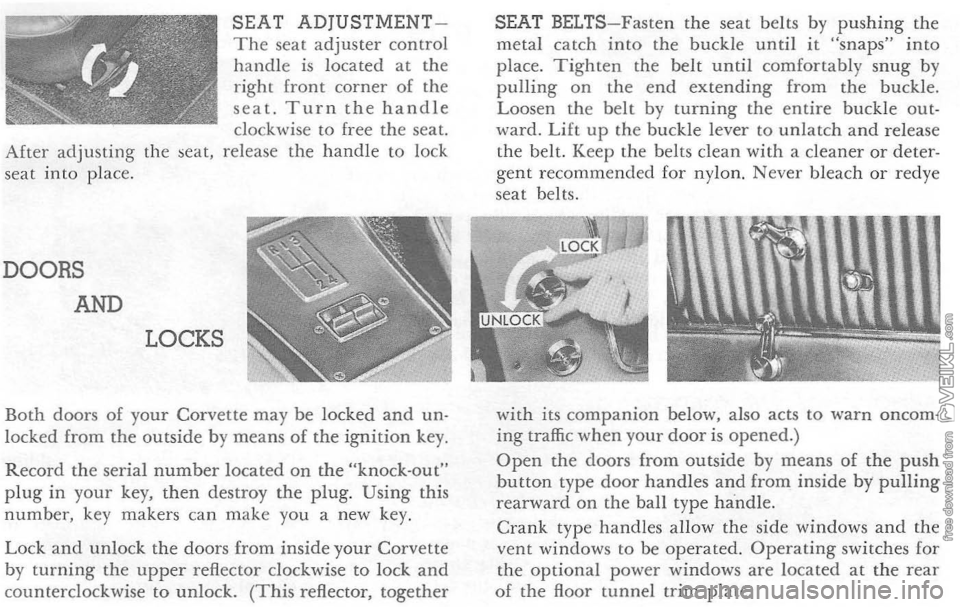
SEAT ADjUSTMENTThe seat adjuster control handle is located at the right front corner of the seat. Turn the handle clockwise to free the seat. After adjusting the seat, release the handle to lock
seat into place.
DOORS
AND
LOCKS
Both doors of your Corvette may be locked and un· locked from the outside by means of the ignition key.
Record the serial number located on the "knock·out" plug in your key, then destroy the plug. Using this number, key makers can make you a new key.
Lock and unlock the doors from inside your Corvette by turning the upper reflector clockwise to lock and counterclockwise to unlock. (This reflector, together
SEAT BELTS-Fasten the seat belts by pushing the metal catch into the buckle until it "snaps" into place. Tighten the belt until comfortably snug by pulling on the end extending from the buckle.
Loosen the belt by turning the entire buckle out· ward. Lift up the buckle lever to unlatch and release
the belt. Keep the belts clean with a cleaner or deter· gent recommended for nylon. Never bleach or redye
seat belts.
w
ith its companion below, also acts to warn oncoming traffic when your door is opened.) Open the doors from outside by means of the push bu tton type door handles and from inside by pulling rearward on the ball type handle .
Crank type handles allow the side windows and the vent windows to be operated. Operating switches for
the optional power windows are located at the rear o f the floor tunnel trim plate.
Page 25 of 52
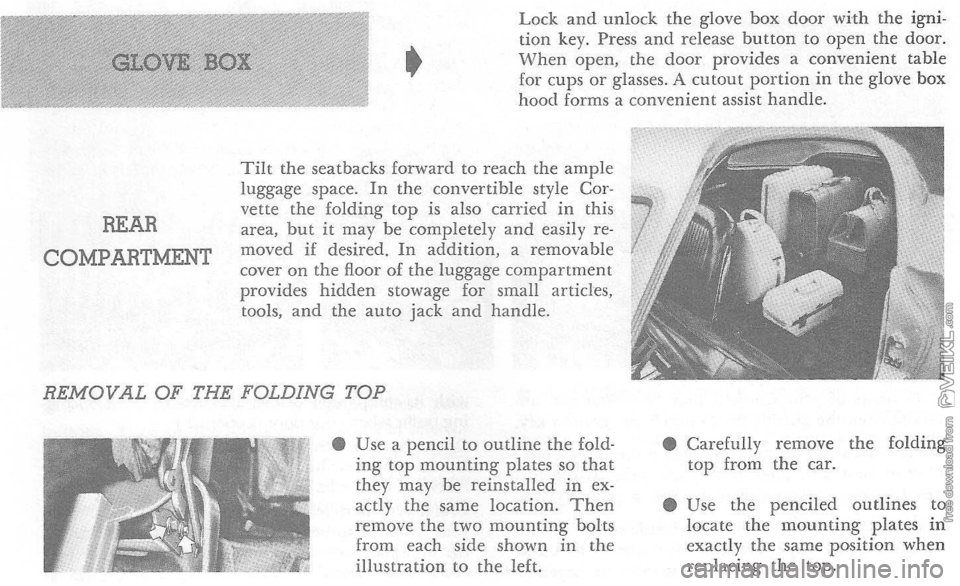
REAR
COMPARTMENT •
Lock and unlock the glove box door with the igni
tion key. Press and release button to open the door. When open, the door provides a convenient table for cups or glasses. A cutout portion in the glove box
hood forms a convenient assist handle.
Tilt the seatbacks forward to reach the ample
luggage space_ In the convertible style Cor
vette the folding top is also carried in this
area, but it may be completely and easily removed if desired. In addition, a removable
cover on the floor of the luggage compartment
provides hidden stowage for small articles,
tools,
and the auto jack and handle-
REMOVAL OF THE FOLDING TOP
• Use a pencil to outline the folding top mounting plates so that they may be reinstalled in ex
actly the same location. Then remove the two mounting bolts
from each side shown in the
illustration to the left. •
Carefully remove the folding top from the caL
• Use
the penciled outlines to locate the mounting plates in exactly the same position when replacing the top.
Page 26 of 52
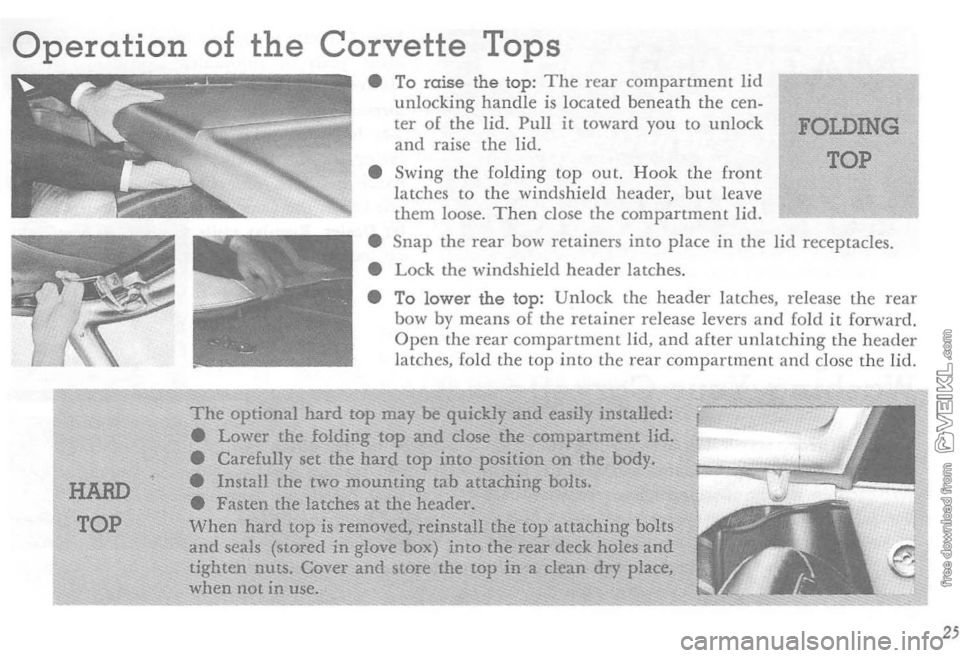
Operation of the Corvette Tops
HARD
TOP
• To raise the top: The rear compartment lid unlocking handle is located beneath the cen
ter of the lid. Pull it toward you to unlock and raise the lid.
• Swing
the folding top out. Hook the front latches to the windshield header, but leave them loose. Then close the compartment lid.
FOLDING
TOP
• Snap the rear bow retainers into place in the lid receptacles .
• Lock the windshield
header latches.
• To
lower the top: Unlock the header latches, release the rear
bow by
means of the retainer release levers and fold it fonvard. Open the rcar compartment lid, and after unlatching the header latches, fold the top into the rear compartment and close the lid.
The optional hard top may be quickly and easily installed:
• Lower the folding top and close the compartment lid.
• Carefully set the hard top into position on the body,
• Install the two mounting tab attaching bolts.
• Fasten the latches
at the header.
When hard top is removed, reinstall the top attaching bolts and seals (stored in glove box) into the rear deck holes and tighten nuts. Cover and store the top in·a clean dry place.
when not in use.
25
Page 33 of 52
Check the front of the radiator core occasionally for
insects and leaves. Flush them out from the back
sid e of the radiator using a water hose and city water
pressure.
RADIATOR CAP
The Corvette cooling system is equipped with a 13 lb. pressure cap. To remove the cap, carefully turn ~ turn to allow exces s system pressure to escape, then turn the cap all the way off. If the engine is
ov erh eated, wait for several minutes before removing
the
radiator cap.
Tire
Care
To enjoy maximum service from your tires, keep
them inflated to the pressures recommended on
page
46.
Regular Corvette tires should not be used for ex
treme vehicle operation. Special purpose tires are
available,
if needed, from major tire manufacturers. DRAINING
AND FILLING
THE COOLING SYSTEM
I. Open the drain cock at the bottom of the
radiator.
2. Remove the drain plug located on each side of the engine block just above the oil pan and be· hind the spark plug wire shields. 3. Replace the engine drain plugs and close the
radiator drain cock before refilling the radiator.
4.
To refill , add coolant until supply tank remains
one -half full. Then start engine and add coolant as necessary to maintain normal one-half- full level in supply tank. Recheck when cool and fill to
normal level.
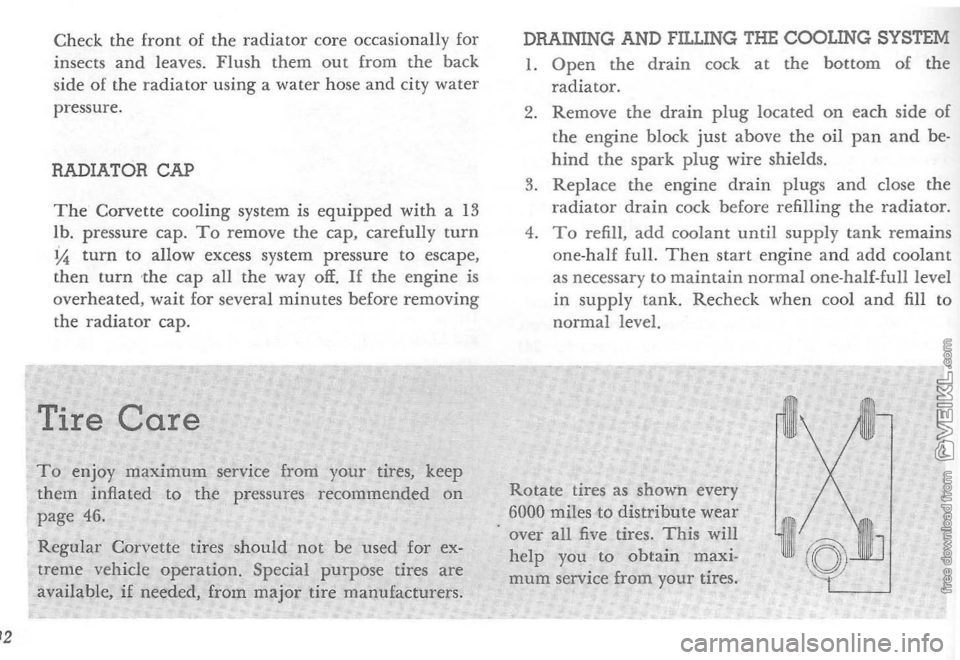
Rotate tires
as shown every
6000 miles to distribute wear
. over all five tires. This will help you to obtain maxi
mum service from your tires.
Page 34 of 52
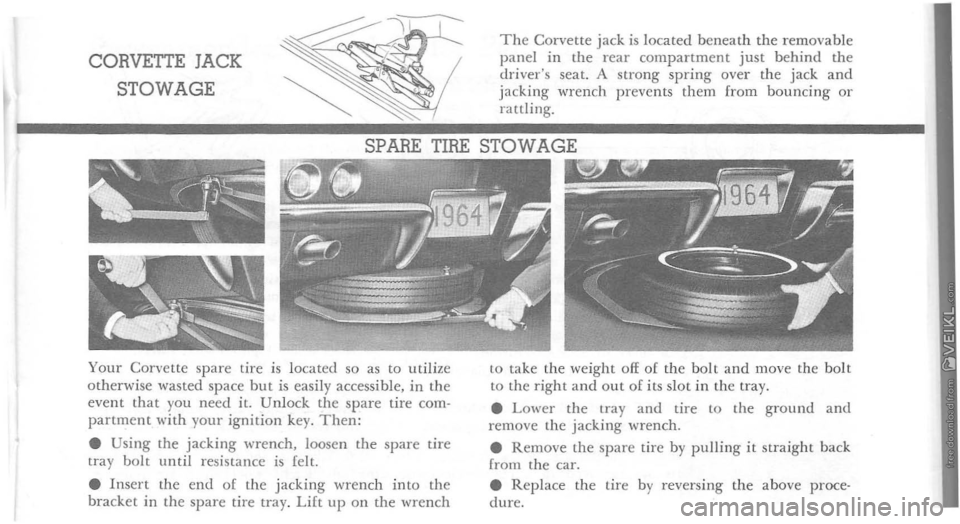
CORVETTE JACK
STOWAGE
The Corvette jack is located beneath the removable panel in the rear compartment just behind the driver's seat. A strong spring over the jack and jacking ·wrench prevents them from bouncing or rattling.
SPARE TIRE STOWAGE
Your Corvette spare tire is located so as to utilize otherwise wasted space but is easily accessible, in the event that you need it. Unlock the spare tire com· partn:tent with your ignition key. Then: • Using the jacking wrench, loosen the spare tire tTay bolt until resistance is felt.
• Insert the end of the jacking wrench into the bracket in the spare tire tray. Lift up o n the wrench
E.&1~1I,lI;II
to take the weight off of the bolt and move the bol t to the right and out of its slot i n t h e tray.
•
Lower the tray and tire to the ground and remove the jacking wrench .
• Remove the spare tire by pulling it straight back
(rom the car.
• Replace the tire by reversing the above procedure.