clock CHEVROLET CORVETTE 1998 5.G Owners Manual
[x] Cancel search | Manufacturer: CHEVROLET, Model Year: 1998, Model line: CORVETTE, Model: CHEVROLET CORVETTE 1998 5.GPages: 378, PDF Size: 19.91 MB
Page 105 of 378
Downloaded from www.Manualslib.com manuals search engine Interior Lamps
Instrument Panel Brightness Control
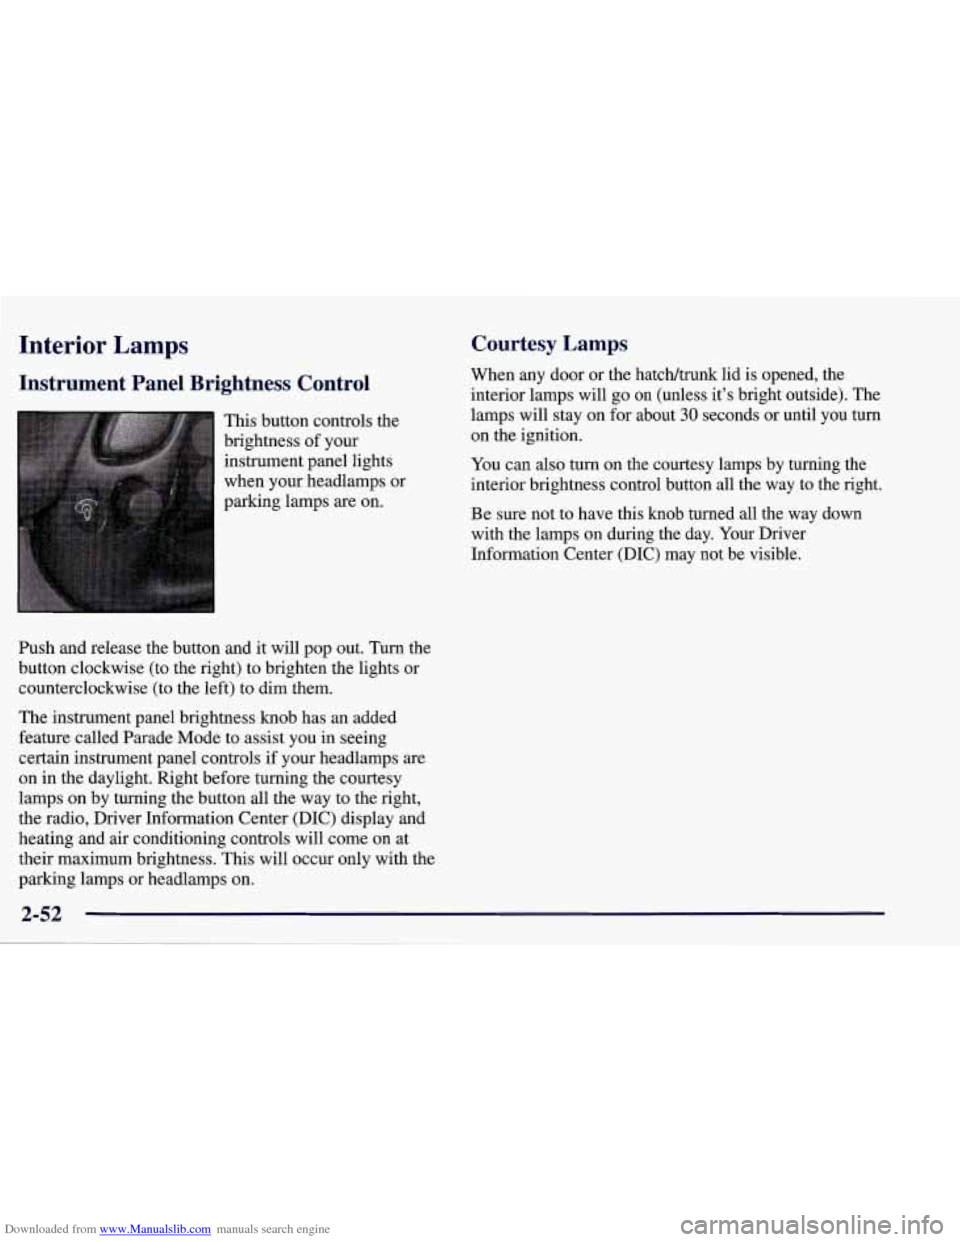
This button controls the
brightness of your
instrument panel lights
when your headlamps or
parking lamps
are on.
Ish and release the button and it will pop out. Turn the
button clockwise (to the right) to brighten the lights or
counterclockwise (to the left) to dim them.
The instrument panel brightness knob has an added
feature called Parade Mode to assist you in seeing
certain instrument panel controls if your headlamps
are
on in the daylight. Right before turning the courtesy
lamps on by turning the button all the way to the right,
the radio, Driver Information Center (DIC) display and
heating and air conditioning controls will come on at
their maximum brightness. This will occur only with the
parking lamps or headlamps on.
Courtesy Lamps
When any door or the hatch/trunk lid is opened, the
interior lamps will go
on (unless it’s bright outside). The
lamps will stay on for about
30 seconds or until you turn
on the ignition.
You can
also turn on the courtesy lamps by turning the
interior brightness control button all the way to the right.
Be sure not to have this knob turned all the way down
with the lamps on during the day. Your Driver
Information Center
(DIC) may not be visible.
2-52
Page 160 of 378
Downloaded from www.Manualslib.com manuals search engine Section 3 Comfort Controls and Audio Systems
In this section, you’ll find out how to operate the comfort control and audio systems offered with your vehicle. Be
sure to read about the particular systems supplied with your vehicle.
3-2
3-2
3-4
3-9
3- 10
3-11 3-11
3- 12 3-12
3-12
3-17 Comfort Controls
Manual
Comfort Controls
Automatic Electronic Dual Climate Control
System (If Equipped)
Sensors
Air Conditioning
Heating
Defogging and Defrosting
Audio Systems Setting the Clock for
All Systems
AM-FM Stereo with Cassette Tape Player and
Automatic Tone Control
CD Adapter Kits
3- 17
3-2 1
3-25
3 -27
3-27
3-28
3-29
3-29
3-29
3-30 AM-FM Stereo with Compact Disc Player and
Automatic Tone Control
(If Equipped)
Trunk Mounted CD Changer Theft-Deterrent Feature
Understanding Radio Reception
Tips About Your Audio System
Care of Your Cassette Tape Player
Care of Your Compact Discs
Care
of Your Compact Disc Player
Power Mast Antenna (Option)
Integrated Windshield and Rear Window
Antennas (Option)
3-1
Page 164 of 378
Downloaded from www.Manualslib.com manuals search engine When adjusting the temperature, start with a driver-set
temperature of
73°F (23 "C) until you determine your
comfort zone. If you choose
60°F (16"C), the system
will remain at maximum cooling and will not
automatically adjust fan speed or air delivery. If you
choose
90°F (32"C), the system will remain at
maximum heating and will not automatically adjust fan
speed or air delivery. Choosing either maximum setting
will not cause the system to heat or cool any faster.
Turning the knob past either maximum setting has no
effect on the operation of the system.
Passenger Temperature Offset
The PASSENGER knob changes the temperature on the
passenger's side of the vehicle. When the knob is in the
12 o'clock position, the passenger's temperature is the
same as the driver's. Turn the knob to the right for
warmer air
on the passenger's side, to the left for cooler
air. If the driver-set temperature is set at
60°F (1 6 " C) or
90 OF (32 " C), turning the passenger knob has no effect
because the system is locked at a maximum setting.
Automatic Operation
Press the AUTO button to place the entire system in the
automatic mode. After a five second display of the current settings, only the word
AUTO and the outside
temperature will be shown on the digital display. The
system will operate to achieve your comfort set
temperature as quickly as possible. If you have set the
driver temperature at
60°F (16°C) or 90°F (32"C), the
system will not operate automatically until a different
temperature is selected. The AUTO control system
works best with the windows up and the removable roof
installed or the convertible top up.
A Typical Cold Weather Example:
Your vehicle has been parked outside overnight in cold
weather (below
32 OF/ 0 " C) and you have set the driver
temperature at
73°F (23°C) and have selected the AUTO
mode. The system will automatically adjust the
temperature output to maximum heating. The fan will start
at a low speed. This is to avoid blowing cold
air into the
vehicle. The length of the delay depends on the amount of
time since the engine was last started, the outside
temperature and the engine coolant temperature. As the
coolant warms up, the fan speed will gradually increase.
Air will flow to the floor with some air to the windshield
to prevent fogging under most normal conditions.
3-5
Page 171 of 378
Downloaded from www.Manualslib.com manuals search engine When you enter a vehicle in cold weather, turn the
blower fan to the highest speed for a few moments
before driving
off. This helps clear the intake outlets
of snow and moisture, and reduces the chance of
fogging the inside of the windows.
Keep the area around the base of the center
instrument panel console and air path under the seats
clear of objects. This helps air circulate throughout
your vehicle.
Audio Systems
Your Delco Electronics audio system has been designed
to operate easily and give years of listening pleasure.
You will get the most enjoyment out of it if you acquaint
yourself with it first. Find out what your Delco
Electronics system can do and how to operate all its
controls, to be sure you're getting the most out of the
advanced engineering that went into it.
Setting the Clock for All Systems
Press and hold HR until the correct hour appears. Press
and hold
MN until the correct minute appears.
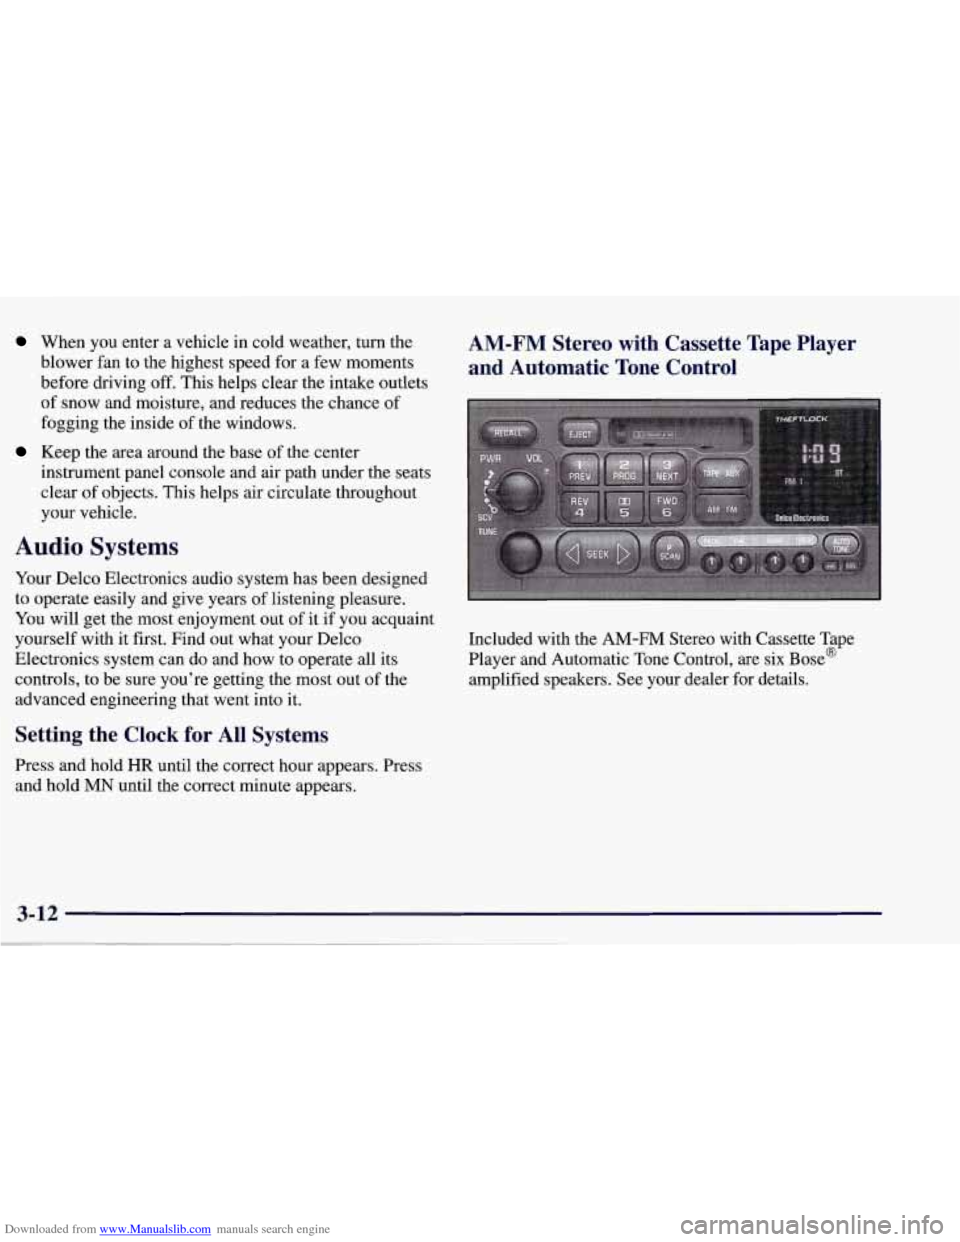
AM-FM Stereo with Cassette Tape Player
and Automatic Tone Control
Included with the AM-FM Stereo with Cassette Tape
Player and Automatic Tone Control, are six Bose@
amplified speakers. See your dealer for details.
Page 172 of 378
Downloaded from www.Manualslib.com manuals search engine Playing the Radio
PWR-VOL: Press this knob to turn the system on and
off. To increase volume, turn the knob to the right. Turn
it to the left to decrease volume. The knob is capable of
rotating continuously.
RECALL: Press this button to recall the station being
played. If you press the button when the ignition is
off,
the clock will show for a few seconds.
SCV: Your system has a feature called
Speed-Compensated-Volume (SCV). With SCV, your
audio system adjusts automatically to make up for road
and wind noise as you drive. Set the volume at the
desired level. Move the control ring behind the upper
knob to the right to adjust the SCV. Then, as you drive,
SCV automatically increases the volume, as necessary,
to overcome noise at any particular speed. The volume
level should always sound the same to you as you drive.
If you don’t want to use SCV, turn the control all the
way down. Each notch on the control ring allows for
more volume compensation at faster vehicle speeds.
Finding a Station
AM-FM: Press this button to switch between AM, FM1
and FM2. The display shows your selection.
TUNE: Press this knob lightly so it extends. Turn it to
choose radio stations. Push the
knob back into its stored
position when you’re not using it.
SEEK: Press the right or left arrow to go to the
next higher
or lower station. The sound will mute
while seeking.
SCAN: Press one of the SEEK arrows for two seconds,
and SCAN will appear in the display. Use SCAN to
listen to stations for a few seconds. The radio will go to
a station, stop for a few seconds, then
go on to the next
station. Press SEEK again to stop scanning. The sound
will mute while scanning.
PUSHBUTTONS: The six numbered pushbuttons let
you return to your favorite stations. You can set up to
18 stations (six AM, six FM1 and six FM2). Just:
1. Turn the radio on.
2. Press AM-FM to select the band.
3. Tune in the desired station.
4. Press AUTO TONE to select the equalization that
best suits the type of station selected.
3-13
Page 177 of 378
Downloaded from www.Manualslib.com manuals search engine Playing the Radio
PWR-VOL: Press this knob to turn the system on and
off. To increase volume, turn the knob to the right. Turn
it to the left to decrease volume. The knob is capable of
rotating continuously.
RECALL: Press this button to recall the station being
played. If you press the button when the ignition is off,
the clock will show for a few seconds.
SCV: Your system has a feature called
Speed-Compensated-Volume (SCV). With SCV, your
audio system adjusts automatically to make up for road
and wind noise as you drive. Set the volume at the
desired level. Move the control ring behind the upper
knob to the right to adjust the SCV. Then, as you drive,
SCV automatically increases the volume, as necessary,
to overcome noise at any particular speed. The volume
level should always sound the same to you as you drive. If you don’t want to use SCV, turn the control all the
way down. Each notch on the control ring allows for
more volume compensation at faster vehicle speeds.
Finding a Station
AM-FM: Press this button to switch between AM, FM1
and
FM2. The display shows your selection.
TUNE: Press this knob lightly so it extends. Turn it to
choose radio stations. Push the knob back into its stored
position when you’re not using it.
SEEK: Press the right or left arrow to go to the
next higher or lower station. The sound will mute
while seeking.
SCAN: Press one of the SEEK arrows for two seconds,
and SCAN will appear on the display. Use
SCAN to
listen to stations for a few seconds. The radio will
go to
a station, stop for a few seconds, then go on to the next
station. Press
SEEK again to stop scanning. The sound
will mute while scanning.
PUSHBUTTONS: The six numbered pushbuttons let
you return to your favorite stations. You can set up to
18 stations (six AM, six FM1 and six FM2). Just:
1. Turn the radio
on.
2. Press AM-FM to select the band.
3. Tune in the desired station.
4. Press AUTO TONE to select the equalization that
best suits the type of station selected.
3-18
Page 202 of 378
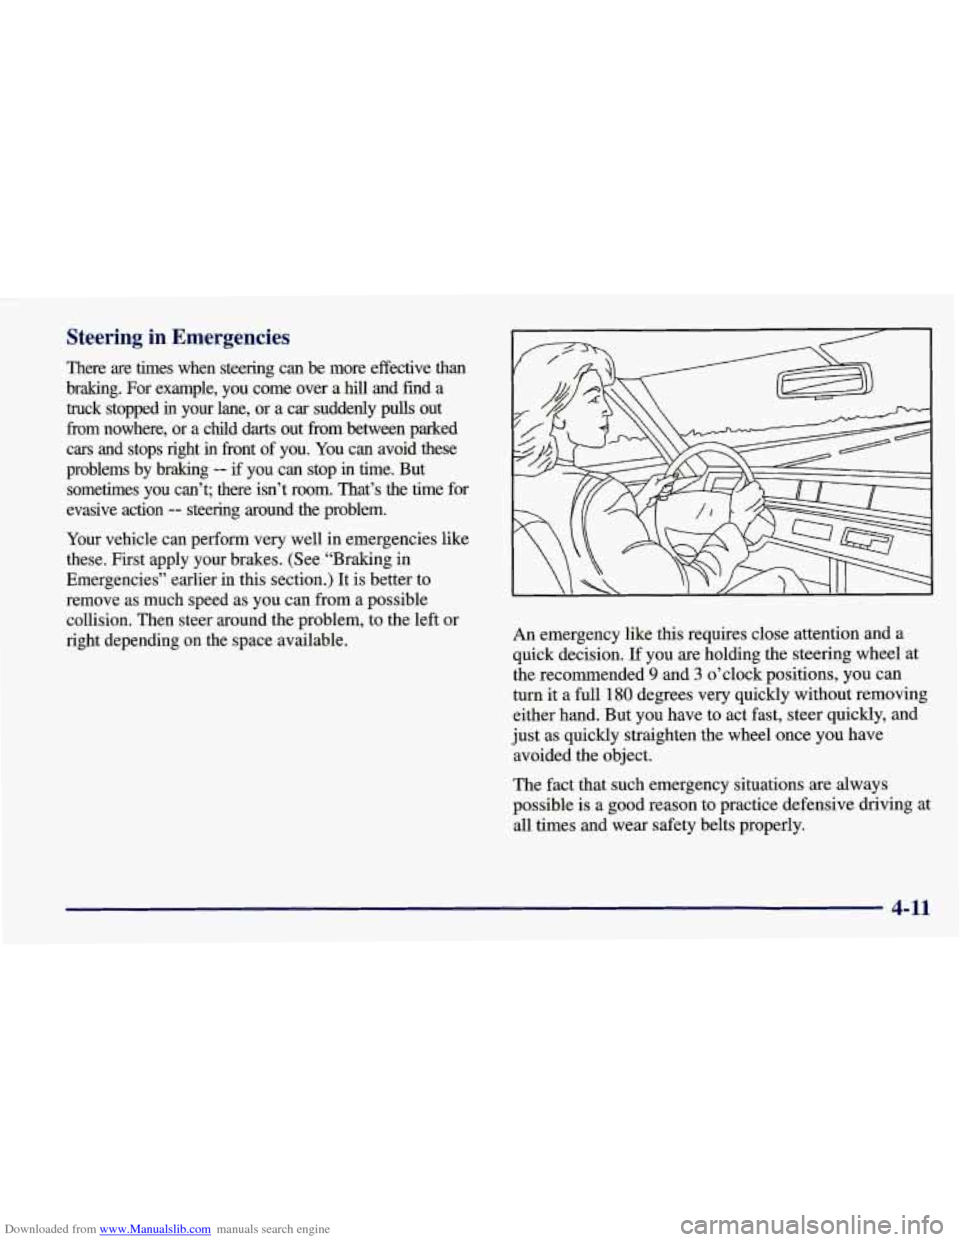
Downloaded from www.Manualslib.com manuals search engine Steering in Emergencies
There are times when steering can be more effective than
bralung. For example, you come over a
hill and find a
truck stopped
in your lane, or a car suddenly pulls out
fiom nowhere, or a chdd
darts out fiom between parked
cars and stops right
in fiont of you. You can avoid these
problems by braking
-- if you can stop in time. But
sometimes you can’t; there isn’t room. That’s the time \
for
evasive action
-- steering around the problem.
Your vehicle can perform very well in emergencies like
these. First apply your brakes. (See “Braking in
Emergencies” earlier in this section.)
It is better to
remove
as much speed as you can from a possible
collision. Then steer around the problem, to the left or
right depending on the space available. An emergency like this requires close
attention and a
quick decision.
If you are holding the steering wheel at
the recommended
9 and 3 o’clock positions, you can
turn it a full
180 degrees very quickly without removing
either hand. But you have to act fast, steer quickly, and
just as quickly straighten the wheel once you have
avoided the object.
The fact that such emergency situations are always
possible is a good reason to practice defensive driving at
all times and wear safety belts properly.
4-11
Page 251 of 378
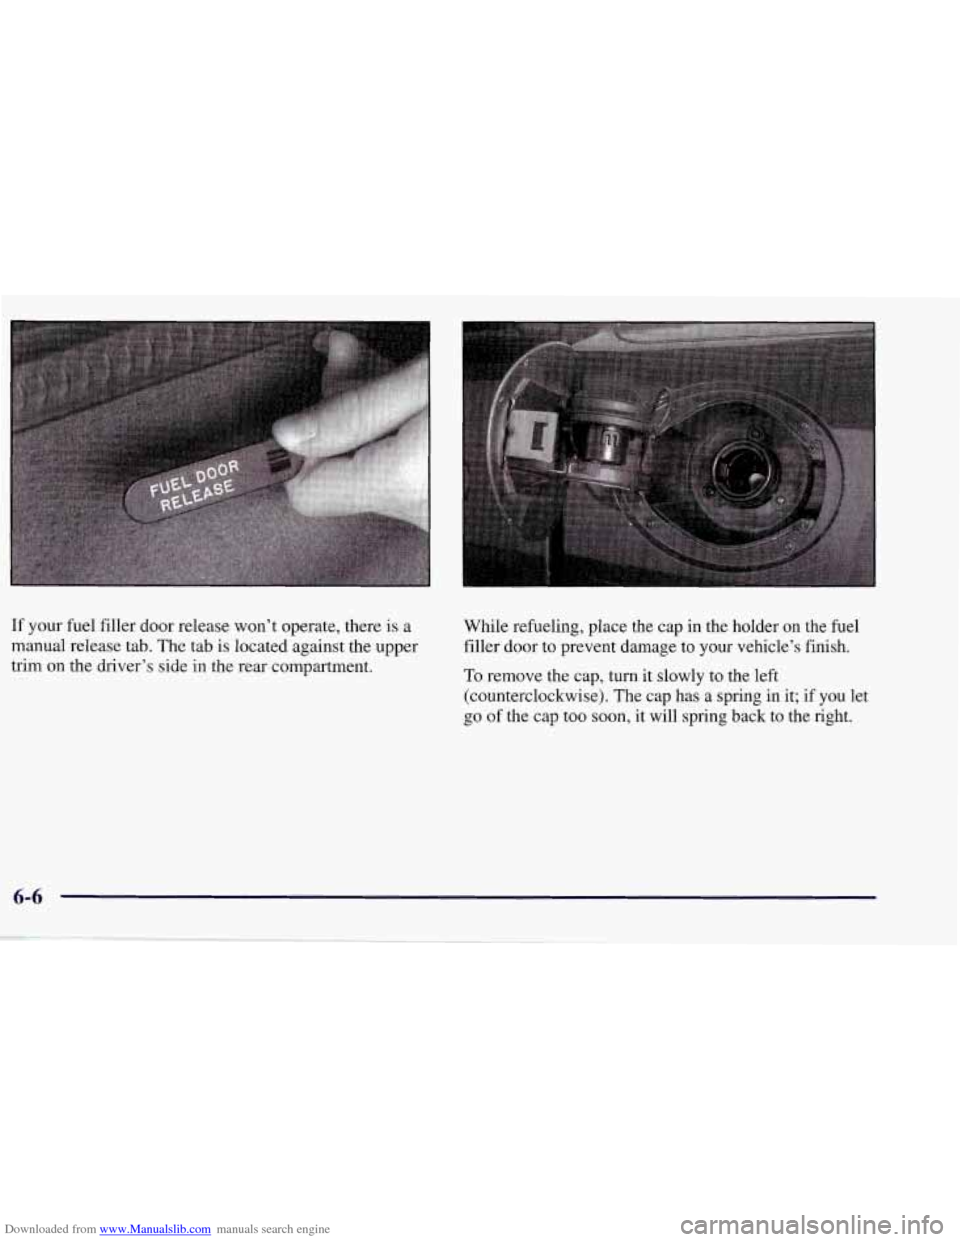
Downloaded from www.Manualslib.com manuals search engine If your fuel filler door release won’t operate, there is a
manual release tab. The tab is located against the upper
trim on the driver’s side in the rear compartment. While
refueling, place the cap in the holder on the fuel
filler door to prevent damage to your vehicle’s finish.
To remove the cap, turn it slowly to the left
(counterclockwise). The cap has a spring in it; if you let
go of the cap too soon, it will spring back to the right.
6-6
Page 252 of 378
Downloaded from www.Manualslib.com manuals search engine When you put the cap back on, turn it to the right
(clockwise) until you hear a clicking sound. Make sure
you fully install the cap.
/9 CAUTION:
If J ,.I get gasoline on yourself and then
something ignites it, you could be badly burned.
Gasoline can spray out on you
if you open the
fuel filler cap too quickly. This spray can happen
if your tank is nearly full, and is more likely in
hot weather. Open the fuel filler cap slowly and
wait for any “hiss” noise to stop. Then unscrew
the cap all the way.
Be careful not to spill gasoline. Clean gasoline from
painted surfaces as soon as possible. See “Cleaning the
Outside of Your Vehicle” in the Index.
I NOTICE:
If you need a new cap, be sure to get the right
type. Your dealer can get one for you.
If you get
the wrong type, it may not fit or have proper
venting, and your fuel tank and emissions system
might be damaged.
6-7
Page 279 of 378
Downloaded from www.Manualslib.com manuals search engine 6
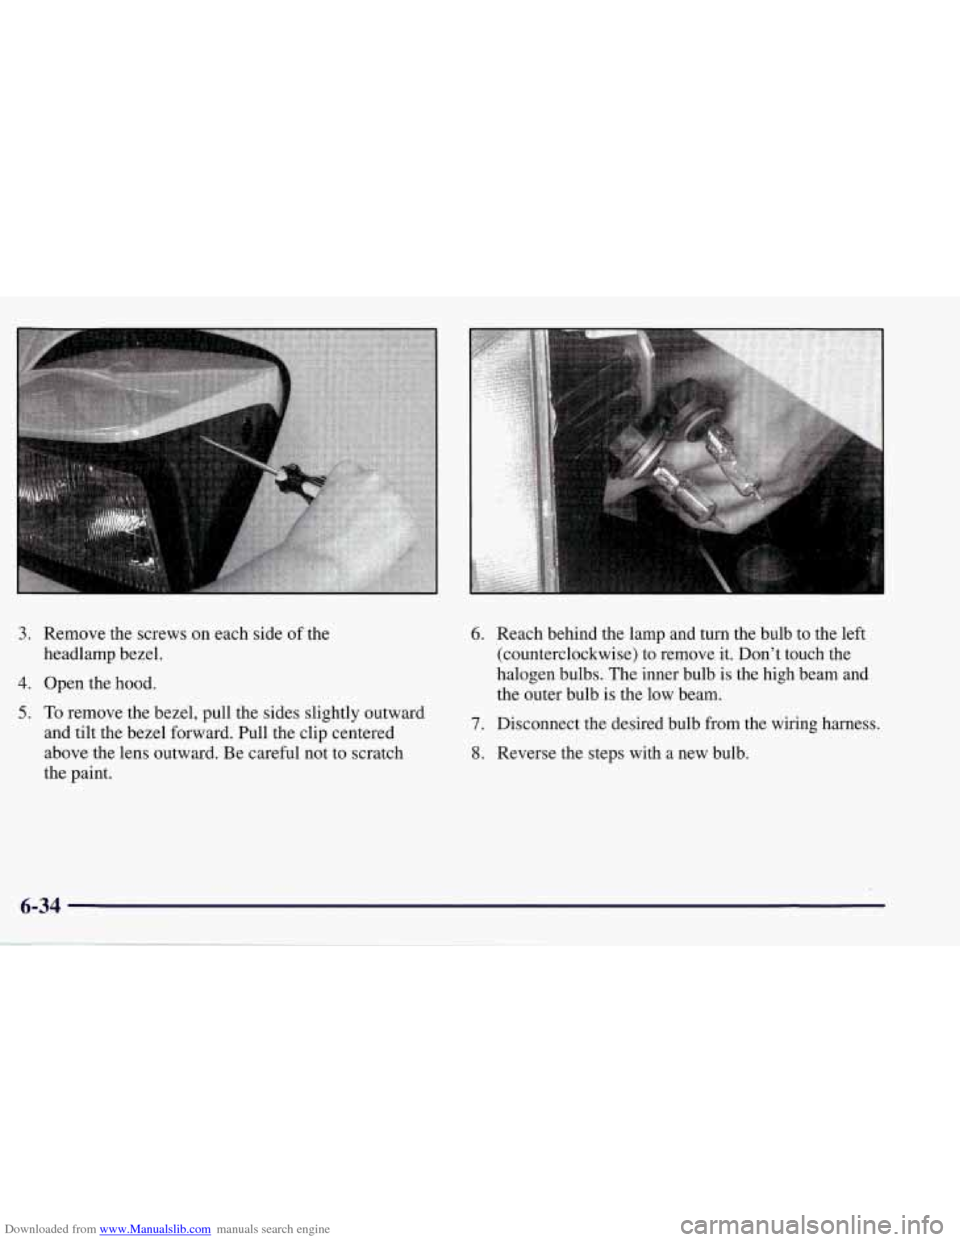
3. Remove the screws on each side of the
headlamp bezel.
4. Open the hood.
5. To remove the bezel, pull the sides slightly outward
and tilt the bezel forward. Pull the clip centered
above the lens outward. Be careful not to scratch
the paint.
6. Reach behind the lamp and turn the bulb to the left
(counterclockwise) to remove it. Don’t touch the
halogen bulbs. The inner bulb is the high beam and
the outer bulb is the low beam.
7. Disconnect the desired bulb from the wiring harness.
8. Reverse the steps with a new bulb.