fuel pressure CHEVROLET CORVETTE 1998 5.G Owners Manual
[x] Cancel search | Manufacturer: CHEVROLET, Model Year: 1998, Model line: CORVETTE, Model: CHEVROLET CORVETTE 1998 5.GPages: 378, PDF Size: 19.91 MB
Page 15 of 378
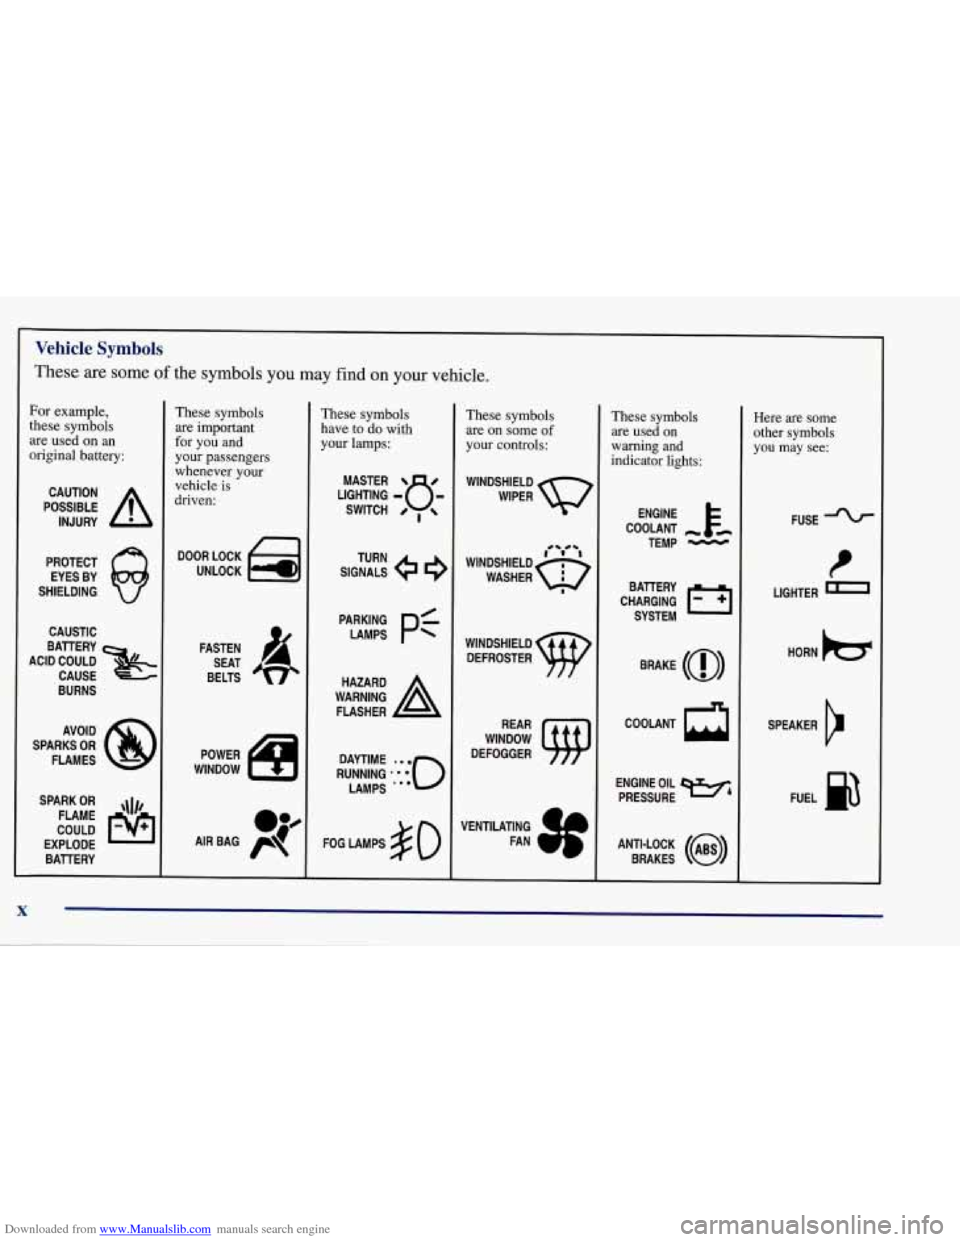
Downloaded from www.Manualslib.com manuals search engine Vehicle Symbols
These are some of the symbols you may find on your vehicle.
For example,
these symbols
are used on
an
original battery:
POSSIBLE A
CAUTION
INJURY
PROTECT EYES BY
SHIELDING
Q
CAUSTIC
These symbols
are important
for you and
your passengers
whenever your
vehicle
is
driven:
DOOR LOCK
UNLOCK
ACID COULD BAlTERY
CAUSE
BURNS
AVOID
SPARKS
OR
FLAMES
SPARK
OR ,\I/,
COULD FLAME
EXPLODE BAllERY FASTEN
SEAT
BELTS
These symbols
have
to do with
your lamps:
SIGNALS TURN
A
FLASHER
FOG LAMPS
$0
These symbols
are on some
of
your controls:
WINDSHIELD
DEFROSTER
WINDOW
DEFOGGER
VENTILATING FAN
These symbols
are used on
warning and
indicator lights:
COOLANT -
TEMP -
CHARGING I-1
BATTERY
SYSTEM
BRAKE
(@)
COOLANT
a
ENGINE OIL
PRESSURE
WA
ANTI-LOCK (@)
BRAKES
Here are some
other symbols
you may see:
FUSE
t
LIGHTER
HORN
b
SPEAKER
b
FUEL p3
X
Page 138 of 378
Downloaded from www.Manualslib.com manuals search engine I NOTICE:
Damage to your engine from neglected oil
problems can be costly and
is not covered by
your warranty.
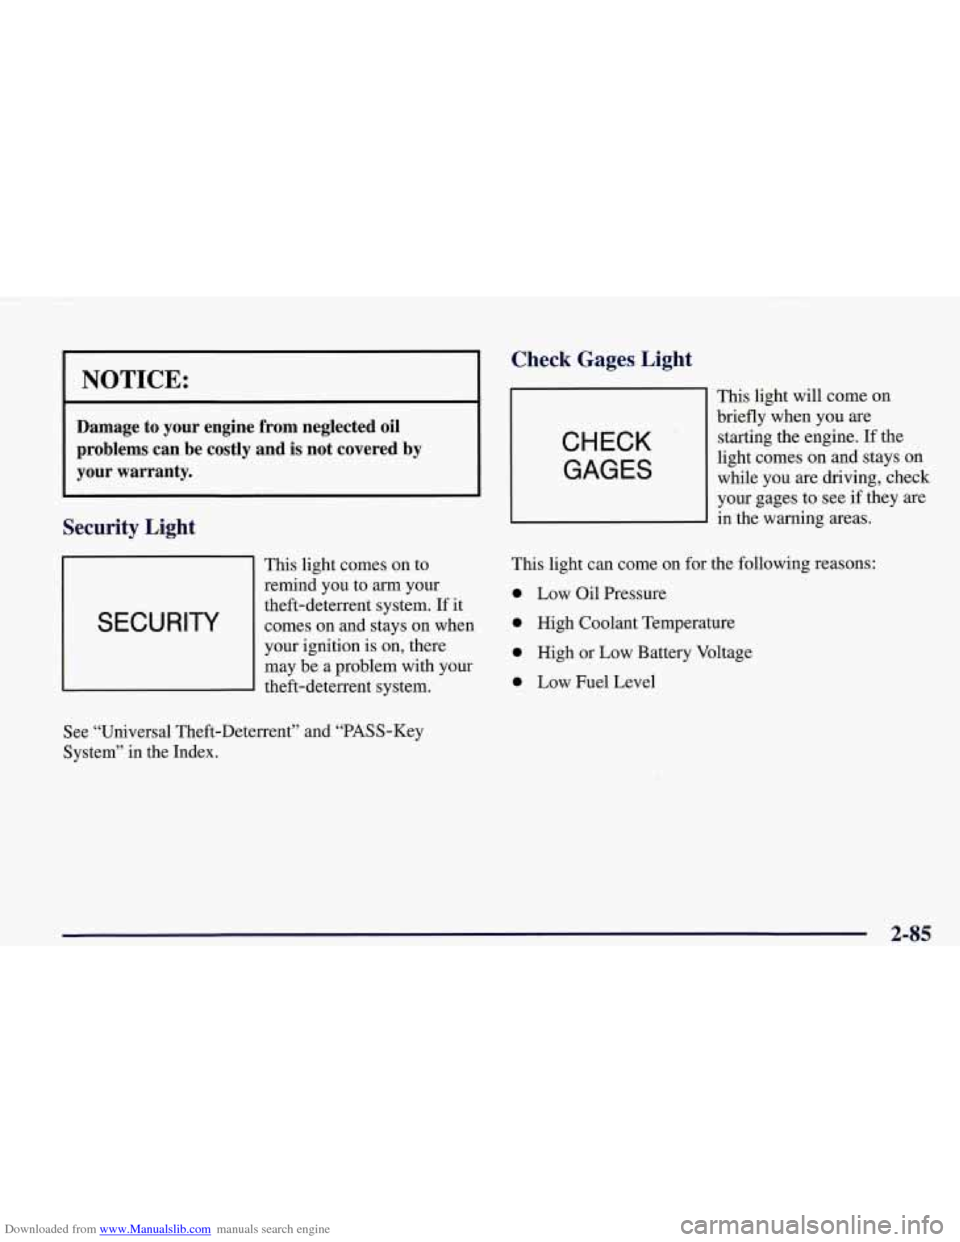
Security Light
This light comes on to
remind you to
arrn your
I SECURITY
theft-deterrent system. If it
comes on and stays on when
I
your ignition is on, there
may be a problem with your
theft-deterrent system.
Check Gages, Light
CHECK
GAGES
This light will come on
briefly when you are
starting the engine. If the
light comes on and stays on
while you are driving, check
your gages to see
if they are
in the warning areas.
This light can come on for the following reasons:
0 Low Oil Pressure
0 High Coolant Temperature
0 High or Low Battery Voltage
0 Low Fuel Level
See “Universal Theft-Deterrent” and “PASS-Key
System” in the Index.
2-85
Page 140 of 378
Downloaded from www.Manualslib.com manuals search engine Driver Information Center (DIC)
The Driver Information Center (DIC) will display
information about how your vehicle is functioning, as
well as warning messages if a system problem is
detected. The DIC display area is located in the
instrument cluster below the speedometer and
tachometer, directly above the steering column.
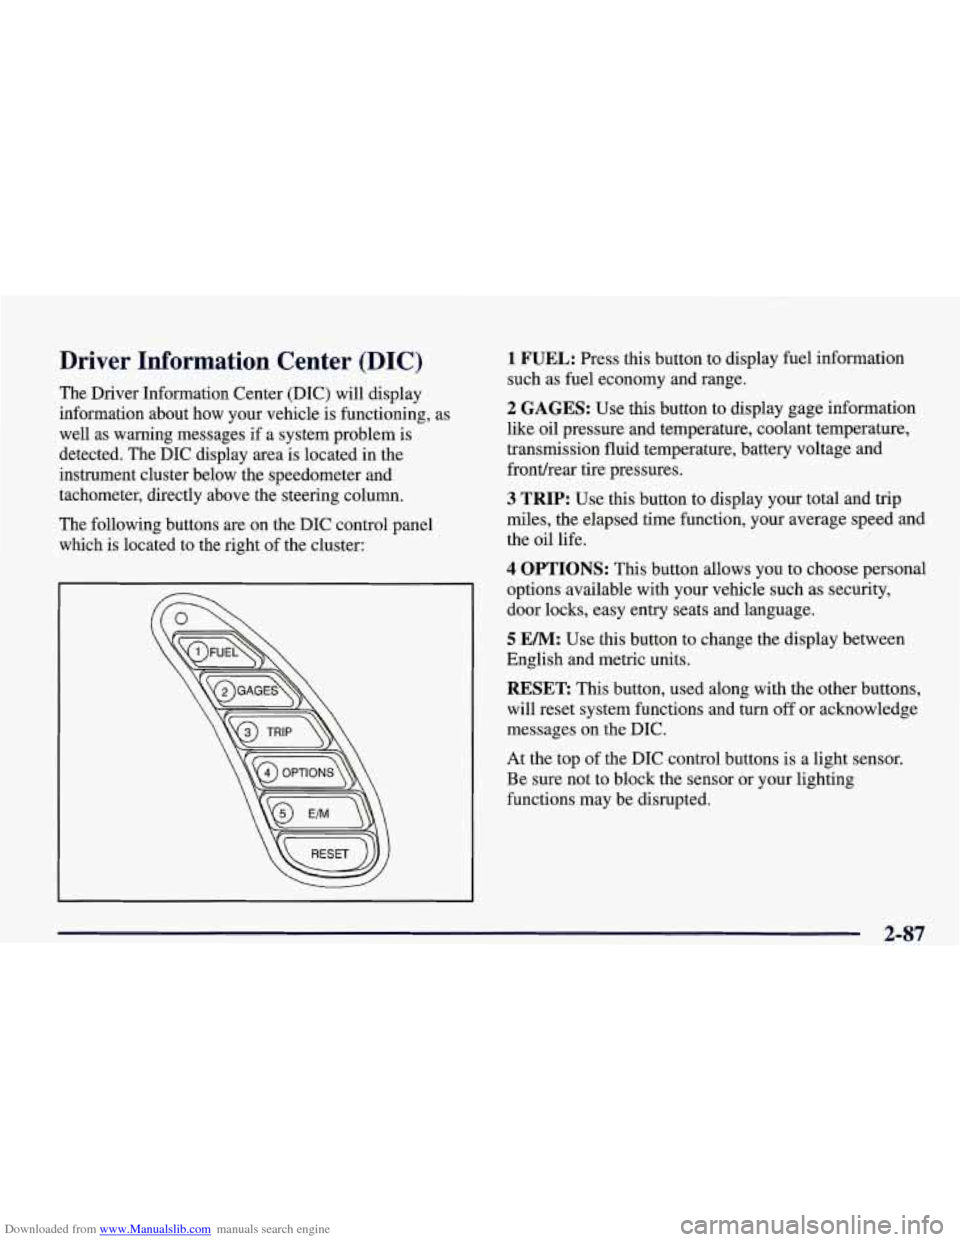
The following buttons are on the DIC control panel which is located to the right of the cluster:
1 FUEL: Press this button to display fuel information
such as fuel economy and range.
2 GAGES: Use this button to display gage information
like oil pressure and temperature, coolant temperature,
transmission fluid temperature, battery voltage and
fronthear tire pressures.
3 TRIP: Use this button to display your total and trip
miles, the elapsed time function, your average speed and
the oil life.
4 OPTIONS: This button allows you to choose personal
options available with your vehicle such as security,
door locks, easy entry seats and language.
5 EM: Use this button to change the display between
English and metric units.
RESET: This button, used along with the other buttons,
will reset system functions and turn
off or acknowledge
messages on the DIC.
At the top of the DIC control buttons is a light sensor.
Be sure not to block the sensor or your lighting
functions may be disrupted.
2-87
Page 142 of 378
Downloaded from www.Manualslib.com manuals search engine Press FUEL again to display instantaneous fuel
economy, such as:
0 INST. 20.1 MPG or
0 INST. 5.3 WlOO km
Press FUEL again to display the range, such as:
0 RANGE 20 MI or
RANGE32km
The range calculates the remaining distance you can
drive without refueling. It's based on fuel economy and
the fuel remaining in the tank.
If the range is lower than 30 miles (48 krn), the display
will read RANGE LOW.
The fuel economy data used to determine fuel range is
an average of recent driving conditions.
As your driving
conditions change, this data is gradually updated.
Resetting the fuel range causes the fuel economy data to
be updated immediately. Press RESET to reset the
fuel range.
2 GAGES
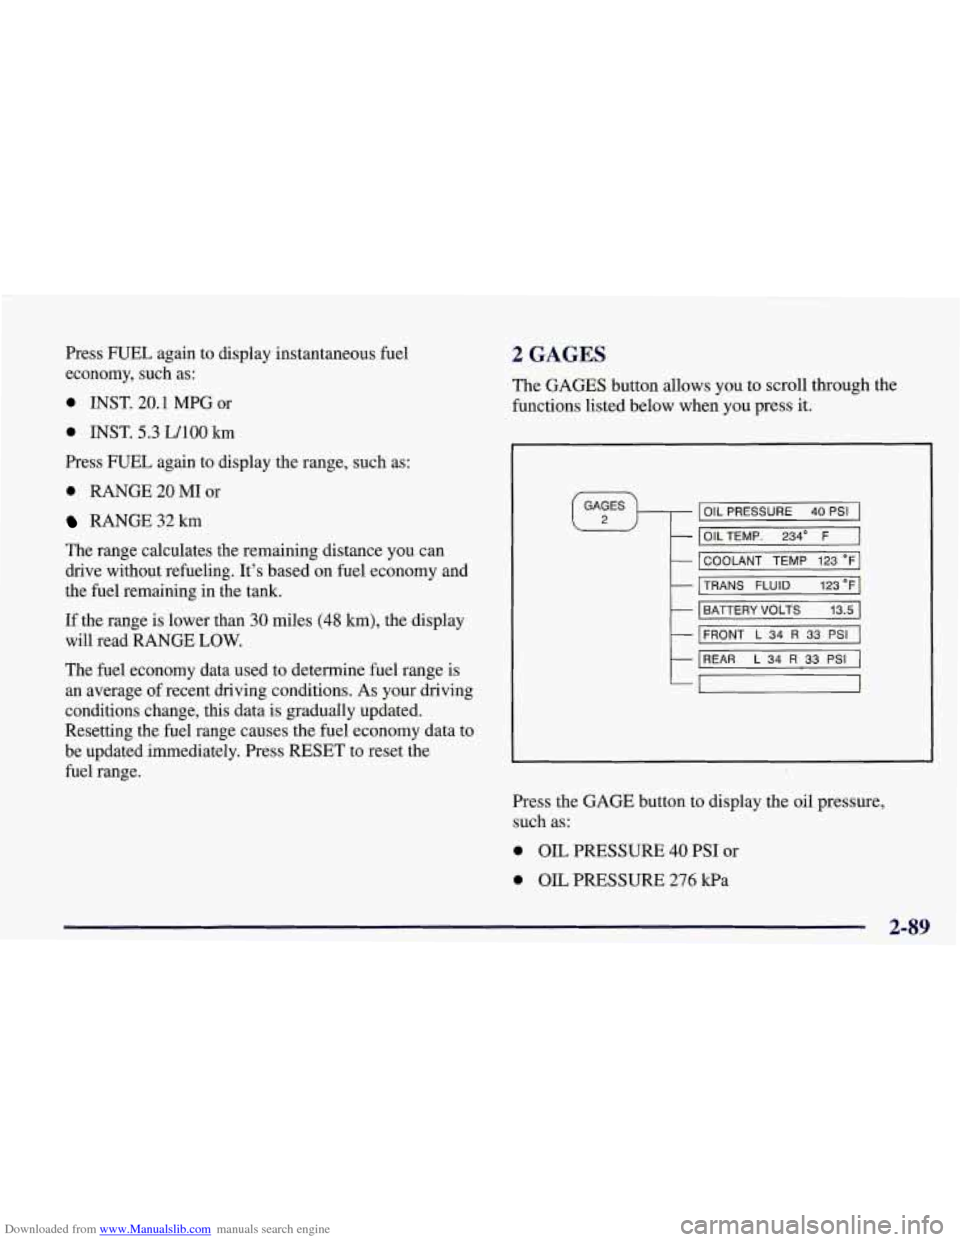
The GAGES button allows you to scroll through the
functions listed below when you press it.
GAGES
2 OIL PRESSURE 40 PSI
- OILTEMP. 234" F
- COOLANT TEMP 123 "F
- TRANS FLUID 123°F
- BATTERY VOLTS 13.5
- FRONT L 34 R 33 PSI
- REAR L 34 R 33 PSI
-,
Press the GAGE button to display the oil pressure,
such as:
0 OIL PRESSURE 40 PSI or
0 OIL PRESSURE 276 kPa
2-89
Page 212 of 378
Downloaded from www.Manualslib.com manuals search engine The exit speed is usually posted.
Reduce your speed according to your speedometer, not
to your sense
of motion. After driving for any distance
at higher speeds, you may tend to think you are going slower than you actually are.
Before Leaving on a Long Trip
Make sure you’re ready. Try to be well rested. If you
must start when you’re not fresh
-- such as after a day’s
work
-- don’t plan to make too many miles that first part
of the journey. Wear comfortable clothing and shoes you
can easily drive in.
Is your vehicle ready for a long trip?
If you keep it
serviced and maintained, it’s ready
to go. If it needs
service, have it done before starting out. Of course,
you’ll find experienced and able service experts in
GM
dealerships all across North America. They’ll be ready
and willing to help if you need it. Here are some things you can check before a
trip:
0
0
0
0
0
0
0
Windshield Washer Fluid: Is the reservoir full? Are
all windows clean inside and outside?
Wiper Blades: Are they in good shape?
Fuel, Engine Oil, Other Fluids: Have you checked
all levels?
Lamps: Are they all working? Are the lenses clean?
Tires: They are vitally important to a safe,
trouble-free trip.
Is the tread good enough for
long-distance driving? Are the tires all inflated to the
recommended pressure?
Weather Forecasts: What’s the weather outlook
along your route? Should you delay your trip a short’
time to avoid a major storm system?
Maps: Do you have up-to-date maps?
4-21
Page 220 of 378
Downloaded from www.Manualslib.com manuals search engine Loading Your Vehicle
TIRE-LOADING INFORMATION
VEHICLE CAP. WT.
FRT. CTR. RR. TOTAL LBS.
MAX. LOADING & GVWR SAME AS VEHICLE
CAPACITY WEIGHT
XXX COLD TIRE
TIRE
SIZE SPEED PRESSURE
RTG PSI/KPa
FRT.
RR.
SPA.
IF TIRES ARE HOT, ADD 4PSIi28KPa
SEE OWNER‘S MANUAL FOR ADDITIONAL
INFORMATiON
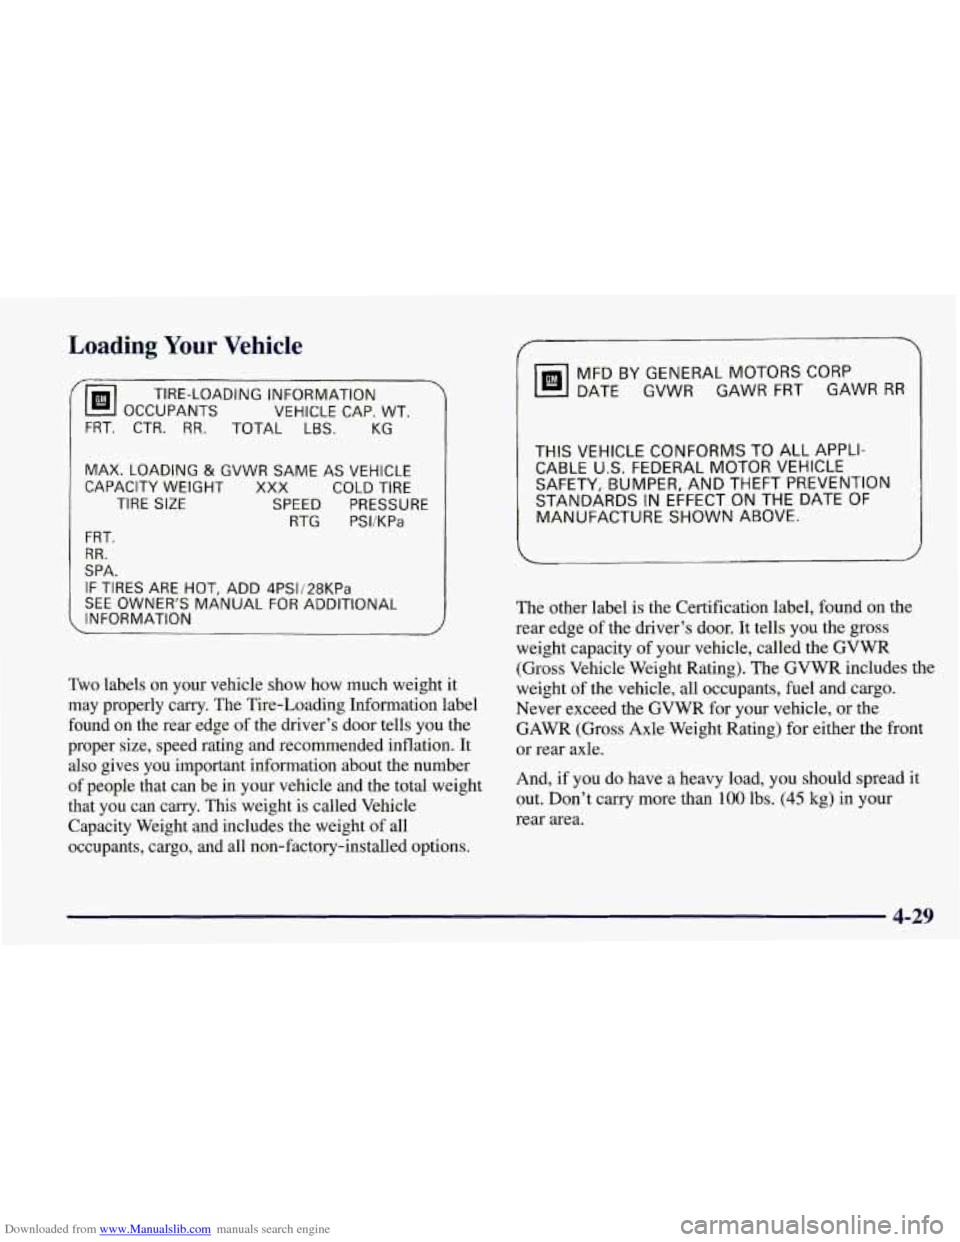
Two labels on your vehicle show how much weight it
may properly carry. The Tire-Loading Information label
found on the rear edge of the driver’s door tells you the
proper size, speed rating and recommended inflation. It
also gives you important information about the number
of people that can be in your vehicle and the total weight
that you can carry. This weight is called Vehicle
Capacity Weight and includes the weight
of all
occupants, cargo, and all non-factory-installed options.
MFD BY GENERAL MOTORS CORP
DATE GVWR GAWR FRT GAWR
RR
THIS VEHICLE CONFORMS TO ALL APPLI-
CABLE U.S. FEDERAL MOTOR VEHICLE
SAFETY, BUMPER, AND THEFT PREVENTION
STANDARDS IN EFFECT ON THE DATE
OF
MANUFACTURE SHOWN ABOVE.
I
The other label is the Certification label, found on the
rear edge of the driver’s door. It tells you the gross
weight capacity of your vehicle, called the GVWR
(Gross Vehicle Weight Rating). The GVWR includes the
weight of the vehicle, all occupants, fuel and cargo.
Never exceed the GVWR for your vehicle, or the
GAWR (Gross Axle Weight Rating) for either the front
or rear axle.
And, if you do have a heavy load,
you should spread it
out. Don’t carry more than
100 lbs. (45 kg) in your
rear area.
4-29
Page 246 of 378
Downloaded from www.Manualslib.com manuals search engine Section 6 Service and Appearance Care
Here you will find information about the care of your vehicle. This section begins with service and fuel information,
and then it shows how to check important fluid and lubricant levels. There is also technical information about your
vehicle, and a part devoted to its appearance care.
6-2
6-3
6-8
6- 12
6- 16
6-18
6- 19
6-20
6-2
1
6-22
6-26
6-26
6-27
6-29
6-32
6-33
6-37
6-40
Service
Fuel
Filling a Portable Fuel Container
Engine Oil
Air Cleaner
Automatic Transmission Fluid
Manual Transmission Fluid
Hydraulic Clutch
Rear Axle
Engine Coolant Surge Tank Pressure Cap
Power Steering Fluid
Windshield Washer Fluid
Brakes
Battery
Bulb Replacement
Windshield Wiper Blade Replacement
Tires 6-52
6-52
6-54
6-54
6-55
6-55
6-56
6-57
6-58
6-58
6-59
6-59
6-61
6-62
6-62
6-62
6-69
6-70 Appearance Care Cleaning the Inside of Your Vehicle
Care of Safety Belts
Cleaning Glass Surfaces
Weatherstrips Cleaning a Removable Roof Panel
Cleaning the Outside of Your Vehicle
Cleaning Your Convertible Top
Cleaning Aluminum Wheels
Cleaning Tires
Finish Damage
Underbody Maintenance
Appearance Care Materials Chart
Vehicle Identification Number (VIN)
Service Parts Identification Label
Electrical System
Replacement Bulbs
Capacities and Specifications
6-1
Page 289 of 378
Downloaded from www.Manualslib.com manuals search engine Inflation -- Tire Pressure
The Tire-Loading Information label, which is on the
rear edge of the driver’s door shows the correct inflation
pressures for your tires when they’re cold. “Cold”
means your vehicle has been sitting for at least three
hours or driven no more than
1 mile (1.6 km).
NOTICE:
Don’t let anyone tell you that underinflation or
overinflation is all right. It’s not.
If your tires
don’t have enough
air (underinflation), you can
get the following:
0 Too much flexing
0 Too much heat
0 Tire overloading
0 Bad wear
Bad handling
0 Bad fuel economy.
NOTICE: (Continued) NOTICE: (Continued)
If your tires
have too much air (overinflation).
you can get the following:
Unusual wear
Bad handling
0 Rough ride
0 Needless damage from road hazards.
When to Check
Check your tires once a month or more.
How to Check
With the Tire Pressure Monitor, you can check tire
inflation pressures while driving. After you’ve reached a
speed
of 15 mph (24 kmh) or more, press and release the
GAGES button on the Driver Information Center (DIC)
until the front tire pressures are displayed. Then, press
and release the GAGES button for the rear tire
pressures.
If the display doesn’t show tire pressure, or if
the SERVICE TIRE
MON SYS message appears, see
your dealer for service.
Page 316 of 378
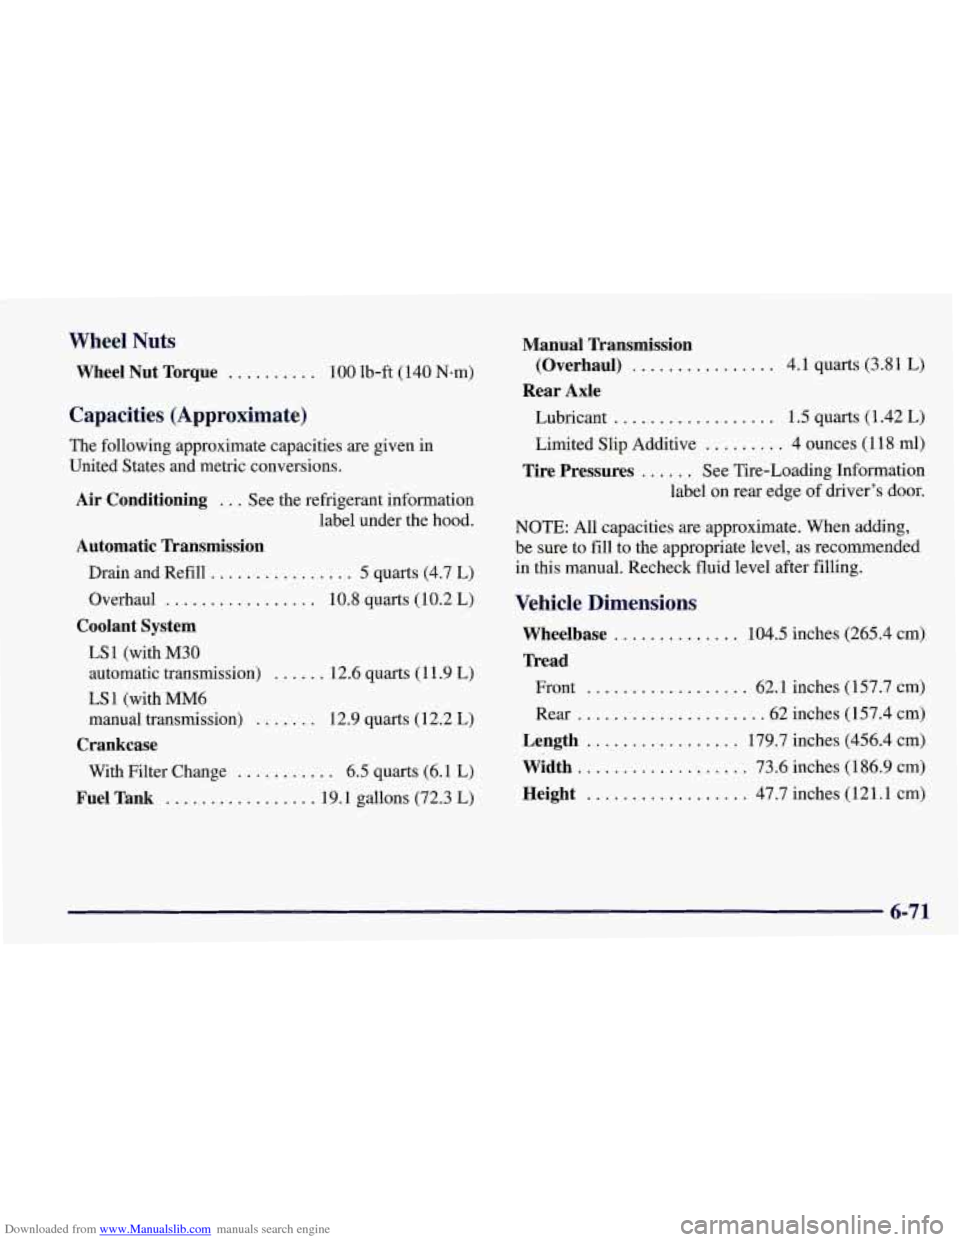
Downloaded from www.Manualslib.com manuals search engine Wheel Nuts
Wheel Nut Torque .......... 100 lb-ft (140 N-m)
Capacities (Approximate)
The following approximate capacities are given in
United States and metric conversions.
Air Conditioning ... See the refrigerant information
label under the hood.
Automatic Transmission
Drain and Refill ................ 5 quarts (4.7 L)
Overhaul
................. 10.8 quarts (10.2 L)
Coolant System
LS 1 (with M30
automatic transmission)
...... 12.6 quarts (1 1.9 L)
LS 1 (with "6
manual transmission)
....... 12.9 quarts ( 12.2 L)
Crankcase
With Filter Change ........... 6.5 quarts (6.1 L)
Fuel Tank ................. 19.1 gallons (72.3 L)
Manual Transmission
Rear Axle (Overhaul)
................ 4.1
quarts (3.8 1 L)
Lubricant
.................. 1.5 quarts (1 -42 L)
Limited Slip Additive ......... 4 ounces (1 18 ml)
Tire Pressures ...... See Tire-Loading Information
label on rear edge of driver's door.
NOTE: All capacities are approximate. When adding,
be sure to fill to the appropriate level, as recommended
in this manual. Recheck fluid level after filling.
Vehicle Dimensions
Wheelbase .............. 104.5 inches (265.4 cm)
Tread
Front .................. 62.1 inches (157.7 cm)
Rear
.................... .62 inches (157.4 cm)
Length ................. 179.7 inches (456.4 cm)
Width ................... 73.6 inches (1 86.9 cm)
Height .................. 47.7 inches (1 21.1 cm)
6-71
Page 330 of 378
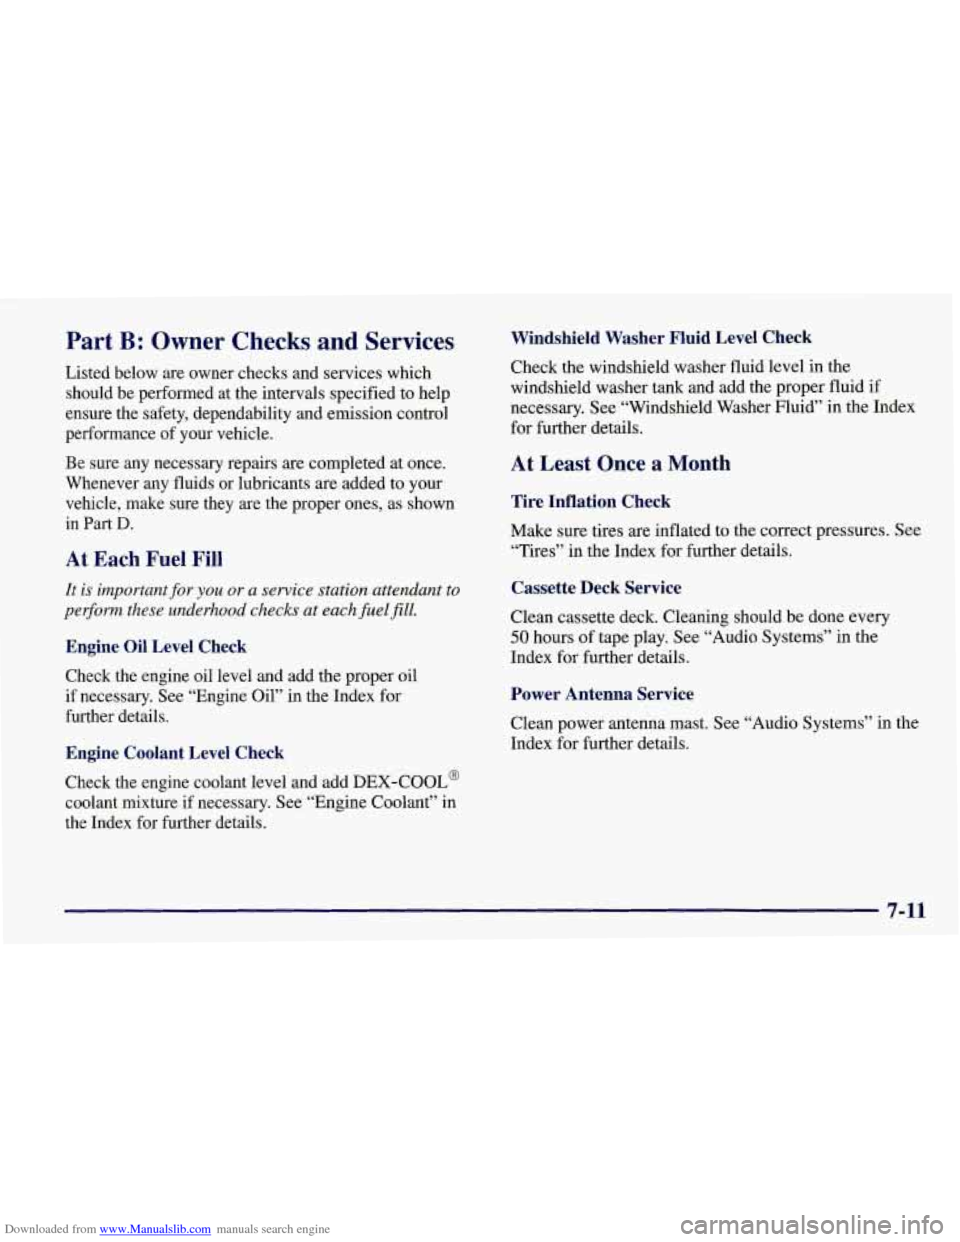
Downloaded from www.Manualslib.com manuals search engine Part B: Owner Checks and Services
Listed below are owner checks and services which
should be performed at the intervals specified to help
ensure the safety, dependability and emission control
performance of your vehicle.
Be sure any necessary repairs are completed at once.
Whenever any fluids or lubricants are added to your
vehicle, make sure they
are the proper ones, as shown
in
Part D.
At Each Fuel Fill
It is important for you or a service station attendant to
pe$om these underhood checks at each fuel
fill.
Engine Oil Level Check
Check the engine oil level and add the proper oil
if necessary. See “Engine Oil” in the Index for
further details.
Engine Coolant Level Check
Check the engine coolant level and add DEX-COOL@
coolant mixture
if necessary. See “Engine Coolant” in
the Index for further details.
Windshield Washer Fluid Level Check
Check the windshield washer fluid level in the
windshield washer tank and add the proper fluid if
necessary.
See “Windshield Washer Fluid” in the Index
for further details.
At Least Once a Month
Tire Inflation Check
Make sure tires are inflated to the correct pressures. See
“Tires” in the Index for further details.
Cassette Deck Service
Clean cassette deck. Cleaning should be done every
50 hours of tape play. See “Audio Systems” in the
Index for further details.
Power Antenna Service
Clean power antenna mast. See “Audio Systems” in the
Index for further details.
7-11