lock CHEVROLET CORVETTE 2000 5.G Owners Manual
[x] Cancel search | Manufacturer: CHEVROLET, Model Year: 2000, Model line: CORVETTE, Model: CHEVROLET CORVETTE 2000 5.GPages: 361, PDF Size: 2.44 MB
Page 2 of 361
Free lockout assistance
Free dead-battery assistance
Free out-of-fuel assistance
Emergency towing
Every
2000
Corvette
under warranty is
backed with the
following
services:
1-800-CHEV-USA®
(For vehicles purchased in Canada,
call
1-800-268-6800)
that provides in an emergency:
1-800-CHEV-USA
(For vehicles purchased in Canada,
call
1-800-268-6800)
Bumper-to-Bumper
3-years/36,000 miles (60 000 km)
Limited Warranty
Courtesy
Transportation
Page 4 of 361
Table of Contents
Keys and Door Locks
Remote Keyless Entry (RKE) System
Hatch/Trunk Lid Release
Automatic Transmission (If Equipped)
Manual Transmission (If Equipped)
Parking Brake
Windows
Tilt Wheel
Turn Signal/Multifunction Lever
Windshield WipersCruise Control
Interior and Exterior Lamps
Mirrors
Storage Compartments
Convenience Net
Accessory Power Outlet
Instrument Panel, Warning Lights and Gages
Head-Up Display
Driver Information Center
Memory Seats and Seat Controls
Safety BeltsAir Bag System
Child Restraints
Section
1
Section
2
Seats and Restraint Systems
Features and Controls
ii
Page 5 of 361
Table of Contents (cont'd)
Defensive Driving
Drunken Driving
Control of a Vehicle
Braking
SteeringDriving Tips for Various Road Conditions
Recreational Vehicle Towing
Loading Your Vehicle
Towing a Trailer Heating and Air Conditioning
Setting the Radio ClockRadio/Cassette Player/CD Player
Radio Theft-Deterrent Feature
Hazard Warning Flashers
Jump Starting
Towing Your VehicleEngine Overheating
Changing a Flat Tire
If You're Stuck
Problems on the Road
Section
3
Section
4
Section
5
iii Your Driving and the Road Comfort Controls and Audio Systems
Page 16 of 361

xiv
For example,
these symbols
are used on an
original battery:
CAUTION
POSSIBLE
INJURY
PROTECT
EYES BY
SHIELDING
CAUSTIC
BATTERY
ACID COULD
CAUSE
BURNS
AVOID
SPARKS OR
FLAMES
SPARK OR
FLAME
COULD
EXPLODE
BATTERY
These symbols
are important
for you and
your passengers
whenever your
vehicle is
driven:
DOOR LOCK
UNLOCK
FASTEN
SEAT
BELTS
POWER
WINDOW
AIR BAG
These symbols
have to do with
your lamps:
MASTER
LIGHTING
SWITCH
TURN
SIGNALS
PARKING
LAMPS
HAZARD
WARNING
FLASHER
DAYTIME
RUNNING
LAMPS
FOG LAMPS
These symbols
are on some of
your controls:
WINDSHIELD
WIPER
WINDSHIELD
WASHER
WINDSHIELD
DEFROSTER
REAR
WINDOW
DEFOGGER
VENTILATING
FAN
These symbols
are used on
warning and
indicator lights:
ENGINE
COOLANT
TEMP
BATTERY
CHARGING
SYSTEM
BRAKE
COOLANT
ENGINE OIL
PRESSURE
ANTI-LOCK
BRAKES
Here are some
other symbols
you may see:
FUSE
LIGHTER
HORN
SPEAKER
FUEL
Vehicle Symbols
These are some of the symbols you may find on your vehicle.
Page 20 of 361
1-2
Seats and Seat Controls
This part tells you about the seats -- how to adjust them,
and also about reclining seatbacks and seatback latches.
Manual Seats
CAUTION:
You can lose control of the vehicle if you try to
adjust a manual driver's seat while the vehicle is
moving. The sudden movement could startle and
confuse you, or make you push a pedal when you
don't want to. Adjust the driver's seat only when
the vehicle is not moving.
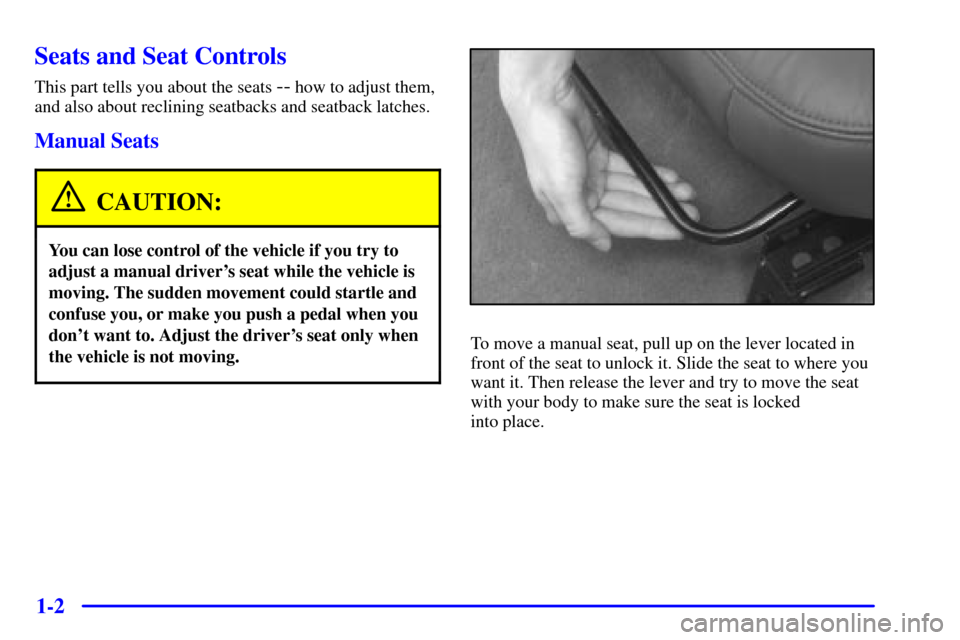
To move a manual seat, pull up on the lever located in
front of the seat to unlock it. Slide the seat to where you
want it. Then release the lever and try to move the seat
with your body to make sure the seat is locked
into place.
Page 22 of 361
1-4 Sport Seat (Option)
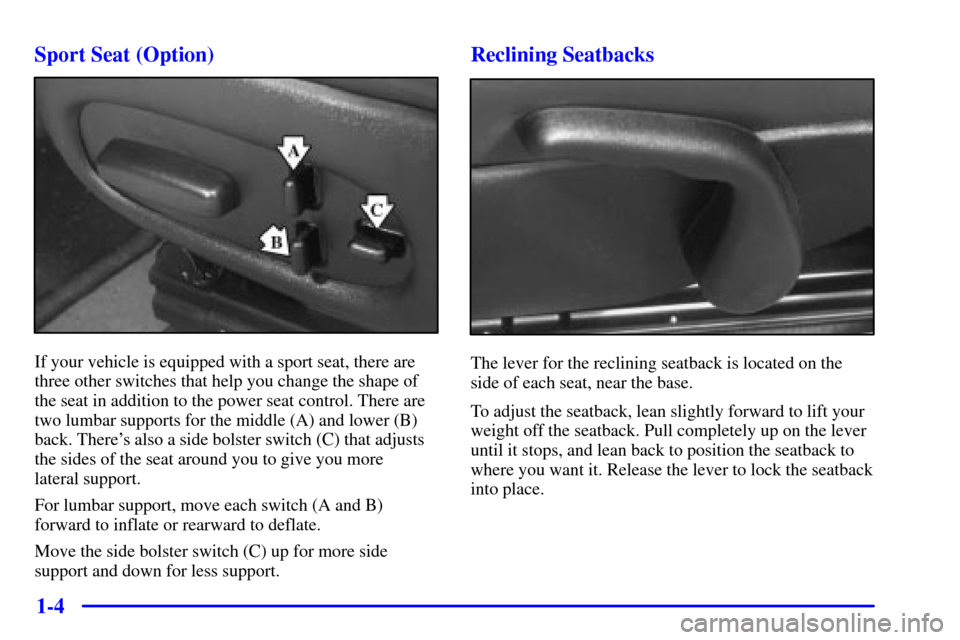
If your vehicle is equipped with a sport seat, there are
three other switches that help you change the shape of
the seat in addition to the power seat control. There are
two lumbar supports for the middle (A) and lower (B)
back. There's also a side bolster switch (C) that adjusts
the sides of the seat around you to give you more
lateral support.
For lumbar support, move each switch (A and B)
forward to inflate or rearward to deflate.
Move the side bolster switch (C) up for more side
support and down for less support.
Reclining Seatbacks
The lever for the reclining seatback is located on the
side of each seat, near the base.
To adjust the seatback, lean slightly forward to lift your
weight off the seatback. Pull completely up on the lever
until it stops, and lean back to position the seatback to
where you want it. Release the lever to lock the seatback
into place.
Page 24 of 361
1-6 Seatback Latches
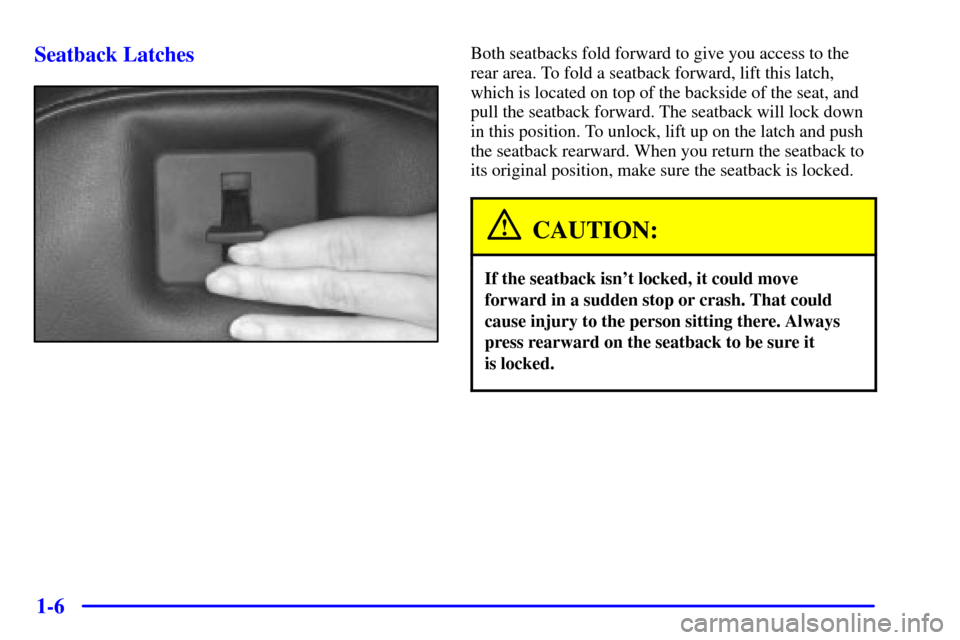
Both seatbacks fold forward to give you access to the
rear area. To fold a seatback forward, lift this latch,
which is located on top of the backside of the seat, and
pull the seatback forward. The seatback will lock down
in this position. To unlock, lift up on the latch and push
the seatback rearward. When you return the seatback to
its original position, make sure the seatback is locked.
CAUTION:
If the seatback isn't locked, it could move
forward in a sudden stop or crash. That could
cause injury to the person sitting there. Always
press rearward on the seatback to be sure it
is locked.
Page 30 of 361
1-12
Q:If I'm a good driver, and I never drive far from
home, why should I wear safety belts?
A:You may be an excellent driver, but if you're in an
accident
-- even one that isn't your fault -- you
and your passenger can be hurt. Being a good
driver doesn't protect you from things beyond
your control, such as bad drivers.
Most accidents occur within 25 miles (40 km)
of home. And the greatest number of serious
injuries and deaths occur at speeds of less than
40 mph (65 km/h).
Safety belts are for everyone.
How to Wear Safety Belts Properly
Adults
This part is only for people of adult size.
Be aware that there are special things to know about
safety belts and children. And there are different rules
for smaller children and babies. If a child will be riding
in your vehicle, see the part of this manual called
ªChildren.º Follow those rules for everyone's protection.
First, you'll want to know which restraint systems your
vehicle has.
We'll start with the driver position.
Driver Position
This part describes the driver's restraint system.
Lap-Shoulder Belt
The driver has a lap-shoulder belt. Here's how to wear
it properly.
1. Close and lock the door.
2. Adjust the seat (to see how, see ªSeatsº in the Index)
so you can sit up straight.
Page 31 of 361
1-13
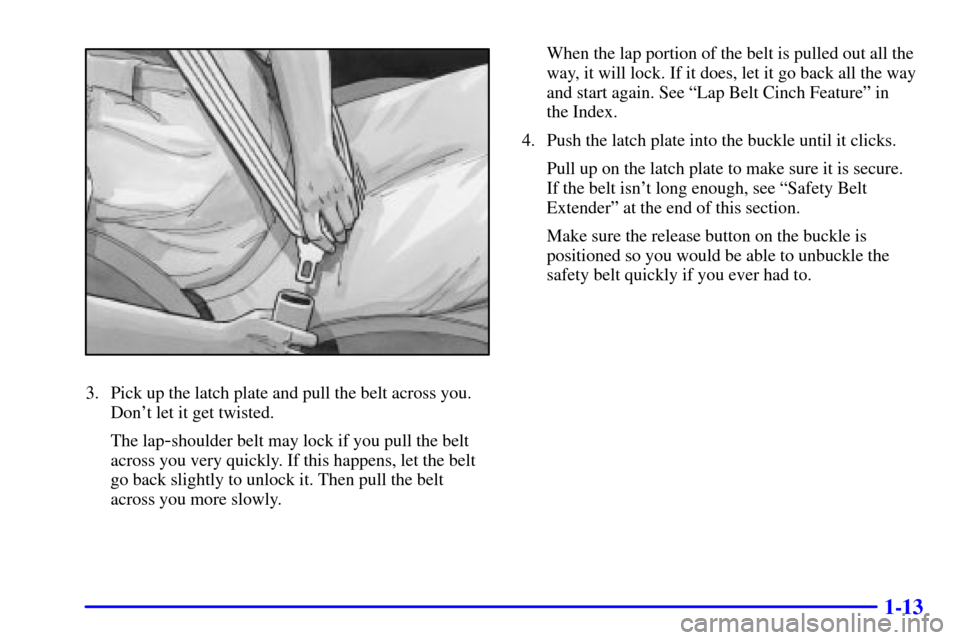
3. Pick up the latch plate and pull the belt across you.
Don't let it get twisted.
The lap
-shoulder belt may lock if you pull the belt
across you very quickly. If this happens, let the belt
go back slightly to unlock it. Then pull the belt
across you more slowly.When the lap portion of the belt is pulled out all the
way, it will lock. If it does, let it go back all the way
and start again. See ªLap Belt Cinch Featureº in
the Index.
4. Push the latch plate into the buckle until it clicks.
Pull up on the latch plate to make sure it is secure.
If the belt isn't long enough, see ªSafety Belt
Extenderº at the end of this section.
Make sure the release button on the buckle is
positioned so you would be able to unbuckle the
safety belt quickly if you ever had to.
Page 32 of 361
1-14
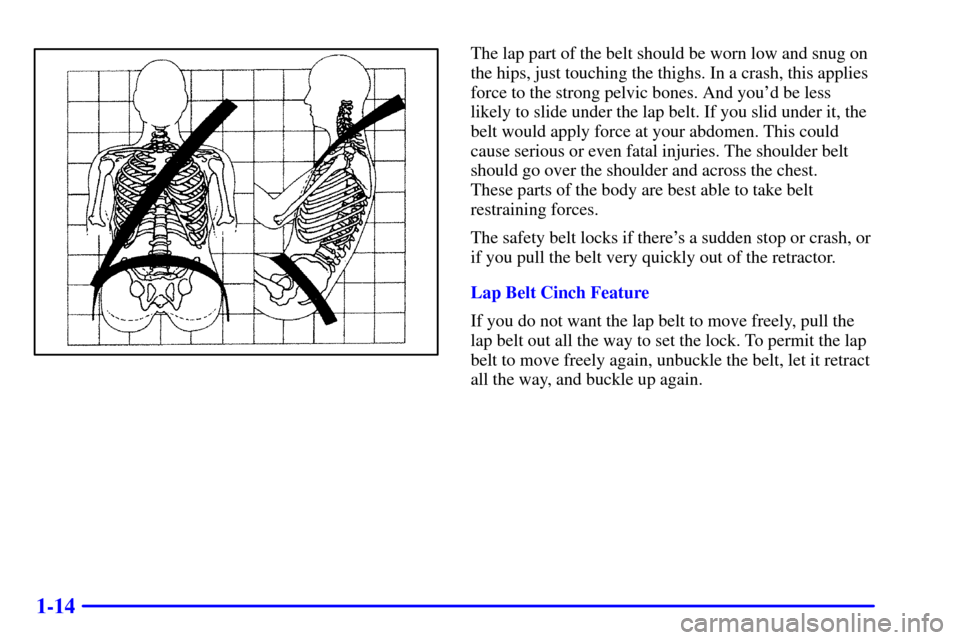
The lap part of the belt should be worn low and snug on
the hips, just touching the thighs. In a crash, this applies
force to the strong pelvic bones. And you'd be less
likely to slide under the lap belt. If you slid under it, the
belt would apply force at your abdomen. This could
cause serious or even fatal injuries. The shoulder belt
should go over the shoulder and across the chest.
These parts of the body are best able to take belt
restraining forces.
The safety belt locks if there's a sudden stop or crash, or
if you pull the belt very quickly out of the retractor.
Lap Belt Cinch Feature
If you do not want the lap belt to move freely, pull the
lap belt out all the way to set the lock. To permit the lap
belt to move freely again, unbuckle the belt, let it retract
all the way, and buckle up again.