CHEVROLET CORVETTE 2001 5.G Owners Manual
Manufacturer: CHEVROLET, Model Year: 2001, Model line: CORVETTE, Model: CHEVROLET CORVETTE 2001 5.GPages: 383, PDF Size: 2.59 MB
Page 261 of 383
5-18
If a Tire Goes Flat
Your Corvette has no spare tire, no tire changing
equipment and no place to store a tire.
It's unusual for a tire to ªblow outº while you're driving,
especially if you maintain your tires properly. See
ªTiresº in the Index. If air goes out of a tire, it's much
more likely to leak out slowly.
If your vehicle has Extended Mobility Tires (EMT), you
won't need to stop on the side of the road to change a
flat tire. EMT tires can operate effectively with no air
pressure. If you drive on a deflated EMT for 50 miles
(80 km) or less and at speeds of 55 mph (90 km/h) or
less, there is a good chance that the tire can be repaired.
Contact the nearest authorized Chevrolet or Goodyear
EMT servicing facility, as soon as possible, to have the
flat tire inspected and repaired or replaced. For more
information, see ªExtended Mobility Tiresº in the Index.CAUTION:
Special tools and procedures are required to
service an Extended Mobility Tire (EMT). If
these special tools and procedures aren't used,
you or others could be injured and your vehicle
could be damaged. Always be sure the proper
tools and procedures, as described in the service
manual, are used.
To order a service manual, see ªService and Owner
Publicationsº in the Index.
Page 262 of 383
5-19
Z06 models do not have Extended Mobility Tires. If a
Z06 model tire goes flat, avoid further tire and wheel
damage by driving slowly to a level place and stopping.
Then do this:
1. Turn on the hazard warning flashers.
2. Set the parking brake firmly.
3. Put the shift lever (manual transmission)
in REVERSE (R).
4. Turn off the engine.
5. Inspect the flat tire.
If the tire has been separated from the wheel or has
damaged sidewalls or large tears that allow rapid air
loss, call a tire repair facility. See ªRoadside Assistanceº
in the Index.
If the flat tire is due to a slow leak caused by a nail or
other similar road hazard, the Tire Inflator Kit may be
used to repair the damaged tire temporarily. The kit uses
a liquid tire sealant to seal small punctures in the tread
area of the tire. The flat tire is then inflated to at least
26 psi (179 kPa) and driven to evenly distribute the tiresealant. The tire pressure is checked after driving for a
maximum of 10 minutes to see if the slow leak has been
stopped. If the tire pressure is 19 psi (131 kPa) or more,
inflate the tire up to the standard operating pressure as
shown on the Tire Pressure Label found on the rear edge
of the driver's door. See ªTires, Pressureº in the Index.
You should have the damaged tire repaired as soon as
possible. The tire sealant is a temporary repair only.
For more information regarding the tire inflator kit see
ªTire Inflator Kitº following this section.
NOTICE:
If the tire pressure has dropped below 19 psi
(131 kPa), the vehicle should not be driven
further. Damage to the tire may be severe and
the sealant will not be effective. Contact Roadside
Assistance, see ªRoadside Assistanceº in
the Index.
Page 263 of 383
5-20
Tire Inflator Kit (Z06 Models Only)
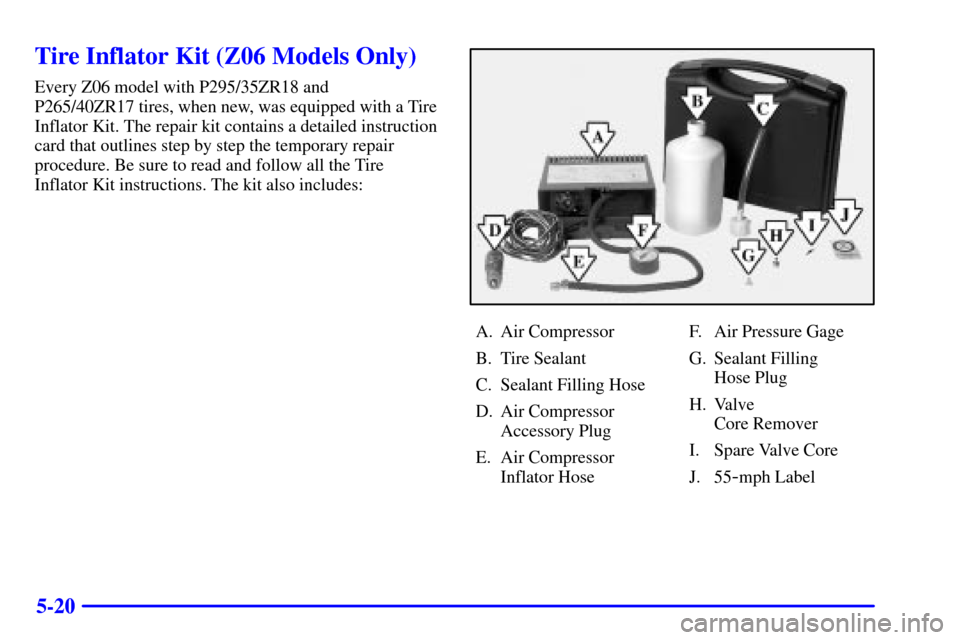
Every Z06 model with P295/35ZR18 and
P265/40ZR17 tires, when new, was equipped with a Tire
Inflator Kit. The repair kit contains a detailed instruction
card that outlines step by step the temporary repair
procedure. Be sure to read and follow all the Tire
Inflator Kit instructions. The kit also includes:
A. Air Compressor
B. Tire Sealant
C. Sealant Filling Hose
D. Air Compressor
Accessory Plug
E. Air Compressor
Inflator HoseF. Air Pressure Gage
G. Sealant Filling
Hose Plug
H. Valve
Core Remover
I. Spare Valve Core
J. 55
-mph Label
Page 264 of 383
5-21 Tire Sealant
The kit contains a liquid sealant that when injected into
a flat tire, may temporarily repair nail holes or cuts in
the tread area of the tire. The tire sealant cannot repair
tire damage caused while driving on a flat tire or a tire
that has had a ªblow outº or a tire that has punctures in
the sidewall areas. The tire sealant solution is a one
-time
use application for one tire only. Check the tire sealant
expiration date; the sealant may not be as effective
beyond the expiration date. The tire sealant can be
peeled off easily after drying.
NOTICE:
Do not use a tire sealant if your vehicle is
equipped with Extended Mobility Tires or tire
pressure monitors. The tire sealant can damage
tire pressure monitor sensors. See ªExtended
Mobility Tiresº in the Index.
Air Compressor
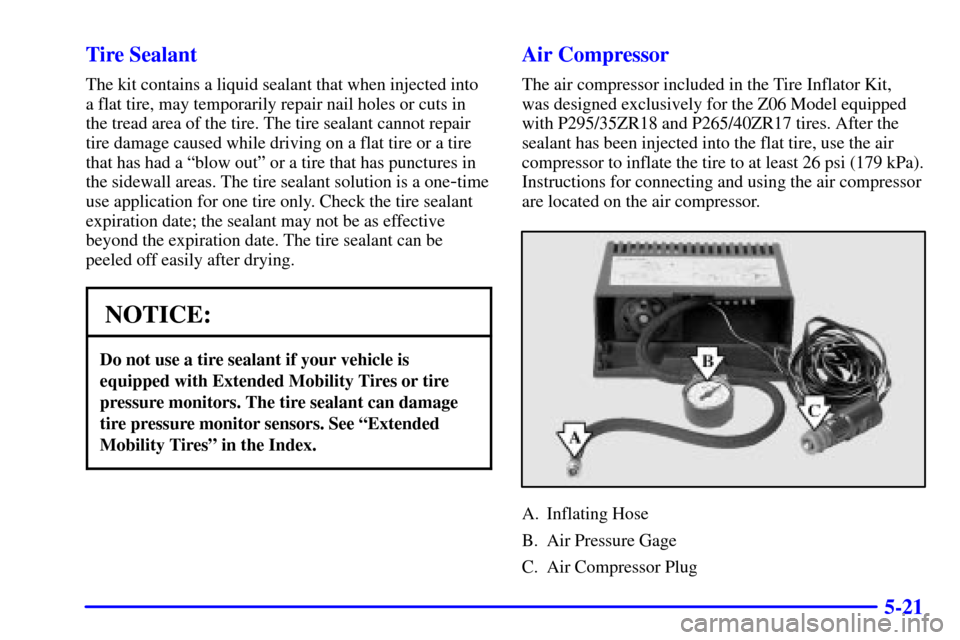
The air compressor included in the Tire Inflator Kit,
was designed exclusively for the Z06 Model equipped
with P295/35ZR18 and P265/40ZR17 tires. After the
sealant has been injected into the flat tire, use the air
compressor to inflate the tire to at least 26 psi (179 kPa).
Instructions for connecting and using the air compressor
are located on the air compressor.
A. Inflating Hose
B. Air Pressure Gage
C. Air Compressor Plug
Page 265 of 383
5-22
NOTICE:
The car engine must be running to avoid draining
the battery while running the air compressor.
Follow the proper steps to be sure your vehicle won't
move. See ªParking Your Vehicle, Manual
Transmissionº in the Index.
CAUTION:
It can be dangerous to get out of your vehicle
with the engine running, if the shift lever is not in
NEUTRAL (N) with the parking brake firmly set
(manual transmission). Your vehicle can roll or
move suddenly even when on fairly level ground.
To be sure your vehicle won't move, always
set your parking brake and move the shift lever
to NEUTRAL (N) when you start or idle
your engine.
CAUTION:
Idling the engine in a closed-in place or with the
climate control system off can cause deadly
carbon monoxide (CO). See ªEngine Exhaustº in
the Index.
CAUTION:
Inflating something too much can make it
explode, and you or others could be injured. Be
sure to read the inflator instructions, and inflate
the tire to its recommended pressure. Do not
exceed 36 psi (248 kPa).
Page 266 of 383
5-23
NOTICE:
Do not allow the air compressor to operate
continuously for more than 6 minutes to help
prevent damage from overheating.
NOTICE:
If 26 psi (179 kPa) tire pressure cannot be
reached after 6 minutes, the vehicle should not be
driven further. Damage to the tire is severe and
the sealant will not be effective. Remove the air
compressor plug from the accessory power outlet
and unscrew the inflating hose from the tire
valve. See ªRoadside Assistanceº in the Index.
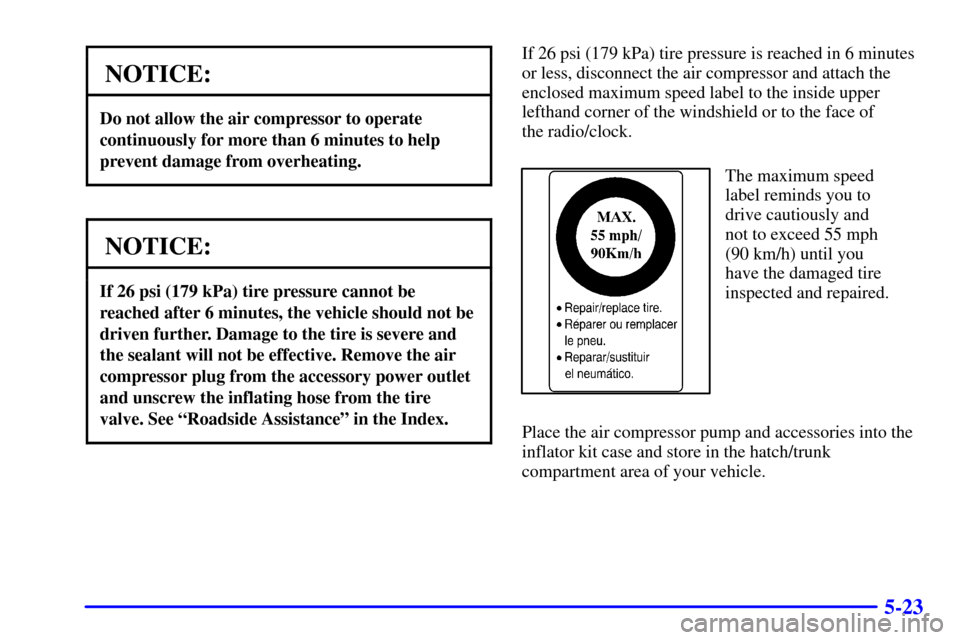
If 26 psi (179 kPa) tire pressure is reached in 6 minutes
or less, disconnect the air compressor and attach the
enclosed maximum speed label to the inside upper
lefthand corner of the windshield or to the face of
the radio/clock.
The maximum speed
label reminds you to
drive cautiously and
not to exceed 55 mph
(90 km/h) until you
have the damaged tire
inspected and repaired.
Place the air compressor pump and accessories into the
inflator kit case and store in the hatch/trunk
compartment area of your vehicle.
Page 267 of 383
5-24 Tire Inflator Kit Storage
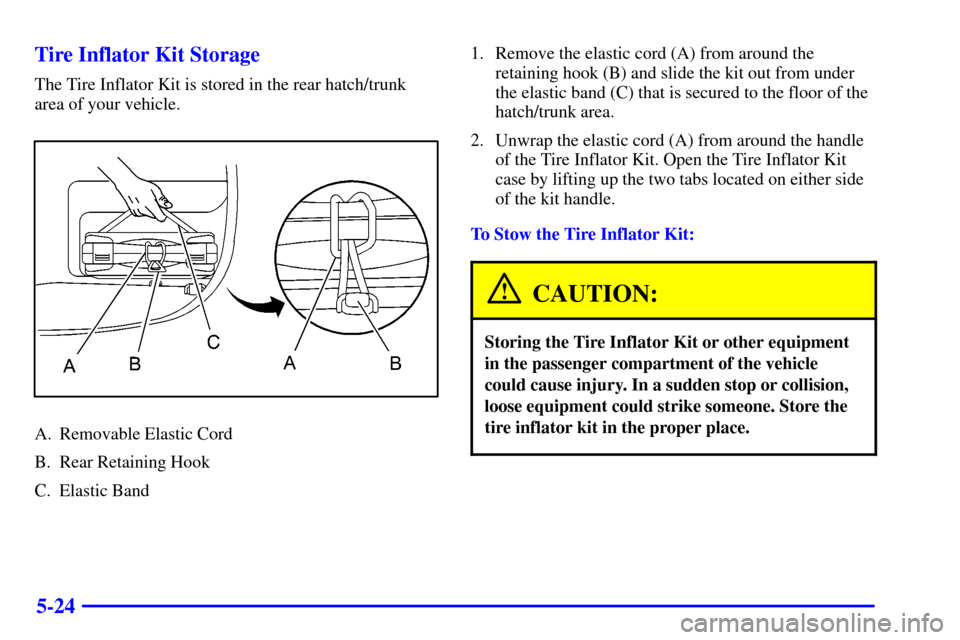
The Tire Inflator Kit is stored in the rear hatch/trunk
area of your vehicle.
A. Removable Elastic Cord
B. Rear Retaining Hook
C. Elastic Band1. Remove the elastic cord (A) from around the
retaining hook (B) and slide the kit out from under
the elastic band (C) that is secured to the floor of the
hatch/trunk area.
2. Unwrap the elastic cord (A) from around the handle
of the Tire Inflator Kit. Open the Tire Inflator Kit
case by lifting up the two tabs located on either side
of the kit handle.
To Stow the Tire Inflator Kit:
CAUTION:
Storing the Tire Inflator Kit or other equipment
in the passenger compartment of the vehicle
could cause injury. In a sudden stop or collision,
loose equipment could strike someone. Store the
tire inflator kit in the proper place.
Page 268 of 383

5-25
A. Tire Inflator Kit
B. Removable Elastic Cord
1. Loop the elastic cord (B) around the handle of the
Tire Inflator Kit (A).A. Tire Inflator Kit
B. Removable Elastic Cord
C. Rear Retaining Hook
D. Elastic Band
2. Insert the tire inflator kit under the elastic band (D)
that is secured to the floor of the hatch/trunk area of
your vehicle.
3. Wrap elastic cord (B) around the retaining hook (C).
Page 269 of 383
5-26
If You're Stuck: In Sand, Mud,
Ice or Snow
In order to free your vehicle when it is stuck, you will
need to spin the wheels, but you don't want to spin
your wheels too fast. The method known as ªrockingº
can help you get out when you're stuck, but you must
use caution.
CAUTION:
If you let your tires spin at high speed, they can
explode, and you or others could be injured. And,
the transmission or other parts of the vehicle can
overheat. That could cause an engine
compartment fire or other damage. When you're
stuck, spin the wheels as little as possible. Don't
spin the wheels above 35 mph (55 km/h) as shown
on the speedometer.
NOTICE:
Spinning your wheels can destroy parts of your
vehicle as well as the tires. If you spin the wheels
too fast while shifting your transmission back
and forth, you can destroy your transmission.
For information about using tire chains on your vehicle,
see ªTire Chainsº in the Index.
Rocking Your Vehicle To Get It Out
First, turn your steering wheel left and right. That will clear
the area around your front wheels. You should turn your
TCS System off. See ªTraction Control Systemº in the
Index. Then shift back and forth between REVERSE (R)
and a forward gear, spinning the wheels as little as possible.
For a manual transmission, shift slowly between either
FIRST (1) or SECOND (2) and REVERSE (R), allowing
the wheels to stop before shifting into gear. Release the
accelerator pedal while you shift, and press lightly on the
accelerator pedal when the transmission is in gear. By
slowly spinning your wheels in the forward and reverse
directions, you will cause a rocking motion that may free
your vehicle. If that doesn't get you out after a few tries, you
may need to be towed out. If you do need to be towed out,
see ªTowing Your Vehicleº in the Index.
Page 270 of 383
6-
6-1
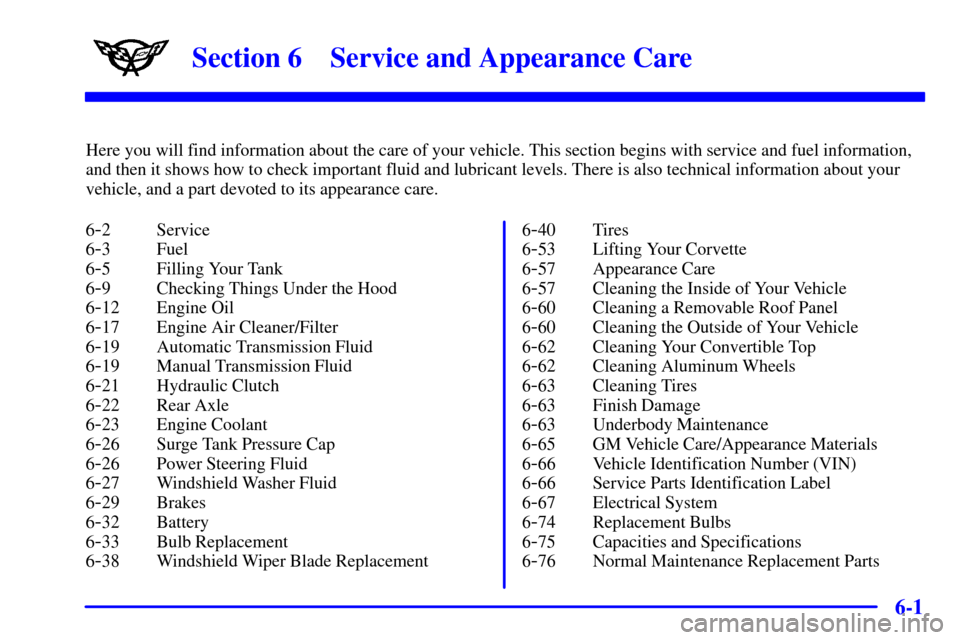
Section 6 Service and Appearance Care
Here you will find information about the care of your vehicle. This section begins with service and fuel information,
and then it shows how to check important fluid and lubricant levels. There is also technical information about your
vehicle, and a part devoted to its appearance care.
6
-2 Service
6
-3 Fuel
6
-5 Filling Your Tank
6
-9 Checking Things Under the Hood
6
-12 Engine Oil
6
-17 Engine Air Cleaner/Filter
6
-19 Automatic Transmission Fluid
6
-19 Manual Transmission Fluid
6
-21 Hydraulic Clutch
6
-22 Rear Axle
6
-23 Engine Coolant
6
-26 Surge Tank Pressure Cap
6
-26 Power Steering Fluid
6
-27 Windshield Washer Fluid
6
-29 Brakes
6
-32 Battery
6
-33 Bulb Replacement
6
-38 Windshield Wiper Blade Replacement6
-40 Tires
6
-53 Lifting Your Corvette
6
-57 Appearance Care
6
-57 Cleaning the Inside of Your Vehicle
6
-60 Cleaning a Removable Roof Panel
6
-60 Cleaning the Outside of Your Vehicle
6
-62 Cleaning Your Convertible Top
6
-62 Cleaning Aluminum Wheels
6
-63 Cleaning Tires
6
-63 Finish Damage
6
-63 Underbody Maintenance
6
-65 GM Vehicle Care/Appearance Materials
6
-66 Vehicle Identification Number (VIN)
6
-66 Service Parts Identification Label
6
-67 Electrical System
6
-74 Replacement Bulbs
6
-75 Capacities and Specifications
6
-76 Normal Maintenance Replacement Parts