check engine CHEVROLET CORVETTE 2003 5.G Service Manual
[x] Cancel search | Manufacturer: CHEVROLET, Model Year: 2003, Model line: CORVETTE, Model: CHEVROLET CORVETTE 2003 5.GPages: 368, PDF Size: 2.55 MB
Page 266 of 368
Checking Brake Fluid
You can check the brake ¯uid without taking off the cap.
Just look at the brake ¯uid reservoir. The ¯uid level
should be above the MIN mark on the reservoir. If it isn't,
have your brake system checked to see if there is
a leak.
After work is done on the brake hydraulic system, make
sure the level is between the MIN and MAX marks.
What to Add
When you do need brake ¯uid, use only DOT-3 brake
¯uid. Refer toPart D: Recommended Fluids and
Lubricants on page 6-14. Use new brake ¯uid from a
sealed container only.
Always clean the brake ¯uid reservoir cap and the area
around the cap before removing it. This will help
keep dirt from entering the reservoir.
{CAUTION:
With the wrong kind of ¯uid in your brake
system, your brakes may not work well, or
they may not even work at all. This could
cause a crash. Always use the proper
brake ¯uid.
Notice:
·Using the wrong ¯uid can badly damage brake
system parts. For example, just a few drops of
mineral-based oil, such as engine oil, in your
brake system can damage brake system
parts so badly that they'll have to be replaced.
Don't let someone put in the wrong kind of ¯uid.
·If you spill brake ¯uid on your vehicle's painted
surfaces, the paint ®nish can be damaged. Be
careful not to spill brake ¯uid on your vehicle. If
you do, wash it off immediately. See
ªAppearance Careº in the Index.
5-38
Page 271 of 368
5. Check that the jumper cables don't have loose or
missing insulation. If they do, you could get a
shock. The vehicles could be damaged, too.
Before you connect the cables, here are some
basic things you should know. Positive (+) will go to
positive (+) or to a remote positive (+) terminal if
the vehicle has one. Negative (-) will go to a heavy,
unpainted metal engine part or to a remote
negative (-) terminal if the vehicle has one.
Don't connect positive (+) to negative (-) or you'll
get a short that would damage the battery and
maybe other parts, too. And don't connect
the negative (-) cable to the negative (-) terminal
on the dead battery because this can cause sparks.
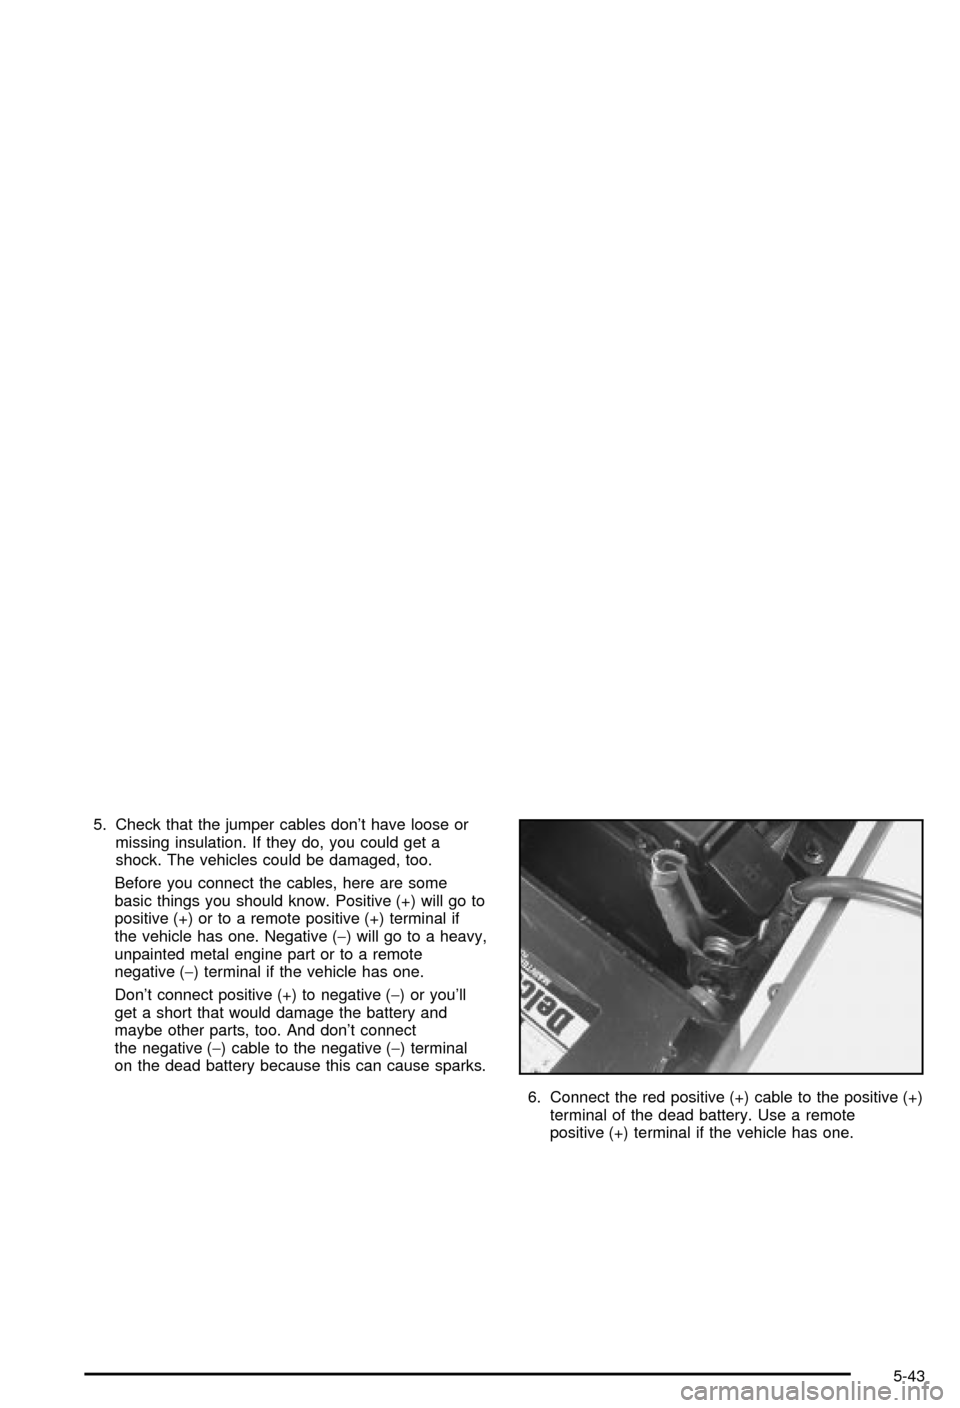
6. Connect the red positive (+) cable to the positive (+)
terminal of the dead battery. Use a remote
positive (+) terminal if the vehicle has one.
5-43
Page 297 of 368

Z06 models do not have Extended Mobility Tires. If a
Z06 model tire goes ¯at, avoid further tire and wheel
damage by driving slowly to a level place and stopping.
Then do this:
1. Turn on the hazard warning ¯ashers.
2. Set the parking brake ®rmly.
3. Put the shift lever (manual transmission) in
REVERSE (R).
4. Turn off the engine.
5. Inspect the ¯at tire.
If the tire has been separated from the wheel or has
damaged sidewalls or large tears that allow rapid
air loss, call a tire repair facility. See
Roadside
Assistance Program on page 7-6.If the ¯at tire is due to a slow leak caused by a nail or
other similar road hazard, the tire in¯ator kit may
be used to repair the damaged tire temporarily. The kit
uses a liquid tire sealant to seal small punctures in
the tread area of the tire. The ¯at tire is then in¯ated to
at least 26 psi (179 kPa) and driven to evenly distribute
the tire sealant. The tire pressure is checked after
driving for a maximum of 10 minutes to see if the slow
leak has been stopped. If the tire pressure is 19 psi
(131 kPa) or more, in¯ate the tire up to the standard
operating pressure as shown on the Tire Pressure Label
found on the rear edge of the driver's door. See
In¯ation -- Tire Pressure on page 5-56.
You should have the damaged tire repaired as soon as
possible. The tire sealant is a temporary repair only.
For more information regarding the tire in¯ator kit
see ªTire In¯ator Kit (Z06 Only)º following this section.
Notice:If the tire pressure has dropped below
19 psi (131 kPa), the vehicle should not be driven
further. Damage to the tire may be severe and
the sealant will not be effective. Contact Roadside
Assistance. See ªRoadside Assistanceº in the Index.
5-69
Page 299 of 368
Tire Sealant
The kit contains a liquid sealant that when injected into
a ¯at tire, may temporarily repair nail holes or cuts
in the tread area of the tire. The tire sealant cannot
repair tire damage caused while driving on a ¯at tire or
a tire that has had a ªblow outº or a tire that has
punctures in the sidewall areas. The tire sealant solution
is a one-time use application for one tire only. Check
the tire sealant expiration date; the sealant may not be
as effective beyond the expiration date. The tire
sealant can be peeled off easily after drying.
Notice:Do not use a tire sealant if your vehicle is
equipped with Extended Mobility Tires or tire
pressure monitors. The tire sealant can damage tire
pressure monitor sensors. See ªExtended Mobility
Tiresº in the Index.
Air Compressor
The air compressor included in the tire in¯ator kit, was
designed exclusively for the Z06 Model equipped
with P295/35ZR18 and P265/40ZR17 tires. After the
sealant has been injected into the ¯at tire, use the
air compressor to in¯ate the tire to at least 26 psi
(179 kPa). Instructions for connecting and using the air
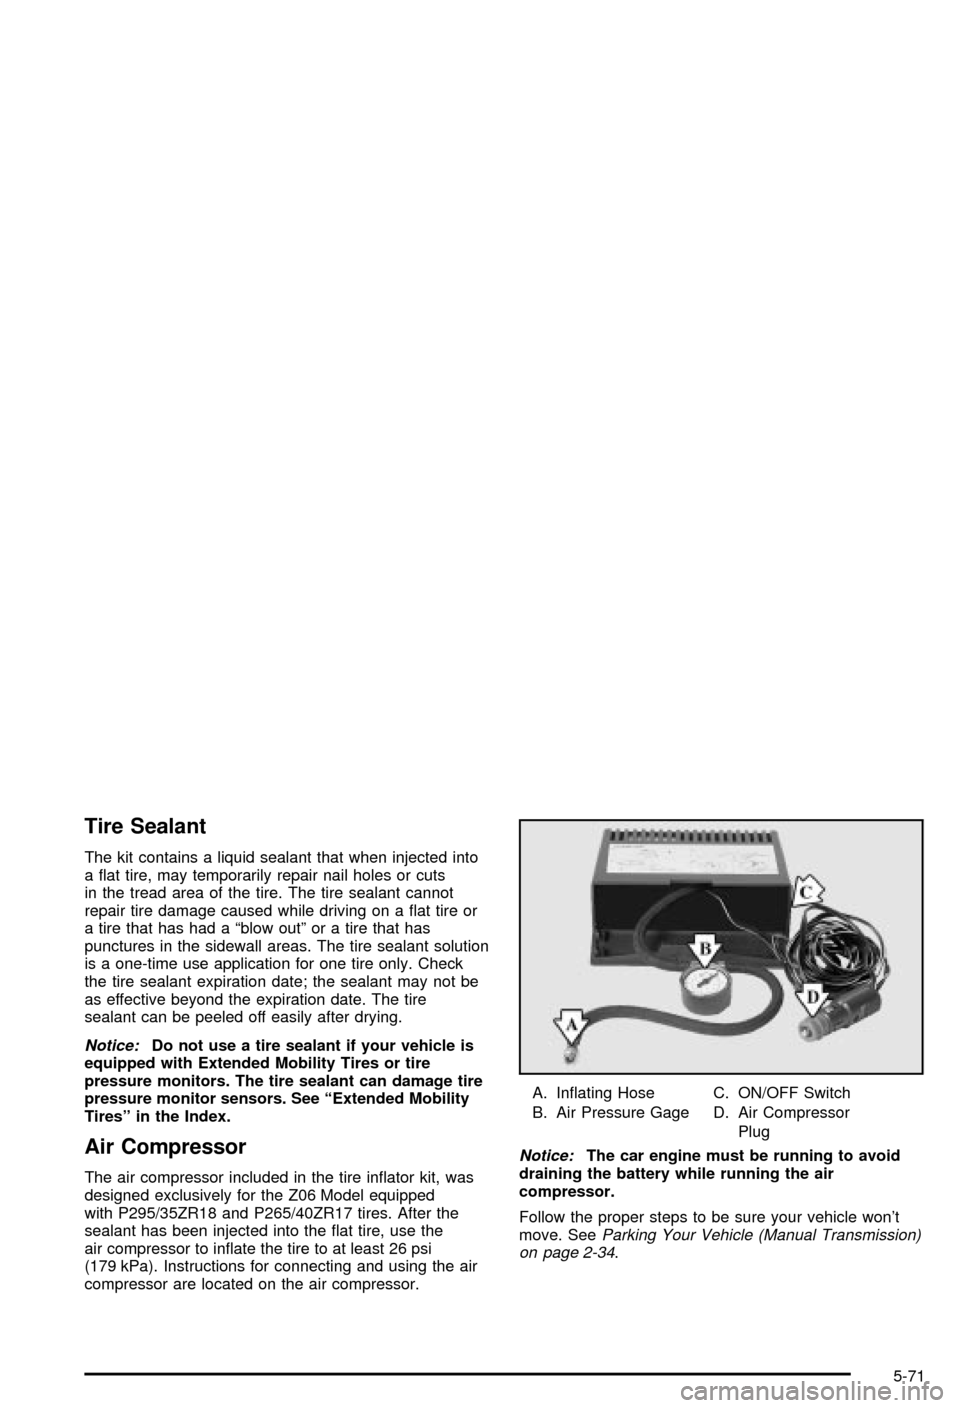
compressor are located on the air compressor.A. In¯ating Hose
B. Air Pressure GageC. ON/OFF Switch
D. Air Compressor
Plug
Notice:The car engine must be running to avoid
draining the battery while running the air
compressor.
Follow the proper steps to be sure your vehicle won't
move. See
Parking Your Vehicle (Manual Transmission)
on page 2-34.
5-71
Page 320 of 368
Capacities and Speci®cations
The following approximate capacities are given in English and metric conversions.
Please refer to
Part D: Recommended Fluids and Lubricants on page 6-14for more information.
Capacities and Speci®cations
ApplicationCapacities
English Metric
Air Conditioning Refrigerant R134a 1.75 lbs 0.79 kg
Automatic Transmission
Drain and Re®ll 5.0 quarts 4.7 L
Overhaul 10.8 quarts 10.2 L
Cooling System 12.6 quarts 11.9 L
Engine Oil with Filter 6.5 quarts 6.1 L
Fuel Tank 18.0 gallons 68.0 L
Manual Transmission (Overhaul) 4.1 quarts 3.8 L
Wheel Nut Torque 100 lb ft 140Y
All capacities are approximate. When adding, be sure to ®ll to the appropriate level, as recommended in this
manual. Recheck ¯uid level after ®lling
5-92
Page 325 of 368
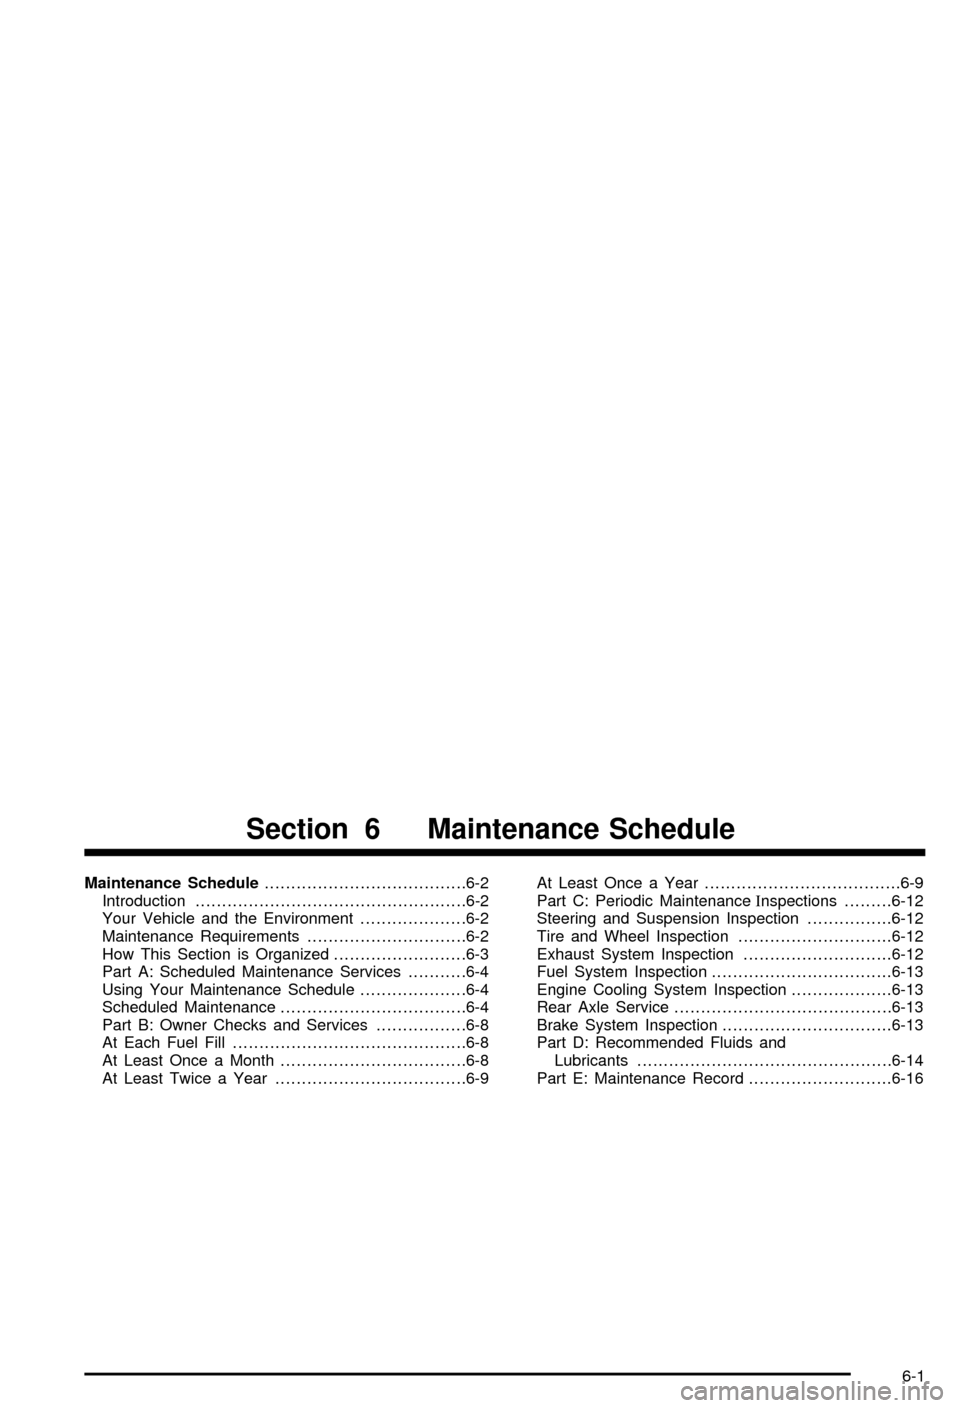
Maintenance Schedule......................................6-2
Introduction...................................................6-2
Your Vehicle and the Environment....................6-2
Maintenance Requirements..............................6-2
How This Section is Organized.........................6-3
Part A: Scheduled Maintenance Services...........6-4
Using Your Maintenance Schedule....................6-4
Scheduled Maintenance...................................6-4
Part B: Owner Checks and Services.................6-8
At Each Fuel Fill............................................6-8
At Least Once a Month...................................6-8
At Least Twice a Year....................................6-9At Least Once a Year.....................................6-9
Part C: Periodic MaintenanceInspections.........6-12
Steering and Suspension Inspection................6-12
Tire and Wheel Inspection.............................6-12
Exhaust System Inspection............................6-12
Fuel System Inspection..................................6-13
Engine Cooling System Inspection...................6-13
Rear Axle Service.........................................6-13
Brake System Inspection................................6-13
Part D: Recommended Fluids and
Lubricants................................................6-14
Part E: Maintenance Record...........................6-16
Section 6 Maintenance Schedule
6-1
Page 326 of 368

Maintenance Schedule
Introduction
Important: Keep engine oil at the proper level and
change as recommended.
Have you purchased the GM Protection Plan? The Plan
supplements your new vehicle warranties. See your
Warranty and Owner Assistance booklet or your dealer
for details.
Your Vehicle and the Environment
Proper vehicle maintenance not only helps to keep your
vehicle in good working condition, but also helps the
environment. Improper vehicle maintenance can
even affect the quality of the air we breathe. Improper
¯uid levels or the wrong tire in¯ation can increase
the level of emissions from your vehicle. To help protect
our environment, and to keep your vehicle in good
condition, be sure to maintain your vehicle properly.
Maintenance Requirements
Maintenance intervals, checks, inspections and
recommended ¯uids and lubricants as prescribed in this
manual are necessary to keep your vehicle in good
working condition. Any damage caused by failure
to follow scheduled maintenance may not be covered by
warranty.
6-2
Page 328 of 368

Part A: Scheduled Maintenance
Services
This part contains engine oil scheduled maintenance
which explains the engine oil life system and how
it indicates when to change the engine oil and ®lter.
Also, listed are scheduled maintenance services which
are to be performed at the mileage intervals speci®ed.
Using Your Maintenance Schedule
We at General Motors want to keep your vehicle in good
working condition. But we don't know exactly how
you'll drive it. You may drive short distances only a few
times a week. Or you may drive long distances all
the time in very hot, dusty weather. You may use your
vehicle in making deliveries. Or you may drive it to
work, to do errands or in many other ways.
Because of the different ways people use their vehicles,
maintenance needs may vary. You may need more
frequent checks and replacements. So please read the
following and note how you drive. If you have
questions on how to keep your vehicle in good condition,
see your dealer.
This part tells you the maintenance services you should
have done and when to schedule them.When you go to your dealer for your service needs,
you'll know that GM-trained and supported service
people will perform the work using genuine GM parts.
The proper ¯uids and lubricants to use are listed in
Part D. Make sure whoever services your vehicle uses
these. All parts should be replaced and all necessary
repairs done before you or anyone else drives the
vehicle.
This schedule is for vehicles that:
·carry passengers and cargo within recommended
limits. You will ®nd these on your vehicle's
Tire-Loading Information label. See
Loading Your
Vehicle on page 4-33.
·are driven on reasonable road surfaces within legal
driving limits.
·use the recommended fuel. SeeGasoline Octane
on page 5-4
.
Scheduled Maintenance
The services shown in this schedule up to 100,000 miles
(166 000 km) should be repeated after 100,000 miles
(166 000 km) at the same intervals for the life of
this vehicle. The services shown at 150,000 miles
(240 000 km) should be repeated at the same interval
after 150,000 miles (240 000 km) for the life of this
vehicle.
6-4
Page 329 of 368

SeePart B: Owner Checks and Services on page 6-8,Part C: Periodic MaintenanceInspections on page 6-12andPart D: Recommended Fluids and Lubricants on
page 6-14.
Footnotes
²The U.S. Environmental Protection Agency or the
California Air Resources Board has determined that the
failure to perform this maintenance item will not nullify
the emissions warranty or limit recall liability prior to the
completion of the vehicle's useful life. We, however,
urge that all recommended maintenance services
be performed at the indicated intervals and the
maintenance be recorded.
Engine Oil Scheduled Maintenance
Change engine oil and ®lter as indicated by the
Engine Oil Life System (or every 12 months,
whichever occurs ®rst). Reset the system.
Your vehicle has a computer system that lets you know
when to change the engine oil and ®lter. This is
based on engine revolutions and engine temperature,
and not on mileage. Based on driving conditions,
the mileage at which an oil change will be indicated can
vary considerably. For the oil life system to work
properly, you must reset the system every time the oil is
changed.When the system has calculated that oil life has been
diminished, it will indicate that an oil change is
necessary. A CHANGE OIL SOON message will come
on. Change your oil as soon as possible within the
next two times you stop for fuel. It is possible that, if you
are driving under the best conditions, the oil life
system may not indicate that an oil change is necessary
for over a year. However, your engine oil and ®lter
must be changed at least once a year and at this time
the system must be reset. Your dealer has GM-trained
service people who will perform this work using
genuine GM parts and reset the system.
It is also important to check your oil regularly and keep
it at the proper level.
If the system is ever reset accidentally, you must
change your oil at 3,000 miles (5 000 km) since your
last oil change. Remember to reset the oil life system
whenever the oil is changed. SeeEngine Oil on
page 5-13for information on resetting the system.
Use engine oil meeting the GM Standard GM4718M.
An Emission Control Service.
See the mileage intervals following for additional
services that may be performed with an engine oil
change. After the services are performed, record the
date, odometer reading and who performed the service
on the maintenance record pages in Part E of this
schedule.
6-5
Page 332 of 368

Part B: Owner Checks and Services
Listed in this part are owner checks and services
which should be performed at the intervals speci®ed to
help ensure the safety, dependability and emission
control performance of your vehicle.
Be sure any necessary repairs are completed at once.
Whenever any ¯uids or lubricants are added to your
vehicle, make sure they are the proper ones, as shown
in Part D.
At Each Fuel Fill
It is important for you or a service station attendant to
perform these underhood checks at each fuel ®ll.
Engine Oil Level Check
Check the engine oil level and add the proper oil if
necessary. SeeEngine Oil on page 5-13for further
details.
Engine Coolant Level Check
Check the engine coolant level and add DEX-COOLž
coolant mixture if necessary. SeeEngine Coolant
on page 5-23for further details.
Windshield Washer Fluid Level Check
Check the windshield washer ¯uid level in the windshield
washer tank and add the proper ¯uid if necessary.
See
Windshield Washer Fluid on page 5-36for further
details.
At Least Once a Month
Tire In¯ation Check
Make sure tires are in¯ated to the correct pressures.
SeeTires on page 5-54for further details.
Cassette Tape Player Service
Clean cassette tape player. Cleaning should be done
every 50 hours of tape play. SeeAudio System(s)
on page 3-62for further details.
Power Antenna Service
Clean power antenna mast. SeeAudio System(s) on
page 3-62for further details.
6-8