Recommended Fluids CHEVROLET CORVETTE 2004 5.G Owners Manual
[x] Cancel search | Manufacturer: CHEVROLET, Model Year: 2004, Model line: CORVETTE, Model: CHEVROLET CORVETTE 2004 5.GPages: 384, PDF Size: 2.46 MB
Page 123 of 384
The wiper speed can only be adjusted when the lever
is in the INT position. Use this position for light rain
or snow.
LO (Low Speed):Move the lever up to the first setting
past INT, for steady wiping at low speed.
HI (High Speed):Move the lever up to the second
setting past INT, for steady wiping at high speed.
MIST:Move the lever all the way down to MIST for a
single wiping cycle. Hold it there until the windshield
wipers start; then let go. The windshield wipers will stop
after one wipe. If you want more wipes, hold the
band on MIST longer.
Heavy snow or ice can overload the wipers. If this
occurs, a circuit breaker will stop the wipers until the
motor cools. So, be sure to clear any ice and snow from
the windshield wiper blades before using them. If the
wiper blades are frozen to the windshield, carefully
loosen them or warm the windshield before turning the
wipers on. If your blades do become worn or
damaged, get new blades or blade inserts.Windshield Washer
The lever on the right side of the steering column also
controls the windshield washer. There is a button at
the end of the lever. To spray washer fluid on the
windshield, press the button and hold it. The washer will
spray until you release the button. The wipers will
continue to clear the window for about six seconds after
the button is released and then stop or return to your
preset speed.
{CAUTION:
In freezing weather, do not use your washer
until the windshield is warmed. Otherwise the
washer uid can form ice on the windshield,
blocking your vision.
If the fluid in the windshield washer fluid reservoir is low,
the message LOW WASHER FLUID will appear on the
Driver Information Center (DIC) display. It will take
60 seconds after the bottle is refilled for this message to
turn off. For information on the correct washer fluid to
use, seeWindshield Washer Fluid on page 5-36and
Recommended Fluids and Lubricants on page 6-11.
3-9
Page 229 of 384
The exit ramp can be curved, sometimes quite sharply.
The exit speed is usually posted. Reduce your speed
according to your speedometer, not to your sense
of motion. After driving for any distance at higher
speeds, you may tend to think you are going slower
than you actually are.
Before Leaving on a Long Trip
Make sure you are ready. Try to be well rested. If you
must start when you are not fresh — such as after
a day’s work — do not plan to make too many miles that
first part of the journey. Wear comfortable clothing
and shoes you can easily drive in.
Is your vehicle ready for a long trip? If you keep it
serviced and maintained, it is ready to go. If it needs
service, have it done before starting out. Of course, you
will find experienced and able service experts in GM
dealerships all across North America. They will be ready
and willing to help if you need it.Here are some things you can check before a trip:
•Windshield Washer Fluid:Is the reservoir full? Are
all windows clean inside and outside?
•Wiper Blades:Are they in good shape?
•Fuel, Engine Oil, Other Fluids:Have you checked
all levels?
•Lamps:Are they all working? Are the lenses clean?
•Tires:They are vitally important to a safe,
trouble-free trip. Is the tread good enough for
long-distance driving? Are the tires all inflated to the
recommended pressure?
•Weather Forecasts:What is the weather outlook
along your route? Should you delay your trip a
short time to avoid a major storm system?
•Maps:Do you have up-to-date maps?
4-25
Page 264 of 384
How to Add Fluid
Here’s how to add fluid. Refer to the Maintenance
Schedule to determine what kind of fluid to use. See
Recommended Fluids and Lubricants on page 6-11.
1. Remove the filler plug.
2. Add fluid at the filler plug hole. Add only enough
fluid to bring the fluid level up to the bottom of the
filler plug hole.
3. Install the filler plug. Be sure the plug is fully
seated.
4. Tighten the plug to 20 lb ft (27Y).
Hydraulic Clutch
The hydraulic clutch linkage in your vehicle is
self-adjusting. The master cylinder reservoir is filled with
hydraulic fluid.
It is not necessary to regularly check the fluid unless
you suspect there is a leak in the system. Adding fluid
won’t correct a leak.
A fluid loss in this system could indicate a problem.
Have the system inspected and repaired.
When to Check and What to Use
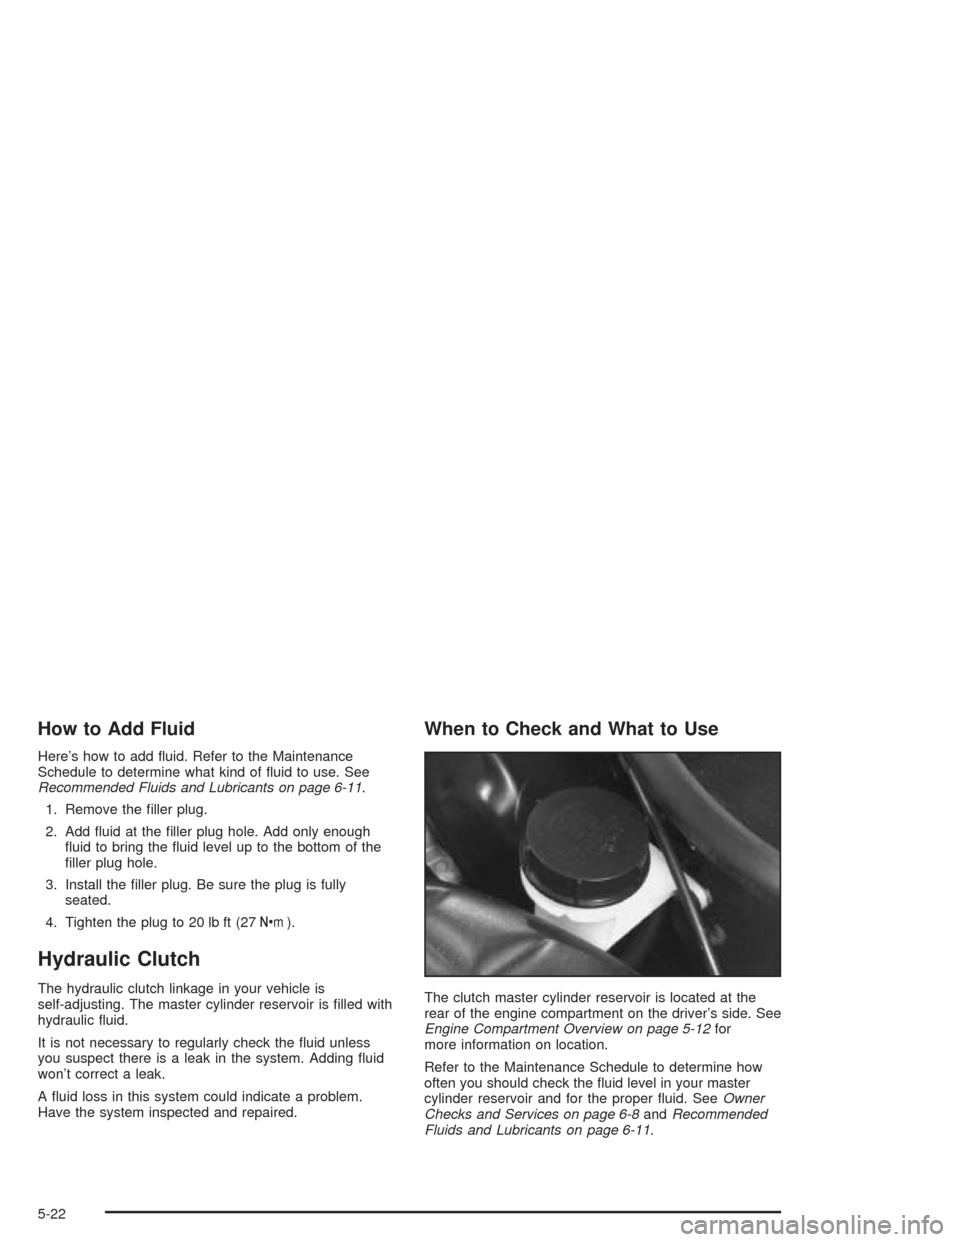
The clutch master cylinder reservoir is located at the
rear of the engine compartment on the driver’s side. See
Engine Compartment Overview on page 5-12for
more information on location.
Refer to the Maintenance Schedule to determine how
often you should check the fluid level in your master
cylinder reservoir and for the proper fluid. SeeOwner
Checks and Services on page 6-8andRecommended
Fluids and Lubricants on page 6-11.
5-22
Page 277 of 384
Power Steering Fluid
When to Check Power Steering Fluid
It is not necessary to regularly check power steering fluid
unless you suspect there is a leak in the system or
you hear an unusual noise. A fluid loss in this system
could indicate a problem. Have the system inspected
and repaired. SeeEngine Compartment Overview
on page 5-12for reservoir location.
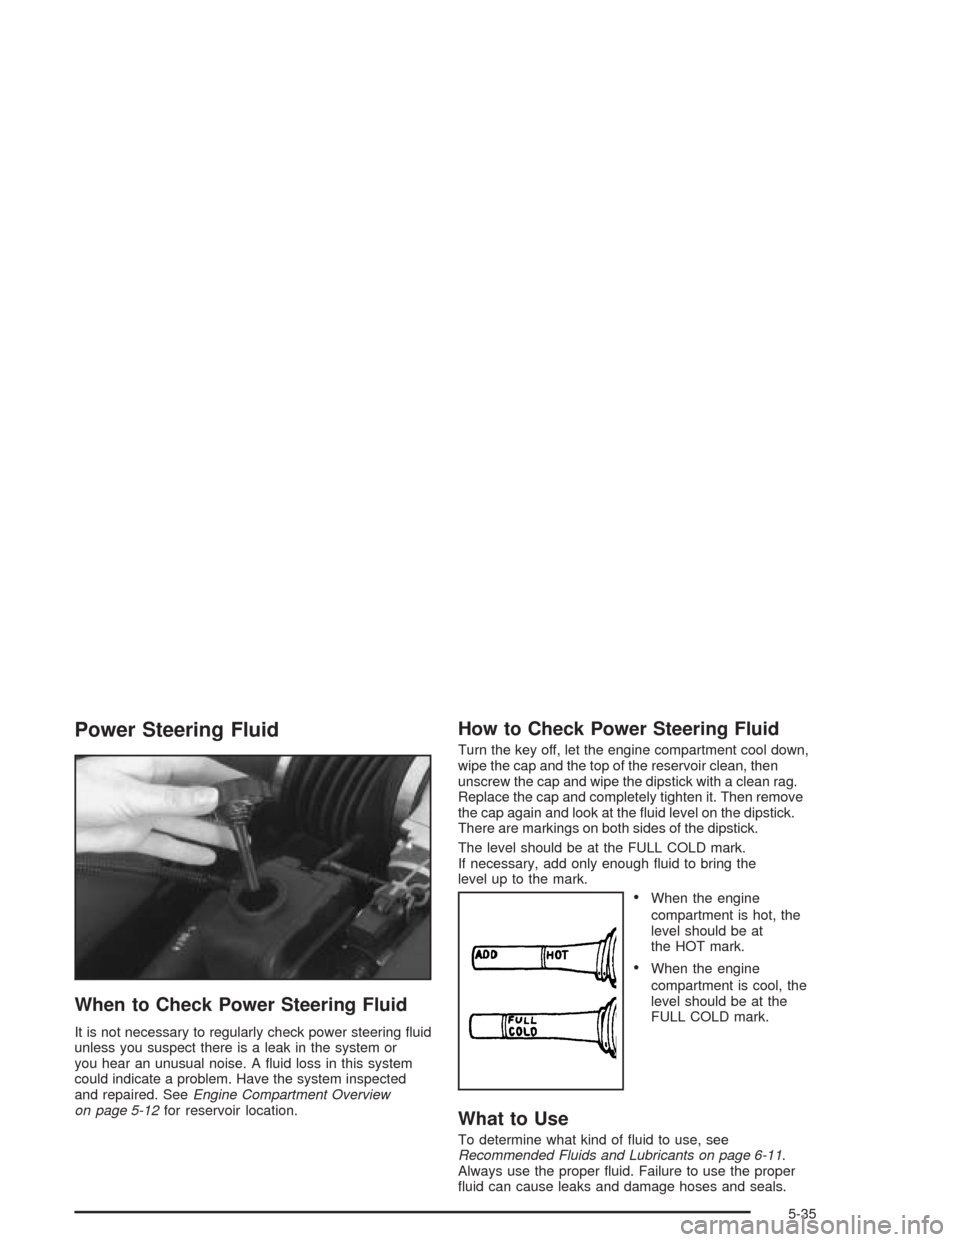
How to Check Power Steering Fluid
Turn the key off, let the engine compartment cool down,
wipe the cap and the top of the reservoir clean, then
unscrew the cap and wipe the dipstick with a clean rag.
Replace the cap and completely tighten it. Then remove
the cap again and look at the fluid level on the dipstick.
There are markings on both sides of the dipstick.
The level should be at the FULL COLD mark.
If necessary, add only enough fluid to bring the
level up to the mark.
•When the engine
compartment is hot, the
level should be at
the HOT mark.
•When the engine
compartment is cool, the
level should be at the
FULL COLD mark.
What to Use
To determine what kind of fluid to use, see
Recommended Fluids and Lubricants on page 6-11.
Always use the proper fluid. Failure to use the proper
fluid can cause leaks and damage hoses and seals.
5-35
Page 280 of 384
Checking Brake Fluid
You can check the brake fluid without taking off the cap.
Just look at the brake fluid reservoir. The fluid level
should be above the MIN mark on the reservoir. If it is
not, have your brake system checked to see if there
is a leak.
After work is done on the brake hydraulic system, make
sure the level is between the MIN and MAX marks.
What to Add
When you do need brake fluid, use only DOT-3 brake
fluid. Refer toRecommended Fluids and Lubricants
on page 6-11. Use new brake fluid from a sealed
container only.
Always clean the brake fluid reservoir cap and the area
around the cap before removing it. This will help
keep dirt from entering the reservoir.
{CAUTION:
With the wrong kind of uid in your brake
system, your brakes may not work well, or they
may not even work at all. This could cause a
crash. Always use the proper brake uid.
Notice:
Using the wrong uid can badly damage brake
system parts. For example, just a few drops of
mineral-based oil, such as engine oil, in your
brake system can damage brake system
parts so badly that they will have to be replaced.
Do not let someone put in the wrong kind of
uid.
If you spill brake uid on your vehicle’s painted
surfaces, the paint nish can be damaged. Be
careful not to spill brake uid on your vehicle. If
you do, wash it off immediately. SeeAppearance
Care on page 5-82.
5-38
Page 327 of 384
Care of Safety Belts
Keep belts clean and dry.
{CAUTION:
Do not bleach or dye safety belts. If you do, it
may severely weaken them. In a crash, they
might not be able to provide adequate
protection. Clean safety belts only with mild
soap and lukewarm water.
Weatherstrips
Silicone grease on weatherstrips will make them last
longer, seal better, and not stick or squeak. Apply
silicone grease with a clean cloth. During very cold,
damp weather frequent application may be required. See
Recommended Fluids and Lubricants on page 6-11.
Cleaning the Outside of Your
Vehicle
The paint finish on your vehicle provides beauty, depth
of color, gloss retention and durability.
Washing Your Vehicle
The best way to preserve your vehicle’s finish is to keep
it clean by washing it often with lukewarm or cold water.
Do not wash your vehicle in the direct rays of the sun.
Use a car washing soap. Do not use strong soaps
or chemical detergents. Be sure to rinse the vehicle well,
removing all soap residue completely. You can get
GM-approved cleaning products from your dealer. See
Vehicle Care/Appearance Materials on page 5-90.
Do not use cleaning agents that are petroleum based,
or that contain acid or abrasives. All cleaning agents
should be flushed promptly and not allowed to dry on the
surface, or they could stain. Dry the finish with a soft,
clean chamois or an all-cotton towel to avoid surface
scratches and water spotting.
5-85
Page 333 of 384
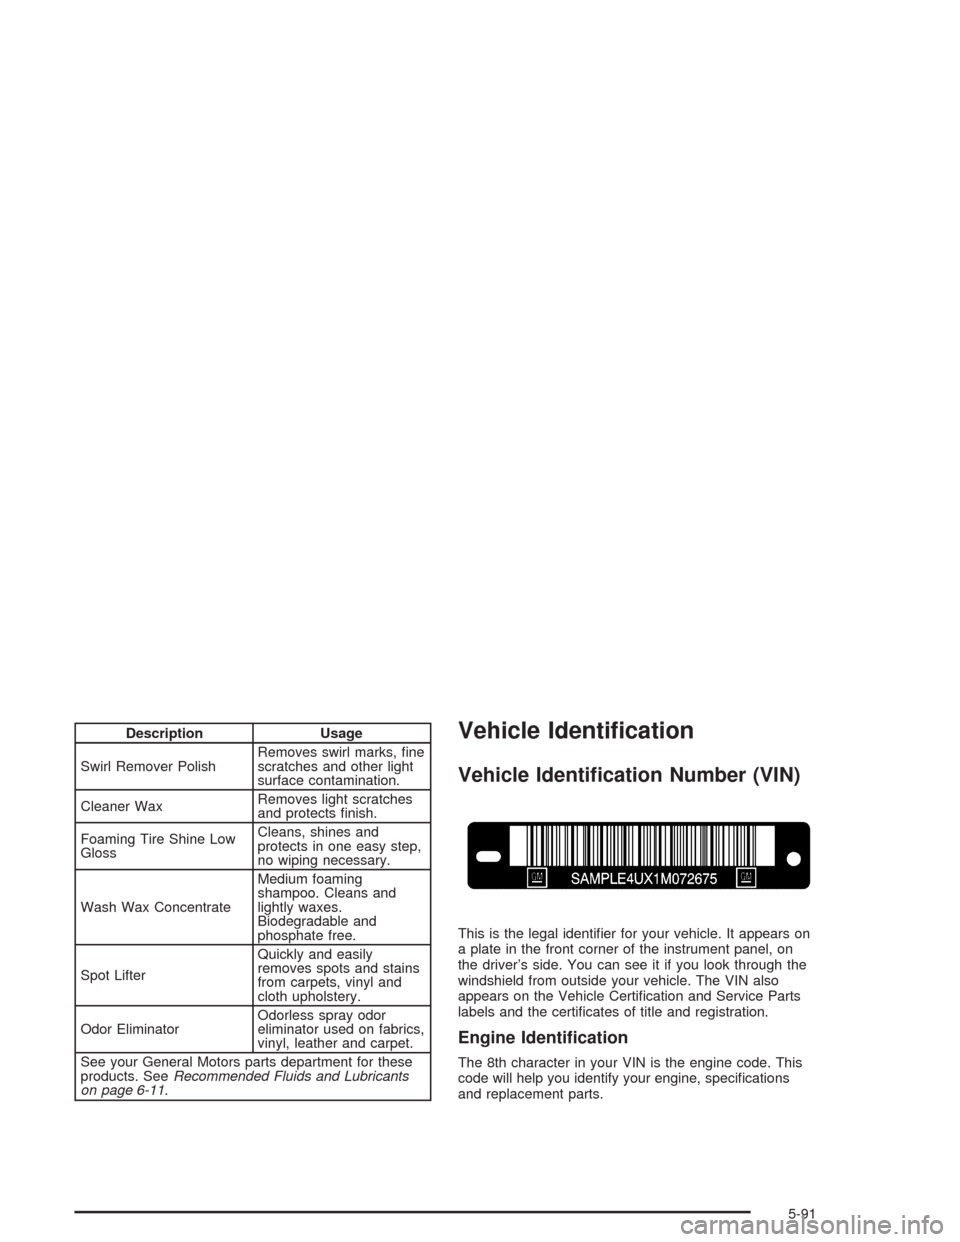
Description Usage
Swirl Remover PolishRemoves swirl marks, fine
scratches and other light
surface contamination.
Cleaner WaxRemoves light scratches
and protects finish.
Foaming Tire Shine Low
GlossCleans, shines and
protects in one easy step,
no wiping necessary.
Wash Wax ConcentrateMedium foaming
shampoo. Cleans and
lightly waxes.
Biodegradable and
phosphate free.
Spot LifterQuickly and easily
removes spots and stains
from carpets, vinyl and
cloth upholstery.
Odor EliminatorOdorless spray odor
eliminator used on fabrics,
vinyl, leather and carpet.
See your General Motors parts department for these
products. SeeRecommended Fluids and Lubricants
on page 6-11.Vehicle Identication
Vehicle Identication Number (VIN)
This is the legal identifier for your vehicle. It appears on
a plate in the front corner of the instrument panel, on
the driver’s side. You can see it if you look through the
windshield from outside your vehicle. The VIN also
appears on the Vehicle Certification and Service Parts
labels and the certificates of title and registration.
Engine Identication
The 8th character in your VIN is the engine code. This
code will help you identify your engine, specifications
and replacement parts.
5-91
Page 341 of 384
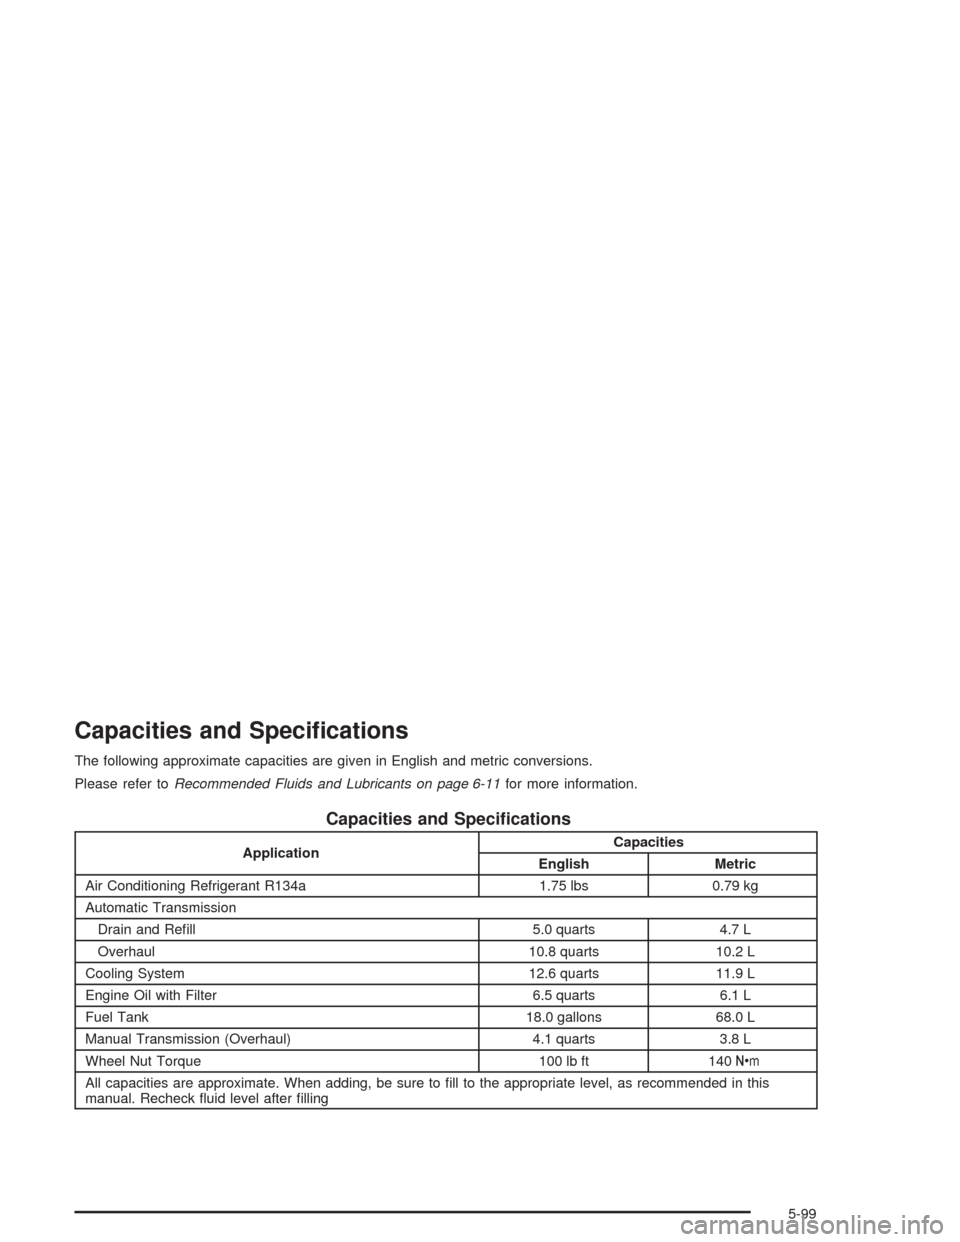
Capacities and Specications
The following approximate capacities are given in English and metric conversions.
Please refer toRecommended Fluids and Lubricants on page 6-11for more information.
Capacities and Specications
ApplicationCapacities
English Metric
Air Conditioning Refrigerant R134a 1.75 lbs 0.79 kg
Automatic Transmission
Drain and Refill 5.0 quarts 4.7 L
Overhaul 10.8 quarts 10.2 L
Cooling System 12.6 quarts 11.9 L
Engine Oil with Filter 6.5 quarts 6.1 L
Fuel Tank 18.0 gallons 68.0 L
Manual Transmission (Overhaul) 4.1 quarts 3.8 L
Wheel Nut Torque 100 lb ft 140Y
All capacities are approximate. When adding, be sure to fill to the appropriate level, as recommended in this
manual. Recheck fluid level after filling
5-99
Page 343 of 384
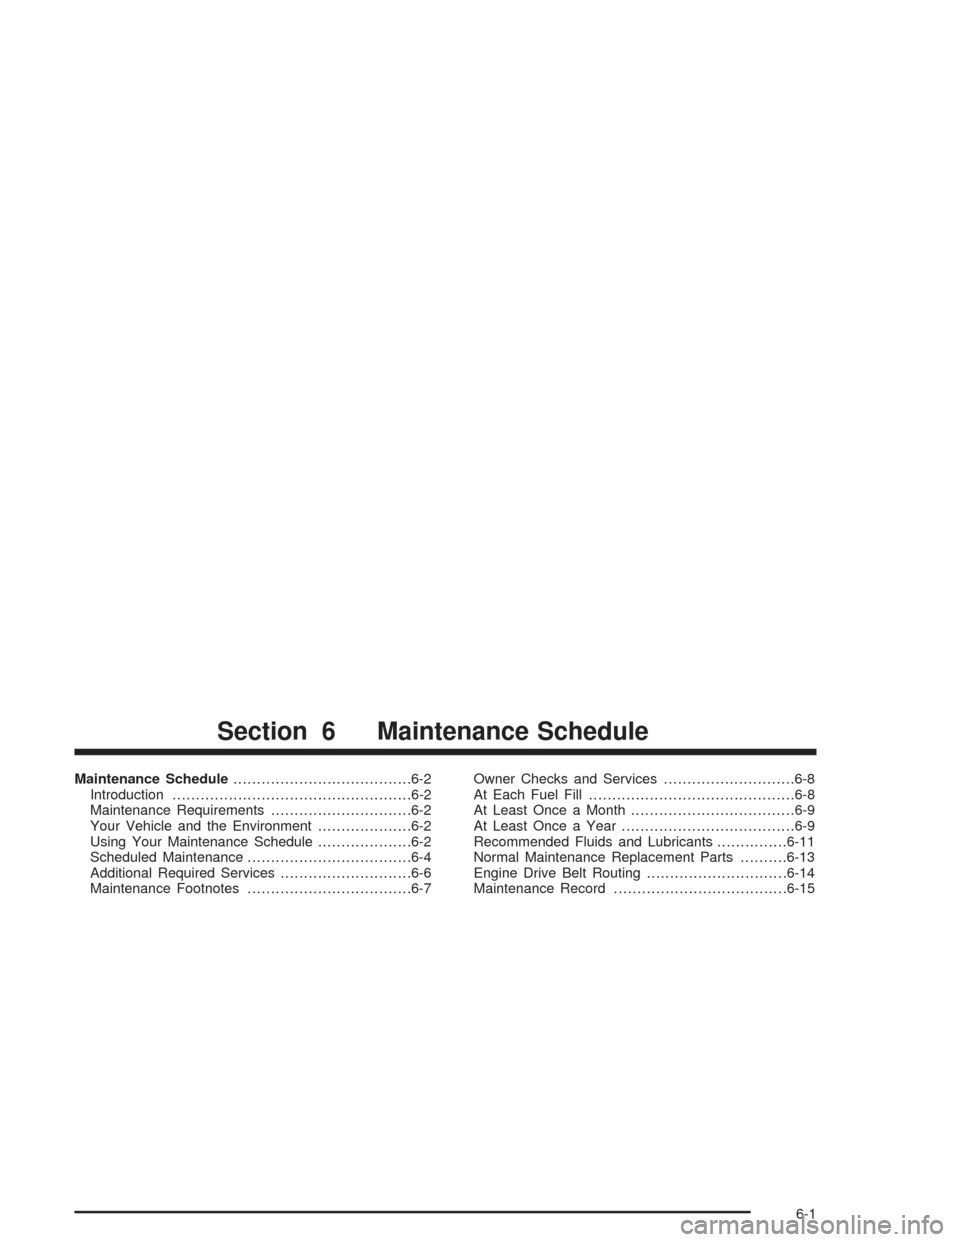
Maintenance Schedule......................................6-2
Introduction...................................................6-2
Maintenance Requirements..............................6-2
Your Vehicle and the Environment....................6-2
Using Your Maintenance Schedule....................6-2
Scheduled Maintenance...................................6-4
Additional Required Services............................6-6
Maintenance Footnotes...................................6-7Owner Checks and Services............................6-8
At Each Fuel Fill............................................6-8
At Least Once a Month...................................6-9
At Least Once a Year.....................................6-9
Recommended Fluids and Lubricants...............6-11
Normal Maintenance Replacement Parts..........6-13
Engine Drive Belt Routing..............................6-14
Maintenance Record.....................................6-15
Section 6 Maintenance Schedule
6-1
Page 345 of 384
This schedule is for vehicles that:
•carry passengers and cargo within recommended
limits. You will find these limits on the tire and
loading information label. SeeLoading Your Vehicle
on page 4-33.
•are driven on reasonable road surfaces within legal
driving limits.
•use the recommended fuel. SeeGasoline Octane
on page 5-5.
The services inScheduled Maintenance on page 6-4
should be performed when indicated. SeeAdditional
Required Services on page 6-6andMaintenance
Footnotes on page 6-7for further information.
{CAUTION:
Performing maintenance work on a vehicle can
be dangerous. In trying to do some jobs, you
can be seriously injured. Do your own
maintenance work only if you have the
required know-how and the proper tools and
equipment for the job. If you have any doubt,
see your GM Goodwrench dealer to have a
qualied technician do the work.Some maintenance services can be complex. So,
unless you are technically qualified and have the
necessary equipment, you should have your GM
Goodwrench dealer do these jobs.
When you go to your GM Goodwrench dealer for your
service needs, you will know that GM-trained and
supported service technicians will perform the work
using genuine GM parts.
If you want to get service information, seeService
Publications Ordering Information on page 7-11.
Owner Checks and Services on page 6-8tells you what
should be checked, when to check it and what you
can easily do to help keep your vehicle in good
condition.
The proper replacement parts, fluids and lubricants to
use are listed inRecommended Fluids and Lubricants
on page 6-11andNormal Maintenance Replacement
Parts on page 6-13. When your vehicle is serviced,
make sure these are used. All parts should be replaced
and all necessary repairs done before you or anyone
else drives the vehicle. We recommend the use of
genuine GM parts.
6-3