transmission CHEVROLET CORVETTE 2004 5.G Owners Manual
[x] Cancel search | Manufacturer: CHEVROLET, Model Year: 2004, Model line: CORVETTE, Model: CHEVROLET CORVETTE 2004 5.GPages: 384, PDF Size: 2.46 MB
Page 57 of 384
Keys...............................................................2-3
Remote Keyless Entry System.........................2-5
Remote Keyless Entry System Operation...........2-6
Doors and Locks.............................................2-9
Door Locks....................................................2-9
Power Door Locks........................................2-10
Lockout Protection........................................2-10
Leaving Your Vehicle....................................2-10
Hatch/Trunk.................................................2-11
Windows........................................................2-14
Power Windows............................................2-15
Sun Visors...................................................2-15
Theft-Deterrent Systems..................................2-16
Theft-Deterrent System..................................2-16
PASS-Key
®..................................................2-18
Starting and Operating Your Vehicle................2-19
New Vehicle Break-In....................................2-19
Front Air Dam..............................................2-19
Ignition Positions..........................................2-20
Starting Your Engine.....................................2-21
Engine Coolant Heater..................................2-23
Automatic Transmission Operation...................2-25
Manual Transmission Operation......................2-28Parking Brake..............................................2-31
Shifting Into Park (P).....................................2-32
Shifting Out of Park (P).................................2-34
Parking Your Vehicle (Manual Transmission).....2-35
Parking Over Things That Burn.......................2-35
Engine Exhaust............................................2-36
Running Your Engine While You Are
Parked (Automatic Transmission).................2-36
Mirrors...........................................................2-37
Manual Rearview Mirror.................................2-37
Automatic Dimming Rearview Mirror................2-38
Outside Power Heated Mirrors........................2-38
Outside Automatic Dimming Mirror..................2-39
Outside Convex Mirror...................................2-39
Storage Areas................................................2-40
Glove Box...................................................2-40
Cupholder(s)................................................2-40
Center Console Storage Area.........................2-40
Floor Mats...................................................2-41
Rear Storage Area........................................2-42
Convenience Net..........................................2-43
Cargo Cover................................................2-43
Section 2 Features and Controls
2-1
Page 68 of 384
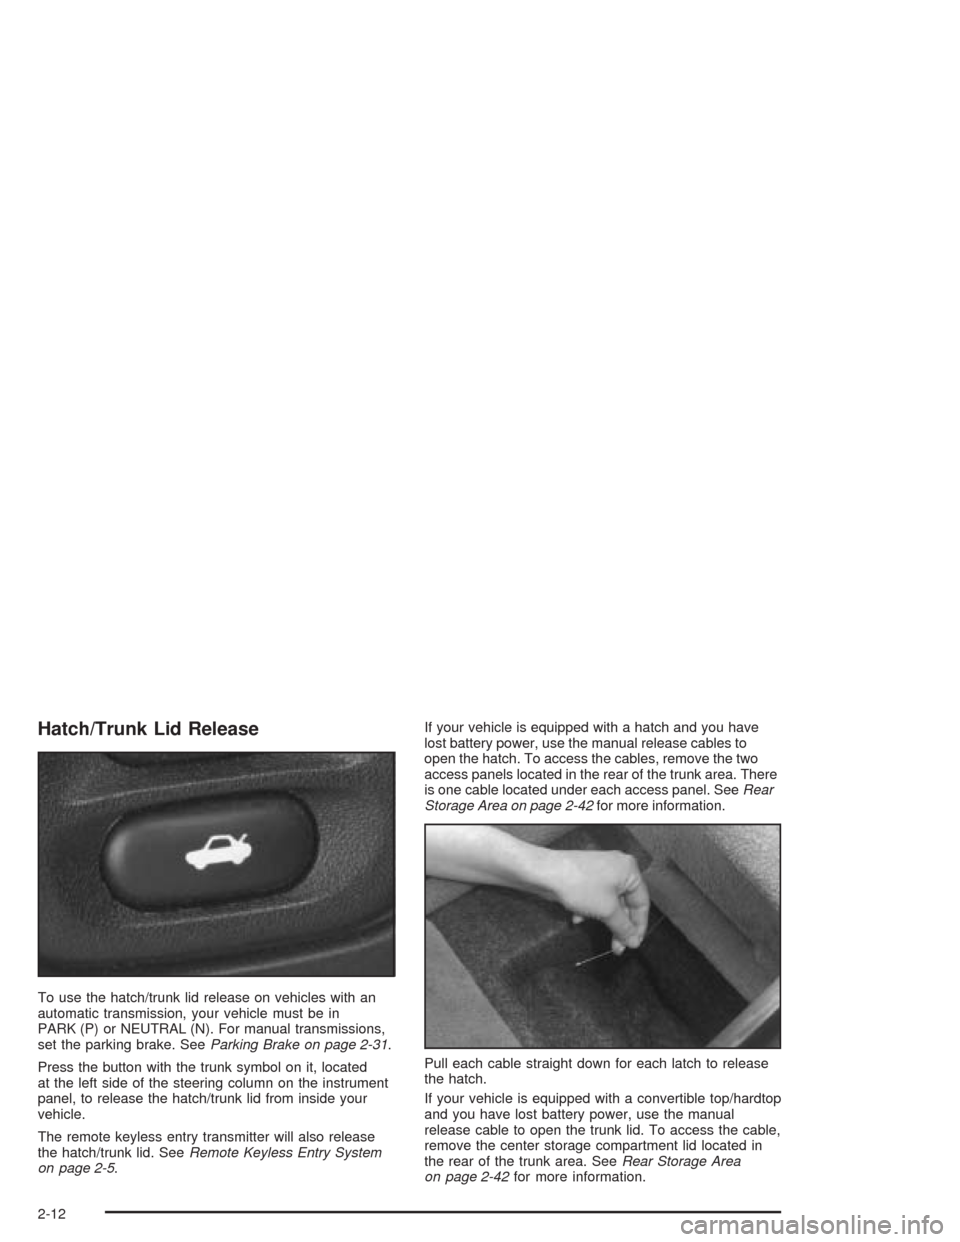
Hatch/Trunk Lid Release
To use the hatch/trunk lid release on vehicles with an
automatic transmission, your vehicle must be in
PARK (P) or NEUTRAL (N). For manual transmissions,
set the parking brake. SeeParking Brake on page 2-31.
Press the button with the trunk symbol on it, located
at the left side of the steering column on the instrument
panel, to release the hatch/trunk lid from inside your
vehicle.
The remote keyless entry transmitter will also release
the hatch/trunk lid. SeeRemote Keyless Entry System
on page 2-5.If your vehicle is equipped with a hatch and you have
lost battery power, use the manual release cables to
open the hatch. To access the cables, remove the two
access panels located in the rear of the trunk area. There
is one cable located under each access panel. SeeRear
Storage Area on page 2-42for more information.
Pull each cable straight down for each latch to release
the hatch.
If your vehicle is equipped with a convertible top/hardtop
and you have lost battery power, use the manual
release cable to open the trunk lid. To access the cable,
remove the center storage compartment lid located in
the rear of the trunk area. SeeRear Storage Area
on page 2-42for more information.
2-12
Page 76 of 384
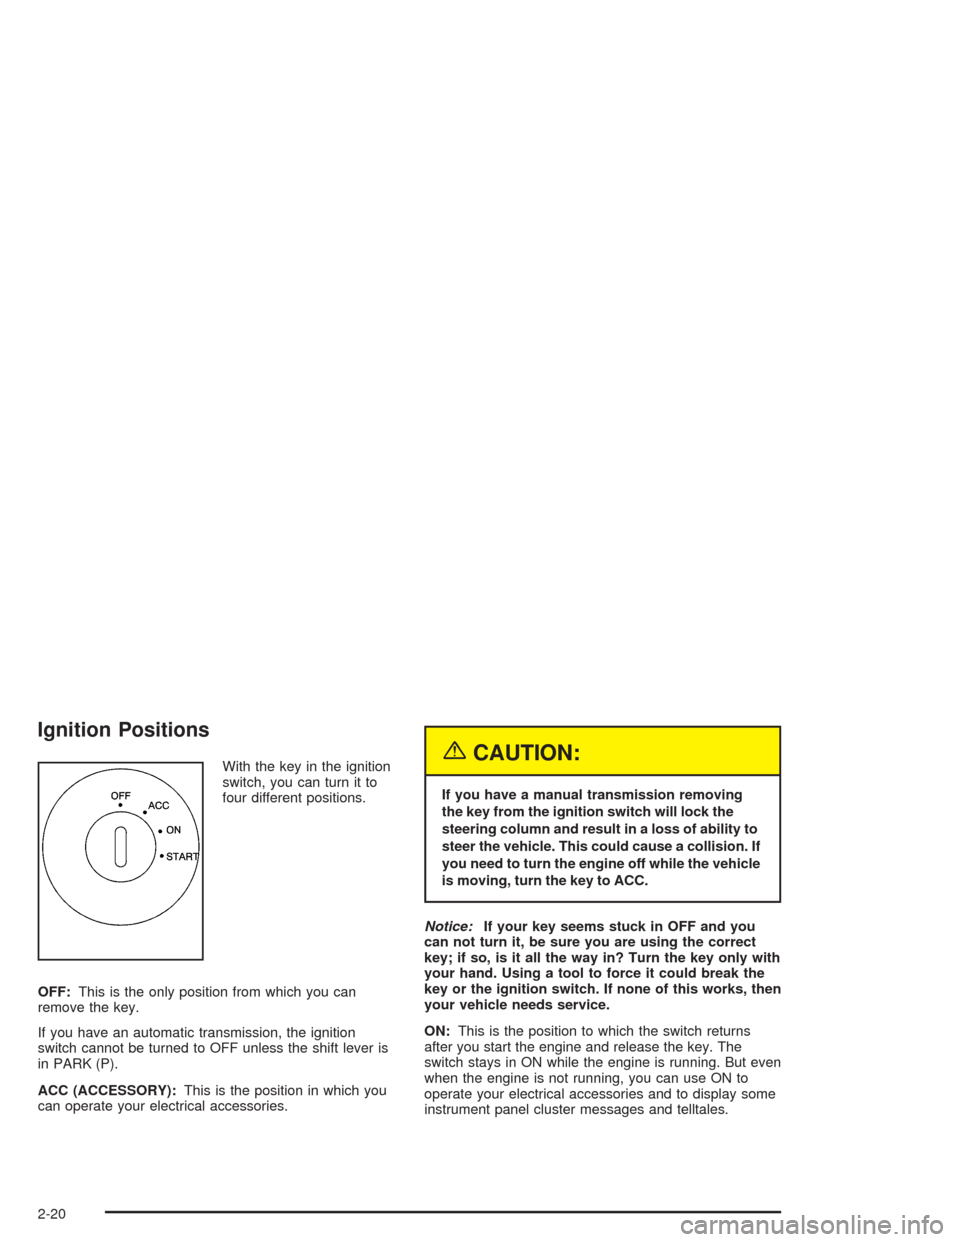
Ignition Positions
With the key in the ignition
switch, you can turn it to
four different positions.
OFF:This is the only position from which you can
remove the key.
If you have an automatic transmission, the ignition
switch cannot be turned to OFF unless the shift lever is
in PARK (P).
ACC (ACCESSORY):This is the position in which you
can operate your electrical accessories.{CAUTION:
If you have a manual transmission removing
the key from the ignition switch will lock the
steering column and result in a loss of ability to
steer the vehicle. This could cause a collision. If
you need to turn the engine off while the vehicle
is moving, turn the key to ACC.
Notice:If your key seems stuck in OFF and you
can not turn it, be sure you are using the correct
key; if so, is it all the way in? Turn the key only with
your hand. Using a tool to force it could break the
key or the ignition switch. If none of this works, then
your vehicle needs service.
ON:This is the position to which the switch returns
after you start the engine and release the key. The
switch stays in ON while the engine is running. But even
when the engine is not running, you can use ON to
operate your electrical accessories and to display some
instrument panel cluster messages and telltales.
2-20
Page 77 of 384
START:This position starts the engine. When the
engine starts, release the key. The ignition switch will
return to ON for normal driving.
When the engine is not running, ACCESSORY and ON
allow you to operate your electrical accessories,
such as the radio.
A warning tone will sound if you open the driver’s door
while the ignition is in OFF or ACCESSORY and
the key is in the ignition.
Retained Accessory Power (RAP)
With RAP, your power windows and the audio system
will continue to work for up to 15 minutes after the
ignition key is turned to OFF and neither door is opened.
If a door is opened, the power windows and audio
system will shut off.
Starting Your Engine
This vehicle has a computer system that monitors
engine speed, throttle and pedal position, and records
the current status.
Automatic Transmission
Move your shift lever to PARK (P) or NEUTRAL (N).
Your engine will not start in any other position – that is
a safety feature. To restart when you are already
moving, use NEUTRAL (N) only.
Notice:Do not try to shift to PARK (P) if your
vehicle is moving. If you do, you could damage the
transmission. Shift to PARK (P) only when your
vehicle is stopped.
2-21
Page 78 of 384
Manual Transmission
The shift lever should be in NEUTRAL and the parking
brake engaged. Hold the clutch pedal to the floor
and start the engine. Your vehicle will not start if the
clutch pedal is not all the way down – that is a safety
feature.
1. With your foot off the accelerator pedal, turn the
ignition key to START. When the engine starts,
let go of the key. The idle speed will go down as
your engine gets warm.
Notice:Holding your key in START for longer than
15 seconds at a time will cause your battery to
be drained much sooner. And the excessive heat
can damage your starter motor. Wait about
15 seconds between each try to help avoid draining
your battery or damaging your starter.
2. If it does not start within 10 seconds, push the
accelerator pedal all the way to the floor, while
you hold the ignition key in START. When
the engine starts, let go of the key and let up on the
accelerator pedal. Wait about 15 seconds between
each try.When starting your engine in very cold weather (below
0°F or−18°C), do this:
1. With your foot off the accelerator pedal, turn the
ignition key to START and hold it there up to
15 seconds. When the engine starts, let go of
the key.
2. If your engine still will not start, or starts but then
stops, it could be flooded with too much gasoline.
Try pushing your accelerator pedal all the way to the
floor and holding it there as you hold the key in
START for about three seconds. When the engine
starts, let go of the key and accelerator. If the
vehicle starts briefly but then stops again, do the
same thing, but this time keep the pedal down
for five or six seconds. This clears the extra
gasoline from the engine.
Notice:Your engine is designed to work with the
electronics in your vehicle. If you add electrical
parts or accessories, you could change the way the
engine operates. Before adding electrical equipment,
check with your dealer. If you do not, your engine
might not perform properly.
2-22
Page 81 of 384
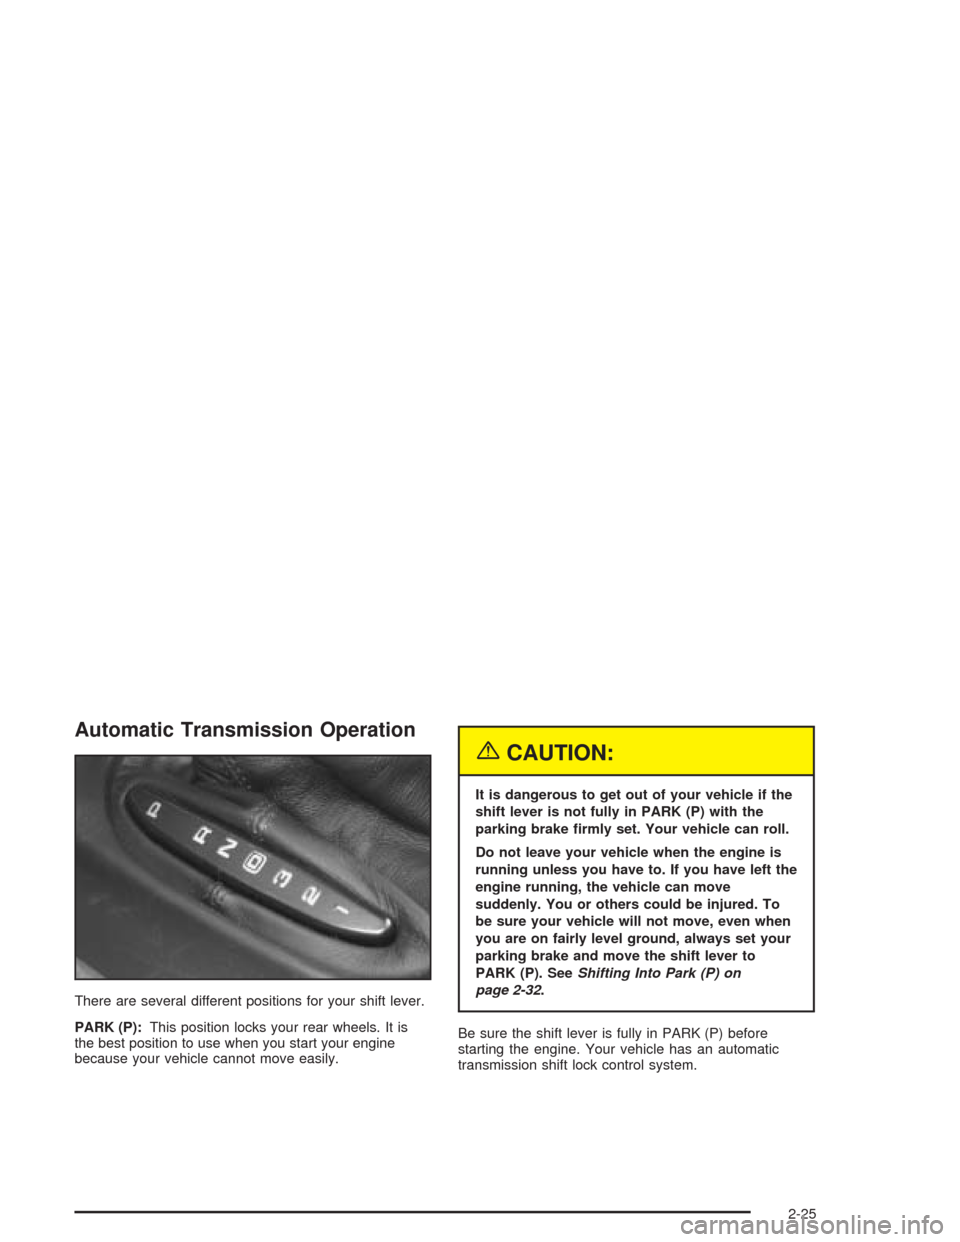
Automatic Transmission Operation
There are several different positions for your shift lever.
PARK (P):This position locks your rear wheels. It is
the best position to use when you start your engine
because your vehicle cannot move easily.
{CAUTION:
It is dangerous to get out of your vehicle if the
shift lever is not fully in PARK (P) with the
parking brake �rmly set. Your vehicle can roll.
Do not leave your vehicle when the engine is
running unless you have to. If you have left the
engine running, the vehicle can move
suddenly. You or others could be injured. To
be sure your vehicle will not move, even when
you are on fairly level ground, always set your
parking brake and move the shift lever to
PARK (P). SeeShifting Into Park (P) on
page 2-32.
Be sure the shift lever is fully in PARK (P) before
starting the engine. Your vehicle has an automatic
transmission shift lock control system.
2-25
Page 82 of 384
You have to fully apply your regular brakes before you
can shift from PARK (P) when the ignition key is in
ON. If you cannot shift out of PARK (P), ease pressure
on the shift lever – push the shift lever all the way
into PARK (P) and release the shift lever button as you
maintain brake application. Then press the shift lever
button and move the shift lever into the gear you wish. If
you do not apply the brake after 15 seconds once the
ignition is turned on, you will receive a PRESS BRAKE
BEFORE SHIFT message in the Driver Information
Center (DIC). SeeShifting Out of Park (P) on page 2-34.
REVERSE (R):Use this gear to back up.
Notice:Shifting to REVERSE (R) while your vehicle
is moving forward could damage the transmission.
The repairs would not be covered by your warranty.
Shift to REVERSE (R) only after your vehicle is
stopped.
To rock your vehicle back and forth to get out of snow,
ice or sand without damaging your transmission,
see If You Are Stuck: In Sand, Mud, Ice or Snow on
page 4-32.NEUTRAL (N):In this position, your engine does not
connect with the wheels. To restart when you are
already moving, use NEUTRAL (N) only. Also, use
NEUTRAL (N) when your vehicle is being towed.
{CAUTION:
Shifting into a drive gear while your engine is
running at high speed is dangerous. Unless
your foot is �rmly on the brake pedal, your
vehicle could move very rapidly. You could
lose control and hit people or objects. Do not
shift into a drive gear while your engine is
running at high speed.
Notice:Shifting out of PARK (P) or NEUTRAL (N)
with the engine running at high speed may damage
the transmission. The repairs would not be
covered by your warranty. Be sure the engine is not
running at high speed when shifting your vehicle.
AUTOMATIC OVERDRIVE (
X): This position is
for normal driving.
2-26
Page 83 of 384
THIRD (3):This position is also used for normal driving.
However, it offers more power and lower fuel economy
than AUTOMATIC OVERDRIVE (
X).
Here are some times you might choose THIRD (3)
instead of AUTOMATIC OVERDRIVE (
X):
•When driving on hilly, winding roads.
•When going down a steep hill.
SECOND (2):This position gives you more power but
lower fuel economy than THIRD (3). You can use
SECOND (2) on hills. It can help control your speed as
you go down steep mountain roads, but then you
would also want to use your brakes off and on.
If you manually select SECOND (2) when you start the
vehicle, the transmission will drive (and stay) in
second gear. You may use this feature for reducing
torque to the rear wheels when you are trying to start
your vehicle from a stop on slippery road surfaces, or for
preventing the transmission from downshifting into
FIRST (1) in situations where a downshift would
be undesirable.FIRST (1):This position gives you even more power,
but lower fuel economy, than SECOND (2). You can use
it on very steep hills, in deep snow or mud. If the shift
lever is put in FIRST (1), the transmission will not
shift into first gear until the vehicle is going slowly
enough.
Notice:Spinning the tires or holding the vehicle in
one place on a hill using only the accelerator
pedal may damage the transmission. If you are
stuck, do not spin the tires. When stopping on a hill,
use the brakes to hold the vehicle in place.
Maximum engine speed is limited to protect driveline
components from improper operation.
2-27
Page 84 of 384
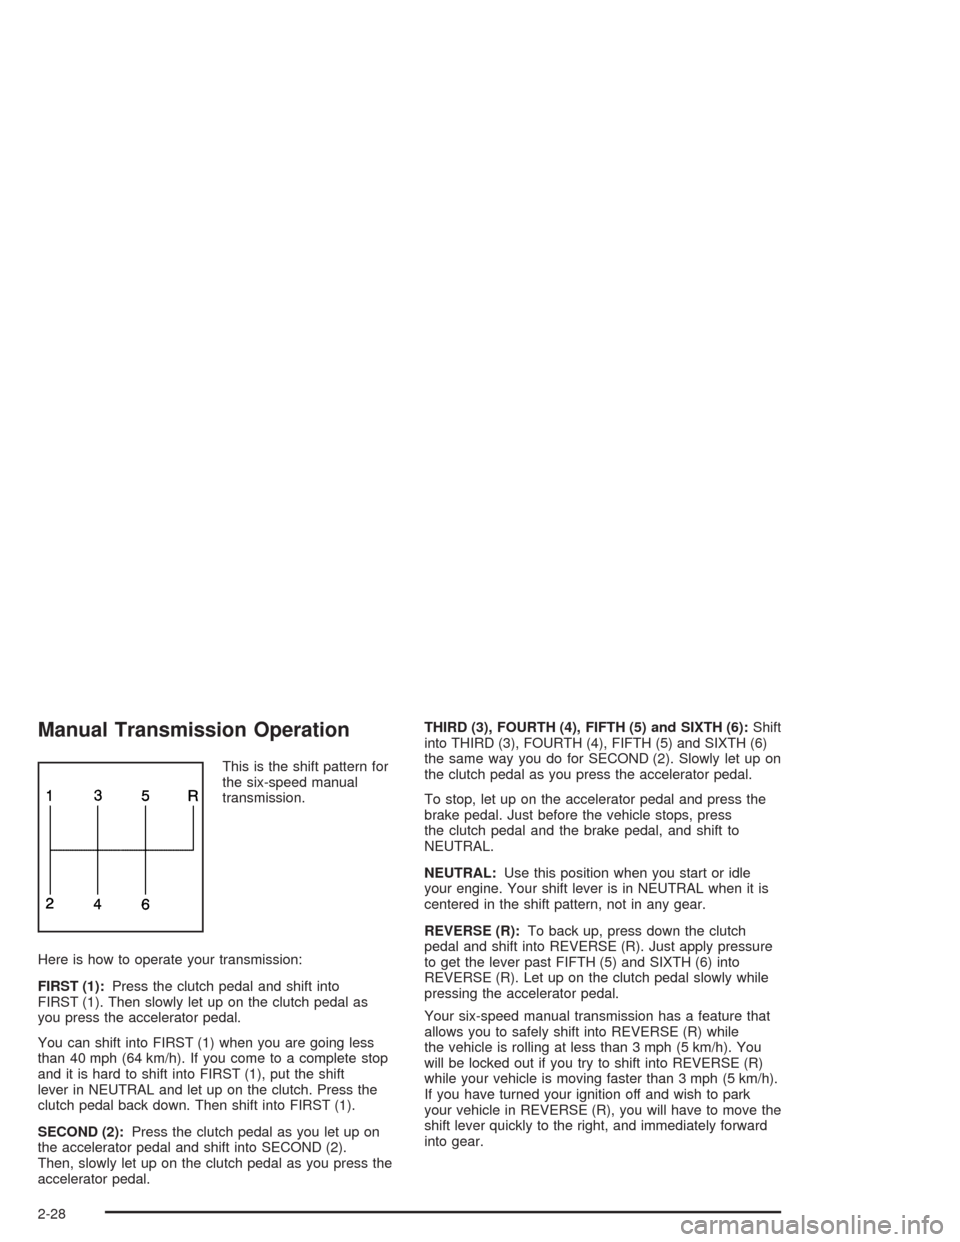
Manual Transmission Operation
This is the shift pattern for
the six-speed manual
transmission.
Here is how to operate your transmission:
FIRST (1):Press the clutch pedal and shift into
FIRST (1). Then slowly let up on the clutch pedal as
you press the accelerator pedal.
You can shift into FIRST (1) when you are going less
than 40 mph (64 km/h). If you come to a complete stop
and it is hard to shift into FIRST (1), put the shift
lever in NEUTRAL and let up on the clutch. Press the
clutch pedal back down. Then shift into FIRST (1).
SECOND (2):Press the clutch pedal as you let up on
the accelerator pedal and shift into SECOND (2).
Then, slowly let up on the clutch pedal as you press the
accelerator pedal.THIRD (3), FOURTH (4), FIFTH (5) and SIXTH (6):Shift
into THIRD (3), FOURTH (4), FIFTH (5) and SIXTH (6)
the same way you do for SECOND (2). Slowly let up on
the clutch pedal as you press the accelerator pedal.
To stop, let up on the accelerator pedal and press the
brake pedal. Just before the vehicle stops, press
the clutch pedal and the brake pedal, and shift to
NEUTRAL.
NEUTRAL:Use this position when you start or idle
your engine. Your shift lever is in NEUTRAL when it is
centered in the shift pattern, not in any gear.
REVERSE (R):To back up, press down the clutch
pedal and shift into REVERSE (R). Just apply pressure
to get the lever past FIFTH (5) and SIXTH (6) into
REVERSE (R). Let up on the clutch pedal slowly while
pressing the accelerator pedal.
Your six-speed manual transmission has a feature that
allows you to safely shift into REVERSE (R) while
the vehicle is rolling at less than 3 mph (5 km/h). You
will be locked out if you try to shift into REVERSE (R)
while your vehicle is moving faster than 3 mph (5 km/h).
If you have turned your ignition off and wish to park
your vehicle in REVERSE (R), you will have to move the
shift lever quickly to the right, and immediately forward
into gear.
2-28
Page 85 of 384
Shift Speeds (Manual Transmission)
{CAUTION:
If you skip a gear when you downshift, you
could lose control of your vehicle. You could
injure yourself or others. Don’t shift down
more than one gear at a time when you
downshift.
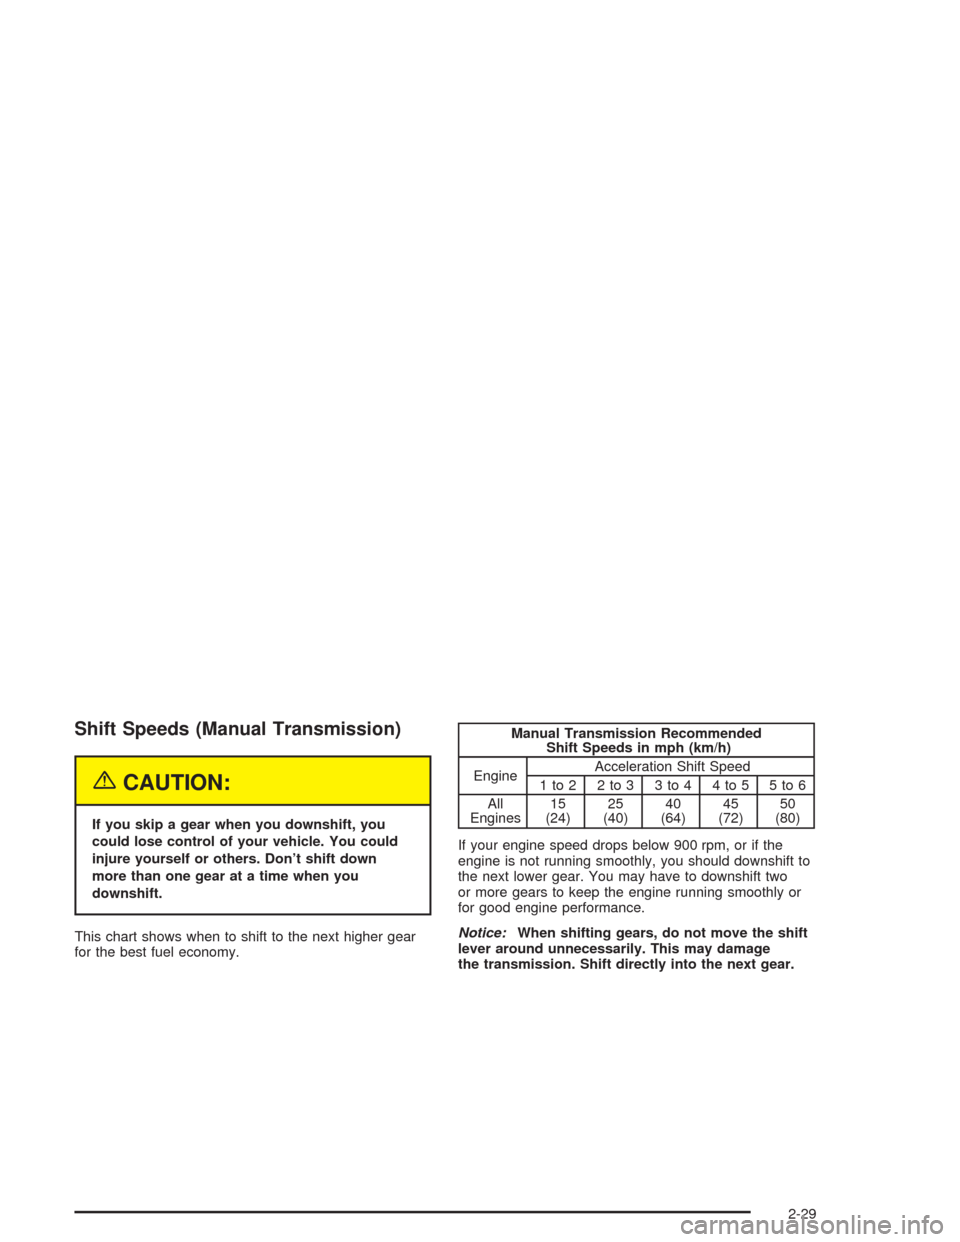
This chart shows when to shift to the next higher gear
for the best fuel economy.
Manual Transmission Recommended
Shift Speeds in mph (km/h)
EngineAcceleration Shift Speed
1to2 2to3 3to4 4to5 5to6
All
Engines15
(24)25
(40)40
(64)45
(72)50
(80)
If your engine speed drops below 900 rpm, or if the
engine is not running smoothly, you should downshift to
the next lower gear. You may have to downshift two
or more gears to keep the engine running smoothly or
for good engine performance.
Notice:When shifting gears, do not move the shift
lever around unnecessarily. This may damage
the transmission. Shift directly into the next gear.
2-29