change time CHEVROLET CORVETTE 2006 6.G Owner's Manual
[x] Cancel search | Manufacturer: CHEVROLET, Model Year: 2006, Model line: CORVETTE, Model: CHEVROLET CORVETTE 2006 6.GPages: 426, PDF Size: 2.48 MB
Page 214 of 426
Here are some ways in which you can help avoid
distraction while driving.
While your vehicle is parked:
Familiarize yourself with all of its controls.
Familiarize yourself with its operation.
Set up your audio system by presetting your
favorite radio stations, setting the tone, and
adjusting the speakers. Then, when driving
conditions permit, you can tune to your favorite
radio stations using the presets and steering wheel
controls if the vehicle has them.
Notice:Before adding any sound equipment to
your vehicle, such as an audio system, CD player,
CB radio, mobile telephone, or two-way radio, make
sure that it can be added by checking with your
dealer. Also, check federal rules covering mobile
radio and telephone units. If sound equipment can
be added, it is very important to do it properly.
Added sound equipment may interfere with
the operation of your vehicle’s engine, radio, or
other systems, and even damage them. Your
vehicle’s systems may interfere with the operation
of sound equipment that has been added.Notice:The chime signals related to safety belts,
parking brake, and other functions of your vehicle
operate through the radio/entertainment system.
If that equipment is replaced or additional equipment
is added to your vehicle, the chimes may not
work. Make sure that replacement or additional
equipment is compatible with your vehicle before
installing it. SeeAccessories and Modifications
on page 5-3.
Your vehicle may have a feature called Retained
Accessory Power (RAP). With RAP, the audio system
can be played even after the ignition is turned off.
SeeRetained Accessory Power (RAP) on page 2-23
for more information.
Setting the Time
With the ignition on and the radio off, press the H or the
M button to enter clock mode. Press and hold H until
the correct hour appears on the display. Press and
hold M until the correct minute appears on the display.
To change the time default setting from 12 hour to
24 hour, press either the H or the M button for
two seconds to enter the clock mode. Press the tune
knob to select between the 12 or 24 hour display format.
The clock mode will automatically time out with the
changed display format set as the current default setting.
3-78
Page 237 of 426
Care of the CD Player
The use of CD lens cleaners for CD players is not
advised, due to the risk of contaminating the internal
lens of the CD optics with lubricants.
Diversity Antenna System
The AM-FM antenna is a hidden self tuning system. It
optimizes the AM and FM signals relative to the vehicle’s
position and radio station source. No maintenance or
adjustments are needed.
XM™ Satellite Radio Antenna
System (Roof or Trunk Mounted)
The XM™ Satellite Radio antenna is located on the roof
or on the trunk lid of your vehicle. Keep this antenna
clear of snow and ice build up for clear radio reception.
XM™ Satellite Radio Antenna
System (Diversity System)
Your vehicle may have the XM™ Satellite Radio
antennas that are located in the outside rear view
mirrors. These antennas are hidden from view and are
not accessible.
Chime Level Adjustment
The radio is used to adjust the vehicle’s chime level.
To change the volume level of the chime, press and hold
pushbutton 6 with the ignition on and the radio power off.
The volume level will change from the normal level to
loud, and LOUD will appear on the radio display. To
change back to the default or normal setting, press and
hold pushbutton 6 again. The volume level will change
from the loud level to normal, and NORMAL will appear
on the radio display. Only one chime will be heard when
changing from the normal to the loud setting. Each time
the chime volume is changed, three chimes will sound as
an example of the new volume selected. Removing the
radio and not replacing it with a factory radio or chime
module will disable vehicle chimes.
3-101
Page 246 of 426
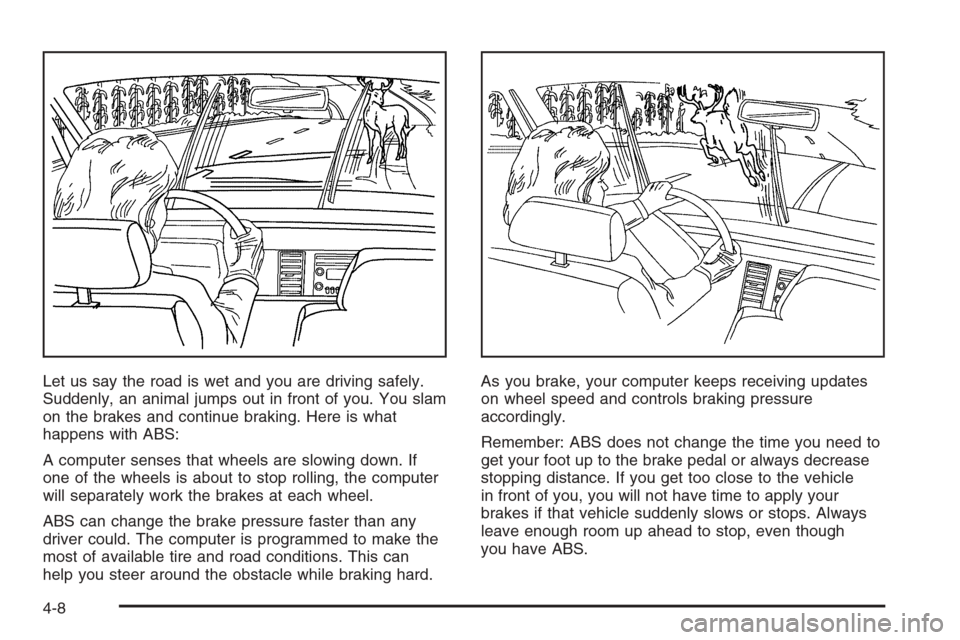
Let us say the road is wet and you are driving safely.
Suddenly, an animal jumps out in front of you. You slam
on the brakes and continue braking. Here is what
happens with ABS:
A computer senses that wheels are slowing down. If
one of the wheels is about to stop rolling, the computer
will separately work the brakes at each wheel.
ABS can change the brake pressure faster than any
driver could. The computer is programmed to make the
most of available tire and road conditions. This can
help you steer around the obstacle while braking hard.As you brake, your computer keeps receiving updates
on wheel speed and controls braking pressure
accordingly.
Remember: ABS does not change the time you need to
get your foot up to the brake pedal or always decrease
stopping distance. If you get too close to the vehicle
in front of you, you will not have time to apply your
brakes if that vehicle suddenly slows or stops. Always
leave enough room up ahead to stop, even though
you have ABS.
4-8
Page 251 of 426
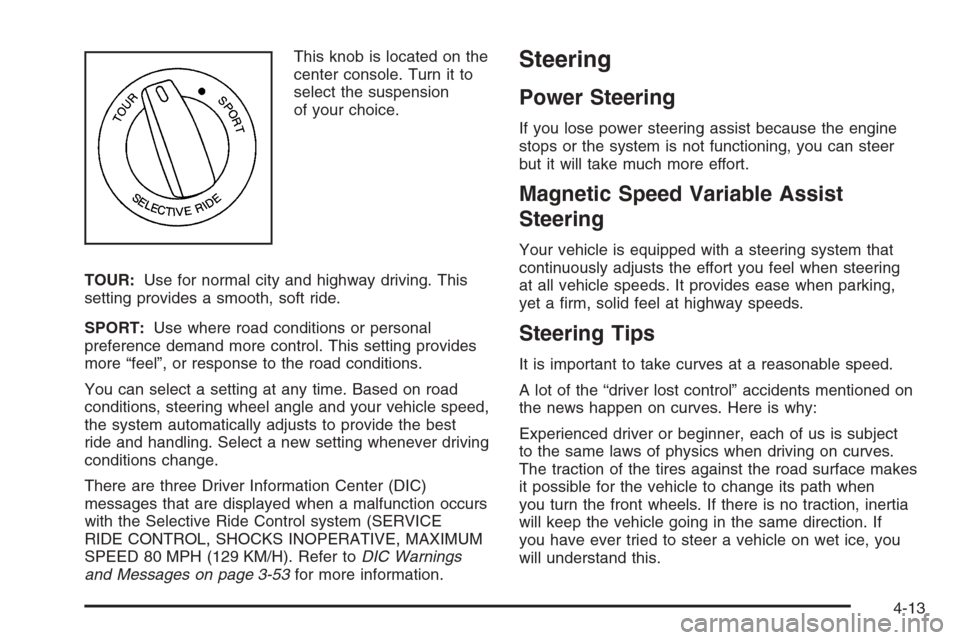
This knob is located on the
center console. Turn it to
select the suspension
of your choice.
TOUR:Use for normal city and highway driving. This
setting provides a smooth, soft ride.
SPORT:Use where road conditions or personal
preference demand more control. This setting provides
more “feel”, or response to the road conditions.
You can select a setting at any time. Based on road
conditions, steering wheel angle and your vehicle speed,
the system automatically adjusts to provide the best
ride and handling. Select a new setting whenever driving
conditions change.
There are three Driver Information Center (DIC)
messages that are displayed when a malfunction occurs
with the Selective Ride Control system (SERVICE
RIDE CONTROL, SHOCKS INOPERATIVE, MAXIMUM
SPEED 80 MPH (129 KM/H). Refer toDIC Warnings
and Messages on page 3-53for more information.Steering
Power Steering
If you lose power steering assist because the engine
stops or the system is not functioning, you can steer
but it will take much more effort.
Magnetic Speed Variable Assist
Steering
Your vehicle is equipped with a steering system that
continuously adjusts the effort you feel when steering
at all vehicle speeds. It provides ease when parking,
yet a �rm, solid feel at highway speeds.
Steering Tips
It is important to take curves at a reasonable speed.
A lot of the “driver lost control” accidents mentioned on
the news happen on curves. Here is why:
Experienced driver or beginner, each of us is subject
to the same laws of physics when driving on curves.
The traction of the tires against the road surface makes
it possible for the vehicle to change its path when
you turn the front wheels. If there is no traction, inertia
will keep the vehicle going in the same direction. If
you have ever tried to steer a vehicle on wet ice, you
will understand this.
4-13
Page 255 of 426
Check your mirrors, glance over your shoulder,
and start your left lane change signal before moving
out of the right lane to pass. When you are far
enough ahead of the passed vehicle to see its front in
your inside mirror, activate your right lane change
signal and move back into the right lane. Remember
that your passenger side outside mirror is convex.
The vehicle you just passed may seem to be farther
away from you than it really is.
Try not to pass more than one vehicle at a time on
two-lane roads. Reconsider before passing the next
vehicle.
Do not overtake a slowly moving vehicle too rapidly.
Even though the brake lamps are not �ashing, it may
be slowing down or starting to turn.
If you are being passed, make it easy for the
following driver to get ahead of you. Perhaps
you can ease a little to the right.
Loss of Control
Let us review what driving experts say about what
happens when the three control systems — brakes,
steering, and acceleration — do not have enough
friction where the tires meet the road to do what the
driver has asked.In any emergency, do not give up. Keep trying to
steer and constantly seek an escape route or area
of less danger.
Skidding
In a skid, a driver can lose control of the vehicle.
Defensive drivers avoid most skids by taking reasonable
care suited to existing conditions, and by not overdriving
those conditions. But skids are always possible.
The three types of skids correspond to your vehicle’s
three control systems. In the braking skid, your wheels
are not rolling. In the steering or cornering skid, too much
speed or steering in a curve causes tires to slip and lose
cornering force. And in the acceleration skid, too much
throttle causes the driving wheels to spin.
A cornering skid is best handled by easing your foot off
the accelerator pedal.
Remember: Any traction control system helps avoid only
the acceleration skid. If your traction control system is
off, then an acceleration skid is also best handled
by easing your foot off the accelerator pedal.
If your vehicle starts to slide, ease your foot off the
accelerator pedal and quickly steer the way you want
the vehicle to go. If you start steering quickly enough,
your vehicle may straighten out. Always be ready
for a second skid if it occurs.
4-17
Page 299 of 426
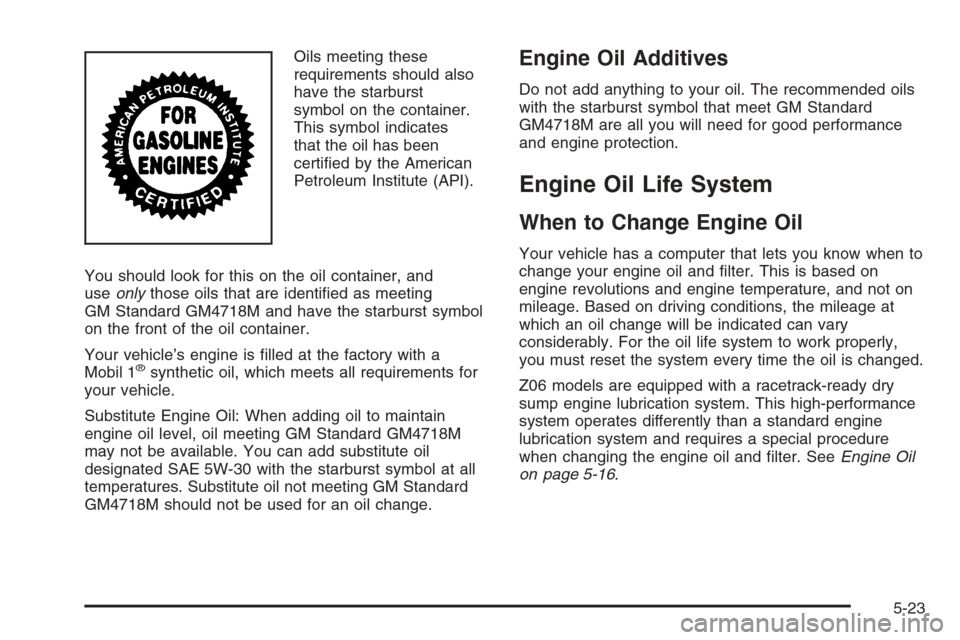
Oils meeting these
requirements should also
have the starburst
symbol on the container.
This symbol indicates
that the oil has been
certi�ed by the American
Petroleum Institute (API).
You should look for this on the oil container, and
useonlythose oils that are identi�ed as meeting
GM Standard GM4718M and have the starburst symbol
on the front of the oil container.
Your vehicle’s engine is �lled at the factory with a
Mobil 1
®synthetic oil, which meets all requirements for
your vehicle.
Substitute Engine Oil: When adding oil to maintain
engine oil level, oil meeting GM Standard GM4718M
may not be available. You can add substitute oil
designated SAE 5W-30 with the starburst symbol at all
temperatures. Substitute oil not meeting GM Standard
GM4718M should not be used for an oil change.
Engine Oil Additives
Do not add anything to your oil. The recommended oils
with the starburst symbol that meet GM Standard
GM4718M are all you will need for good performance
and engine protection.
Engine Oil Life System
When to Change Engine Oil
Your vehicle has a computer that lets you know when to
change your engine oil and �lter. This is based on
engine revolutions and engine temperature, and not on
mileage. Based on driving conditions, the mileage at
which an oil change will be indicated can vary
considerably. For the oil life system to work properly,
you must reset the system every time the oil is changed.
Z06 models are equipped with a racetrack-ready dry
sump engine lubrication system. This high-performance
system operates differently than a standard engine
lubrication system and requires a special procedure
when changing the engine oil and �lter. SeeEngine Oil
on page 5-16.
5-23
Page 300 of 426
When the system has calculated that oil life has been
diminished, it will indicate that an oil change is
necessary. A CHANGE ENGINE OIL message will
come on. Change your oil as soon as possible within
the next 600 miles (1 000 km). It is possible that, if you
are driving under the best conditions, the oil life
system may not indicate that an oil change is necessary
for over a year. However, your engine oil and �lter
must be changed at least once a year and at this time
the system must be reset. Your dealer has GM-trained
service people who will perform this work using
genuine GM parts and reset the system. It is also
important to check your oil regularly and keep it at the
proper level.
If the system is ever reset accidentally, you must
change your oil at 3,000 miles (5 000 km) since your
last oil change. Remember to reset the oil life system
whenever the oil is changed.How to Reset the Engine Oil Life
System
The Engine Oil Life System calculates when to change
your engine oil and �lter based on vehicle use.
Anytime your oil is changed, reset the system so it can
calculate when the next oil change is required. If a
situation occurs where you change your oil prior to a
CHANGE ENGINE OIL message being turned on, reset
the system.
To reset the CHANGE ENGINE OIL message after an
oil change, do the following:
1. Press the TRIP button so the OIL LIFE percentage
is displayed.
2. Press RESET and hold for two seconds. OIL LIFE
REMAINING 100% will appear.
If the CHANGE ENGINE OIL message comes back on
when you start your vehicle, the engine oil life system
has not reset. Repeat the procedure.
5-24
Page 320 of 426
Brake Wear
Your vehicle has four-wheel disc brakes.
Disc brake pads have built-in wear indicators that make
a high-pitched warning sound when the brake pads
are worn and new pads are needed. The sound
may come and go or be heard all the time your vehicle
is moving, except when you are pushing on the
brake pedal �rmly.
{CAUTION:
The brake wear warning sound means that soon
your brakes will not work well. That could lead
to an accident. When you hear the brake wear
warning sound, have your vehicle serviced.
Notice:Continuing to drive with worn-out brake
pads could result in costly brake repair.
Some driving conditions or climates may cause a brake
squeal when the brakes are �rst applied or lightly
applied. This does not mean something is wrong with
your brakes.
Brake linings should always be replaced as complete
axle sets.
Brake Pedal Travel
See your dealer if the brake pedal does not return to
normal height, or if there is a rapid increase in
pedal travel. This could be a sign of brake trouble.
Brake Adjustment
As you make brake stops, your disc brakes
automatically adjust for wear.
Replacing Brake System Parts
The braking system on a vehicle is complex. Its many
parts have to be of top quality and work well together if
the vehicle is to have really good braking. Your vehicle
was designed and tested with top-quality GM brake parts.
When you replace parts of your braking system — for
example, when your brake linings wear down and you
need new ones put in — be sure you get new approved
GM replacement parts. If you do not, your brakes may no
longer work properly. For example, if someone puts in
brake linings that are wrong for your vehicle, the balance
between your front and rear brakes can change — for the
worse. The braking performance you have come to
expect can change in many other ways if someone puts
in the wrong replacement brake parts.
5-44
Page 338 of 426
Tread:The portion of a tire that comes into contact
with the road.
Treadwear Indicators:Narrow bands, sometimes
called wear bars, that show across the tread of a tire
when only 1/16 inch (1.6 mm) of tread remains.
SeeWhen It Is Time for New Tires on page 5-69.
UTQGS (Uniform Tire Quality Grading Standards):
A tire information system that provides consumers
with ratings for a tire’s traction, temperature, and
treadwear. Ratings are determined by tire manufacturers
using government testing procedures. The ratings are
molded into the sidewall of the tire. SeeUniform
Tire Quality Grading on page 5-72.
Vehicle Capacity Weight:The number of designated
seating positions multiplied by 150 lbs (68 kg) plus
the rated cargo load. SeeLoading Your Vehicle
on page 4-33.
Vehicle Maximum Load on the Tire:Load on an
individual tire due to curb weight, accessory weight,
occupant weight, and cargo weight.
Vehicle Placard:A label permanently attached to a
vehicle showing the vehicle’s capacity weight and
the original equipment tire size and recommended
in�ation pressure. See “Tire and Loading Information
Label” underLoading Your Vehicle on page 4-33.Extended Mobility Tires
Your vehicle, when new, had Goodyear Extended
Mobility Tires (EMT). There’s no spare tire, no tire
changing equipment and no place to store a tire in
the vehicle. Extended Mobility Tires perform so well
without any air that a Tire Pressure Monitor (TPM) is
used to alert you if a tire has lost pressure.
If a tire goes �at, you won’t need to stop on the side of
the road to change the tire. You can just keep on
driving. The shorter the distance you drive and the
slower the speed, the greater the chance that the tire will
not have to be replaced. If you drive on a de�ated
EMT for 25 miles (40 km) or less and at speeds
of 55 mph (90 km/h) or less, there is a good chance that
the tire can be repaired. The tire can operate effectively
with no air pressure for up to 100 miles (160 km) at
speeds up to 55 mph (90 km/h), but the tire would then
have to be replaced. When a tire is �lled with air, it
provides a cushion between the road and the wheel.
Because you won’t have this cushion when driving on a
de�ated tire, try to avoid potholes that could damage
your wheel and require replacement of it.
Some road hazards can damage a tire beyond repair.
This damage could occur even before you’ve driven on
the tire in a de�ated condition.
5-62
Page 344 of 426

The Tire and Loading Information Label (tire information
placard) is attached to the vehicle’s b-pillar. This label
shows the size of your vehicle’s original tires and the
correct in�ation pressure for your vehicle’s tires when
they are cold. SeeLoading Your Vehicle on page 4-33.
Your vehicle’s TPMS can alert you about a low or high
tire pressure condition but it does not replace normal tire
maintenance. SeeIn�ation - Tire Pressure on page 5-64
andWhen It Is Time for New Tires on page 5-69.
The SERVICE TIRE MONITOR message, in the DIC,
is displayed when the TPMS is malfunctioning.
For example, one or more TPMS sensors may be
inoperable or missing. Also, the active handling system
will be affected, seeActive Handling System on
page 4-10. See your dealer for service.
TPMS Sensor Identi�cation Codes
Each TPMS sensor has a unique identi�cation code.
Any time you replace one or more of the TPMS sensors,
the identi�cation codes will need to be matched to the
new tire/wheel position. The sensors are matched, to the
tire/wheel positions, in the following order: driver’s
side front tire, passenger’s side front tire, passenger’s
side rear tire, and driver’s side rear tire using a
TPMS diagnostic tool. See your GM dealer for service.
Federal Communications Commission
(FCC) and Industry and Science
Canada
The Tire Pressure Monitor System (TPMS) operates on
a radio frequency and complies with Part 15 of the
FCC Rules. Operation is subject to the following
two conditions:
1. This device may not cause harmful interference.
2. This device must accept any interference received,
including interference that may cause undesired
operation.
The Tire Pressure Monitor System (TPMS) operates
on a radio frequency and complies with RSS-210
of Industry and Science Canada. Operation is subject
to the following two conditions:
1. This device may not cause interference.
2. This device must accept any interference received,
including interference that may cause undesired
operation of the device.
Changes or modi�cations to this system by other than
an authorized service facility could void authorization to
use this equipment.
5-68