air condition CHEVROLET CORVETTE 2010 6.G Owners Manual
[x] Cancel search | Manufacturer: CHEVROLET, Model Year: 2010, Model line: CORVETTE, Model: CHEVROLET CORVETTE 2010 6.GPages: 472, PDF Size: 11.44 MB
Page 16 of 472
Sensing System for Passenger
Airbag
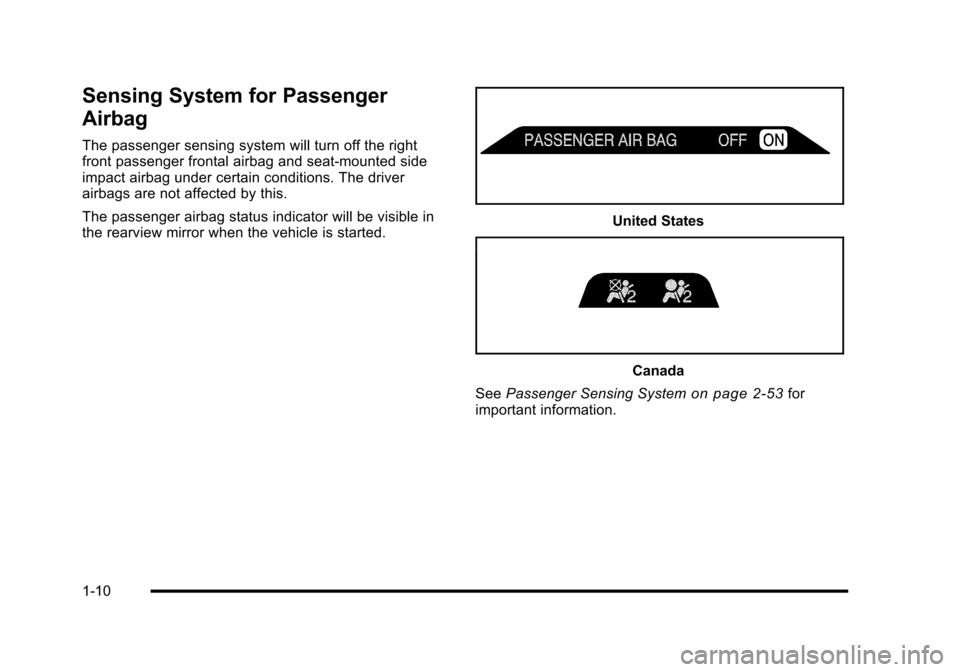
The passenger sensing system will turn off the right
front passenger frontal airbag and seat‐mounted side
impact airbag under certain conditions. The driver
airbags are not affected by this.
The passenger airbag status indicator will be visible in
the rearview mirror when the vehicle is started.
United States
Canada
See Passenger Sensing System
on page 2‑53for
important information.
1-10
Page 21 of 472
Climate Controls
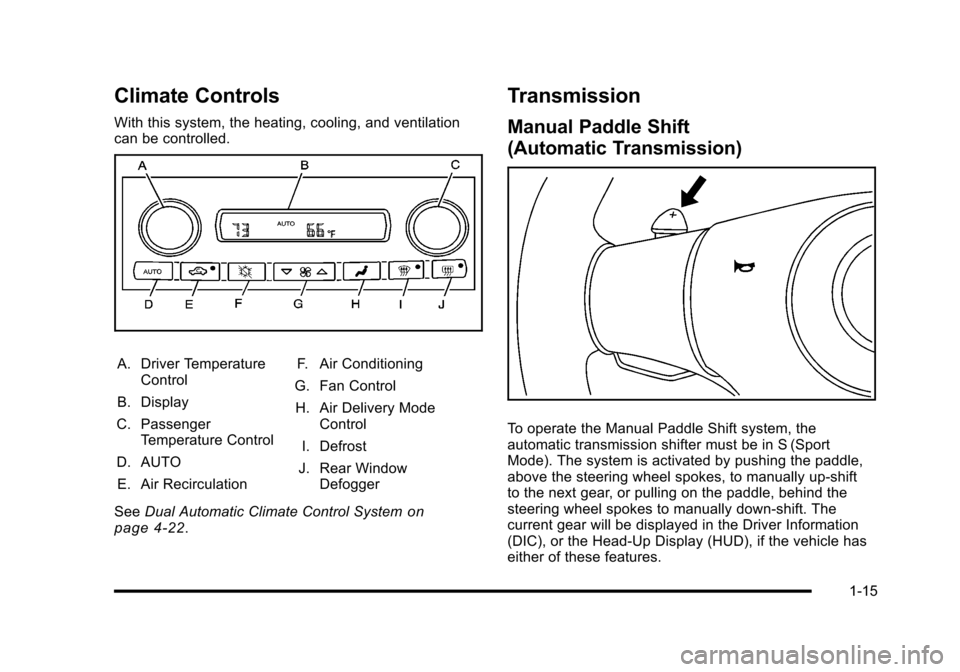
With this system, the heating, cooling, and ventilation
can be controlled.
A. Driver Temperature Control
B. Display
C. Passenger Temperature Control
D. AUTO E. Air Recirculation F. Air Conditioning
G. Fan Control H. Air Delivery Mode Control
I. Defrost
J. Rear Window Defogger
See Dual Automatic Climate Control System
on
page 4‑22.
Transmission
Manual Paddle Shift
(Automatic Transmission)
To operate the Manual Paddle Shift system, the
automatic transmission shifter must be in S (Sport
Mode). The system is activated by pushing the paddle,
above the steering wheel spokes, to manually up-shift
to the next gear, or pulling on the paddle, behind the
steering wheel spokes to manually down-shift. The
current gear will be displayed in the Driver Information
(DIC), or the Head-Up Display (HUD), if the vehicle has
either of these features.
1-15
Page 32 of 472
![CHEVROLET CORVETTE 2010 6.G Owners Manual How OnStar Service Works
Q
: This blue button connects you to a specially
trained OnStar advisor to verify your account
information and to answer questions.
]: Push this red emergency button to ge CHEVROLET CORVETTE 2010 6.G Owners Manual How OnStar Service Works
Q
: This blue button connects you to a specially
trained OnStar advisor to verify your account
information and to answer questions.
]: Push this red emergency button to ge](/img/24/8125/w960_8125-31.png)
How OnStar Service Works
Q
: This blue button connects you to a specially
trained OnStar advisor to verify your account
information and to answer questions.
]: Push this red emergency button to get priority
help from specially trained OnStar emergency advisors.
X: Push this button for hands‐free, voice‐activated
calling and to give voice commands for turn‐by‐turn
navigation.
Crisis Assist, Stolen Vehicle Assistance, Vehicle
Diagnostics, Remote Door Unlock, Roadside
Assistance, Turn‐by‐Turn Navigation and Hands‐Free
Calling are available on most vehicles. Not all OnStar
services are available on all vehicles. For more
information see the OnStar Owner's Guide or visit
www.onstar.com (U.S.) or www.onstar.ca (Canada),
contact OnStar at 1-888-4-ONSTAR (1‐888‐466‐7827)
or TTY 1‐877‐248‐2080, or press
Qto speak with an
OnStar advisor 24 hours a day, 7 days a week.
For a full description of OnStar services and system
limitations, see the OnStar Owner's Guide in the
glove box.
OnStar service is subject to the OnStar terms and
conditions included in the OnStar Subscriber
Information. OnStar service cannot work unless the vehicle is in a
place where OnStar has an agreement with a wireless
service provider for service in that area. OnStar service
also cannot work unless the vehicle is in a place where
the wireless service provider OnStar has hired for that
area has coverage, network capacity and reception
when the service is needed, and technology that is
compatible with the OnStar service. Not all services are
available everywhere, particularly in remote or enclosed
areas, or at all times.
The OnStar system can record and transmit vehicle
information. This information is automatically sent to an
OnStar call center when
Qis pressed,]is pressed,
or if the airbags or ACR system deploy. This information
usually includes the vehicle's GPS location and, in the
event of a crash, additional information regarding the
crash that the vehicle was involved in (e.g. the direction
from which the vehicle was hit). When the virtual
advisor feature of OnStar hands-free calling is used, the
vehicle also sends OnStar the vehicle's GPS location
so they can provide services where it is located.
1-26
Page 59 of 472
Safety Belt Pretensioners
This vehicle has safety belt pretensioners for the
front outboard occupants. Although the safety belt
pretensioners cannot be seen, they are part of the
safety belt assembly. They can help tighten the safety
belts during the early stages of a moderate to severe
frontal and near frontal crash if the threshold conditions
for pretensioner activation are met. And, for vehicles
with side impact airbags, safety belt pretensioners can
help tighten the safety belts in a side crash.
Pretensioners work only once. If the pretensioners
activate in a crash, they will need to be replaced, and
probably other new parts for the vehicle's safety belt
system. See Replacing Restraint System Parts After a
Crash on page 2‑61.
Safety Belt Use During Pregnancy
Safety belts work for everyone, including pregnant
women. Like all occupants, they are more likely to be
seriously injured if they do not wear safety belts.
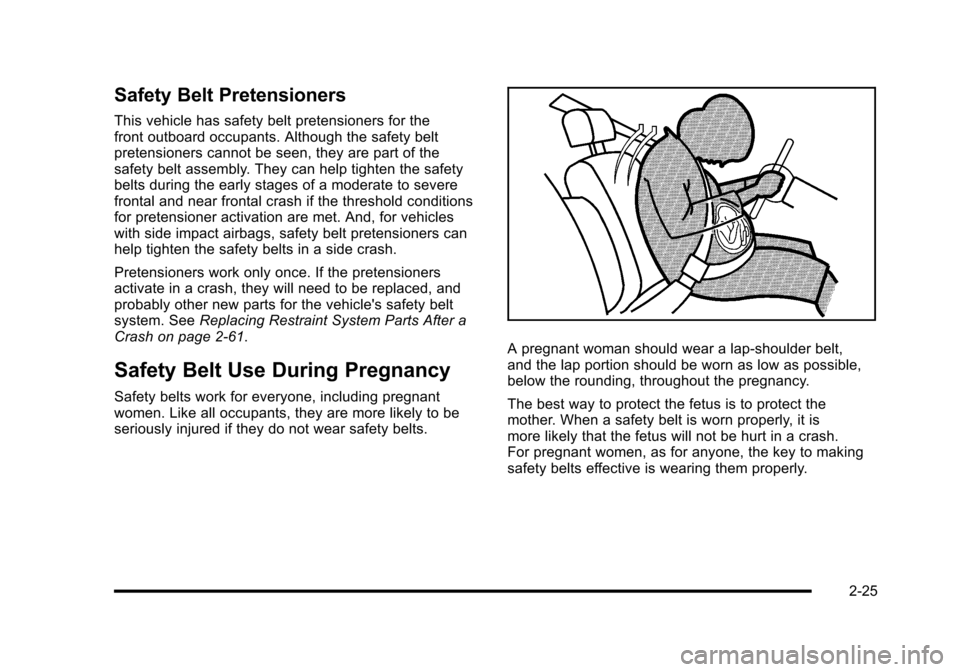
A pregnant woman should wear a lap-shoulder belt,
and the lap portion should be worn as low as possible,
below the rounding, throughout the pregnancy.
The best way to protect the fetus is to protect the
mother. When a safety belt is worn properly, it is
more likely that the fetus will not be hurt in a crash.
For pregnant women, as for anyone, the key to making
safety belts effective is wearing them properly.
2-25
Page 74 of 472
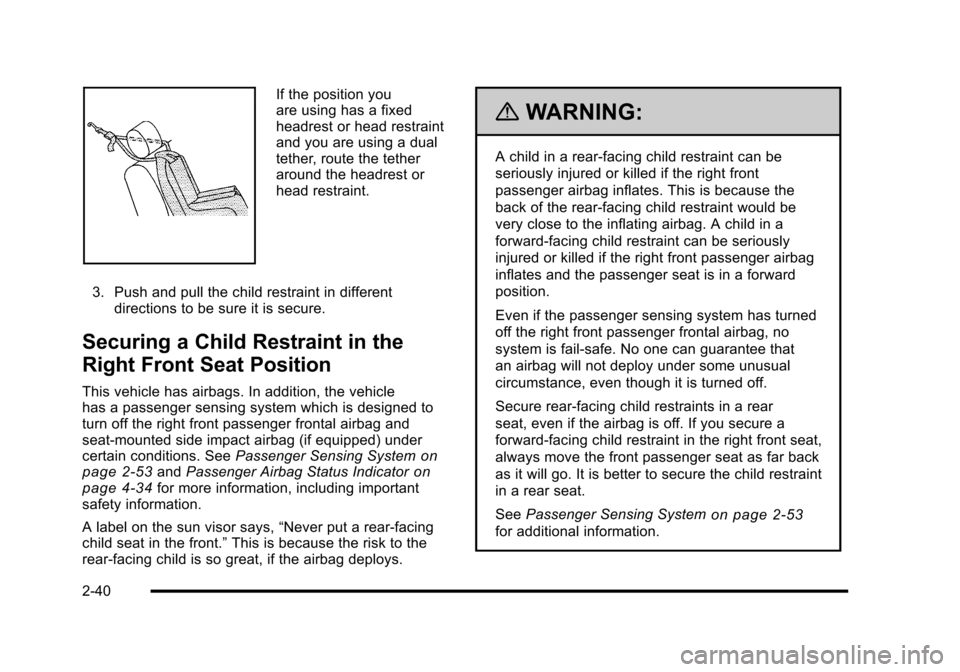
If the position you
are using has a fixed
headrest or head restraint
and you are using a dual
tether, route the tether
around the headrest or
head restraint.
3. Push and pull the child restraint in different directions to be sure it is secure.
Securing a Child Restraint in the
Right Front Seat Position
This vehicle has airbags. In addition, the vehicle
has a passenger sensing system which is designed to
turn off the right front passenger frontal airbag and
seat-mounted side impact airbag (if equipped) under
certain conditions. See Passenger Sensing System
on
page 2‑53and Passenger Airbag Status Indicatoron
page 4‑34for more information, including important
safety information.
A label on the sun visor says, “Never put a rear-facing
child seat in the front.” This is because the risk to the
rear-facing child is so great, if the airbag deploys.
{WARNING:
A child in a rear-facing child restraint can be
seriously injured or killed if the right front
passenger airbag inflates. This is because the
back of the rear-facing child restraint would be
very close to the inflating airbag. A child in a
forward-facing child restraint can be seriously
injured or killed if the right front passenger airbag
inflates and the passenger seat is in a forward
position.
Even if the passenger sensing system has turned
off the right front passenger frontal airbag, no
system is fail-safe. No one can guarantee that
an airbag will not deploy under some unusual
circumstance, even though it is turned off.
Secure rear-facing child restraints in a rear
seat, even if the airbag is off. If you secure a
forward-facing child restraint in the right front seat,
always move the front passenger seat as far back
as it will go. It is better to secure the child restraint
in a rear seat.
See Passenger Sensing System
on page 2‑53
for additional information.
2-40
Page 87 of 472
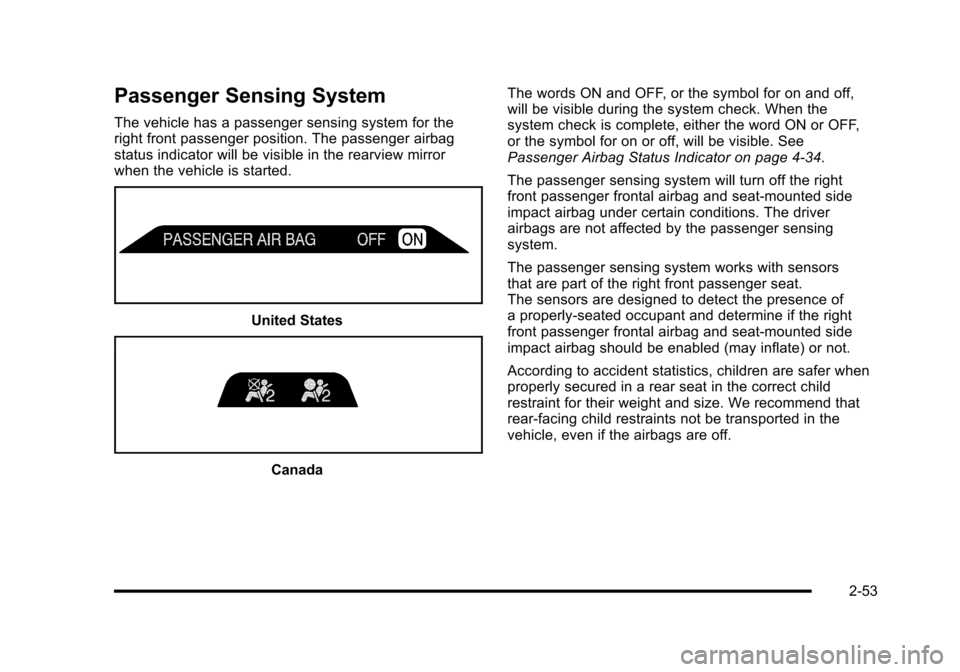
Passenger Sensing System
The vehicle has a passenger sensing system for the
right front passenger position. The passenger airbag
status indicator will be visible in the rearview mirror
when the vehicle is started.
United States
Canada The words ON and OFF, or the symbol for on and off,
will be visible during the system check. When the
system check is complete, either the word ON or OFF,
or the symbol for on or off, will be visible. See
Passenger Airbag Status Indicator on page 4‑34.
The passenger sensing system will turn off the right
front passenger frontal airbag and seat-mounted side
impact airbag under certain conditions. The driver
airbags are not affected by the passenger sensing
system.
The passenger sensing system works with sensors
that are part of the right front passenger seat.
The sensors are designed to detect the presence of
a properly-seated occupant and determine if the right
front passenger frontal airbag and seat-mounted side
impact airbag should be enabled (may inflate) or not.
According to accident statistics, children are safer when
properly secured in a rear seat in the correct child
restraint for their weight and size. We recommend that
rear-facing child restraints not be transported in the
vehicle, even if the airbags are off.
2-53
Page 124 of 472
N (Neutral) :In this position, the engine does not
connect with the wheels. To restart the engine when
the vehicle is already moving, use N (Neutral) only.
If the vehicle needs towing, see Towing Your Vehicle
on
page 5‑33.
{WARNING:
Shifting into a drive gear while the engine is
running at high speed is dangerous. Unless your
foot is firmly on the brake pedal, the vehicle could
move very rapidly. You could lose control and hit
people or objects. Do not shift into a drive gear
while the engine is running at high speed.
Notice: Shifting out of P (Park) or N (Neutral) with
the engine running at high speed may damage the
transmission. The repairs would not be covered by
the vehicle warranty. Be sure the engine is not
running at high speed when shifting the vehicle. D (Drive) :
This position is for normal driving. It provides
the best fuel economy. If you need more power for
passing, push the pedal down to achieve the desired
level of acceleration.
Downshifting the transmission in slippery road
conditions could result in skidding, see “Skidding”
under Loss of Control on page 5‑18.
S (Sport Mode) : When in S (Sport Mode), the
transmission will work as an automatic until you use
the Manual Paddle Shift Controls, which activates driver
manual gear selection. See Manual Paddle Shift later in
this section. While in S (Sport Mode), the transmission
will have more noticeable upshifts for sportier vehicle
performance.
3-28
Page 156 of 472
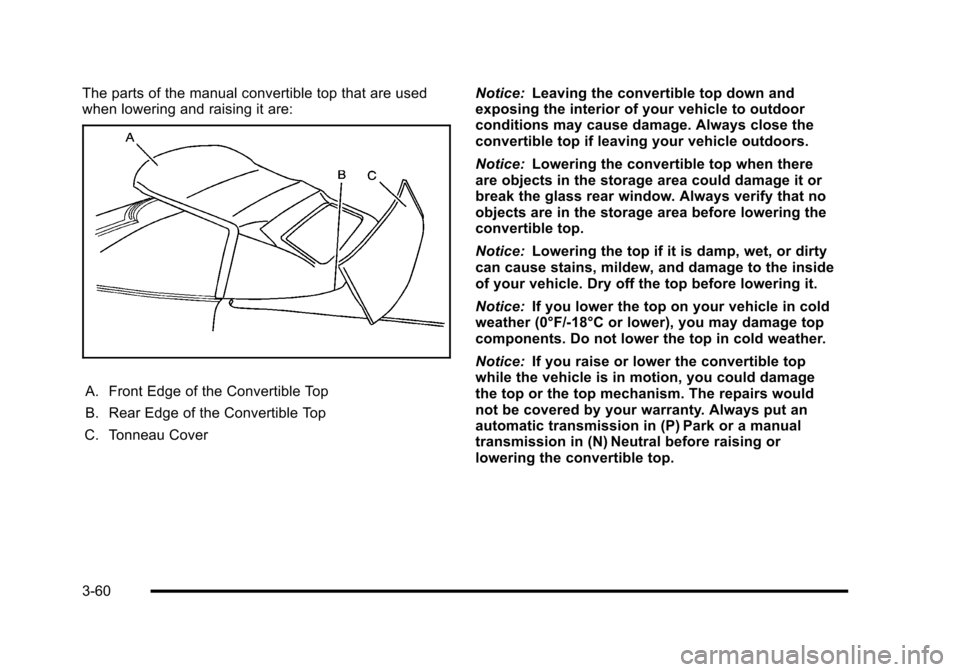
The parts of the manual convertible top that are used
when lowering and raising it are:
A. Front Edge of the Convertible Top
B. Rear Edge of the Convertible Top
C. Tonneau Cover Notice:
Leaving the convertible top down and
exposing the interior of your vehicle to outdoor
conditions may cause damage. Always close the
convertible top if leaving your vehicle outdoors.
Notice: Lowering the convertible top when there
are objects in the storage area could damage it or
break the glass rear window. Always verify that no
objects are in the storage area before lowering the
convertible top.
Notice: Lowering the top if it is damp, wet, or dirty
can cause stains, mildew, and damage to the inside
of your vehicle. Dry off the top before lowering it.
Notice: If you lower the top on your vehicle in cold
weather (0°F/-18°C or lower), you may damage top
components. Do not lower the top in cold weather.
Notice: If you raise or lower the convertible top
while the vehicle is in motion, you could damage
the top or the top mechanism. The repairs would
not be covered by your warranty. Always put an
automatic transmission in (P) Park or a manual
transmission in (N) Neutral before raising or
lowering the convertible top.
3-60
Page 164 of 472
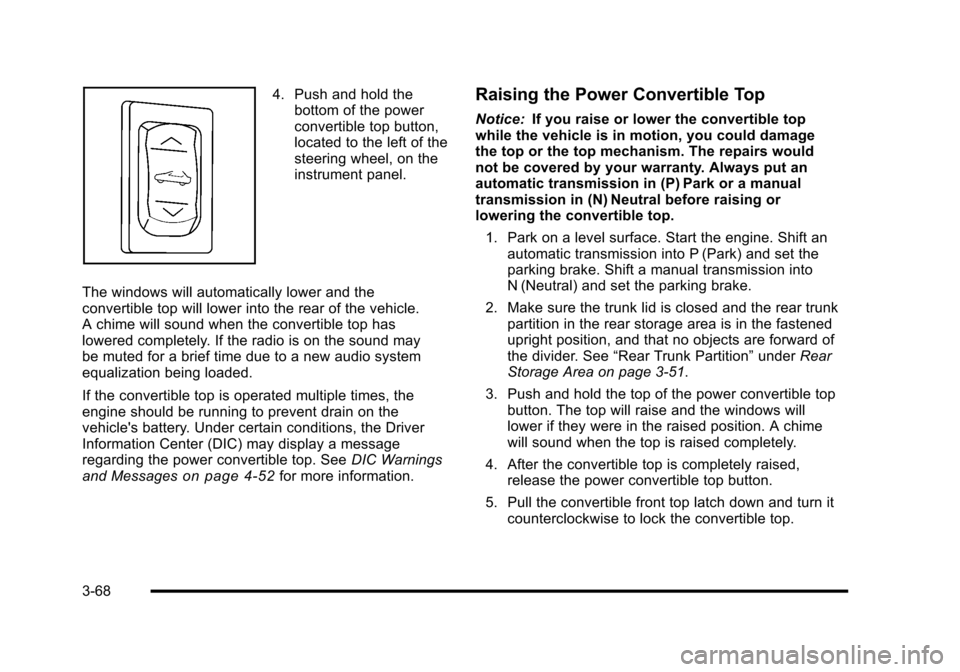
4. Push and hold the bottom of the power
convertible top button,
located to the left of the
steering wheel, on the
instrument panel.
The windows will automatically lower and the
convertible top will lower into the rear of the vehicle.
A chime will sound when the convertible top has
lowered completely. If the radio is on the sound may
be muted for a brief time due to a new audio system
equalization being loaded.
If the convertible top is operated multiple times, the
engine should be running to prevent drain on the
vehicle's battery. Under certain conditions, the Driver
Information Center (DIC) may display a message
regarding the power convertible top. See DIC Warnings
and Messages
on page 4‑52for more information.
Raising the Power Convertible Top
Notice: If you raise or lower the convertible top
while the vehicle is in motion, you could damage
the top or the top mechanism. The repairs would
not be covered by your warranty. Always put an
automatic transmission in (P) Park or a manual
transmission in (N) Neutral before raising or
lowering the convertible top.
1. Park on a level surface. Start the engine. Shift an automatic transmission into P (Park) and set the
parking brake. Shift a manual transmission into
N (Neutral) and set the parking brake.
2. Make sure the trunk lid is closed and the rear trunk partition in the rear storage area is in the fastened
upright position, and that no objects are forward of
the divider. See “Rear Trunk Partition” underRear
Storage Area on page 3‑51.
3. Push and hold the top of the power convertible top button. The top will raise and the windows will
lower if they were in the raised position. A chime
will sound when the top is raised completely.
4. After the convertible top is completely raised, release the power convertible top button.
5. Pull the convertible front top latch down and turn it counterclockwise to lock the convertible top.
3-68
Page 190 of 472

Climate Controls
Dual Automatic Climate
Control System
With this system the heating, cooling, and ventilation
can be controlled.
A. Driver Temperature Controls
B. Display
C. Passenger Temperature Control
D. AUTO E. Recirculation F. Air Conditioning
G. Fan Control H. Air Delivery Mode Control
I. Defrost
J. Rear Window Defogger When the vehicle is first started, the display shows the
driver's temperature setting, the outside temperature,
the fan speed and the air delivery, for about
10 seconds.
The outside temperature is shown in the center of the
display. The digital display will show the readings in
Fahrenheit or Celsius. See
“Personal Options”under
DIC Vehicle Personalization
on page 4‑71for
information on changing your display.
Automatic Operation
AUTO (Automatic) : Press the AUTO button to
place the entire system in the automatic mode. When
automatic operation is active, the system automatically
controls the inside temperature, the air delivery mode,
and the fan speed.
After a ten second display of the current settings,
the word AUTO, the driver's temperature setting
and the outside temperature will be shown.
4-22