capacities CHEVROLET CORVETTE 2019 Owner's Manual
[x] Cancel search | Manufacturer: CHEVROLET, Model Year: 2019, Model line: CORVETTE, Model: CHEVROLET CORVETTE 2019Pages: 367, PDF Size: 6.8 MB
Page 163 of 367
Chevrolet Corvette Owner Manual (GMNA-Localizing-U.S./Canada/Mexico-
12032182) - 2019 - crc - 5/8/18
162 Driving and Operating
vehicle for racing or other
competitive driving. SeeCompetitive
Driving Mode 0203.
A manual transmission is
recommended for extended track
usage at higher ambient
temperatures. Consult the Track
Preparation Guide for additional
information. See your dealer.
Be sure to follow all service
procedures before driving the
vehicle at track events or
competitively.
Prior to each track event and again
before re-entering the public road
system, tighten the wheel nuts with
a torque wrench to the proper
torque specification. See Capacities
and Specifications 0326.Engine Sound Management
Setting
Caution
Do not place the vehicle in
Engine Sound Management –
Stealth mode. Damage could
result to exhaust valve actuators.
Engine Oil
Caution
If the vehicle is used for track
events and competitive driving,
the engine may use more oil than
it would with normal use. Low oil
levels can damage the engine.
Check the oil level often and
maintain the proper level. See
Engine Oil0232.
The engine is factory filled with
0W-40 dexos2 oil. For LT1 and LT4
engines only, 0W-40 dexos2 engine
oil is approved for both track and
street use. 15W-50 full synthetic engine oil may also be used for
track use, but after track use must
be changed back to 0W-40 dexos2
for street use. If 0W-40 dexos2 oil is
not available, 5W-30 dexos1 full
synthetic engine oil may be used for
street use. If 5W-30 dexos1 is used,
it must be changed to 0W-40
dexos2 or 15W-50 full synthetic
engine oil for track use.
For the LT5 engine, SAE 15W-50
full synthetic engine oil must be
used for track use, but after track
use must be changed back to
0W-40 dexos2 for street use.
Z51 Performance Package, Grand
Sport, Z06, and ZR1: Check the oil
level often during track events and
competitive driving and keep the
level at or near 0.5 L (0.5 qt) above
the upper mark that shows the
proper operating range on the
engine oil dipstick. After the
competitive driving, remove excess
oil so that the level on the dipstick is
not above the upper mark that
shows the proper operating range.
Page 234 of 367

Chevrolet Corvette Owner Manual (GMNA-Localizing-U.S./Canada/Mexico-
12032182) - 2019 - crc - 5/8/18
Vehicle Care 233
Follow these guidelines:
.To get an accurate reading, park
the vehicle on level ground.
Check the engine oil level after
the engine has been off for at
least two hours. Checking the
engine oil level on steep grades
or too soon after engine shutoff
can result in incorrect readings.
Accuracy improves when
checking a cold engine prior to
starting. Remove the dipstick
and check the level.
. If unable to wait two hours, the
engine must be off for at least
15 minutes if the engine is
warm, or at least 30 minutes if
the engine is not warm. Pull out
the dipstick, wipe it with a clean
paper towel or cloth, then push it
back in all the way. Remove it
again, keeping the tip down, and
check the level.When to Add Engine Oil
(Except ZR1, Z06, Grand Sport,
and Stingray with Z51)
If the oil is below the cross-hatched
area at the tip of the dipstick and
the engine has been off for at least
15 minutes, add 1 L (1 qt) of the
recommended oil and then recheck
the level. See “Selecting the Right
Engine Oil” later in this section for
an explanation of what kind of oil to
use. For engine oil crankcase
capacity, see Capacities and
Specifications 0326.
See Track Events and Competitive
Driving 0161 for additional
information on engine oil.
Caution
Do not add too much oil. Oil
levels above or below the
acceptable operating range
shown on the dipstick are harmful
to the engine. If the oil level is
above the operating range (i.e.,
the engine has so much oil that
the oil level gets above the
cross-hatched area that shows
the proper operating range), the
engine could be damaged. Drain
the excess oil or limit driving of
the vehicle, and seek a service
professional to remove the
excess oil.
See Engine Compartment Overview
0 225 for the location of the engine
oil fill cap.
Add enough oil to put the level
somewhere in the proper operating
range. Push the dipstick all the way
back in when through.
Page 236 of 367

Chevrolet Corvette Owner Manual (GMNA-Localizing-U.S./Canada/Mexico-
12032182) - 2019 - crc - 5/8/18
Vehicle Care 235
4. Remove the dipstick from theexternal engine oil tank and
wipe it with a clean lint-free
paper towel or a cloth.
Re-insert the dipstick into the
external oil tank, pushing it all
the way in until it stops.
5. Remove the dipstick from the oil tank and read the level on
the cross-hatched area.
When to Add Engine Oil (ZR1,
Z06, Grand Sport, and Stingray
with Z51)
If the oil is below the cross-hatched
area at the tip of the dipstick, add
1 L (1 qt) of the recommended oil
through the oil fill cap opening in the
oil tank and then recheck the level. See
“Selecting the Right Engine Oil”
for an explanation of what kind of oil
to use. For engine oil crankcase
capacity, see Capacities and
Specifications 0326.
See Track Events and Competitive
Driving 0161 for additional
information on engine oil.
Caution
Do not add too much oil. Oil
levels above or below the
acceptable operating range
shown on the dipstick are harmful
to the engine. If the oil level is
above the operating range (i.e.,
the engine has so much oil that
the oil level gets above the
cross-hatched area that shows
the proper operating range), the
engine could be damaged. Drain
the excess oil or limit driving of
the vehicle, and seek a service
professional to remove the
excess oil. See
Engine Compartment Overview
0 225 for the location of the external
engine oil tank and fill cap.
Add enough oil to put the level
somewhere in the proper operating
range. Push the dipstick all the way
back into the oil tank when through.
Changing Engine Oil and Filter
(ZR1, Z06, Grand Sport, and
Stingray with Z51)
The vehicle may have a
racetrack-ready dry sump engine
lubrication system. This high
performance system operates
differently than a standard engine
lubrication system and requires a
special procedure when changing
the engine oil and filter. Follow this
procedure closely when changing
the engine oil and filter.
Page 237 of 367

Chevrolet Corvette Owner Manual (GMNA-Localizing-U.S./Canada/Mexico-
12032182) - 2019 - crc - 5/8/18
236 Vehicle Care
1. Engine Oil Drain Plugs
2. Seals
Steps to follow:1. Remove the two engine oil drain plugs from the bottom of
the engine oil pan. One drain
plug drains the external oil tank
via the oil transfer supply line.
The other drain plug drains
residual oil from the crankcase
sump. Allow the oil to drain.
2. Once the oil has been drained from the engine, remove the
engine oil filter and allow the oil
to drain. 3. Reinstall both drain plugs and
tighten them to 25 Y
(18 lb ft).
4. Replace the oil filter and tighten it three-quarters to one
turn after gasket contact. See
Maintenance Replacement
Parts 0323 for the correct filter.
5. Oil is filled through the opening in the top of the external
engine oil tank. Remove the oil
fill cap.
6. Add oil to the oil tank. See Capacities and Specifications
0326.
7. Install the oil fill cap and insert the dipstick, if removed.
8. Start the engine and let it run at idle for at least 15 seconds.
This will circulate the fresh
engine oil through the
lubrication system.
9. Shut off the engine and check the oil level as described under
“Checking Engine Oil (ZR1,
Z06, Grand Sport, and Stingray
with Z51).”
Selecting the Right Engine Oil
Selecting the right engine oil
depends on both the proper oil
specification and viscosity grade.
See Recommended Fluids and
Lubricants 0321.
Specification
Use engine oils that meet the
dexos2 specification.
Engine oils that have been
approved by GM as meeting the
dexos2 specification are marked
with the dexos2 approved logo. See
www.gmdexos.com.
Page 280 of 367

Chevrolet Corvette Owner Manual (GMNA-Localizing-U.S./Canada/Mexico-
12032182) - 2019 - crc - 5/8/18
Vehicle Care 279
.The tire has a bump, bulge,
or split.
.The tire has a puncture, cut,
or other damage that cannot
be repaired well because of
the size or location of the
damage.
Tire Rotation
The tires should be rotated
every 12 000 km/7,500 mi. See
Maintenance Schedule0312.
Tires are rotated to achieve
uniform wear for all tires. The
first rotation is the most
important.
Anytime unusual wear is
noticed, rotate the tires as soon
as possible, check for proper tire
inflation pressure, and check for
damaged tires or wheels. If the
unusual wear continues after the
rotation, check the wheel
alignment. See
When It Is Time for New
Tires 0280 andWheel
Replacement 0284.
Different tire sizes should not be
rotated front to rear.
Use this rotation pattern if the
vehicle has different size tires
on the front and rear.
Adjust the front and rear tires to
the recommended inflation
pressure on the Tire and
Loading Information label after the tires have been rotated.
See
Tire Pressure 0274 and
Vehicle Load Limits 0175.
Reset the Tire Pressure Monitor
System. See Tire Pressure
Monitor Operation 0276.
Check that all wheel nuts are
properly tightened. See “Wheel
Nut Torque” underCapacities
and Specifications 0326.
{Warning
Rust or dirt on a wheel, or on the
parts to which it is fastened, can
make wheel nuts become loose
after time. The wheel could come
off and cause a crash. When
changing a wheel, remove any
rust or dirt from places where the
wheel attaches to the vehicle. In
an emergency, a cloth or a paper
towel can be used; however, use
a scraper or wire brush later to
remove all rust or dirt.
Page 287 of 367
Chevrolet Corvette Owner Manual (GMNA-Localizing-U.S./Canada/Mexico-
12032182) - 2019 - crc - 5/8/18
286 Vehicle Care
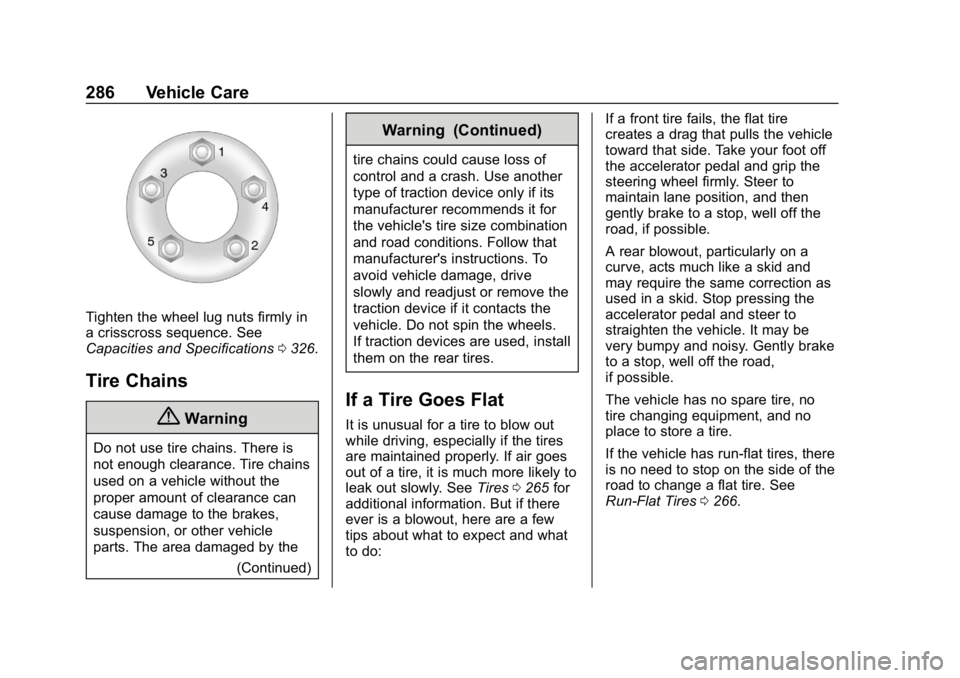
Tighten the wheel lug nuts firmly in
a crisscross sequence. See
Capacities and Specifications0326.
Tire Chains
{Warning
Do not use tire chains. There is
not enough clearance. Tire chains
used on a vehicle without the
proper amount of clearance can
cause damage to the brakes,
suspension, or other vehicle
parts. The area damaged by the
(Continued)
Warning (Continued)
tire chains could cause loss of
control and a crash. Use another
type of traction device only if its
manufacturer recommends it for
the vehicle's tire size combination
and road conditions. Follow that
manufacturer's instructions. To
avoid vehicle damage, drive
slowly and readjust or remove the
traction device if it contacts the
vehicle. Do not spin the wheels.
If traction devices are used, install
them on the rear tires.
If a Tire Goes Flat
It is unusual for a tire to blow out
while driving, especially if the tires
are maintained properly. If air goes
out of a tire, it is much more likely to
leak out slowly. SeeTires0265 for
additional information. But if there
ever is a blowout, here are a few
tips about what to expect and what
to do: If a front tire fails, the flat tire
creates a drag that pulls the vehicle
toward that side. Take your foot off
the accelerator pedal and grip the
steering wheel firmly. Steer to
maintain lane position, and then
gently brake to a stop, well off the
road, if possible.
A rear blowout, particularly on a
curve, acts much like a skid and
may require the same correction as
used in a skid. Stop pressing the
accelerator pedal and steer to
straighten the vehicle. It may be
very bumpy and noisy. Gently brake
to a stop, well off the road,
if possible.
The vehicle has no spare tire, no
tire changing equipment, and no
place to store a tire.
If the vehicle has run-flat tires, there
is no need to stop on the side of the
road to change a flat tire. See
Run-Flat Tires
0266.
Page 326 of 367
Chevrolet Corvette Owner Manual (GMNA-Localizing-U.S./Canada/Mexico-
12032182) - 2019 - crc - 5/8/18
Technical Data 325
Technical Data
Vehicle Identification
Vehicle IdentificationNumber (VIN) . . . . . . . . . . . . . . . 325
Service Parts Identification Label . . . . . . . . . . . . . . . . . . . . . . . . 325
Vehicle Data
Capacities andSpecifications . . . . . . . . . . . . . . . 326
Engine Drive Belt Routing . . . . 329
Vehicle Identification
Vehicle Identification
Number (VIN)
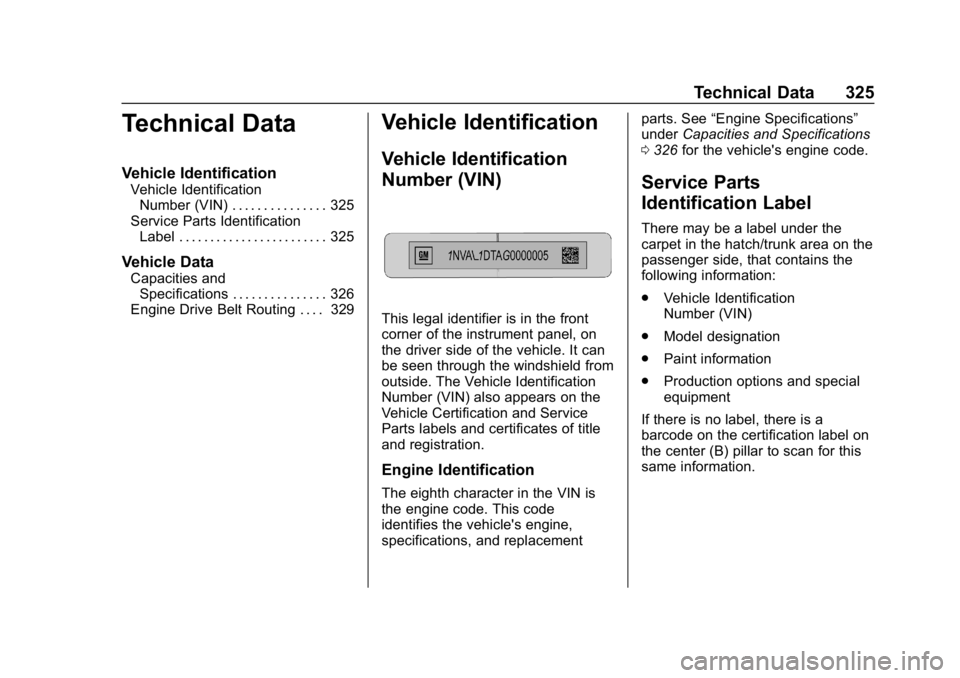
This legal identifier is in the front
corner of the instrument panel, on
the driver side of the vehicle. It can
be seen through the windshield from
outside. The Vehicle Identification
Number (VIN) also appears on the
Vehicle Certification and Service
Parts labels and certificates of title
and registration.
Engine Identification
The eighth character in the VIN is
the engine code. This code
identifies the vehicle's engine,
specifications, and replacement parts. See
“Engine Specifications”
under Capacities and Specifications
0 326 for the vehicle's engine code.
Service Parts
Identification Label
There may be a label under the
carpet in the hatch/trunk area on the
passenger side, that contains the
following information:
.
Vehicle Identification
Number (VIN)
. Model designation
. Paint information
. Production options and special
equipment
If there is no label, there is a
barcode on the certification label on
the center (B) pillar to scan for this
same information.
Page 327 of 367

Chevrolet Corvette Owner Manual (GMNA-Localizing-U.S./Canada/Mexico-
12032182) - 2019 - crc - 5/8/18
326 Technical Data
Vehicle Data
Capacities and Specifications
The following approximate capacities are given in metric and English conversions.
SeeRecommended Fluids and Lubricants 0321.
Application Capacities
Metric English
Air Conditioning Refrigerant For the air conditioning system refrigerant charge type and amount, see the refrigerant label underthe hood. See your dealer for more information.
Engine Cooling System LT1 and LT4 Engines with V08 Heavy Duty Cooling
System 12.0 L 12.7 qt
LT1 and LT4 Engines without V08 Heavy Duty Cooling
System 11.2 L 11.8 qt
LT5 Engine 13.1 L 13.8 qt
Intercooler System LT4 Engine 4.3 L 4.5 qt
LT5 Engine 5.0 L 5.3 qt
Engine Oil with Filter 6.2L LT1 V8 Engine with Z51 or Grand Sport 9.3 L 9.8 qt
Page 328 of 367

Chevrolet Corvette Owner Manual (GMNA-Localizing-U.S./Canada/Mexico-
12032182) - 2019 - crc - 5/8/18
Technical Data 327
ApplicationCapacities
Metric English
6.2L LT1 V8 Engine without Z51 or Grand Sport 6.6 L 7.0 qt
6.2L LT4 V8 Supercharged Engine 9.3 L 9.8 qt
6.2L LT5 V8 Supercharged Engine 9.3 L 9.8 qt
Fuel Tank 70.4 L 18.6 gal
Wheel Nut Torque 140 Y100 lb ft
All capacities are approximate. When adding, be sure to fill to the approximate level, as recommended in this
manual. Recheck fluid level after filling
Engine Specifications
Engine VIN Code Transmission Spark Plug Gap Firing Order
6.2L LT1 V8 Engine 7Automatic
Manual 0.95–1.10 mm
(0.037–0.043 in) 1–8–7–2–6–5–4–3
6.2L LT4 V8 Supercharged
Engine 6
Automatic
Manual 0.725–0.875 mm
(0.029–0.034 in) 1–8–7–2–6–5–4–3
6.2L LT5 V8 Supercharged
Engine 9
Automatic
Manual 0.725–0.875 mm
(0.029–0.034 in) 1–8–7–2–6–5–4–3
Page 358 of 367
Chevrolet Corvette Owner Manual (GMNA-Localizing-U.S./Canada/Mexico-
12032182) - 2019 - crc - 5/8/18
Index 357
Automatic (cont'd)Transmission Fluid . . . . . . . . . . . 238
Automatic Transmission Manual Mode . . . . . . . . . . . . . . . . . 189
Axle, Rear . . . . . . . . . . . . . . . . . . . . . . 252
B
Battery Exterior Lighting BatterySaver . . . . . . . . . . . . . . . . . . . . . . . 144
Power Protection . . . . . . . . . . . . . 144
Battery - North America . . . . 251, 295
Blade Replacement, Wiper . . . . . 254
Boost Gauge . . . . . . . . . . . . . . . . . . . 110
Brake Parking, Electric . . . . . . . . . . . . . . 195
System Warning Light . . . . . . . . .115
Brakes . . . . . . . . . . . . . . . . . . . . . . . . . . 249 Antilock . . . . . . . . . . . . . . . . . . . . . . . 195
Assist . . . . . . . . . . . . . . . . . . . . . . . . . 197
Fluid . . . . . . . . . . . . . . . . . . . . . . . . . . 250
Braking . . . . . . . . . . . . . . . . . . . . . . . . . 159
Break-In, New Vehicle . . . . . . . . . . 179
Bulb Replacement Headlamp Aiming . . . . . . . . . . . . . 256
Headlamps . . . . . . . . . . . . . . . . . . . 257
High Intensity Discharge(HID) Lighting . . . . . . . . . . . . . . . 257 Bulb Replacement (cont'd)
License Plate Lamps . . . . . . . . . 257
Buying New Tires . . . . . . . . . . . . . . . 280
C
Calibration . . . . . . . . . . . . . . . . . . . . . . 100
California Perchlorate MaterialsRequirements . . . . . . . . . . . . . . . 220
California
Proposition
65 Warning . . . . . . . . . .219, 251, 295, Back Cover
Canadian Vehicle Owners . . . . . . . . 2
Capacities and
Specifications . . . . . . . . . . . . . . . . . 326
Carbon Monoxide Engine Exhaust . . . . . . . . . . . . . . . 186
Hatch . . . . . . . . . . . . . . . . . . . . . . . . . . . 38
Winter Driving . . . . . . . . . . . . . . . . 173
Cargo Cover . . . . . . . . . . . . . . . . . . . . . . . . . . . 96
Tie-Downs . . . . . . . . . . . . . . . . . . . . . . 97
Caution, Danger, and Warning . . . . 2
Center Console Storage . . . . . . . . . 96
Chains, Tire . . . . . . . . . . . . . . . . . . . . 286
Charging System Light . . . . . . . . . 113 Check
Engine Light (Malfunction
Indicator) . . . . . . . . . . . . . . . . . . . . .113
Child Restraints Infants and Young Children . . . . . 86
Lower Anchors and Tethersfor Children . . . . . . . . . . . . . . . . . . . 90
Older Children . . . . . . . . . . . . . . . . . . 85
Securing . . . . . . . . . . . . . . . . . . . . . . . . 91
Systems . . . . . . . . . . . . . . . . . . . . . . . . 89
Cleaning
Exterior Care . . . . . . . . . . . . . . . . . 300
Interior Care . . . . . . . . . . . . . . . . . . 306
Climate Control Systems Dual Automatic . . . . . . . . . . . . . . . 151
Clock . . . . . . . . . . . . . . . . . . . . . . . . . . . 100
Cluster, Instrument . . . . . . . . . . . . . 103
Clutch, Hydraulic . . . . . . . . . . . . . . . 239
Collision Damage Repair . . . . . . . 337
Compartments Storage . . . . . . . . . . . . . . . . . . . . . . . . . 94
Compass . . . . . . . . . . . . . . . . . . . . . . . 100
Competition Oriented Tires . . . . . 268
Competitive Driving Mode . . . . . . 203
Composite Materials . . . . . . . . . . . . 179
Compressor Kit, Tire Sealant . . . 287
Connected Services Connections . . . . . . . . . . . . . . . . . . 353