transmission CHEVROLET CORVETTE 2019 Owner's Manual
[x] Cancel search | Manufacturer: CHEVROLET, Model Year: 2019, Model line: CORVETTE, Model: CHEVROLET CORVETTE 2019Pages: 367, PDF Size: 6.8 MB
Page 6 of 367
Chevrolet Corvette Owner Manual (GMNA-Localizing-U.S./Canada/Mexico-
12032182) - 2019 - crc - 5/8/18
In Brief 5
In Brief
Instrument Panel
Instrument Panel . . . . . . . . . . . . . . . . 6
Initial Drive Information
Initial Drive Information . . . . . . . . . . 8
Remote Keyless Entry (RKE)System . . . . . . . . . . . . . . . . . . . . . . . . 8
Remote Vehicle Start . . . . . . . . . . . 9
Door Locks . . . . . . . . . . . . . . . . . . . . . 9
Trunk Release . . . . . . . . . . . . . . . . . 10
Windows . . . . . . . . . . . . . . . . . . . . . . . 11
Seat Adjustment . . . . . . . . . . . . . . . 12
Memory Features . . . . . . . . . . . . . . 12
Heated and Ventilated Seats . . . 13
Seat Belts . . . . . . . . . . . . . . . . . . . . . 13
Passenger Sensing System . . . 14
Mirror Adjustment . . . . . . . . . . . . . . 14
Steering Wheel Adjustment . . . . 15
Interior Lighting . . . . . . . . . . . . . . . . 15
Exterior Lighting . . . . . . . . . . . . . . . 16
Windshield Wiper/Washer . . . . . . 16
Climate Controls . . . . . . . . . . . . . . . 17
Transmission . . . . . . . . . . . . . . . . . . 18
Vehicle Features
Infotainment System . . . . . . . . . . . 19
Steering Wheel Controls . . . . . . . 19 Cruise Control . . . . . . . . . . . . . . . . . 19
Driver Information
Center (DIC) . . . . . . . . . . . . . . . . . 19
Curb View Camera . . . . . . . . . . . . 20
Rear Vision Camera (RVC) . . . . 20
Power Outlets . . . . . . . . . . . . . . . . . 20
Universal Remote System . . . . . 20
Roof Panel . . . . . . . . . . . . . . . . . . . . 21
Convertible . . . . . . . . . . . . . . . . . . . . 21
Performance and Maintenance
Traction Control/Electronic Stability Control . . . . . . . . . . . . . . 21
Tire Pressure Monitor . . . . . . . . . . 21
Performance Vehicle Features . . . . . . . . . . . . . . . . . . . . . 22
Fuel (LT1 6.2L V8 Engine) . . . . . 22
Fuel (LT4 and LT5 6.2L
Supercharged V8 Engines) . . . 23
E85 or FlexFuel . . . . . . . . . . . . . . . . 23
Engine Oil Life System . . . . . . . . 23
Car Wash Guidelines . . . . . . . . . . 24
Driving for Better Fuel Economy . . . . . . . . . . . . . . . . . . . . . 24
Roadside Assistance Program . . . . . . . . . . . . . . . . . . . . . . 24
Page 8 of 367

Chevrolet Corvette Owner Manual (GMNA-Localizing-U.S./Canada/Mexico-
12032182) - 2019 - crc - 5/8/18
In Brief 7
1.Air Vents 0155.
2. Instrument Panel Illumination
Control 0143 (Out of View).
3. Turn Signal Lever. See Turn
and Lane-Change Signals
0 142.
Exterior Lamp Controls 0139.
4. Manual Shift Paddles (If Equipped). See Manual Mode
0 189.
Active Rev Match Paddles (If
Equipped). See Active Rev
Match 0193.
5. Instrument Cluster 0103.
6. Windshield Wiper/Washer 099.
7. Instrument Panel Storage Button. See Instrument Panel
Storage 094.
8. Passenger Airbag Status Indicator. See Passenger
Sensing System 079.
9. Alarm System Indicator Light. See Vehicle Alarm System
0 41. Light Sensor. See
Automatic
Headlamp System 0141.
10. Hazard Warning Flashers
0142.
11. Infotainment 0145.
12. Passenger Temperature Control. See Dual Automatic
Climate Control System 0151.
Passenger Heated and
Ventilated Seat Controls (If
Equipped). See Heated and
Ventilated Front Seats 065.
13. Driver and Redundant Passenger Heated and
Ventilated Seat Controls (If
Equipped). See Heated and
Ventilated Front Seats 065.
14. Dual Automatic Climate Control
System 0151.
15. Electric Parking Brake 0195.
16. MODE SELECT Knob. See Competitive Driving Mode
0203. 17. Shift Lever (Manual Shown).
SeeAutomatic Transmission
0 187 orManual Transmission
0 192.
18. Keyless Ignition. See Ignition
Positions 0180.
19. Bluetooth Controls. See “Steering Wheel Controls” in
the infotainment manual.
Voice Recognition Controls.
See “Steering Wheel Controls”
in the infotainment manual.
Driver Information Center (DIC)
Controls. See Driver
Information Center (DIC) 0121.
20. See “Steering Wheel Controls”
in the infotainment manual.
21. Horn 099.
22. Steering Wheel Adjustment
099 (Out of View).
23. Cruise Control 0207.
24. Convertible Top Switch (Out of View) (If Equipped). See
Convertible Top 052.
25. Hood Release (Out of View). SeeHood 0223.
Page 11 of 367
Chevrolet Corvette Owner Manual (GMNA-Localizing-U.S./Canada/Mexico-
12032182) - 2019 - crc - 5/8/18
10 In Brief
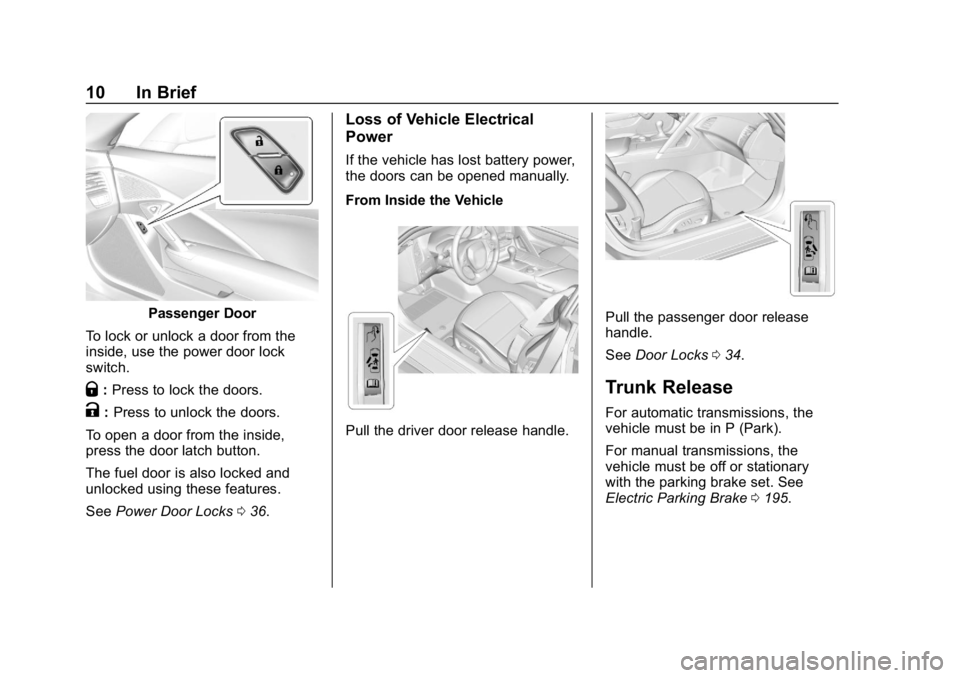
Passenger Door
To lock or unlock a door from the
inside, use the power door lock
switch.
Q: Press to lock the doors.
K:Press to unlock the doors.
To open a door from the inside,
press the door latch button.
The fuel door is also locked and
unlocked using these features.
See Power Door Locks 036.
Loss of Vehicle Electrical
Power
If the vehicle has lost battery power,
the doors can be opened manually.
From Inside the Vehicle
Pull the driver door release handle.
Pull the passenger door release
handle.
See Door Locks 034.
Trunk Release
For automatic transmissions, the
vehicle must be in P (Park).
For manual transmissions, the
vehicle must be off or stationary
with the parking brake set. See
Electric Parking Brake 0195.
Page 19 of 367
Chevrolet Corvette Owner Manual (GMNA-Localizing-U.S./Canada/Mexico-
12032182) - 2019 - crc - 5/8/18
18 In Brief
Transmission
Manual Paddle Shift
(Automatic Transmission)
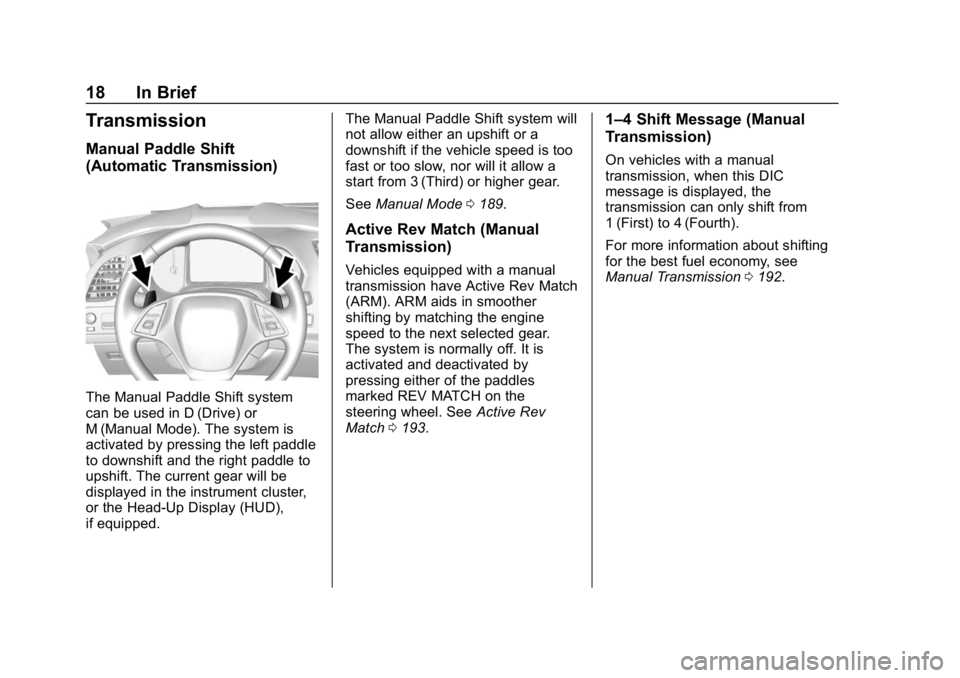
The Manual Paddle Shift system
can be used in D (Drive) or
M (Manual Mode). The system is
activated by pressing the left paddle
to downshift and the right paddle to
upshift. The current gear will be
displayed in the instrument cluster,
or the Head-Up Display (HUD),
if equipped.The Manual Paddle Shift system will
not allow either an upshift or a
downshift if the vehicle speed is too
fast or too slow, nor will it allow a
start from 3 (Third) or higher gear.
See
Manual Mode 0189.
Active Rev Match (Manual
Transmission)
Vehicles equipped with a manual
transmission have Active Rev Match
(ARM). ARM aids in smoother
shifting by matching the engine
speed to the next selected gear.
The system is normally off. It is
activated and deactivated by
pressing either of the paddles
marked REV MATCH on the
steering wheel. See Active Rev
Match 0193.
1–4 Shift Message (Manual
Transmission)
On vehicles with a manual
transmission, when this DIC
message is displayed, the
transmission can only shift from
1 (First) to 4 (Fourth).
For more information about shifting
for the best fuel economy, see
Manual Transmission 0192.
Page 25 of 367
Chevrolet Corvette Owner Manual (GMNA-Localizing-U.S./Canada/Mexico-
12032182) - 2019 - crc - 5/8/18
24 In Brief
Car Wash Guidelines
Caution
Some automatic car washes can
cause damage to the vehicle,
wheels, or convertible top,
if equipped. Automatic car
washes are not recommended,
due to lack of clearance for the
undercarriage and/or wide rear
tires and wheels. See "Washing
the Vehicle" underExterior Care
0 300
Driving for Better Fuel
Economy
Driving habits can affect fuel
mileage. Here are some driving tips
to get the best fuel economy
possible:
.
Set the climate controls to the
desired temperature after the
engine is started, or turn them
off when not required.
. Avoid fast starts and accelerate
smoothly. .
Brake gradually and avoid
abrupt stops.
. Avoid idling the engine for long
periods of time.
. When road and weather
conditions are appropriate, use
cruise control.
. Always follow posted speed
limits or drive more slowly when
conditions require.
. Keep vehicle tires properly
inflated.
. Combine several trips into a
single trip.
. Replace the vehicle's tires with
the same TPC Spec number
molded into the tire's sidewall
near the size.
. Follow recommended scheduled
maintenance.
. Select Eco Mode for improved
fuel economy. This will result in
better Active Fuel Management
operation. See Active Fuel
Management (Except ZR1/LT5)
0 185. .
For recommended shift speeds,
see Manual Transmission 0192.
Premium Fuel
Use the recommended fuel.
See Recommended Fuel (LT1 6.2L
V8 Engine) 0212 orRecommended
Fuel (LT4 and LT5 6.2L
Supercharged V8 Engines) 0213.
Roadside Assistance
Program
U.S.: 1-800-243-8872
TTY Users (U.S. Only):
1-888-889-2438
Canada: 1-800-268-6800
New Chevrolet owners are
automatically enrolled in the
Roadside Assistance Program.
See Roadside Assistance Program
0 334.
Page 29 of 367
Chevrolet Corvette Owner Manual (GMNA-Localizing-U.S./Canada/Mexico-
12032182) - 2019 - crc - 5/8/18
28 Keys, Doors, and Windows
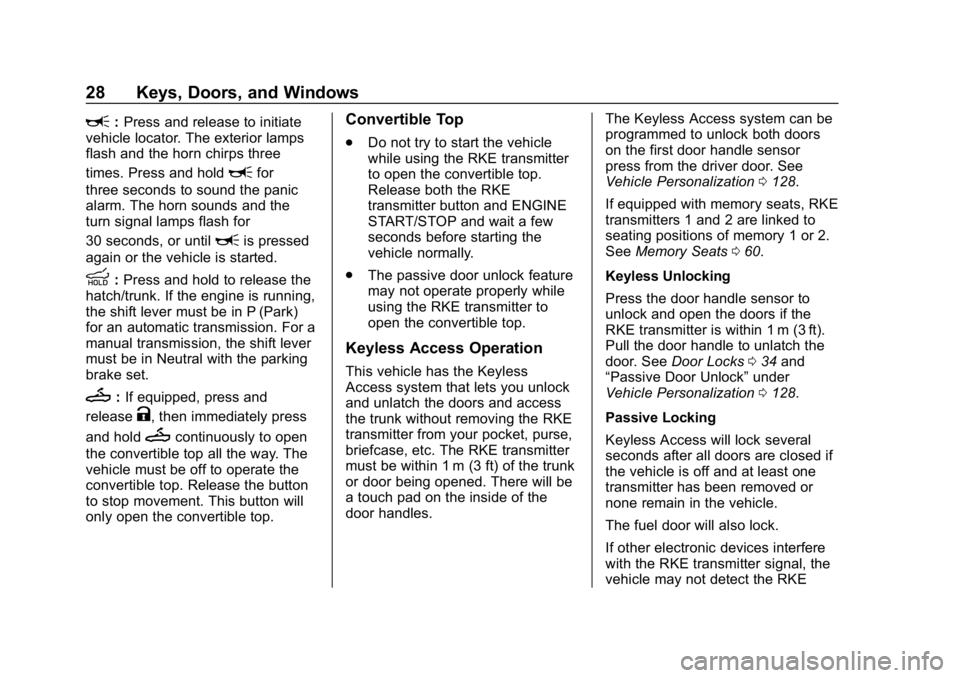
L:Press and release to initiate
vehicle locator. The exterior lamps
flash and the horn chirps three
times. Press and hold
Lfor
three seconds to sound the panic
alarm. The horn sounds and the
turn signal lamps flash for
30 seconds, or until
Lis pressed
again or the vehicle is started.
M: Press and hold to release the
hatch/trunk. If the engine is running,
the shift lever must be in P (Park)
for an automatic transmission. For a
manual transmission, the shift lever
must be in Neutral with the parking
brake set.
M: If equipped, press and
release
K, then immediately press
and hold
Mcontinuously to open
the convertible top all the way. The
vehicle must be off to operate the
convertible top. Release the button
to stop movement. This button will
only open the convertible top.
Convertible Top
. Do not try to start the vehicle
while using the RKE transmitter
to open the convertible top.
Release both the RKE
transmitter button and ENGINE
START/STOP and wait a few
seconds before starting the
vehicle normally.
. The passive door unlock feature
may not operate properly while
using the RKE transmitter to
open the convertible top.
Keyless Access Operation
This vehicle has the Keyless
Access system that lets you unlock
and unlatch the doors and access
the trunk without removing the RKE
transmitter from your pocket, purse,
briefcase, etc. The RKE transmitter
must be within 1 m (3 ft) of the trunk
or door being opened. There will be
a touch pad on the inside of the
door handles. The Keyless Access system can be
programmed to unlock both doors
on the first door handle sensor
press from the driver door. See
Vehicle Personalization
0128.
If equipped with memory seats, RKE
transmitters 1 and 2 are linked to
seating positions of memory 1 or 2.
See Memory Seats 060.
Keyless Unlocking
Press the door handle sensor to
unlock and open the doors if the
RKE transmitter is within 1 m (3 ft).
Pull the door handle to unlatch the
door. See Door Locks 034 and
“Passive Door Unlock” under
Vehicle Personalization 0128.
Passive Locking
Keyless Access will lock several
seconds after all doors are closed if
the vehicle is off and at least one
transmitter has been removed or
none remain in the vehicle.
The fuel door will also lock.
If other electronic devices interfere
with the RKE transmitter signal, the
vehicle may not detect the RKE
Page 38 of 367
Chevrolet Corvette Owner Manual (GMNA-Localizing-U.S./Canada/Mexico-
12032182) - 2019 - crc - 5/8/18
Keys, Doors, and Windows 37
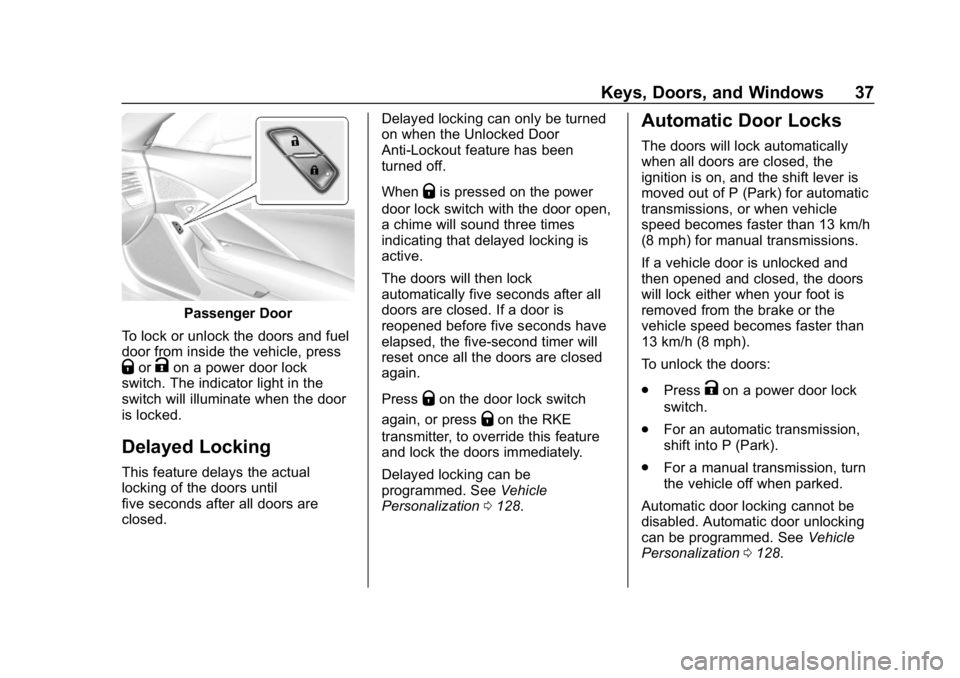
Passenger Door
To lock or unlock the doors and fuel
door from inside the vehicle, press
QorKon a power door lock
switch. The indicator light in the
switch will illuminate when the door
is locked.
Delayed Locking
This feature delays the actual
locking of the doors until
five seconds after all doors are
closed. Delayed locking can only be turned
on when the Unlocked Door
Anti-Lockout feature has been
turned off.
When
Qis pressed on the power
door lock switch with the door open,
a chime will sound three times
indicating that delayed locking is
active.
The doors will then lock
automatically five seconds after all
doors are closed. If a door is
reopened before five seconds have
elapsed, the five-second timer will
reset once all the doors are closed
again.
Press
Qon the door lock switch
again, or press
Qon the RKE
transmitter, to override this feature
and lock the doors immediately.
Delayed locking can be
programmed. See Vehicle
Personalization 0128.
Automatic Door Locks
The doors will lock automatically
when all doors are closed, the
ignition is on, and the shift lever is
moved out of P (Park) for automatic
transmissions, or when vehicle
speed becomes faster than 13 km/h
(8 mph) for manual transmissions.
If a vehicle door is unlocked and
then opened and closed, the doors
will lock either when your foot is
removed from the brake or the
vehicle speed becomes faster than
13 km/h (8 mph).
To unlock the doors:
.
Press
Kon a power door lock
switch.
. For an automatic transmission,
shift into P (Park).
. For a manual transmission, turn
the vehicle off when parked.
Automatic door locking cannot be
disabled. Automatic door unlocking
can be programmed. See Vehicle
Personalization 0128.
Page 40 of 367
Chevrolet Corvette Owner Manual (GMNA-Localizing-U.S./Canada/Mexico-
12032182) - 2019 - crc - 5/8/18
Keys, Doors, and Windows 39
Warning (Continued)
and set the fan speed to the
highest setting. See
“Climate Control Systems”
in the Index.
. If the vehicle is equipped
with a power liftgate, disable
the power liftgate function.
For more information about
carbon monoxide, see Engine
Exhaust 0186.
Hatch/Trunk Release
For automatic transmissions, the
vehicle must be in P (Park).
For manual transmissions, the
vehicle must be off or stationary
with the parking brake set. See
Electric Parking Brake 0195.
{Warning
When opening or closing the
hatch/trunk, keep hands away
from the closure area. You or
others could be injured.
{Warning
The ZR1 has a small amount of
space between the hatch/trunk lid
and the rear adjustable
performance wing. To help avoid
potential injury from pinching, use
one hand to raise the hatch/trunk
lid enough to clear the wing, and
use the other hand to fully open
the hatch/trunk lid. To release the hatch/trunk:
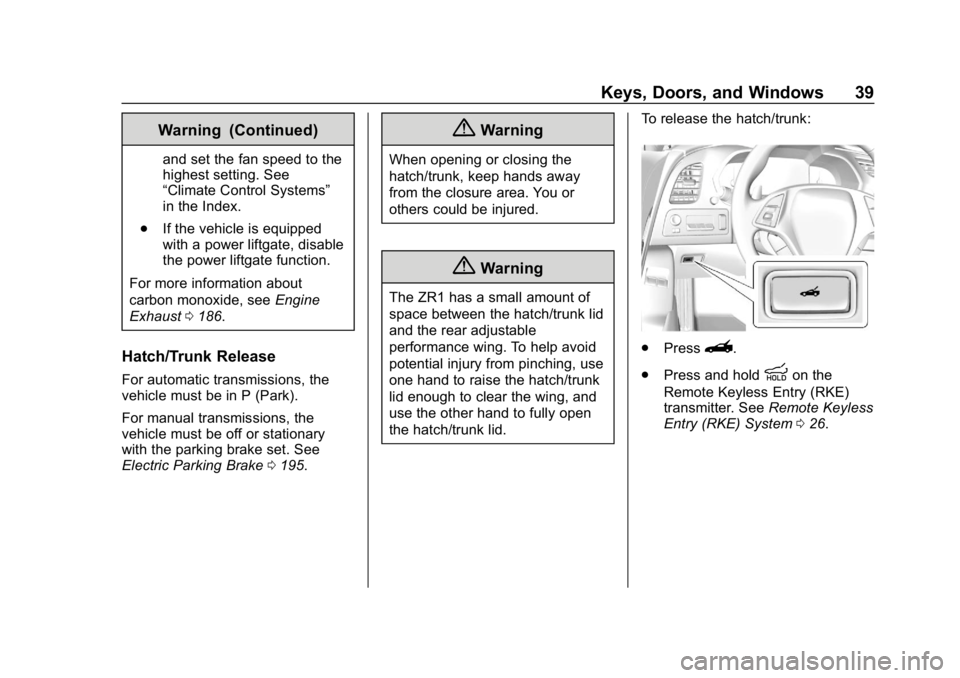
.
Press}.
. Press and hold
Mon the
Remote Keyless Entry (RKE)
transmitter. See Remote Keyless
Entry (RKE) System 026.
Page 50 of 367
Chevrolet Corvette Owner Manual (GMNA-Localizing-U.S./Canada/Mexico-
12032182) - 2019 - crc - 5/8/18
Keys, Doors, and Windows 49
Removing the Roof Panel
{Warning
Do not remove a roof panel while
the vehicle is moving. The panel
could fall into the vehicle and
strike an occupant and cause you
to lose control. It could also fly off
and strike another vehicle.
Remove the roof panel only when
the vehicle is parked.
It may be necessary to have help
removing the roof panel.
To remove: 1. Shift an automatic transmission into P (Park) or a manual
transmission into 1 (First) or
R (Reverse).
2. Turn the ignition off and set the parking brake.
3. Lower both sun visors.
4. Open the rear hatch/trunk and remove any items that may
interfere with proper storage of
the roof panel. 5. Lower the windows.
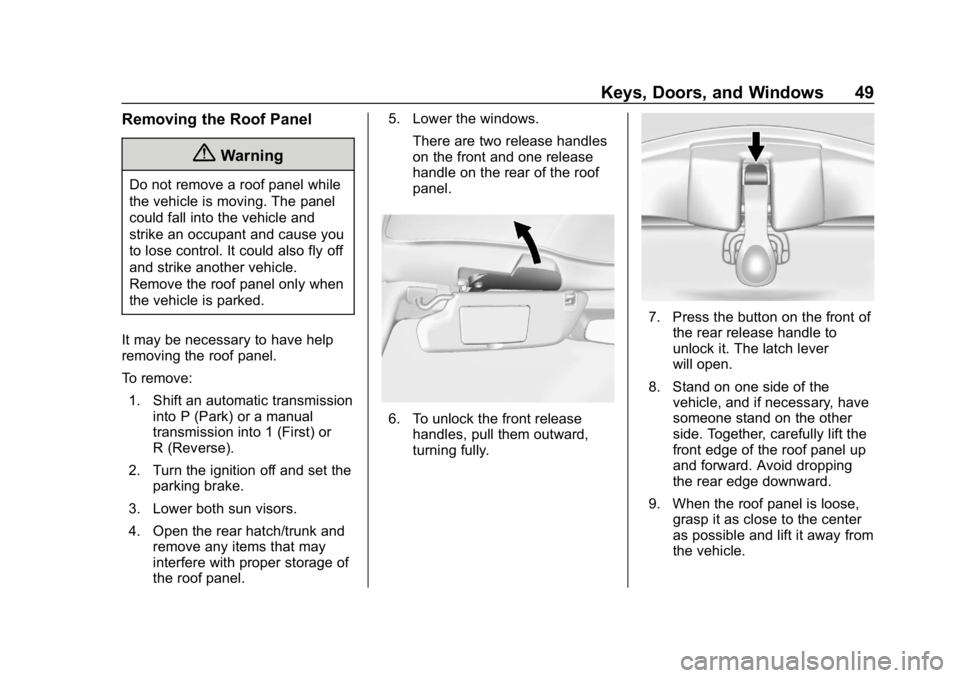
There are two release handles
on the front and one release
handle on the rear of the roof
panel.
6. To unlock the front releasehandles, pull them outward,
turning fully.
7. Press the button on the front ofthe rear release handle to
unlock it. The latch lever
will open.
8. Stand on one side of the vehicle, and if necessary, have
someone stand on the other
side. Together, carefully lift the
front edge of the roof panel up
and forward. Avoid dropping
the rear edge downward.
9. When the roof panel is loose, grasp it as close to the center
as possible and lift it away from
the vehicle.
Page 52 of 367
Chevrolet Corvette Owner Manual (GMNA-Localizing-U.S./Canada/Mexico-
12032182) - 2019 - crc - 5/8/18
Keys, Doors, and Windows 51
Caution (Continued)
interior trim. Always move
handles to the open position
when installing the roof.
It is easier if two people install the
roof panel.
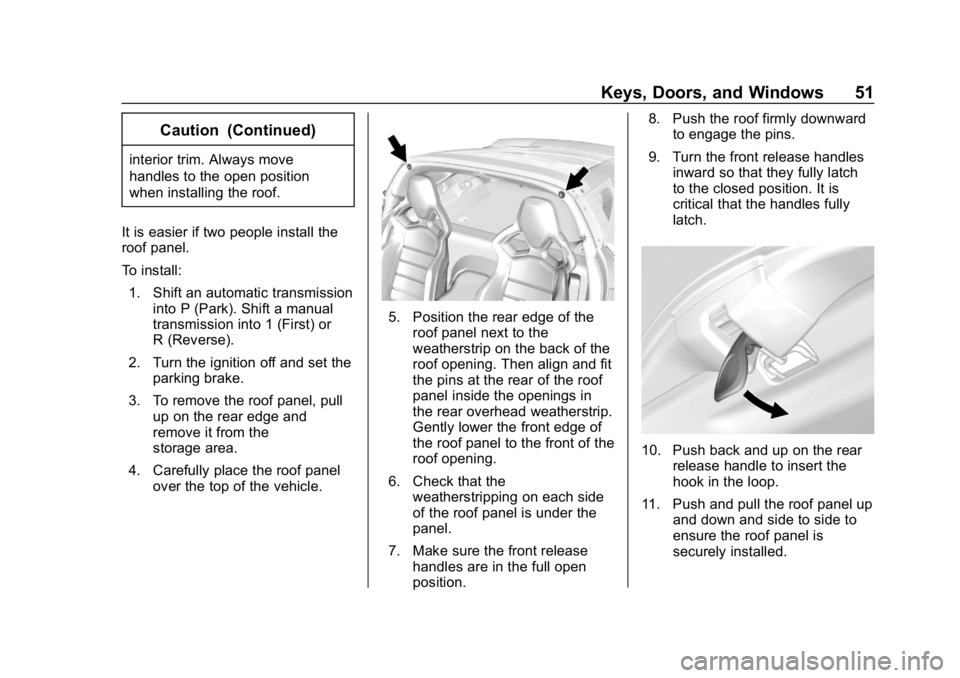
To install: 1. Shift an automatic transmission into P (Park). Shift a manual
transmission into 1 (First) or
R (Reverse).
2. Turn the ignition off and set the parking brake.
3. To remove the roof panel, pull up on the rear edge and
remove it from the
storage area.
4. Carefully place the roof panel over the top of the vehicle.
5. Position the rear edge of theroof panel next to the
weatherstrip on the back of the
roof opening. Then align and fit
the pins at the rear of the roof
panel inside the openings in
the rear overhead weatherstrip.
Gently lower the front edge of
the roof panel to the front of the
roof opening.
6. Check that the weatherstripping on each side
of the roof panel is under the
panel.
7. Make sure the front release handles are in the full open
position. 8. Push the roof firmly downward
to engage the pins.
9. Turn the front release handles inward so that they fully latch
to the closed position. It is
critical that the handles fully
latch.
10. Push back and up on the rear release handle to insert the
hook in the loop.
11. Push and pull the roof panel up and down and side to side to
ensure the roof panel is
securely installed.