sensor CHEVROLET CORVETTE 2021 User Guide
[x] Cancel search | Manufacturer: CHEVROLET, Model Year: 2021, Model line: CORVETTE, Model: CHEVROLET CORVETTE 2021Pages: 338, PDF Size: 6.56 MB
Page 219 of 338
Chevrolet Corvette Owner Manual (GMNA-Localizing-U.S./Canada/Mexico-
14622938) - 2021 - CRC - 2/10/21
218 Driving and Operating
Limited-Slip Differential
(Without Z51)
The mechanical limited-slip differential can
give more traction on snow, mud, ice, sand,
or gravel. It works like a standard axle most
of the time, but when traction is low, this
feature allows the drive wheel with the
most traction to move the vehicle. See
Competitive Driving Mode0215 and
Maintenance Schedule 0293.
Limited-Slip Differential (With Z51)
The Electronic Limited-Slip Differential (eLSD)
is a hydraulically actuated clutch system
inside the transaxle. It can infinitely vary
the clutch engagement between 0 and
2250 N*m (1659 lb-ft) of breakaway torque
between the rear wheels. When necessary it
responds from open to full engagement in
fractions of a second. Smaller clutch
adjustments happen even faster.
The eLSD:
.Uses the vehicle sensors and driver inputs
to determine the optimum amount of
clutch engagement for the conditions.
.Improves traction while cornering by
changing the engagement to achieve a
balance between directional control and
acceleration.
.Provides optimal engagement for
high-speed control and stability without
affecting precise steering and turn-in.
.Improves vehicle stability during spirited
driving and evasive maneuvers. It is fully
integrated with the Active Handling and
Performance Traction Management (PTM)
systems (if equipped).
There are unique calibrations based on the
Traction Control System (TCS) setting. eLSD
modes change automatically when the
traction control button is pressed. No unique
input from the driver is required.
.Mode 1 is the standard mode when the
vehicle is started. It provides a touring
calibration with an emphasis on vehicle
stability. Mode 1 is also used in PTM
Wet mode.
.Mode 2 is engaged when both TCS and
StabiliTrak are turned off. This calibration
provides more nimble corner turn-in, and
is biased for better traction out of
corners.
.Mode 3 is engaged when PTM is engaged
in Dry, Sport 1 & 2, and Race modes. This
is a nimble calibration with similar
functionality as eLSD Mode 2, however, it
is integrated to work with PTM.
.Mode 4 is engaged when TCS is selected
off, but StabiliTrak remains on. Vehicle
stability is still the priority, while allowing
for optimized traction out of corners.
Cruise Control
With cruise control, a speed of about
40 km/h (25 mph) or more can be
maintained without keeping your foot on
the accelerator. Cruise control does not work
at speeds below about 40 km/h (25 mph).
{Warning
Cruise control can be dangerous where
you cannot drive safely at a steady
speed. Do not use cruise control on
winding roads or in heavy traffic.
Cruise control can be dangerous on
slippery roads. On such roads, fast
changes in tire traction can cause (Continued)
Page 222 of 338
Chevrolet Corvette Owner Manual (GMNA-Localizing-U.S./Canada/Mexico-
14622938) - 2021 - CRC - 2/10/21
Driving and Operating 221
{Warning
Do not rely on the Driver Assistance
Systems. These systems do not replace
the need for paying attention and driving
safely. You may not hear or see alerts or
warnings provided by these systems.
Failure to use proper care when driving
may result in injury, death, or vehicle
damage. SeeDefensive Driving 0178.
Under many conditions, these systems
will not:
.Detect children, pedestrians, bicyclists,
or animals.
.Detect vehicles or objects outside the
area monitored by the system.
.Work at all driving speeds.
.Warn you or provide you with enough
time to avoid a crash.
.Work under poor visibility or bad
weather conditions.
.Work if the detection sensor is not
cleaned or is covered by ice, snow,
mud, or dirt. (Continued)
Warning (Continued)
.Work if the detection sensor is
covered up, such as with a sticker,
magnet, or metal plate.
.Work if the area surrounding the
detection sensor is damaged or not
properly repaired.
Complete attention is always required
while driving, and you should be ready to
take action and apply the brakes and/or
steer the vehicle to avoid crashes.
Audible Alert
Some driver assistance features alert the
driver of obstacles by beeping. To change
the volume of the warning chime, see
“Comfort and Convenience” underVehicle
Personalization 098.
Cleaning
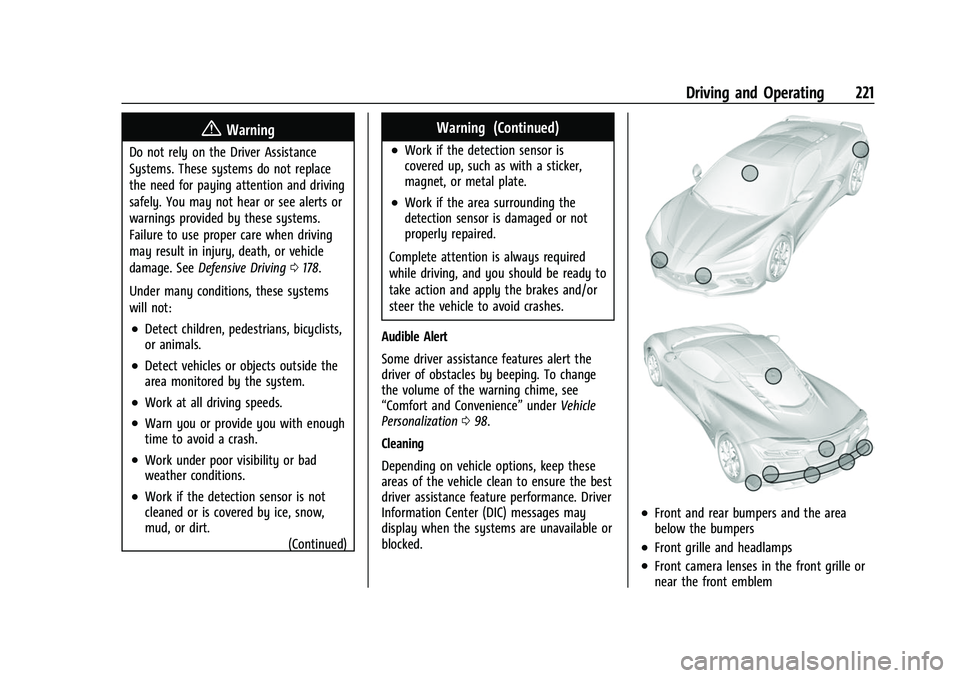
Depending on vehicle options, keep these
areas of the vehicle clean to ensure the best
driver assistance feature performance. Driver
Information Center (DIC) messages may
display when the systems are unavailable or
blocked.
.Front and rear bumpers and the area
below the bumpers
.Front grille and headlamps
.Front camera lenses in the front grille or
near the front emblem
Page 224 of 338
Chevrolet Corvette Owner Manual (GMNA-Localizing-U.S./Canada/Mexico-
14622938) - 2021 - CRC - 2/10/21
Driving and Operating 223
Curb View Camera
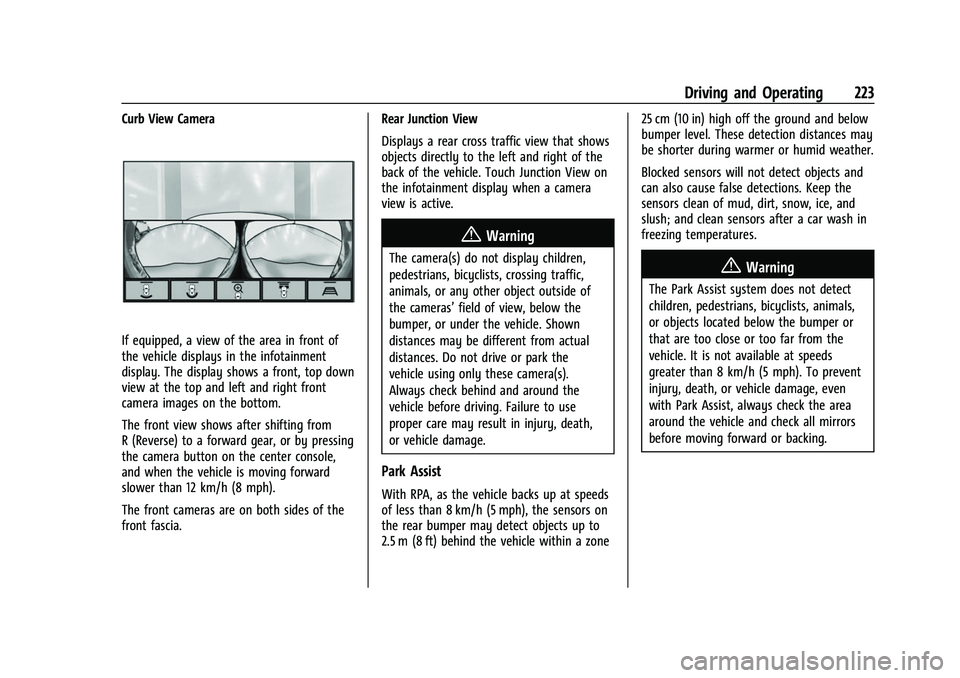
If equipped, a view of the area in front of
the vehicle displays in the infotainment
display. The display shows a front, top down
view at the top and left and right front
camera images on the bottom.
The front view shows after shifting from
R (Reverse) to a forward gear, or by pressing
the camera button on the center console,
and when the vehicle is moving forward
slower than 12 km/h (8 mph).
The front cameras are on both sides of the
front fascia.Rear Junction View
Displays a rear cross traffic view that shows
objects directly to the left and right of the
back of the vehicle. Touch Junction View on
the infotainment display when a camera
view is active.
{Warning
The camera(s) do not display children,
pedestrians, bicyclists, crossing traffic,
animals, or any other object outside of
the cameras’
field of view, below the
bumper, or under the vehicle. Shown
distances may be different from actual
distances. Do not drive or park the
vehicle using only these camera(s).
Always check behind and around the
vehicle before driving. Failure to use
proper care may result in injury, death,
or vehicle damage.
Park Assist
With RPA, as the vehicle backs up at speeds
of less than 8 km/h (5 mph), the sensors on
the rear bumper may detect objects up to
2.5 m (8 ft) behind the vehicle within a zone 25 cm (10 in) high off the ground and below
bumper level. These detection distances may
be shorter during warmer or humid weather.
Blocked sensors will not detect objects and
can also cause false detections. Keep the
sensors clean of mud, dirt, snow, ice, and
slush; and clean sensors after a car wash in
freezing temperatures.
{Warning
The Park Assist system does not detect
children, pedestrians, bicyclists, animals,
or objects located below the bumper or
that are too close or too far from the
vehicle. It is not available at speeds
greater than 8 km/h (5 mph). To prevent
injury, death, or vehicle damage, even
with Park Assist, always check the area
around the vehicle and check all mirrors
before moving forward or backing.
Page 226 of 338
Chevrolet Corvette Owner Manual (GMNA-Localizing-U.S./Canada/Mexico-
14622938) - 2021 - CRC - 2/10/21
Driving and Operating 225
SBZA Detection Zones
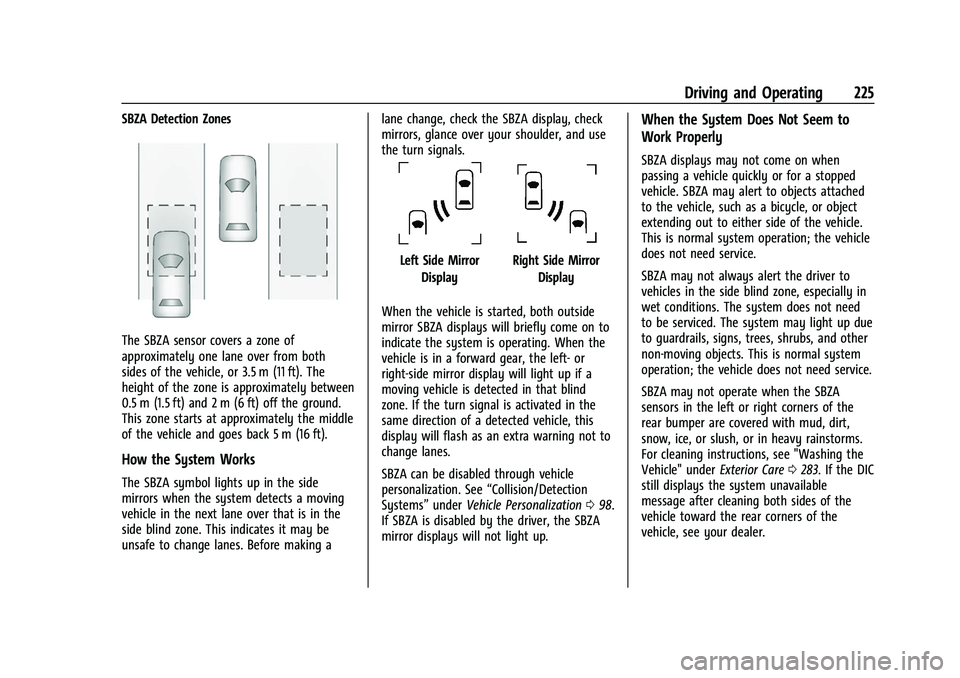
The SBZA sensor covers a zone of
approximately one lane over from both
sides of the vehicle, or 3.5 m (11 ft). The
height of the zone is approximately between
0.5 m (1.5 ft) and 2 m (6 ft) off the ground.
This zone starts at approximately the middle
of the vehicle and goes back 5 m (16 ft).
How the System Works
The SBZA symbol lights up in the side
mirrors when the system detects a moving
vehicle in the next lane over that is in the
side blind zone. This indicates it may be
unsafe to change lanes. Before making alane change, check the SBZA display, check
mirrors, glance over your shoulder, and use
the turn signals.
Left Side Mirror
DisplayRight Side Mirror Display
When the vehicle is started, both outside
mirror SBZA displays will briefly come on to
indicate the system is operating. When the
vehicle is in a forward gear, the left- or
right-side mirror display will light up if a
moving vehicle is detected in that blind
zone. If the turn signal is activated in the
same direction of a detected vehicle, this
display will flash as an extra warning not to
change lanes.
SBZA can be disabled through vehicle
personalization. See “Collision/Detection
Systems” underVehicle Personalization 098.
If SBZA is disabled by the driver, the SBZA
mirror displays will not light up.
When the System Does Not Seem to
Work Properly
SBZA displays may not come on when
passing a vehicle quickly or for a stopped
vehicle. SBZA may alert to objects attached
to the vehicle, such as a bicycle, or object
extending out to either side of the vehicle.
This is normal system operation; the vehicle
does not need service.
SBZA may not always alert the driver to
vehicles in the side blind zone, especially in
wet conditions. The system does not need
to be serviced. The system may light up due
to guardrails, signs, trees, shrubs, and other
non-moving objects. This is normal system
operation; the vehicle does not need service.
SBZA may not operate when the SBZA
sensors in the left or right corners of the
rear bumper are covered with mud, dirt,
snow, ice, or slush, or in heavy rainstorms.
For cleaning instructions, see "Washing the
Vehicle" under Exterior Care0283. If the DIC
still displays the system unavailable
message after cleaning both sides of the
vehicle toward the rear corners of the
vehicle, see your dealer.
Page 254 of 338
Chevrolet Corvette Owner Manual (GMNA-Localizing-U.S./Canada/Mexico-
14622938) - 2021 - CRC - 2/10/21
Vehicle Care 253
.To check the P (Park) mechanism's holding
ability: With the engine running, shift to
P (Park). Then release the parking brake
followed by the regular brake.
Contact your dealer if service is required.
Wiper Blade Replacement
Windshield wiper blades should be inspected
for wear and cracking.
Replacement blades come in different types
and are removed in different ways. For
proper type and length, see Maintenance
Replacement Parts 0302.
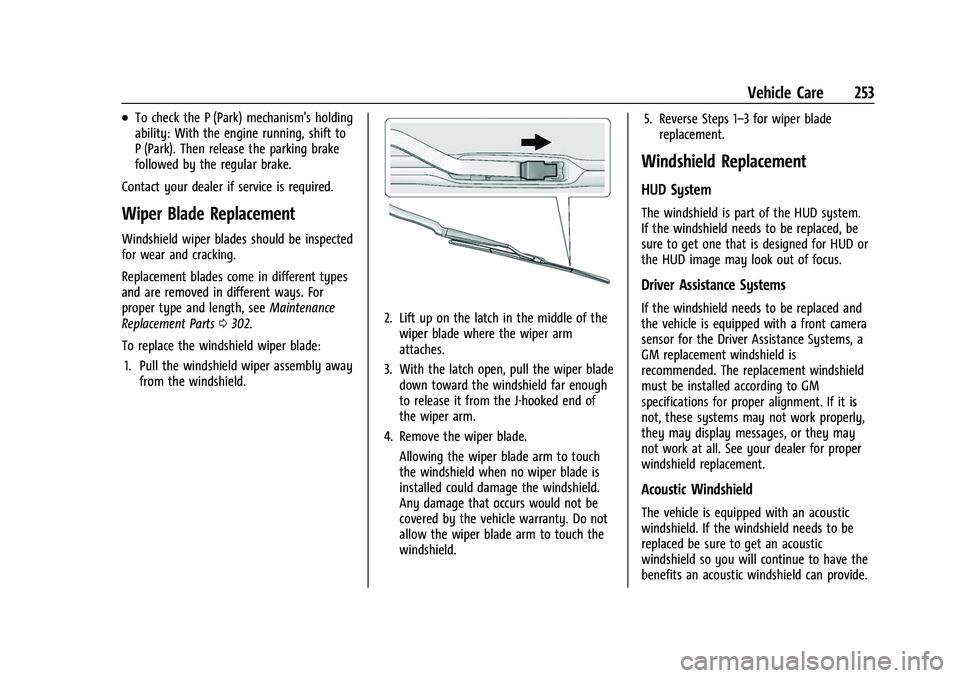
To replace the windshield wiper blade: 1. Pull the windshield wiper assembly away from the windshield.
2. Lift up on the latch in the middle of thewiper blade where the wiper arm
attaches.
3. With the latch open, pull the wiper blade down toward the windshield far enough
to release it from the J-hooked end of
the wiper arm.
4. Remove the wiper blade. Allowing the wiper blade arm to touch
the windshield when no wiper blade is
installed could damage the windshield.
Any damage that occurs would not be
covered by the vehicle warranty. Do not
allow the wiper blade arm to touch the
windshield. 5. Reverse Steps 1–3 for wiper blade
replacement.
Windshield Replacement
HUD System
The windshield is part of the HUD system.
If the windshield needs to be replaced, be
sure to get one that is designed for HUD or
the HUD image may look out of focus.
Driver Assistance Systems
If the windshield needs to be replaced and
the vehicle is equipped with a front camera
sensor for the Driver Assistance Systems, a
GM replacement windshield is
recommended. The replacement windshield
must be installed according to GM
specifications for proper alignment. If it is
not, these systems may not work properly,
they may display messages, or they may
not work at all. See your dealer for proper
windshield replacement.
Acoustic Windshield
The vehicle is equipped with an acoustic
windshield. If the windshield needs to be
replaced be sure to get an acoustic
windshield so you will continue to have the
benefits an acoustic windshield can provide.
Page 258 of 338
Chevrolet Corvette Owner Manual (GMNA-Localizing-U.S./Canada/Mexico-
14622938) - 2021 - CRC - 2/10/21
Vehicle Care 257
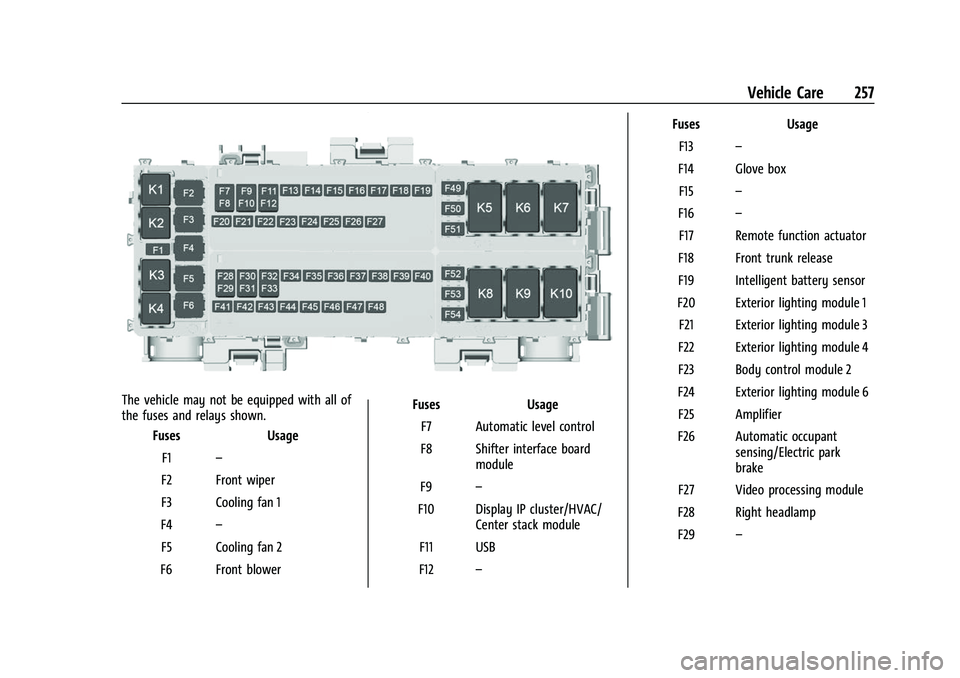
The vehicle may not be equipped with all of
the fuses and relays shown.Fuses Usage
F1 –
F2 Front wiper
F3 Cooling fan 1
F4 –
F5 Cooling fan 2
F6 Front blower Fuses Usage
F7 Automatic level control
F8 Shifter interface board module
F9 –
F10 Display IP cluster/HVAC/ Center stack module
F11 USB
F12 – Fuses Usage
F13 –
F14 Glove box F15 –
F16 –
F17 Remote function actuator
F18 Front trunk release
F19 Intelligent battery sensor
F20 Exterior lighting module 1 F21 Exterior lighting module 3
F22 Exterior lighting module 4
F23 Body control module 2
F24 Exterior lighting module 6 F25 Amplifier
F26 Automatic occupant sensing/Electric park
brake
F27 Video processing module
F28 Right headlamp
F29 –
Page 261 of 338
Chevrolet Corvette Owner Manual (GMNA-Localizing-U.S./Canada/Mexico-
14622938) - 2021 - CRC - 2/10/21
260 Vehicle Care
FusesUsage
10 Engine control module/ Air conditioning
11 –
12 Lithium ion battery module
13 Active fuel management
14 Seat fan 15 –
16 Exterior lighting module 17 Instrument panel cluster/Shifter interface
board/Transmission
control module/
Electronic brake control
module
18 Engine control module
19 –
20 Sensing and diagnostic module/Inside rear view
mirror
21 Exhaust valve solenoid
22 Fuel pump/Fuel tank zone module Fuses
Usage
23 Tonneau left
24 Tonneau right 25 Convertible top right
26 Convertible top left 27 Electronic suspension control
28 –
29 CGM
30 O2 sensor 31 O2 sensor/Engine oil/ Canister purge/Active
fuel management
32 Ignition even
33 Ignition odd
34 Engine control module 1 35 Engine control module/ Mass air flow Sensor/
O2 sensor/Air
conditioning
36 –
37 Canister vent
38 Latch control module Fuses
Usage
39 Right window switch/ Door lock
40 Left window switch/ Door lock
41 –
42 Engine control module 2
43 –
44 Air conditioning clutch 45 –
46 –
47 –
48 –
49 Auxiliary cooling fan right
50 –
51 –
52 –
53 Starter solenoid
54 Auxiliary cooling fan left
Page 269 of 338
Chevrolet Corvette Owner Manual (GMNA-Localizing-U.S./Canada/Mexico-
14622938) - 2021 - CRC - 2/10/21
268 Vehicle Care
When to Check
Check the pressure of the tires once a
month or more.
How to Check
Use a good quality pocket-type gauge
to check tire pressure. Proper tire
inflation cannot be determined by
looking at the tire. Check the tire
inflation pressure when the tires are
cold, meaning the vehicle has not been
driven for at least three hours or no
more than 1.6 km (1 mi).
Remove the valve cap from the tire
valve stem. Press the tire gauge firmly
onto the valve to get a pressure
measurement. If the cold tire inflation
pressure matches the recommended
pressure on the Tire and Loading
Information label, no further adjustment
is necessary. If the inflation pressure is
low, add air until the recommended
pressure is reached. If the inflation
pressure is high, press on the metal
stem in the center of the tire valve to
release air.Recheck the tire pressure with the tire
gauge.
Put the valve caps back on the valve
stems to keep out dirt and moisture.
Use only valve caps designed for the
vehicle by GM. TPMS sensors could be
damaged and would not be covered by
the vehicle warranty.
Tire Pressure for High-Speed
Operation
{Warning
Driving at high speeds, 255 km/h
(155 mph) or higher, puts additional strain
on tires. Sustained high-speed driving
causes excessive heat buildup and can
cause sudden tire failure. This could cause
a crash, and you or others could be
killed. Some high-speed rated tires require
inflation pressure adjustment for
high-speed operation. When speed limits
and road conditions allow the vehicle to
be driven at high speeds, make sure the
tires are rated for high-speed operation,
(Continued)
Warning (Continued)
are in excellent condition, and are set to
the correct cold tire inflation pressure for
the vehicle load.
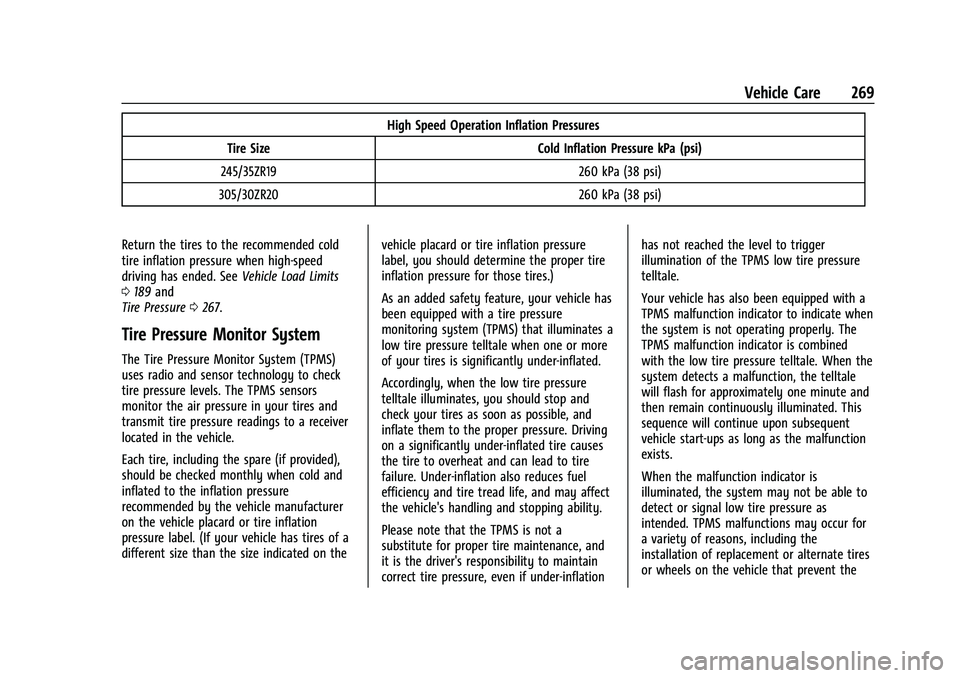
Vehicles with tire sizes listed in the High
Speed Operation Inflation Pressures table
require inflation pressure adjustment when
driving the vehicle at speeds of 255 km/h
(155 mph) or higher. Set the cold tire
inflation pressure to the corresponding value
in the table for the tire size on the vehicle.
Page 270 of 338
Chevrolet Corvette Owner Manual (GMNA-Localizing-U.S./Canada/Mexico-
14622938) - 2021 - CRC - 2/10/21
Vehicle Care 269
High Speed Operation Inflation Pressures
Tire Size Cold Inflation Pressure kPa (psi)
245/35ZR19 260 kPa (38 psi)
305/30ZR20 260 kPa (38 psi)
Return the tires to the recommended cold
tire inflation pressure when high-speed
driving has ended. See Vehicle Load Limits
0 189 and
Tire Pressure 0267.
Tire Pressure Monitor System
The Tire Pressure Monitor System (TPMS)
uses radio and sensor technology to check
tire pressure levels. The TPMS sensors
monitor the air pressure in your tires and
transmit tire pressure readings to a receiver
located in the vehicle.
Each tire, including the spare (if provided),
should be checked monthly when cold and
inflated to the inflation pressure
recommended by the vehicle manufacturer
on the vehicle placard or tire inflation
pressure label. (If your vehicle has tires of a
different size than the size indicated on the vehicle placard or tire inflation pressure
label, you should determine the proper tire
inflation pressure for those tires.)
As an added safety feature, your vehicle has
been equipped with a tire pressure
monitoring system (TPMS) that illuminates a
low tire pressure telltale when one or more
of your tires is significantly under-inflated.
Accordingly, when the low tire pressure
telltale illuminates, you should stop and
check your tires as soon as possible, and
inflate them to the proper pressure. Driving
on a significantly under-inflated tire causes
the tire to overheat and can lead to tire
failure. Under-inflation also reduces fuel
efficiency and tire tread life, and may affect
the vehicle's handling and stopping ability.
Please note that the TPMS is not a
substitute for proper tire maintenance, and
it is the driver's responsibility to maintain
correct tire pressure, even if under-inflationhas not reached the level to trigger
illumination of the TPMS low tire pressure
telltale.
Your vehicle has also been equipped with a
TPMS malfunction indicator to indicate when
the system is not operating properly. The
TPMS malfunction indicator is combined
with the low tire pressure telltale. When the
system detects a malfunction, the telltale
will flash for approximately one minute and
then remain continuously illuminated. This
sequence will continue upon subsequent
vehicle start-ups as long as the malfunction
exists.
When the malfunction indicator is
illuminated, the system may not be able to
detect or signal low tire pressure as
intended. TPMS malfunctions may occur for
a variety of reasons, including the
installation of replacement or alternate tires
or wheels on the vehicle that prevent the
Page 271 of 338
Chevrolet Corvette Owner Manual (GMNA-Localizing-U.S./Canada/Mexico-
14622938) - 2021 - CRC - 2/10/21
270 Vehicle Care
TPMS from functioning properly. Always
check the TPMS malfunction telltale after
replacing one or more tires or wheels on
your vehicle to ensure that the replacement
or alternate tires and wheels allow the
TPMS to continue to function properly.
SeeTire Pressure Monitor Operation 0270.
See Radio Frequency Statement 0316.
Tire Pressure Monitor Operation
This vehicle may have a Tire Pressure
Monitor System (TPMS). The TPMS is
designed to warn the driver when a low tire
pressure condition exists. TPMS sensors are
mounted onto each tire and wheel
assembly, excluding the spare tire and
wheel assembly. The TPMS sensors monitor
the air pressure in the tires and transmit the
tire pressure readings to a receiver located
in the vehicle.
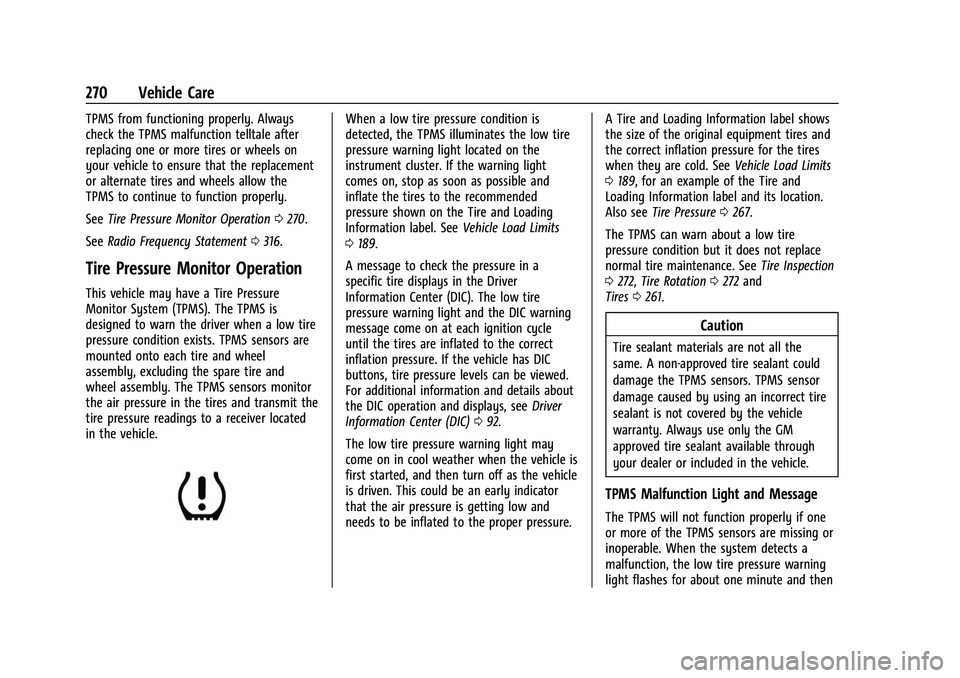
When a low tire pressure condition is
detected, the TPMS illuminates the low tire
pressure warning light located on the
instrument cluster. If the warning light
comes on, stop as soon as possible and
inflate the tires to the recommended
pressure shown on the Tire and Loading
Information label. See Vehicle Load Limits
0 189.
A message to check the pressure in a
specific tire displays in the Driver
Information Center (DIC). The low tire
pressure warning light and the DIC warning
message come on at each ignition cycle
until the tires are inflated to the correct
inflation pressure. If the vehicle has DIC
buttons, tire pressure levels can be viewed.
For additional information and details about
the DIC operation and displays, see Driver
Information Center (DIC) 092.
The low tire pressure warning light may
come on in cool weather when the vehicle is
first started, and then turn off as the vehicle
is driven. This could be an early indicator
that the air pressure is getting low and
needs to be inflated to the proper pressure. A Tire and Loading Information label shows
the size of the original equipment tires and
the correct inflation pressure for the tires
when they are cold. See
Vehicle Load Limits
0 189, for an example of the Tire and
Loading Information label and its location.
Also see Tire Pressure 0267.
The TPMS can warn about a low tire
pressure condition but it does not replace
normal tire maintenance. See Tire Inspection
0 272, Tire Rotation 0272 and
Tires 0261.
Caution
Tire sealant materials are not all the
same. A non-approved tire sealant could
damage the TPMS sensors. TPMS sensor
damage caused by using an incorrect tire
sealant is not covered by the vehicle
warranty. Always use only the GM
approved tire sealant available through
your dealer or included in the vehicle.
TPMS Malfunction Light and Message
The TPMS will not function properly if one
or more of the TPMS sensors are missing or
inoperable. When the system detects a
malfunction, the low tire pressure warning
light flashes for about one minute and then