battery location CHEVROLET CORVETTE 2021 Owner's Manual
[x] Cancel search | Manufacturer: CHEVROLET, Model Year: 2021, Model line: CORVETTE, Model: CHEVROLET CORVETTE 2021Pages: 338, PDF Size: 6.56 MB
Page 8 of 338
Chevrolet Corvette Owner Manual (GMNA-Localizing-U.S./Canada/Mexico-
14622938) - 2021 - CRC - 2/10/21
Keys, Doors, and Windows 7
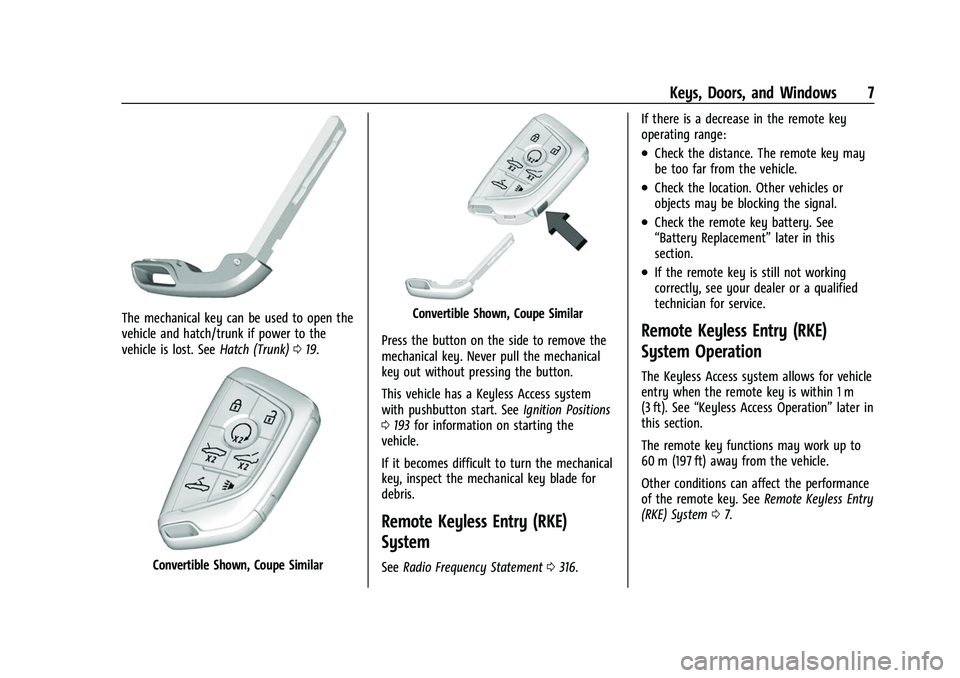
The mechanical key can be used to open the
vehicle and hatch/trunk if power to the
vehicle is lost. SeeHatch (Trunk)019.
Convertible Shown, Coupe Similar
Convertible Shown, Coupe Similar
Press the button on the side to remove the
mechanical key. Never pull the mechanical
key out without pressing the button.
This vehicle has a Keyless Access system
with pushbutton start. See Ignition Positions
0 193 for information on starting the
vehicle.
If it becomes difficult to turn the mechanical
key, inspect the mechanical key blade for
debris.
Remote Keyless Entry (RKE)
System
See Radio Frequency Statement 0316. If there is a decrease in the remote key
operating range:
.Check the distance. The remote key may
be too far from the vehicle.
.Check the location. Other vehicles or
objects may be blocking the signal.
.Check the remote key battery. See
“Battery Replacement”
later in this
section.
.If the remote key is still not working
correctly, see your dealer or a qualified
technician for service.
Remote Keyless Entry (RKE)
System Operation
The Keyless Access system allows for vehicle
entry when the remote key is within 1 m
(3 ft). See “Keyless Access Operation” later in
this section.
The remote key functions may work up to
60 m (197 ft) away from the vehicle.
Other conditions can affect the performance
of the remote key. See Remote Keyless Entry
(RKE) System 07.
Page 12 of 338
Chevrolet Corvette Owner Manual (GMNA-Localizing-U.S./Canada/Mexico-
14622938) - 2021 - CRC - 2/10/21
Keys, Doors, and Windows 11
4. Press ENGINE START/STOP. When theremote key is learned, the DIC display
will show that it is ready to program the
next remote key.
5. Remove the remote key from the backup location and press
KorQon the
remote key.
To program additional remote keys,
repeat Steps 3–5.
When all additional remote keys are
programmed, press and hold ENGINE
START/STOP for approximately
12 seconds to exit programming mode.
Programming without Recognized
Remote Keys
If two currently recognized remote keys are
not available, see your dealer to program
new remote keys.
Starting the Vehicle with a Low Remote
Key Battery
For improved vehicle security, the remote
key is equipped with a motion sensor. When
starting the vehicle, if the remote key has
been idle for a while, the DIC may display
KEY IN SLEEP MODE, MOVE KEY, THEN
START. Move the remote key slightly and
try starting the vehicle. If the remote key battery is weak or if there is interference
with the signal, the DIC may display NO
REMOTE DETECTED or NO REMOTE KEY WAS
DETECTED PLACE KEY IN KEY POCKET, THEN
START YOUR VEHICLE.
If this occurs, follow these steps:
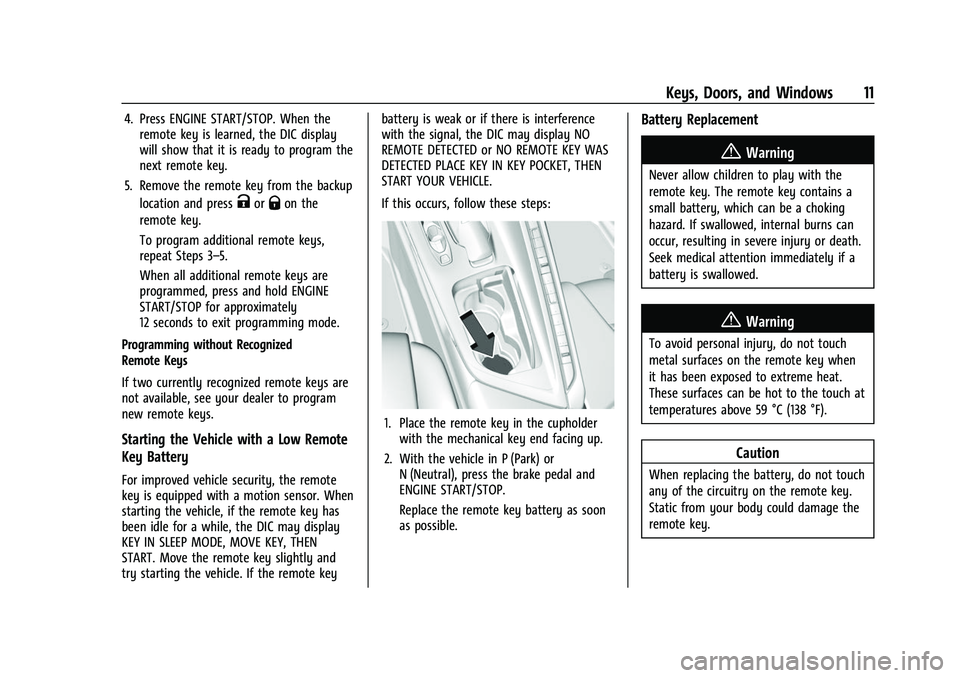
1. Place the remote key in the cupholder
with the mechanical key end facing up.
2. With the vehicle in P (Park) or N (Neutral), press the brake pedal and
ENGINE START/STOP.
Replace the remote key battery as soon
as possible.
Battery Replacement
{Warning
Never allow children to play with the
remote key. The remote key contains a
small battery, which can be a choking
hazard. If swallowed, internal burns can
occur, resulting in severe injury or death.
Seek medical attention immediately if a
battery is swallowed.
{Warning
To avoid personal injury, do not touch
metal surfaces on the remote key when
it has been exposed to extreme heat.
These surfaces can be hot to the touch at
temperatures above 59 °C (138 °F).
Caution
When replacing the battery, do not touch
any of the circuitry on the remote key.
Static from your body could damage the
remote key.
Page 61 of 338
Chevrolet Corvette Owner Manual (GMNA-Localizing-U.S./Canada/Mexico-
14622938) - 2021 - CRC - 2/10/21
60 Seats and Restraints
approved by GM for your specific vehicle.
SeeAdding Equipment to the
Airbag-Equipped Vehicle 060 for more
information about modifications that can
affect how the system operates.
The ON indicator may be lit if an object,
such as a briefcase, handbag, grocery bag,
laptop, or other electronic device, is put on
an unoccupied seat. If this is not desired,
remove the object from the seat.
{Warning
Stowing articles under the passenger seat
or between the passenger seat cushion
and seatback may interfere with the
proper operation of the passenger
sensing system.
Servicing the Airbag-Equipped
Vehicle
Airbags affect how the vehicle should be
serviced. There are parts of the airbag
system in several places around the vehicle.
Your dealer and the service manual have
information about servicing the vehicle and
the airbag system. To purchase a service
manual, see Publication Ordering
Information 0315.
{Warning
For up to 10 seconds after the vehicle is
turned off and the battery is
disconnected, an airbag can still inflate
during improper service. You can be
injured if you are close to an airbag
when it inflates. Avoid yellow connectors.
They are probably part of the airbag
system. Be sure to follow proper service
procedures, and make sure the person
performing work for you is qualified to
do so.
Adding Equipment to the
Airbag-Equipped Vehicle
Adding accessories that change the vehicle's
frame, bumper system, height, front end,
or side sheet metal may keep the airbag
system from working properly.
The operation of the airbag system can also
be affected by changing, including
improperly repairing or replacing, any parts
of the following:
.Airbag system, including airbag modules,
front or side impact sensors, sensing and
diagnostic module, or airbag wiring
.Front seats, including stitching, seams or
zippers
.Seat belts
.Steering wheel, instrument panel, ceiling
trim, or pillar garnish trim
.Inner door seals, including speakers
Your dealer and the service manual have
information about the location of the airbag
modules and sensors, sensing and diagnostic
module, and airbag wiring along with the
proper replacement procedures.
In addition, the vehicle has a passenger
sensing system for the front outboard
passenger position, which includes sensors
that are part of the passenger seat. The
passenger sensing system may not operate
properly if the original seat trim is replaced
with non-GM covers, upholstery or trim,
or with GM covers, upholstery or trim
designed for a different vehicle. Any object,
such as an aftermarket seat heater or a
comfort-enhancing pad or device, installed
under or on top of the seat fabric, could
also interfere with the operation of the
passenger sensing system. This could either
prevent proper deployment of the passenger
airbag(s) or prevent the passenger sensing
Page 82 of 338
Chevrolet Corvette Owner Manual (GMNA-Localizing-U.S./Canada/Mexico-
14622938) - 2021 - CRC - 2/10/21
Instruments and Controls 81
Performance
Press the thumbwheel to enter the
Performance menu. Scroll through the
available items.
G-force :Gives the driver an indication of
the vehicle performance in cornering. The
G-force gauge will show as an info tile on
the left side of the cluster, if selected.
Friction Bubble : A four quadrant visual
display, indicative of the four corners of the
car, with a “bubble”showing where the
most inertia is being exerted on the vehicle.
Performance Timer : Press the thumbwheel
to enter the setup menu, then select Set
Start Speed. Scroll to desired Start Speed,
then press the thumbwheel to save it. While
on this menu, to change the End Speed,
scroll to End Speed and use the thumbwheel
to scroll to desired End Speed. Press the
thumbwheel to save it. On the next
acceleration, the performance timer will
record the time. Pressing the thumbwheel
while the timer is running will cancel the
timer if done before reaching the End Speed.
Lap Timer (without PDR) : Press
Twhen
Lap Timer is displayed to start, stop, or reset
the lap timer. Press the thumbwheel while
the Lap Timer page is active to start the timer. If the lap timer is active, pressing the
thumbwheel will stop the current lap timer
and start a new lap. Pressing the
thumbwheel within 10 seconds after
completing the last lap (Stop Lap Timer
option is displayed), the Lap Timer will stop.
Lap Timer (with PDR) :
The lap times
recorded with the PDR system will
automatically be displayed in this window.
This only happens if a track has been
selected in the PDR system and a video
recording is started. See Performance Data
Recorder (PDR) 0143.
Oil Temperature : Shows the current oil
temperature in either degrees Celsius (°C) or
degrees Fahrenheit (°F).
Oil Pressure : Shows the current oil pressure
in either kilopascal (kPa) or in pounds per
square inch (psi).
Battery Voltage : Shows the current battery
voltage.
Transmission Fluid Temperature : Shows the
temperature of the transmission fluid in
either degrees Celsius (°C) or degrees
Fahrenheit (°F).
Tire Status : Shows individual tire pressures
and overall temperature as either Cold, Cool,
Normal, Warm, or Hot. Normal is typical for normal driving while Warm is typical for
aggressive driving. Unknown may be
displayed if tire temperature information is
unavailable.
eLSD (Z51 Only) :
Displays the amount of
rear differential coupling when the Electronic
Limited-Slip Differential (eLSD) is active and
functioning during vehicle operation.
A reading of 1% is an open differential and
100% is locked. It is normal for the value to
make small or large changes due to driving
conditions and driver inputs. See Limited-Slip
Differential (Without Z51) 0218 or
Limited-Slip Differential (With Z51) 0218.
Front Lift : During a driver requested Front
Lift (if equipped), the driver may
"remember" using the
S, or dismiss the
display by pressing the thumbwheel. When
the Front Lift is Raised due to location, the
driver may delete that stored location using
the
S, or dismiss the display by pressing
the thumbwheel.
See Front Lift System 0214.
Audio
In the Audio menu, use the thumbwheel to
scroll through audio presets.
Page 138 of 338
Chevrolet Corvette Owner Manual (GMNA-Localizing-U.S./Canada/Mexico-
14622938) - 2021 - CRC - 2/10/21
Infotainment System 137
.The vehicle changes directions more than
once, or the vehicle is turning on a turn
table in a parking lot.
.The vehicle is entering and/or exiting a
parking lot, garage, or a lot with a roof.
.The GPS signal is not received.
.A roof carrier is installed on the vehicle.
.Tire chains are installed on the vehicle.
.The tires are replaced or worn.
.The tire pressure for the tires is incorrect.
.This is the first navigation use after the
map data is updated.
.The 12-volt battery has been disconnected
for several days.
.The vehicle is driving in heavy traffic
where driving is at low speeds, and the
vehicle is stopped and started repeatedly.
Problems with Route Guidance
Inappropriate route guidance can occur
under one or more of the following
conditions:
.The turn was not made on the road
indicated.
.Route guidance might not be available
when using automatic rerouting for the
next right or left turn.
.The route might not be changed when
using automatic rerouting.
.There is no route guidance when turning
at an intersection.
.Plural names of places might be
announced occasionally.
.It could take a long time to operate
automatic rerouting during high-speed
driving.
.Automatic rerouting might display a route
returning to the set waypoint if heading
for a destination without passing through
a set waypoint.
.The route prohibits the entry of a vehicle
due to a regulation by time or season or
any other regulation which may be given.
.Some routes might not be searched.
.The route to the destination might not be
shown if there are new roads, if roads
have recently changed, or if certain roads
are not listed in the map data. SeeMaps
0 129.
To recalibrate the vehicle's position on the
map, park with the vehicle running for two
to five minutes, until the vehicle position
updates. Make sure the vehicle is parked in a location that is safe and has a clear view
of the sky and away from large
obstructions.
If the System Needs Service
If the navigation system needs service, see
your dealer.
Map Data Updates
The map data in the vehicle is the most
up-to-date information available when the
vehicle was produced.
See www.gmnavdisc.com for details on
ordering, purchasing, and installing a new or
replacement SD card. Features are subject to
change. For more information on this
feature, see my.chevrolet.com/learn.
Database Coverage Explanations
Coverage areas vary with respect to the
level of map detail available for any given
area. Some areas feature greater levels of
detail than others. If this happens, it does
not mean there is a problem with the
system. As the map data is updated, more
detail can become available for areas that
previously had limited detail. See
Map Data
Updates 0137.
Page 195 of 338
Chevrolet Corvette Owner Manual (GMNA-Localizing-U.S./Canada/Mexico-
14622938) - 2021 - CRC - 2/10/21
194 Driving and Operating
2. Shift into N (Neutral). This can be donewhile the vehicle is moving. After
shifting into N (Neutral), firmly apply the
brakes and steer the vehicle to a safe
location.
3. Come to a complete stop. Shift into P (Park).
4. Set the parking brake. See Electric
Parking Brake 0205. Press ENGINE
START/STOP to turn the vehicle off.
{Warning
Turning off the vehicle while moving may
cause loss of power assist in the brake
and steering systems and disable the
airbags. While driving, only shut the
vehicle off in an emergency.
If the vehicle cannot be pulled over and
must be turned off while driving, press and
hold ENGINE START/STOP for more than
two seconds, or press twice within
five seconds.
ACC/ACCESSORY (Amber Indicator Light) :
This mode allows the use of some electrical
accessories when the engine is off. With the ignition off, pressing the button
one time without the brake pedal applied
will place the ignition in ACC/ACCESSORY.
The ignition will switch from ACC/
ACCESSORY to off after five minutes to
prevent battery rundown.
ON/RUN/START (Green Indicator Light) :
This
mode is for driving and starting. With the
ignition off and the brake pedal applied,
pressing the button once will place the
ignition in ON/RUN/START. Once engine
cranking begins, release the button. Engine
cranking will continue until the engine
starts. See Starting the Engine 0194. The
ignition will then remain in ON/RUN.
Service Mode
This power mode is available for service and
diagnostics, and to verify the proper
operation of the malfunction indicator lamp
as may be required for emission inspection
purposes. With the vehicle off and the brake
pedal not applied, pressing and holding
ENGINE START/STOP for more than
five seconds will place the vehicle in Service
Mode. The instruments and audio systems
will operate as they do in ON/RUN, but the
vehicle will not be able to be driven. The engine will not start in Service Mode. Press
ENGINE START/STOP again to turn the
vehicle off.
Starting the Engine
Caution
If you add electrical parts or accessories,
you could change the way the engine
operates. Any resulting damage would
not be covered by the vehicle warranty.
See
Add-On Electrical Equipment 0229.
Caution
Do not try to shift to P (Park) if the
vehicle is moving. If you do, you could
damage the transmission. Shift to P (Park)
only when the vehicle is stopped.
Place the transmission in P (Park) or
N (Neutral). To restart the vehicle when it is
already moving, use N (Neutral) only.
Starting the Vehicle
The remote key must be inside the vehicle
for the ignition to work.
Page 252 of 338
Chevrolet Corvette Owner Manual (GMNA-Localizing-U.S./Canada/Mexico-
14622938) - 2021 - CRC - 2/10/21
Vehicle Care 251
Brake Fluid
The brake master cylinder reservoir is filled
with GM approved DOT 4 brake fluid as
indicated on the reservoir cap. See
Underhood Compartment Overview0234 for
the location of the reservoir.
Checking Brake Fluid
With the vehicle in P (Park) on a level
surface, the brake fluid level should be
between the minimum and maximum marks
on the brake fluid reservoir.
There are only two reasons why the brake
fluid level in the reservoir may go down:
.Normal brake lining wear. When new
linings are installed, the fluid level goes
back up.
.A fluid leak in the brake hydraulic system.
Have the brake hydraulic system fixed.
With a leak, the brakes will not
work well. Always clean the brake fluid reservoir cap
and the area around the cap before
removing it.
Do not top off the brake fluid. Adding fluid
does not correct a leak. If fluid is added
when the linings are worn, there will be too
much fluid when new brake linings are
installed. Add or remove fluid, as necessary,
only when work is done on the brake
hydraulic system.
Caution
If too much brake fluid is added, the
brake fluid can spill and cause vehicle
damage, including damage to electrical
components and surfaces. Add brake fluid
only when work is done on the brake
hydraulic system.
When the brake fluid falls to a low level,
the brake warning light comes on. See Brake
System Warning Light 088.
Brake fluid absorbs water over time which
degrades the effectiveness of the brake fluid.
Replace brake fluid at the specified intervals
to prevent increased stopping distance. See
Maintenance Schedule 0293. What to Add
Use only GM approved DOT 4 brake fluid
from a clean, sealed container. See
Recommended Fluids and Lubricants
0301.
{Warning
The wrong or contaminated brake fluid
could result in damage to the brake
system. This could result in the loss of
braking leading to a possible injury.
Always use the proper GM approved
brake fluid.
Caution
If brake fluid is spilled on the vehicle's
painted surfaces, the paint finish can be
damaged. Immediately wash off any
painted surface.
Battery - North America
The original equipment battery is
maintenance free. Do not remove the cap
and do not add fluid.
Refer to the replacement number on the
original battery label when a new battery is
needed. For battery replacement, see your
dealer.
Page 273 of 338
Chevrolet Corvette Owner Manual (GMNA-Localizing-U.S./Canada/Mexico-
14622938) - 2021 - CRC - 2/10/21
272 Vehicle Care
briefly press the center of the valve stem.
When the recommended pressure is reached,
the horn sounds once.
If the turn signal lamp does not flash within
15 seconds after starting to inflate the tire,
the tire fill alert has not been activated or is
not working.
If the hazard warning flashers are on, the
tire fill alert visual feedback will not work
properly.
The TPMS will not activate the tire fill alert
properly under the following conditions:
.There is interference from an external
device or transmitter.
.The air pressure from the inflation device
is not sufficient to inflate the tire.
.There is a malfunction in the TPMS.
.There is a malfunction in the horn or turn
signal lamps.
.The identification code of the TPMS
sensor is not registered to the system.
.The battery of the TPMS sensor is low.
If the tire fill alert does not operate due to
TPMS interference, move the vehicle about
1 m (3 ft) back or forward and try again.
If the tire fill alert feature is not working,
use a tire pressure gauge.
TPMS Sensor Matching Process —Auto
Learn Function
Each TPMS sensor has a unique
identification code. The identification code
needs to be matched to a new tire/wheel
position after rotating the tires or replacing
one or more of the TPMS sensors. When a
tire is installed, the vehicle must be
stationary for about 20 minutes before the
system recalculates. The following relearn
process takes up to 10 minutes, driving at a
minimum speed of 20 km/h (12 mph).
A dash (-) or pressure value will display in
the DIC. See Driver Information Center (DIC)
0 92. A warning message displays in the DIC
if a problem occurs during the relearn
process.
Tire Inspection
We recommend that the tires, including
the spare tire, if the vehicle has one, be
inspected for signs of wear or damage
at least once a month.
Replace the tire if:
.The indicators at three or more
places around the tire can be seen.
.There is cord or fabric showing
through the tire's rubber.
.The tread or sidewall is cracked, cut,
or snagged deep enough to show
cord or fabric.
.The tire has a bump, bulge, or split.
.The tire has a puncture, cut, or other
damage that cannot be repaired well
because of the size or location of the
damage.
Tire Rotation
The tires should be rotated every
12 000 km (7,500 mi). See Maintenance
Schedule 0293.
Tires are rotated to achieve uniform
wear for all tires. The first rotation is
the most important.
Anytime unusual wear is noticed, rotate
the tires as soon as possible, check for
proper tire inflation pressure, and check
for damaged tires or wheels. If the
unusual wear continues after the
rotation, check the wheel alignment.
Page 320 of 338
Chevrolet Corvette Owner Manual (GMNA-Localizing-U.S./Canada/Mexico-
14622938) - 2021 - CRC - 2/10/21
OnStar 319
OnStar
OnStar Overview
OnStar Overview . . . . . . . . . . . . . . . . . . . . . . 319
OnStar Services
Emergency . . . . . . . . . . . . . . . . . . . . . . . . . . . . 320
Security . . . . . . . . . . . . . . . . . . . . . . . . . . . . . . . 320
OnStar Additional Information
OnStar Additional Information . . . . . . . . 320
OnStar Overview
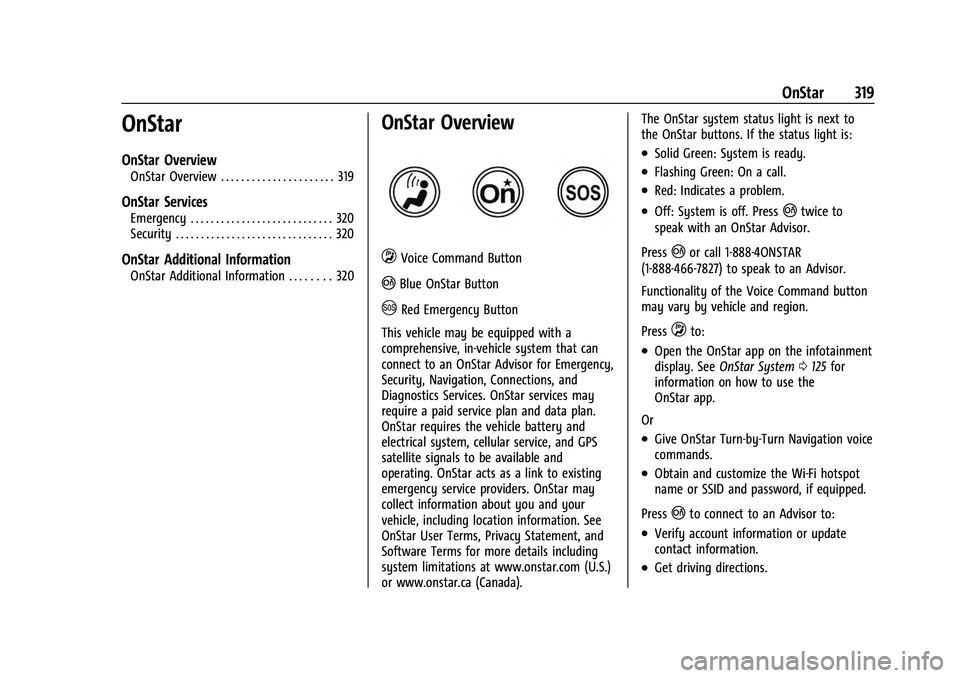
QVoice Command Button
|Blue OnStar Button
URed Emergency Button
This vehicle may be equipped with a
comprehensive, in-vehicle system that can
connect to an OnStar Advisor for Emergency,
Security, Navigation, Connections, and
Diagnostics Services. OnStar services may
require a paid service plan and data plan.
OnStar requires the vehicle battery and
electrical system, cellular service, and GPS
satellite signals to be available and
operating. OnStar acts as a link to existing
emergency service providers. OnStar may
collect information about you and your
vehicle, including location information. See
OnStar User Terms, Privacy Statement, and
Software Terms for more details including
system limitations at www.onstar.com (U.S.)
or www.onstar.ca (Canada). The OnStar system status light is next to
the OnStar buttons. If the status light is:
.Solid Green: System is ready.
.Flashing Green: On a call.
.Red: Indicates a problem.
.Off: System is off. Press|twice to
speak with an OnStar Advisor.
Press
|or call 1-888-4ONSTAR
(1-888-466-7827) to speak to an Advisor.
Functionality of the Voice Command button
may vary by vehicle and region.
Press
Qto:
.Open the OnStar app on the infotainment
display. See OnStar System 0125 for
information on how to use the
OnStar app.
Or
.Give OnStar Turn-by-Turn Navigation voice
commands.
.Obtain and customize the Wi-Fi hotspot
name or SSID and password, if equipped.
Press
|to connect to an Advisor to:
.Verify account information or update
contact information.
.Get driving directions.
Page 321 of 338
Chevrolet Corvette Owner Manual (GMNA-Localizing-U.S./Canada/Mexico-
14622938) - 2021 - CRC - 2/10/21
320 OnStar
.Receive a Diagnostic check of the vehicle's
key operating systems.
.Receive Roadside Assistance.
.Manage Wi-Fi Settings, if equipped.
Press
Uto get a priority connection to an
OnStar Advisor available 24/7 to:
.Get help for an emergency.
.Be a Good Samaritan or respond to an
AMBER Alert.
.Get assistance in severe weather or other
crisis situations and find evacuation
routes.
OnStar Services
Emergency
Emergency Services require an active safety
and security plan. With Automatic Crash
Response, built-in sensors can automatically
alert a specially trained OnStar Advisor who
is immediately connected in to the vehicle
to help.
Press
Ufor a priority connection to an
OnStar Advisor who can contact emergency
service providers, direct them to your exact
location, and relay important information. With OnStar Crisis Assist, specially trained
Advisors are available 24 hours a day, 7 days
a week, to provide a central point of
contact, assistance, and information during a
crisis.
With Roadside Assistance, Advisors can
locate a nearby service provider to help with
a flat tire, a battery jump, or an empty
gas tank.
Security
If equipped, OnStar provides these services:
.With Stolen Vehicle Assistance, OnStar
Advisors can use GPS to pinpoint the
vehicle and help authorities quickly
recover it.
.With Remote Ignition Block, if equipped,
OnStar can block the engine from being
restarted.
.With Stolen Vehicle Slowdown,
if equipped, OnStar can work with law
enforcement to gradually slow the
vehicle down.
Theft Alarm Notification
If equipped, if the doors are locked and the
vehicle alarm sounds, a notification by text,
e-mail, or phone call will be sent. If the
vehicle is stolen, an OnStar Advisor can work
with authorities to recover the vehicle.
OnStar Additional
Information
In-Vehicle Audio Messages
Audio messages may play important
information at the following times:
.Prior to vehicle purchase. Press|to set
up an account.
.After change in ownership and at
90 days.
Transferring Service
Press|to request account transfer
eligibility information. The Advisor can
cancel or change account information.
Selling/Transferring the Vehicle
Call 1-888-4ONSTAR (1-888-466-7827)
immediately to terminate your OnStar or
connected services if the vehicle is disposed
of, sold, transferred, or if the lease ends.