weight CHEVROLET CORVETTE 2021 Owner's Manual
[x] Cancel search | Manufacturer: CHEVROLET, Model Year: 2021, Model line: CORVETTE, Model: CHEVROLET CORVETTE 2021Pages: 338, PDF Size: 6.56 MB
Page 20 of 338

Chevrolet Corvette Owner Manual (GMNA-Localizing-U.S./Canada/Mexico-
14622938) - 2021 - CRC - 2/10/21
Keys, Doors, and Windows 19
Emergency Hood Release Button
The underhood compartment is equipped
with a glow-in-the-dark emergency hood
release button. This button will glow
following exposure to light. Press the button
to open the hood from inside the underhood
compartment.
Closing the Hood
{Warning
Do not drive the vehicle if the hood is
not latched completely. The hood could
open fully, block your vision, and cause a
crash. You or others could be injured.
Always close the hood completely before(Continued)
Warning (Continued)
driving. When the hood is not closed, the
vehicle will not exceed 42 km/h
(26 mph). Close the hood to drive faster
than 42 km/h (26 mph).
The hood is not heavy enough to latch
under its own weight. The hood will remain
open until the striker is pushed into the
latch. Ensure the hood is fully latched before
taking the vehicle out of P (Park). 1. Before closing the hood, be sure all filler caps are on properly, and all tools are
removed.
2. Ensure that all cargo is placed away from the emergency hood release
button.
3. Pull the hood down and set the striker gently into the latch.
4. Firmly press down on the front edge of the hood until the latch clicks twice.
5. Check that the hood is flush to the fascia to ensure the hood is fully closed. Storing Your Vehicle{Warning
The emergency hood release button
inside the underhood compartment will
not function when the battery is
disconnected or depleted. To avoid
personal injury or death, always keep the
hood fully closed and latched when
storing the vehicle. If the hood is not
latched, a person could climb into the
underhood compartment and
inadvertently close the hood. People
should never climb inside the underhood
compartment. Never shut the hood when
a person is inside.
See “Opening The Hood When There Is No
Electrical Power,” earlier in this section.
Hatch (Trunk)
{Warning
Components under the hatch, hatch
vents, and glass can get hot from running
the engine. To help avoid the risk of
burning unprotected skin, never touch
(Continued)
Page 58 of 338
Chevrolet Corvette Owner Manual (GMNA-Localizing-U.S./Canada/Mexico-
14622938) - 2021 - CRC - 2/10/21
Seats and Restraints 57
Passenger Sensing System
The vehicle has a passenger sensing system
for the front outboard passenger position.
The passenger airbag status indicator will
light on the overhead console when the
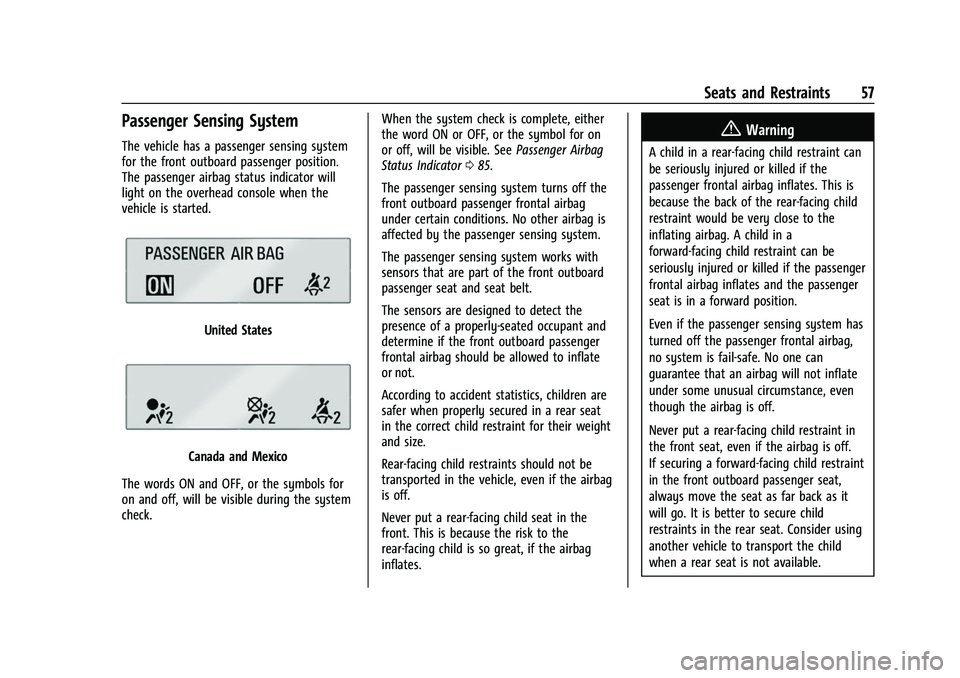
vehicle is started.
United States
Canada and Mexico
The words ON and OFF, or the symbols for
on and off, will be visible during the system
check. When the system check is complete, either
the word ON or OFF, or the symbol for on
or off, will be visible. See
Passenger Airbag
Status Indicator 085.
The passenger sensing system turns off the
front outboard passenger frontal airbag
under certain conditions. No other airbag is
affected by the passenger sensing system.
The passenger sensing system works with
sensors that are part of the front outboard
passenger seat and seat belt.
The sensors are designed to detect the
presence of a properly-seated occupant and
determine if the front outboard passenger
frontal airbag should be allowed to inflate
or not.
According to accident statistics, children are
safer when properly secured in a rear seat
in the correct child restraint for their weight
and size.
Rear-facing child restraints should not be
transported in the vehicle, even if the airbag
is off.
Never put a rear-facing child seat in the
front. This is because the risk to the
rear-facing child is so great, if the airbag
inflates.
{Warning
A child in a rear-facing child restraint can
be seriously injured or killed if the
passenger frontal airbag inflates. This is
because the back of the rear-facing child
restraint would be very close to the
inflating airbag. A child in a
forward-facing child restraint can be
seriously injured or killed if the passenger
frontal airbag inflates and the passenger
seat is in a forward position.
Even if the passenger sensing system has
turned off the passenger frontal airbag,
no system is fail-safe. No one can
guarantee that an airbag will not inflate
under some unusual circumstance, even
though the airbag is off.
Never put a rear-facing child restraint in
the front seat, even if the airbag is off.
If securing a forward-facing child restraint
in the front outboard passenger seat,
always move the seat as far back as it
will go. It is better to secure child
restraints in the rear seat. Consider using
another vehicle to transport the child
when a rear seat is not available.
Page 59 of 338
Chevrolet Corvette Owner Manual (GMNA-Localizing-U.S./Canada/Mexico-
14622938) - 2021 - CRC - 2/10/21
58 Seats and Restraints
The passenger sensing system is designed to
turn off the front outboard passenger
frontal airbag if:
.The front outboard passenger seat is
unoccupied.
.The system determines an infant is
present in a child restraint.
.A front outboard passenger takes his/her
weight off of the seat for a period
of time.
When the passenger sensing system has
turned off the front outboard passenger
frontal airbag, the OFF indicator will light
and stay lit as a reminder that the airbag is
off. See Passenger Airbag Status Indicator
0 85.
The passenger sensing system is designed to
turn on the front outboard passenger frontal
airbag anytime the system senses that a
person of adult size is sitting properly in the
front outboard passenger seat.
When the passenger sensing system has
allowed the airbag to be enabled, the ON
indicator will light and stay lit as a reminder
that the airbag is active.
For some children, including children in child
restraints, and for very small adults, the
passenger sensing system may or may not turn off the front outboard passenger
frontal airbag, depending upon the person's
seating posture and body build. Everyone in
the vehicle who has outgrown child
restraints should wear a seat belt
properly
—whether or not there is an
airbag for that person.{Warning
If the airbag readiness light ever comes
on and stays on, it means that
something may be wrong with the airbag
system. To help avoid injury to yourself
or others, have the vehicle serviced right
away. See Airbag Readiness Light 085
for more information, including important
safety information.
If the On Indicator Is Lit for a Child
Restraint
The passenger sensing system is designed to
turn off the front outboard passenger
frontal airbag if the system determines that
an infant is present in a child restraint. If a
child restraint has been installed and the ON
indicator is lit:
1. Turn the vehicle off. 2. Remove the child restraint from the
vehicle.
3. Remove any additional items from the seat such as blankets, cushions, seat
covers, seat heaters, or seat massagers.
4. Reinstall the child restraint following the directions provided by the child restraint
manufacturer and refer to Securing Child
Restraints 066.
Make sure the seat belt retractor is
locked by pulling the shoulder belt all
the way out of the retractor when
installing the child restraint, even if the
child restraint is equipped with a seat
belt lock-off. When the retractor lock is
set, the belt can be tightened but not
pulled out of the retractor.
5. If, after reinstalling the child restraint and restarting the vehicle, the ON
indicator is still lit, turn the vehicle off.
Then slightly recline the vehicle seatback
and adjust the seat cushion,
if adjustable, to make sure that the
vehicle seatback is not pushing the child
restraint into the seat cushion.
6. Restart the vehicle.
Page 62 of 338
Chevrolet Corvette Owner Manual (GMNA-Localizing-U.S./Canada/Mexico-
14622938) - 2021 - CRC - 2/10/21
Seats and Restraints 61
system from properly turning off the
passenger airbag(s). SeePassenger Sensing
System 057.
If the vehicle must be modified because you
have a disability and have questions about
whether the modifications will affect the
vehicle’s airbag system, or if you have
questions about whether the airbag system
will be affected if the vehicle is modified for
any other reason, call Customer Assistance.
See Customer Assistance Offices 0310.
Airbag System Check
The airbag system does not need regularly
scheduled maintenance or replacement.
Make sure the airbag readiness light is
working. See Airbag Readiness Light 085.
Caution
If an airbag covering is damaged, opened,
or broken, the airbag may not work
properly. Do not open or break the airbag
coverings. If there are any opened or
broken airbag coverings, have the airbag
covering and/or airbag module replaced.
For the location of the airbags, see Where
Are the Airbags? 054. See your dealer
for service.
Replacing Airbag System Parts
after a Crash
{Warning
A crash can damage the airbag systems
in the vehicle. A damaged airbag system
may not properly protect you and your
passenger(s) in a crash, resulting in
serious injury or even death. To help
make sure the airbag systems are
working properly after a crash, have
them inspected and any necessary
replacements made as soon as possible.
If an airbag inflates, you will need to
replace airbag system parts. See your dealer
for service.
If the airbag readiness light stays on after
the vehicle is started or comes on when you
are driving, the airbag system may not work
properly. Have the vehicle serviced right
away. See Airbag Readiness Light 085.
Child Restraints
Older Children
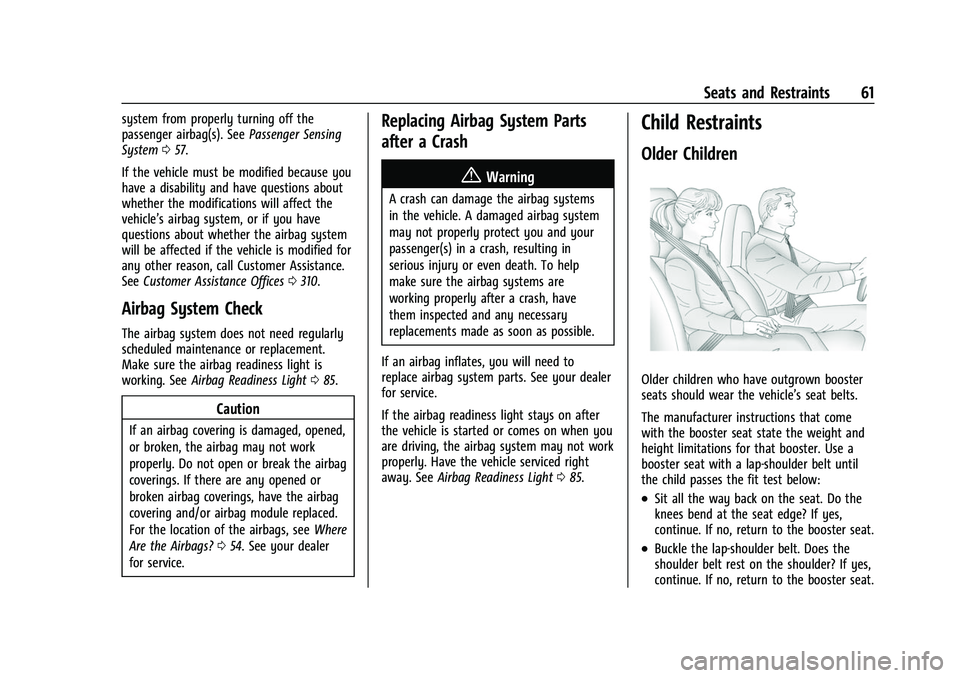
Older children who have outgrown booster
seats should wear the vehicle’s seat belts.
The manufacturer instructions that come
with the booster seat state the weight and
height limitations for that booster. Use a
booster seat with a lap-shoulder belt until
the child passes the fit test below:
.Sit all the way back on the seat. Do the
knees bend at the seat edge? If yes,
continue. If no, return to the booster seat.
.Buckle the lap-shoulder belt. Does the
shoulder belt rest on the shoulder? If yes,
continue. If no, return to the booster seat.
Page 65 of 338
Chevrolet Corvette Owner Manual (GMNA-Localizing-U.S./Canada/Mexico-
14622938) - 2021 - CRC - 2/10/21
64 Seats and Restraints
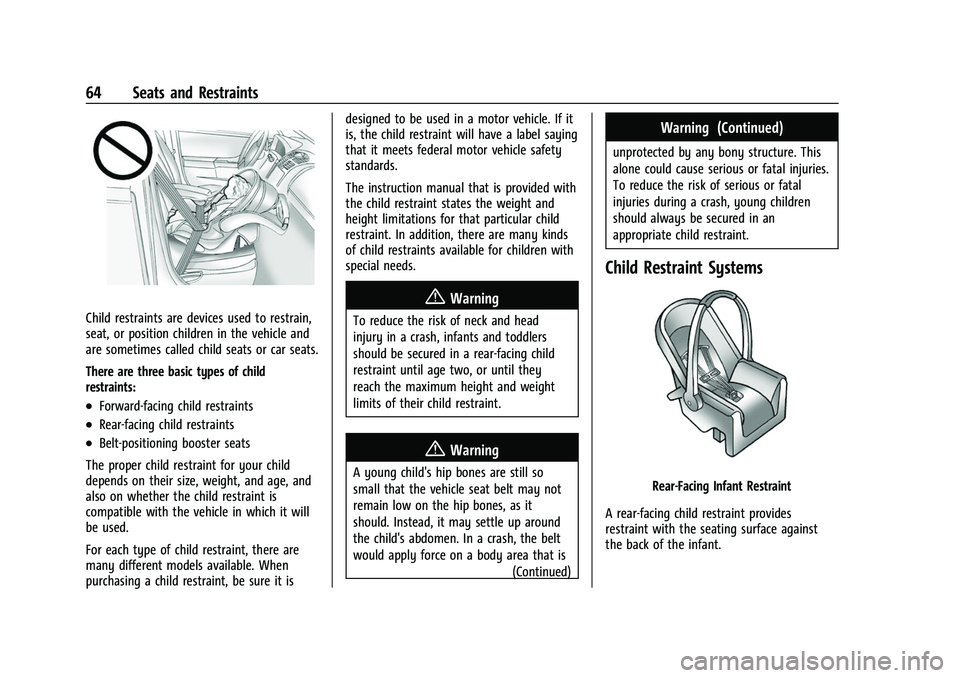
Child restraints are devices used to restrain,
seat, or position children in the vehicle and
are sometimes called child seats or car seats.
There are three basic types of child
restraints:
.Forward-facing child restraints
.Rear-facing child restraints
.Belt-positioning booster seats
The proper child restraint for your child
depends on their size, weight, and age, and
also on whether the child restraint is
compatible with the vehicle in which it will
be used.
For each type of child restraint, there are
many different models available. When
purchasing a child restraint, be sure it is designed to be used in a motor vehicle. If it
is, the child restraint will have a label saying
that it meets federal motor vehicle safety
standards.
The instruction manual that is provided with
the child restraint states the weight and
height limitations for that particular child
restraint. In addition, there are many kinds
of child restraints available for children with
special needs.
{Warning
To reduce the risk of neck and head
injury in a crash, infants and toddlers
should be secured in a rear-facing child
restraint until age two, or until they
reach the maximum height and weight
limits of their child restraint.
{Warning
A young child's hip bones are still so
small that the vehicle seat belt may not
remain low on the hip bones, as it
should. Instead, it may settle up around
the child's abdomen. In a crash, the belt
would apply force on a body area that is
(Continued)
Warning (Continued)
unprotected by any bony structure. This
alone could cause serious or fatal injuries.
To reduce the risk of serious or fatal
injuries during a crash, young children
should always be secured in an
appropriate child restraint.
Child Restraint Systems
Rear-Facing Infant Restraint
A rear-facing child restraint provides
restraint with the seating surface against
the back of the infant.
Page 186 of 338
Chevrolet Corvette Owner Manual (GMNA-Localizing-U.S./Canada/Mexico-
14622938) - 2021 - CRC - 2/10/21
Driving and Operating 185
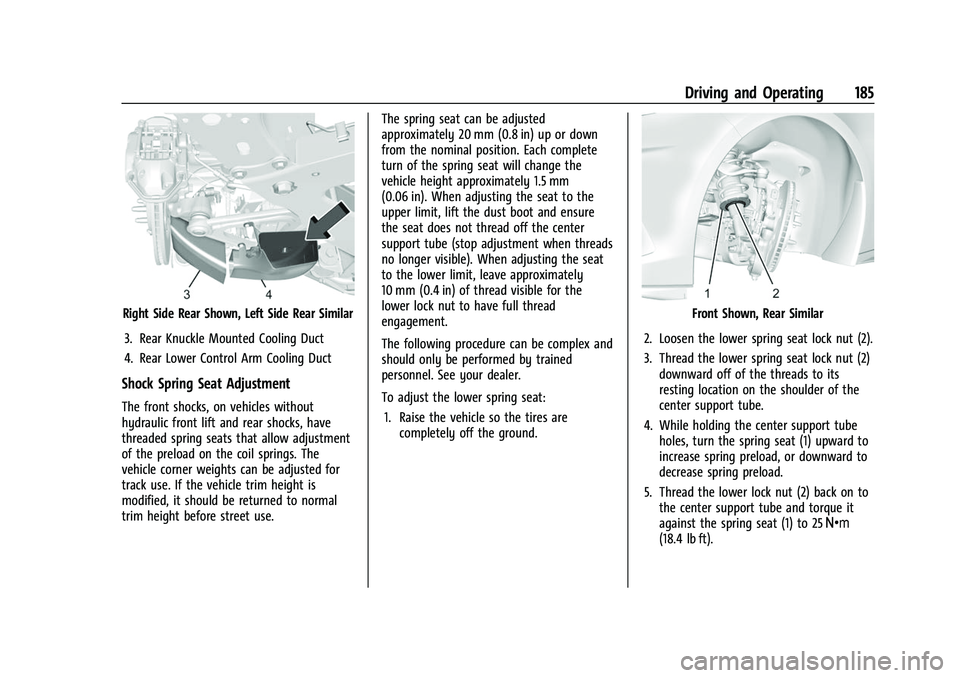
Right Side Rear Shown, Left Side Rear Similar3. Rear Knuckle Mounted Cooling Duct
4. Rear Lower Control Arm Cooling Duct
Shock Spring Seat Adjustment
The front shocks, on vehicles without
hydraulic front lift and rear shocks, have
threaded spring seats that allow adjustment
of the preload on the coil springs. The
vehicle corner weights can be adjusted for
track use. If the vehicle trim height is
modified, it should be returned to normal
trim height before street use. The spring seat can be adjusted
approximately 20 mm (0.8 in) up or down
from the nominal position. Each complete
turn of the spring seat will change the
vehicle height approximately 1.5 mm
(0.06 in). When adjusting the seat to the
upper limit, lift the dust boot and ensure
the seat does not thread off the center
support tube (stop adjustment when threads
no longer visible). When adjusting the seat
to the lower limit, leave approximately
10 mm (0.4 in) of thread visible for the
lower lock nut to have full thread
engagement.
The following procedure can be complex and
should only be performed by trained
personnel. See your dealer.
To adjust the lower spring seat:
1. Raise the vehicle so the tires are completely off the ground.
Front Shown, Rear Similar
2. Loosen the lower spring seat lock nut (2).
3. Thread the lower spring seat lock nut (2) downward off of the threads to its
resting location on the shoulder of the
center support tube.
4. While holding the center support tube holes, turn the spring seat (1) upward to
increase spring preload, or downward to
decrease spring preload.
5. Thread the lower lock nut (2) back on to the center support tube and torque it
against the spring seat (1) to 25 Y
(18.4 lb ft).
Page 190 of 338
Chevrolet Corvette Owner Manual (GMNA-Localizing-U.S./Canada/Mexico-
14622938) - 2021 - CRC - 2/10/21
Driving and Operating 189
If the Vehicle Is Stuck
Slowly and cautiously spin the wheels to
free the vehicle when stuck in sand, mud,
ice, or snow.
If stuck too severely for the traction system
to free the vehicle, turn the traction system
off and use the rocking method. See
Traction Control/Electronic Stability Control
0206.
{Warning
If the vehicle's tires spin at high speed,
they can explode, and you or others
could be injured. The vehicle can
overheat, causing an engine compartment
fire or other damage. Spin the wheels as
little as possible and avoid going above
56 km/h (35 mph).
Rocking the Vehicle to Get it Out
Turn the steering wheel left and right to
clear the area around the front wheels. Turn
off any traction system. Shift back and forth
between R (Reverse) and a low forward gear,
spinning the wheels as little as possible. To
prevent transmission wear, wait until the
wheels stop spinning before shifting gears.
Release the accelerator pedal while shifting, and press lightly on the accelerator pedal
when the transmission is in gear. Slowly
spinning the wheels in the forward and
reverse directions causes a rocking motion
that could free the vehicle. If that does not
get the vehicle out after a few tries, it may
need to be towed out. If the vehicle does
need to be towed out, see
Towing the
Vehicle 0281.
Vehicle Load Limits
It is very important to know how much
weight the vehicle can carry. This
weight is called the vehicle capacity
weight and includes the weight of all
occupants, cargo, and all
nonfactory-installed options. Two labels
on the vehicle may show how much
weight it may properly carry: the Tire
and Loading Information label and the
Certification label.
{Warning
Do not load the vehicle any heavier
than the Gross Vehicle Weight Rating
(GVWR), or either the maximum
front or rear Gross Axle Weight
(Continued)
Warning (Continued)
Rating (GAWR). This can cause
systems to break and change the
way the vehicle handles. This could
cause loss of control and a crash.
Overloading can also reduce stopping
performance, damage the tires, and
shorten the life of the vehicle.
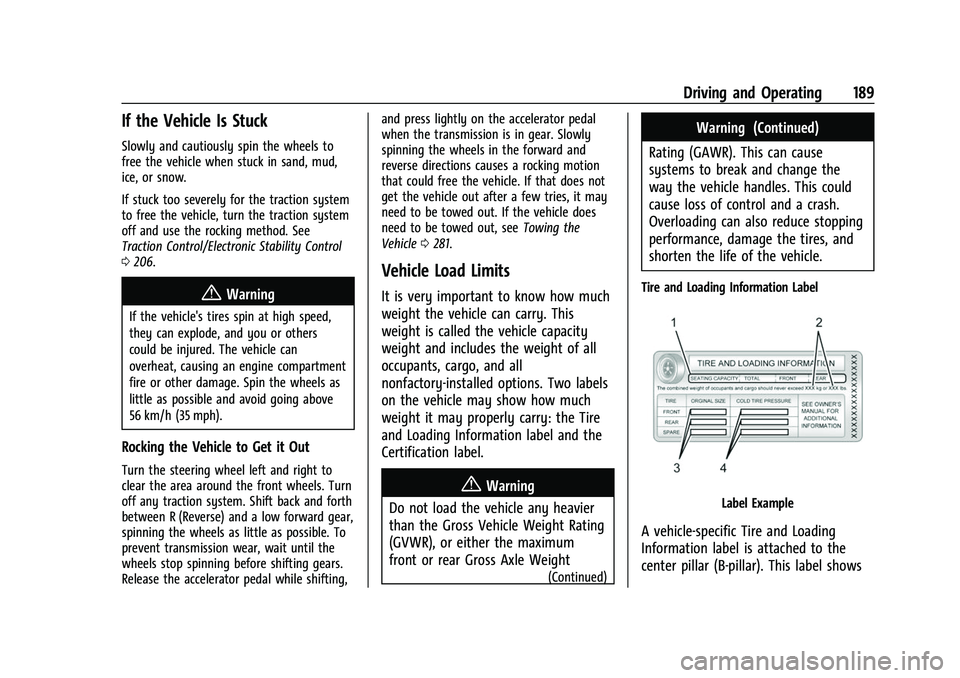
Tire and Loading Information Label
Label Example
A vehicle-specific Tire and Loading
Information label is attached to the
center pillar (B-pillar). This label shows
Page 191 of 338
Chevrolet Corvette Owner Manual (GMNA-Localizing-U.S./Canada/Mexico-
14622938) - 2021 - CRC - 2/10/21
190 Driving and Operating
the number of occupant seating
positions (1), and the maximum vehicle
capacity weight (2) in kilograms and
pounds.
The Tire and Loading Information label
also shows the size of the original
equipment tires (3) and the
recommended cold tire inflation
pressures (4). For more information on
tires and inflation seeTires0261 and
Tire Pressure 0267.
There is also important loading
information on the vehicle Certification
label. It may show the Gross Vehicle
Weight Rating (GVWR) and the Gross
Axle Weight Rating (GAWR) for the
front and rear axle. See “Certification
Label” later in this section.
Steps for Determining Correct Load Limit–
1.
Locate the statement "The combined
weight of occupants and cargo
should never exceed XXX kg or
XXX lbs." on your vehicle’s placard.
2.Determine the combined weight of
the driver and passengers that will
be riding in your vehicle.
3.Subtract the combined weight of the
driver and passengers from XXX kg
or XXX lbs.
4.The resulting figure equals the
available amount of cargo and
luggage load capacity. For example,
if the "XXX" amount equals 1400 lbs.
and there will be five 150 lb
passengers in your vehicle, the
amount of available cargo and
luggage load capacity is 650 lbs.
(1400-750 (5 x 150) = 650 lbs.)
5.Determine the combined weight of
luggage and cargo being loaded on
the vehicle. That weight may not
safely exceed the available cargo and
luggage load capacity calculated in
Step 4.
6.If your vehicle will be towing a
trailer, load from your trailer will be
transferred to your vehicle. Consult
this manual to determine how this
reduces the available cargo and
luggage load capacity of your
vehicle.” This vehicle is neither designed nor
intended to tow a trailer.
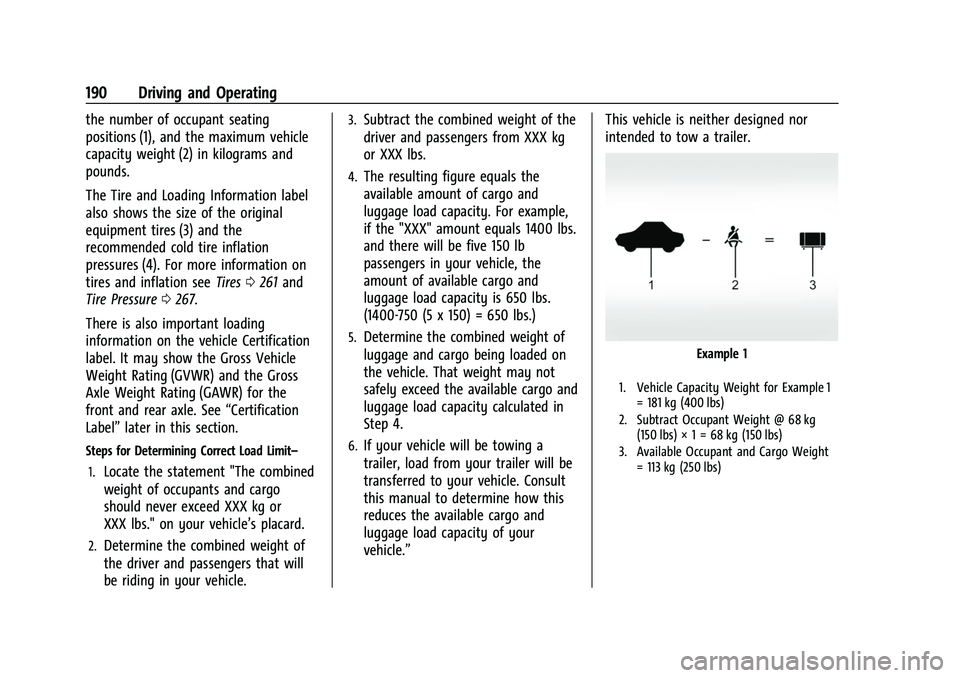
Example 1
1. Vehicle Capacity Weight for Example 1
= 181 kg (400 lbs)
2. Subtract Occupant Weight @ 68 kg (150 lbs) × 1 = 68 kg (150 lbs)
3. Available Occupant and Cargo Weight = 113 kg (250 lbs)
Page 192 of 338
Chevrolet Corvette Owner Manual (GMNA-Localizing-U.S./Canada/Mexico-
14622938) - 2021 - CRC - 2/10/21
Driving and Operating 191
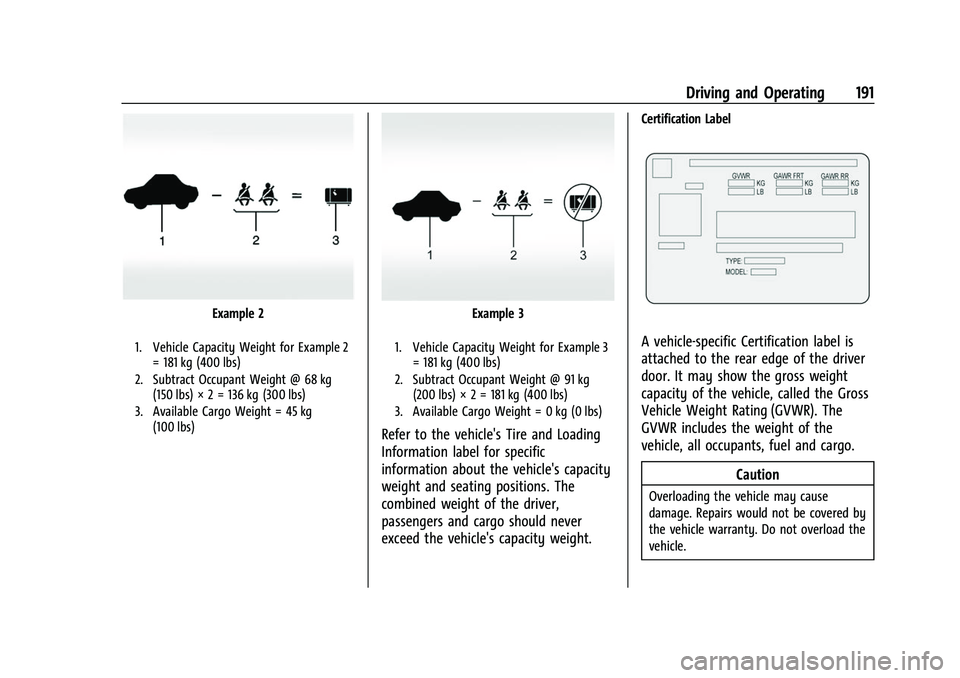
Example 2
1. Vehicle Capacity Weight for Example 2= 181 kg (400 lbs)
2. Subtract Occupant Weight @ 68 kg (150 lbs) × 2 = 136 kg (300 lbs)
3. Available Cargo Weight = 45 kg (100 lbs)
Example 3
1. Vehicle Capacity Weight for Example 3= 181 kg (400 lbs)
2. Subtract Occupant Weight @ 91 kg (200 lbs) × 2 = 181 kg (400 lbs)
3. Available Cargo Weight = 0 kg (0 lbs)
Refer to the vehicle's Tire and Loading
Information label for specific
information about the vehicle's capacity
weight and seating positions. The
combined weight of the driver,
passengers and cargo should never
exceed the vehicle's capacity weight.
Certification Label
A vehicle-specific Certification label is
attached to the rear edge of the driver
door. It may show the gross weight
capacity of the vehicle, called the Gross
Vehicle Weight Rating (GVWR). The
GVWR includes the weight of the
vehicle, all occupants, fuel and cargo.
Caution
Overloading the vehicle may cause
damage. Repairs would not be covered by
the vehicle warranty. Do not overload the
vehicle.
Page 193 of 338
Chevrolet Corvette Owner Manual (GMNA-Localizing-U.S./Canada/Mexico-
14622938) - 2021 - CRC - 2/10/21
192 Driving and Operating
{Warning
Things you put inside your vehicle
can strike and injure people in a
sudden stop or turn, or in a crash.
.Put things in the rear area of your
vehicle. Try to spread the weight
evenly.
.Never stack heavier things, like
suitcases, inside the vehicle so
that some of them are above the
tops of the seats.
.Do not leave an unsecured child
restraint in your vehicle.
.When you carry something inside
the vehicle, secure it whenever
you can.
Starting and Operating
New Vehicle Break-In
Follow these recommended guidelines
during the first 2 414 km (1,500 mi) of driving
this vehicle. Parts have a break-in period and
performance will be better in the long run. During the first 800 km (500 mi), engine
torque will be limited in low gears.
For the first 322 km (200 mi):
.To break in new tires, drive at moderate
speeds and avoid hard cornering.
.New brake linings also need a break-in
period. Avoid making hard stops. This is
recommended every time brake linings
are replaced.
For the first 800 km (500 mi):
.Avoid full throttle starts and abrupt stops.
.Do not exceed 4000 rpm.
.Avoid driving at any one constant speed,
fast or slow, including the use of cruise
control.
.Avoid downshifting to brake or slow the
vehicle when the engine speed will
exceed 4000 rpm.
.Do not let the engine labor. Never lug the
engine. This rule applies at all times, not
just during the break-in period.
For the first 2 414 km (1,500 mi):
.Do not participate in track events, sport
driving schools, or similar activities.
.Check engine oil with every refueling and
add if necessary. Oil and fuel
consumption may be higher than normal.
Front Air Dam (and Splitter)
If equipped, the front air dam and splitter
have minimal ground clearance.
Under normal operation, the components
will occasionally contact some road surfaces
(speed bumps, driveway ramps, etc.). This
can be heard inside the vehicle as a scraping
noise. This is normal and does not indicate a
problem.
Use care when approaching bumps or
objects on road surfaces and avoid them
when possible.
If equipped, the Front Lift System may be
used to increase front air dam or splitter
clearance. See Front Lift System 0214.
Composite Materials
This vehicle may be equipped with parts
containing carbon fiber, sheet-molding
compound, or other composite materials.
Dealer-installed accessories may also contain
composite materials. These parts and
accessories may include the splitter or rocker
extensions.