brakes CHEVROLET CORVETTE 2022 Owner's Manual
[x] Cancel search | Manufacturer: CHEVROLET, Model Year: 2022, Model line: CORVETTE, Model: CHEVROLET CORVETTE 2022Pages: 338, PDF Size: 7.6 MB
Page 218 of 338
Chevrolet Corvette Owner Manual (GMNA-Localizing-U.S./Canada/Mexico-
15342622) - 2022 - CRC - 5/4/21
Driving and Operating 217
{Warning
Cruise control can be dangerous where
you cannot drive safely at a steady
speed. Do not use cruise control on
winding roads or in heavy traffic.
Cruise control can be dangerous on
slippery roads. On such roads, fast
changes in tire traction can cause
excessive wheel slip, and you could lose
control. Do not use cruise control on
slippery roads.
If the Traction Control System (TCS) begins
to limit wheel spin while you are using
cruise control, the cruise control
automatically disengages. See Traction
Control/Electronic Stability Control 0205.
When road conditions allow for using safely
again, cruise control can be turned back on.
If the brakes are applied, cruise control
disengages.
Cruise control will disengage if either TCS or
StabiliTrak/Electronic Stability Control (ESC)
is turned off.
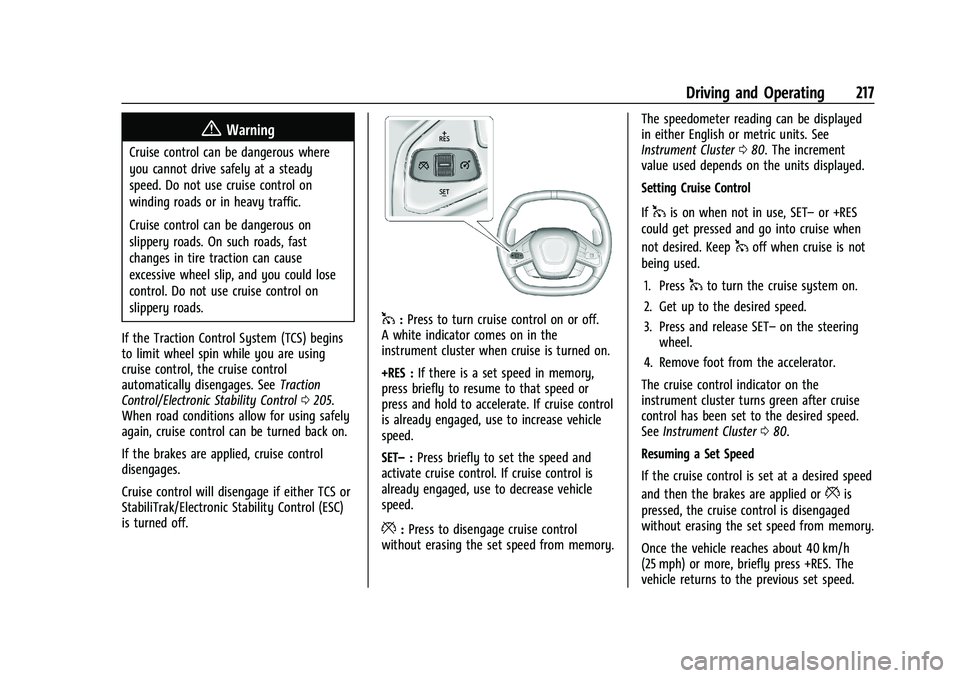
1: Press to turn cruise control on or off.
A white indicator comes on in the
instrument cluster when cruise is turned on.
+RES : If there is a set speed in memory,
press briefly to resume to that speed or
press and hold to accelerate. If cruise control
is already engaged, use to increase vehicle
speed.
SET– :Press briefly to set the speed and
activate cruise control. If cruise control is
already engaged, use to decrease vehicle
speed.
*: Press to disengage cruise control
without erasing the set speed from memory. The speedometer reading can be displayed
in either English or metric units. See
Instrument Cluster
080. The increment
value used depends on the units displayed.
Setting Cruise Control
If
1is on when not in use, SET– or +RES
could get pressed and go into cruise when
not desired. Keep
1off when cruise is not
being used.
1. Press
1to turn the cruise system on.
2. Get up to the desired speed.
3. Press and release SET– on the steering
wheel.
4. Remove foot from the accelerator.
The cruise control indicator on the
instrument cluster turns green after cruise
control has been set to the desired speed.
See Instrument Cluster 080.
Resuming a Set Speed
If the cruise control is set at a desired speed
and then the brakes are applied or
*is
pressed, the cruise control is disengaged
without erasing the set speed from memory.
Once the vehicle reaches about 40 km/h
(25 mph) or more, briefly press +RES. The
vehicle returns to the previous set speed.
Page 220 of 338
Chevrolet Corvette Owner Manual (GMNA-Localizing-U.S./Canada/Mexico-
15342622) - 2022 - CRC - 5/4/21
Driving and Operating 219
{Warning
Do not rely on the Driver Assistance
Systems. These systems do not replace
the need for paying attention and driving
safely. You may not hear or see alerts or
warnings provided by these systems.
Failure to use proper care when driving
may result in injury, death, or vehicle
damage. SeeDefensive Driving 0175.
Under many conditions, these systems
will not:
.Detect children, pedestrians, bicyclists,
or animals.
.Detect vehicles or objects outside the
area monitored by the system.
.Work at all driving speeds.
.Warn you or provide you with enough
time to avoid a crash.
.Work under poor visibility or bad
weather conditions.
.Work if the detection sensor is not
cleaned or is covered by ice, snow,
mud, or dirt. (Continued)
Warning (Continued)
.Work if the detection sensor is
covered up, such as with a sticker,
magnet, or metal plate.
.Work if the area surrounding the
detection sensor is damaged or not
properly repaired.
Complete attention is always required
while driving, and you should be ready to
take action and apply the brakes and/or
steer the vehicle to avoid crashes.
Audible Alert
Some driver assistance features alert the
driver of obstacles by beeping. To change
the volume of the warning chime, see
“Comfort and Convenience” underVehicle
Personalization 098.
Cleaning
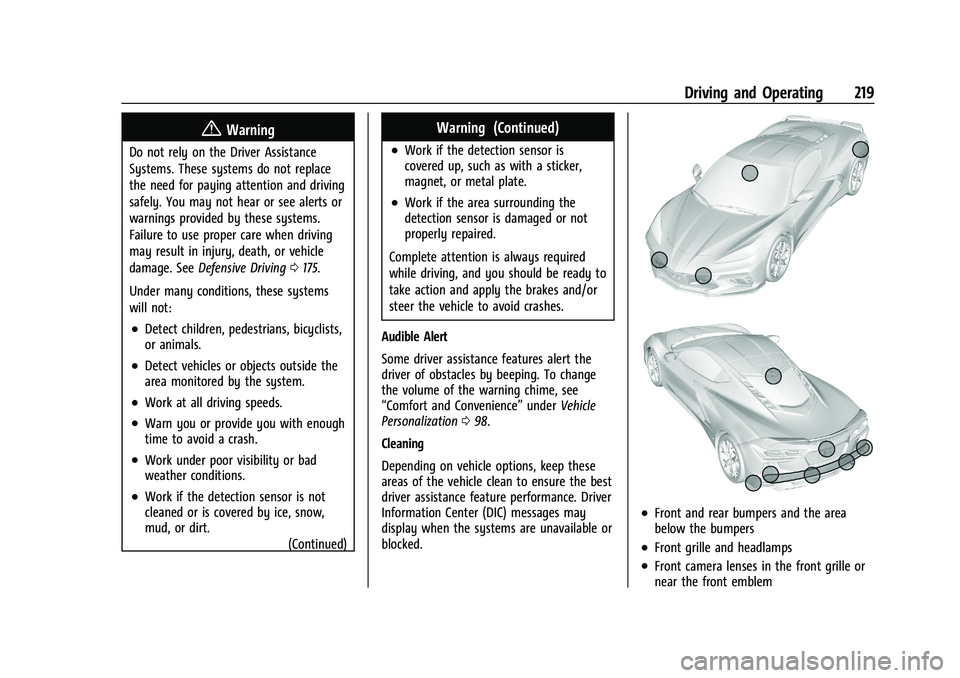
Depending on vehicle options, keep these
areas of the vehicle clean to ensure the best
driver assistance feature performance. Driver
Information Center (DIC) messages may
display when the systems are unavailable or
blocked.
.Front and rear bumpers and the area
below the bumpers
.Front grille and headlamps
.Front camera lenses in the front grille or
near the front emblem
Page 229 of 338
Chevrolet Corvette Owner Manual (GMNA-Localizing-U.S./Canada/Mexico-
15342622) - 2022 - CRC - 5/4/21
228 Vehicle Care
Vehicle Care
General Information
General Information . . . . . . . . . . . . . . . . . . . 229
California Perchlorate MaterialsRequirements . . . . . . . . . . . . . . . . . . . . . . . . 229
Accessories and Modifications . . . . . . . . . 229
Lifting the Vehicle . . . . . . . . . . . . . . . . . . . . . 229
Vehicle Checks
Doing Your Own Service Work . . . . . . . . . 231
Underhood Compartment Overview . . . . 231
Engine Compartment Overview . . . . . . . . 232
Engine Oil . . . . . . . . . . . . . . . . . . . . . . . . . . . . . 235
Engine Oil Life System . . . . . . . . . . . . . . . . 238
Dual Clutch Transmission Fluid . . . . . . . . 238
Dual Clutch Transmission Fluid Life System . . . . . . . . . . . . . . . . . . . . . . . . . . . . . . 239
Engine Air Filter Life System . . . . . . . . . . 239
Engine Air Cleaner/Filter . . . . . . . . . . . . . . 240
Cooling System . . . . . . . . . . . . . . . . . . . . . . . . 242
Engine Overheating . . . . . . . . . . . . . . . . . . . 245
Washer Fluid . . . . . . . . . . . . . . . . . . . . . . . . . . 246
Brakes . . . . . . . . . . . . . . . . . . . . . . . . . . . . . . . . 246
Brake Fluid . . . . . . . . . . . . . . . . . . . . . . . . . . . . 248
Battery - North America . . . . . . . . . . . . . . . 249
Park Brake and P (Park) Mechanism Check . . . . . . . . . . . . . . . . . . . . . . . . . . . . . . . . 250 Wiper Blade Replacement . . . . . . . . . . . . . 250
Windshield Replacement . . . . . . . . . . . . . . . 251
Gas Strut(s) . . . . . . . . . . . . . . . . . . . . . . . . . . . . 251
Headlamp Aiming
Front Headlamp Aiming . . . . . . . . . . . . . . . 252
Bulb Replacement
LED Lighting . . . . . . . . . . . . . . . . . . . . . . . . . . . 252
Electrical System
Electrical System Overload . . . . . . . . . . . . . 252
Fuses and Circuit Breakers . . . . . . . . . . . . . 253
Instrument Panel Fuse Block . . . . . . . . . . . 254
Rear Compartment Fuse Block . . . . . . . . . 256
Wheels and Tires
Tires . . . . . . . . . . . . . . . . . . . . . . . . . . . . . . . . . . 259
All-Season Tires . . . . . . . . . . . . . . . . . . . . . . . 260
Winter Tires . . . . . . . . . . . . . . . . . . . . . . . . . . 260
Run-Flat Tires . . . . . . . . . . . . . . . . . . . . . . . . . 260
Low-Profile Tires . . . . . . . . . . . . . . . . . . . . . . . 261
Summer Tires . . . . . . . . . . . . . . . . . . . . . . . . . . 261
Tire Sidewall Labeling . . . . . . . . . . . . . . . . . 261
Tire Designations . . . . . . . . . . . . . . . . . . . . . . 262
Tire Terminology and Definitions . . . . . . 263
Tire Pressure . . . . . . . . . . . . . . . . . . . . . . . . . . 265
Tire Pressure for High-Speed
Operation . . . . . . . . . . . . . . . . . . . . . . . . . . . 266
Tire Pressure Monitor System . . . . . . . . . 267 Tire Pressure Monitor Operation . . . . . . 268
Tire Inspection . . . . . . . . . . . . . . . . . . . . . . . . 270
Tire Rotation . . . . . . . . . . . . . . . . . . . . . . . . . . 270
When It Is Time for New Tires . . . . . . . . . 271
Buying New Tires . . . . . . . . . . . . . . . . . . . . . . 272
Different Size Tires and Wheels . . . . . . . . 273
Uniform Tire Quality Grading . . . . . . . . . . 273
Wheel Alignment and Tire Balance . . . . 275
Wheel Replacement . . . . . . . . . . . . . . . . . . . 275
Tire Chains . . . . . . . . . . . . . . . . . . . . . . . . . . . . 276
If a Tire Goes Flat . . . . . . . . . . . . . . . . . . . . . 276
Jump Starting
Jump Starting - North America . . . . . . . . 276
Towing the Vehicle
Towing the Vehicle . . . . . . . . . . . . . . . . . . . . 279
Recreational Vehicle Towing . . . . . . . . . . . 281
Appearance Care
Exterior Care . . . . . . . . . . . . . . . . . . . . . . . . . . 282
Interior Care . . . . . . . . . . . . . . . . . . . . . . . . . . 286
Floor Mats . . . . . . . . . . . . . . . . . . . . . . . . . . . . 289
Page 230 of 338
Chevrolet Corvette Owner Manual (GMNA-Localizing-U.S./Canada/Mexico-
15342622) - 2022 - CRC - 5/4/21
Vehicle Care 229
General Information
For service and parts needs, visit your
dealer. You will receive genuine GM parts
and GM-trained and supported service
people.
Genuine GM parts have one of these marks:
California Perchlorate Materials
Requirements
Certain types of automotive applications,
such as airbag initiators, seat belt
pretensioners, and lithium batteries
contained in electronic keys, may containperchlorate materials. Perchlorate Material
–
special handling may apply. See
www.dtsc.ca.gov/hazardouswaste/
perchlorate.
Accessories and Modifications
Adding non-dealer accessories or making
modifications to the vehicle can affect
vehicle performance and safety, including
such things as airbags, braking, stability,
ride and handling, emissions systems,
aerodynamics, durability, and electronic
systems like antilock brakes, traction control,
and stability control. These accessories or
modifications could even cause malfunction
or damage not covered by the vehicle
warranty.
Damage to suspension components caused
by modifying vehicle height outside of
factory settings will not be covered by the
vehicle warranty.
Damage to vehicle components resulting
from modifications or the installation or use
of non-GM certified parts, including control
module or software modifications, is not
covered under the terms of the vehicle
warranty and may affect remaining
warranty coverage for affected parts. GM Accessories are designed to complement
and function with other systems on the
vehicle. See your dealer to accessorize the
vehicle using genuine GM Accessories
installed by a dealer technician.
Also, see
Adding Equipment to the
Airbag-Equipped Vehicle 060.
Lifting the Vehicle
{Warning
Lifting a vehicle can cause an injury. The
vehicle can slip off the jack and roll over
you or other people. You and they could
be badly injured. Find a level place to lift
your vehicle. To help prevent the vehicle
from moving:
1. Set the parking brake firmly.
2. Put the transmission in P (Park).
3. Turn off the engine.
To be even more certain the vehicle will
not move, put blocks in front of and
behind the wheels.
Page 247 of 338
Chevrolet Corvette Owner Manual (GMNA-Localizing-U.S./Canada/Mexico-
15342622) - 2022 - CRC - 5/4/21
246 Vehicle Care
If the engine coolant temperature gauge is
no longer in the shaded area or an overheat
warning no longer displays, the vehicle can
be driven. Continue to drive the vehicle
slowly for about 10 minutes. Keep a safe
vehicle distance from the vehicle in front.
If the warning does not come back on,
continue to drive normally and have the
cooling system checked for proper fill and
function.
If the warning continues, pull over safely,
and park the vehicle right away.
If there is no sign of steam, idle the engine
for three minutes while parked. If the
warning is still displayed, turn off the
engine until it cools down.
Washer Fluid
What to Use
When the vehicle needs windshield washer
fluid, be sure to read the manufacturer
instructions before use. If the vehicle will be
operating in an area where the temperature
may fall below freezing, use a fluid that has
sufficient protection against freezing.
Adding Washer Fluid
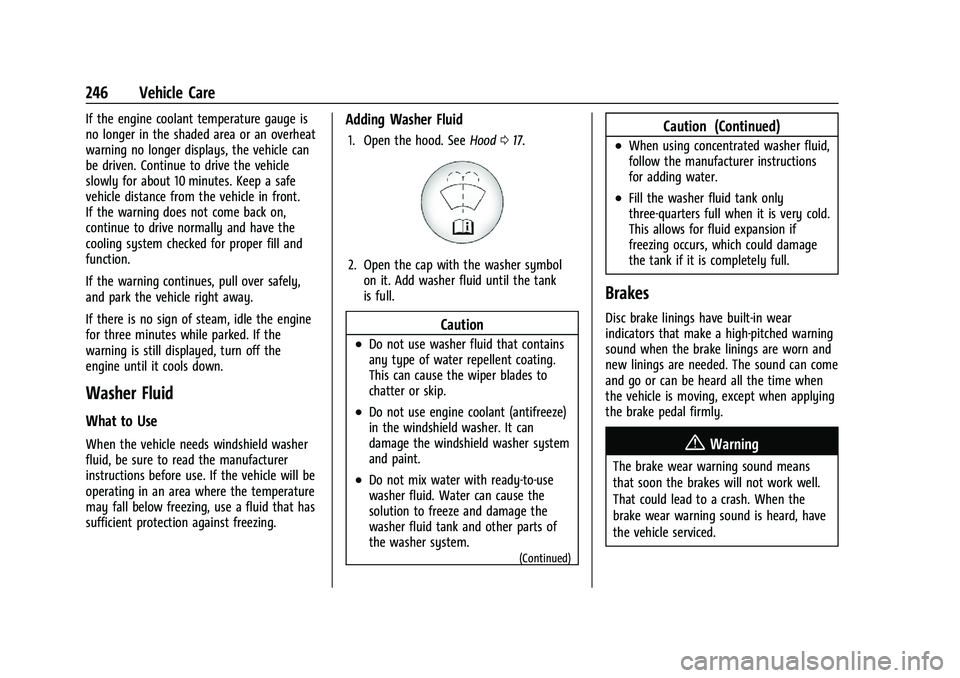
1. Open the hood. SeeHood017.
2. Open the cap with the washer symbol
on it. Add washer fluid until the tank
is full.
Caution
.Do not use washer fluid that contains
any type of water repellent coating.
This can cause the wiper blades to
chatter or skip.
.Do not use engine coolant (antifreeze)
in the windshield washer. It can
damage the windshield washer system
and paint.
.Do not mix water with ready-to-use
washer fluid. Water can cause the
solution to freeze and damage the
washer fluid tank and other parts of
the washer system.
(Continued)
Caution (Continued)
.When using concentrated washer fluid,
follow the manufacturer instructions
for adding water.
.Fill the washer fluid tank only
three-quarters full when it is very cold.
This allows for fluid expansion if
freezing occurs, which could damage
the tank if it is completely full.
Brakes
Disc brake linings have built-in wear
indicators that make a high-pitched warning
sound when the brake linings are worn and
new linings are needed. The sound can come
and go or can be heard all the time when
the vehicle is moving, except when applying
the brake pedal firmly.
{Warning
The brake wear warning sound means
that soon the brakes will not work well.
That could lead to a crash. When the
brake wear warning sound is heard, have
the vehicle serviced.
Page 248 of 338
Chevrolet Corvette Owner Manual (GMNA-Localizing-U.S./Canada/Mexico-
15342622) - 2022 - CRC - 5/4/21
Vehicle Care 247
Caution
Continuing to drive with worn-out brake
linings could result in costly brake
repairs.
Properly torqued wheel nuts are necessary
to help prevent brake pulsation. When tires
are rotated, inspect brake linings for wear
and evenly tighten wheel nuts in the proper
sequence to torque specifications. See
Capacities and Specifications 0304.
Brake linings should be replaced as complete
axle sets.
Brake Squeal and Brake Dust
Some driving conditions or climates can
cause a brake squeal when the brakes are
first applied, clearing up following several
applies. This does not mean something is
wrong with the brakes.
Vehicles equipped with high performance
brake systems provide superior fade
resistance but will produce increased brake
squeal and brake dust on the wheels and
calipers as compared to standard brake
linings. This is normal. To help reduce squeal, the brake pads are
treated with an anti-squeal paste that may
need to be reapplied periodically as part of
normal vehicle maintenance. The anti-squeal
paste will dissipate over time. Also, the use
of wheel cleaners or power washers directly
on the brake calipers may remove the
anti-squeal paste from the brake pads.
It may be necessary to reapply the
anti-squeal paste if it is removed during
cleaning.
If brake squeal is excessive, the anti-squeal
paste should be reapplied. The anti-squeal
paste should always be reapplied whenever
the brake pads are removed or replaced. See
your dealer for service.Brake Pedal Travel
See your dealer if the brake pedal does not
return to normal height, or if there is a
rapid increase in pedal travel. This could be
a sign that brake service may be required.
Replacing Brake System Parts
Always replace brake system parts with
new, approved replacement parts. If this is
not done, the brakes may not work
properly. The braking performance canchange in many ways if the wrong brake
parts are installed or if parts are improperly
installed.
The Brake Fade Warning Assist system is
designed for use with the factory-installed
brake pads or GM-approved replacement
pads. If the brake pads on the vehicle need
to be replaced, use GM-approved brake pads.
If this is not done, the brake fade warning
system may not function properly.
High Performance Brake Lining Car Wash
and Extended Parking Care
If equipped with high performance brake
components, binding, clunking or pulsation
may be noticeable when first moving the
vehicle after parking in cold weather when
the brakes have been wet, such as when
driving in the rain or after a car wash. The
release clunking is normal for brakes with
high performance brake linings and does not
affect the operation of the brakes. When
driving, normal braking should allow for the
brakes to clean up and or any pulsation to
go away. Apply the brakes several times
until the binding or clunking stops. If the
vehicle is washed before long term storage,
drive it and apply the brakes several times
to thoroughly dry the brakes before storing.
Page 249 of 338
Chevrolet Corvette Owner Manual (GMNA-Localizing-U.S./Canada/Mexico-
15342622) - 2022 - CRC - 5/4/21
248 Vehicle Care
Z51 Brake Burnish Procedure for
Corrosion Cleanup
Corrosion spotting and grooving on the
brake rotor surface may appear after the
vehicle sits for an extended period of time,
especially in high humidity. This corrosion
may result in brake pulsation and noise. To
help restore optimal braking performance
and reduce noise, complete the following
procedure:
Caution
Performing the brake burnish procedure
on a base brake system can result in
brake damage.
Perform this procedure only on dry
pavement, in a safe manner, and in
compliance with all local and state
ordinances/laws regarding motor vehicle
operation.
Caution
The new vehicle break-in period should be
completed before performing the brake
burnishing procedure or damage may
occur to the powertrain/engine. See New
Vehicle Break-In 0189.
Caution
Brake fade can occur during this burnish
procedure and can cause brake pedal
travel and force to increase. This could
extend stopping distance until the brakes
are fully burnished.
Completing the following procedure as
instructed will not damage the brakes. The
brake pads may smoke and produce an
odor. The braking force and pedal travel
may increase. After the procedure, the brake
pads may appear white at the rotor contact. 1. Using the G-Force Gauge in the HUD display, apply the brakes 10 times
starting at 100 km/h (60 mph) to
50 km/h (30 mph) while decelerating at
0.4g. SeeHead-Up Display (HUD) 094.
This is a medium brake application. Drive
for at least 0.5 km (0.3 mi) between
applying the brakes.
2. If further cleanup of the brake discs is needed, repeat this procedure with 0.7g
applications.
As with all high performance brake systems,
some amount of brake squeal is normal.
Brake Fluid
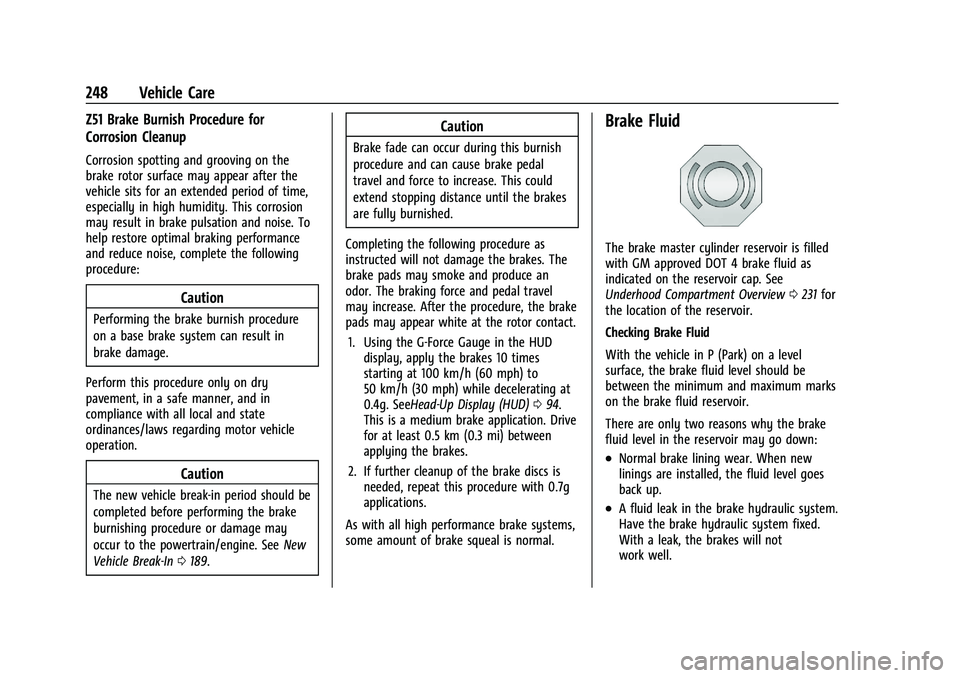
The brake master cylinder reservoir is filled
with GM approved DOT 4 brake fluid as
indicated on the reservoir cap. See
Underhood Compartment Overview 0231 for
the location of the reservoir.
Checking Brake Fluid
With the vehicle in P (Park) on a level
surface, the brake fluid level should be
between the minimum and maximum marks
on the brake fluid reservoir.
There are only two reasons why the brake
fluid level in the reservoir may go down:
.Normal brake lining wear. When new
linings are installed, the fluid level goes
back up.
.A fluid leak in the brake hydraulic system.
Have the brake hydraulic system fixed.
With a leak, the brakes will not
work well.
Page 274 of 338
Chevrolet Corvette Owner Manual (GMNA-Localizing-U.S./Canada/Mexico-
15342622) - 2022 - CRC - 5/4/21
Vehicle Care 273
Warning (Continued)
death. Only your dealer or authorized
tire service center should mount or
dismount the tires.
{Warning
Mixing tires of different sizes (other
than those originally installed on the
vehicle), brands, tread patterns,
or types may cause loss of vehicle
control, resulting in a crash or other
vehicle damage. Use the correct size,
brand, and type of tire on all wheels.
{Warning
Using bias-ply tires on the vehicle
may cause the wheel rim flanges to
develop cracks after many miles of
driving. A tire and/or wheel could fail
suddenly and cause a crash. Use only
radial-ply tires with the wheels on
the vehicle. Winter tires with the same speed rating
as the original equipment tires may not
be available for H, V, W, Y and ZR
speed rated tires. Never exceed the
winter tires’
maximum speed capability
when using winter tires with a lower
speed rating.
If the vehicle tires must be replaced
with a tire that does not have a TPC
Spec number, make sure they are the
same size, load range, speed rating, and
construction (radial) as the original
tires.
The Tire and Loading Information label
indicates the original equipment tires
on the vehicle. See Vehicle Load Limits
0 186.
Different Size Tires and Wheels
If wheels or tires are installed that are a
different size than the original equipment
wheels and tires, vehicle performance,
including its braking, ride and handling
characteristics, stability, and resistance to
rollover may be affected. If the vehicle has
electronic systems such as antilock brakes,
rollover airbags, traction control, or electronic stability control, the
performance of these systems can also be
affected.
{Warning
If different sized wheels are used, there
may not be an acceptable level of
performance and safety if tires not
recommended for those wheels are
selected. This increases the chance of a
crash and serious injury. Only use GM
specific wheel and tire systems developed
for the vehicle, and have them properly
installed by a GM certified technician.
See Buying New Tires 0272 and
Accessories and Modifications 0229.
Uniform Tire Quality Grading
The following information relates to the
system developed by the United States
National Highway Traffic Safety
Administration (NHTSA), which grades
tires by treadwear, traction, and
temperature performance. This applies
only to vehicles sold in the United
States. The grades are molded on the
sidewalls of most passenger car tires.
Page 277 of 338
Chevrolet Corvette Owner Manual (GMNA-Localizing-U.S./Canada/Mexico-
15342622) - 2022 - CRC - 5/4/21
276 Vehicle Care
Warning (Continued)
It could fail suddenly and cause a crash.
When replacing wheels, use a new GM
original equipment wheel.
Tire Chains
{Warning
Do not use tire chains. There is not
enough clearance. Tire chains used on a
vehicle without the proper amount of
clearance can cause damage to the
brakes, suspension, or other vehicle parts.
The area damaged by the tire chains
could cause loss of control and a crash.
Use another type of traction device only
if its manufacturer recommends it for the
vehicle's tire size combination and road
conditions. Follow that manufacturer's
instructions. To avoid vehicle damage,
drive slowly and readjust or remove the
traction device if it contacts the vehicle.
Do not spin the wheels. If traction
devices are used, install them on the rear
tires.
If a Tire Goes Flat
It is unusual for a tire to blow out while
driving, especially if the tires are maintained
properly. If air goes out of a tire, it is much
more likely to leak out slowly. SeeTires
0 259 for additional information. But if
there ever is a blowout, here are a few tips
about what to expect and what to do:
If a front tire fails, the flat tire creates a
drag that pulls the vehicle toward that side.
Take your foot off the accelerator pedal and
grip the steering wheel firmly. Steer to
maintain lane position, and then gently
brake to a stop, well off the road,
if possible.
A rear blowout, particularly on a curve, acts
much like a skid and may require the same
correction as used in a skid. Stop pressing
the accelerator pedal and steer to straighten
the vehicle. It may be very bumpy and
noisy. Gently brake to a stop, well off the
road, if possible.
The vehicle has no spare tire, no tire
changing equipment, and no place to store
a tire.
If the vehicle has run-flat tires, there is no
need to stop on the side of the road to
change a flat tire. See Run-Flat Tires0260.{Warning
Special tools and procedures are required
to service a run-flat tire. If these special
tools and procedures are not used, injury
or vehicle damage may occur. Always be
sure the proper tools and procedures, as
described in the service manual, are used.
Jump Starting
Jump Starting - North America
For more information about the vehicle
battery, see Battery - North America 0249.
If the battery has run down, use another
vehicle and some jumper cables to start the
vehicle. Be sure to use the following steps
to do it safely.
{Warning
WARNING: Battery posts, terminals and
related accessories can expose you to
chemicals including lead and lead
compounds, which are known to the
State of California to cause cancer and
birth defects or other reproductive harm.
(Continued)
Page 279 of 338
Chevrolet Corvette Owner Manual (GMNA-Localizing-U.S./Canada/Mexico-
15342622) - 2022 - CRC - 5/4/21
278 Vehicle Care
To avoid the possibility of the vehicles
rolling, set the parking brake firmly on
both vehicles involved in the jump start
procedure. Put an automatic transmission
in P (Park) or a manual transmission in
Neutral before setting the parking
brakes.
Caution
If any accessories are left on or plugged
in during the jump starting procedure,
they could be damaged. The repairs
would not be covered by the vehicle
warranty. Whenever possible, turn off or
unplug all accessories on either vehicle
when jump starting.
3. Turn off the ignition on both vehicles. Unplug unnecessary accessories plugged
into the accessory power outlet. Turn off
the radio and all lamps that are not
needed. This will avoid sparks and help
save both batteries. And it could save
the radio!
4. Open the hood. See Hood017.
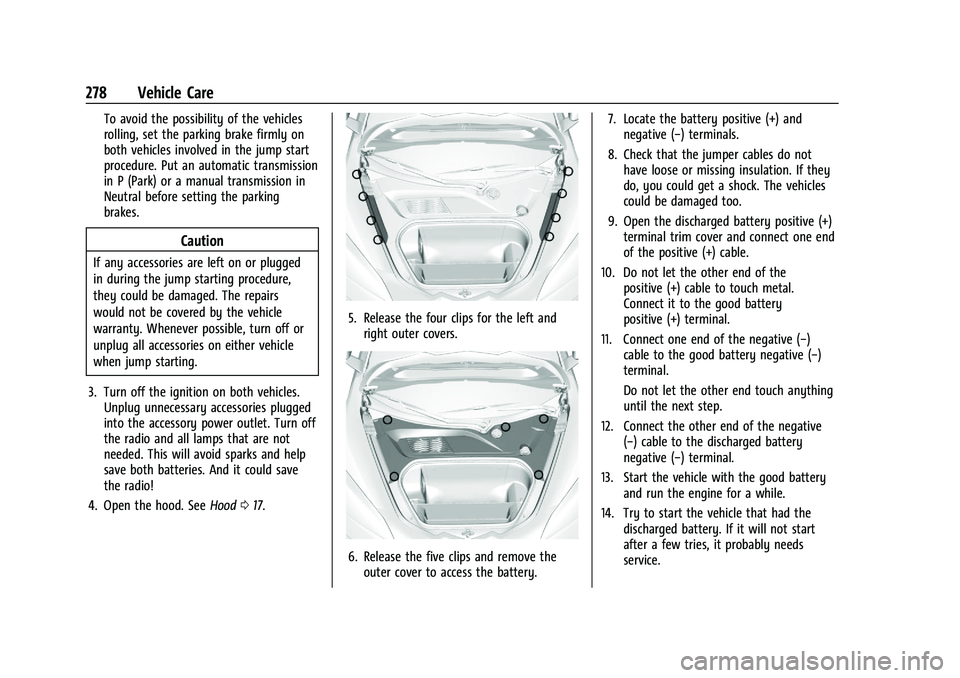
5. Release the four clips for the left and
right outer covers.
6. Release the five clips and remove theouter cover to access the battery. 7. Locate the battery positive (+) and
negative (−) terminals.
8. Check that the jumper cables do not have loose or missing insulation. If they
do, you could get a shock. The vehicles
could be damaged too.
9. Open the discharged battery positive (+) terminal trim cover and connect one end
of the positive (+) cable.
10. Do not let the other end of the positive (+) cable to touch metal.
Connect it to the good battery
positive (+) terminal.
11. Connect one end of the negative (−) cable to the good battery negative (−)
terminal.
Do not let the other end touch anything
until the next step.
12. Connect the other end of the negative (−) cable to the discharged battery
negative (−) terminal.
13. Start the vehicle with the good battery and run the engine for a while.
14. Try to start the vehicle that had the discharged battery. If it will not start
after a few tries, it probably needs
service.