CHEVROLET CORVETTE C6 2012 Owners Manual
Manufacturer: CHEVROLET, Model Year: 2012, Model line: CORVETTE C6, Model: CHEVROLET CORVETTE C6 2012Pages: 432, PDF Size: 5.73 MB
Page 291 of 432
Black plate (15,1)Chevrolet Corvette Owner Manual - 2012
Vehicle Care 10-15
When to Add Engine Oil
(Except Z06, ZR1, and Grand
Sport)
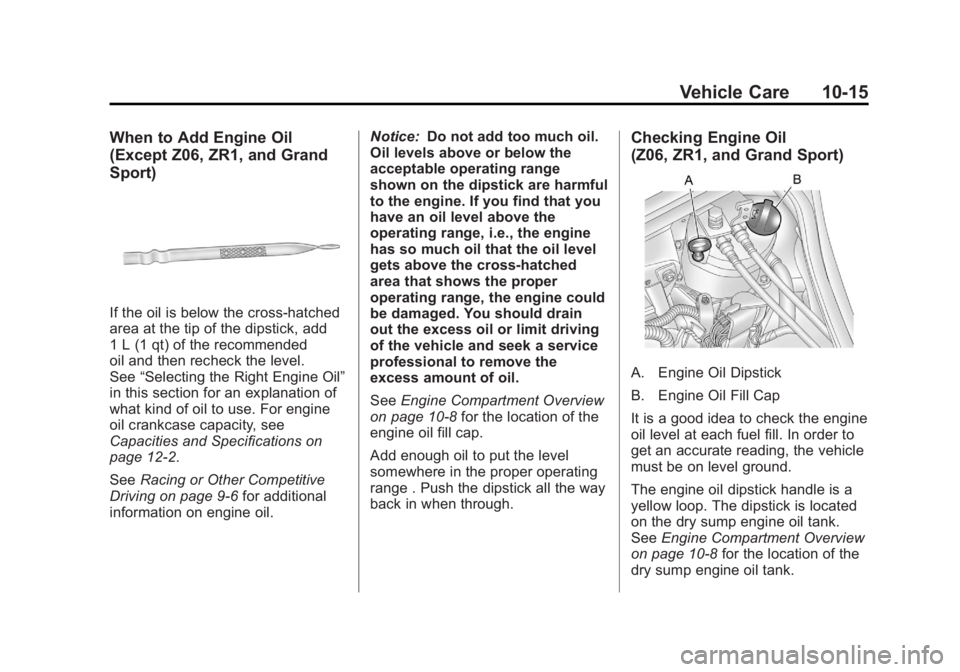
If the oil is below the cross-hatched
area at the tip of the dipstick, add
1 L (1 qt) of the recommended
oil and then recheck the level.
See“Selecting the Right Engine Oil”
in this section for an explanation of
what kind of oil to use. For engine
oil crankcase capacity, see
Capacities and Specifications on
page 12‑2.
See Racing or Other Competitive
Driving on page 9‑6 for additional
information on engine oil. Notice:
Do not add too much oil.
Oil levels above or below the
acceptable operating range
shown on the dipstick are harmful
to the engine. If you find that you
have an oil level above the
operating range, i.e., the engine
has so much oil that the oil level
gets above the cross-hatched
area that shows the proper
operating range, the engine could
be damaged. You should drain
out the excess oil or limit driving
of the vehicle and seek a service
professional to remove the
excess amount of oil.
See Engine Compartment Overview
on page 10‑8 for the location of the
engine oil fill cap.
Add enough oil to put the level
somewhere in the proper operating
range . Push the dipstick all the way
back in when through.
Checking Engine Oil
(Z06, ZR1, and Grand Sport)
A. Engine Oil Dipstick
B. Engine Oil Fill Cap
It is a good idea to check the engine
oil level at each fuel fill. In order to
get an accurate reading, the vehicle
must be on level ground.
The engine oil dipstick handle is a
yellow loop. The dipstick is located
on the dry sump engine oil tank.
See Engine Compartment Overview
on page 10‑8 for the location of the
dry sump engine oil tank.
Page 292 of 432
Black plate (16,1)Chevrolet Corvette Owner Manual - 2012
10-16 Vehicle Care
These vehicles have a racetrack‐
ready dry sump engine lubrication
system. This high‐performance
system operates differently than a
standard engine lubrication system
and requires a special procedure
when checking the engine oil level.
Follow this procedure closely when
checking the engine oil level.
The engine oil level must be
checked when the engine is warm.
Cold oil level in the dry sump tank
may not indicate the actual amount
of oil in the system. With this
system, engine oil is contained in an
external tank, separate from the
engine. Under normal operating
conditions, the oil pan under the
engine does not store any oil. If the
vehicle has been parked for an
extended period without the engine
being started, some oil will seep
back into the oil pan, reducing the
amount of oil held in the dry sump
tank and there could be no engine
oil at all showing on the dipstick.This is normal since the dipstick is
designed to read engine oil level
only after the engine has run long
enough to reach normal operating
temperature. Do not add engine oil
based on cold engine dipstick
readings. The engine oil level on the
dipstick will also be inaccurate if
checked while the engine is running.
1. To obtain an accurate engine
oil level reading, warm up the
engine to at least 80°C (175°F).
Cold oil will not give a correct oil
level reading.
2. Once the engine is warm, turn off the engine. Checking the oil
while the engine is running will
result in an incorrect oil level
reading.
3. Wait at least five minutes (but not more than 20 minutes)
to allow oil to drain and settle
in the engine. 4. Remove the dipstick from the
external engine oil tank and
clean it with a lint‐free paper
towel or a cloth. Re‐insert the
dipstick into the external oil tank,
pushing it all the way in until it
stops.
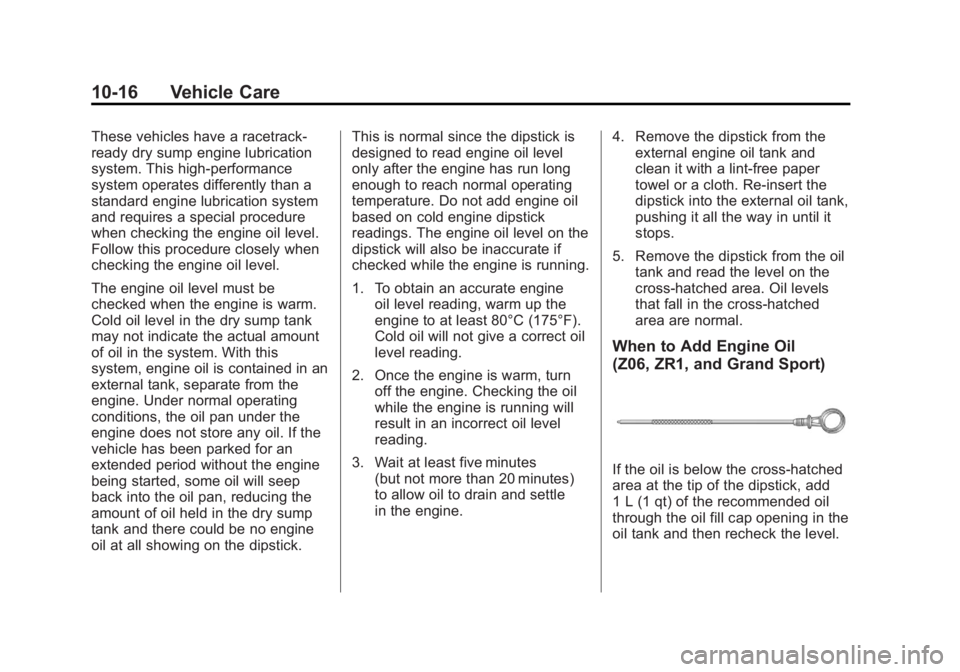
5. Remove the dipstick from the oil tank and read the level on the
cross‐hatched area. Oil levels
that fall in the cross‐hatched
area are normal.
When to Add Engine Oil
(Z06, ZR1, and Grand Sport)
If the oil is below the cross-hatched
area at the tip of the dipstick, add
1 L (1 qt) of the recommended oil
through the oil fill cap opening in the
oil tank and then recheck the level.
Page 293 of 432
Black plate (17,1)Chevrolet Corvette Owner Manual - 2012
Vehicle Care 10-17
See“Selecting the Right Engine Oil”
for an explanation of what kind of oil
to use. For engine oil crankcase
capacity, see Capacities and
Specifications on page 12‑2.
See Racing or Other Competitive
Driving on page 9‑6 for additional
information on engine oil.
Notice: Do not add too much oil.
Oil levels above or below the
acceptable operating range
shown on the dipstick are harmful
to the engine. If you find that you
have an oil level above the
operating range, i.e., the engine
has so much oil that the oil level
gets above the cross-hatched
area that shows the proper
operating range, the engine could
be damaged. You should drain
out the excess oil or limit driving
of the vehicle and seek a service
professional to remove the
excess amount of oil. See
Engine Compartment Overview
on page 10‑8 for the location of the
external engine oil tank and fill cap.
Add enough oil to put the level
somewhere in the proper operating
range. Push the dipstick all the way
back into the oil tank when through.
Changing Engine Oil and Filter
(Z06, ZR1, and Grand Sport)
These vehicles have a racetrack‐
ready dry sump engine lubrication
system. This high‐performance
system operates differently than a
standard engine lubrication system
and requires a special procedure
when changing the engine oil and
filter. Follow this procedure closely
when changing the engine oil and
filter.
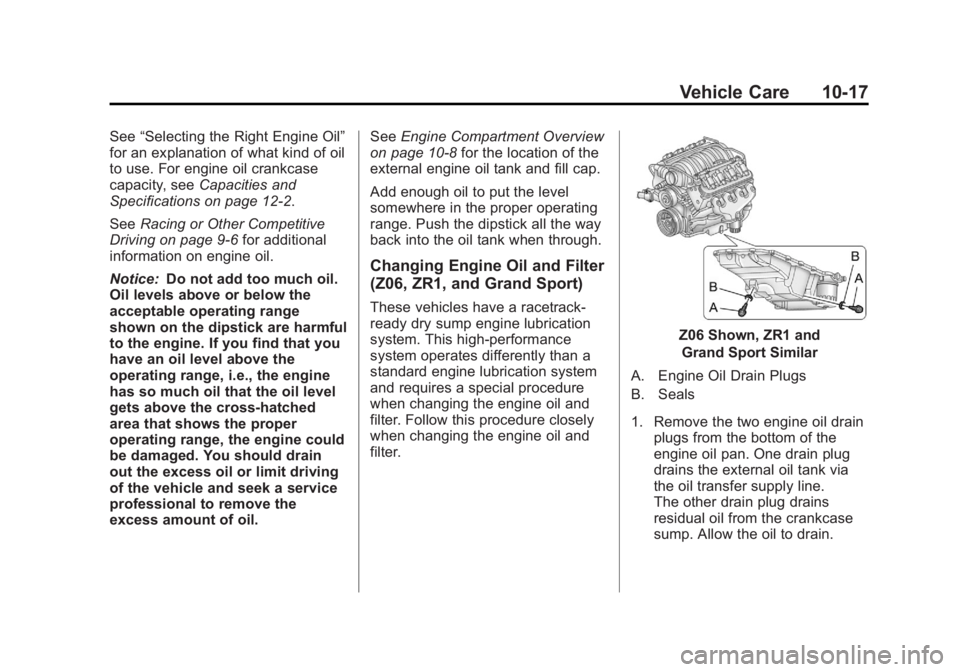
Z06 Shown, ZR1 and
Grand Sport Similar
A. Engine Oil Drain Plugs
B. Seals
1. Remove the two engine oil drain plugs from the bottom of the
engine oil pan. One drain plug
drains the external oil tank via
the oil transfer supply line.
The other drain plug drains
residual oil from the crankcase
sump. Allow the oil to drain.
Page 294 of 432
Black plate (18,1)Chevrolet Corvette Owner Manual - 2012
10-18 Vehicle Care
2. Once the oil has been drainedfrom the engine, remove the
engine oil filter and allow the oil
to drain.
3. Re‐install both drain plugs and tighten them to 25 Y(18 lb ft).
4. Replace the oil filter and tighten it to 30 Y(22 lb ft).
See Maintenance Replacement
Parts on page 11‑14 for the
correct filter.
5. Oil is filled through the opening in the top of the external engine
oil tank. Remove the oil fill cap.
6. Add 9.9 L (10.5 quarts) of oil to the oil tank. See Capacities and
Specifications on page 12‑2.
7. Install the oil fill cap and insert the dipstick, if removed. 8. Start the engine and let it run at
idle for at least 15 seconds.
This will circulate the fresh
engine oil through the lubrication
system.
9. Shut off the engine and check the oil level as described under
“Checking Engine Oil (Z06, ZR1,
and Grand Sport).”
Selecting the Right Engine Oil
Selecting the right engine oil
depends on both the proper oil
specification and viscosity grade.
See Recommended Fluids and
Lubricants on page 11‑12.
Specification
Use and ask for licensed engine
oils with the dexos1™ approved
certification mark. Engine oils
meeting the requirements for the
vehicle should have the dexos1
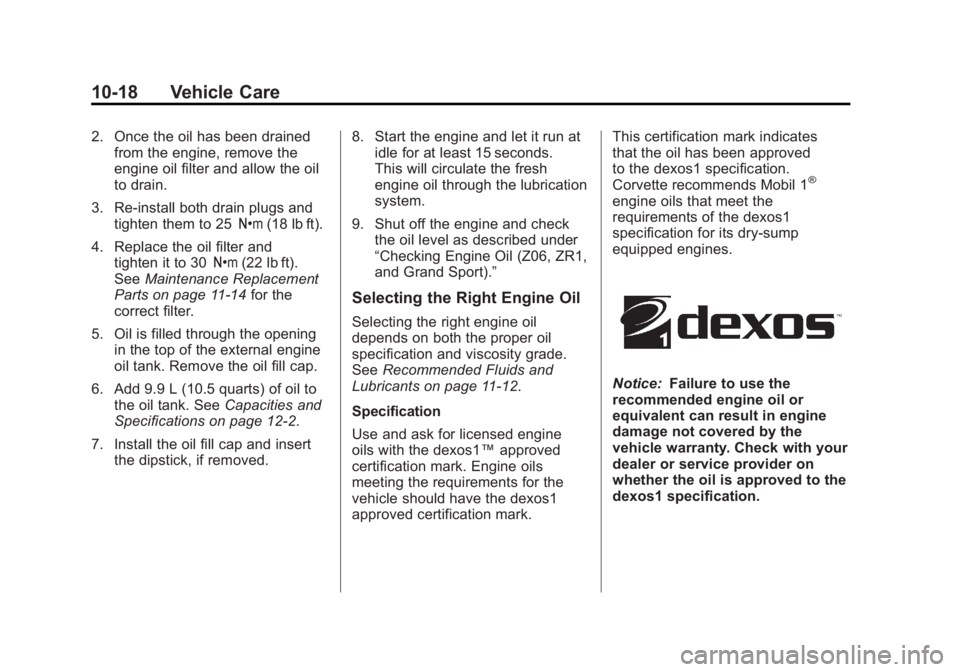
approved certification mark. This certification mark indicates
that the oil has been approved
to the dexos1 specification.
Corvette recommends Mobil 1
®
engine oils that meet the
requirements of the dexos1
specification for its dry‐sump
equipped engines.
Notice:
Failure to use the
recommended engine oil or
equivalent can result in engine
damage not covered by the
vehicle warranty. Check with your
dealer or service provider on
whether the oil is approved to the
dexos1 specification.
Page 295 of 432
Black plate (19,1)Chevrolet Corvette Owner Manual - 2012
Vehicle Care 10-19
Viscosity Grade
SAE 5W‐30 is the best viscosity
grade for the vehicle. Do not use
other viscosity grade oils such as
SAE 10W‐30, 10W‐40, or 20W‐50.
If in an area of extreme cold, where
the temperature falls below−20°F
(−29°C), an SAE 0W‐30 oil should
be used. An oil of this viscosity
grade will provide easier cold
starting for the engine at extremely
low temperatures. When selecting
an oil of the appropriate viscosity
grade, always select an oil that
meets the dexos1 specification or
equivalent. See “Specification”for
more information.
Engine Oil Additives/Engine
Oil Flushes
Do not add anything to the oil.
The recommended oils with the
dexos specification and displaying
the dexos certification mark are all
that is needed for good performance
and engine protection. Engine oil system flushes are not
recommended and could cause
engine damage not covered by the
vehicle warranty.
What to Do with Used Oil
Used engine oil contains certain
elements that can be unhealthy for
your skin and could even cause
cancer. Do not let used oil stay on
your skin for very long. Clean your
skin and nails with soap and water,
or a good hand cleaner. Wash or
properly dispose of clothing or rags
containing used engine oil. See the
manufacturer's warnings about the
use and disposal of oil products.
Used oil can be a threat to the
environment. If you change your
own oil, be sure to drain all the oil
from the filter before disposal. Never
dispose of oil by putting it in the
trash or pouring it on the ground,
into sewers, or into streams or
bodies of water. Recycle it by taking
it to a place that collects used oil.
Engine Oil Life System
When to Change Engine Oil
This vehicle has a computer that
indicates when to change the
engine oil and filter. This is based
on a combination of factors which
include engine revolutions, engine
temperature, and miles driven.
Based on driving conditions, the
mileage at which an oil change is
indicated can vary considerably.
For the oil life system to work
properly, the system must be reset
every time the oil is changed.
Z06, ZR1, and Grand Sport models
have a racetrack‐ready dry sump
engine lubrication system. This
high‐performance system operates
differently than a standard engine
lubrication system and requires a
special procedure when changing
the engine oil and filter. See
Engine
Oil on page 10‑14.
Page 296 of 432
Black plate (20,1)Chevrolet Corvette Owner Manual - 2012
10-20 Vehicle Care
When the system has calculated
that oil life has been diminished,
it indicates that an oil change is
necessary. A CHANGE ENGINE
OIL message comes on. Change
the oil as soon as possible within
the next 1 000 km (600 mi). It is
possible that, if driving under the
best conditions, the oil life system
might indicate that an oil change is
not necessary for up to a year.
The engine oil and filter must be
changed at least once a year and,
at this time, the system must be
reset. Your dealer has trained
service people who will perform this
work and reset the system. It is also
important to check the oil regularly
over the course of an oil drain
interval and keep it at the proper
level.
If the system is ever reset
accidentally, the oil must be
changed at 5 000 km (3,000 mi)
since the last oil change.
Remember to reset the oil life
system whenever the oil is changed.How to Reset the Engine Oil
Life System
Reset the system whenever the
engine oil is changed so that the
system can calculate the next
engine oil change. To reset the
system:
1. Press the TRIP button sothe OIL LIFE percentage is
displayed.
2. Press RESET and hold for two seconds. OIL LIFE
REMAINING 100% will
appear.
If the CHANGE ENGINE OIL
message comes back on when the
vehicle is started, the engine oil life
system has not reset. Repeat the
procedure.
Automatic Transmission
Fluid
How to Check Automatic
Transmission Fluid
It is not necessary to check
the transmission fluid level.
A transmission fluid leak is the only
reason for fluid loss. If a leak
occurs, take the vehicle to the
dealer and have it repaired as soon
as possible.
The vehicle is not equipped with a
transmission fluid level dipstick.
There is a special procedure for
checking and changing the
transmission fluid. Because this
procedure is difficult, this should be
done at the dealer. Contact the
dealer for additional information or
the procedure can be found in the
service manual. To purchase a
service manual, see Service
Publications Ordering Information
on page 13‑18.
Page 297 of 432
Black plate (21,1)Chevrolet Corvette Owner Manual - 2012
Vehicle Care 10-21
Notice:Use of the incorrect
automatic transmission fluid may
damage the vehicle, and the
damages may not be covered by
the vehicle warranty. Always use
the automatic transmission fluid
listed in Recommended Fluids
and Lubricants on page 11‑12.
Change the fluid and filter at the
intervals listed in Maintenance
Schedule on page 11‑3, and
be sure to use the fluid listed in
Recommended Fluids and
Lubricants on page 11‑12.
Manual Transmission
Fluid
It is not necessary to check the
manual transmission fluid level.
A transmission fluid leak is the
only reason for fluid loss. If a leak
occurs, take the vehicle to the
dealer and have it repaired as soon
as possible. See Recommended
Fluids and Lubricants on page 11‑12
for the proper fluid to use.
Hydraulic Clutch
It is not necessary to regularly
check clutch fluid unless you
suspect there is a leak in the
system. Adding fluid will not correct
a leak. A fluid loss in this system
could indicate a problem. Have the
system inspected and repaired.
When to Check and What
to Use
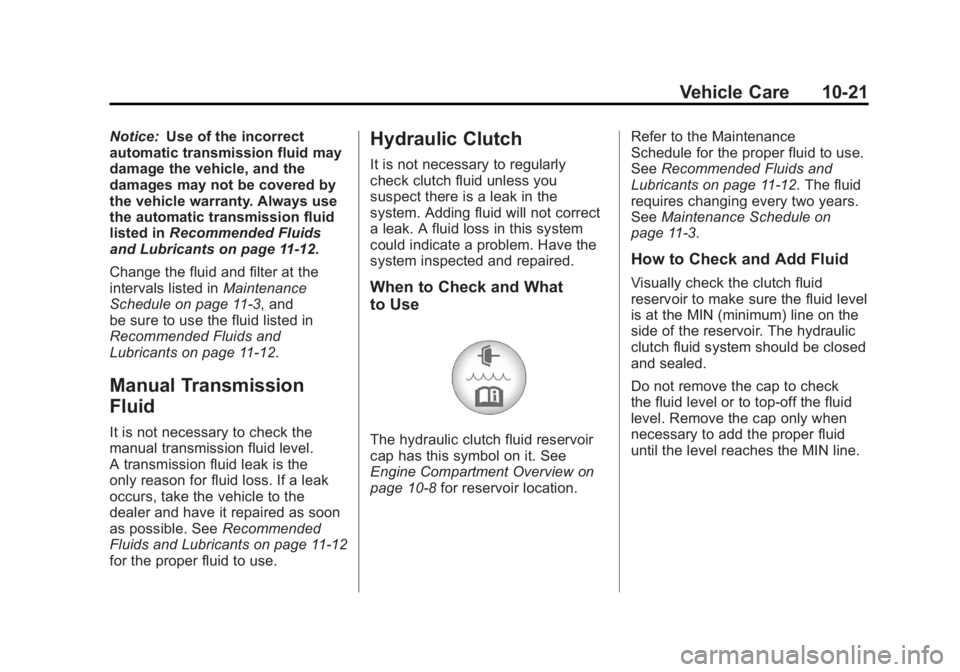
The hydraulic clutch fluid reservoir
cap has this symbol on it. See
Engine Compartment Overview on
page 10‑8 for reservoir location. Refer to the Maintenance
Schedule for the proper fluid to use.
See
Recommended Fluids and
Lubricants on page 11‑12. The fluid
requires changing every two years.
See Maintenance Schedule on
page 11‑3.
How to Check and Add Fluid
Visually check the clutch fluid
reservoir to make sure the fluid level
is at the MIN (minimum) line on the
side of the reservoir. The hydraulic
clutch fluid system should be closed
and sealed.
Do not remove the cap to check
the fluid level or to top‐off the fluid
level. Remove the cap only when
necessary to add the proper fluid
until the level reaches the MIN line.
Page 298 of 432
Black plate (22,1)Chevrolet Corvette Owner Manual - 2012
10-22 Vehicle Care
Engine Air Cleaner/Filter
SeeEngine Compartment Overview
on page 10‑8 for the location of the
engine air cleaner/filter.
Notice: If you spray water into
the engine air cleaner/filter intake
and water enters the engine air
cleaner/filter housing, you could
damage your vehicle's engine.
The repairs would not be covered
by your warranty. Do not spray
water into the engine air cleaner/
filter intake and/or housing.
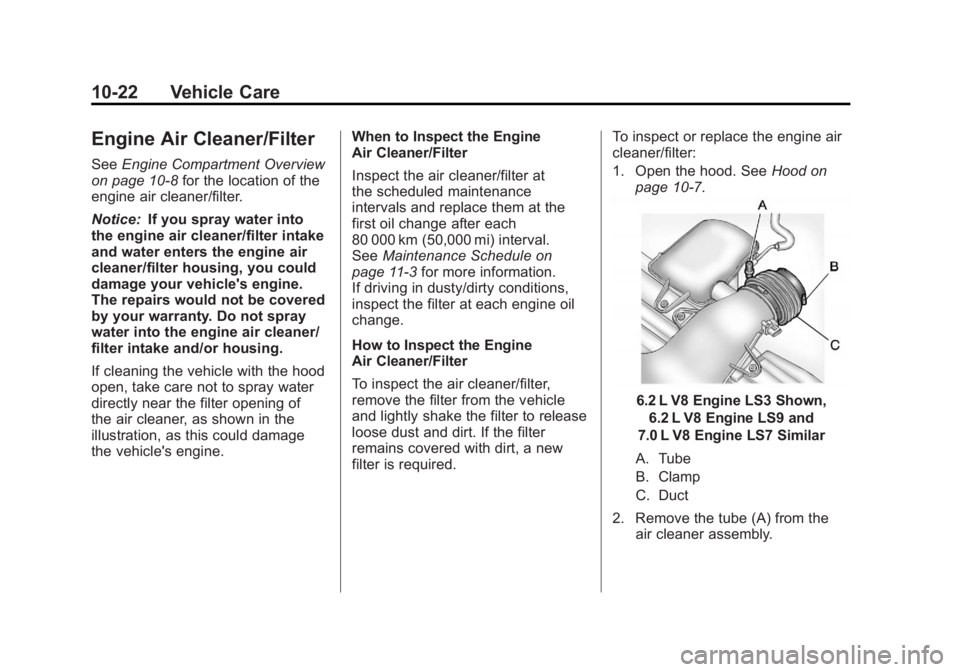
If cleaning the vehicle with the hood
open, take care not to spray water
directly near the filter opening of
the air cleaner, as shown in the
illustration, as this could damage
the vehicle's engine. When to Inspect the Engine
Air Cleaner/Filter
Inspect the air cleaner/filter at
the scheduled maintenance
intervals and replace them at the
first oil change after each
80 000 km (50,000 mi) interval.
See
Maintenance Schedule on
page 11‑3 for more information.
If driving in dusty/dirty conditions,
inspect the filter at each engine oil
change.
How to Inspect the Engine
Air Cleaner/Filter
To inspect the air cleaner/filter,
remove the filter from the vehicle
and lightly shake the filter to release
loose dust and dirt. If the filter
remains covered with dirt, a new
filter is required. To inspect or replace the engine air
cleaner/filter:
1. Open the hood. See
Hood on
page 10‑7.
6.2 L V8 Engine LS3 Shown,
6.2 L V8 Engine LS9 and
7.0 L V8 Engine LS7 Similar
A. Tube
B. Clamp
C. Duct
2. Remove the tube (A) from the air cleaner assembly.
Page 299 of 432
Black plate (23,1)Chevrolet Corvette Owner Manual - 2012
Vehicle Care 10-23
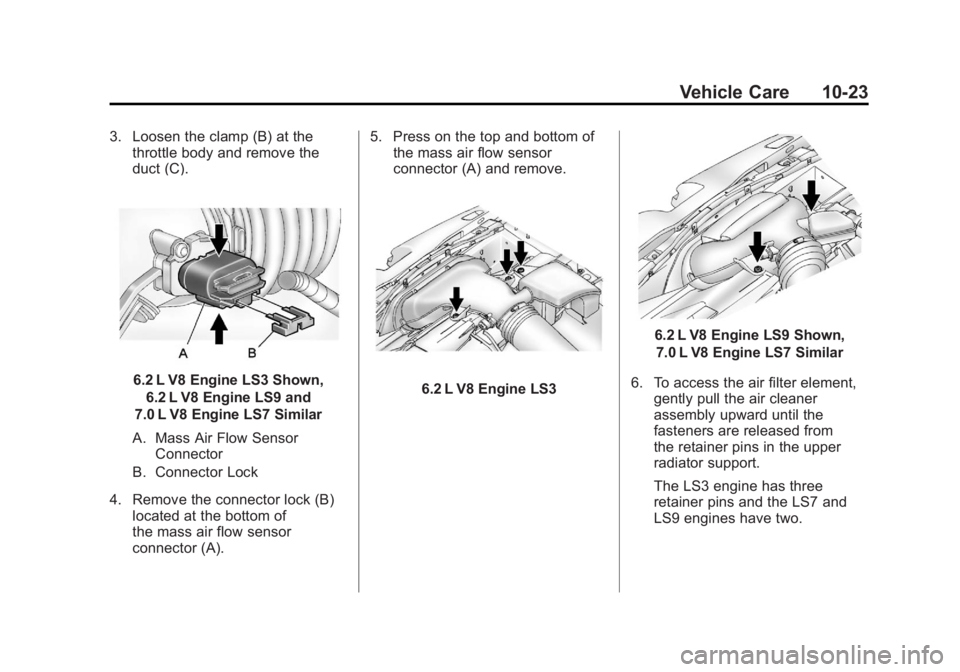
3. Loosen the clamp (B) at thethrottle body and remove the
duct (C).
6.2 L V8 Engine LS3 Shown,
6.2 L V8 Engine LS9 and
7.0 L V8 Engine LS7 Similar
A. Mass Air Flow Sensor Connector
B. Connector Lock
4. Remove the connector lock (B) located at the bottom of
the mass air flow sensor
connector (A). 5. Press on the top and bottom of
the mass air flow sensor
connector (A) and remove.6.2 L V8 Engine LS3
6.2 L V8 Engine LS9 Shown,
7.0 L V8 Engine LS7 Similar
6. To access the air filter element, gently pull the air cleaner
assembly upward until the
fasteners are released from
the retainer pins in the upper
radiator support.
The LS3 engine has three
retainer pins and the LS7 and
LS9 engines have two.
Page 300 of 432
Black plate (24,1)Chevrolet Corvette Owner Manual - 2012
10-24 Vehicle Care
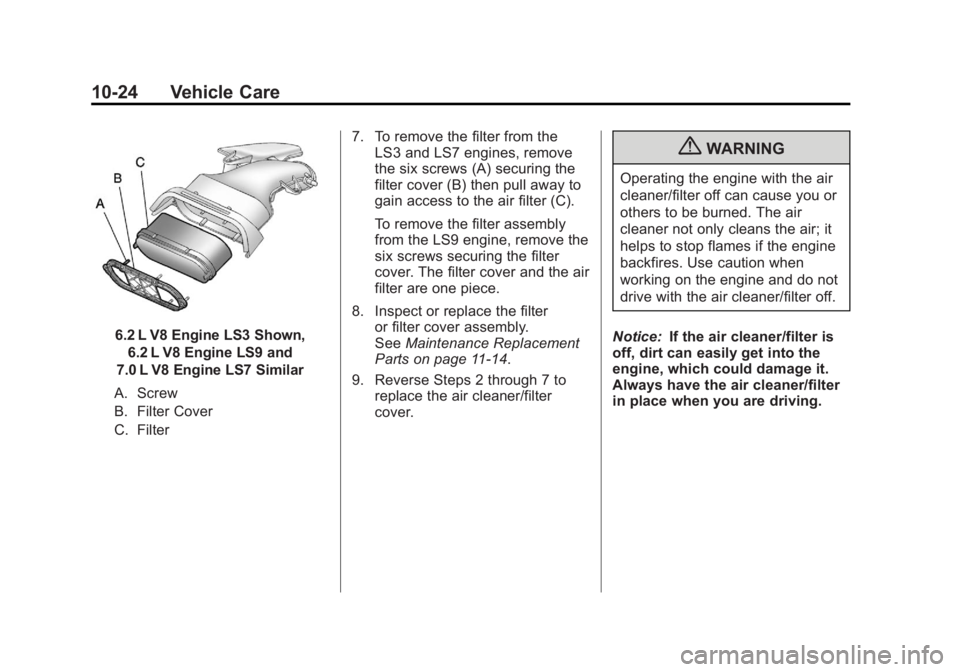
6.2 L V8 Engine LS3 Shown,6.2 L V8 Engine LS9 and
7.0 L V8 Engine LS7 Similar
A. Screw
B. Filter Cover
C. Filter 7. To remove the filter from the
LS3 and LS7 engines, remove
the six screws (A) securing the
filter cover (B) then pull away to
gain access to the air filter (C).
To remove the filter assembly
from the LS9 engine, remove the
six screws securing the filter
cover. The filter cover and the air
filter are one piece.
8. Inspect or replace the filter or filter cover assembly.
See Maintenance Replacement
Parts on page 11‑14.
9. Reverse Steps 2 through 7 to replace the air cleaner/filter
cover.
{WARNING
Operating the engine with the air
cleaner/filter off can cause you or
others to be burned. The air
cleaner not only cleans the air; it
helps to stop flames if the engine
backfires. Use caution when
working on the engine and do not
drive with the air cleaner/filter off.
Notice: If the air cleaner/filter is
off, dirt can easily get into the
engine, which could damage it.
Always have the air cleaner/filter
in place when you are driving.