Capacities and Specifications CHEVROLET CORVETTE C6 2012 Owners Manual
[x] Cancel search | Manufacturer: CHEVROLET, Model Year: 2012, Model line: CORVETTE C6, Model: CHEVROLET CORVETTE C6 2012Pages: 432, PDF Size: 5.73 MB
Page 291 of 432
Black plate (15,1)Chevrolet Corvette Owner Manual - 2012
Vehicle Care 10-15
When to Add Engine Oil
(Except Z06, ZR1, and Grand
Sport)
If the oil is below the cross-hatched
area at the tip of the dipstick, add
1 L (1 qt) of the recommended
oil and then recheck the level.
See“Selecting the Right Engine Oil”
in this section for an explanation of
what kind of oil to use. For engine
oil crankcase capacity, see
Capacities and Specifications on
page 12‑2.
See Racing or Other Competitive
Driving on page 9‑6 for additional
information on engine oil. Notice:
Do not add too much oil.
Oil levels above or below the
acceptable operating range
shown on the dipstick are harmful
to the engine. If you find that you
have an oil level above the
operating range, i.e., the engine
has so much oil that the oil level
gets above the cross-hatched
area that shows the proper
operating range, the engine could
be damaged. You should drain
out the excess oil or limit driving
of the vehicle and seek a service
professional to remove the
excess amount of oil.
See Engine Compartment Overview
on page 10‑8 for the location of the
engine oil fill cap.
Add enough oil to put the level
somewhere in the proper operating
range . Push the dipstick all the way
back in when through.
Checking Engine Oil
(Z06, ZR1, and Grand Sport)
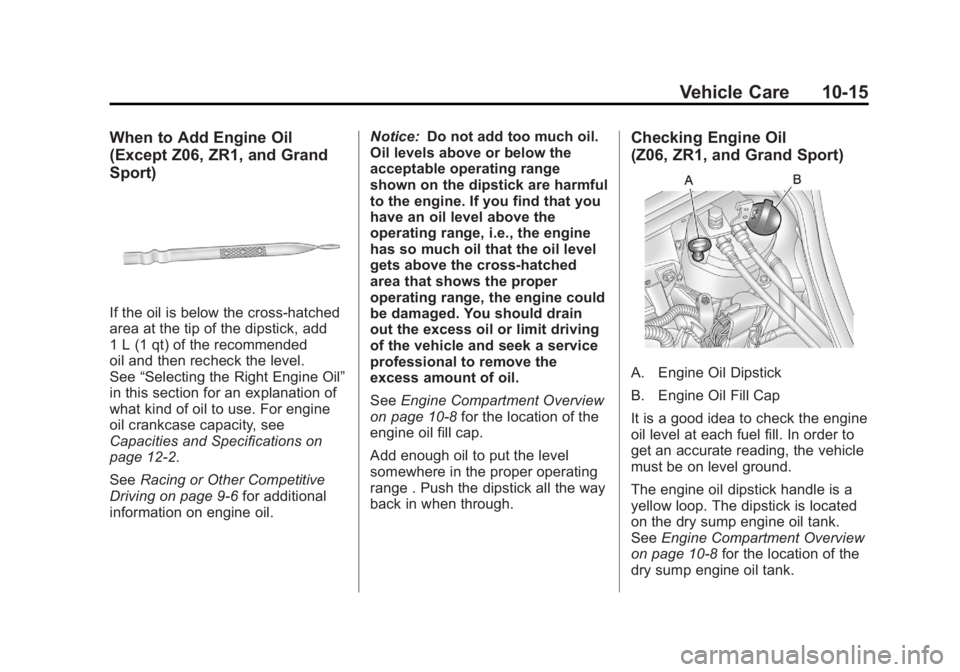
A. Engine Oil Dipstick
B. Engine Oil Fill Cap
It is a good idea to check the engine
oil level at each fuel fill. In order to
get an accurate reading, the vehicle
must be on level ground.
The engine oil dipstick handle is a
yellow loop. The dipstick is located
on the dry sump engine oil tank.
See Engine Compartment Overview
on page 10‑8 for the location of the
dry sump engine oil tank.
Page 293 of 432
Black plate (17,1)Chevrolet Corvette Owner Manual - 2012
Vehicle Care 10-17
See“Selecting the Right Engine Oil”
for an explanation of what kind of oil
to use. For engine oil crankcase
capacity, see Capacities and
Specifications on page 12‑2.
See Racing or Other Competitive
Driving on page 9‑6 for additional
information on engine oil.
Notice: Do not add too much oil.
Oil levels above or below the
acceptable operating range
shown on the dipstick are harmful
to the engine. If you find that you
have an oil level above the
operating range, i.e., the engine
has so much oil that the oil level
gets above the cross-hatched
area that shows the proper
operating range, the engine could
be damaged. You should drain
out the excess oil or limit driving
of the vehicle and seek a service
professional to remove the
excess amount of oil. See
Engine Compartment Overview
on page 10‑8 for the location of the
external engine oil tank and fill cap.
Add enough oil to put the level
somewhere in the proper operating
range. Push the dipstick all the way
back into the oil tank when through.
Changing Engine Oil and Filter
(Z06, ZR1, and Grand Sport)
These vehicles have a racetrack‐
ready dry sump engine lubrication
system. This high‐performance
system operates differently than a
standard engine lubrication system
and requires a special procedure
when changing the engine oil and
filter. Follow this procedure closely
when changing the engine oil and
filter.
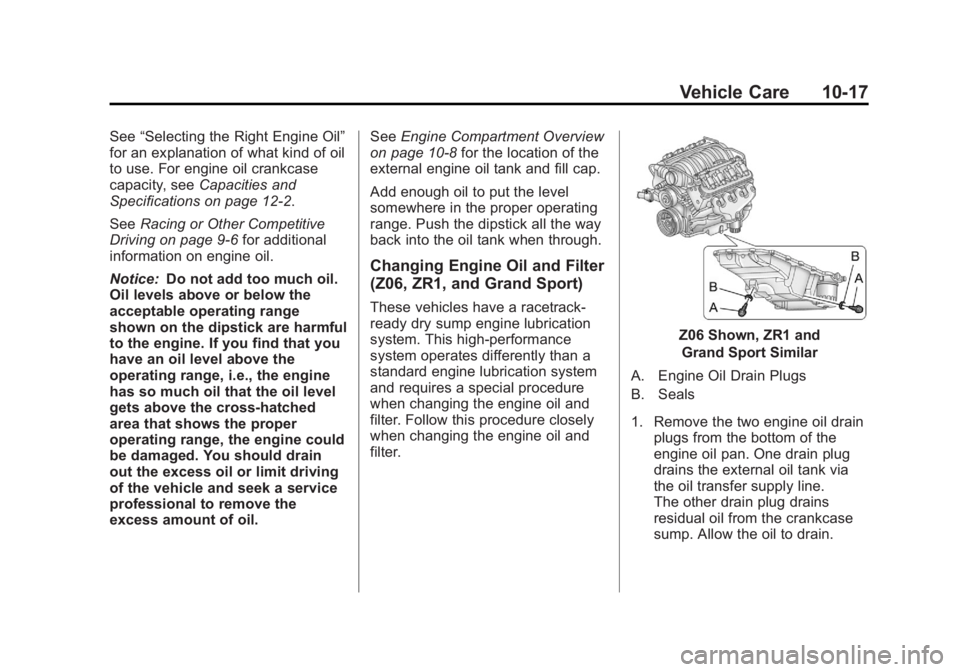
Z06 Shown, ZR1 and
Grand Sport Similar
A. Engine Oil Drain Plugs
B. Seals
1. Remove the two engine oil drain plugs from the bottom of the
engine oil pan. One drain plug
drains the external oil tank via
the oil transfer supply line.
The other drain plug drains
residual oil from the crankcase
sump. Allow the oil to drain.
Page 294 of 432
Black plate (18,1)Chevrolet Corvette Owner Manual - 2012
10-18 Vehicle Care
2. Once the oil has been drainedfrom the engine, remove the
engine oil filter and allow the oil
to drain.
3. Re‐install both drain plugs and tighten them to 25 Y(18 lb ft).
4. Replace the oil filter and tighten it to 30 Y(22 lb ft).
See Maintenance Replacement
Parts on page 11‑14 for the
correct filter.
5. Oil is filled through the opening in the top of the external engine
oil tank. Remove the oil fill cap.
6. Add 9.9 L (10.5 quarts) of oil to the oil tank. See Capacities and
Specifications on page 12‑2.
7. Install the oil fill cap and insert the dipstick, if removed. 8. Start the engine and let it run at
idle for at least 15 seconds.
This will circulate the fresh
engine oil through the lubrication
system.
9. Shut off the engine and check the oil level as described under
“Checking Engine Oil (Z06, ZR1,
and Grand Sport).”
Selecting the Right Engine Oil
Selecting the right engine oil
depends on both the proper oil
specification and viscosity grade.
See Recommended Fluids and
Lubricants on page 11‑12.
Specification
Use and ask for licensed engine
oils with the dexos1™ approved
certification mark. Engine oils
meeting the requirements for the
vehicle should have the dexos1
approved certification mark. This certification mark indicates
that the oil has been approved
to the dexos1 specification.
Corvette recommends Mobil 1
®
engine oils that meet the
requirements of the dexos1
specification for its dry‐sump
equipped engines.
Notice:
Failure to use the
recommended engine oil or
equivalent can result in engine
damage not covered by the
vehicle warranty. Check with your
dealer or service provider on
whether the oil is approved to the
dexos1 specification.
Page 345 of 432
Black plate (69,1)Chevrolet Corvette Owner Manual - 2012
Vehicle Care 10-69
Adjust the front and rear tires
to the recommended inflation
pressure on the Tire and
Loading Information label after
the tires have been rotated.
SeeTire Pressure on
page 10‑62 andVehicle Load
Limits on page 9‑14.
Reset the Tire Pressure
Monitor System. See Tire
Pressure Monitor Operation on
page 10‑66.
Check that all wheel nuts are
properly tightened. See “Wheel
Nut Torque” underCapacities
and Specifications on
page 12‑2.{WARNING
Rust or dirt on a wheel, or on
the parts to which it is fastened,
can make wheel nuts become
loose after time. The wheel could
come off and cause an accident.
When changing a wheel, remove
any rust or dirt from places where
the wheel attaches to the vehicle.
In an emergency, a cloth or a
paper towel can be used;
however, use a scraper or wire
brush later to remove all rust
or dirt.
Lightly coat the center of the
wheel hub with wheel bearing
grease after a wheel change or
tire rotation to prevent corrosion
or rust build-up. Do not get
grease on the flat wheel
mounting surface or on the
wheel nuts or bolts.
When It Is Time for
New Tires
Factors such as maintenance,
temperatures, driving speeds,
vehicle loading, and road conditions
affect the wear rate of the tires.
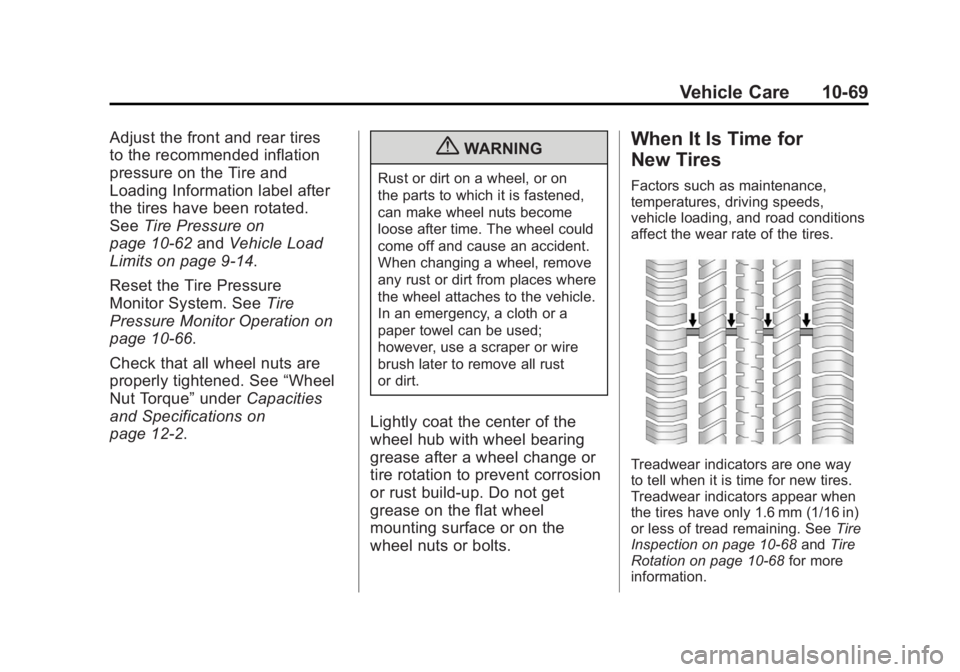
Treadwear indicators are one way
to tell when it is time for new tires.
Treadwear indicators appear when
the tires have only 1.6 mm (1/16 in)
or less of tread remaining. See Tire
Inspection on page 10‑68 andTire
Rotation on page 10‑68 for more
information.
Page 385 of 432
Black plate (1,1)Chevrolet Corvette Owner Manual - 2012
Technical Data 12-1
Technical Data
Vehicle Identification
Vehicle IdentificationNumber (VIN) . . . . . . . . . . . . . . 12-1
Service Parts Identification Label . . . . . . . . . . . . . . . . . . . . . . . 12-1
Vehicle Data
Capacities andSpecifications . . . . . . . . . . . . . . 12-2
Engine Drive Belt Routing . . . 12-5
Vehicle Identification
Vehicle Identification
Number (VIN)
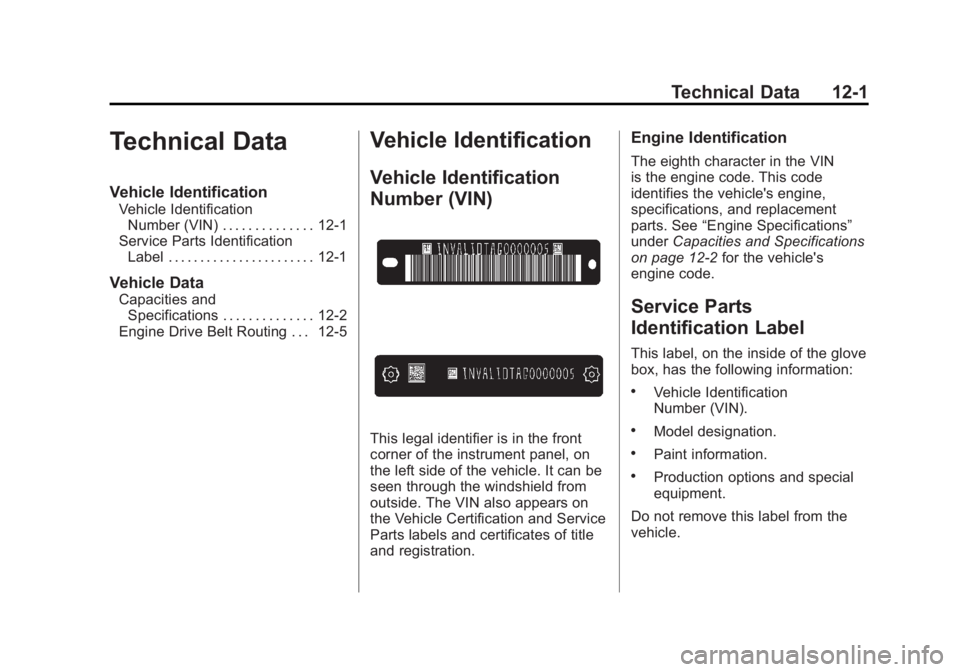
This legal identifier is in the front
corner of the instrument panel, on
the left side of the vehicle. It can be
seen through the windshield from
outside. The VIN also appears on
the Vehicle Certification and Service
Parts labels and certificates of title
and registration.
Engine Identification
The eighth character in the VIN
is the engine code. This code
identifies the vehicle's engine,
specifications, and replacement
parts. See “Engine Specifications”
under Capacities and Specifications
on page 12‑2 for the vehicle's
engine code.
Service Parts
Identification Label
This label, on the inside of the glove
box, has the following information:
.Vehicle Identification
Number (VIN).
.Model designation.
.Paint information.
.Production options and special
equipment.
Do not remove this label from the
vehicle.
Page 386 of 432

Black plate (2,1)Chevrolet Corvette Owner Manual - 2012
12-2 Technical Data
Vehicle Data
Capacities and Specifications
The following approximate capacities are given in metric and English conversions.
SeeRecommended Fluids and Lubricants on page 11‑12 for more information.
Application Capacities
Metric English
Air Conditioning Refrigerant R134a For the air conditioning system refrigerant charge
amount, see the refrigerant label located under the hood. See your dealer for more information.
Cooling System 6.2L LS3 V8 Engine 11.3 L 11.9 qt
6.2L LS9 V8 Supercharged Engine –Cooling System 12.0 L 12.7 qt
6.2L LS9 V8 Supercharged Engine –Supercharger
Intercooler Cooling System 4.9 L 5.2 qt
7.0L LS7 V8 Engine 11.3 L 11.9 qt
Engine Oil with Filter 6.2L LS3 V8 5.7 L 6.0 qt
6.2L LS3 V8 with Z52 Dry Sump Oil System 9.9 L 10.5 qt
Page 422 of 432
Black plate (2,1)Chevrolet Corvette Owner Manual - 2012
i-2 INDEX
B
Battery . . . . . . . . . . . . . . . . . . . . . . . 10-40Exterior Lighting BatterySaver . . . . . . . . . . . . . . . . . . . . . . . . 6-7
Jump Starting . . . . . . . . . . . . . . . 10-78
Power Protection . . . . . . . . . . . . . . 6-7
Voltage and Charging Messages . . . . . . . . . . . . . . . . . . . 5-35
Blade Replacement, Wiper . . . . . . . . . . . . . . . . . . . . . . . 10-43
Bluetooth . . . . . . . . . . . . . . . . . . . . . . 7-16
Boost Gauge . . . . . . . . . . . . . . . . . . 5-13
Brake
System Warning Light . . . . . . . . 5-21
Brakes . . . . . . . . . . . . . . . . . . . . . . . . 10-34 Antilock . . . . . . . . . . . . . . . . . . . . . . . 9-35
Assist . . . . . . . . . . . . . . . . . . . . . . . . . 9-36
Fluid . . . . . . . . . . . . . . . . . . . . . . . . 10-38
Parking . . . . . . . . . . . . . . . . . . . . . . . 9-36
System Messages . . . . . . . . . . . . 5-36
Braking . . . . . . . . . . . . . . . . . . . . . . . . . 9-4
Break-In, New Vehicle . . . . . . . . . 9-18
Bulb Replacement . . . . . . . . . . . . 10-46 Fog Lamps . . . . . . . . . . . . . . . . . . . . 6-5
Halogen Bulbs . . . . . . . . . . . . . . 10-44
Headlamp Aiming . . . . . . . . . . . 10-44 Bulb Replacement (cont'd)
Headlamps . . . . . . . . . . . . . . . . . 10-44
Headlamps, Front Turn
Signal, and Parking
Lamps . . . . . . . . . . . . . . . . . . . . 10-45
High Intensity Discharge (HID) Lighting . . . . . . . . . . . . . 10-44
Taillamps, Turn Signal, and Stoplamps . . . . . . . . . . . . 10-46
Buying New Tires . . . . . . . . . . . . . 10-70
C
Calibration . . . . . . . . . . . . . . . . . . . . . . 5-5
California Fuel Requirements . . . . . . . . . . . 9-49
Perchlorate MaterialsRequirements . . . . . . . . . . . . . . . 10-3
Warning . . . . . . . . . . . . . . . . . . . . . . 10-3
Canadian Vehicle Owners . . . . . . . . iii
Capacities and Specifications . . . . . . . . . . . . . . . . 12-2
Carbon Monoxide Engine Exhaust . . . . . . . . . . . . . . . 9-26
Hatch . . . . . . . . . . . . . . . . . . . . . . . . . 2-11
Winter Driving . . . . . . . . . . . . . . . . 9-11 Cargo
Cover . . . . . . . . . . . . . . . . . . . . . . . . . . 4-2
Cautions, Danger, and Warnings . . . . . . . . . . . . . . . . . . . . . . . . iv
CD Player . . . . . . . . . . . . . . . . . . . . . 7-11
Center Console Storage . . . . . . . . 4-2
Chains, Tire . . . . . . . . . . . . . . . . . . 10-76
Check Engine Light . . . . . . . . . . . . . . . . . . 5-19
Child Restraints Infants and Young
Children . . . . . . . . . . . . . . . . . . . . . 3-31
Lower Anchors and Tethers for Children . . . 3-35, 3-36
Older Children . . . . . . . . . . . . . . . . 3-29
Securing . . . . . . . . . . . . . . . . . . . . . . 3-40
Systems . . . . . . . . . . . . . . . . . . . . . . 3-33
Cigarette Lighter . . . . . . . . . . . . . . . . 5-7
Circuit Breakers . . . . . . . . . . . . . . 10-47
Cleaning Exterior Care . . . . . . . . . . . . . . . 10-82
Interior Care . . . . . . . . . . . . . . . . 10-86
Climate Control Systems Dual Automatic . . . . . . . . . . . . . . . . 8-1
Clock . . . . . . . . . . . . . . . . . . . . . . . . . . . 5-6
Page 430 of 432
Black plate (10,1)Chevrolet Corvette Owner Manual - 2012
i-10 INDEX
Safety System Check . . . . . . . . . . 3-14
Satellite Radio . . . . . . . . . . . . . . . . . . 7-7
Scheduling Appointments . . . . . 13-13
Seatback Latches . . . . . . . . . . . . . . 3-7
SeatsHead Restraints . . . . . . . . . . . . . . . 3-2
Heated Front . . . . . . . . . . . . . . . . . . 3-8
Lumbar Adjustment, Front . . . . . 3-2
Memory . . . . . . . . . . . . . . . . . . . . . . . . 3-4
Power Adjustment, Front . . . . . . 3-2
Reclining Seatbacks . . . . . . . . . . . 3-3
Securing Child Restraints . . . . . . 3-40
Security Light . . . . . . . . . . . . . . . . . . . . . . . . . . 5-25
OnStar
®. . . . . . . . . . . . . . . . . . . . . . 14-2
Vehicle . . . . . . . . . . . . . . . . . . . . . . . 2-14
Selective Ride Control . . . . . . . . . 9-43
Service Accessories andModifications . . . . . . . . . . . . . . . . 10-3
Doing Your Own Work . . . . . . . . 10-7
Engine Soon Light . . . . . . . . . . . . 5-19
Maintenance Records . . . . . . .11-15
Maintenance, General Information . . . . . . . . . . . . . . . . . . 11-1
Parts Identification Label . . . . . 12-1 Service (cont'd)
Publications Ordering
Information . . . . . . . . . . . . . . . . 13-18
Scheduling Appointments . . . 13-13
Vehicle Messages . . . . . . . . . . . . 5-49
Servicing the Airbag . . . . . . . . . . . 3-26
Shift Lock Control Function Check, Automatic
Transmission . . . . . . . . . . . . . . . . 10-42
Shifting Into Park . . . . . . . . . . . . . . . . . . . . . . 9-24
Out of Park . . . . . . . . . . . . . . . . . . . 9-25
Signals, Turn and Lane-Change . . . . . . . . . . . . . . . . . 6-4
Specifications and Capacities . . . . . . . . . . . . . . . . . . . . 12-2
Speedometer . . . . . . . . . . . . . . . . . . 5-12
Sport Cup Tires . . . . . . . . . . . . . . . 10-57
StabiliTrak OFF Light . . . . . . . . . . . . . . . . . . . . . 5-23
Starter Switch Check . . . . . . . . . 10-41
Starting the Engine . . . . . . . . . . . . 9-22
Starting the Vehicle Messsages . . . . . . . . . . . . . . . . . . . 5-49 Steering . . . . . . . . . . . . . . . . . . . . . . . . 9-4
Fluid, Power . . . . . . . . . . . . . . . . 10-32
Wheel Adjustment . . . . . . . . . . . . . 5-2
Wheel Controls . . . . . . . . . . . . . . . . 5-3
Storage Rear . . . . . . . . . . . . . . . . . . . . . . . . . . . 4-1
Storage Areas
Cargo Cover . . . . . . . . . . . . . . . . . . . 4-2
Center Console . . . . . . . . . . . . . . . . 4-2
Convenience Net . . . . . . . . . . . . . . 4-3
Glove Box . . . . . . . . . . . . . . . . . . . . . 4-1
Stuck Vehicle . . . . . . . . . . . . . . . . . . 9-13
Sun Visors . . . . . . . . . . . . . . . . . . . . . 2-19
Symbols . . . . . . . . . . . . . . . . . . . . . . . . . . iv
System Infotainment . . . . . . . . . . . . . . . . . . . 7-1
T
Tachometer . . . . . . . . . . . . . . . . . . . . 5-12
Taillamps
Turn Signal andStoplamps . . . . . . . . . . . . . . . . 10-46
Text Telephone (TTY) Users . . . 13-6