ECU CHEVROLET CORVETTE C7 2018 Owner's Manual
[x] Cancel search | Manufacturer: CHEVROLET, Model Year: 2018, Model line: CORVETTE C7, Model: CHEVROLET CORVETTE C7 2018Pages: 353, PDF Size: 6.48 MB
Page 90 of 353
Chevrolet Corvette Owner Manual (GMNA-Localizing-U.S./Canada/Mexico-
11374030) - 2018 - crc - 3/29/17
Seats and Restraints 89
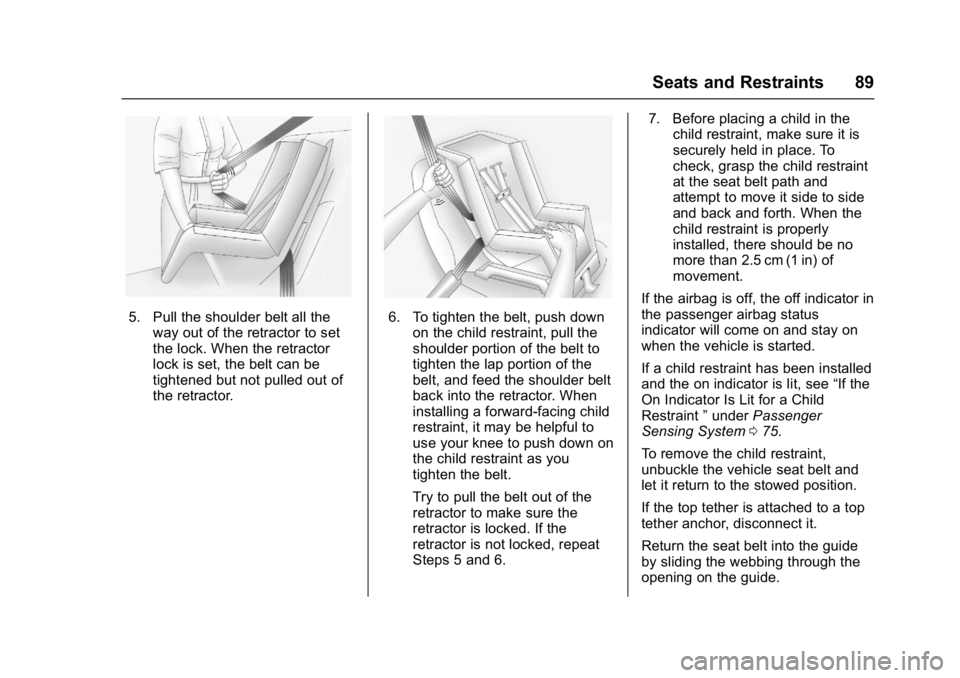
5. Pull the shoulder belt all theway out of the retractor to set
the lock. When the retractor
lock is set, the belt can be
tightened but not pulled out of
the retractor.6. To tighten the belt, push downon the child restraint, pull the
shoulder portion of the belt to
tighten the lap portion of the
belt, and feed the shoulder belt
back into the retractor. When
installing a forward-facing child
restraint, it may be helpful to
use your knee to push down on
the child restraint as you
tighten the belt.
Try to pull the belt out of the
retractor to make sure the
retractor is locked. If the
retractor is not locked, repeat
Steps 5 and 6. 7. Before placing a child in the
child restraint, make sure it is
securely held in place. To
check, grasp the child restraint
at the seat belt path and
attempt to move it side to side
and back and forth. When the
child restraint is properly
installed, there should be no
more than 2.5 cm (1 in) of
movement.
If the airbag is off, the off indicator in
the passenger airbag status
indicator will come on and stay on
when the vehicle is started.
If a child restraint has been installed
and the on indicator is lit, see “If the
On Indicator Is Lit for a Child
Restraint ”under Passenger
Sensing System 075.
To remove the child restraint,
unbuckle the vehicle seat belt and
let it return to the stowed position.
If the top tether is attached to a top
tether anchor, disconnect it.
Return the seat belt into the guide
by sliding the webbing through the
opening on the guide.
Page 94 of 353
Chevrolet Corvette Owner Manual (GMNA-Localizing-U.S./Canada/Mexico-
11374030) - 2018 - crc - 3/29/17
Storage 93
Attach the elastic loops on the four
corners of the cargo cover to the
hooks on the front and rear corners
of the hatch.
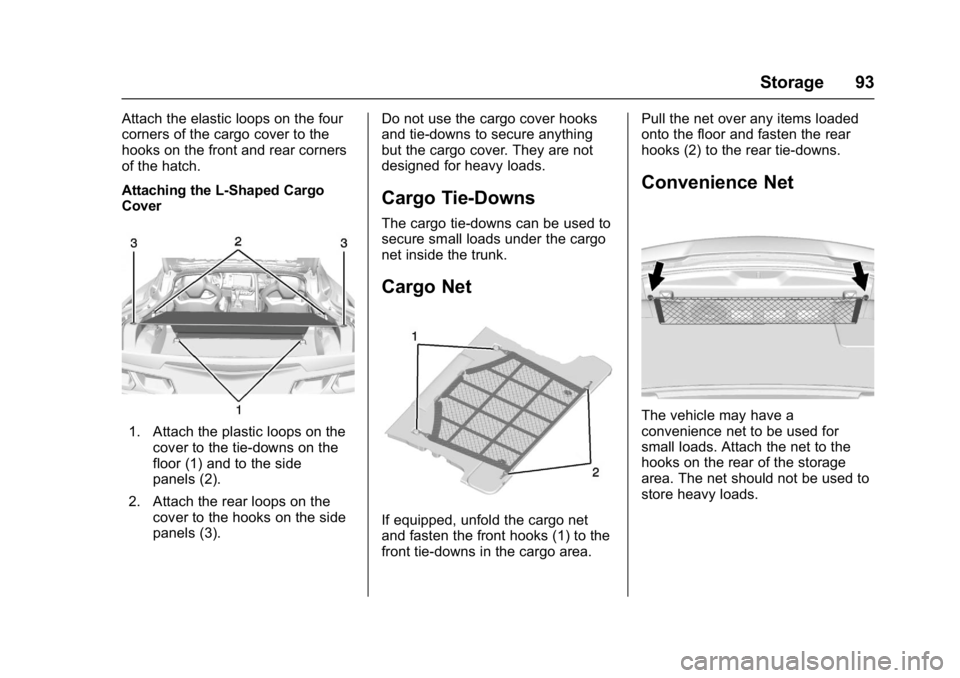
Attaching the L-Shaped Cargo
Cover
1. Attach the plastic loops on thecover to the tie-downs on the
floor (1) and to the side
panels (2).
2. Attach the rear loops on the cover to the hooks on the side
panels (3). Do not use the cargo cover hooks
and tie-downs to secure anything
but the cargo cover. They are not
designed for heavy loads.
Cargo Tie-Downs
The cargo tie-downs can be used to
secure small loads under the cargo
net inside the trunk.
Cargo Net
If equipped, unfold the cargo net
and fasten the front hooks (1) to the
front tie-downs in the cargo area. Pull the net over any items loaded
onto the floor and fasten the rear
hooks (2) to the rear tie-downs.
Convenience Net
The vehicle may have a
convenience net to be used for
small loads. Attach the net to the
hooks on the rear of the storage
area. The net should not be used to
store heavy loads.
Page 95 of 353
Chevrolet Corvette Owner Manual (GMNA-Localizing-U.S./Canada/Mexico-
11374030) - 2018 - crc - 3/29/17
94 Instruments and Controls
Instruments and
Controls
Controls
Steering Wheel Adjustment . . . . 95
Steering Wheel Controls . . . . . . . 95
Horn . . . . . . . . . . . . . . . . . . . . . . . . . . . 95
Windshield Wiper/Washer . . . . . . 95
Compass . . . . . . . . . . . . . . . . . . . . . . 96
Clock . . . . . . . . . . . . . . . . . . . . . . . . . . 96
Power Outlets . . . . . . . . . . . . . . . . . 97
Warning Lights, Gauges, and
Indicators
Warning Lights, Gauges, andIndicators . . . . . . . . . . . . . . . . . . . . 98
Instrument Cluster . . . . . . . . . . . . . 99
Speedometer . . . . . . . . . . . . . . . . . 104
Odometer . . . . . . . . . . . . . . . . . . . . . 104
Trip Odometer . . . . . . . . . . . . . . . . 104
Tachometer . . . . . . . . . . . . . . . . . . . 104
Fuel Gauge . . . . . . . . . . . . . . . . . . . 105
Boost Gauge . . . . . . . . . . . . . . . . . 106
Engine Coolant Temperature Gauge . . . . . . . . . . . . . . . . . . . . . . 106
Seat Belt Reminders . . . . . . . . . 107
Airbag Readiness Light . . . . . . . 108
Passenger Airbag Status Indicator . . . . . . . . . . . . . . . . . . . . 108 Charging System Light . . . . . . . 109
Malfunction Indicator Lamp . . . 109
Brake System Warning
Light . . . . . . . . . . . . . . . . . . . . . . . . . 111
Electric Parking Brake
Light . . . . . . . . . . . . . . . . . . . . . . . . 112
Service Electric Parking Brake Light . . . . . . . . . . . . . . . . . . . . . . . . 112
Antilock Brake System (ABS) Warning Light . . . . . . . . . . . . . . . 112
Traction Off Light . . . . . . . . . . . . . 113
Traction Control System (TCS)/ Electronic Stability Control
Light . . . . . . . . . . . . . . . . . . . . . . . . 113
Electronic Stability Control (ESC) Off Light . . . . . . . . . . . . . . 113
Engine Coolant Temperature Warning Light . . . . . . . . . . . . . . . 114
Tire Pressure Light . . . . . . . . . . . 114
Engine Oil Pressure Light . . . . . 115
Low Fuel Warning Light . . . . . . . 115
Security Light . . . . . . . . . . . . . . . . . 115
High-Beam On Light . . . . . . . . . . 116
Lamps On Reminder . . . . . . . . . . 116
Cruise Control Light . . . . . . . . . . 116
Door Ajar Light . . . . . . . . . . . . . . . 116
Information Displays
Driver Information Center (DIC) . . . . . . . . . . . . . . . . 116
Head-Up Display (HUD) . . . . . . 118
Vehicle Messages
Vehicle Messages . . . . . . . . . . . . 123
Engine Power Messages . . . . . 123
Vehicle Speed Messages . . . . . 124
Vehicle Personalization
Vehicle Personalization . . . . . . . 124
Universal Remote System
Universal Remote System . . . . 131
Universal Remote System Programming . . . . . . . . . . . . . . . 131
Universal Remote System Operation . . . . . . . . . . . . . . . . . . . 133
Page 116 of 353
Chevrolet Corvette Owner Manual (GMNA-Localizing-U.S./Canada/Mexico-
11374030) - 2018 - crc - 3/29/17
Instruments and Controls 115
Engine Oil Pressure Light
Caution
Lack of proper engine oil
maintenance can damage the
engine. Driving with the engine oil
low can also damage the engine.
The repairs would not be covered
by the vehicle warranty. Check
the oil level as soon as possible.
Add oil if required, but if the oil
level is within the operating range
and the oil pressure is still low,
have the vehicle serviced. Always
follow the maintenance schedule
for changing engine oil.
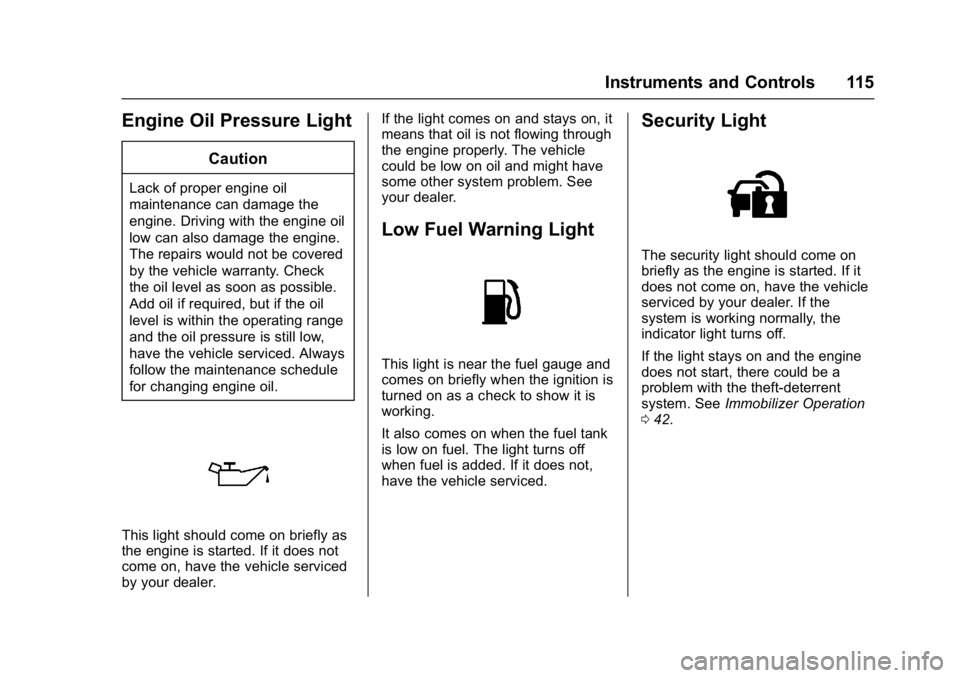
This light should come on briefly as
the engine is started. If it does not
come on, have the vehicle serviced
by your dealer.If the light comes on and stays on, it
means that oil is not flowing through
the engine properly. The vehicle
could be low on oil and might have
some other system problem. See
your dealer.
Low Fuel Warning Light
This light is near the fuel gauge and
comes on briefly when the ignition is
turned on as a check to show it is
working.
It also comes on when the fuel tank
is low on fuel. The light turns off
when fuel is added. If it does not,
have the vehicle serviced.
Security Light
The security light should come on
briefly as the engine is started. If it
does not come on, have the vehicle
serviced by your dealer. If the
system is working normally, the
indicator light turns off.
If the light stays on and the engine
does not start, there could be a
problem with the theft-deterrent
system. See
Immobilizer Operation
0 42.
Page 117 of 353
Chevrolet Corvette Owner Manual (GMNA-Localizing-U.S./Canada/Mexico-
11374030) - 2018 - crc - 3/29/17
116 Instruments and Controls
High-Beam On Light
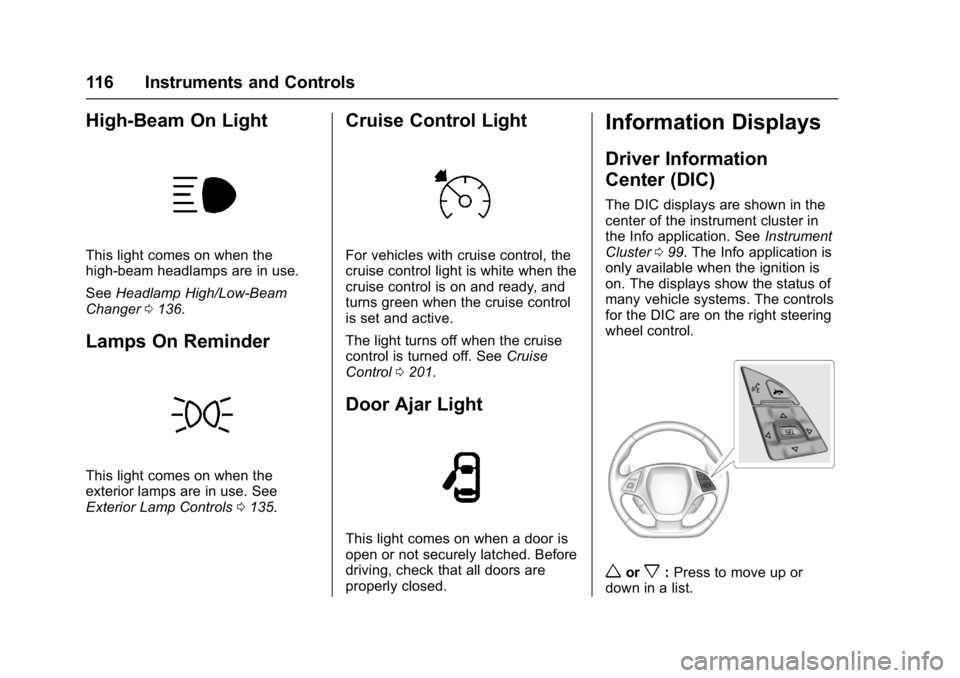
This light comes on when the
high-beam headlamps are in use.
SeeHeadlamp High/Low-Beam
Changer 0136.
Lamps On Reminder
This light comes on when the
exterior lamps are in use. See
Exterior Lamp Controls 0135.
Cruise Control Light
For vehicles with cruise control, the
cruise control light is white when the
cruise control is on and ready, and
turns green when the cruise control
is set and active.
The light turns off when the cruise
control is turned off. See Cruise
Control 0201.
Door Ajar Light
This light comes on when a door is
open or not securely latched. Before
driving, check that all doors are
properly closed.
Information Displays
Driver Information
Center (DIC)
The DIC displays are shown in the
center of the instrument cluster in
the Info application. See Instrument
Cluster 099. The Info application is
only available when the ignition is
on. The displays show the status of
many vehicle systems. The controls
for the DIC are on the right steering
wheel control.
worx: Press to move up or
down in a list.
Page 124 of 353
Chevrolet Corvette Owner Manual (GMNA-Localizing-U.S./Canada/Mexico-
11374030) - 2018 - crc - 3/29/17
Instruments and Controls 123
.HUD is adjusted to the proper
height.
. Polarized sunglasses are
not worn.
. Windshield and HUD lens are
clean.
If the HUD image is not correct,
contact your dealer.
The windshield is part of the HUD
system. See Windshield
Replacement 0244.Vehicle Messages
Messages displayed on the DIC
indicate the status of the vehicle or
some action that may be needed to
correct a condition. Multiple
messages may appear one after
another.
The messages that do not require
immediate action can be
acknowledged and cleared by
pressing
V. The messages that
require immediate action cannot be
cleared until that action is
performed.
All messages should be taken
seriously; clearing the message
does not correct the problem.
If a SERVICE message appears,
see your dealer.
Follow the instructions given in the
messages. The system displays
messages regarding the following
topics:
. Service Messages
. Fluid Levels
. Vehicle Security .
Brakes
. Ride Control Systems
. Driver Assistance Systems
. Cruise Control
. Lighting and Bulb Replacement
. Wiper/Washer Systems
. Doors and Windows
. Seat Belts
. Airbag Systems
. Engine and Transmission
. Tire Pressure
. Battery
Engine Power Messages
ENGINE POWER IS REDUCED
This message displays when the
vehicle's propulsion power is
reduced. Reduced propulsion power
can affect the vehicle's ability to
accelerate. If this message is on,
but there is no observed reduction
in performance, proceed to your
destination. The performance may
be reduced the next time the vehicle
is driven. The vehicle may be driven
Page 132 of 353
Chevrolet Corvette Owner Manual (GMNA-Localizing-U.S./Canada/Mexico-
11374030) - 2018 - crc - 3/29/17
Instruments and Controls 131
Universal Remote
System
SeeRadio Frequency Statement
0 326.
The FCC Grant of Equipment
Authorization Certificate number is
NZLSAHL5B.
The Canadian Registration ID
number is 4112A-SAHL5B.
Universal Remote System
Programming
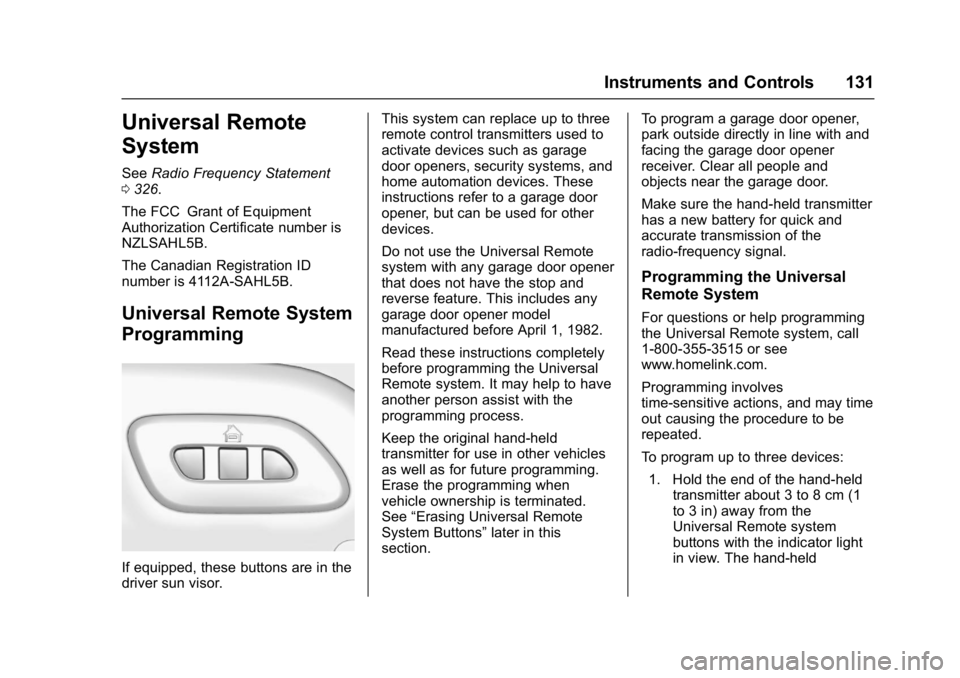
If equipped, these buttons are in the
driver sun visor. This system can replace up to three
remote control transmitters used to
activate devices such as garage
door openers, security systems, and
home automation devices. These
instructions refer to a garage door
opener, but can be used for other
devices.
Do not use the Universal Remote
system with any garage door opener
that does not have the stop and
reverse feature. This includes any
garage door opener model
manufactured before April 1, 1982.
Read these instructions completely
before programming the Universal
Remote system. It may help to have
another person assist with the
programming process.
Keep the original hand-held
transmitter for use in other vehicles
as well as for future programming.
Erase the programming when
vehicle ownership is terminated.
See
“Erasing Universal Remote
System Buttons” later in this
section. To program a garage door opener,
park outside directly in line with and
facing the garage door opener
receiver. Clear all people and
objects near the garage door.
Make sure the hand-held transmitter
has a new battery for quick and
accurate transmission of the
radio-frequency signal.
Programming the Universal
Remote System
For questions or help programming
the Universal Remote system, call
1-800-355-3515 or see
www.homelink.com.
Programming involves
time-sensitive actions, and may time
out causing the procedure to be
repeated.
To program up to three devices:
1. Hold the end of the hand-held transmitter about 3 to 8 cm (1
to 3 in) away from the
Universal Remote system
buttons with the indicator light
in view. The hand-held
Page 142 of 353
Chevrolet Corvette Owner Manual (GMNA-Localizing-U.S./Canada/Mexico-
11374030) - 2018 - crc - 3/29/17
Infotainment System 141
Infotainment
System
Introduction
Infotainment . . . . . . . . . . . . . . . . . . 141
Performance Data
Recorder (PDR)
Performance DataRecorder (PDR) . . . . . . . . . . . . . 141
Introduction
Infotainment
See the infotainment manual for
information on the radio, audio
players, phone, navigation system,
and voice or speech recognition.
It also includes information on
settings.
Performance Data
Recorder (PDR)
If equipped, the PDR icon displays
on the Home Page.
Important Information
Use of the PDR may be prohibited
or legally restricted in certain
countries and situations. Ensure
compliance with applicable laws and
regulations, including, but not
limited to: privacy laws, laws related
to camera surveillance and
recordings, road traffic and security
laws, and laws on the protection of
publicity and personality rights.
. Do not use the PDR if it causes
distraction.
. Do not rely on camera footage to
steer the vehicle.
. Comply with any notice and
consent requirements before
capturing and/or recording the
voices or images of other
persons or before collecting
other personal data.
Page 174 of 353
Chevrolet Corvette Owner Manual (GMNA-Localizing-U.S./Canada/Mexico-
11374030) - 2018 - crc - 4/4/17
Driving and Operating 173
weight of the driver, passengers
and cargo should never exceed
the vehicle's capacity weight.
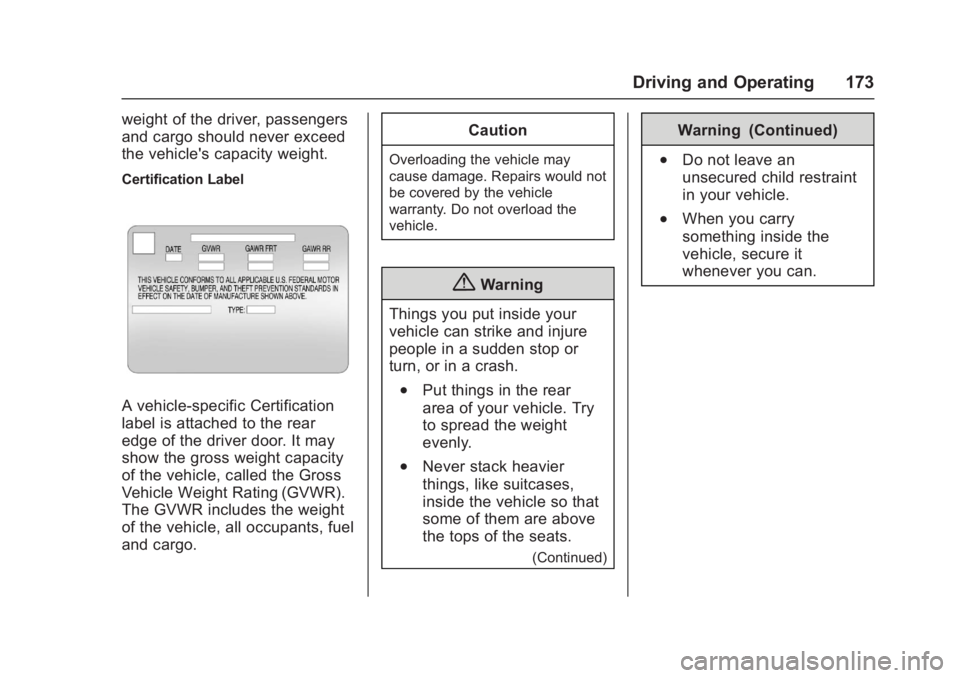
Certification Label
A vehicle-specific Certification
label is attached to the rear
edge of the driver door. It may
show the gross weight capacity
of the vehicle, called the Gross
Vehicle Weight Rating (GVWR).
The GVWR includes the weight
of the vehicle, all occupants, fuel
and cargo.Caution
Overloading the vehicle may
cause damage. Repairs would not
be covered by the vehicle
warranty. Do not overload the
vehicle.
{Warning
Things you put inside your
vehicle can strike and injure
people in a sudden stop or
turn, or in a crash.
.Put things in the rear
area of your vehicle. Try
to spread the weight
evenly.
.Never stack heavier
things, like suitcases,
inside the vehicle so that
some of them are above
the tops of the seats.
(Continued)
Warning (Continued)
.Do not leave an
unsecured child restraint
in your vehicle.
.When you carry
something inside the
vehicle, secure it
whenever you can.
Page 232 of 353
Chevrolet Corvette Owner Manual (GMNA-Localizing-U.S./Canada/Mexico-
11374030) - 2018 - crc - 3/29/17
Vehicle Care 231
Caution (Continued)
may be damaged and cause
engine coolant to leak. Damage
would not be covered by the
vehicle warranty.
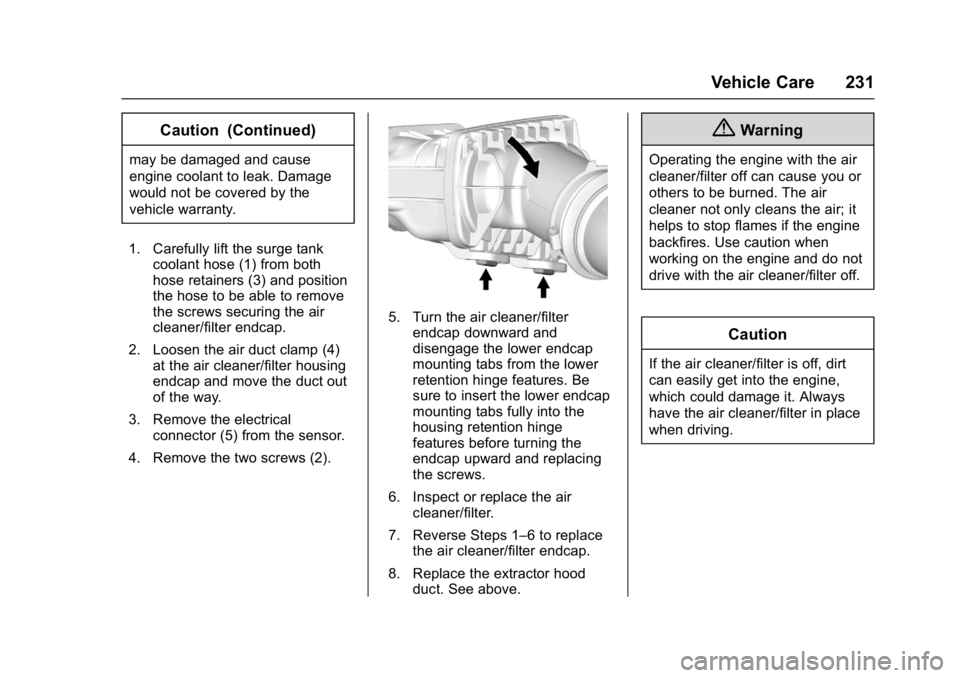
1. Carefully lift the surge tank coolant hose (1) from both
hose retainers (3) and position
the hose to be able to remove
the screws securing the air
cleaner/filter endcap.
2. Loosen the air duct clamp (4) at the air cleaner/filter housing
endcap and move the duct out
of the way.
3. Remove the electrical connector (5) from the sensor.
4. Remove the two screws (2).
5. Turn the air cleaner/filter endcap downward and
disengage the lower endcap
mounting tabs from the lower
retention hinge features. Be
sure to insert the lower endcap
mounting tabs fully into the
housing retention hinge
features before turning the
endcap upward and replacing
the screws.
6. Inspect or replace the air cleaner/filter.
7. Reverse Steps 1–6 to replace the air cleaner/filter endcap.
8. Replace the extractor hood duct. See above.
{Warning
Operating the engine with the air
cleaner/filter off can cause you or
others to be burned. The air
cleaner not only cleans the air; it
helps to stop flames if the engine
backfires. Use caution when
working on the engine and do not
drive with the air cleaner/filter off.
Caution
If the air cleaner/filter is off, dirt
can easily get into the engine,
which could damage it. Always
have the air cleaner/filter in place
when driving.