engine CHEVROLET CORVETTE C8 2021 User Guide
[x] Cancel search | Manufacturer: CHEVROLET, Model Year: 2021, Model line: CORVETTE C8, Model: CHEVROLET CORVETTE C8 2021Pages: 339, PDF Size: 6.44 MB
Page 22 of 339
Chevrolet Corvette Owner Manual (GMNA-Localizing-U.S./Canada/Mexico-
14622938) - 2021 - CRC - 9/22/20
Keys, Doors, and Windows 21
.Press the hatch/trunk release touchpad
while unlocked, or if locked, with the
remote key within 1 m (3 ft). SeeKeys
0 6.
.From the rear of the vehicle, lift the
hatch/trunk until the gas strut system
automatically raises and holds it in the
fully open position.
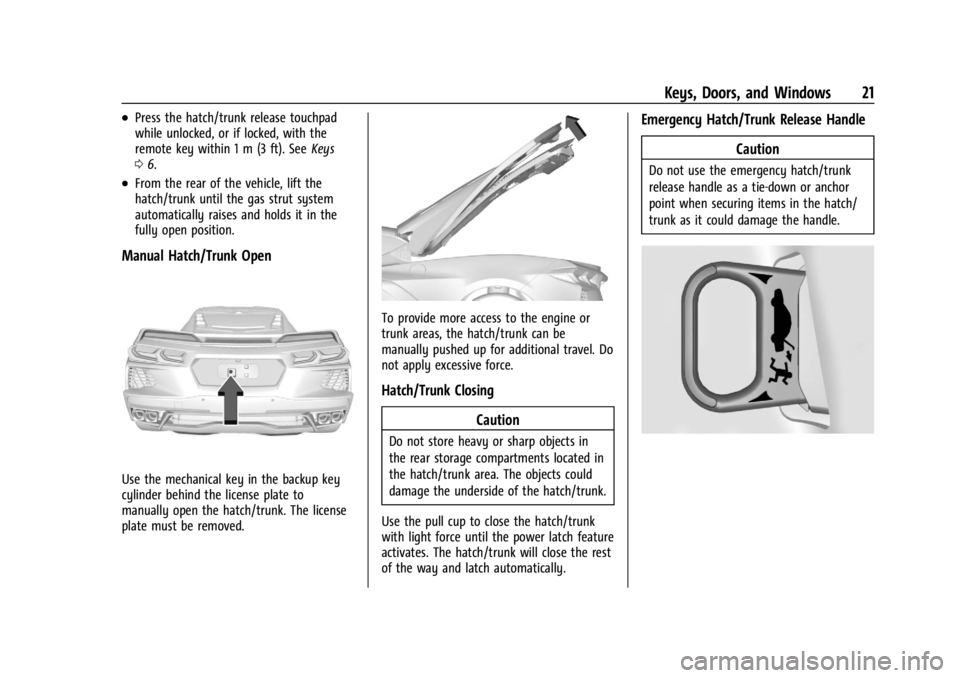
Manual Hatch/Trunk Open
Use the mechanical key in the backup key
cylinder behind the license plate to
manually open the hatch/trunk. The license
plate must be removed.
To provide more access to the engine or
trunk areas, the hatch/trunk can be
manually pushed up for additional travel. Do
not apply excessive force.
Hatch/Trunk Closing
Caution
Do not store heavy or sharp objects in
the rear storage compartments located in
the hatch/trunk area. The objects could
damage the underside of the hatch/trunk.
Use the pull cup to close the hatch/trunk
with light force until the power latch feature
activates. The hatch/trunk will close the rest
of the way and latch automatically.
Emergency Hatch/Trunk Release Handle Caution
Do not use the emergency hatch/trunk
release handle as a tie-down or anchor
point when securing items in the hatch/
trunk as it could damage the handle.
Page 25 of 339
Chevrolet Corvette Owner Manual (GMNA-Localizing-U.S./Canada/Mexico-
14622938) - 2021 - CRC - 9/22/20
24 Keys, Doors, and Windows
Immobilizer Operation
The vehicle has a passive theft-deterrent
system.
The security light comes on in the
instrument cluster if there is a problem with
arming or disarming the theft-deterrent
system. This light also comes on briefly
when the engine is started.
The system is automatically armed when
the ignition is turned off.
The immobilization system is disarmed
when the ignition is turned on or placed in
ACC/ACCESSORY and a valid remote key is
found in the vehicle.
You do not have to manually arm or disarm
the system.
The system has one or more remote keys
that are matched to an immobilizer control
unit in the vehicle. Only a correctly matched
remote key starts the vehicle. The vehicle
may not start if the remote key is damaged.If the engine does not start and the security
light comes on, there may be a problem
with the immobilizer system. Try starting
the vehicle again.
If the vehicle does not start and the remote
key appears to be undamaged, try another
remote key. Or, place the remote key in the
cupholder backup location. See
Remote
Keyless Entry (RKE) System Operation 07.
If the engine still does not start with the
other remote key, or with the remote key in
the cupholder backup location, the vehicle
needs service. If the engine does start, the
first remote key may be faulty. See your
dealer or have a new remote key
programmed to the vehicle.
The immobilizer system can learn new or
replacement remote keys. Up to eight
remote keys can be programmed for the
vehicle. To program additional remote keys,
see “Programming Remote Keys to the
Vehicle” underRemote Keyless Entry (RKE)
System Operation 07.
Do not leave the remote key or device that
disarms or deactivates the theft-deterrent
system in the vehicle.
Exterior Mirrors
Convex Mirrors
{Warning
A convex mirror can make things, like
other vehicles, look farther away than
they really are. If you cut too sharply
into the right lane, you could hit a
vehicle on the right. Check the inside
mirror or glance over your shoulder
before changing lanes.
The passenger side mirror is convex shaped.
A convex mirror's surface is curved so more
can be seen from the driver seat.
Page 35 of 339
Chevrolet Corvette Owner Manual (GMNA-Localizing-U.S./Canada/Mexico-
14622938) - 2021 - CRC - 9/22/20
34 Keys, Doors, and Windows
3. Grasp the roof panel and pull toward therear of the vehicle until it separates from
the upper receivers, being careful not to
hit the sides of the trunk. Carefully lift
the roof panel out of the trunk.
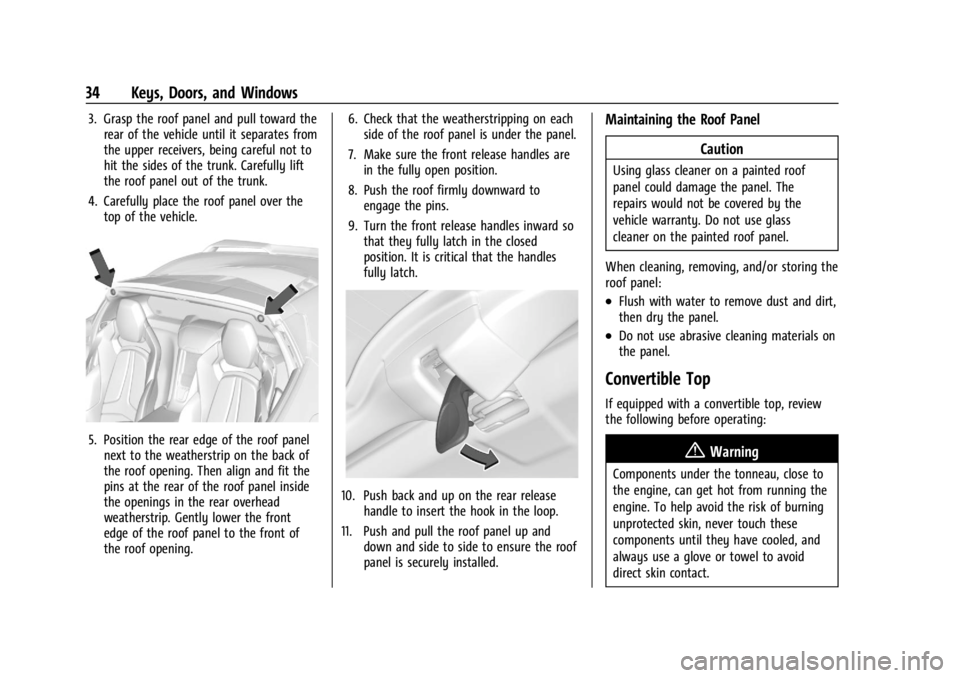
4. Carefully place the roof panel over the top of the vehicle.
5. Position the rear edge of the roof panelnext to the weatherstrip on the back of
the roof opening. Then align and fit the
pins at the rear of the roof panel inside
the openings in the rear overhead
weatherstrip. Gently lower the front
edge of the roof panel to the front of
the roof opening. 6. Check that the weatherstripping on each
side of the roof panel is under the panel.
7. Make sure the front release handles are in the fully open position.
8. Push the roof firmly downward to engage the pins.
9. Turn the front release handles inward so that they fully latch in the closed
position. It is critical that the handles
fully latch.
10. Push back and up on the rear release handle to insert the hook in the loop.
11. Push and pull the roof panel up and down and side to side to ensure the roof
panel is securely installed.
Maintaining the Roof Panel
Caution
Using glass cleaner on a painted roof
panel could damage the panel. The
repairs would not be covered by the
vehicle warranty. Do not use glass
cleaner on the painted roof panel.
When cleaning, removing, and/or storing the
roof panel:
.Flush with water to remove dust and dirt,
then dry the panel.
.Do not use abrasive cleaning materials on
the panel.
Convertible Top
If equipped with a convertible top, review
the following before operating:
{Warning
Components under the tonneau, close to
the engine, can get hot from running the
engine. To help avoid the risk of burning
unprotected skin, never touch these
components until they have cooled, and
always use a glove or towel to avoid
direct skin contact.
Page 36 of 339
Chevrolet Corvette Owner Manual (GMNA-Localizing-U.S./Canada/Mexico-
14622938) - 2021 - CRC - 9/22/20
Keys, Doors, and Windows 35
{Warning
While opening or closing the convertible
top, people can be injured by the moving
parts of the tonneau cover or convertible
top. Maintain visual contact with the top
while it is being operated.
Caution
Follow these guidelines when operating
the convertible top or damage can occur:
.Remove all items from the roof, trunk
lid, or tonneau cover before operating.
.Remove all objects that may contact
the convertible top when it is
operated.
.Do not leave the vehicle with the
convertible top open.
.Do not exceed 50 km/h (31 mph) until
the top has completely closed or
opened.
.Do not open or close the top while
driving in high wind conditions.
(Continued)
Caution (Continued)
.Do not operate the convertible top
multiple times in a short period of
time without starting the engine to
avoid draining the vehicle battery.
.Only store the vehicle with the top
fully closed.
Opening the Convertible Top —Driver Door
Switch
1. Ensure the roof and tonneau cover are clear of any objects.
2. The trunk must be closed.
3. Start the vehicle or place it in ACC/ ACCESSORY.
4. When possible, operate the convertible top when the vehicle is stopped. The top
can be operated while driving below
50 km/h (31 mph) and will stop if that
speed is exceeded. The top operation will
take approximately 17 seconds. Make
sure the top operation can be completed
before that speed is reached.
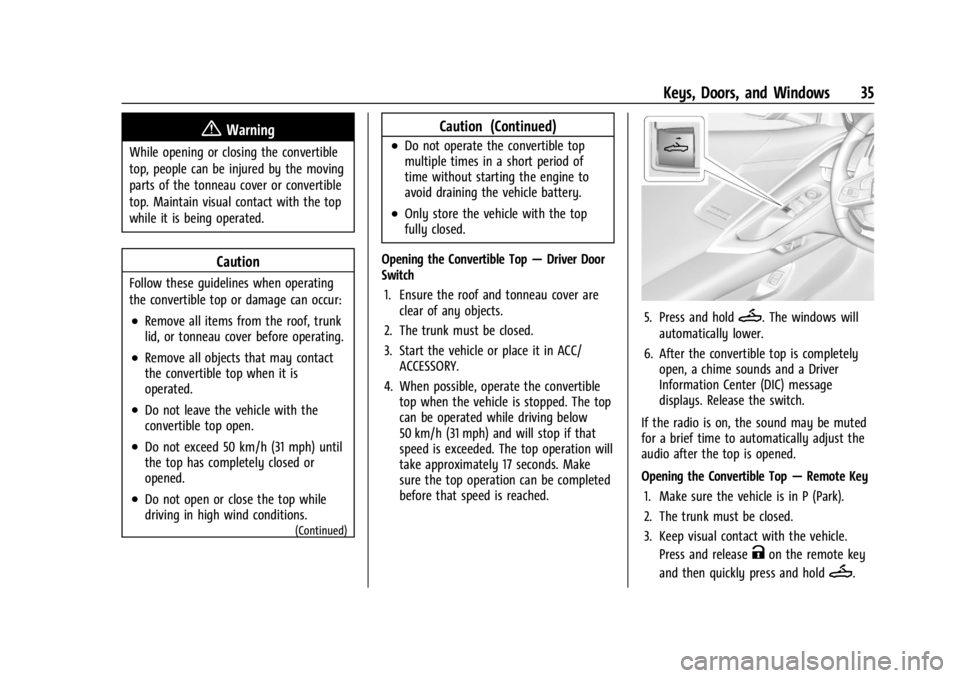
5. Press and holdM. The windows will
automatically lower.
6. After the convertible top is completely open, a chime sounds and a Driver
Information Center (DIC) message
displays. Release the switch.
If the radio is on, the sound may be muted
for a brief time to automatically adjust the
audio after the top is opened.
Opening the Convertible Top —Remote Key
1. Make sure the vehicle is in P (Park).
2. The trunk must be closed.
3. Keep visual contact with the vehicle. Press and release
Kon the remote key
and then quickly press and hold
M.
Page 38 of 339
Chevrolet Corvette Owner Manual (GMNA-Localizing-U.S./Canada/Mexico-
14622938) - 2021 - CRC - 9/22/20
Keys, Doors, and Windows 37
.If the top has recently been opened and
closed repeatedly, it will be temporarily
disabled. A DIC message displays. Normal
operation will be restored within
10 minutes after the system has cooled.
.If the vehicle battery is low, the top
operation may be disabled. Try to start
the vehicle. A DIC message displays.
.If the battery has recently been
reconnected or if the vehicle has been
jump started, the top may not operate
until the power windows have been
programmed. Complete the power
window programming procedure. See
Power Windows029.
Other features may be affected while
operating the convertible top:
.If you start the vehicle while using the
remote key to open the convertible top,
the convertible top will halt the motion.
After starting the vehicle, use the
convertible top switch inside the vehicle
to continue the top motion.
.The windows cannot close while the top
is moving.
.When driving with the top not fully
secured, chimes can be heard above
50 km/h (31 mph).
.The Rear Camera Mirror will not work on the
convertible with the top down. Use
the tab to switch to standard mirror
display.
If the vehicle battery has been disconnected
and reconnected, if the fuses were pulled or
replaced, or if a jump start was performed, a
message indicating the top is not secure
may display. Press and release
Kand then
quickly press and hold
Mon the remote
key, or press and hold
Mon the driver
door switch to open the top, or pull and
hold
Mon the driver door switch to close
the top until this message clears.
Partial Top Cycling
If the convertible top operation is stopped
before completion, the top will temporarily
hold its position. Over time, the tonneau
may drift to a near closed position. Opening the Tonneau Cover
—Engine Access
{Warning
When opening or closing the tonneau
cover, people can be injured by the
moving parts of the tonneau cover.
Maintain visual contact with the tonneau
cover when it is in motion and keep
hands and objects away from the moving
parts.
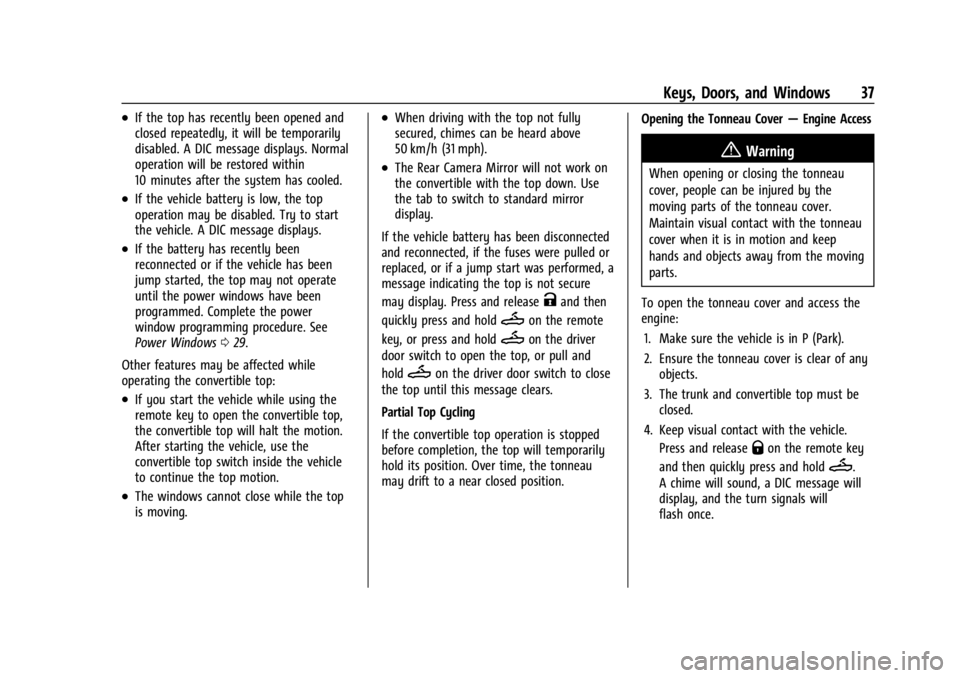
To open the tonneau cover and access the
engine: 1. Make sure the vehicle is in P (Park).
2. Ensure the tonneau cover is clear of any objects.
3. The trunk and convertible top must be closed.
4. Keep visual contact with the vehicle. Press and release
Qon the remote key
and then quickly press and hold
M.
A chime will sound, a DIC message will
display, and the turn signals will
flash once.
Page 39 of 339
Chevrolet Corvette Owner Manual (GMNA-Localizing-U.S./Canada/Mexico-
14622938) - 2021 - CRC - 9/22/20
38 Keys, Doors, and Windows
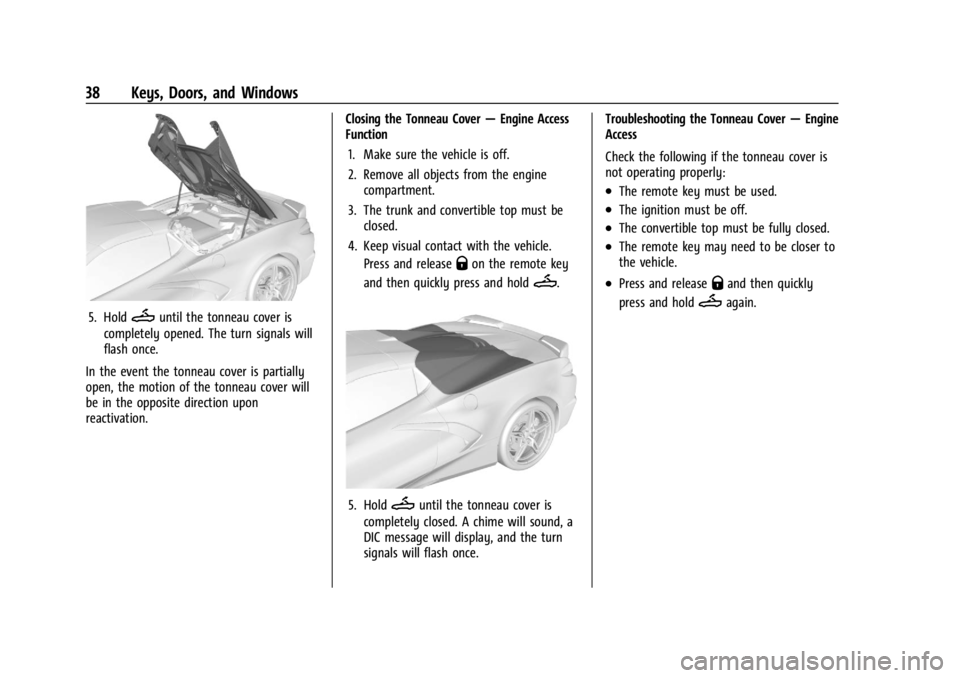
5. HoldMuntil the tonneau cover is
completely opened. The turn signals will
flash once.
In the event the tonneau cover is partially
open, the motion of the tonneau cover will
be in the opposite direction upon
reactivation. Closing the Tonneau Cover
—Engine Access
Function
1. Make sure the vehicle is off.
2. Remove all objects from the engine compartment.
3. The trunk and convertible top must be closed.
4. Keep visual contact with the vehicle. Press and release
Qon the remote key
and then quickly press and hold
M.
5. HoldMuntil the tonneau cover is
completely closed. A chime will sound, a
DIC message will display, and the turn
signals will flash once. Troubleshooting the Tonneau Cover
—Engine
Access
Check the following if the tonneau cover is
not operating properly:
.The remote key must be used.
.The ignition must be off.
.The convertible top must be fully closed.
.The remote key may need to be closer to
the vehicle.
.Press and releaseQand then quickly
press and hold
Magain.
Page 45 of 339
Chevrolet Corvette Owner Manual (GMNA-Localizing-U.S./Canada/Mexico-
14622938) - 2021 - CRC - 9/22/20
44 Seats and Restraints
Heated and Ventilated Front
Seats
{Warning
If temperature change or pain to the skin
cannot be felt, the seat heater may cause
burns. To reduce the risk of burns, use
care when using the seat heater,
especially for long periods of time. Do
not place anything on the seat that
insulates against heat, such as a blanket,
cushion, cover, or similar item. This may
cause the seat heater to overheat. An
overheated seat heater may cause a burn
or may damage the seat.
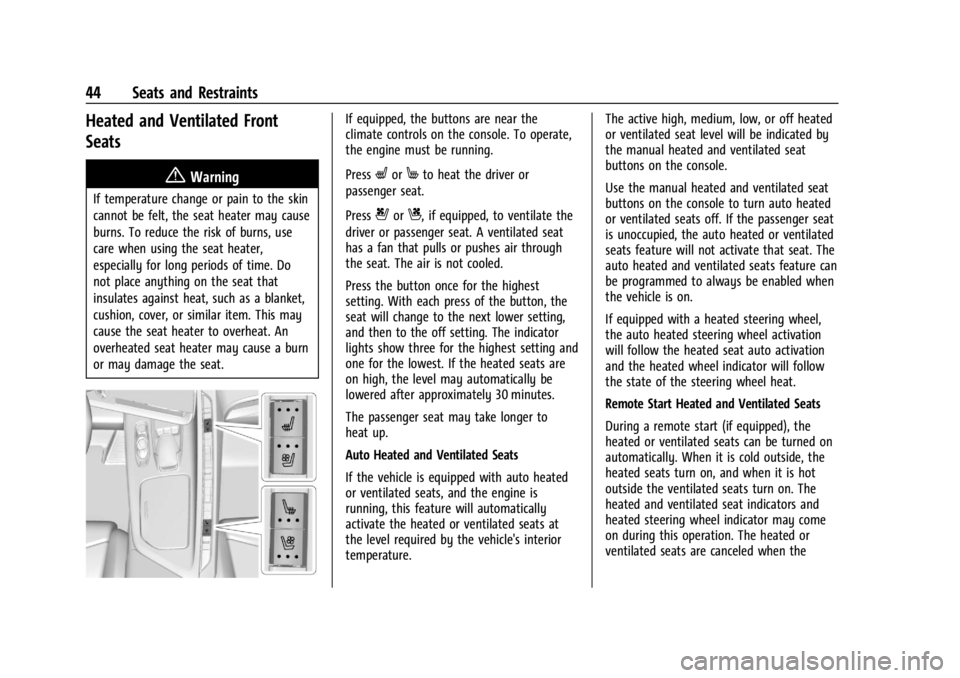
If equipped, the buttons are near the
climate controls on the console. To operate,
the engine must be running.
Press
LorMto heat the driver or
passenger seat.
Press
{orC, if equipped, to ventilate the
driver or passenger seat. A ventilated seat
has a fan that pulls or pushes air through
the seat. The air is not cooled.
Press the button once for the highest
setting. With each press of the button, the
seat will change to the next lower setting,
and then to the off setting. The indicator
lights show three for the highest setting and
one for the lowest. If the heated seats are
on high, the level may automatically be
lowered after approximately 30 minutes.
The passenger seat may take longer to
heat up.
Auto Heated and Ventilated Seats
If the vehicle is equipped with auto heated
or ventilated seats, and the engine is
running, this feature will automatically
activate the heated or ventilated seats at
the level required by the vehicle's interior
temperature. The active high, medium, low, or off heated
or ventilated seat level will be indicated by
the manual heated and ventilated seat
buttons on the console.
Use the manual heated and ventilated seat
buttons on the console to turn auto heated
or ventilated seats off. If the passenger seat
is unoccupied, the auto heated or ventilated
seats feature will not activate that seat. The
auto heated and ventilated seats feature can
be programmed to always be enabled when
the vehicle is on.
If equipped with a heated steering wheel,
the auto heated steering wheel activation
will follow the heated seat auto activation
and the heated wheel indicator will follow
the state of the steering wheel heat.
Remote Start Heated and Ventilated Seats
During a remote start (if equipped), the
heated or ventilated seats can be turned on
automatically. When it is cold outside, the
heated seats turn on, and when it is hot
outside the ventilated seats turn on. The
heated and ventilated seat indicators and
heated steering wheel indicator may come
on during this operation. The heated or
ventilated seats are canceled when the
Page 47 of 339
Chevrolet Corvette Owner Manual (GMNA-Localizing-U.S./Canada/Mexico-
14622938) - 2021 - CRC - 9/22/20
46 Seats and Restraints
Questions and Answers About Seat Belts
Q: Will I be trapped in the vehicle after acrash if I am wearing a seat belt?
A: You could be— whether you are
wearing a seat belt or not. Your chance
of being conscious during and after a
crash, so you canunbuckle and get out,
is much greater if you are belted.
Q: If my vehicle has airbags, why should I have to wear seat belts?
A: Airbags are supplemental systems only.
They work withseat belts —not instead
of them. Whether or not an airbag is
provided, all occupants still have to
buckle up to get the most protection.
Also, in nearly all states and in all
Canadian provinces, the law requires
wearing seat belts.
Buckle To Drive
If equipped, this feature prevents the vehicle
from shifting out of P (Park) when the driver
seat belt is not buckled. The Buckle to Drive
feature must be turned ON in the
infotainment system to work. See Vehicle
Personalization 097 and if equipped, Teen
Driver 0159. If the engine is running, the
driver seat belt is not buckled, and the brake pedal is pressed with the vehicle in P (Park),
a message displays in the Driver Information
Center (DIC). Buckle the driver seat belt to
shift out of P (Park). Shifting from P (Park)
will be prevented once for each ignition
cycle.
For some fleet vehicles, the feature is
always ON and it cannot be turned OFF in
the infotainment system. Shifting from
P (Park) will be prevented each time the
above conditions exist.
On some models, Buckle to Drive may also
prevent shifting out of P (Park) if a front
passenger is unbuckled under similar
conditions. A message displays in the DIC.
Buckle the front passenger seat belt to shift
out of P (Park). This feature may not allow
the vehicle to shift out of P (Park) if an
object, such as a briefcase, handbag, grocery
bag, laptop, or other electronic device, is on
the front passenger seat. If this happens,
remove the object from the seat or buckle
the seat belt to shift out of P (Park).
If the driver, or on some vehicles, the
present front passenger remains unbuckled,
the DIC message will turn off after several
seconds and the vehicle can be shifted out
of P (Park). See
“Seat Belts”and“Child Restraints”
in the Index for information
about the importance of proper
restraint use.
If the driver seat belt, and in some vehicles
the front passenger seat belt, is unbuckled
when driving, the seat belt reminder chime
and light(s) will come on. See Seat Belt
Reminders 084. This feature may not
function properly if the airbag readiness
light is on. See Airbag Readiness Light 084.
How to Wear Seat Belts Properly
Follow these rules for everyone's protection.
There are additional things to know about
seat belts and children, including smaller
children and infants. If a child will be riding
in the vehicle, see Older Children061 or
Infants and Young Children 062. Review
and follow the rules for children in addition
to the following rules.
It is very important for all occupants to
buckle up. Statistics show that unbelted
people are hurt more often in crashes than
those who are wearing seat belts.
There are important things to know about
wearing a seat belt properly.
Page 57 of 339
Chevrolet Corvette Owner Manual (GMNA-Localizing-U.S./Canada/Mexico-
14622938) - 2021 - CRC - 9/22/20
56 Seats and Restraints
components of the airbag module may be
hot for several minutes. For location of the
airbags, seeWhere Are the Airbags? 054.
The parts of the airbag that come into
contact with you may be warm, but not too
hot to touch. There may be some smoke
and dust coming from the vents in the
deflated airbags. Airbag inflation does not
prevent the driver from seeing out of the
windshield or being able to steer the
vehicle, nor does it prevent people from
leaving the vehicle.
{Warning
When an airbag inflates, there may be
dust in the air. This dust could cause
breathing problems for people with a
history of asthma or other breathing
trouble. To avoid this, everyone in the
vehicle should get out as soon as it is
safe to do so. If you have breathing
problems but cannot get out of the
vehicle after an airbag inflates, then get
fresh air by opening a window or a door.
If you experience breathing problems
following an airbag deployment, you
should seek medical attention. The vehicle has a feature that may
automatically unlock the doors, turn on the
interior lamps and hazard warning flashers
after the airbags inflate. The feature may
also activate, without airbag inflation, after
an event that exceeds a predetermined
threshold.
After turning the ignition off and then on
again, the fuel system will return to normal
operation; the doors can be locked, the
interior lamps can be turned off, and the
hazard warning flashers can be turned off
using the controls for those features. If any
of these systems are damaged in the crash
they may not operate as normal.
{Warning
A crash severe enough to inflate the
airbags may have also damaged
important functions in the vehicle, such
as the fuel system, brake and steering
systems, etc. Even if the vehicle appears
to be drivable after a moderate crash,
there may be concealed damage that
could make it difficult to safely operate
the vehicle.
(Continued)
Warning (Continued)
Use caution if you should attempt to
restart the engine after a crash has
occurred.
In many crashes severe enough to inflate
the airbag, windshields are broken by
vehicle deformation. Additional windshield
breakage may also occur from the front
outboard passenger airbag.
.Airbags are designed to inflate only once.
After an airbag inflates, you will need
some new parts for the airbag system.
If you do not get them, the airbag
system will not be there to help protect
you in another crash. A new system will
include airbag modules and possibly other
parts. The service manual for the vehicle
covers the need to replace other parts.
.The vehicle has a crash sensing and
diagnostic module which records
information after a crash. See Vehicle
Data Recording and Privacy 0317 and
Event Data Recorders 0318.
.Let only qualified technicians work on the
airbag system. Improper service can mean
that the airbag system will not work
properly. See your dealer for service.
Page 74 of 339
Chevrolet Corvette Owner Manual (GMNA-Localizing-U.S./Canada/Mexico-
14622938) - 2021 - CRC - 9/22/20
Instruments and Controls 73
Instruments and Controls
Controls
Steering Wheel Adjustment . . . . . . . . . . . . 74
Steering Wheel Controls . . . . . . . . . . . . . . . . 74
Heated Steering Wheel . . . . . . . . . . . . . . . . . 74
Horn . . . . . . . . . . . . . . . . . . . . . . . . . . . . . . . . . . . 74
Windshield Wiper/Washer . . . . . . . . . . . . . . 74
Compass . . . . . . . . . . . . . . . . . . . . . . . . . . . . . . . . 75
Clock . . . . . . . . . . . . . . . . . . . . . . . . . . . . . . . . . . . 75
Power Outlets . . . . . . . . . . . . . . . . . . . . . . . . . . 76
Wireless Charging . . . . . . . . . . . . . . . . . . . . . . 77
Warning Lights, Gauges, and Indicators
Warning Lights, Gauges, andIndicators . . . . . . . . . . . . . . . . . . . . . . . . . . . . . 79
Instrument Cluster . . . . . . . . . . . . . . . . . . . . . 79
Speedometer . . . . . . . . . . . . . . . . . . . . . . . . . . . 82
Odometer . . . . . . . . . . . . . . . . . . . . . . . . . . . . . . 82
Trip Odometer . . . . . . . . . . . . . . . . . . . . . . . . . . 82
Tachometer . . . . . . . . . . . . . . . . . . . . . . . . . . . . 82
Fuel Gauge . . . . . . . . . . . . . . . . . . . . . . . . . . . . . 83
Engine Coolant Temperature Gauge . . . . 83
Transmission Temperature Gauge . . . . . . 83
Seat Belt Reminders . . . . . . . . . . . . . . . . . . . . 84
Airbag Readiness Light . . . . . . . . . . . . . . . . . 84
Passenger Airbag Status Indicator . . . . . . 85 Charging System Light . . . . . . . . . . . . . . . . . 85
Malfunction Indicator Lamp (Check
Engine Light) . . . . . . . . . . . . . . . . . . . . . . . . . 86
Front Lift System Light . . . . . . . . . . . . . . . . . 87
Brake System Warning Light . . . . . . . . . . . 87
Electric Parking Brake Light . . . . . . . . . . . . . 88
Service Electric Parking Brake Light . . . . . 88
Antilock Brake System (ABS) Warning Light . . . . . . . . . . . . . . . . . . . . . . . . . . . . . . . . . 88
Performance Shifting Light . . . . . . . . . . . . . 89
Traction Off Light . . . . . . . . . . . . . . . . . . . . . . 89
Traction Control System (TCS)/Electronic Stability Control Light . . . . . . . . . . . . . . . . 89
Electronic Stability Control (ESC) Off Light . . . . . . . . . . . . . . . . . . . . . . . . . . . . . . . . . 90
Tire Pressure Light . . . . . . . . . . . . . . . . . . . . . 90
Engine Oil Pressure Light . . . . . . . . . . . . . . . 90
Security Light . . . . . . . . . . . . . . . . . . . . . . . . . . . 91
High-Beam On Light . . . . . . . . . . . . . . . . . . . . 91
Lamps On Reminder . . . . . . . . . . . . . . . . . . . . 91
Cruise Control Light . . . . . . . . . . . . . . . . . . . . . 91
Door Ajar Light . . . . . . . . . . . . . . . . . . . . . . . . . 91
Information Displays
Driver Information Center (DIC) . . . . . . . . . 92
Head-Up Display (HUD) . . . . . . . . . . . . . . . . . 93
Vehicle Messages
Vehicle Messages . . . . . . . . . . . . . . . . . . . . . . . 97
Engine Power Messages . . . . . . . . . . . . . . . . 97
Vehicle Speed Messages . . . . . . . . . . . . . . . . 97
Vehicle Personalization
Vehicle Personalization . . . . . . . . . . . . . . . . . 97
Universal Remote System
Universal Remote System . . . . . . . . . . . . . 102
Universal Remote System Programming . . . . . . . . . . . . . . . . . . . . . . . . 102
Universal Remote System Operation . . . . . . . . . . . . . . . . . . . . . . . . . . . 104