air conditioning CHEVROLET CORVETTE C8 2021 Owners Manual
[x] Cancel search | Manufacturer: CHEVROLET, Model Year: 2021, Model line: CORVETTE C8, Model: CHEVROLET CORVETTE C8 2021Pages: 339, PDF Size: 6.44 MB
Page 3 of 339
Chevrolet Corvette Owner Manual (GMNA-Localizing-U.S./Canada/Mexico-
14622938) - 2021 - CRC - 9/22/20
2 Introduction
Using this Manual
To quickly locate information about the
vehicle, use the Index in the back of the
manual. It is an alphabetical list of what is
in the manual and the page number where
it can be found.
Danger, Warning, and Caution
Warning messages found on vehicle labels
and in this manual describe hazards and
what to do to avoid or reduce them.
{Danger
Danger indicates a hazard with a high
level of risk which will result in serious
injury or death.
{Warning
Warning indicates a hazard that could
result in injury or death.
Caution
Caution indicates a hazard that could
result in property or vehicle damage.
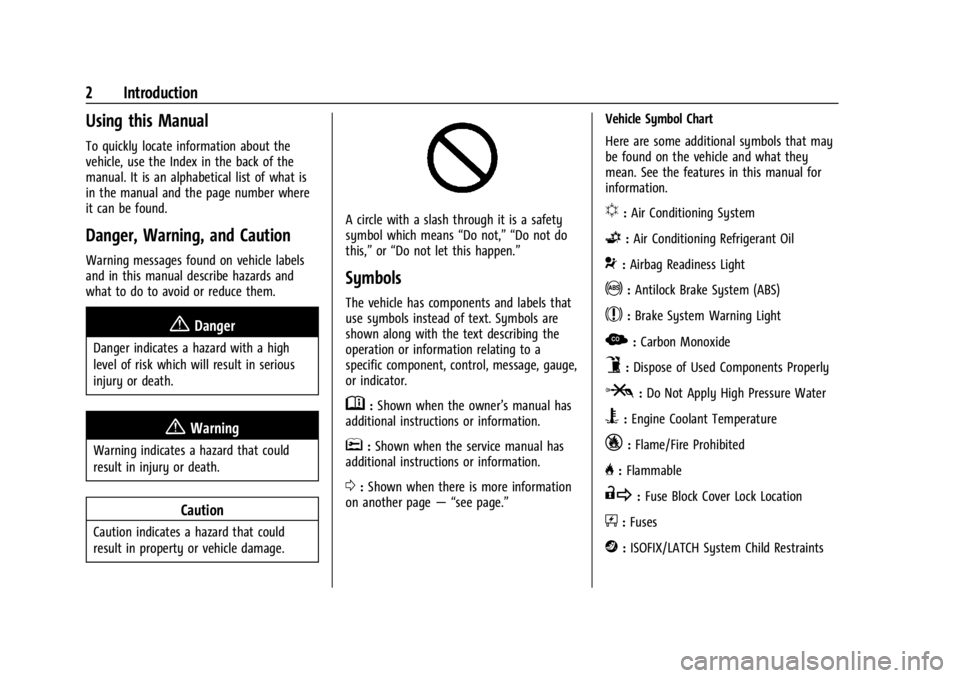
A circle with a slash through it is a safety
symbol which means“Do not,” “Do not do
this,” or“Do not let this happen.”
Symbols
The vehicle has components and labels that
use symbols instead of text. Symbols are
shown along with the text describing the
operation or information relating to a
specific component, control, message, gauge,
or indicator.
M:Shown when the owner’s manual has
additional instructions or information.
*: Shown when the service manual has
additional instructions or information.
0: Shown when there is more information
on another page — “see page.” Vehicle Symbol Chart
Here are some additional symbols that may
be found on the vehicle and what they
mean. See the features in this manual for
information.
u:
Air Conditioning System
G:Air Conditioning Refrigerant Oil
9:Airbag Readiness Light
!:Antilock Brake System (ABS)
$:Brake System Warning Light
z: Carbon Monoxide
9:Dispose of Used Components Properly
P:Do Not Apply High Pressure Water
B:Engine Coolant Temperature
_:Flame/Fire Prohibited
H: Flammable
R:Fuse Block Cover Lock Location
+:Fuses
j:ISOFIX/LATCH System Child Restraints
Page 172 of 339
Chevrolet Corvette Owner Manual (GMNA-Localizing-U.S./Canada/Mexico-
14622938) - 2021 - CRC - 9/22/20
Climate Controls 171
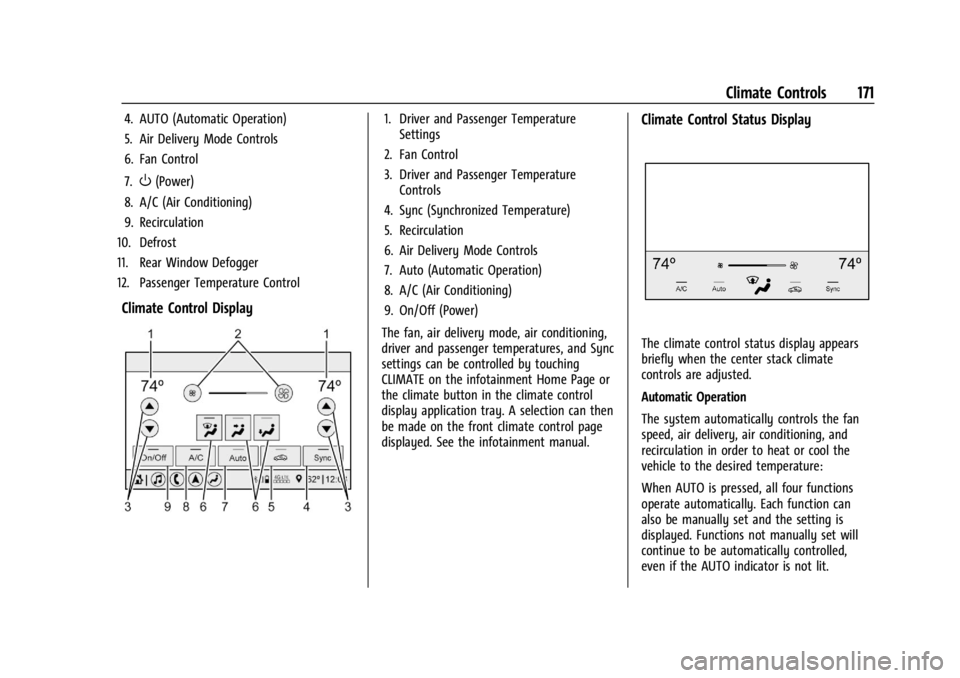
4. AUTO (Automatic Operation)
5. Air Delivery Mode Controls
6. Fan Control
7.
O(Power)
8. A/C (Air Conditioning)
9. Recirculation
10. Defrost
11. Rear Window Defogger
12. Passenger Temperature Control
Climate Control Display
1. Driver and Passenger Temperature Settings
2. Fan Control
3. Driver and Passenger Temperature Controls
4. Sync (Synchronized Temperature)
5. Recirculation
6. Air Delivery Mode Controls
7. Auto (Automatic Operation)
8. A/C (Air Conditioning)
9. On/Off (Power)
The fan, air delivery mode, air conditioning,
driver and passenger temperatures, and Sync
settings can be controlled by touching
CLIMATE on the infotainment Home Page or
the climate button in the climate control
display application tray. A selection can then
be made on the front climate control page
displayed. See the infotainment manual.Climate Control Status Display
The climate control status display appears
briefly when the center stack climate
controls are adjusted.
Automatic Operation
The system automatically controls the fan
speed, air delivery, air conditioning, and
recirculation in order to heat or cool the
vehicle to the desired temperature:
When AUTO is pressed, all four functions
operate automatically. Each function can
also be manually set and the setting is
displayed. Functions not manually set will
continue to be automatically controlled,
even if the AUTO indicator is not lit.
Page 173 of 339
Chevrolet Corvette Owner Manual (GMNA-Localizing-U.S./Canada/Mexico-
14622938) - 2021 - CRC - 9/22/20
172 Climate Controls
For automatic operation:1. Press AUTO.
2. Set the temperature. Allow the system time to stabilize. Adjust the temperature
as needed for best comfort.
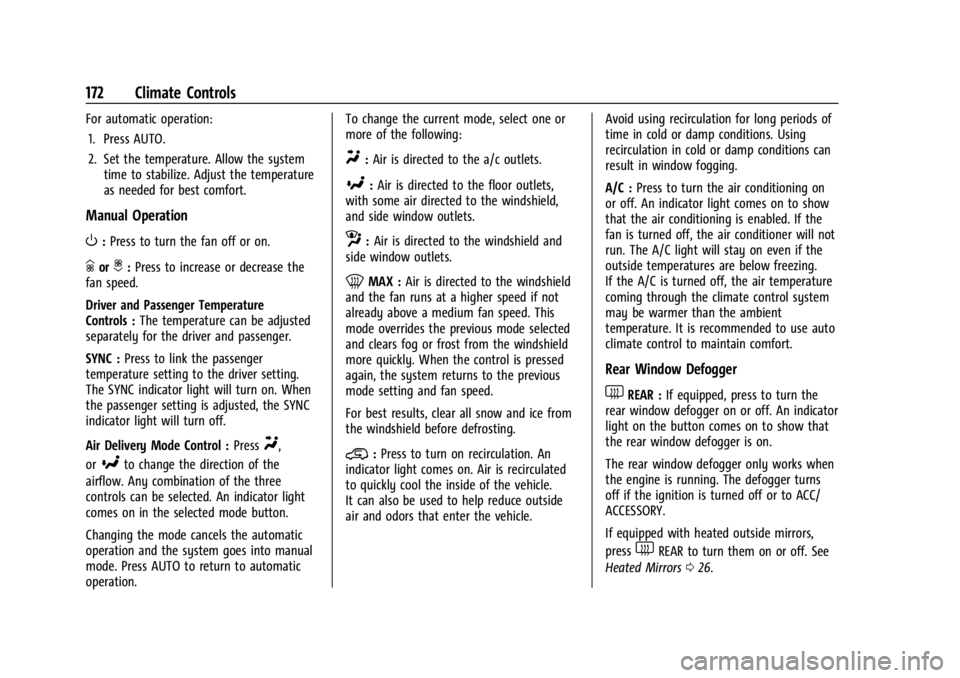
Manual Operation
O:Press to turn the fan off or on.
hori:Press to increase or decrease the
fan speed.
Driver and Passenger Temperature
Controls : The temperature can be adjusted
separately for the driver and passenger.
SYNC : Press to link the passenger
temperature setting to the driver setting.
The SYNC indicator light will turn on. When
the passenger setting is adjusted, the SYNC
indicator light will turn off.
Air Delivery Mode Control : Press
Y,
or
[to change the direction of the
airflow. Any combination of the three
controls can be selected. An indicator light
comes on in the selected mode button.
Changing the mode cancels the automatic
operation and the system goes into manual
mode. Press AUTO to return to automatic
operation. To change the current mode, select one or
more of the following:
Y:
Air is directed to the a/c outlets.
[:Air is directed to the floor outlets,
with some air directed to the windshield,
and side window outlets.
z: Air is directed to the windshield and
side window outlets.
0MAX : Air is directed to the windshield
and the fan runs at a higher speed if not
already above a medium fan speed. This
mode overrides the previous mode selected
and clears fog or frost from the windshield
more quickly. When the control is pressed
again, the system returns to the previous
mode setting and fan speed.
For best results, clear all snow and ice from
the windshield before defrosting.
@: Press to turn on recirculation. An
indicator light comes on. Air is recirculated
to quickly cool the inside of the vehicle.
It can also be used to help reduce outside
air and odors that enter the vehicle. Avoid using recirculation for long periods of
time in cold or damp conditions. Using
recirculation in cold or damp conditions can
result in window fogging.
A/C :
Press to turn the air conditioning on
or off. An indicator light comes on to show
that the air conditioning is enabled. If the
fan is turned off, the air conditioner will not
run. The A/C light will stay on even if the
outside temperatures are below freezing.
If the A/C is turned off, the air temperature
coming through the climate control system
may be warmer than the ambient
temperature. It is recommended to use auto
climate control to maintain comfort.
Rear Window Defogger
1REAR : If equipped, press to turn the
rear window defogger on or off. An indicator
light on the button comes on to show that
the rear window defogger is on.
The rear window defogger only works when
the engine is running. The defogger turns
off if the ignition is turned off or to ACC/
ACCESSORY.
If equipped with heated outside mirrors,
press
1REAR to turn them on or off. See
Heated Mirrors 026.
Page 175 of 339
Chevrolet Corvette Owner Manual (GMNA-Localizing-U.S./Canada/Mexico-
14622938) - 2021 - CRC - 9/22/20
174 Climate Controls
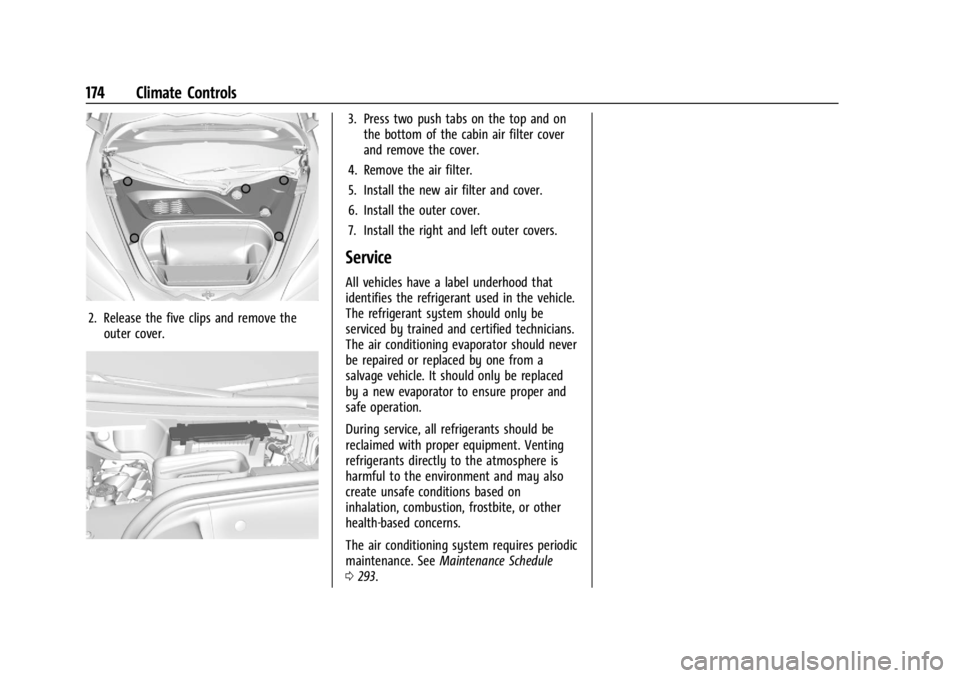
2. Release the five clips and remove theouter cover.
3. Press two push tabs on the top and onthe bottom of the cabin air filter cover
and remove the cover.
4. Remove the air filter.
5. Install the new air filter and cover.
6. Install the outer cover.
7. Install the right and left outer covers.
Service
All vehicles have a label underhood that
identifies the refrigerant used in the vehicle.
The refrigerant system should only be
serviced by trained and certified technicians.
The air conditioning evaporator should never
be repaired or replaced by one from a
salvage vehicle. It should only be replaced
by a new evaporator to ensure proper and
safe operation.
During service, all refrigerants should be
reclaimed with proper equipment. Venting
refrigerants directly to the atmosphere is
harmful to the environment and may also
create unsafe conditions based on
inhalation, combustion, frostbite, or other
health-based concerns.
The air conditioning system requires periodic
maintenance. See Maintenance Schedule
0 293.
Page 249 of 339
Chevrolet Corvette Owner Manual (GMNA-Localizing-U.S./Canada/Mexico-
14622938) - 2021 - CRC - 9/22/20
248 Vehicle Care
7. Verify coolant level after the engine isshut off and the coolant is cold.
If necessary, repeat coolant fill procedure
Steps 3−7.
If the coolant still is not at the proper
level when the system cools down again,
see your dealer.
Caution
If the pressure cap is not tightly installed,
coolant loss and engine damage may
occur. Be sure the cap is properly and
tightly secured.
Engine Overheating
The vehicle has several indicators to warn of
engine overheating.
There is an engine coolant temperature
gauge on the instrument cluster. See Engine
Coolant Temperature Gauge 083. The
vehicle may also display a message on the
Driver Information Center (DIC).
If the decision is made not to lift the hatch
but to get service help right away, see
Roadside Assistance Program 0311.
If the decision is made to lift the hatch,
make sure the vehicle is parked on a level
surface. Then check to see if the engine cooling fans
are running. There are two cooling fans
located in the front (one at each corner) and
two cooling fans in the rear (one on each
side of the engine). If the engine is
overheating, the fans should be running.
If they are not, do not continue to run the
engine, and have the vehicle serviced.
Caution
Do not run the engine if there is a leak
in the engine cooling system. This can
cause a loss of all coolant and can
damage the system and vehicle. Have
any leaks fixed right away.
If Steam Is Coming from the Engine
{Warning
Steam and scalding liquids from a hot
cooling system are under pressure.
Turning the pressure cap, even a little,
can cause them to come out at high
speed and you could be burned. Never
turn the cap when the cooling system,
including the pressure cap, is hot. Wait
for the cooling system and pressure cap
to cool.
If Steam Is Coming from the Engine
Compartment with no Overheat Warning
Water from rain and car washes could enter
the engine compartment and contact hot
surfaces. If steam is coming from the engine
compartment with no accompanying
overheat warning, no service is needed.
If No Steam Is Coming from the Engine
If an engine overheat warning is displayed
but no steam can be seen or heard, the
problem may not be too serious. Sometimes
the engine can get a little too hot when the
vehicle:
.Climbs a long hill on a hot day.
.Stops after high-speed driving.
.Idles for long periods in traffic.
If the overheat warning is displayed with no
sign of steam: 1. Turn the air conditioning off.
2. Turn the heater on to the highest temperature and to the highest fan
speed. Open the windows as necessary.
3. When it is safe to do so, pull off the road, shift to P (Park) or N (Neutral), and
let the engine idle.
Page 260 of 339
Chevrolet Corvette Owner Manual (GMNA-Localizing-U.S./Canada/Mexico-
14622938) - 2021 - CRC - 9/22/20
Vehicle Care 259
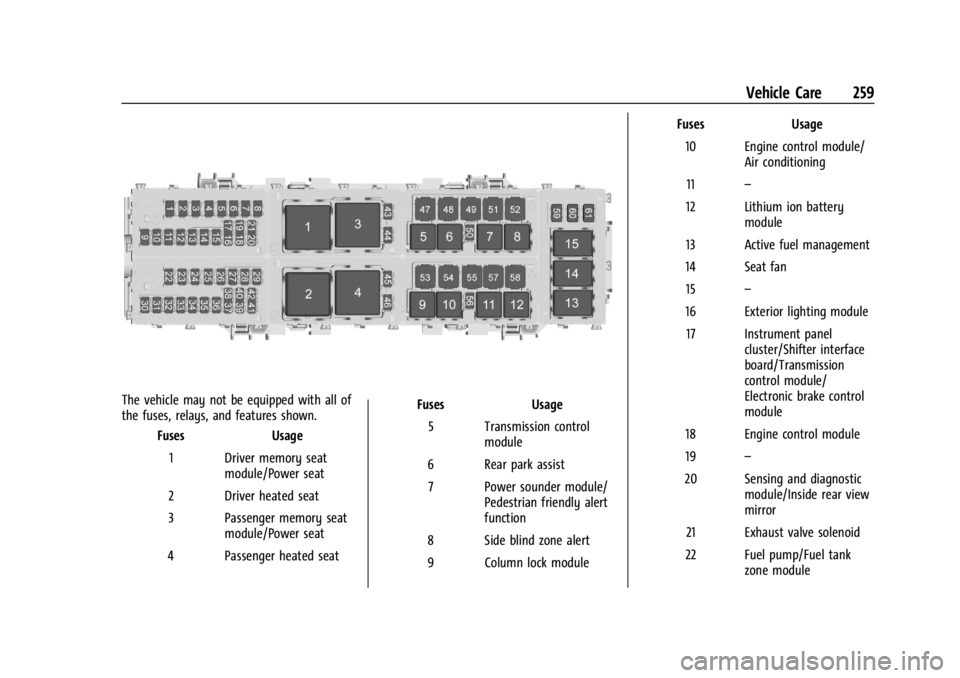
The vehicle may not be equipped with all of
the fuses, relays, and features shown.Fuses Usage
1 Driver memory seat module/Power seat
2 Driver heated seat
3 Passenger memory seat module/Power seat
4 Passenger heated seat Fuses
Usage
5 Transmission control module
6 Rear park assist 7 Power sounder module/ Pedestrian friendly alert
function
8 Side blind zone alert
9 Column lock module Fuses
Usage
10 Engine control module/ Air conditioning
11 –
12 Lithium ion battery module
13 Active fuel management
14 Seat fan 15 –
16 Exterior lighting module 17 Instrument panel cluster/Shifter interface
board/Transmission
control module/
Electronic brake control
module
18 Engine control module
19 –
20 Sensing and diagnostic module/Inside rear view
mirror
21 Exhaust valve solenoid
22 Fuel pump/Fuel tank zone module
Page 261 of 339
Chevrolet Corvette Owner Manual (GMNA-Localizing-U.S./Canada/Mexico-
14622938) - 2021 - CRC - 9/22/20
260 Vehicle Care
FusesUsage
23 Tonneau left
24 Tonneau right 25 Convertible top right
26 Convertible top left 27 Electronic suspension control
28 –
29 CGM
30 O2 sensor 31 O2 sensor/Engine oil/ Canister purge/Active
fuel management
32 Ignition even
33 Ignition odd
34 Engine control module 1 35 Engine control module/ Mass air flow sensor/O2
sensor/Air conditioning
36 –
37 Canister vent
38 Latch control module Fuses
Usage
39 Right window switch/ Door lock
40 Left window switch/ Door lock
41 –
42 Engine control module 2
43 –
44 Air conditioning clutch 45 –
46 –
47 –
48 –
49 Auxiliary cooling fan right
50 –
51 –
52 –
53 Starter solenoid
54 Auxiliary cooling fan left Fuses
Usage
55 Automatic leveling control
56 –
57 Rear window defogger
58 –
59 Left/right window
60 Passenger power seat 61 Driver power seat
Relays Usage
1 –
2 Powertrain relay
3 Run/crank relay
4 Rear defogger relay 5 Air conditioning clutch relay
6 –
7 –
8 –
9 –
10 –
Page 266 of 339
Chevrolet Corvette Owner Manual (GMNA-Localizing-U.S./Canada/Mexico-
14622938) - 2021 - CRC - 9/22/20
Vehicle Care 265
(4) Construction Code:A letter code is
used to indicate the type of ply
construction in the tire. The letter "R"
means radial ply construction; the letter
"D" means diagonal or bias ply
construction.
(5) Rim Diameter
:Diameter of the
wheel in inches.
(6) Service Description
:These
characters represent the load index and
speed rating of the tire. The load index
represents the load carrying capacity a
tire is certified to carry. The speed
rating is the maximum speed a tire is
certified to carry a load.
Tire Terminology and Definitions
Air Pressure:The amount of air inside
the tire pressing outward on each
square inch of the tire. Air pressure is
expressed in kPa (kilopascal) or psi
(pounds per square inch).
Accessory Weight
:The combined
weight of optional accessories. Some
examples of optional accessories are automatic transmission, power
windows, power seats, and air
conditioning.
Aspect Ratio
:The relationship of a
tire's height to its width.
Belt
:A rubber coated layer of cords
between the plies and the tread. Cords
may be made from steel or other
reinforcing materials.
Bead
:The tire bead contains steel
wires wrapped by steel cords that hold
the tire onto the rim.
Bias Ply Tire
:A pneumatic tire in which
the plies are laid at alternate angles
less than 90 degrees to the centerline
of the tread.
Cold Tire Pressure
:The amount of air
pressure in a tire, measured in kPa
(kilopascal) or psi (pounds per square
inch) before a tire has built up heat
from driving. See Tire Pressure0267. Curb Weight
:The weight of a motor
vehicle with standard and optional
equipment including the maximum
capacity of fuel, oil, and coolant, but
without passengers and cargo.
DOT Markings
:A code molded into the
sidewall of a tire signifying that the tire
is in compliance with the U.S.
Department of Transportation (DOT)
Motor Vehicle Safety Standards. The
DOT code includes the Tire Identification
Number (TIN), an alphanumeric
designator which can also identify the
tire manufacturer, production plant,
brand, and date of production.
GVWR
:Gross Vehicle Weight Rating.
See Vehicle Load Limits 0188.
GAWR FRT
:Gross Axle Weight Rating
for the front axle. See Vehicle Load
Limits 0188.
GAWR RR
:Gross Axle Weight Rating
for the rear axle. See Vehicle Load
Limits 0188.
Page 295 of 339
Chevrolet Corvette Owner Manual (GMNA-Localizing-U.S./Canada/Mexico-
14622938) - 2021 - CRC - 9/22/20
294 Service and Maintenance
transmission performance. The transmission
fluid must be changed at least every three
years and the Fluid Life System must be
reset. Your dealer has trained service
technicians who will change the fluid and
reset the system. If the system is ever reset
accidentally, the fluid must be changed at
72 000 km (45,000 mi) since the last fluid
change. SeeDual Clutch Transmission Fluid
Life System 0242.
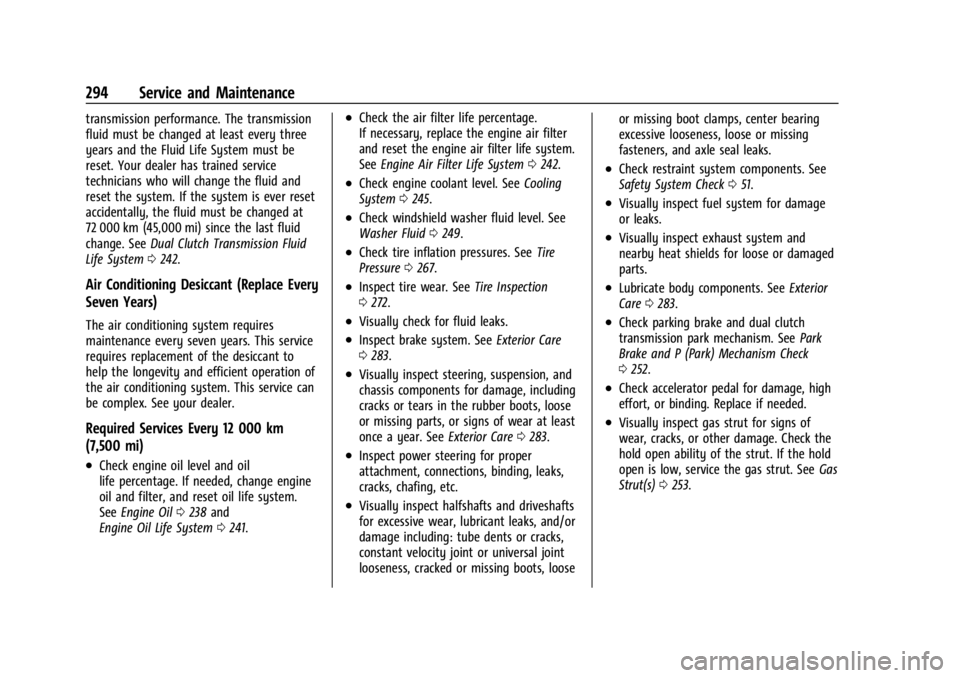
Air Conditioning Desiccant (Replace Every
Seven Years)
The air conditioning system requires
maintenance every seven years. This service
requires replacement of the desiccant to
help the longevity and efficient operation of
the air conditioning system. This service can
be complex. See your dealer.
Required Services Every 12 000 km
(7,500 mi)
.Check engine oil level and oil
life percentage. If needed, change engine
oil and filter, and reset oil life system.
See Engine Oil 0238 and
Engine Oil Life System 0241.
.Check the air filter life percentage.
If necessary, replace the engine air filter
and reset the engine air filter life system.
See Engine Air Filter Life System 0242.
.Check engine coolant level. See Cooling
System 0245.
.Check windshield washer fluid level. See
Washer Fluid 0249.
.Check tire inflation pressures. See Tire
Pressure 0267.
.Inspect tire wear. See Tire Inspection
0 272.
.Visually check for fluid leaks.
.Inspect brake system. See Exterior Care
0 283.
.Visually inspect steering, suspension, and
chassis components for damage, including
cracks or tears in the rubber boots, loose
or missing parts, or signs of wear at least
once a year. See Exterior Care0283.
.Inspect power steering for proper
attachment, connections, binding, leaks,
cracks, chafing, etc.
.Visually inspect halfshafts and driveshafts
for excessive wear, lubricant leaks, and/or
damage including: tube dents or cracks,
constant velocity joint or universal joint
looseness, cracked or missing boots, loose or missing boot clamps, center bearing
excessive looseness, loose or missing
fasteners, and axle seal leaks.
.Check restraint system components. See
Safety System Check
051.
.Visually inspect fuel system for damage
or leaks.
.Visually inspect exhaust system and
nearby heat shields for loose or damaged
parts.
.Lubricate body components. See Exterior
Care 0283.
.Check parking brake and dual clutch
transmission park mechanism. See Park
Brake and P (Park) Mechanism Check
0 252.
.Check accelerator pedal for damage, high
effort, or binding. Replace if needed.
.Visually inspect gas strut for signs of
wear, cracks, or other damage. Check the
hold open ability of the strut. If the hold
open is low, service the gas strut. See Gas
Strut(s) 0253.
Page 296 of 339
Chevrolet Corvette Owner Manual (GMNA-Localizing-U.S./Canada/Mexico-
14622938) - 2021 - CRC - 9/22/20
Service and Maintenance 295
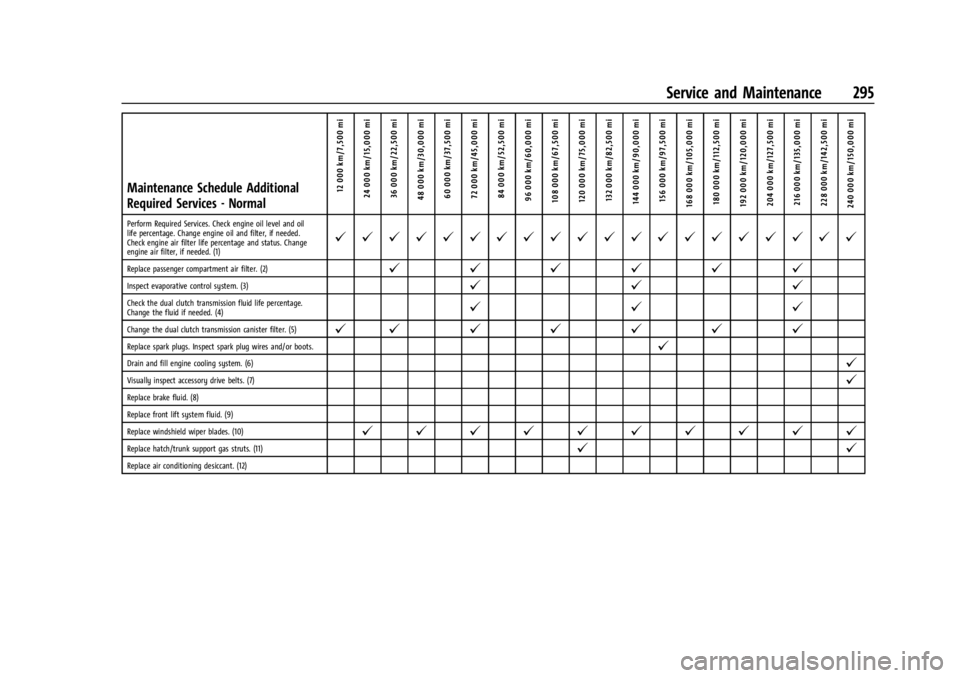
Maintenance Schedule Additional
Required Services - Normal12 000 km/7,500 mi
24 000 km/15,000 mi
36 000 km/22,500 mi
48 000 km/30,000 mi 60 000 km/37,500 mi
72 000 km/45,000 mi84 000 km/52,500 mi
96 000 km/60,000 mi
108 000 km/67,500 mi 120 000 km/75,000 mi 132 000 km/82,500 mi
144 000 km/90,000 mi 156 000 km/97,500 mi
168 000 km/105,000 mi 180 000 km/112,500 mi
192 000 km/120,000 mi 204 000 km/127,500 mi 216 000 km/135,000 mi
228 000 km/142,500 mi
240 000 km/150,000 mi
Perform Required Services. Check engine oil level and oil
life percentage. Change engine oil and filter, if needed.
Check engine air filter life percentage and status. Change
engine air filter, if needed. (1)@ @ @ @ @ @ @ @ @ @ @ @ @ @ @ @ @ @ @ @
Replace passenger compartment air filter. (2)@ @@@@@
Inspect evaporative control system. (3)@ @@
Check the dual clutch transmission fluid life percentage.
Change the fluid if needed. (4)@@@
Change the dual clutch transmission canister filter. (5)@ @@@@@@
Replace spark plugs. Inspect spark plug wires and/or boots.@
Drain and fill engine cooling system. (6)@
Visually inspect accessory drive belts. (7)@
Replace brake fluid. (8)
Replace front lift system fluid. (9)
Replace windshield wiper blades. (10)
@ @ @ @ @ @ @ @ @ @
Replace hatch/trunk support gas struts. (11)@ @
Replace air conditioning desiccant. (12)