buttons CHEVROLET CORVETTE GRAND SPORT 2015 Owners Manual
[x] Cancel search | Manufacturer: CHEVROLET, Model Year: 2015, Model line: CORVETTE GRAND SPORT, Model: CHEVROLET CORVETTE GRAND SPORT 2015Pages: 391, PDF Size: 5.36 MB
Page 16 of 391
Black plate (9,1)Chevrolet Corvette Owner Manual (GMNA-Localizing-U.S./Canada/Mexico-
7576293) - 2015 - crc - 6/17/14
In Brief 1-9
SeePower Seat Adjustment on
page 3-2.
Lumbar and Bolster
Adjustment
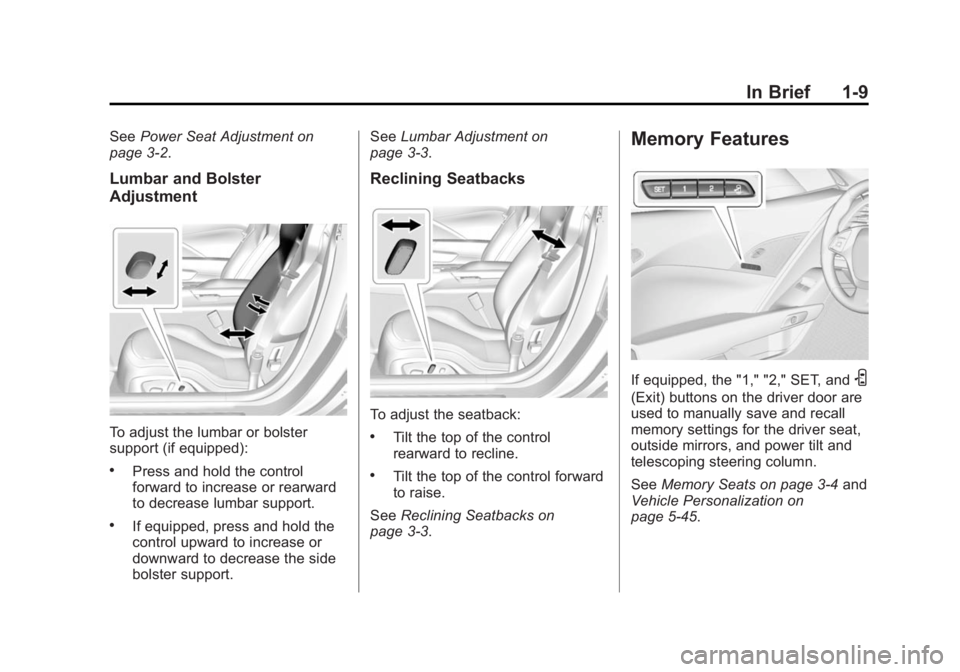
To adjust the lumbar or bolster
support (if equipped):
.Press and hold the control
forward to increase or rearward
to decrease lumbar support.
.If equipped, press and hold the
control upward to increase or
downward to decrease the side
bolster support. See
Lumbar Adjustment on
page 3-3.
Reclining Seatbacks
To adjust the seatback:
.Tilt the top of the control
rearward to recline.
.Tilt the top of the control forward
to raise.
See Reclining Seatbacks on
page 3-3.
Memory Features
If equipped, the "1," "2," SET, andS
(Exit) buttons on the driver door are
used to manually save and recall
memory settings for the driver seat,
outside mirrors, and power tilt and
telescoping steering column.
See Memory Seats on page 3-4 and
Vehicle Personalization on
page 5-45.
Page 17 of 391
Black plate (10,1)Chevrolet Corvette Owner Manual (GMNA-Localizing-U.S./Canada/Mexico-
7576293) - 2015 - crc - 6/17/14
1-10 In Brief
Heated and Ventilated
Seats
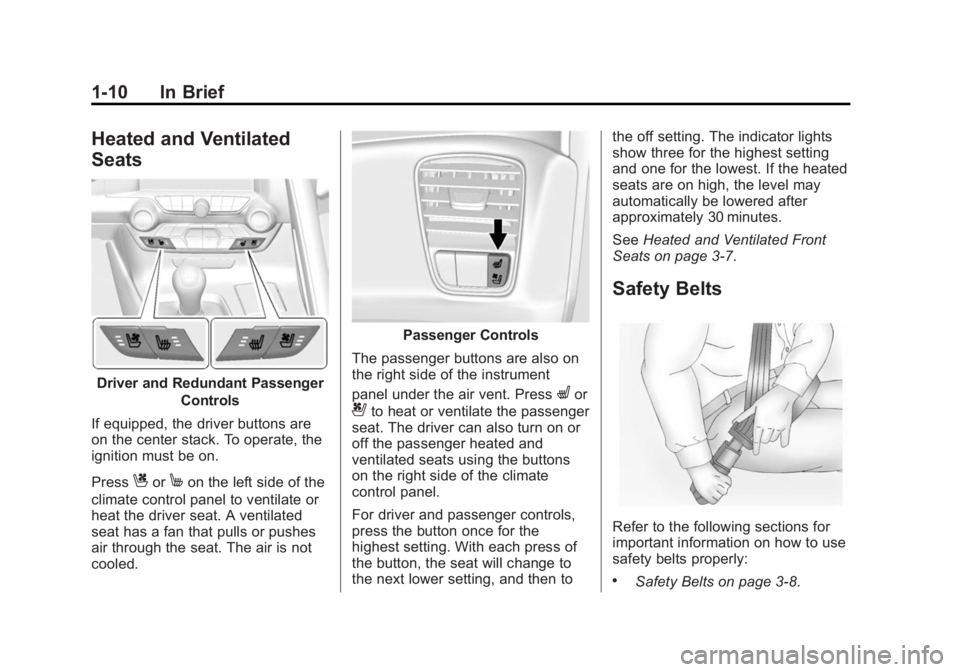
Driver and Redundant PassengerControls
If equipped, the driver buttons are
on the center stack. To operate, the
ignition must be on.
Press
CorMon the left side of the
climate control panel to ventilate or
heat the driver seat. A ventilated
seat has a fan that pulls or pushes
air through the seat. The air is not
cooled.
Passenger Controls
The passenger buttons are also on
the right side of the instrument
panel under the air vent. Press
Lor
{to heat or ventilate the passenger
seat. The driver can also turn on or
off the passenger heated and
ventilated seats using the buttons
on the right side of the climate
control panel.
For driver and passenger controls,
press the button once for the
highest setting. With each press of
the button, the seat will change to
the next lower setting, and then to the off setting. The indicator lights
show three for the highest setting
and one for the lowest. If the heated
seats are on high, the level may
automatically be lowered after
approximately 30 minutes.
See
Heated and Ventilated Front
Seats on page 3-7.
Safety Belts
Refer to the following sections for
important information on how to use
safety belts properly:
.Safety Belts on page 3-8.
Page 20 of 391
Black plate (13,1)Chevrolet Corvette Owner Manual (GMNA-Localizing-U.S./Canada/Mexico-
7576293) - 2015 - crc - 6/17/14
In Brief 1-13
Interior Lighting
Courtesy Lamps
When any door or the hatch/trunk is
opened, the interior lamps will come
on, unless it is bright outside.
To turn the courtesy lamps on or off,
turn the instrument panel brightness
knob completely clockwise or
counterclockwise.
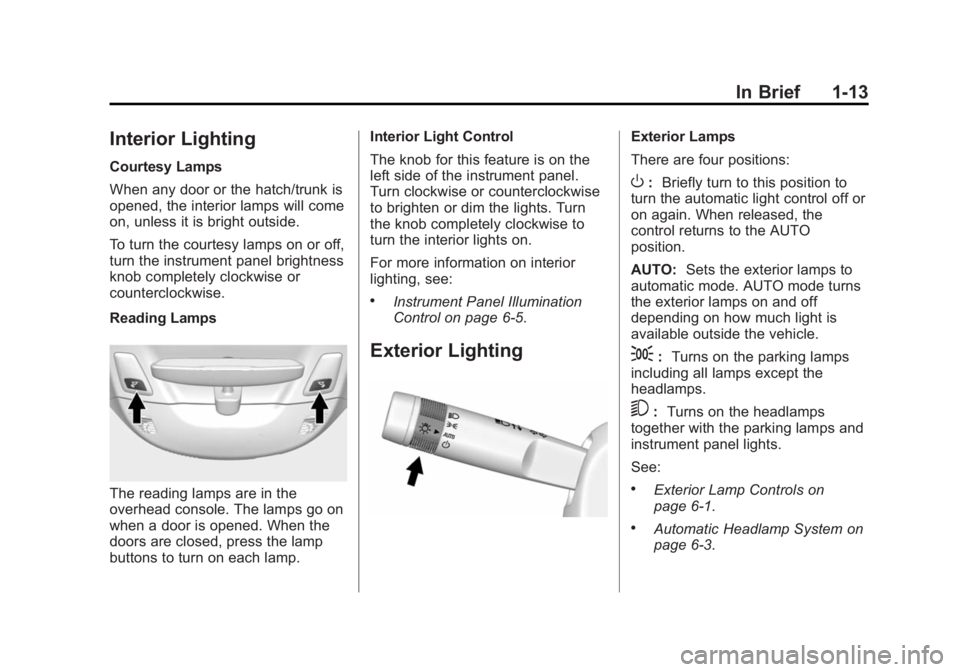
Reading Lamps
The reading lamps are in the
overhead console. The lamps go on
when a door is opened. When the
doors are closed, press the lamp
buttons to turn on each lamp.Interior Light Control
The knob for this feature is on the
left side of the instrument panel.
Turn clockwise or counterclockwise
to brighten or dim the lights. Turn
the knob completely clockwise to
turn the interior lights on.
For more information on interior
lighting, see:
.Instrument Panel Illumination
Control on page 6-5.
Exterior Lighting
Exterior Lamps
There are four positions:
O:
Briefly turn to this position to
turn the automatic light control off or
on again. When released, the
control returns to the AUTO
position.
AUTO: Sets the exterior lamps to
automatic mode. AUTO mode turns
the exterior lamps on and off
depending on how much light is
available outside the vehicle.
;: Turns on the parking lamps
including all lamps except the
headlamps.
5: Turns on the headlamps
together with the parking lamps and
instrument panel lights.
See:
.Exterior Lamp Controls on
page 6-1.
.Automatic Headlamp System on
page 6-3.
Page 35 of 391
Black plate (6,1)Chevrolet Corvette Owner Manual (GMNA-Localizing-U.S./Canada/Mexico-
7576293) - 2015 - crc - 6/17/14
2-6 Keys, Doors, and Windows
programmed through your dealer.
The vehicle can be reprogrammed
so that lost or stolen transmitters no
longer work. Each vehicle can have
up to eight transmitters programmed
to it.
Programming with a Recognized
Transmitter
A new transmitter can be
programmed to the vehicle when
there is one recognized transmitter.
1. The vehicle must be off and boththe recognized and new
transmitters must be with you.
2. Remove the key base from the recognized RKE transmitter.
3. Place the recognized transmitter in the cupholder.
4. Insert the vehicle key into the key cylinder above the license
plate.
5. Open the hatch/trunk.
6. Turn the key five times within 10 seconds. 7. The DIC displays READY FOR
REMOTE # 3 or 4, up to 8.
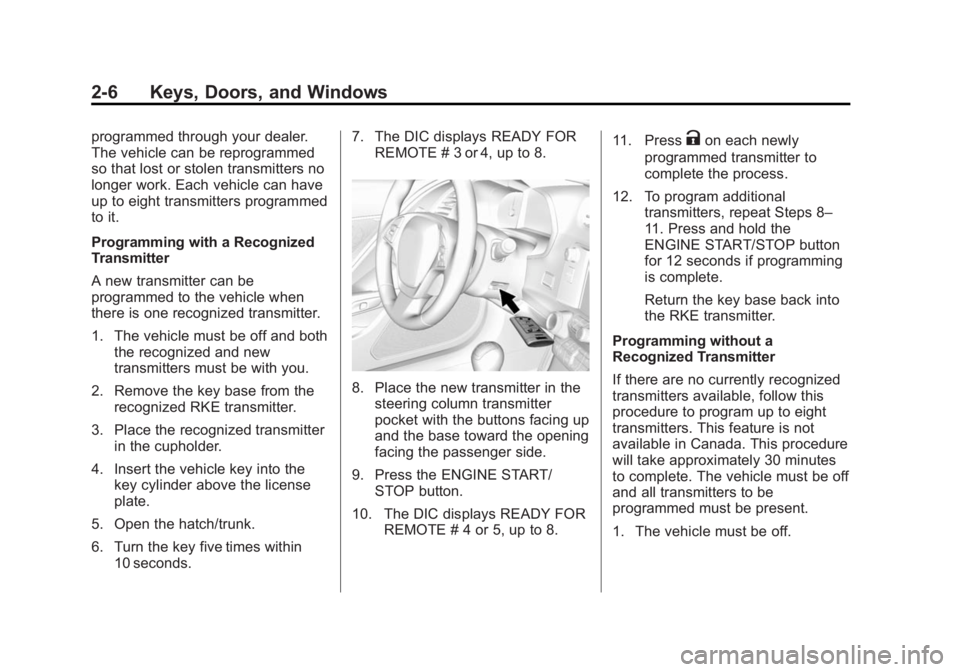
8. Place the new transmitter in thesteering column transmitter
pocket with the buttons facing up
and the base toward the opening
facing the passenger side.
9. Press the ENGINE START/ STOP button.
10. The DIC displays READY FOR REMOTE # 4 or 5, up to 8. 11. Press
Kon each newly
programmed transmitter to
complete the process.
12. To program additional transmitters, repeat Steps 8–
11. Press and hold the
ENGINE START/STOP button
for 12 seconds if programming
is complete.
Return the key base back into
the RKE transmitter.
Programming without a
Recognized Transmitter
If there are no currently recognized
transmitters available, follow this
procedure to program up to eight
transmitters. This feature is not
available in Canada. This procedure
will take approximately 30 minutes
to complete. The vehicle must be off
and all transmitters to be
programmed must be present.
1. The vehicle must be off.
Page 36 of 391
Black plate (7,1)Chevrolet Corvette Owner Manual (GMNA-Localizing-U.S./Canada/Mexico-
7576293) - 2015 - crc - 6/17/14
Keys, Doors, and Windows 2-7
2. Remove the key from thetransmitter and insert the vehicle
key into the key cylinder above
the license plate.
3. Open the hatch/trunk.
4. Turn the key five times within 10 seconds.
The DIC message displays
REMOTE LEARN PENDING
PLEASE WAIT.
5. Return key base back into the RKE transmitter.
6. Wait for 10 minutes until the DIC displays PRESS ENGINE
START BUTTON TO LEARN,
then press the ENGINE START/
STOP button.
The DIC reads REMOTE
LEARN PENDING,
PLEASE WAIT.
7. Repeat Step 6 two additional times. After the third time all
previously known transmitters
will no longer work with the
vehicle. Remaining transmitters
can be relearned during the next steps. The DIC display should
now show READY FOR
REMOTE #1.
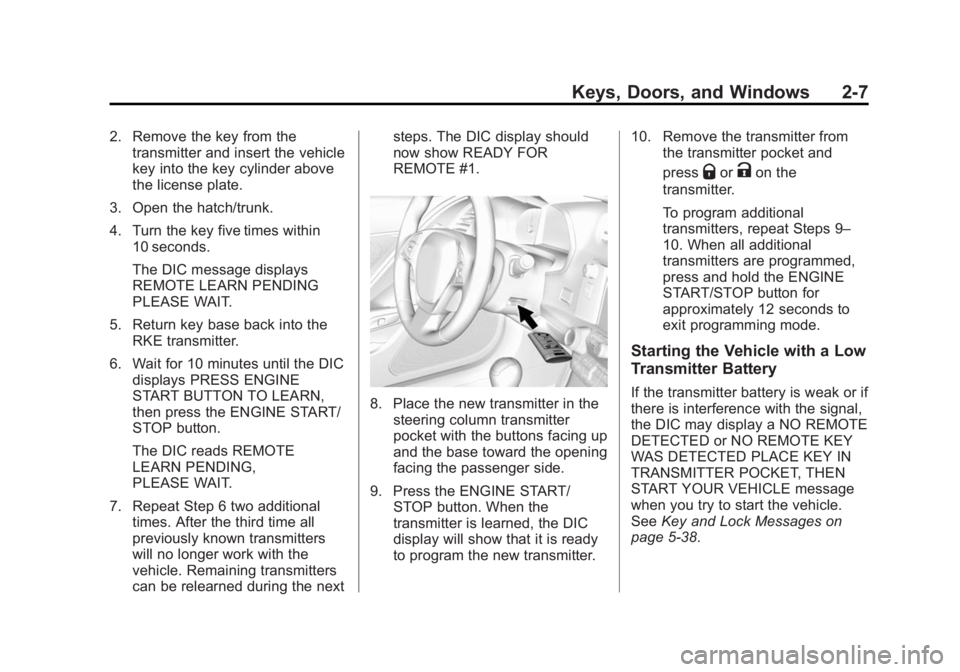
8. Place the new transmitter in the
steering column transmitter
pocket with the buttons facing up
and the base toward the opening
facing the passenger side.
9. Press the ENGINE START/ STOP button. When the
transmitter is learned, the DIC
display will show that it is ready
to program the new transmitter. 10. Remove the transmitter from
the transmitter pocket and
press
QorKon the
transmitter.
To program additional
transmitters, repeat Steps 9–
10. When all additional
transmitters are programmed,
press and hold the ENGINE
START/STOP button for
approximately 12 seconds to
exit programming mode.
Starting the Vehicle with a Low
Transmitter Battery
If the transmitter battery is weak or if
there is interference with the signal,
the DIC may display a NO REMOTE
DETECTED or NO REMOTE KEY
WAS DETECTED PLACE KEY IN
TRANSMITTER POCKET, THEN
START YOUR VEHICLE message
when you try to start the vehicle.
See Key and Lock Messages on
page 5-38.
Page 37 of 391
Black plate (8,1)Chevrolet Corvette Owner Manual (GMNA-Localizing-U.S./Canada/Mexico-
7576293) - 2015 - crc - 6/17/14
2-8 Keys, Doors, and Windows
{Caution
When replacing the battery, do
not touch any of the circuitry on
the transmitter. Static from your
body could damage the
transmitter.
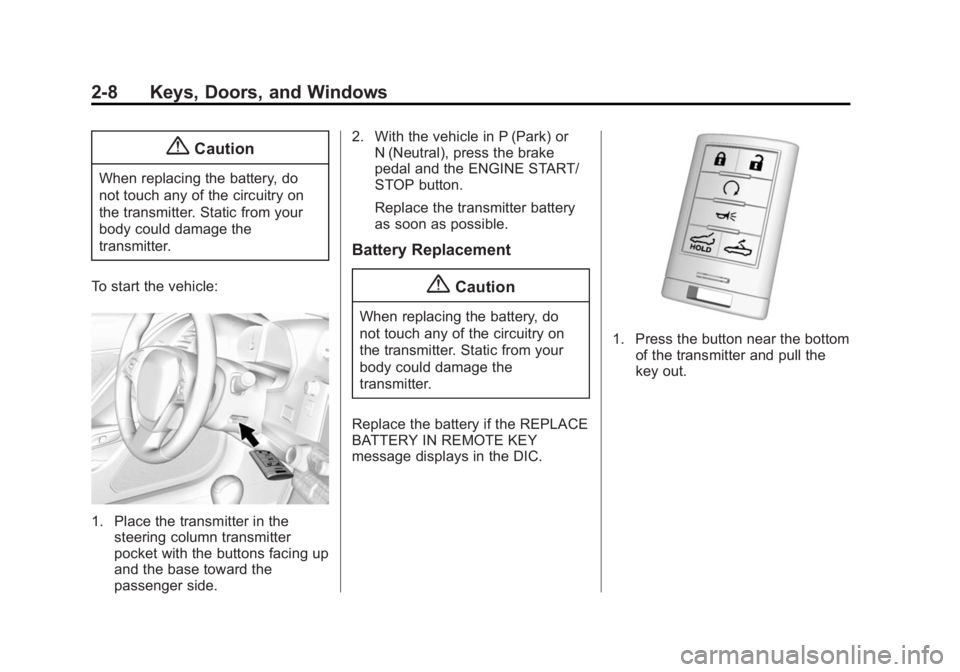
To start the vehicle:
1. Place the transmitter in the steering column transmitter
pocket with the buttons facing up
and the base toward the
passenger side. 2. With the vehicle in P (Park) or
N (Neutral), press the brake
pedal and the ENGINE START/
STOP button.
Replace the transmitter battery
as soon as possible.
Battery Replacement
{Caution
When replacing the battery, do
not touch any of the circuitry on
the transmitter. Static from your
body could damage the
transmitter.
Replace the battery if the REPLACE
BATTERY IN REMOTE KEY
message displays in the DIC.
1. Press the button near the bottom of the transmitter and pull the
key out.
Page 50 of 391
Black plate (21,1)Chevrolet Corvette Owner Manual (GMNA-Localizing-U.S./Canada/Mexico-
7576293) - 2015 - crc - 6/17/14
Keys, Doors, and Windows 2-21
Interior Mirrors
Interior Rearview Mirrors
Adjust the rearview mirror for a clear
view of the area behind your
vehicle.
If equipped with OnStar, there are
three buttons at the bottom of the
mirror. See your dealer for more
information on the system and how
to subscribe to OnStar. SeeOnStar
Overview on page 14-1.
To avoid accidental OnStar calls,
clean the mirror with the ignition off.
Do not spray glass cleaner directly
on the mirror. Use a soft towel
dampened with water.
Manual Rearview Mirror
Push the tab forward for daytime
use and pull it rearward for
nighttime use to avoid glare of the
headlamps from behind.
Automatic Dimming
Rearview Mirror
If equipped, automatic dimming
reduces the glare of headlamps
from behind. The dimming feature
comes on when the vehicle is
started.
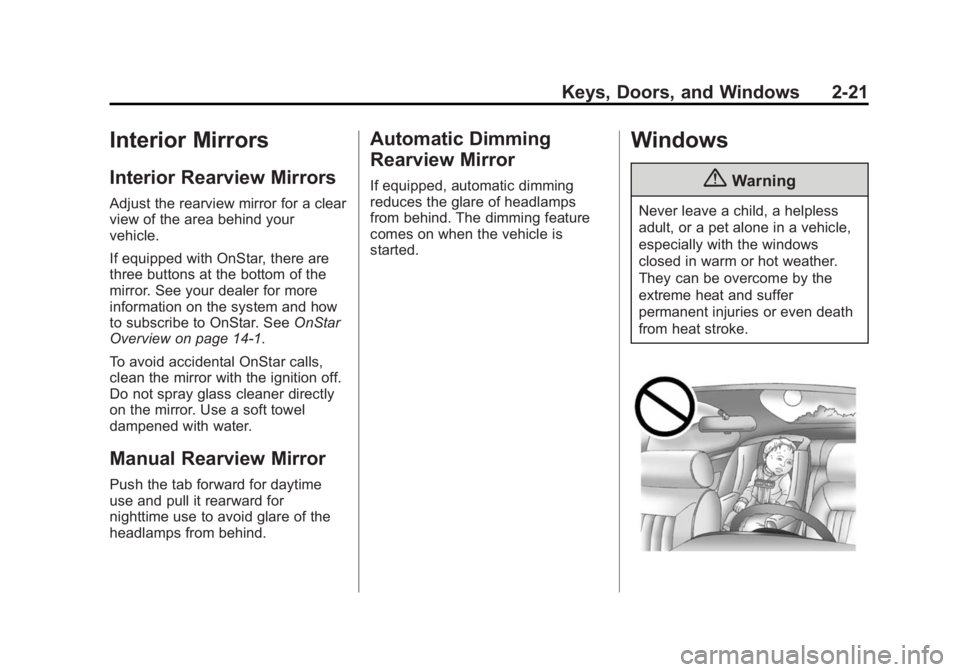
Windows
{Warning
Never leave a child, a helpless
adult, or a pet alone in a vehicle,
especially with the windows
closed in warm or hot weather.
They can be overcome by the
extreme heat and suffer
permanent injuries or even death
from heat stroke.
Page 60 of 391
Black plate (31,1)Chevrolet Corvette Owner Manual (GMNA-Localizing-U.S./Canada/Mexico-
7576293) - 2015 - crc - 6/17/14
Keys, Doors, and Windows 2-31
Other features may be affected
while operating the convertible top:
.The trunk can only be opened
with the key until the convertible
top is completely opened or
closed.
.Do not try to start the vehicle
while opening the top with the
RKE transmitter. A DIC message
may display. Release both
buttons and wait a few seconds
before starting the vehicle
normally.
.The passive door unlock feature
may not operate properly while
using the RKE transmitter to
open the convertible top.
.The windows cannot close while
the top is moving.
.When driving with the top not
fully secured, chimes can be
heard above 80 km/h (50 mph).
If the vehicle battery has been
disconnected and reconnected, the
fuses were pulled or replaced, or a
jump start was performed, the TOP NOT SECURE message may
display. Press and hold
Mto
open/close the top until this
message is cleared.
See Convertible Top Messages on
page 5-35.
Partial Top Cycling
If the convertible top operation is
stopped before completion, the top
will temporarily hold its position.
If the ignition is in ACC/
ACCESSORY or ON/RUN/START,
the top will be held for up to
five minutes. If the vehicle is moving
or off, the amount of time will vary
from a few seconds to about a
minute.
Beeps and DIC messages will be
displayed before the top will move.
When this occurs, immediately finish
the convertible top operation by
pressing the button again until it
completes. If the top cannot be secured, keep
clear of the top components. In
some conditions the top may move
quickly.
Do not drive with the convertible top
in an unsecured position. The top
components may move
unexpectedly. In some cases the
top may not be able to be power
operated. If this occurs, follow the
DIC messages displayed.
If the tonneau cover is not secured
and latched, and the vehicle is
moving above 10 km/h (6 mph), the
tonneau cover may automatically
move to a stable position.
See
Convertible Top Messages on
page 5-35.
Page 67 of 391
Black plate (4,1)Chevrolet Corvette Owner Manual (GMNA-Localizing-U.S./Canada/Mexico-
7576293) - 2015 - crc - 6/17/14
3-4 Seats and Restraints
Memory Seats
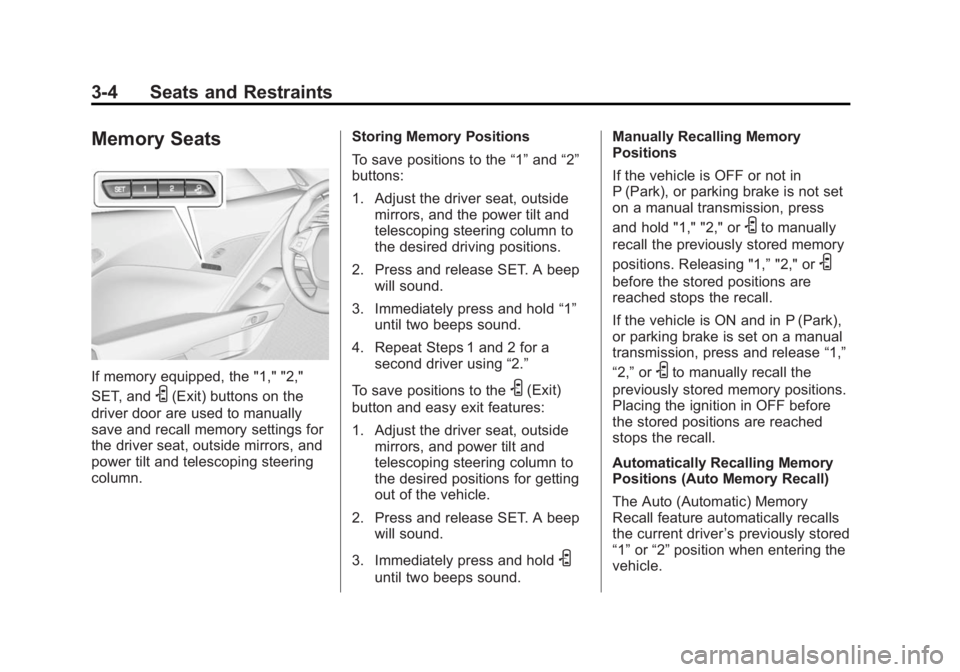
If memory equipped, the "1," "2,"
SET, and
S(Exit) buttons on the
driver door are used to manually
save and recall memory settings for
the driver seat, outside mirrors, and
power tilt and telescoping steering
column. Storing Memory Positions
To save positions to the
“1”and “2”
buttons:
1. Adjust the driver seat, outside mirrors, and the power tilt and
telescoping steering column to
the desired driving positions.
2. Press and release SET. A beep will sound.
3. Immediately press and hold “1”
until two beeps sound.
4. Repeat Steps 1 and 2 for a second driver using “2.”
To save positions to theS(Exit)
button and easy exit features:
1. Adjust the driver seat, outside mirrors, and power tilt and
telescoping steering column to
the desired positions for getting
out of the vehicle.
2. Press and release SET. A beep will sound.
3. Immediately press and hold
S
until two beeps sound. Manually Recalling Memory
Positions
If the vehicle is OFF or not in
P (Park), or parking brake is not set
on a manual transmission, press
and hold "1," "2," or
Sto manually
recall the previously stored memory
positions. Releasing "1,” "2," or
S
before the stored positions are
reached stops the recall.
If the vehicle is ON and in P (Park),
or parking brake is set on a manual
transmission, press and release “1,”
“2,” or
Sto manually recall the
previously stored memory positions.
Placing the ignition in OFF before
the stored positions are reached
stops the recall.
Automatically Recalling Memory
Positions (Auto Memory Recall)
The Auto (Automatic) Memory
Recall feature automatically recalls
the current driver ’s previously stored
“1” or“2” position when entering the
vehicle.
Page 70 of 391
Black plate (7,1)Chevrolet Corvette Owner Manual (GMNA-Localizing-U.S./Canada/Mexico-
7576293) - 2015 - crc - 6/17/14
Seats and Restraints 3-7
Heated and Ventilated
Front Seats
{Warning
If you cannot feel temperature
change or pain to the skin, the
seat heater may cause burns. To
reduce the risk of burns, people
with such a condition should use
care when using the seat heater,
especially for long periods of
time. Do not place anything on
the seat that insulates against
heat, such as a blanket, cushion,
cover, or similar item. This may
cause the seat heater to
overheat. An overheated seat
heater may cause a burn or may
damage the seat.
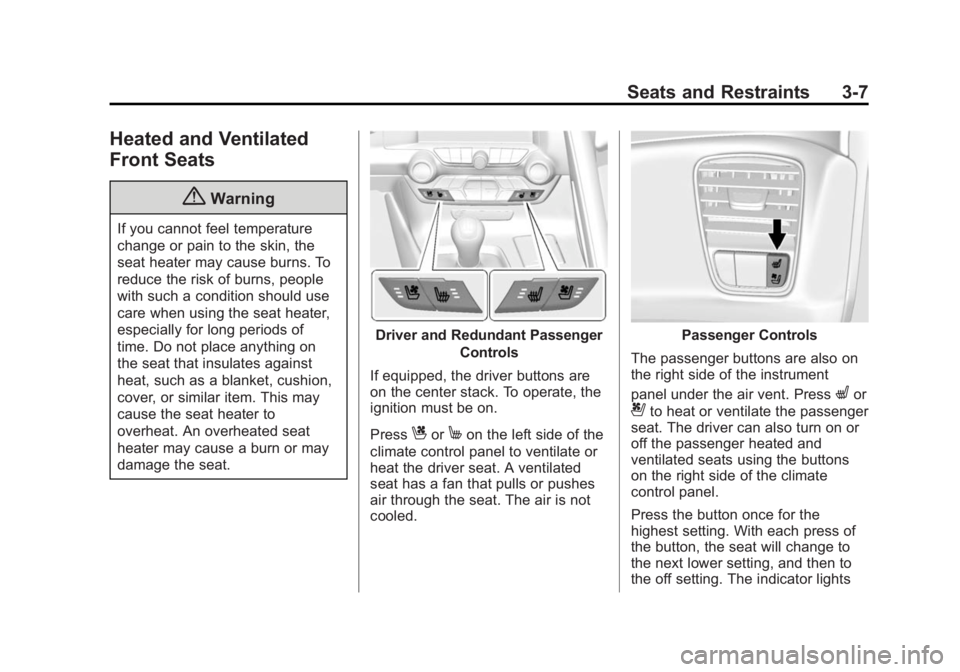
Driver and Redundant PassengerControls
If equipped, the driver buttons are
on the center stack. To operate, the
ignition must be on.
Press
CorMon the left side of the
climate control panel to ventilate or
heat the driver seat. A ventilated
seat has a fan that pulls or pushes
air through the seat. The air is not
cooled.
Passenger Controls
The passenger buttons are also on
the right side of the instrument
panel under the air vent. Press
Lor
{to heat or ventilate the passenger
seat. The driver can also turn on or
off the passenger heated and
ventilated seats using the buttons
on the right side of the climate
control panel.
Press the button once for the
highest setting. With each press of
the button, the seat will change to
the next lower setting, and then to
the off setting. The indicator lights