weight CHEVROLET CORVETTE GRAND SPORT 2015 Owners Manual
[x] Cancel search | Manufacturer: CHEVROLET, Model Year: 2015, Model line: CORVETTE GRAND SPORT, Model: CHEVROLET CORVETTE GRAND SPORT 2015Pages: 391, PDF Size: 5.36 MB
Page 84 of 391
Black plate (21,1)Chevrolet Corvette Owner Manual (GMNA-Localizing-U.S./Canada/Mexico-
7576293) - 2015 - crc - 6/17/14
Seats and Restraints 3-21
The passenger sensing system will
turn off the front outboard
passenger frontal airbag under
certain conditions. No other airbag
is affected by the passenger
sensing system.
The passenger sensing system
works with sensors that are part of
the front outboard passenger seat
and safety belt. The sensors are
designed to detect the presence of
a properly-seated occupant and
determine if the front outboard
passenger frontal airbag should be
allowed to inflate or not.
According to accident statistics,
children are safer when properly
secured in a rear seat in the correct
child restraint for their weight
and size.
Rear-facing child restraints should
not be transported in the vehicle,
even if the airbag is off.
Never put a rear-facing child seat in
the front. This is because the risk to
the rear-facing child is so great,
if the airbag inflates.{Warning
A child in a rear-facing child
restraint can be seriously injured
or killed if the passenger frontal
airbag inflates. This is because
the back of the rear-facing child
restraint would be very close to
the inflating airbag. A child in a
forward-facing child restraint can
be seriously injured or killed if the
passenger frontal airbag inflates
and the passenger seat is in a
forward position.
Even if the passenger sensing
system has turned off the
passenger frontal airbag, no
system is fail-safe. No one can
guarantee that an airbag will not
inflate under some unusual
circumstance, even though the
airbag is off.(Continued)
Warning (Continued)
Secure rear-facing child restraints
in a rear seat, even if the airbag
is off. If you secure a
forward-facing child restraint in
the front outboard passenger
seat, always move the seat as far
back as it will go. It is better to
secure the child restraint in a
rear seat.
The passenger sensing system is
designed to turn off the front
outboard passenger frontal airbag if:
.The front outboard passenger
seat is unoccupied.
.The system determines an infant
is present in a child restraint.
.A front outboard passenger
takes his/her weight off of the
seat for a period of time.
.There is a critical problem with
the airbag system or the
passenger sensing system.
Page 90 of 391
Black plate (27,1)Chevrolet Corvette Owner Manual (GMNA-Localizing-U.S./Canada/Mexico-
7576293) - 2015 - crc - 6/17/14
Seats and Restraints 3-27
The manufacturer instructions that
come with the booster seat state the
weight and height limitations for that
booster. Use a booster seat with a
lap-shoulder belt until the child
passes the fit test below:
.Sit all the way back on the seat.
Do the knees bend at the seat
edge? If yes, continue. If no,
return to the booster seat.
.Buckle the lap-shoulder belt.
Does the shoulder belt rest on
the shoulder? If yes, continue.
If no, return to the booster seat.
.Does the lap belt fit low and
snug on the hips, touching the
thighs? If yes, continue. If no,
return to the booster seat.
.Can proper safety belt fit be
maintained for the length of the
trip? If yes, continue. If no,
return to the booster seat.Q: What is the proper way to
wear safety belts?
A: An older child should wear a
lap-shoulder belt and get the
additional restraint a shoulder
belt can provide. The shoulder
belt should not cross the face or
neck. The lap belt should fit
snugly below the hips, just
touching the top of the thighs.
This applies belt force to the
child's pelvic bones in a crash.
It should never be worn over the
abdomen, which could cause
severe or even fatal internal
injuries in a crash.
According to accident statistics,
children are safer when properly
restrained in a rear seating position.
In a crash, children who are not
buckled up can strike other people
who are buckled up, or can be
thrown out of the vehicle. Older
children need to use safety belts
properly.
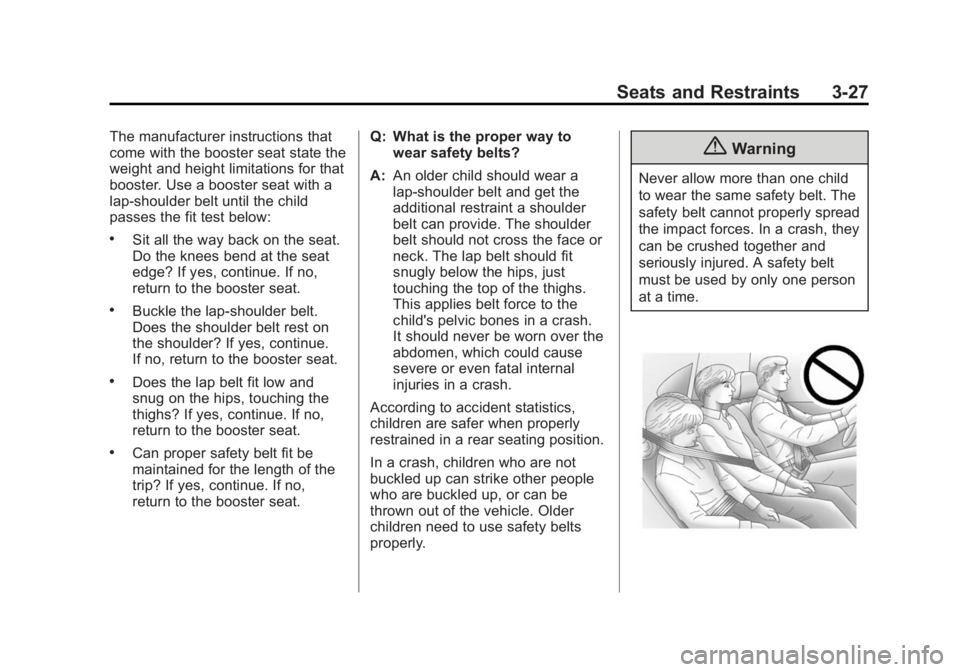
{Warning
Never allow more than one child
to wear the same safety belt. The
safety belt cannot properly spread
the impact forces. In a crash, they
can be crushed together and
seriously injured. A safety belt
must be used by only one person
at a time.
Page 93 of 391
Black plate (30,1)Chevrolet Corvette Owner Manual (GMNA-Localizing-U.S./Canada/Mexico-
7576293) - 2015 - crc - 6/17/14
3-30 Seats and Restraints
weight, height, and age but also
whether or not the restraint will
be compatible with the motor
vehicle in which it will be used.
For most basic types of child
restraints, there are many
different models available. When
purchasing a child restraint, be
sure it is designed to be used in
a motor vehicle. If it is, the
restraint will have a label saying
that it meets federal motor
vehicle safety standards.
The restraint manufacturer
instructions that come with the
restraint state the weight and
height limitations for a particular
child restraint. In addition, there
are many kinds of restraints
available for children with
special needs.{Warning
To reduce the risk of neck and
head injury during a crash, infants
need complete support. In a
crash, if an infant is in a
rear-facing child restraint, the
crash forces can be distributed
across the strongest part of an
infant's body, the back and
shoulders. Infants should always
be secured in rear-facing child
restraints.
{Warning
A young child's hip bones are still
so small that the vehicle's regular
safety belt may not remain low on
the hip bones, as it should.
Instead, it may settle up around
the child's abdomen. In a crash,
the belt would apply force on a
body area that is unprotected by(Continued)
Warning (Continued)
any bony structure. This alone
could cause serious or fatal
injuries. To reduce the risk of
serious or fatal injuries during a
crash, young children should
always be secured in appropriate
child restraints.
Page 195 of 391
Black plate (14,1)Chevrolet Corvette Owner Manual (GMNA-Localizing-U.S./Canada/Mexico-
7576293) - 2015 - crc - 6/17/14
9-14 Driving and Operating
Warning (Continued)
vehicle can overheat, causing an
engine compartment fire or other
damage. Spin the wheels as little
as possible and avoid going
above 56 km/h (35 mph).
Rocking the Vehicle to Get
it Out
Turn the steering wheel left and
right to clear the area around the
front wheels. Turn off any traction
system. Shift back and forth
between R (Reverse) and a low
forward gear, spinning the wheels
as little as possible. To prevent
transmission wear, wait until the
wheels stop spinning before shifting
gears. Release the accelerator
pedal while shifting, and press
lightly on the accelerator pedal
when the transmission is in gear.
Slowly spinning the wheels in the
forward and reverse directions
causes a rocking motion that could
free the vehicle. If that does not getthe vehicle out after a few tries, it
might need to be towed out. If the
vehicle does need to be towed out,
see
Towing the Vehicle on
page 10-82.
Vehicle Load Limits
It is very important to know how
much weight your vehicle can
carry. This weight is called the
vehicle capacity weight and
includes the weight of all
occupants, cargo, and all
nonfactory-installed options.
Two labels on your vehicle show
how much weight it may
properly carry: the Tire and
Loading Information label and
the Certification label.
{Warning
Do not load the vehicle any
heavier than the Gross
Vehicle Weight Rating
(Continued)
Warning (Continued)
(GVWR), or either the
maximum front or rear Gross
Axle Weight Rating (GAWR).
This can cause systems to
break and change the way the
vehicle handles. This could
cause loss of control and a
crash. Overloading can also
shorten the life of the vehicle.
Page 196 of 391
Black plate (15,1)Chevrolet Corvette Owner Manual (GMNA-Localizing-U.S./Canada/Mexico-
7576293) - 2015 - crc - 6/17/14
Driving and Operating 9-15
Tire and Loading Information
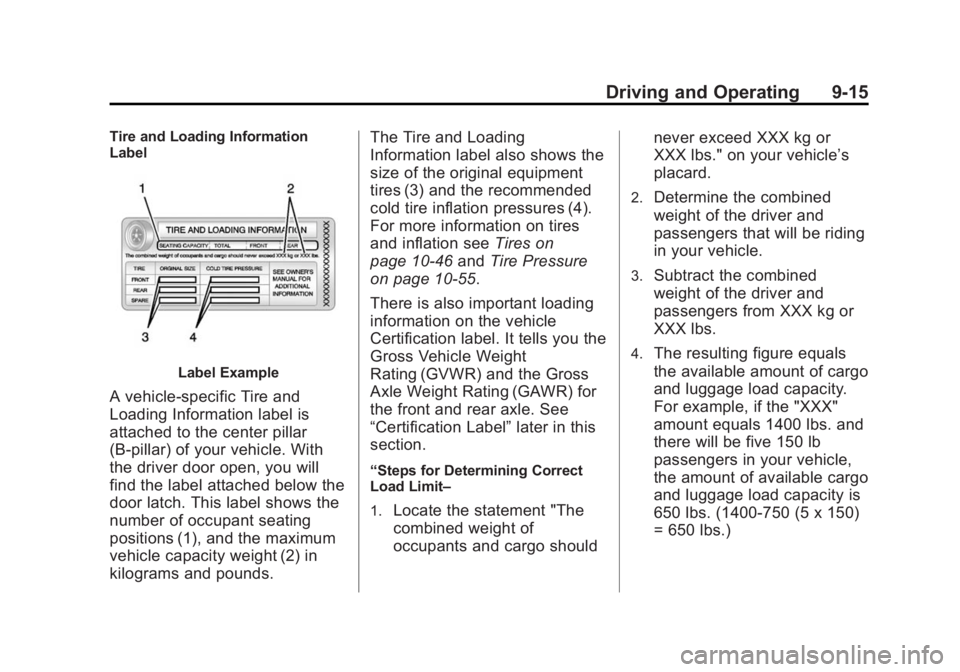
Label
Label Example
A vehicle-specific Tire and
Loading Information label is
attached to the center pillar
(B-pillar) of your vehicle. With
the driver door open, you will
find the label attached below the
door latch. This label shows the
number of occupant seating
positions (1), and the maximum
vehicle capacity weight (2) in
kilograms and pounds.The Tire and Loading
Information label also shows the
size of the original equipment
tires (3) and the recommended
cold tire inflation pressures (4).
For more information on tires
and inflation see
Tires on
page 10-46 andTire Pressure
on page 10-55.
There is also important loading
information on the vehicle
Certification label. It tells you the
Gross Vehicle Weight
Rating (GVWR) and the Gross
Axle Weight Rating (GAWR) for
the front and rear axle. See
“Certification Label” later in this
section.
“Steps for Determining Correct
Load Limit–
1.
Locate the statement "The
combined weight of
occupants and cargo should never exceed XXX kg or
XXX lbs." on your vehicle’s
placard.
2.Determine the combined
weight of the driver and
passengers that will be riding
in your vehicle.
3.Subtract the combined
weight of the driver and
passengers from XXX kg or
XXX lbs.
4.The resulting figure equals
the available amount of cargo
and luggage load capacity.
For example, if the "XXX"
amount equals 1400 lbs. and
there will be five 150 lb
passengers in your vehicle,
the amount of available cargo
and luggage load capacity is
650 lbs. (1400-750 (5 x 150)
= 650 lbs.)
Page 197 of 391
Black plate (16,1)Chevrolet Corvette Owner Manual (GMNA-Localizing-U.S./Canada/Mexico-
7576293) - 2015 - crc - 6/17/14
9-16 Driving and Operating
5.Determine the combined
weight of luggage and cargo
being loaded on the vehicle.
That weight may not safely
exceed the available cargo
and luggage load capacity
calculated in Step 4.
6.If your vehicle will be towing
a trailer, load from your trailer
will be transferred to your
vehicle. Consult this manual
to determine how this
reduces the available cargo
and luggage load capacity of
your vehicle.”
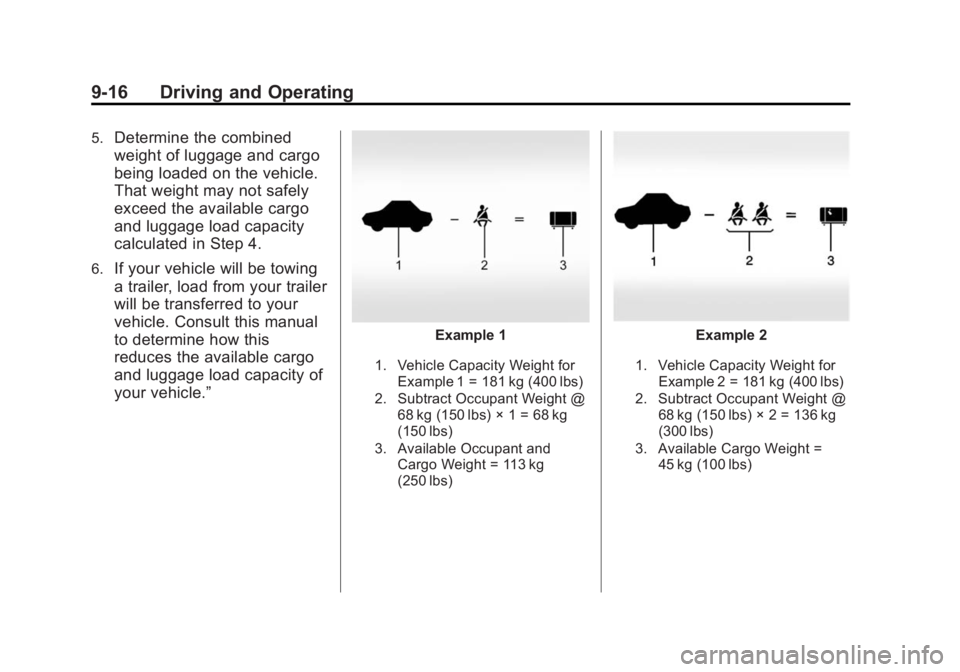
Example 1
1. Vehicle Capacity Weight forExample 1 = 181 kg (400 lbs)
2. Subtract Occupant Weight @ 68 kg (150 lbs) × 1 = 68 kg
(150 lbs)
3. Available Occupant and Cargo Weight = 113 kg
(250 lbs)
Example 2
1. Vehicle Capacity Weight for
Example 2 = 181 kg (400 lbs)
2. Subtract Occupant Weight @ 68 kg (150 lbs) × 2 = 136 kg
(300 lbs)
3. Available Cargo Weight = 45 kg (100 lbs)
Page 198 of 391
Black plate (17,1)Chevrolet Corvette Owner Manual (GMNA-Localizing-U.S./Canada/Mexico-
7576293) - 2015 - crc - 6/17/14
Driving and Operating 9-17
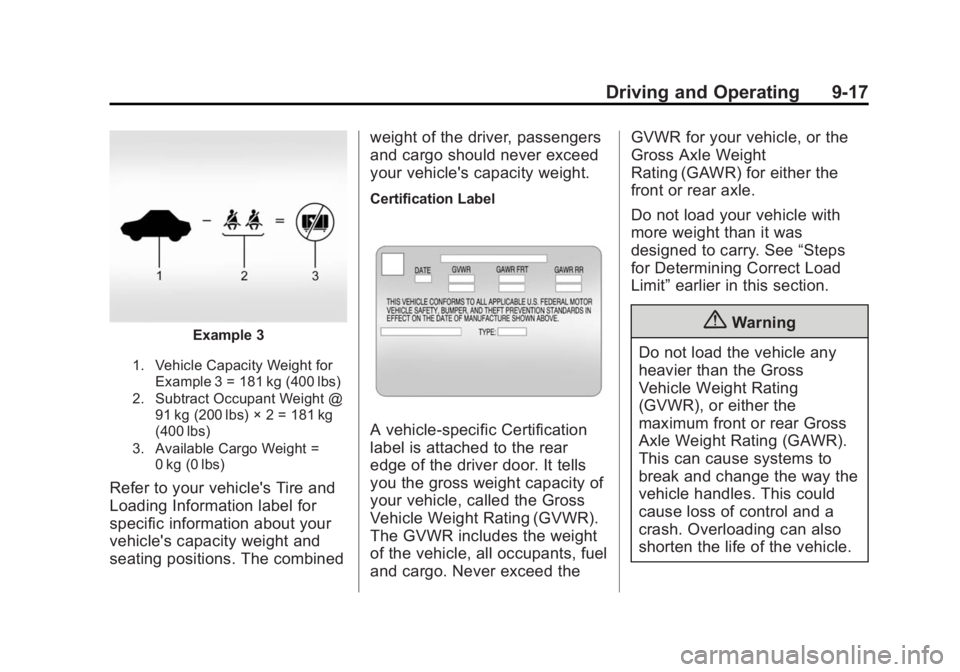
Example 3
1. Vehicle Capacity Weight forExample 3 = 181 kg (400 lbs)
2. Subtract Occupant Weight @ 91 kg (200 lbs) × 2 = 181 kg
(400 lbs)
3. Available Cargo Weight = 0 kg (0 lbs)
Refer to your vehicle's Tire and
Loading Information label for
specific information about your
vehicle's capacity weight and
seating positions. The combined weight of the driver, passengers
and cargo should never exceed
your vehicle's capacity weight.
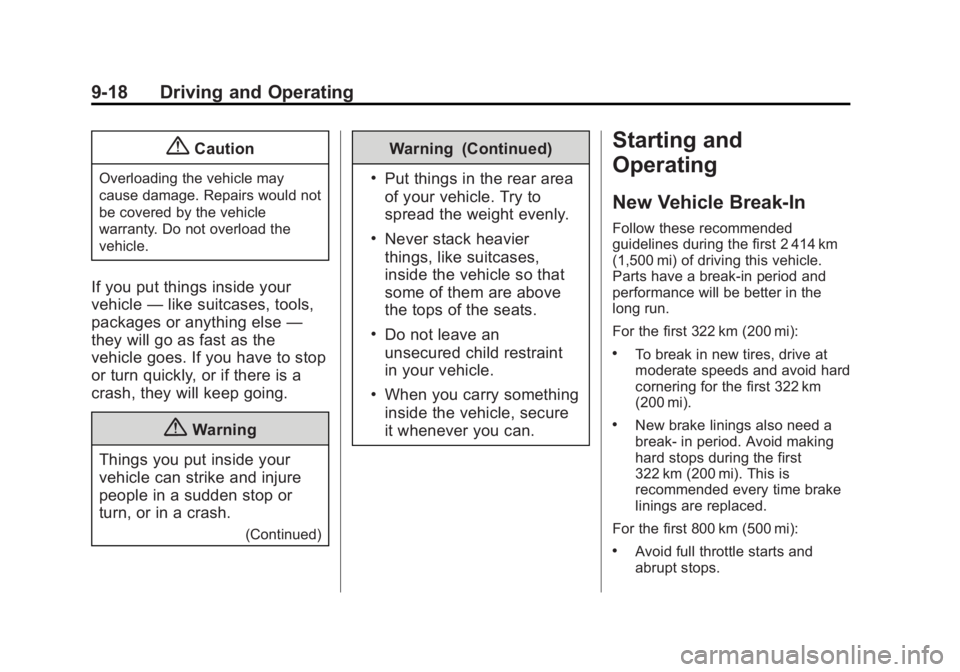
Certification Label
A vehicle-specific Certification
label is attached to the rear
edge of the driver door. It tells
you the gross weight capacity of
your vehicle, called the Gross
Vehicle Weight Rating (GVWR).
The GVWR includes the weight
of the vehicle, all occupants, fuel
and cargo. Never exceed theGVWR for your vehicle, or the
Gross Axle Weight
Rating (GAWR) for either the
front or rear axle.
Do not load your vehicle with
more weight than it was
designed to carry. See
“Steps
for Determining Correct Load
Limit” earlier in this section.
{Warning
Do not load the vehicle any
heavier than the Gross
Vehicle Weight Rating
(GVWR), or either the
maximum front or rear Gross
Axle Weight Rating (GAWR).
This can cause systems to
break and change the way the
vehicle handles. This could
cause loss of control and a
crash. Overloading can also
shorten the life of the vehicle.
Page 199 of 391
Black plate (18,1)Chevrolet Corvette Owner Manual (GMNA-Localizing-U.S./Canada/Mexico-
7576293) - 2015 - crc - 6/17/14
9-18 Driving and Operating
{Caution
Overloading the vehicle may
cause damage. Repairs would not
be covered by the vehicle
warranty. Do not overload the
vehicle.
If you put things inside your
vehicle—like suitcases, tools,
packages or anything else —
they will go as fast as the
vehicle goes. If you have to stop
or turn quickly, or if there is a
crash, they will keep going.
{Warning
Things you put inside your
vehicle can strike and injure
people in a sudden stop or
turn, or in a crash.
(Continued)
Warning (Continued)
.Put things in the rear area
of your vehicle. Try to
spread the weight evenly.
.Never stack heavier
things, like suitcases,
inside the vehicle so that
some of them are above
the tops of the seats.
.Do not leave an
unsecured child restraint
in your vehicle.
.When you carry something
inside the vehicle, secure
it whenever you can.
Starting and
Operating
New Vehicle Break-In
Follow these recommended
guidelines during the first 2 414 km
(1,500 mi) of driving this vehicle.
Parts have a break-in period and
performance will be better in the
long run.
For the first 322 km (200 mi):
.To break in new tires, drive at
moderate speeds and avoid hard
cornering for the first 322 km
(200 mi).
.New brake linings also need a
break- in period. Avoid making
hard stops during the first
322 km (200 mi). This is
recommended every time brake
linings are replaced.
For the first 800 km (500 mi):
.Avoid full throttle starts and
abrupt stops.
Page 205 of 391
Black plate (24,1)Chevrolet Corvette Owner Manual (GMNA-Localizing-U.S./Canada/Mexico-
7576293) - 2015 - crc - 6/17/14
9-24 Driving and Operating
3. Press the ENGINE START/STOP button to turn the
engine off.
Leaving the Vehicle with the
Engine Running (Automatic
Transmission)
{Warning
It can be dangerous to leave the
vehicle with the engine running.
It could overheat and catch fire.
It is dangerous to get out of the
vehicle if the shift lever is not fully
in P (Park) with the parking brake
firmly set. The vehicle can roll.
Do not leave the vehicle when the
engine is running. If you have left
the engine running, the vehicle
can move suddenly. You or others
could be injured. To be sure the
vehicle will not move, even when
you are on fairly level ground,
always set the parking brake and
(Continued)
Warning (Continued)
move the shift lever to P (Park).
SeeShifting Into Park on
page 9-23.
If you have to leave the vehicle with
the engine running, be sure the
vehicle is in P (Park) and the
parking brake is firmly set before
you leave it. After you have moved
the shift lever into P (Park), hold
down the regular brake pedal. See if
you can move the shift lever away
from P (Park) without first pushing
the button on the lever. If you can, it
means that the shift lever was not
fully locked into P (Park).
Torque Lock (Automatic
Transmission)
If you are parking on a hill and you
do not shift the transmission into
P (Park) properly, the weight of the
vehicle may put too much force on
the parking pawl in the
transmission. You may find it difficult to pull the shift lever out of P (Park).
This is called
“torque lock.”
To prevent torque lock, set the
parking brake and then shift into
P (Park) properly before you leave
the driver seat. To find out how, see
“Shifting Into P (Park)” previously in
this section.
When you are ready to drive, move
the shift lever out of P (Park) before
you release the parking brake.
If torque lock does occur, you may
need to have another vehicle push
yours a little uphill to take some of
the pressure from the transmission
parking pawl, so you can pull the
shift lever out of P (Park).
Shifting out of Park
Shift lock release prevents shifting
out of P (Park) unless the vehicle is
running or in accessory mode and
the brake pedal is applied.
Page 270 of 391
Black plate (31,1)Chevrolet Corvette Owner Manual (GMNA-Localizing-U.S./Canada/Mexico-
7576293) - 2015 - crc - 6/17/14
Vehicle Care 10-31
Brake Rotor Wear
Z06 models may have ceramic
brake rotors. Visually inspect rotors
whenever the brake pads are
replaced. Weigh rotors before brake
pads are replaced to confirm that
the rotor mass is greater than the
wear-out mass printed on the rotor.
The rotor can be reused if the
weight of the rotor is above the
mass limit. See the service manual
for rotor inspection and weighing
methods. SeeService Publications
Ordering Information on page 13-11.
Brake Rotor Protector
{Warning
Ceramic rotors will be very hot
after operation and touching them
may cause burns. Be sure brake
system is completely cool prior to
installation of protector, or coming
in contact with them.
{Caution
Rotors may be chipped if hard
contact is made with the wheel
during wheel installation or
removal. Always use the rotor
protectors. Follow the wheel
removal and installation
instructions.
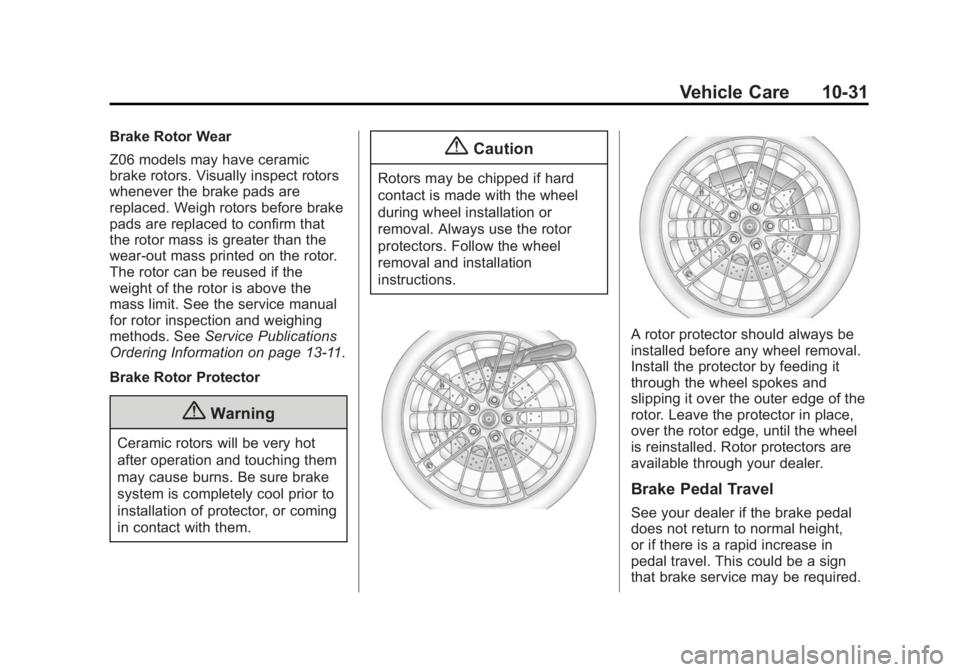
A rotor protector should always be
installed before any wheel removal.
Install the protector by feeding it
through the wheel spokes and
slipping it over the outer edge of the
rotor. Leave the protector in place,
over the rotor edge, until the wheel
is reinstalled. Rotor protectors are
available through your dealer.
Brake Pedal Travel
See your dealer if the brake pedal
does not return to normal height,
or if there is a rapid increase in
pedal travel. This could be a sign
that brake service may be required.