clutch CHEVROLET CRUZE 2011 1.G Owners Manual
[x] Cancel search | Manufacturer: CHEVROLET, Model Year: 2011, Model line: CRUZE, Model: CHEVROLET CRUZE 2011 1.GPages: 394, PDF Size: 6.89 MB
Page 220 of 394
Black plate (20,1)Chevrolet Cruze Owner Manual - 2011
9-20 Driving and Operating
Manual Transmission
The shift lever should be in
N (Neutral) and the parking brake
engaged. Hold the clutch pedal
down to the floor and start the
engine. The vehicle will not start if
the clutch pedal is not all the
way down.
Starting Procedure
1. With your foot off the acceleratorpedal, turn the ignition key to
START. When the engine starts,
let go of the key. The idle speed
will go down as the engine
warms. Do not race the engine
immediately after starting it.
Allow the oil to warm up and
lubricate all moving parts.
The vehicle has a
Computer-Controlled Cranking
System. This feature assists in
starting the engine and protects
components. If the ignition key is
turned to the START position,
and then released when the
engine begins cranking, the
engine will continue cranking for a few seconds or until the
vehicle starts. If the engine does
not start and the key is held in
START for many seconds,
cranking stops after 15 seconds
to prevent cranking motor
damage. To prevent gear
damage, this system also
prevents cranking if the engine
is already running. Engine
cranking can be stopped by
turning the ignition switch to
ACC/ACCESSORY or
LOCK/OFF.
Notice: Cranking the engine for
long periods of time, by returning
the key to the START position
immediately after cranking has
ended, can overheat and damage
the cranking motor, and drain the
battery. Wait at least 15 seconds
between each try, to let the
cranking motor cool down. 2. If the engine does not start
after 5‐10 seconds, especially in
very cold weather (below 0°F
or−18°C), it could be flooded
with too much gasoline. Push
the accelerator pedal all the way
to the floor and holding it there
as you hold the key in START
for a maximum of 15 seconds.
Wait at least 15 seconds
between each try, to allow the
cranking motor to cool. When
the engine starts, let go of the
key and accelerator. If the
vehicle starts briefly but then
stops again, repeat the
procedure. This clears the extra
gasoline from the engine. Do not
race the engine immediately
after starting it. Operate the
engine and transmission gently
until the oil warms up and
lubricates all moving parts.
Notice: The engine is designed to
work with the electronics in the
vehicle. If you add electrical parts
or accessories, you could change
the way the engine operates.
Page 224 of 394
Black plate (24,1)Chevrolet Cruze Owner Manual - 2011
9-24 Driving and Operating
Parking
If the vehicle has a manual
transmission, before getting out of
the vehicle, move the shift lever into
R (Reverse), and firmly apply the
parking brake. Once the shift lever
has been placed into R (Reverse)
with the clutch pedal pressed in,
turn the ignition key to LOCK/OFF,
remove the key and release the
clutch.
If parking on a hill, or if the vehicle
is pulling a trailer, seeDriving
Characteristics and Towing Tips on
page 9‑46.
Parking Over Things
That Burn
{WARNING
Things that can burn could touch
hot exhaust parts under the
vehicle and ignite. Do not park
over papers, leaves, dry grass,
or other things that can burn.
Engine Exhaust
{WARNING
Engine exhaust contains Carbon
Monoxide (CO) which cannot be
seen or smelled. Exposure to CO
can cause unconsciousness and
even death.
Exhaust may enter the vehicle if:
.The vehicle idles in areas
with poor ventilation (parking
garages, tunnels, deep snow
that may block underbody
airflow or tail pipes).
.The exhaust smells or
sounds strange or different.
.The exhaust system leaks
due to corrosion or damage.
.The vehicle’s exhaust system
has been modified, damaged
or improperly repaired.
(Continued)
WARNING (Continued)
.There are holes or openings
in the vehicle body from
damage or after-market
modifications that are not
completely sealed.
If unusual fumes are detected or
if it is suspected that exhaust is
coming into the vehicle:
.Drive it only with the windows
completely down.
.Have the vehicle repaired
immediately.
Never park the vehicle with the
engine running in an enclosed
area such as a garage or a
building that has no fresh air
ventilation.
Page 229 of 394
Black plate (29,1)Chevrolet Cruze Owner Manual - 2011
Driving and Operating 9-29
The transmission will only allow
you to shift into gears appropriate
for the vehicle speed and engine
revolutions per minute (rpm). The
transmission will not automatically
shift to the next lower gear if the
engine rpm is too high, nor to the
next higher gear when the maximum
engine rpm is reached.
If shifting is prevented for any
reason, the currently selected gear
will flash multiple times, indicating
that the transmission has not shifted
gears.
While in the DSC mode, the
transmission will automatically
downshift when the vehicle comes
to a stop. This will allow for more
power during take-off.
When accelerating the vehicle from
a stop in snowy and icy conditions,
you may want to shift into second
gear. A higher gear allows the
vehicle to gain more traction on
slippery surfaces.Manual Transmission
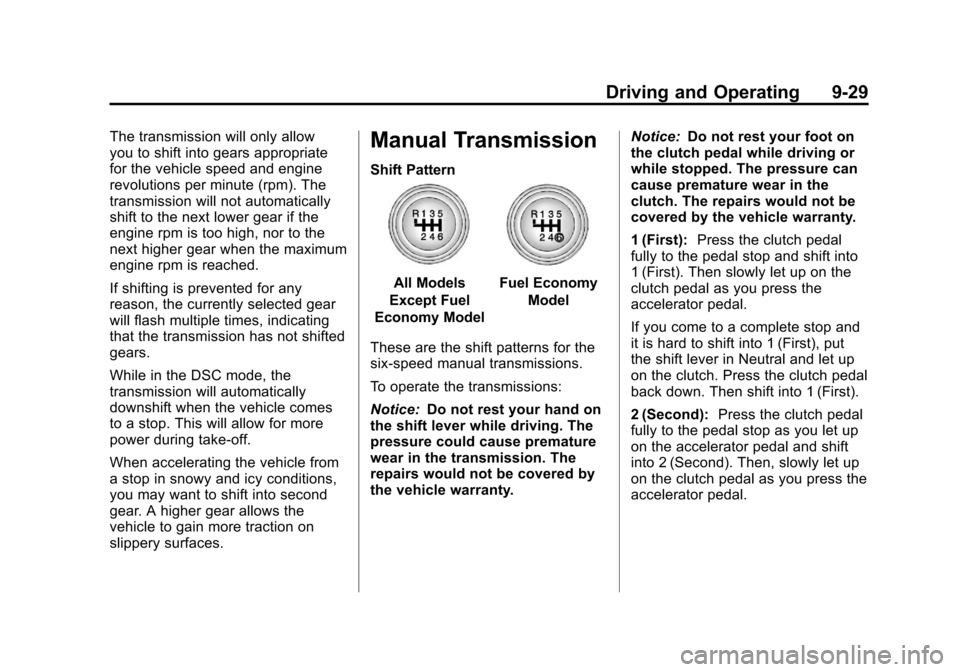
Shift Pattern
All Models
Except Fuel
Economy ModelFuel Economy
Model
These are the shift patterns for the
six-speed manual transmissions.
To operate the transmissions:
Notice: Do not rest your hand on
the shift lever while driving. The
pressure could cause premature
wear in the transmission. The
repairs would not be covered by
the vehicle warranty. Notice:
Do not rest your foot on
the clutch pedal while driving or
while stopped. The pressure can
cause premature wear in the
clutch. The repairs would not be
covered by the vehicle warranty.
1 (First): Press the clutch pedal
fully to the pedal stop and shift into
1 (First). Then slowly let up on the
clutch pedal as you press the
accelerator pedal.
If you come to a complete stop and
it is hard to shift into 1 (First), put
the shift lever in Neutral and let up
on the clutch. Press the clutch pedal
back down. Then shift into 1 (First).
2 (Second): Press the clutch pedal
fully to the pedal stop as you let up
on the accelerator pedal and shift
into 2 (Second). Then, slowly let up
on the clutch pedal as you press the
accelerator pedal.
Page 230 of 394
Black plate (30,1)Chevrolet Cruze Owner Manual - 2011
9-30 Driving and Operating
3 (Third), 4 (Fourth), 5 (Fifth) and
6 (Sixth):Shift into 3 (Third),
4 (Fourth), 5 (Fifth) and 6 (Sixth) the
same way you do for 2 (Second).
Slowly let up on the clutch pedal as
you press the accelerator pedal.
For the best fuel economy, use
6 (Sixth) gear whenever vehicle
speed and driving conditions allow.
An up-shift light in the instrument
cluster indicates when to shift to the
next higher gear for the best fuel
economy.
During normal driving, upshifts
should occur between 1,300 and
2,500 rpm, and downshifts should
occur between 1,500 and
1,000 rpm. To stop, let up on the accelerator
pedal and press the brake pedal.
Just before the vehicle stops, press
the clutch pedal and the brake
pedal, and shift to Neutral.
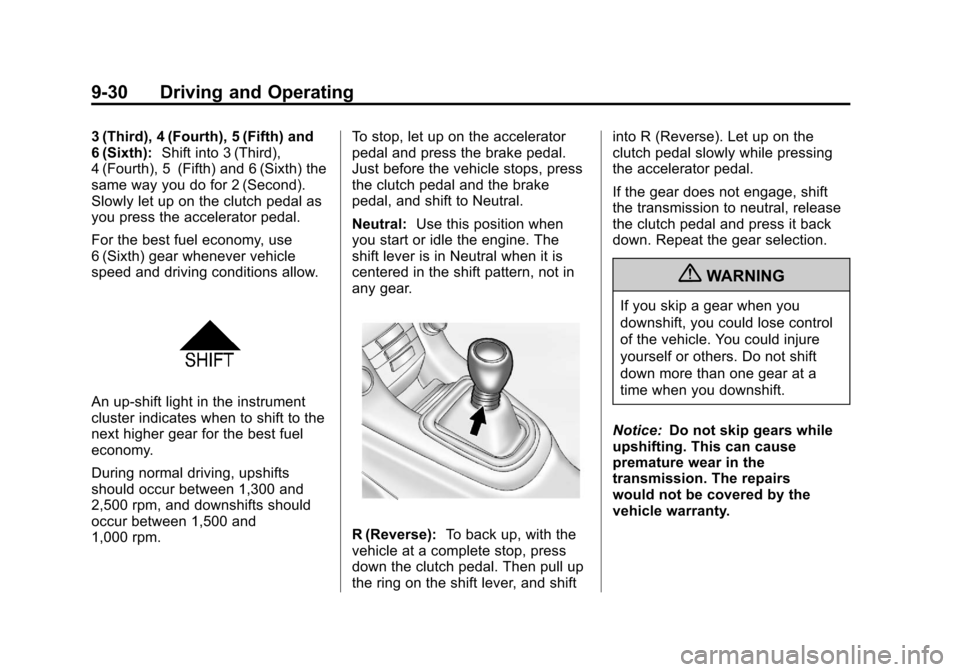
Neutral:
Use this position when
you start or idle the engine. The
shift lever is in Neutral when it is
centered in the shift pattern, not in
any gear.
R (Reverse): To back up, with the
vehicle at a complete stop, press
down the clutch pedal. Then pull up
the ring on the shift lever, and shift into R (Reverse). Let up on the
clutch pedal slowly while pressing
the accelerator pedal.
If the gear does not engage, shift
the transmission to neutral, release
the clutch pedal and press it back
down. Repeat the gear selection.
{WARNING
If you skip a gear when you
downshift, you could lose control
of the vehicle. You could injure
yourself or others. Do not shift
down more than one gear at a
time when you downshift.
Notice: Do not skip gears while
upshifting. This can cause
premature wear in the
transmission. The repairs
would not be covered by the
vehicle warranty.
Page 237 of 394
Black plate (37,1)Chevrolet Cruze Owner Manual - 2011
Driving and Operating 9-37
Setting Cruise Control
If the cruise button is on when not in
use, it could get bumped and go into
cruise when not desired. Keep the
cruise control switch off when cruise
is not being used.
1. Press
5.
2. Get to the speed desired.
3. Move the thumbwheel down and release it.
4. Take your foot off the accelerator pedal.
Resuming a Set Speed
If the cruise control is set at a
desired speed and then the brakes
or clutch for manual transmissions
are applied, the cruise control is
disengaged without erasing the set
speed from memory.
Once the vehicle reaches about
40 km/h (25 mph) or more, move the
thumbwheel up toward RES/+
briefly. The vehicle returns to the
speed selected previously and stays
there. Increasing Speed While Using
Cruise Control
If the cruise control system is
already activated,
.Move the thumbwheel up toward
RES/+ and hold it until the
desired speed is reached, and
then release it.
.To increase the speed in small
amounts, move the thumbwheel
up toward RES/+ briefly and
then release it. Each time this is
done, the vehicle goes about
1.6 km/h (1 mph) faster.
Reducing Speed While Using
Cruise Control
If the cruise control system is
already activated,
.Move the thumbwheel toward
SET/− and hold until the desired
lower speed is reached, then
release it.
.To slow down in small amounts,
move the thumbwheel toward
SET/− briefly. Each time this is
done, the vehicle goes about
1.6 km/h (1 mph) slower.
Passing Another Vehicle While
Using Cruise Control
Use the accelerator pedal to
increase the vehicle speed. When
you take your foot off the pedal, the
vehicle slows down to the previous
set cruise control speed.
Using Cruise Control on Hills
How well the cruise control works
on hills depends upon the vehicle
speed, load, and the steepness of
the hills. When going up steep hills,
you might have to step on the
accelerator pedal to maintain the
vehicle speed. When going
downhill, you might have to brake or
shift to a lower gear to maintain the
vehicle speed. When the brakes are
applied the cruise control is
disengaged.
Page 238 of 394
Black plate (38,1)Chevrolet Cruze Owner Manual - 2011
9-38 Driving and Operating
Ending Cruise Control
There are three ways to end cruise
control:
.To disengage cruise control;
step lightly on the brake pedal or
clutch for manual transmission.
.Press*on the steering wheel.
.To turn off the cruise control,
press
5on the steering wheel.
Erasing Speed Memory
The cruise control set speed is
erased from memory by pressing
the
5button or if the ignition is
turned off.
Object Detection
Systems
Ultrasonic Parking Assist
For vehicles with the Ultrasonic
Rear Parking Assist (URPA) system,
it assists the driver with parking and
avoiding objects while in
R (Reverse). URPA operates at
speeds less than 8 km/h (5 mph),
and the sensors on the rear bumper
detect objects up to 2.5 m (8 ft)
behind the vehicle, and at least
20 cm (8 in) off the ground.
{WARNING
The Ultrasonic Rear Parking
Assist (URPA) system does not
replace driver vision. It cannot
detect:
.Objects that are below the
bumper, underneath the
vehicle, or too close or far
from the vehicle
.Children, pedestrians,
bicyclists, or pets.
If you do not use proper care
before and while backing, vehicle
damage, injury, or death could
occur. Even with URPA, always
check behind the vehicle before
backing up. While backing, be
sure to look for objects and check
the vehicle's mirrors.
Page 253 of 394
Black plate (1,1)Chevrolet Cruze Owner Manual - 2011
Vehicle Care 10-1
Vehicle Care
General Information
General Information . . . . . . . . . . 10-2
California Proposition65 Warning . . . . . . . . . . . . . . . . . 10-3
California Perchlorate Materials Requirements . . . . 10-3
Accessories and Modifications . . . . . . . . . . . . . . . 10-3
Vehicle Checks
Doing Your OwnService Work . . . . . . . . . . . . . . . 10-4
Hood . . . . . . . . . . . . . . . . . . . . . . . . 10-4
Engine Compartment Overview . . . . . . . . . . . . . . . . . . . 10-6
Engine Oil . . . . . . . . . . . . . . . . . . . 10-9
Engine Oil Life System . . . . . 10-12
Automatic Transmission Fluid . . . . . . . . . . . . . . . . . . . . . . 10-13
Manual Transmission Fluid . . . . . . . . . . . . . . . . . . . . . . 10-14
Hydraulic Clutch . . . . . . . . . . . . 10-14
Engine Air Cleaner/Filter . . . . 10-15
Cooling System . . . . . . . . . . . . 10-16
Engine Coolant . . . . . . . . . . . . . 10-17
Engine Overheating . . . . . . . . 10-20 Overheated Engine
Protection
Operating Mode . . . . . . . . . . . 10-22
Power Steering Fluid . . . . . . . 10-22
Washer Fluid . . . . . . . . . . . . . . . 10-22
Brakes . . . . . . . . . . . . . . . . . . . . . 10-23
Brake Fluid . . . . . . . . . . . . . . . . . 10-24
Battery . . . . . . . . . . . . . . . . . . . . . 10-26
Starter Switch Check . . . . . . . 10-26
Automatic Transmission Shift Lock Control Function
Check . . . . . . . . . . . . . . . . . . . . . 10-27
Ignition Transmission Lock Check . . . . . . . . . . . . . . . . . . . . . 10-28
Park Brake and P (Park) Mechanism Check . . . . . . . . 10-28
Wiper Blade Replacement . . . . . . . . . . . . . . 10-29
Windshield Replacement . . . 10-29
Headlamp Aiming
Headlamp Aiming . . . . . . . . . . 10-30
Bulb Replacement
Bulb Replacement . . . . . . . . . . 10-30
Headlamps, Front Turn Signal, Sidemarker, and
Parking Lamps . . . . . . . . . . . . 10-30 Taillamps, Turn Signal,
Sidemarker, Stoplamps,
and Back-Up Lamps . . . . . . 10-32
License Plate Lamp . . . . . . . . 10-35
Replacement Bulbs . . . . . . . . . 10-36
Electrical System
Electrical System Overload . . . . . . . . . . . . . . . . . . 10-36
Fuses and Circuit Breakers . . . . . . . . . . . . . . . . . . 10-37
Engine Compartment Fuse Block . . . . . . . . . . . . . . . . . . . . . 10-37
Instrument Panel Fuse Block . . . . . . . . . . . . . . . . . . . . . 10-41
Wheels and Tires
Tires . . . . . . . . . . . . . . . . . . . . . . . . 10-42
Winter Tires . . . . . . . . . . . . . . . . 10-43
Low-Profile Tires . . . . . . . . . . . 10-44
Tire Sidewall Labeling . . . . . . 10-44
Tire Designations . . . . . . . . . . . 10-47
Tire Terminology andDefinitions . . . . . . . . . . . . . . . . 10-47
Tire Pressure . . . . . . . . . . . . . . . 10-50
Tire Pressure Monitor System . . . . . . . . . . . . . . . . . . . 10-52
Tire Pressure Monitor Operation . . . . . . . . . . . . . . . . . 10-53
Page 259 of 394

Black plate (7,1)Chevrolet Cruze Owner Manual - 2011
Vehicle Care 10-7
A.Engine Air Cleaner/Filter on
page 10‑15.
B. Engine Oil Dipstick. See “Checking Engine Oil” under
Engine Oil on page 10‑9.
C. Electric Engine Cooling Fans (Out of View). See Cooling
System on page 10‑16.
D. Engine Oil Fill Cap. See “When
to Add Engine Oil” under
Engine Oil on page 10‑9. E. Remote Negative (-) Terminal.
See Jump Starting on
page 10‑84.
F. Brake/Clutch Fluid Reservoir. See “Brake Fluid” underBrakes
on page 10‑23 andHydraulic
Clutch on page 10‑14.
G. Battery on page 10‑26 (Under
Cover).
H. Engine Coolant Surge Tank and Pressure Cap. See Engine
Coolant on page 10‑17. I. Remote Positive (+) Terminal.
See Jump Starting on
page 10‑84.
J. Engine Compartment Fuse
Block on page 10‑37.
K. Windshield Washer Fluid Reservoir. See “Adding Washer
Fluid” under Washer Fluid on
page 10‑22.
Page 261 of 394
Black plate (9,1)Chevrolet Cruze Owner Manual - 2011
Vehicle Care 10-9
A.Engine Air Cleaner/Filter on
page 10‑15.
B. Engine Oil Dipstick. See “Checking Engine Oil” under
Engine Oil on page 10‑9.
C. Engine Cooling Fans (Out of View). See Cooling System on
page 10‑16.
D. Engine Oil Fill Cap. See “When
to Add Engine Oil” under
Engine Oil on page 10‑9.
E. Remote Negative (-) Terminal. See Jump Starting on
page 10‑84.
F. Brake/Clutch Fluid Reservoir. See “Brake Fluid” underBrakes
on page 10‑23 andHydraulic
Clutch on page 10‑14. G.
Battery on page 10‑26 (Under
Cover).
H. Engine Coolant Surge Tank and Pressure Cap. See Cooling
System on page 10‑16.
I. Remote Positive (+) Terminal. See Jump Starting on
page 10‑84.
J. Engine Compartment Fuse
Block on page 10‑37.
K. Windshield Washer Fluid Reservoir. See “Adding Washer
Fluid” under Washer Fluid on
page 10‑22.Engine Oil
To ensure proper engine
performance and long life, careful
attention must be paid to engine oil.
Following these simple, but
important steps will help protect
your investment:
.Always use engine oil approved
to the proper specification and of
the proper viscosity grade. See
“Selecting the Right Engine Oil”
in this section.
.Check the engine oil level
regularly and maintain the
proper oil level. See “Checking
Engine Oil” and“When to Add
Engine Oil” in this section.
.Change the engine oil at the
appropriate time. See Engine Oil
Life System on page 10‑12.
.Always dispose of engine oil
properly. See “What to Do With
Used Oil” in this section.
Page 266 of 394
Black plate (14,1)Chevrolet Cruze Owner Manual - 2011
10-14 Vehicle Care
Change the fluid and filter at the
intervals listed inScheduled
Maintenance on page 11‑2, and be
sure to use the fluid listed in
Recommended Fluids and
Lubricants on page 11‑6.
Manual Transmission
Fluid
How to Check Manual
Transmission Fluid
It is not necessary to check the
manual transmission fluid level.
A transmission fluid leak is the only
reason for fluid loss. If a leak
occurs, take the vehicle to your
dealer service department and have
it repaired as soon as possible. See
Recommended Fluids and
Lubricants on page 11‑6 for the
proper fluid to use.
Hydraulic Clutch
For vehicles with a manual
transmission, it is not necessary to
regularly check brake/clutch fluid
unless there is a leak suspected.
Adding fluid will not correct a leak.
A fluid loss in this system could
indicate a problem. Have the
system inspected and repaired.
When to Check and What
to Use
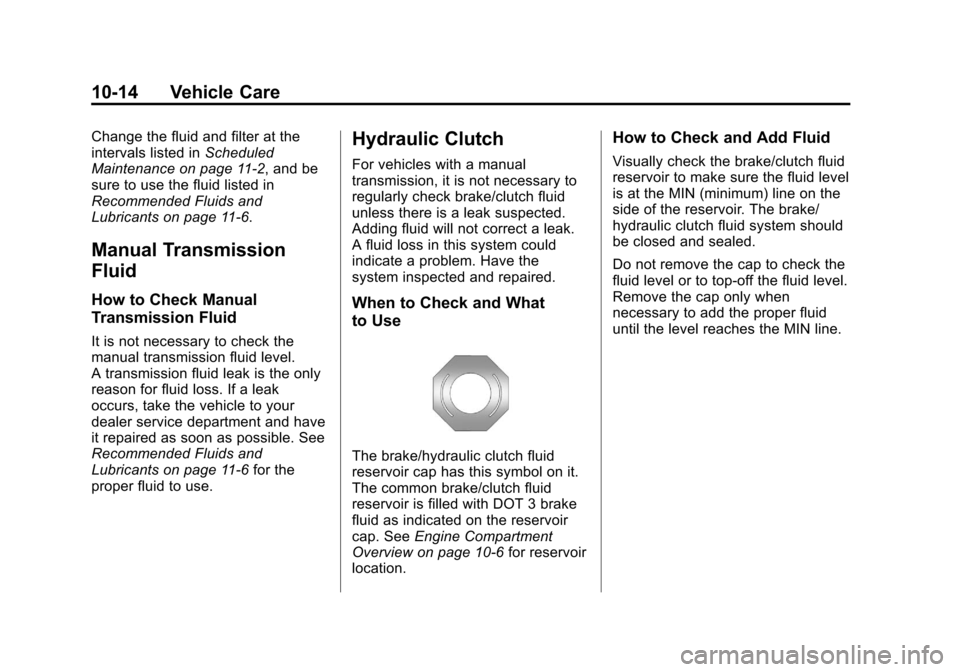
The brake/hydraulic clutch fluid
reservoir cap has this symbol on it.
The common brake/clutch fluid
reservoir is filled with DOT 3 brake
fluid as indicated on the reservoir
cap. See Engine Compartment
Overview on page 10‑6 for reservoir
location.
How to Check and Add Fluid
Visually check the brake/clutch fluid
reservoir to make sure the fluid level
is at the MIN (minimum) line on the
side of the reservoir. The brake/
hydraulic clutch fluid system should
be closed and sealed.
Do not remove the cap to check the
fluid level or to top‐off the fluid level.
Remove the cap only when
necessary to add the proper fluid
until the level reaches the MIN line.