fuel pressure CHEVROLET CRUZE 2011 1.G Owners Manual
[x] Cancel search | Manufacturer: CHEVROLET, Model Year: 2011, Model line: CRUZE, Model: CHEVROLET CRUZE 2011 1.GPages: 394, PDF Size: 6.89 MB
Page 5 of 394

Black plate (5,1)Chevrolet Cruze Owner Manual - 2011
Introduction v
Vehicle Symbol Chart
Here are some additional symbols
that may be found on the vehicle
and what they mean. For more
information on the symbol, refer to
the Index.
9:Airbag Readiness Light
#:Air Conditioning
!:Antilock Brake System (ABS)
g:Audio Steering Wheel Controls
or OnStar®
$: Brake System Warning Light
":Charging System
I:Cruise Control
B: Engine Coolant Temperature
O:Exterior Lamps
#:Fog Lamps
.: Fuel Gauge
+:Fuses
3: Headlamp High/Low-Beam
Changer
j: LATCH System Child
Restraints
*: Malfunction Indicator Lamp
::Oil Pressure
}:Power
/:Remote Vehicle Start
>:Safety Belt Reminders
7:Tire Pressure Monitor
d:Traction Control
M:Windshield Washer Fluid
Page 7 of 394
Black plate (1,1)Chevrolet Cruze Owner Manual - 2011
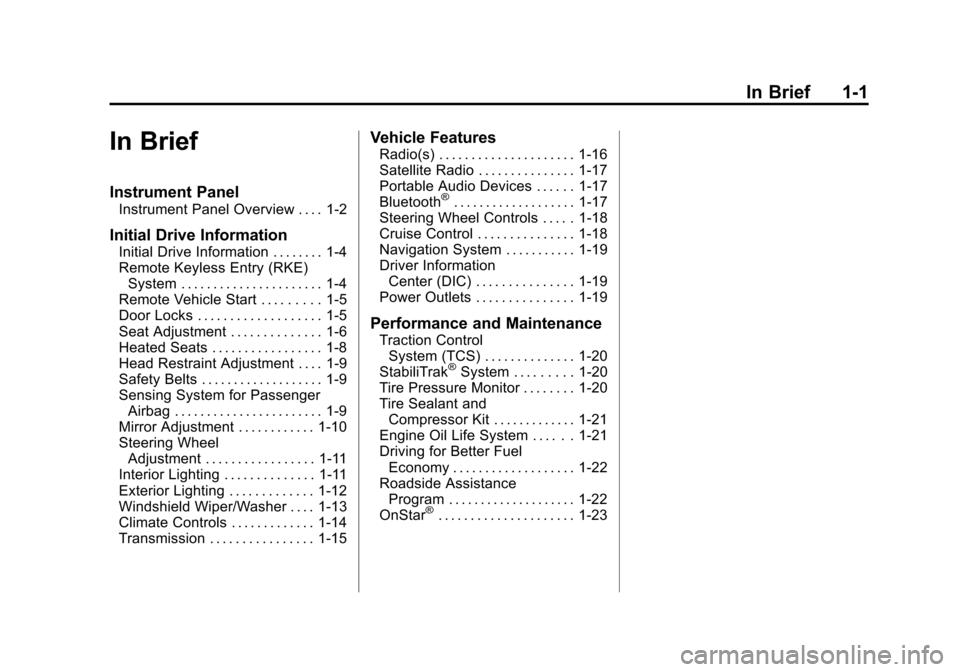
In Brief 1-1
In Brief
Instrument Panel
Instrument Panel Overview . . . . 1-2
Initial Drive Information
Initial Drive Information . . . . . . . . 1-4
Remote Keyless Entry (RKE)System . . . . . . . . . . . . . . . . . . . . . . 1-4
Remote Vehicle Start . . . . . . . . . 1-5
Door Locks . . . . . . . . . . . . . . . . . . . 1-5
Seat Adjustment . . . . . . . . . . . . . . 1-6
Heated Seats . . . . . . . . . . . . . . . . . 1-8
Head Restraint Adjustment . . . . 1-9
Safety Belts . . . . . . . . . . . . . . . . . . . 1-9
Sensing System for Passenger Airbag . . . . . . . . . . . . . . . . . . . . . . . 1-9
Mirror Adjustment . . . . . . . . . . . . 1-10
Steering Wheel Adjustment . . . . . . . . . . . . . . . . . 1-11
Interior Lighting . . . . . . . . . . . . . . 1-11
Exterior Lighting . . . . . . . . . . . . . 1-12
Windshield Wiper/Washer . . . . 1-13
Climate Controls . . . . . . . . . . . . . 1-14
Transmission . . . . . . . . . . . . . . . . 1-15
Vehicle Features
Radio(s) . . . . . . . . . . . . . . . . . . . . . 1-16
Satellite Radio . . . . . . . . . . . . . . . 1-17
Portable Audio Devices . . . . . . 1-17
Bluetooth
®. . . . . . . . . . . . . . . . . . . 1-17
Steering Wheel Controls . . . . . 1-18
Cruise Control . . . . . . . . . . . . . . . 1-18
Navigation System . . . . . . . . . . . 1-19
Driver Information
Center (DIC) . . . . . . . . . . . . . . . 1-19
Power Outlets . . . . . . . . . . . . . . . 1-19
Performance and Maintenance
Traction Control System (TCS) . . . . . . . . . . . . . . 1-20
StabiliTrak
®System . . . . . . . . . 1-20
Tire Pressure Monitor . . . . . . . . 1-20
Tire Sealant and Compressor Kit . . . . . . . . . . . . . 1-21
Engine Oil Life System . . . . . . 1-21
Driving for Better Fuel Economy . . . . . . . . . . . . . . . . . . . 1-22
Roadside Assistance Program . . . . . . . . . . . . . . . . . . . . 1-22
OnStar
®. . . . . . . . . . . . . . . . . . . . . 1-23
Page 113 of 394
Black plate (1,1)Chevrolet Cruze Owner Manual - 2011
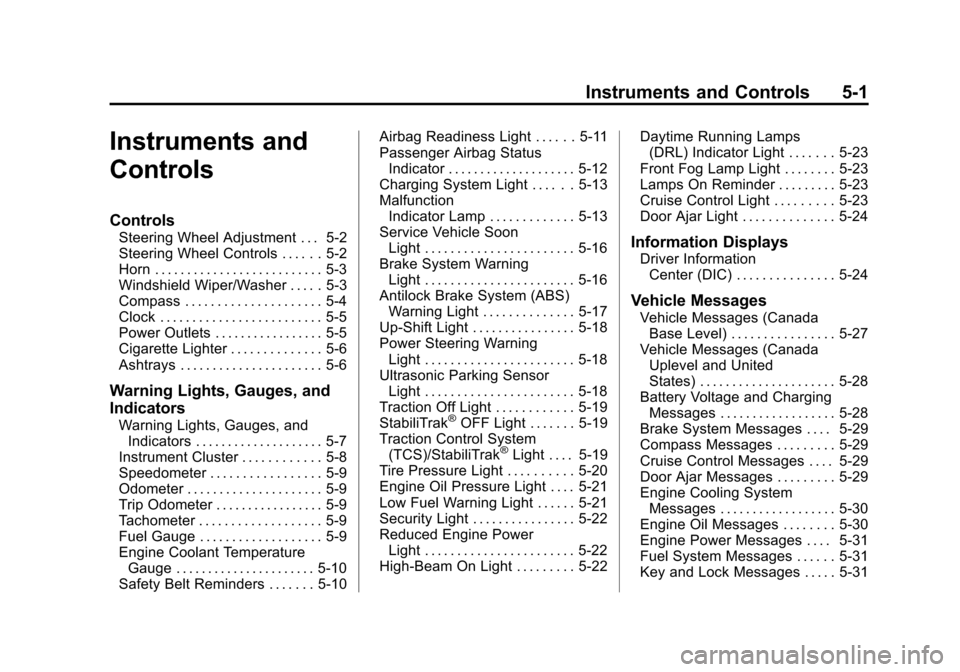
Instruments and Controls 5-1
Instruments and
Controls
Controls
Steering Wheel Adjustment . . . 5-2
Steering Wheel Controls . . . . . . 5-2
Horn . . . . . . . . . . . . . . . . . . . . . . . . . . 5-3
Windshield Wiper/Washer . . . . . 5-3
Compass . . . . . . . . . . . . . . . . . . . . . 5-4
Clock . . . . . . . . . . . . . . . . . . . . . . . . . 5-5
Power Outlets . . . . . . . . . . . . . . . . . 5-5
Cigarette Lighter . . . . . . . . . . . . . . 5-6
Ashtrays . . . . . . . . . . . . . . . . . . . . . . 5-6
Warning Lights, Gauges, and
Indicators
Warning Lights, Gauges, andIndicators . . . . . . . . . . . . . . . . . . . . 5-7
Instrument Cluster . . . . . . . . . . . . 5-8
Speedometer . . . . . . . . . . . . . . . . . 5-9
Odometer . . . . . . . . . . . . . . . . . . . . . 5-9
Trip Odometer . . . . . . . . . . . . . . . . . 5-9
Tachometer . . . . . . . . . . . . . . . . . . . 5-9
Fuel Gauge . . . . . . . . . . . . . . . . . . . 5-9
Engine Coolant Temperature Gauge . . . . . . . . . . . . . . . . . . . . . . 5-10
Safety Belt Reminders . . . . . . . 5-10 Airbag Readiness Light . . . . . . 5-11
Passenger Airbag Status
Indicator . . . . . . . . . . . . . . . . . . . . 5-12
Charging System Light . . . . . . 5-13
Malfunction Indicator Lamp . . . . . . . . . . . . . 5-13
Service Vehicle Soon Light . . . . . . . . . . . . . . . . . . . . . . . 5-16
Brake System Warning Light . . . . . . . . . . . . . . . . . . . . . . . 5-16
Antilock Brake System (ABS) Warning Light . . . . . . . . . . . . . . 5-17
Up-Shift Light . . . . . . . . . . . . . . . . 5-18
Power Steering Warning Light . . . . . . . . . . . . . . . . . . . . . . . 5-18
Ultrasonic Parking Sensor Light . . . . . . . . . . . . . . . . . . . . . . . 5-18
Traction Off Light . . . . . . . . . . . . 5-19
StabiliTrak®OFF Light . . . . . . . 5-19
Traction Control System (TCS)/StabiliTrak
®Light . . . . 5-19
Tire Pressure Light . . . . . . . . . . 5-20
Engine Oil Pressure Light . . . . 5-21
Low Fuel Warning Light . . . . . . 5-21
Security Light . . . . . . . . . . . . . . . . 5-22
Reduced Engine Power Light . . . . . . . . . . . . . . . . . . . . . . . 5-22
High-Beam On Light . . . . . . . . . 5-22 Daytime Running Lamps
(DRL) Indicator Light . . . . . . . 5-23
Front Fog Lamp Light . . . . . . . . 5-23
Lamps On Reminder . . . . . . . . . 5-23
Cruise Control Light . . . . . . . . . 5-23
Door Ajar Light . . . . . . . . . . . . . . 5-24
Information Displays
Driver Information Center (DIC) . . . . . . . . . . . . . . . 5-24
Vehicle Messages
Vehicle Messages (CanadaBase Level) . . . . . . . . . . . . . . . . 5-27
Vehicle Messages (Canada Uplevel and United
States) . . . . . . . . . . . . . . . . . . . . . 5-28
Battery Voltage and Charging Messages . . . . . . . . . . . . . . . . . . 5-28
Brake System Messages . . . . 5-29
Compass Messages . . . . . . . . . 5-29
Cruise Control Messages . . . . 5-29
Door Ajar Messages . . . . . . . . . 5-29
Engine Cooling System Messages . . . . . . . . . . . . . . . . . . 5-30
Engine Oil Messages . . . . . . . . 5-30
Engine Power Messages . . . . 5-31
Fuel System Messages . . . . . . 5-31
Key and Lock Messages . . . . . 5-31
Page 133 of 394
Black plate (21,1)Chevrolet Cruze Owner Manual - 2011
Instruments and Controls 5-21
Engine Oil Pressure Light
{WARNING
Do not keep driving if the oil
pressure is low. The engine can
become so hot that it catches fire.
Someone could be burned. Check
the oil as soon as possible and
have the vehicle serviced.
Notice: Lack of proper engine oil
maintenance can damage the
engine. The repairs would not be
covered by the vehicle warranty.
Always follow the maintenance
schedule for changing engine oil.
The oil pressure light should come
on briefly as the engine is started.
If it does not come on have the
vehicle serviced by your dealer.
If the light comes on and stays on, it
means that oil is not flowing through
the engine properly. The vehicle
could be low on oil and might have
some other system problem. See
your dealer.
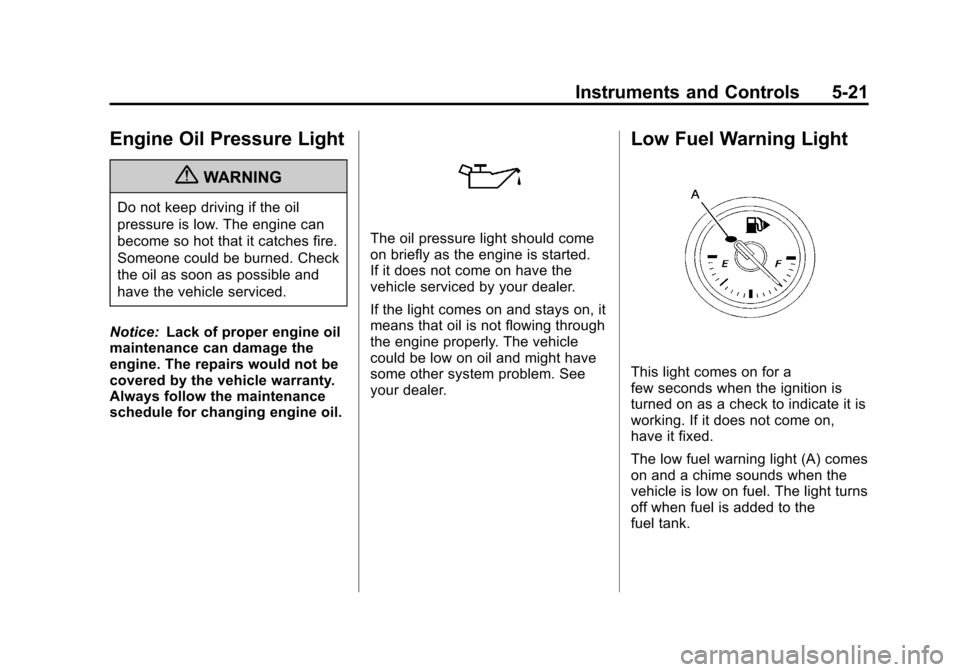
Low Fuel Warning Light
This light comes on for a
few seconds when the ignition is
turned on as a check to indicate it is
working. If it does not come on,
have it fixed.
The low fuel warning light (A) comes
on and a chime sounds when the
vehicle is low on fuel. The light turns
off when fuel is added to the
fuel tank.
Page 138 of 394
Black plate (26,1)Chevrolet Cruze Owner Manual - 2011
5-26 Instruments and Controls
Fuel Used
This display shows the approximate
liters (L) or gallons (gal) of fuel that
have been used since last reset.
The fuel used can be reset by
pressing the SET/CLR button while
the Fuel Used display is showing.
Digital Speed
The speedometer shows how fast
the vehicle is moving in either
kilometers per hour (km/h) or miles
per hour (mph). The speedometer
cannot be reset.
Navigation
This display is used for the OnStar
or Navigation System Turn-by-Turn
guidance. See The OnStar Owner's
Guide or the Navigation manual,
if the vehicle has navigation, for
more information.
Blank Display
This display shows no information.Vehicle Information Menu
Items
Press MENU on the turn signal
lever until Vehicle Information menu
is displayed. Use
w xto scroll
through the following menu items:
.Units
.Tire Pressure
.Remaining Oil Life
.Battery Voltage
.Blank Display
Units
Move
w xto change between
Metric or US when the Unit display
is active. Press SET/CLR to confirm
the setting. This will change the
displays on the cluster and DIC to
either metric or English (US)
measurements. Tire Pressure
The display will show a vehicle with
the approximate pressures of all
four tires. Tire pressure is displayed
in either kilopascal (kPa) or in
pounds per square inch (psi). See
Tire Pressure Monitor System on
page 10‑52
andTire Pressure
Monitor Operation on page 10‑53 for
more information.
Remaining Oil Life
This display shows an estimate of
the oil's remaining useful life.
If REMAINING OIL LIFE 99% is
displayed, that means 99% of the
current oil life remains.
Page 227 of 394
Black plate (27,1)Chevrolet Cruze Owner Manual - 2011
Driving and Operating 9-27
from P (Park) when the ignition key
is in ON/RUN. If you cannot shift out
of P (Park), ease pressure on the
shift lever, then push the shift lever
all the way into P (Park) as you
maintain brake application. Then
press the shift lever button and
move the shift lever into another
gear. SeeShifting Out of Park on
page 9‑23.
R (Reverse): Use this gear to
back up.
Notice: Shifting to R (Reverse)
while the vehicle is moving
forward could damage the
transmission. The repairs would
not be covered by the vehicle
warranty. Shift to R (Reverse) only
after the vehicle is stopped.
To rock the vehicle back and forth to
get out of snow, ice or sand without
damaging the transmission, see If
the Vehicle is Stuck on page 9‑11.
N (Neutral): In this position, the
engine does not connect with the
wheels. To restart the engine when
the vehicle is already moving, use N (Neutral) only. Also, use
N (Neutral) when the vehicle is
being towed.
The vehicle has an automatic
neutral shift feature which allows the
transmission to automatically shift to
N (Neutral) when the vehicle is
stopped with a forward gear
engaged. The reduced load on the
engine improves vehicle fuel
economy.
{WARNING
Shifting into a drive gear while the
engine is running at high speed is
dangerous. Unless your foot is
firmly on the brake pedal, the
vehicle could move very rapidly.
You could lose control and hit
people or objects. Do not shift
into a drive gear while the engine
is running at high speed.
Notice: Shifting out of P (Park) or
N (Neutral) with the engine
running at high speed may damage the transmission. The
repairs would not be covered by
the vehicle warranty. Be sure the
engine is not running at high
speed when shifting the vehicle.
D (Drive):
This position is for
normal driving. It provides the best
fuel economy. If more power is
needed for passing, and the
vehicle is:
.Going less than 56 km/h
(35 mph), push the accelerator
pedal about halfway down.
.Going about 56 km/h (35 mph) or
more, push the accelerator all
the way down.
Notice: If the vehicle seems to
accelerate slowly or not shift
gears when you go faster, and
you continue to drive the vehicle
that way, you could damage the
transmission. Have the vehicle
serviced right away.
Page 229 of 394
Black plate (29,1)Chevrolet Cruze Owner Manual - 2011
Driving and Operating 9-29
The transmission will only allow
you to shift into gears appropriate
for the vehicle speed and engine
revolutions per minute (rpm). The
transmission will not automatically
shift to the next lower gear if the
engine rpm is too high, nor to the
next higher gear when the maximum
engine rpm is reached.
If shifting is prevented for any
reason, the currently selected gear
will flash multiple times, indicating
that the transmission has not shifted
gears.
While in the DSC mode, the
transmission will automatically
downshift when the vehicle comes
to a stop. This will allow for more
power during take-off.
When accelerating the vehicle from
a stop in snowy and icy conditions,
you may want to shift into second
gear. A higher gear allows the
vehicle to gain more traction on
slippery surfaces.Manual Transmission
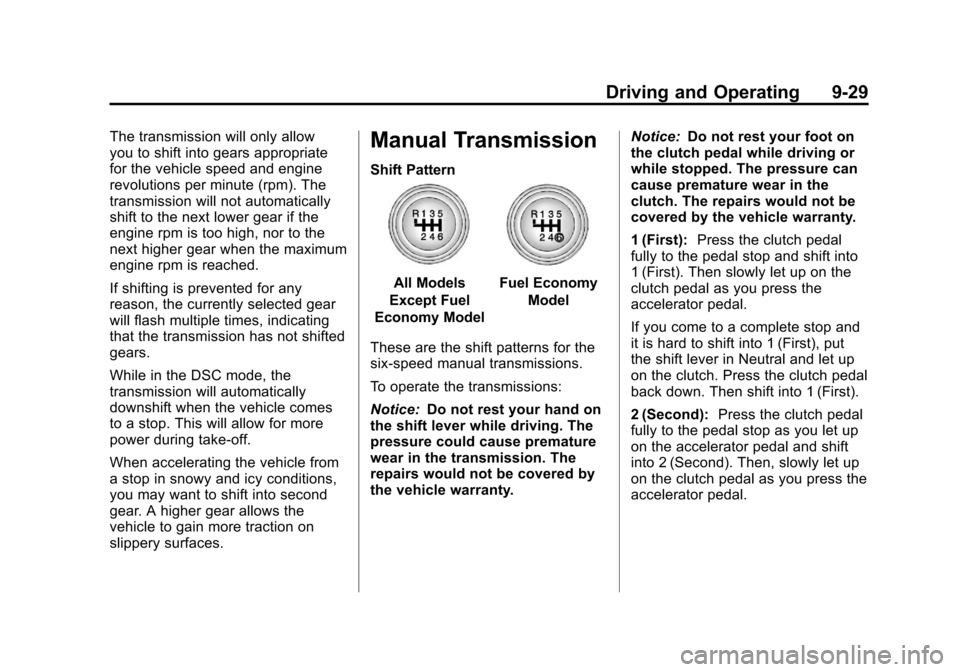
Shift Pattern
All Models
Except Fuel
Economy ModelFuel Economy
Model
These are the shift patterns for the
six-speed manual transmissions.
To operate the transmissions:
Notice: Do not rest your hand on
the shift lever while driving. The
pressure could cause premature
wear in the transmission. The
repairs would not be covered by
the vehicle warranty. Notice:
Do not rest your foot on
the clutch pedal while driving or
while stopped. The pressure can
cause premature wear in the
clutch. The repairs would not be
covered by the vehicle warranty.
1 (First): Press the clutch pedal
fully to the pedal stop and shift into
1 (First). Then slowly let up on the
clutch pedal as you press the
accelerator pedal.
If you come to a complete stop and
it is hard to shift into 1 (First), put
the shift lever in Neutral and let up
on the clutch. Press the clutch pedal
back down. Then shift into 1 (First).
2 (Second): Press the clutch pedal
fully to the pedal stop as you let up
on the accelerator pedal and shift
into 2 (Second). Then, slowly let up
on the clutch pedal as you press the
accelerator pedal.
Page 300 of 394

Black plate (48,1)Chevrolet Cruze Owner Manual - 2011
10-48 Vehicle Care
Belt:A rubber coated layer of
cords that is located between
the plies and the tread. Cords
may be made from steel or other
reinforcing materials.
Bead
:The tire bead contains
steel wires wrapped by steel
cords that hold the tire onto
the rim.
Bias Ply Tire
:A pneumatic tire
in which the plies are laid at
alternate angles less than
90 degrees to the centerline of
the tread.
Cold Tire Pressure
:The
amount of air pressure in a tire,
measured in kPa (kilopascal)
or psi (pounds per square inch)
before a tire has built up heat
from driving. See Tire Pressure
on page 10‑50. Curb Weight
:The weight of a
motor vehicle with standard and
optional equipment including the
maximum capacity of fuel, oil,
and coolant, but without
passengers and cargo.
DOT Markings
:A code molded
into the sidewall of a tire
signifying that the tire is in
compliance with the U.S.
Department of Transportation
(DOT) motor vehicle safety
standards. The DOT code
includes the Tire Identification
Number (TIN), an alphanumeric
designator which can also
identify the tire manufacturer,
production plant, brand, and
date of production.
GVWR
:Gross Vehicle Weight
Rating. See Vehicle Load Limits
on page 9‑12. GAWR FRT
:Gross Axle Weight
Rating for the front axle. See
Vehicle Load Limits on
page 9‑12.
GAWR RR
:Gross Axle Weight
Rating for the rear axle. See
Vehicle Load Limits on
page 9‑12.
Intended Outboard Sidewall
:
The side of an asymmetrical tire,
that must always face outward
when mounted on a vehicle.
Kilopascal (kPa)
:The metric
unit for air pressure.
Light Truck (LT‐Metric) Tire
:A
tire used on light duty trucks and
some multipurpose passenger
vehicles.
Load Index
:An assigned
number ranging from 1 to 279
that corresponds to the load
carrying capacity of a tire.
Page 302 of 394
Black plate (50,1)Chevrolet Cruze Owner Manual - 2011
10-50 Vehicle Care
Tread:The portion of a tire that
comes into contact with
the road.
Treadwear Indicators
:Narrow
bands, sometimes called wear
bars, that show across the tread
of a tire when only 1.6 mm
(1/16 in) of tread remains. See
When It Is Time for New Tires
on page 10‑58.
UTQGS (Uniform Tire Quality
Grading Standards)
:
A tire information system that
provides consumers with
ratings for a tire's traction,
temperature, and treadwear.
Ratings are determined by
tire manufacturers using
government testing procedures.
The ratings are molded into the
sidewall of the tire. See Uniform
Tire Quality Grading on
page 10‑62. Vehicle Capacity Weight
:The
number of designated seating
positions multiplied by
68 kg (150 lbs) plus the rated
cargo load. See Vehicle Load
Limits on page 9‑12.
Vehicle Maximum Load on the
Tire
:Load on an individual tire
due to curb weight, accessory
weight, occupant weight, and
cargo weight.
Vehicle Placard
:A label
permanently attached to a
vehicle showing the vehicle
capacity weight and the original
equipment tire size and
recommended inflation pressure.
See “Tire and Loading
Information Label” underVehicle
Load Limits on page 9‑12.
Tire Pressure
Tires need the correct amount of
air pressure to operate
effectively.
Notice: Do not let anyone tell
you that underinflation or
overinflation is all right. It is
not. If the tires do not have
enough air (underinflation),
you can get the following:
.Tire overloading and
over-heating which could
lead to a blowout.
.Premature or
irregular wear.
.Poor handling.
.Reduced fuel economy.
If the tires have too much air
(overinflation), you can get the
following:
.Unusual wear.
.Poor handling.
Page 304 of 394
Black plate (52,1)Chevrolet Cruze Owner Manual - 2011
10-52 Vehicle Care
Tire Pressure Monitor
System
The Tire Pressure Monitor System
(TPMS) uses radio and sensor
technology to check tire pressure
levels. The TPMS sensors monitor
the air pressure in your tires and
transmit tire pressure readings to a
receiver located in the vehicle.
Each tire, including the spare
(if provided), should be checked
monthly when cold and inflated to
the inflation pressure recommended
by the vehicle manufacturer on the
vehicle placard or tire inflation
pressure label. (If your vehicle has
tires of a different size than the size
indicated on the vehicle placard or
tire inflation pressure label, you
should determine the proper tire
inflation pressure for those tires.)
As an added safety feature, your
vehicle has been equipped with a
tire pressure monitoring system
(TPMS) that illuminates a low tirepressure telltale when one or
more of your tires is significantly
under‐inflated.
Accordingly, when the low tire
pressure telltale illuminates, you
should stop and check your tires as
soon as possible, and inflate them
to the proper pressure. Driving on a
significantly under‐inflated tire
causes the tire to overheat and can
lead to tire failure. Under‐inflation
also reduces fuel efficiency and tire
tread life, and may affect the
vehicle's handling and stopping
ability.
Please note that the TPMS is not a
substitute for proper tire
maintenance, and it is the driver's
responsibility to maintain correct tire
pressure, even if under‐inflation has
not reached the level to trigger
illumination of the TPMS low tire
pressure telltale.
Your vehicle has also been
equipped with a TPMS malfunction
indicator to indicate when the
system is not operating properly.The TPMS malfunction indicator is
combined with the low tire pressure
telltale. When the system detects a
malfunction, the telltale will flash for
approximately one minute and then
remain continuously illuminated.
This sequence will continue upon
subsequent vehicle start‐ups as
long as the malfunction exists.
When the malfunction indicator is
illuminated, the system may not be
able to detect or signal low tire
pressure as intended. TPMS
malfunctions may occur for a variety
of reasons, including the installation
of replacement or alternate tires or
wheels on the vehicle that prevent
the TPMS from functioning properly.
Always check the TPMS malfunction
telltale after replacing one or more
tires or wheels on your vehicle to
ensure that the replacement or
alternate tires and wheels allow the
TPMS to continue to function
properly.
See
Tire Pressure Monitor
Operation on page 10‑53 for
additional information.