fuse CHEVROLET CRUZE 2011 1.G Owners Manual
[x] Cancel search | Manufacturer: CHEVROLET, Model Year: 2011, Model line: CRUZE, Model: CHEVROLET CRUZE 2011 1.GPages: 394, PDF Size: 6.89 MB
Page 5 of 394
Black plate (5,1)Chevrolet Cruze Owner Manual - 2011
Introduction v
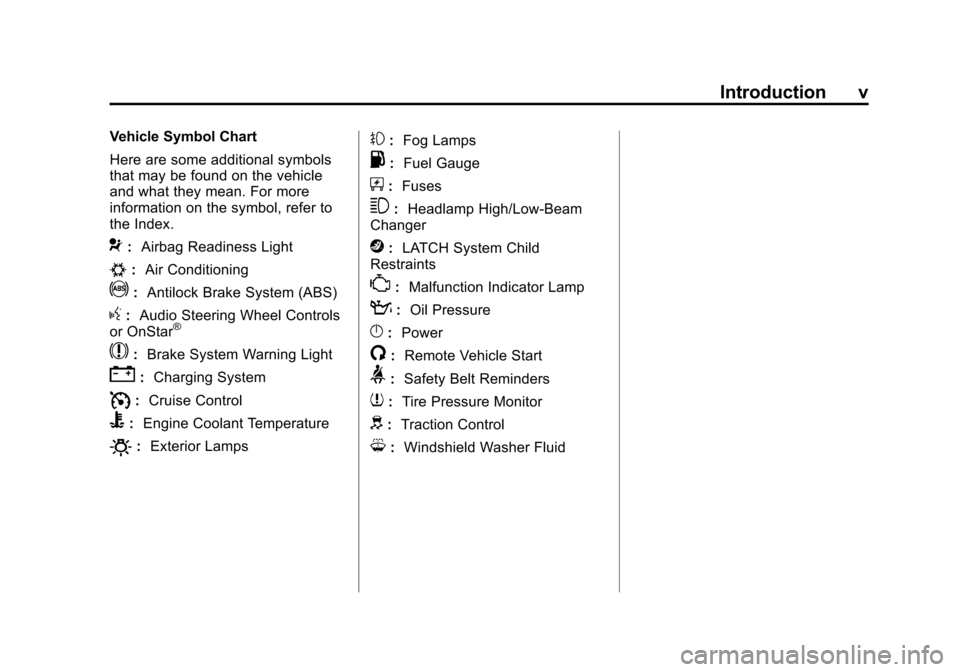
Vehicle Symbol Chart
Here are some additional symbols
that may be found on the vehicle
and what they mean. For more
information on the symbol, refer to
the Index.
9:Airbag Readiness Light
#:Air Conditioning
!:Antilock Brake System (ABS)
g:Audio Steering Wheel Controls
or OnStar®
$: Brake System Warning Light
":Charging System
I:Cruise Control
B: Engine Coolant Temperature
O:Exterior Lamps
#:Fog Lamps
.: Fuel Gauge
+:Fuses
3: Headlamp High/Low-Beam
Changer
j: LATCH System Child
Restraints
*: Malfunction Indicator Lamp
::Oil Pressure
}:Power
/:Remote Vehicle Start
>:Safety Belt Reminders
7:Tire Pressure Monitor
d:Traction Control
M:Windshield Washer Fluid
Page 9 of 394

Black plate (3,1)Chevrolet Cruze Owner Manual - 2011
In Brief 1-3
A.Exterior Lamp Controls on
page 6‑1.
Front Fog Lamps on page 6‑4
(If Equipped).
Instrument Panel Illumination
Control on page 6‑5.
B. Air Vents on page 8‑6.
C. Headlamps High-Low Beam. See Headlamps High-Low
Beam on page 6‑2.
Turn and Lane‐Change Lever.
See Turn and Lane-Change
Signals on page 6‑4.
Driver Information Center (DIC)
Buttons. See Driver Information
Center (DIC) on page 5‑24.
D. Instrument Cluster on page 5‑8.
E. Horn on page 5‑3.
F. Driver Information Center (DIC)
on page 5‑24.
G. Steering Wheel Controls on
page 5‑2. H.
Windshield Wiper/Washer on
page 5‑3.
I. Infotainment on page 7‑1.
Satellite Radio on page 7‑13
(If Equipped).
J. Infotainment Display Screen.
K. Light Sensor. See Automatic
Headlamp System on page 6‑3.
L. Passenger Airbag. See Where
Are the Airbags? on page 3‑27.
M. Hood Release. See Hood on
page 10‑4.
N. Data Link Connector (DLC). See Malfunction Indicator Lamp
on page 5‑13.
O. Instrument Panel Fuse Block on
page 10‑41.
P. Cruise Control on page 9‑36. Q.
Steering Wheel Adjustment on
page 5‑2.
R. Driver Airbag. See Where Are
the Airbags? on page 3‑27.
S. Ignition Switch. See Ignition
Positions on page 9‑18.
T. Driver Knee Airbag. See Where
Are the Airbags? on page 3‑27.
U. Power Door Locks on page 2‑7.
V. Hazard Warning Flashers on
page 6‑3.
W. Shift Lever. See Automatic
Transmission on page 9‑26 or
Manual Transmission on
page 9‑29.
X. Traction Control System (TCS)
on page 9‑33.
StabiliTrak
®System on
page 9‑34.
Page 51 of 394
Black plate (3,1)Chevrolet Cruze Owner Manual - 2011
Seats and Restraints 3-3
The vehicle's rear seat may be
equipped with an adjustable
headrest in the center seating
position that can be adjusted the
same way as the head restraints.
The front seat outboard head
restraints and the center seat rear
headrest, if equipped, are not
designed to be removed.
If you are installing a child restraint
in the rear seat, see“Securing a
Child Restraint Designed for the
LATCH System” underLower
Anchors and Tethers for Children
(LATCH System) on page 3‑49.Front Seats
Seat Adjustment
{WARNING
You can lose control of the
vehicle if you try to adjust a
manual driver seat while the
vehicle is moving. The sudden
movement could startle and
confuse you, or make you push a
pedal when you do not want to.
Adjust the driver seat only when
the vehicle is not moving.
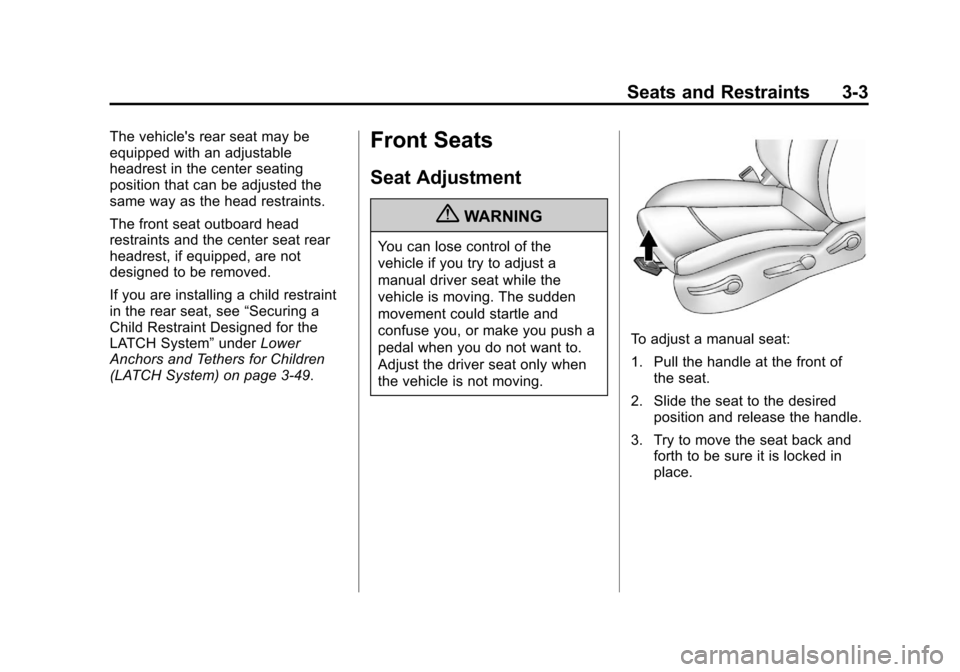
To adjust a manual seat:
1. Pull the handle at the front of the seat.
2. Slide the seat to the desired position and release the handle.
3. Try to move the seat back and forth to be sure it is locked in
place.
Page 53 of 394
Black plate (5,1)Chevrolet Cruze Owner Manual - 2011
Seats and Restraints 3-5
To adjust the seatback, see
Reclining Seatbacks on page 3‑5for
more information.
Reclining Seatbacks
{WARNING
You can lose control of the
vehicle if you try to adjust a
manual driver seat while the
vehicle is moving. The sudden
movement could startle and
confuse you, or make you push a
pedal when you do not want to.
Adjust the driver seat only when
the vehicle is not moving.
{WARNING
If either seatback is not locked, it
could move forward in a sudden
stop or crash. That could cause
injury to the person sitting there.
Always push and pull on the
seatbacks to be sure they are
locked.
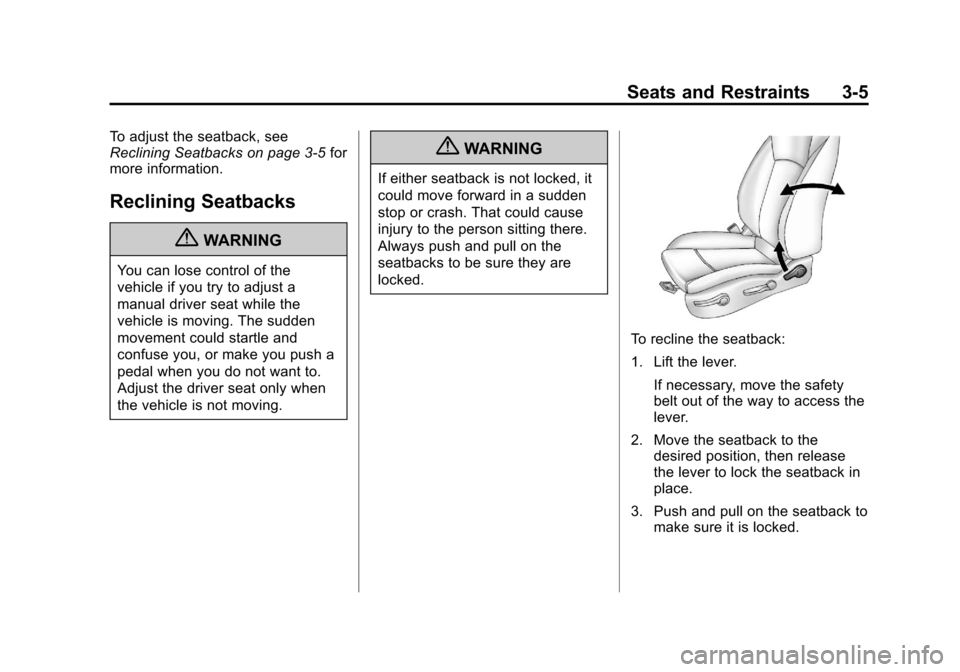
To recline the seatback:
1. Lift the lever.
If necessary, move the safety
belt out of the way to access the
lever.
2. Move the seatback to the desired position, then release
the lever to lock the seatback in
place.
3. Push and pull on the seatback to make sure it is locked.
Page 118 of 394
Black plate (6,1)Chevrolet Cruze Owner Manual - 2011
5-6 Instruments and Controls
Certain electrical accessories may
not be compatible with the
accessory power outlet and could
overload vehicle or adapter fuses.
If a problem is experienced, see
your dealer.
When adding electrical equipment,
be sure to follow the installation
instructions included with the
equipment. SeeAdd-On Electrical
Equipment on page 9‑52.
Notice: Hanging heavy
equipment from the power outlet
can cause damage not covered
by the vehicle warranty. The
power outlets are designed for
accessory power plugs only, such
as cell phone charge cords.Cigarette Lighter
For vehicles with a cigarette lighter,
it is located on the front floor
console.
To activate the cigarette lighter,
push it into the heating element and
let go. When the lighter is ready it
will pop back out.
Notice: Holding a cigarette lighter
in while it is heating does not let
the lighter back away from the
heating element when it is hot.
Damage from overheating can
occur to the lighter or heating
element, or a fuse could be
blown. Do not hold a cigarette
lighter in while it is heating.
Ashtrays
For vehicles with a removable
ashtray, the ashtray can be placed
into the front console cupholders.
To open the ashtray, lift the lid of the
ashtray. After using, close the lid.
To empty the ashtray for cleaning,
slightly turn the upper part of the
ashtray counterclockwise and
remove it.
Notice: If papers, pins, or other
flammable items are put in the
ashtray, hot cigarettes or other
smoking materials could ignite
them and possibly damage the
vehicle. Never put flammable
items in the ashtray.
Page 156 of 394
Black plate (4,1)Chevrolet Cruze Owner Manual - 2011
6-4 Lighting
Turn and Lane-Change
Signals
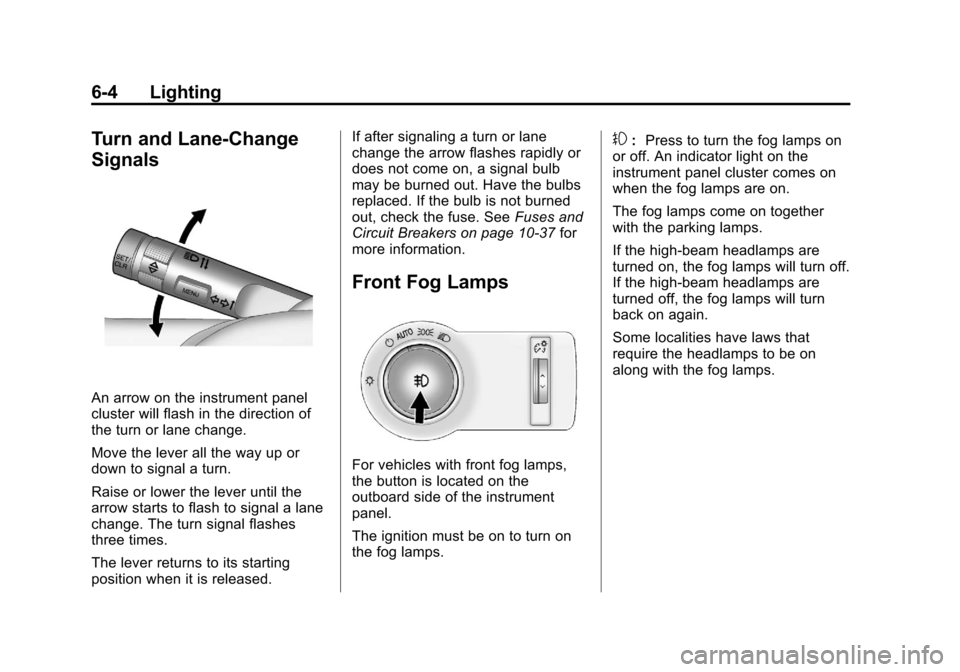
An arrow on the instrument panel
cluster will flash in the direction of
the turn or lane change.
Move the lever all the way up or
down to signal a turn.
Raise or lower the lever until the
arrow starts to flash to signal a lane
change. The turn signal flashes
three times.
The lever returns to its starting
position when it is released.If after signaling a turn or lane
change the arrow flashes rapidly or
does not come on, a signal bulb
may be burned out. Have the bulbs
replaced. If the bulb is not burned
out, check the fuse. See
Fuses and
Circuit Breakers on page 10‑37 for
more information.
Front Fog Lamps
For vehicles with front fog lamps,
the button is located on the
outboard side of the instrument
panel.
The ignition must be on to turn on
the fog lamps.
#: Press to turn the fog lamps on
or off. An indicator light on the
instrument panel cluster comes on
when the fog lamps are on.
The fog lamps come on together
with the parking lamps.
If the high‐beam headlamps are
turned on, the fog lamps will turn off.
If the high‐beam headlamps are
turned off, the fog lamps will turn
back on again.
Some localities have laws that
require the headlamps to be on
along with the fog lamps.
Page 253 of 394
Black plate (1,1)Chevrolet Cruze Owner Manual - 2011
Vehicle Care 10-1
Vehicle Care
General Information
General Information . . . . . . . . . . 10-2
California Proposition65 Warning . . . . . . . . . . . . . . . . . 10-3
California Perchlorate Materials Requirements . . . . 10-3
Accessories and Modifications . . . . . . . . . . . . . . . 10-3
Vehicle Checks
Doing Your OwnService Work . . . . . . . . . . . . . . . 10-4
Hood . . . . . . . . . . . . . . . . . . . . . . . . 10-4
Engine Compartment Overview . . . . . . . . . . . . . . . . . . . 10-6
Engine Oil . . . . . . . . . . . . . . . . . . . 10-9
Engine Oil Life System . . . . . 10-12
Automatic Transmission Fluid . . . . . . . . . . . . . . . . . . . . . . 10-13
Manual Transmission Fluid . . . . . . . . . . . . . . . . . . . . . . 10-14
Hydraulic Clutch . . . . . . . . . . . . 10-14
Engine Air Cleaner/Filter . . . . 10-15
Cooling System . . . . . . . . . . . . 10-16
Engine Coolant . . . . . . . . . . . . . 10-17
Engine Overheating . . . . . . . . 10-20 Overheated Engine
Protection
Operating Mode . . . . . . . . . . . 10-22
Power Steering Fluid . . . . . . . 10-22
Washer Fluid . . . . . . . . . . . . . . . 10-22
Brakes . . . . . . . . . . . . . . . . . . . . . 10-23
Brake Fluid . . . . . . . . . . . . . . . . . 10-24
Battery . . . . . . . . . . . . . . . . . . . . . 10-26
Starter Switch Check . . . . . . . 10-26
Automatic Transmission Shift Lock Control Function
Check . . . . . . . . . . . . . . . . . . . . . 10-27
Ignition Transmission Lock Check . . . . . . . . . . . . . . . . . . . . . 10-28
Park Brake and P (Park) Mechanism Check . . . . . . . . 10-28
Wiper Blade Replacement . . . . . . . . . . . . . . 10-29
Windshield Replacement . . . 10-29
Headlamp Aiming
Headlamp Aiming . . . . . . . . . . 10-30
Bulb Replacement
Bulb Replacement . . . . . . . . . . 10-30
Headlamps, Front Turn Signal, Sidemarker, and
Parking Lamps . . . . . . . . . . . . 10-30 Taillamps, Turn Signal,
Sidemarker, Stoplamps,
and Back-Up Lamps . . . . . . 10-32
License Plate Lamp . . . . . . . . 10-35
Replacement Bulbs . . . . . . . . . 10-36
Electrical System
Electrical System Overload . . . . . . . . . . . . . . . . . . 10-36
Fuses and Circuit Breakers . . . . . . . . . . . . . . . . . . 10-37
Engine Compartment Fuse Block . . . . . . . . . . . . . . . . . . . . . 10-37
Instrument Panel Fuse Block . . . . . . . . . . . . . . . . . . . . . 10-41
Wheels and Tires
Tires . . . . . . . . . . . . . . . . . . . . . . . . 10-42
Winter Tires . . . . . . . . . . . . . . . . 10-43
Low-Profile Tires . . . . . . . . . . . 10-44
Tire Sidewall Labeling . . . . . . 10-44
Tire Designations . . . . . . . . . . . 10-47
Tire Terminology andDefinitions . . . . . . . . . . . . . . . . 10-47
Tire Pressure . . . . . . . . . . . . . . . 10-50
Tire Pressure Monitor System . . . . . . . . . . . . . . . . . . . 10-52
Tire Pressure Monitor Operation . . . . . . . . . . . . . . . . . 10-53
Page 256 of 394
Black plate (4,1)Chevrolet Cruze Owner Manual - 2011
10-4 Vehicle Care
Vehicle Checks
Doing Your Own
Service Work
{WARNING
You can be injured and the
vehicle could be damaged if you
try to do service work on a vehicle
without knowing enough about it.
.Be sure you have sufficient
knowledge, experience, the
proper replacement parts,
and tools before attempting
any vehicle
maintenance task.
.Be sure to use the proper
nuts, bolts, and other
fasteners. Metric and English
fasteners can be easily
confused. If the wrong
fasteners are used, parts can
later break or fall off. You
could be hurt.If doing some of your own service
work, use the proper service
manual. It tells you much more
about how to service the vehicle
than this manual can. To order the
proper service manual, see
Service
Publications Ordering Information
on page 13‑12.
This vehicle has an airbag system.
Before attempting to do your own
service work, see Servicing the
Airbag-Equipped Vehicle on
page 3‑38.
Keep a record with all parts receipts
and list the mileage and the date of
any service work performed. See
Maintenance Records on page 11‑9.
Hood
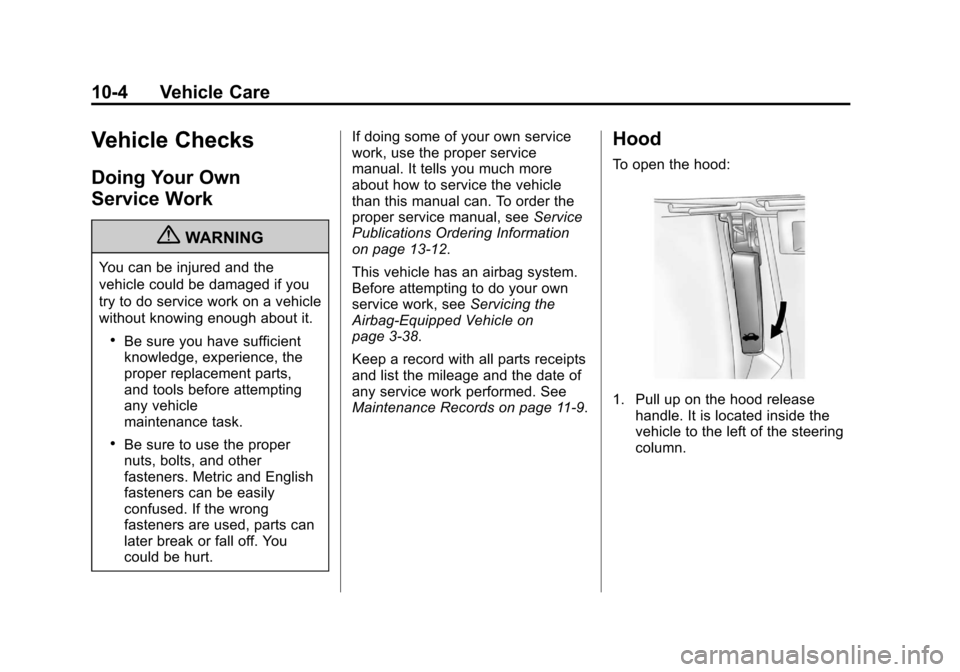
To open the hood:
1. Pull up on the hood release handle. It is located inside the
vehicle to the left of the steering
column.
Page 259 of 394

Black plate (7,1)Chevrolet Cruze Owner Manual - 2011
Vehicle Care 10-7
A.Engine Air Cleaner/Filter on
page 10‑15.
B. Engine Oil Dipstick. See “Checking Engine Oil” under
Engine Oil on page 10‑9.
C. Electric Engine Cooling Fans (Out of View). See Cooling
System on page 10‑16.
D. Engine Oil Fill Cap. See “When
to Add Engine Oil” under
Engine Oil on page 10‑9. E. Remote Negative (-) Terminal.
See Jump Starting on
page 10‑84.
F. Brake/Clutch Fluid Reservoir. See “Brake Fluid” underBrakes
on page 10‑23 andHydraulic
Clutch on page 10‑14.
G. Battery on page 10‑26 (Under
Cover).
H. Engine Coolant Surge Tank and Pressure Cap. See Engine
Coolant on page 10‑17. I. Remote Positive (+) Terminal.
See Jump Starting on
page 10‑84.
J. Engine Compartment Fuse
Block on page 10‑37.
K. Windshield Washer Fluid Reservoir. See “Adding Washer
Fluid” under Washer Fluid on
page 10‑22.
Page 261 of 394
Black plate (9,1)Chevrolet Cruze Owner Manual - 2011
Vehicle Care 10-9
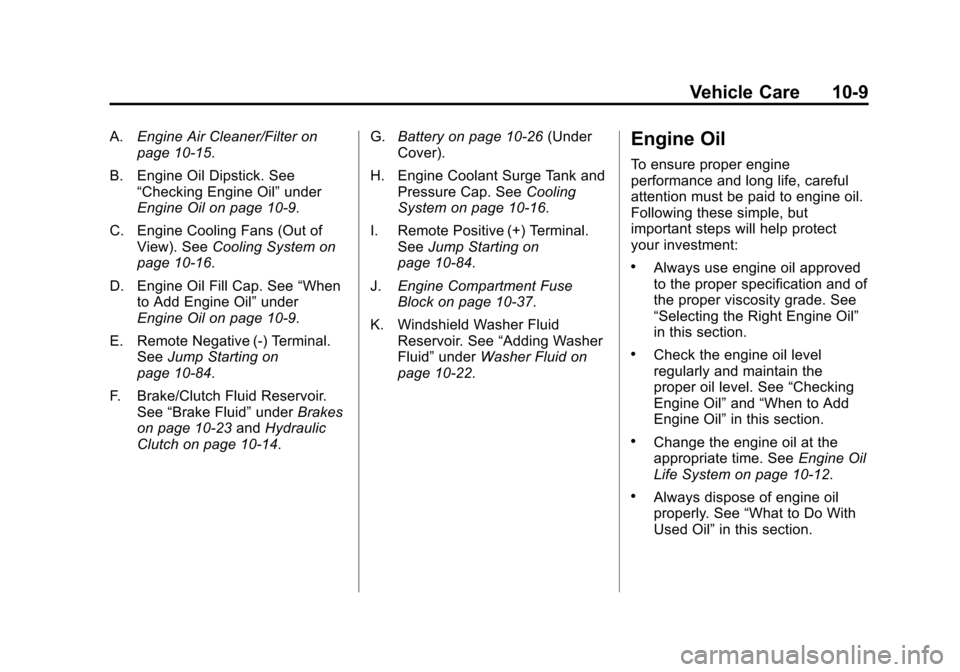
A.Engine Air Cleaner/Filter on
page 10‑15.
B. Engine Oil Dipstick. See “Checking Engine Oil” under
Engine Oil on page 10‑9.
C. Engine Cooling Fans (Out of View). See Cooling System on
page 10‑16.
D. Engine Oil Fill Cap. See “When
to Add Engine Oil” under
Engine Oil on page 10‑9.
E. Remote Negative (-) Terminal. See Jump Starting on
page 10‑84.
F. Brake/Clutch Fluid Reservoir. See “Brake Fluid” underBrakes
on page 10‑23 andHydraulic
Clutch on page 10‑14. G.
Battery on page 10‑26 (Under
Cover).
H. Engine Coolant Surge Tank and Pressure Cap. See Cooling
System on page 10‑16.
I. Remote Positive (+) Terminal. See Jump Starting on
page 10‑84.
J. Engine Compartment Fuse
Block on page 10‑37.
K. Windshield Washer Fluid Reservoir. See “Adding Washer
Fluid” under Washer Fluid on
page 10‑22.Engine Oil
To ensure proper engine
performance and long life, careful
attention must be paid to engine oil.
Following these simple, but
important steps will help protect
your investment:
.Always use engine oil approved
to the proper specification and of
the proper viscosity grade. See
“Selecting the Right Engine Oil”
in this section.
.Check the engine oil level
regularly and maintain the
proper oil level. See “Checking
Engine Oil” and“When to Add
Engine Oil” in this section.
.Change the engine oil at the
appropriate time. See Engine Oil
Life System on page 10‑12.
.Always dispose of engine oil
properly. See “What to Do With
Used Oil” in this section.