trunk CHEVROLET CRUZE 2012 1.G User Guide
[x] Cancel search | Manufacturer: CHEVROLET, Model Year: 2012, Model line: CRUZE, Model: CHEVROLET CRUZE 2012 1.GPages: 400, PDF Size: 6.88 MB
Page 246 of 400

Black plate (48,1)Chevrolet Cruze Owner Manual - 2012
9-48 Driving and Operating
Filling a Portable Fuel
Container
{WARNING
Never fill a portable fuel container
while it is in the vehicle. Static
electricity discharge from the
container can ignite the fuel
vapor. You can be badly burned
and the vehicle damaged if
this occurs. To help avoid injury to
you and others:
.Dispense fuel only into
approved containers.
.Do not fill a container while it
is inside a vehicle, in a
vehicle's trunk, pickup bed,
or on any surface other than
the ground.(Continued)
WARNING (Continued)
.Bring the fill nozzle in contact
with the inside of the fill
opening before operating the
nozzle. Contact should be
maintained until the filling is
complete.
.Do not smoke while
pumping fuel.
.Do not use a cellular phone
while pumping fuel.
Towing
General Towing
Information
Only use towing equipment that has
been designed for the vehicle.
Contact your dealer or trailering
dealer for assistance with preparing
the vehicle for towing a trailer.
See the following trailer towing
information in this section:
.For information on driving while
towing a trailer, see “Driving
Characteristics and
Towing Tips.”
.For maximum vehicle and trailer
weights, see “Trailer Towing.”
Page 285 of 400

Black plate (31,1)Chevrolet Cruze Owner Manual - 2012
Vehicle Care 10-31
Taillamps, Turn Signal,
Sidemarker, Stoplamps,
and Back-Up Lamps
Trunk Deck Inboard Taillamps
1. Open the trunk.
2. Remove the trunk deck trimcover (A).
3. Remove the bulb socket (B) by turning counterclockwise and
pulling straight out.4. Remove the bulb from thesocket (A).
5. Install the new bulb in the bulb socket.
6. Install the bulb socket by turning clockwise.
7. Install the trunk deck trim cover.
Page 286 of 400

Black plate (32,1)Chevrolet Cruze Owner Manual - 2012
10-32 Vehicle Care
A. Back-up Lamp
B. Stoplamp/Taillamp
C. Turn Signal Lamp
D. Sidemarker LampTo replace any one of these bulbs:
Stoplamp/Taillamp, Turn Signal,
Back‐up, and Rear
Sidemarker Lamp
1. Open the trunk.
2. Open the two screw covers.
3. Remove the two screws, that
secure the taillamp assembly.
Page 295 of 400
Black plate (41,1)Chevrolet Cruze Owner Manual - 2012
Vehicle Care 10-41
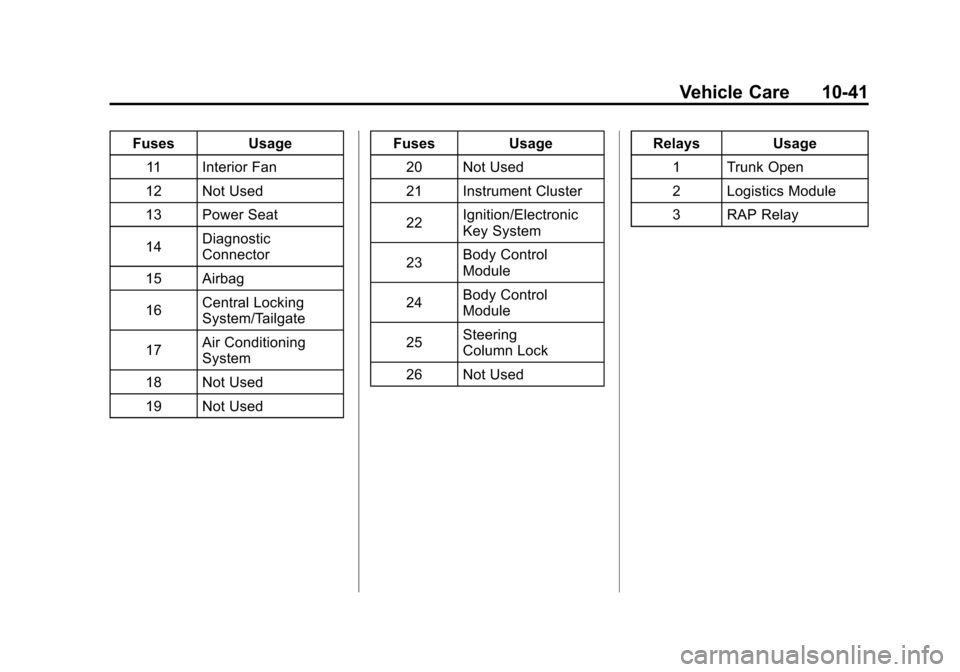
FusesUsage
11 Interior Fan
12 Not Used
13 Power Seat
14 Diagnostic
Connector
15 Airbag
16 Central Locking
System/Tailgate
17 Air Conditioning
System
18 Not Used
19 Not Used Fuses
Usage
20 Not Used
21 Instrument Cluster
22 Ignition/Electronic
Key System
23 Body Control
Module
24 Body Control
Module
25 Steering
Column Lock
26 Not Used Relays
Usage
1 Trunk Open
2 Logistics Module
3 RAP Relay
Page 326 of 400

Black plate (72,1)Chevrolet Cruze Owner Manual - 2012
10-72 Vehicle Care
Storing the Tire Sealant
and Compressor Kit
The tire sealant and compressor kit
is located in the trunk, under the
load floor, behind an access panel.
To remove the kit:
1. Open the trunk. SeeTrunk on
page 2‑12.
2. Turn the left knob counterclockwise and the right
knob clockwise, 90 degrees, at the same time. Then pull the
access panel rearward and up to
remove it.
3. Pull the inflator kit rearward.
Squeeze the two tabs of the
quick release buckle to remove
the tire sealant and
compressor kit.
To store the inflator kit, reverse
the steps.
Tire Changing
Removing the Spare Tire and
Tools
To access the spare tire and tools:
1. Open the trunk. See Trunk on
page 2‑12.
2. Lift the load floor.
A. Retainer Nut
B. Tool Bag Tether
C. Tool Bag
D. Spare Tire
Page 328 of 400

Black plate (74,1)Chevrolet Cruze Owner Manual - 2012
10-74 Vehicle Care
If needed, finish loosening them
with your fingers. The plastic nut
caps will not come off.
If needed, use the flat end of the
wheel wrench and pry along the
edge of the cover until it comes off.
The edge of the wheel cover could
be sharp, so do not try to remove it
with your bare hands. Do not drop
the cover or lay it face down, as it
could become scratched or
damaged. Store the wheel cover in
the trunk until the flat tire is repaired
or replaced.
Once you have removed the wheel
cover, use the following procedure
to remove the flat tire and install the
spare tire.
1. Do a safety check beforeproceeding. See If a Tire Goes
Flat on page 10‑63 for more
information.
2. Turn the wheel wrench counterclockwise once on each
wheel nut to loosen it. Do not
remove them yet.
3. Place the jack near the flat tire.
4. Place the wheel blocks on both sides of the tire at the opposite
corner of the tire being changed.
See If a Tire Goes Flat on
page 10‑63 for proper wheel
block placement.5. If this vehicle is the RS model, locate the front or rear jack
cover on the rocker molding
near the tire being changed.
Place your hand behind the
edge of the cover on the rocker
molding. Pull down and out to
remove the cover.
The cover will remain attached
to the molding by a tether.
Page 390 of 400
Black plate (2,1)Chevrolet Cruze Owner Manual - 2012
i-2 INDEX
Braking . . . . . . . . . . . . . . . . . . . . . . . . . 9-4
Break-In, New Vehicle . . . . . . . . . 9-15
Bulb Replacement . . . . . . . . . . . . 10-34Headlamp Aiming . . . . . . . . . . . 10-29
Headlamps . . . . . . . . . . . . . . . . . 10-29
Headlamps, Front TurnSignal, and Parking
Lamps . . . . . . . . . . . . . . . . . . . . 10-29
License Plate Lamps . . . . . . . 10-34
Taillamps, Turn Signal, Sidemarker, Stoplamps,
and Backup Lamps . . . . . . . . 10-31
Buying New Tires . . . . . . . . . . . . . 10-57
C
Calibration . . . . . . . . . . . . . . . . . . . . . . 5-4
California Fuel Requirements . . . . . . . . . . . 9-45
Perchlorate Materials
Requirements . . . . . . . . . . . . . . . 10-3
Warning . . . . . . . . . . . . . . . . . . . . . . 10-3
Canadian Vehicle Owners . . . . . . . . iii
Capacities and Specifications . . . . . . . . . . . . . . . . 12-2 Carbon Monoxide
Engine Exhaust . . . . . . . . . . . . . . . 9-27
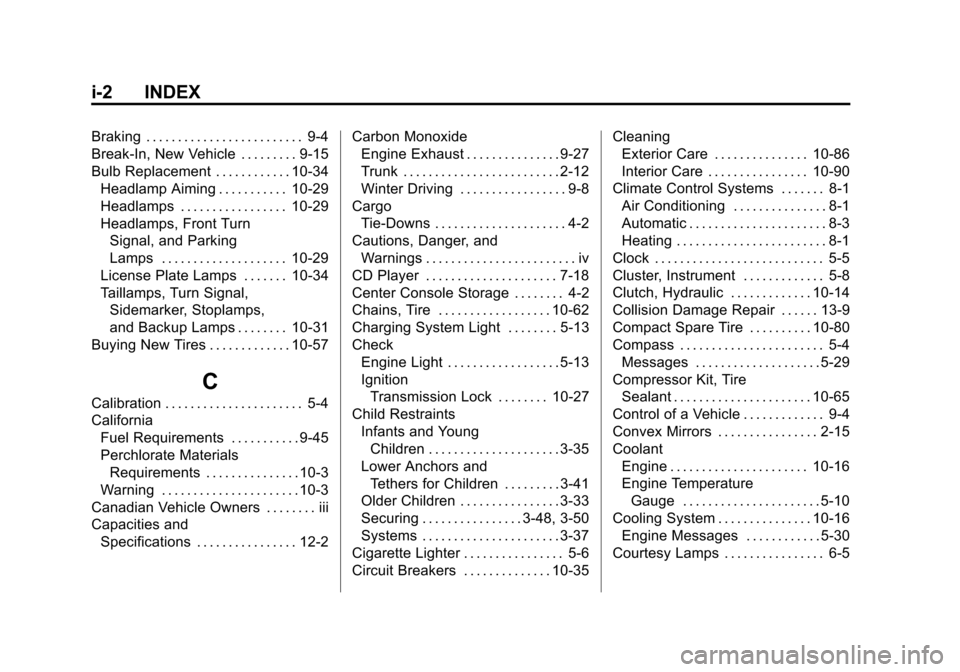
Trunk . . . . . . . . . . . . . . . . . . . . . . . . . 2-12
Winter Driving . . . . . . . . . . . . . . . . . 9-8
Cargo Tie-Downs . . . . . . . . . . . . . . . . . . . . . 4-2
Cautions, Danger, and
Warnings . . . . . . . . . . . . . . . . . . . . . . . . iv
CD Player . . . . . . . . . . . . . . . . . . . . . 7-18
Center Console Storage . . . . . . . . 4-2
Chains, Tire . . . . . . . . . . . . . . . . . . 10-62
Charging System Light . . . . . . . . 5-13
Check Engine Light . . . . . . . . . . . . . . . . . . 5-13
IgnitionTransmission Lock . . . . . . . . 10-27
Child Restraints Infants and YoungChildren . . . . . . . . . . . . . . . . . . . . . 3-35
Lower Anchors and Tethers for Children . . . . . . . . . 3-41
Older Children . . . . . . . . . . . . . . . . 3-33
Securing . . . . . . . . . . . . . . . . 3-48, 3-50
Systems . . . . . . . . . . . . . . . . . . . . . . 3-37
Cigarette Lighter . . . . . . . . . . . . . . . . 5-6
Circuit Breakers . . . . . . . . . . . . . . 10-35 Cleaning
Exterior Care . . . . . . . . . . . . . . . 10-86
Interior Care . . . . . . . . . . . . . . . . 10-90
Climate Control Systems . . . . . . . 8-1 Air Conditioning . . . . . . . . . . . . . . . 8-1
Automatic . . . . . . . . . . . . . . . . . . . . . . 8-3
Heating . . . . . . . . . . . . . . . . . . . . . . . . 8-1
Clock . . . . . . . . . . . . . . . . . . . . . . . . . . . 5-5
Cluster, Instrument . . . . . . . . . . . . . 5-8
Clutch, Hydraulic . . . . . . . . . . . . . 10-14
Collision Damage Repair . . . . . . 13-9
Compact Spare Tire . . . . . . . . . . 10-80
Compass . . . . . . . . . . . . . . . . . . . . . . . 5-4 Messages . . . . . . . . . . . . . . . . . . . . 5-29
Compressor Kit, Tire Sealant . . . . . . . . . . . . . . . . . . . . . . 10-65
Control of a Vehicle . . . . . . . . . . . . . 9-4
Convex Mirrors . . . . . . . . . . . . . . . . 2-15
Coolant Engine . . . . . . . . . . . . . . . . . . . . . . 10-16
Engine TemperatureGauge . . . . . . . . . . . . . . . . . . . . . . 5-10
Cooling System . . . . . . . . . . . . . . . 10-16 Engine Messages . . . . . . . . . . . . 5-30
Courtesy Lamps . . . . . . . . . . . . . . . . 6-5
Page 399 of 400
Black plate (11,1)Chevrolet Cruze Owner Manual - 2012
INDEX i-11
Tires (cont.)Sealant and Compressor
Kit, Storing . . . . . . . . . . . . . . . . 10-72
Sidewall Labeling . . . . . . . . . . . 10-44
Terminology and
Definitions . . . . . . . . . . . . . . . . . 10-46
Uniform Tire Quality Grading . . . . . . . . . . . . . . . . . . . 10-59
Wheel Alignment and Tire
Balance . . . . . . . . . . . . . . . . . . . 10-61
Wheel Replacement . . . . . . . . 10-61
When It Is Time for New Tires . . . . . . . . . . . . . . . . . . . . . . 10-57
Winter . . . . . . . . . . . . . . . . . . . . . . 10-42
Towing Driving Characteristics . . . . . . . . 9-49
Equipment . . . . . . . . . . . . . . . . . . . . 9-55
General Information . . . . . . . . . . 9-48
Recreational Vehicle . . . . . . . . 10-84
Trailer . . . . . . . . . . . . . . . . . . . . . . . . 9-53
Vehicle . . . . . . . . . . . . . . . . . . . . . 10-83 Traction
Control System (TCS) . . . . . . . . 9-37
Control System (TCS)/
StabiliTrak
®Light . . . . . . . . . . . . 5-18
Off Light . . . . . . . . . . . . . . . . . . . . . . 5-18
Trailer Towing . . . . . . . . . . . . . . . . . 9-53
Transmission Automatic . . . . . . . . . . . . . . . . . . . . . 9-29
Fluid, Automatic . . . . . . . . . . . . 10-13
Fluid, Manual . . . . . . . . . . . . . . . 10-13
Messages . . . . . . . . . . . . . . . . . . . . 5-33
Transportation Program, Courtesy . . . . . . . . . . . . . . . . . . . . . 13-8
Trip Odometer . . . . . . . . . . . . . . . . . . 5-9
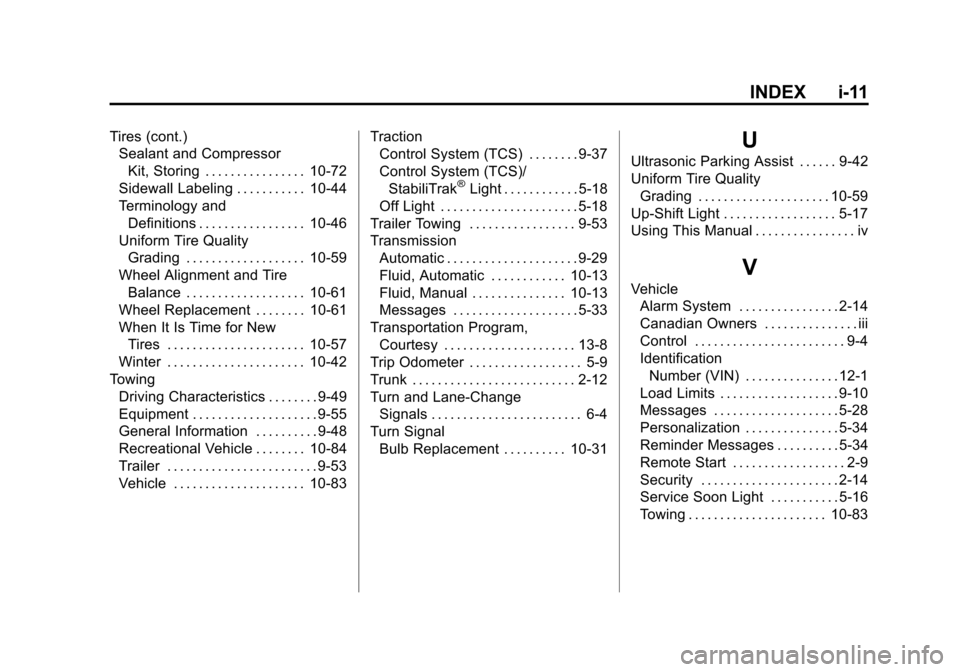
Trunk . . . . . . . . . . . . . . . . . . . . . . . . . . 2-12
Turn and Lane-Change Signals . . . . . . . . . . . . . . . . . . . . . . . . 6-4
Turn Signal Bulb Replacement . . . . . . . . . . 10-31
U
Ultrasonic Parking Assist . . . . . . 9-42
Uniform Tire QualityGrading . . . . . . . . . . . . . . . . . . . . . 10-59
Up-Shift Light . . . . . . . . . . . . . . . . . . 5-17
Using This Manual . . . . . . . . . . . . . . . . iv
V
Vehicle Alarm System . . . . . . . . . . . . . . . . 2-14
Canadian Owners . . . . . . . . . . . . . . . iii
Control . . . . . . . . . . . . . . . . . . . . . . . . 9-4
IdentificationNumber (VIN) . . . . . . . . . . . . . . . 12-1
Load Limits . . . . . . . . . . . . . . . . . . . 9-10
Messages . . . . . . . . . . . . . . . . . . . . 5-28
Personalization . . . . . . . . . . . . . . . 5-34
Reminder Messages . . . . . . . . . . 5-34
Remote Start . . . . . . . . . . . . . . . . . . 2-9
Security . . . . . . . . . . . . . . . . . . . . . . 2-14
Service Soon Light . . . . . . . . . . . 5-16
Towing . . . . . . . . . . . . . . . . . . . . . . 10-83