transmission CHEVROLET CRUZE 2012 1.G Owner's Guide
[x] Cancel search | Manufacturer: CHEVROLET, Model Year: 2012, Model line: CRUZE, Model: CHEVROLET CRUZE 2012 1.GPages: 400, PDF Size: 6.88 MB
Page 230 of 400
Black plate (32,1)Chevrolet Cruze Owner Manual - 2012
9-32 Driving and Operating
While using the DSC feature, the
vehicle will have firmer, quicker
shifting. You can use this for
sport driving or when climbing or
descending hills, to stay in gear
longer, or to downshift for more
power or engine braking.
The transmission will only allow
you to shift into gears appropriate
for the vehicle speed and engine
revolutions per minute (rpm). The
transmission will not automatically
shift to the next lower gear if the
engine rpm is too high, nor to
the next higher gear when the
maximum engine rpm is reached.
If shifting is prevented for any
reason, the currently selected gear
will flash multiple times, indicating
that the transmission has not
shifted gears.
While in the DSC mode, the
transmission will automatically
downshift when the vehicle comes
to a stop. This will allow for more
power during take-off.When accelerating the vehicle from
a stop in snowy and icy conditions,
you may want to shift into second
gear. A higher gear allows the
vehicle to gain more traction on
slippery surfaces.
Electronic Range Select
(ERS) Mode
Fuel Economy Model
Notice:
If you drive the vehicle at
a high rpm without upshifting
while using Electronic Range
Select (ERS), you could damage
the vehicle. Always upshift when
necessary while using ERS.
ERS allows for the selection of the
range of gear positions. Use this
mode when driving downhill or
towing a trailer to limit the top gear
and vehicle speed. The shift
position indicator within the
Driver Information Center (DIC)
will display a number next to the
M indicating the highest available gear under manual mode and the
driving conditions when manual
mode was selected.
1. Move the shift lever from
D (Drive) to the left into the (+) or
(−) manual position.
2. Press the shift lever forward (+) to upshift or rearward (−) to
downshift. An M and the current
gear will be displayed in the DIC.
When shifting to M (Manual Mode),
the transmission will shift to the
range of the current gear. For this
range, the highest gear available is
displayed next to the M in the DIC.
See Driver Information Center (DIC)
on page 5‑23 for more information.
All gears below that number are
available to use. For example, when
4 (Fourth) is shown next to the M,
1 (First) through 4 (Fourth) gears are
shifted automatically. To shift to
5 (Fifth) gear, press the shift lever
forward (+) to upshift or shift into
D (Drive).
Page 231 of 400
Black plate (33,1)Chevrolet Cruze Owner Manual - 2012
Driving and Operating 9-33
M (Manual Mode) will prevent
shifting to a lower gear range if the
engine speed is too high. If vehicle
speed is not reduced within the time
allowed, the lower gear range shift
will not be completed. Slow the
vehicle, then press the shift lever
rearward (−) to downshift to the
desired lower gear range.
While using the ERS, cruise control
can be used.Manual Transmission
Shift Pattern
All Models
Except Fuel
Economy ModelFuel Economy
Model
These are the shift patterns for the
six-speed manual transmissions.
To operate the transmissions:
Notice: Do not rest your hand on
the shift lever while driving. The
pressure could cause premature
wear in the transmission. The
repairs would not be covered by
the vehicle warranty. Notice:
Do not rest your foot on
the clutch pedal while driving or
while stopped. The pressure can
cause premature wear in the
clutch. The repairs would not be
covered by the vehicle warranty.
1 (First): Press the clutch pedal
fully to the pedal stop and shift into
1 (First). Then slowly let up on the
clutch pedal as you press the
accelerator pedal.
If you come to a complete stop and
it is hard to shift into 1 (First), put
the shift lever in Neutral and let up
on the clutch. Press the clutch pedal
back down. Then shift into 1 (First).
2 (Second): Press the clutch pedal
fully to the pedal stop as you let up
on the accelerator pedal and shift
into 2 (Second). Then, slowly let up
on the clutch pedal as you press the
accelerator pedal.
Page 232 of 400
Black plate (34,1)Chevrolet Cruze Owner Manual - 2012
9-34 Driving and Operating
3 (Third), 4 (Fourth), 5 (Fifth), and
6 (Sixth):Shift into 3 (Third),
4 (Fourth), 5 (Fifth), and 6 (Sixth) the
same way you do for 2 (Second).
Slowly let up on the clutch pedal as
you press the accelerator pedal.
For the best fuel economy, use
6 (Sixth) gear whenever vehicle
speed and driving conditions allow.
An up-shift light in the instrument
cluster indicates when to shift to the
next higher gear for the best fuel
economy.
During normal driving, upshifts
should occur between 1,300 and
2,500 rpm, and downshifts should
occur between 1,500 and
1,000 rpm. To stop, let up on the accelerator
pedal and press the brake pedal.
Just before the vehicle stops, press
the clutch pedal and the brake
pedal, and shift to Neutral.
Neutral:
Use this position when
you start or idle the engine. The
shift lever is in Neutral when it is
centered in the shift pattern, not in
any gear.
R (Reverse): To back up, with the
vehicle at a complete stop, press
down the clutch pedal. Then pull up
the ring on the shift lever, and shift into R (Reverse). Let up on the
clutch pedal slowly while pressing
the accelerator pedal.
If the gear does not engage, shift
the transmission to Neutral, release
the clutch pedal and press it back
down. Repeat the gear selection.
{WARNING
If you skip a gear when you
downshift, you could lose control
of the vehicle. You could injure
yourself or others. Do not shift
down more than one gear at a
time when you downshift.
Notice: Do not skip gears
while upshifting. This can
cause premature wear in the
transmission. The repairs would
not be covered by the vehicle
warranty.
Page 239 of 400

Black plate (41,1)Chevrolet Cruze Owner Manual - 2012
Driving and Operating 9-41
Setting Cruise Control
If the cruise button is on when not in
use, it could get bumped and go into
cruise when not desired. Keep the
cruise control switch off when cruise
is not being used.
1. Press
1.
2. Get to the speed desired.
3. Move the thumbwheel down and release it.
4. Take your foot off the accelerator pedal.
Resuming a Set Speed
If the cruise control is set at a
desired speed and then the brakes
or clutch for manual transmissions
are applied, the cruise control is
disengaged without erasing the set
speed from memory.
Once the vehicle reaches about
40 km/h (25 mph) or more, move
the thumbwheel up toward RES/+
briefly. The vehicle returns to the
speed selected previously and
stays there. Increasing Speed While Using
Cruise Control
If the cruise control system is
already activated:
.Move the thumbwheel up toward
RES/+ and hold it until the
desired speed is reached, then
release it.
.To increase the speed in small
amounts, move the thumbwheel
up toward RES/+ briefly and
then release it. Each time this is
done, the vehicle goes about
1.6 km/h (1 mph) faster.
Reducing Speed While Using
Cruise Control
If the cruise control system is
already activated:
.Move the thumbwheel toward
SET/− and hold until the desired
lower speed is reached, then
release it.
.To slow down in small amounts,
move the thumbwheel toward
SET/− briefly. Each time this is
done, the vehicle goes about
1.6 km/h (1 mph) slower.
Passing Another Vehicle While
Using Cruise Control
Use the accelerator pedal to
increase the vehicle speed. When
you take your foot off the pedal, the
vehicle slows down to the previous
set cruise control speed.
Using Cruise Control on Hills
How well the cruise control works
on hills depends upon the vehicle
speed, load, and the steepness of
the hills. When going up steep hills,
you might have to step on the
accelerator pedal to maintain the
vehicle speed. When going
downhill, you might have to brake or
shift to a lower gear to maintain the
vehicle speed. When the brakes are
applied, the cruise control is
disengaged.
Page 240 of 400
Black plate (42,1)Chevrolet Cruze Owner Manual - 2012
9-42 Driving and Operating
Ending Cruise Control
There are three ways to end cruise
control:
.To disengage cruise control,
step lightly on the brake pedal or
clutch for a manual transmission.
.Press*on the steering wheel.
.To turn off cruise control, press1on the steering wheel.
Erasing Speed Memory
The cruise control set speed is
erased from memory if
1is pressed
or if the ignition is turned off.
Object Detection
Systems
Ultrasonic Parking Assist
For vehicles with the Ultrasonic
Rear Parking Assist (URPA) system,
it assists the driver with parking
and avoiding objects while in
R (Reverse). URPA operates at
speeds less than 8 km/h (5 mph).
The sensors on the rear bumper
detect objects up to 2.5 m (8 ft)
behind the vehicle, and at least
20 cm (8 in) off the ground.
{WARNING
The URPA system does not
detect pedestrians, bicyclists,
animals, or any other objects
located below the bumper or that
are too close or too far from the
vehicle. To prevent injury, death,
(Continued)
WARNING (Continued)
or vehicle damage, even with
URPA, always check behind the
vehicle and check all mirrors
before backing.
How the System Works
URPA comes on automatically
when the shift lever is moved into
R (Reverse). A single tone sounds
to indicate the system is working.
URPA operates only at speeds less
than 8 km/h (5 mph).
An obstacle is indicated by audible
beeps. The interval between the
beeps becomes shorter as the
vehicle gets closer to the obstacle.
When the distance is less than
30 cm (12 in), the beeping is a
continuous tone for five seconds.
Page 247 of 400
Black plate (49,1)Chevrolet Cruze Owner Manual - 2012
Driving and Operating 9-49
.For information on equipment to
tow a trailer, see“Towing
Equipment.”
For information on towing a disabled
vehicle, see Towing the Vehicle on
page 10‑83. For information on
towing the vehicle behind another
vehicle such as a motor home, see
Recreational Vehicle Towing on
page 10‑84.
Driving Characteristics
and Towing Tips
{WARNING
The driver can lose control when
pulling a trailer if the correct
equipment is not used or the
vehicle is not driven properly.
For example, if the trailer is too
heavy, the brakes may not work
well —or even at all.
(Continued)
WARNING (Continued)
The driver and passengers could
be seriously injured. The vehicle
may also be damaged; the
resulting repairs would not be
covered by the vehicle warranty.
Pull a trailer only if all the steps in
this section have been followed.
Ask your dealer for advice and
information about towing a trailer
with the vehicle.
The vehicle can tow a trailer if
it is equipped with the proper trailer
towing equipment. To identify the
trailering capacity of the vehicle,
see Trailer Towing (Fuel Economy
Model) on page 9‑53 orTrailer
Towing (Except Fuel Economy
Model) on page 9‑53. Trailering
changes handling, acceleration,
braking, durability, and fuel
economy. With the added weight, the engine,
transmission, wheel assemblies,
and tires are forced to work harder
and under greater loads. The trailer
also adds wind resistance,
increasing the pulling requirements.
For safe trailering, correctly use the
proper trailering equipment.
The following information has
important trailering tips and rules for
your safety and that of your
passengers. Read this section
carefully before pulling a trailer.
Pulling a Trailer
Here are some important points:
.There are many laws, including
speed limit restrictions that apply
to trailering. Check for legal
requirements with state or
provincial police.
.Do not tow a trailer at all during
the first 1 600 km (1,000 mi) the
new vehicle is driven. The
engine or other parts could be
damaged.
Page 248 of 400
Black plate (50,1)Chevrolet Cruze Owner Manual - 2012
9-50 Driving and Operating
.During the first 800 km (500 mi)
that a trailer is towed, do not
drive over 80 km/h (50 mph) and
do not make starts at full throttle.
This reduces wear on the
vehicle.
.Vehicles with automatic
transmissions can tow in
D (Drive) but M (Manual Mode)
is recommended. SeeManual
Mode on page 9‑31 for more
information. Use a lower gear if
the transmission shifts too often.
For vehicles with a manual
transmission, it is better not to
use the highest gear.
.Use the cruise control when
towing.
.Obey speed limit restrictions.
Do not drive faster than the
maximum posted speed for
trailers, or no more than
90 km/h (55 mph), to reduce
wear on the vehicle.
Driving with a Trailer
Towing a trailer requires experience.
Get familiar with handling and
braking with the added trailer
weight. The vehicle is now longer
and not as responsive as the
vehicle is by itself.
Check all trailer hitch parts and
attachments, safety chains,
electrical connectors, lamps, tires,
and mirror adjustments. If the trailer
has electric brakes, start the vehicle
and trailer moving and then apply
the trailer brake controller by hand
to be sure the brakes are working.
During the trip, check regularly to
be sure that the load is secure, and
the lamps and trailer brakes are
working properly.
Towing with a Stability Control
System
When towing, the sound of the
stability control system might be
heard. The system is reacting to the
vehicle movement caused by the trailer, which mainly occurs during
cornering. This is normal when
towing heavier trailers.
Following Distance
Stay at least twice as far behind the
vehicle ahead as you would when
driving the vehicle without a trailer.
This can help to avoid situations
that require heavy braking and
sudden turns.
Passing
More passing distance is needed
when towing a trailer. Because the
rig is longer, it is necessary to go
much farther beyond the passed
vehicle before returning to the lane.
Backing Up
Hold the bottom of the steering
wheel with one hand. Then, to move
the trailer to the left, move that hand
to the left. To move the trailer to the
right, move your hand to the right.
Always back up slowly and,
if possible, have someone
guide you.
Page 249 of 400
Black plate (51,1)Chevrolet Cruze Owner Manual - 2012
Driving and Operating 9-51
Making Turns
Notice:Making very sharp turns
while trailering could cause the
trailer to come in contact with the
vehicle. The vehicle could be
damaged. Avoid making very
sharp turns while trailering.
When turning with a trailer, make
wider turns than normal. Do this so
the trailer will not strike soft
shoulders, curbs, road signs, trees,
or other objects. Avoid jerky or
sudden maneuvers. Signal well in
advance.
Turn Signals When Towing a
Trailer
The arrows on the instrument panel
flash whenever signaling a turn or
lane change. Properly hooked up,
the trailer lamps also flash, telling
other drivers the vehicle is turning,
changing lanes, or stopping. When towing a trailer, the arrows on
the instrument panel flash for turns
even if the bulbs on the trailer are
burned out. For this reason you may
think other drivers are seeing the
signal when they are not. It is
important to check occasionally to
be sure the trailer bulbs are still
working.
Driving On Grades
Reduce speed and shift to a lower
gear before starting down a long or
steep downgrade. If the
transmission is not shifted down, the
brakes might have to be used so
much that they would get hot and no
longer work well.
Vehicles with an automatic
transmission can tow in
D (Drive) but M (Manual Mode)
is recommended. Shift the
transmission to a lower gear if the
transmission shifts too often under
heavy loads and/or hilly conditions.For vehicles with a manual
transmission, it is better not to
use the highest gear.
When towing at high altitude on
steep uphill grades, consider the
following: Engine coolant will boil at
a lower temperature than at normal
altitudes. If the engine is turned off
immediately after towing at high
altitude on steep uphill grades, the
vehicle may show signs similar to
engine overheating. To avoid this,
let the engine run while parked,
preferably on level ground, with the
automatic transmission in P (Park)
for a few minutes before turning the
engine off. For vehicles with manual
transmissions, let the engine run
while parked, preferably on level
ground, with the transmission out of
gear and the parking brake applied,
for a few minutes before turning the
engine off. If the overheat warning
comes on, see
Engine Overheating
on page 10‑19.
Page 250 of 400
Black plate (52,1)Chevrolet Cruze Owner Manual - 2012
9-52 Driving and Operating
Parking on Hills
{WARNING
Parking the vehicle on a hill with
the trailer attached can be
dangerous. If something goes
wrong, the rig could start to move.
People can be injured, and both
the vehicle and the trailer can be
damaged. When possible, always
park the rig on a flat surface.
If parking the rig on a hill:
1. Press the brake pedal, but do not shift into P (Park) yet for
vehicles with an automatic
transmission, or into gear for
vehicles with a manual
transmission. Turn the wheels
into the curb if facing downhill or
into traffic if facing uphill.
2. Have someone place chocks under the trailer wheels. 3. When the wheel chocks are in
place, release the brake pedal
until the chocks absorb the load.
4. Reapply the brake pedal. Then apply the parking brake and shift
into P (Park) for vehicles with an
automatic transmission or into
gear for vehicles with a manual
transmission.
5. Release the brake pedal.
Leaving After Parking on a Hill
1. Apply and hold the brake pedal while you:
1.1. Start the engine.
1.2. Shift into a gear.
1.3. Release the parking brake.
2. Let up on the brake pedal.
3. Drive slowly until the trailer is clear of the chocks.
4. Stop and have someone pick up and store the chocks.
Maintenance When Trailer
Towing
The vehicle needs service more
often when pulling a trailer. See this
manual's Maintenance Schedule or
Index for more information. Things
that are especially important in
trailer operation are automatic
transmission fluid, engine oil, axle
lubricant, belts, cooling system, and
brake system. It is a good idea to
inspect these before and during
the trip.
Check periodically to see that all
hitch nuts and bolts are tight.
Engine Cooling When Trailer
Towing
The cooling system may temporarily
overheat during severe operating
conditions. See Engine Overheating
on page 10‑19.
Page 255 of 400
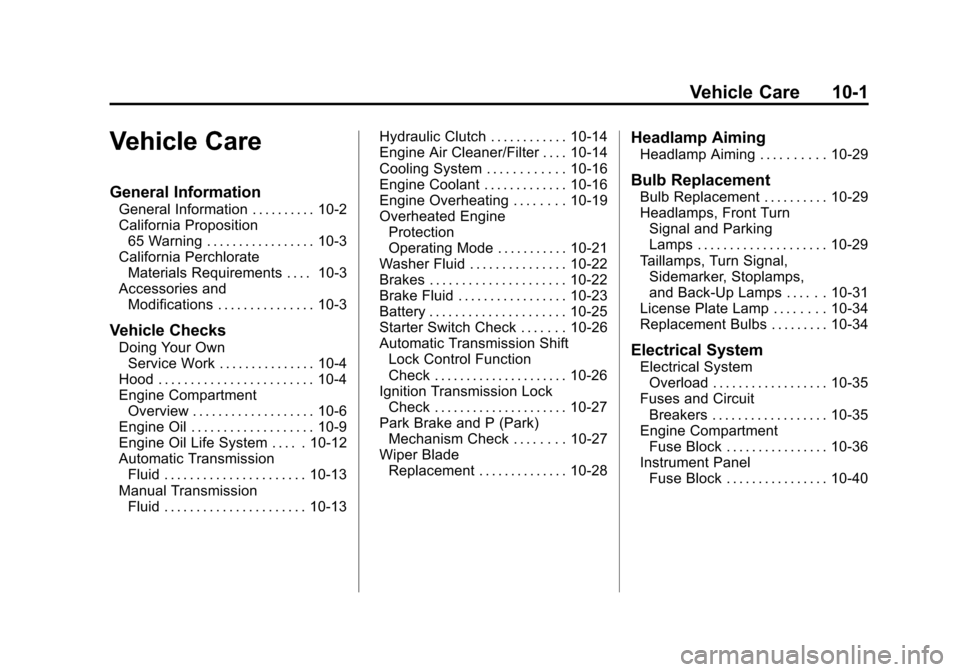
Black plate (1,1)Chevrolet Cruze Owner Manual - 2012
Vehicle Care 10-1
Vehicle Care
General Information
General Information . . . . . . . . . . 10-2
California Proposition65 Warning . . . . . . . . . . . . . . . . . 10-3
California Perchlorate Materials Requirements . . . . 10-3
Accessories and Modifications . . . . . . . . . . . . . . . 10-3
Vehicle Checks
Doing Your OwnService Work . . . . . . . . . . . . . . . 10-4
Hood . . . . . . . . . . . . . . . . . . . . . . . . 10-4
Engine Compartment Overview . . . . . . . . . . . . . . . . . . . 10-6
Engine Oil . . . . . . . . . . . . . . . . . . . 10-9
Engine Oil Life System . . . . . 10-12
Automatic Transmission Fluid . . . . . . . . . . . . . . . . . . . . . . 10-13
Manual Transmission Fluid . . . . . . . . . . . . . . . . . . . . . . 10-13 Hydraulic Clutch . . . . . . . . . . . . 10-14
Engine Air Cleaner/Filter . . . . 10-14
Cooling System . . . . . . . . . . . . 10-16
Engine Coolant . . . . . . . . . . . . . 10-16
Engine Overheating . . . . . . . . 10-19
Overheated Engine
Protection
Operating Mode . . . . . . . . . . . 10-21
Washer Fluid . . . . . . . . . . . . . . . 10-22
Brakes . . . . . . . . . . . . . . . . . . . . . 10-22
Brake Fluid . . . . . . . . . . . . . . . . . 10-23
Battery . . . . . . . . . . . . . . . . . . . . . 10-25
Starter Switch Check . . . . . . . 10-26
Automatic Transmission Shift Lock Control Function
Check . . . . . . . . . . . . . . . . . . . . . 10-26
Ignition Transmission Lock Check . . . . . . . . . . . . . . . . . . . . . 10-27
Park Brake and P (Park) Mechanism Check . . . . . . . . 10-27
Wiper Blade Replacement . . . . . . . . . . . . . . 10-28
Headlamp Aiming
Headlamp Aiming . . . . . . . . . . 10-29
Bulb Replacement
Bulb Replacement . . . . . . . . . . 10-29
Headlamps, Front TurnSignal and Parking
Lamps . . . . . . . . . . . . . . . . . . . . 10-29
Taillamps, Turn Signal, Sidemarker, Stoplamps,
and Back-Up Lamps . . . . . . 10-31
License Plate Lamp . . . . . . . . 10-34
Replacement Bulbs . . . . . . . . . 10-34
Electrical System
Electrical System Overload . . . . . . . . . . . . . . . . . . 10-35
Fuses and Circuit Breakers . . . . . . . . . . . . . . . . . . 10-35
Engine Compartment Fuse Block . . . . . . . . . . . . . . . . 10-36
Instrument Panel Fuse Block . . . . . . . . . . . . . . . . 10-40