brake CHEVROLET CRUZE 2013 1.G Service Manual
[x] Cancel search | Manufacturer: CHEVROLET, Model Year: 2013, Model line: CRUZE, Model: CHEVROLET CRUZE 2013 1.GPages: 394, PDF Size: 6.82 MB
Page 242 of 394

Black plate (52,1)Chevrolet Cruze Owner Manual - 2013 - crc - 10/16/12
9-52 Driving and Operating
Towing with a Stability Control
System
When towing, the sound of the
stability control system might be
heard. The system is reacting to the
vehicle movement caused by the
trailer, which mainly occurs during
cornering. This is normal when
towing heavier trailers.
Following Distance
Stay at least twice as far behind the
vehicle ahead as you would when
driving the vehicle without a trailer.
This can help to avoid situations
that require heavy braking and
sudden turns.
Passing
More passing distance is needed
when towing a trailer. Because the
rig is longer, it is necessary to go
farther beyond the passed vehicle
before returning to the lane.
Backing Up
Hold the bottom of the steering
wheel with one hand. To move the
trailer to the left, move your hand to
the left. To move the trailer to the
right, move your hand to the right.
Always back up slowly and,
if possible, have someone
guide you.
Making Turns
Notice:Making very sharp turns
while trailering could cause the
trailer to come in contact with the
vehicle. The vehicle could be
damaged. Avoid making very
sharp turns while trailering.
When turning with a trailer, make
wider turns than normal so the
trailer will not strike soft shoulders,
curbs, road signs, trees or other
objects. Use the turn signal well in
advance and avoid jerky or sudden
maneuvers.
Turn Signals When Towing a
Trailer
The turn signal indicators on the
instrument cluster flash whenever
signaling a turn or lane change.
Properly hooked up, the trailer
lamps also flash, telling other
drivers the vehicle is turning,
changing lanes or stopping.
When towing a trailer, the arrows on
the instrument cluster flash for turns
even if the bulbs on the trailer are
burned out. Check occasionally to
be sure the trailer bulbs are still
working.
Driving on Grades
Reduce speed and shift to a lower
gear before starting down a long or
steep downgrade. If the
transmission is not shifted down, the
brakes might have to be used so
much that they would get hot and no
longer work well.
The vehicle can tow in D (Drive).
Use a lower gear if the transmission
shifts too often.
Page 243 of 394
Black plate (53,1)Chevrolet Cruze Owner Manual - 2013 - crc - 10/16/12
Driving and Operating 9-53
When towing at high altitude on
steep uphill grades, engine coolant
boils at a lower temperature than at
normal altitudes. If the engine is
turned off immediately after towing
at high altitude on steep uphill
grades, the vehicle could show
signs similar to engine overheating.
To avoid this, let the engine run
while parked, preferably on level
ground, with the transmission in
P (Park) for a few minutes before
turning the engine off. If the
overheat warning comes on, see
Engine Overheating on page 10‑19.
Parking on Hills
{WARNING
Parking the vehicle on a hill with
the trailer attached can be
dangerous. If something goes
wrong, the rig could start to move.
People can be injured, and both
the vehicle and the trailer can be
damaged. When possible, always
park the rig on a flat surface.If parking the rig on a hill:
1. Press the brake pedal, but do
not shift into P (Park) yet. Turn
the wheels into the curb if facing
downhill or into traffic if facing
uphill.
2. Have someone place chocks under the trailer wheels.
3. When the wheel chocks are in place, release the brake pedal
until the chocks absorb the load.
4. Reapply the brake pedal. Then apply the parking brake and shift
into P (Park) for vehicles with an
automatic transmission or into
gear for vehicles with a manual
transmission.
5. Release the brake pedal.
Leaving After Parking on a Hill
1. Apply and hold the brake pedal while you:
.Start the engine.
.Shift into a gear.
.Release the parking brake. 2. Let up on the brake pedal.
3. Drive slowly until the trailer is
clear of the chocks.
4. Stop and have someone pick up and store the chocks.
Maintenance When Trailer
Towing
The vehicle needs service more
often when pulling a trailer. See the
Maintenance Schedule on
page 11‑2. Things that are
especially important in trailer
operation are automatic
transmission fluid, engine oil, axle
lubricant, belts, cooling system and
brake system. Inspect these before
and during the trip.
Check periodically to see that all
hitch nuts and bolts are tight.
Page 245 of 394

Black plate (55,1)Chevrolet Cruze Owner Manual - 2013 - crc - 10/16/12
Driving and Operating 9-55
The trailer tongue (1) should weigh
10 to 15 percent of the total loaded
trailer weight (2).
After loading the trailer, weigh the
trailer and then the tongue,
separately, to see if the weights are
proper. If they are not, adjustments
might be made by moving some
items around in the trailer.
Total Weight on Your Vehicle's
Tires
Be sure the vehicle's tires are
inflated to the upper limit for cold
tires. These numbers can be foundon the Tire and Loading Information
label. See
Vehicle Load Limits on
page 9‑10. Make sure not to go over
the GVW limit for the vehicle,
including the weight of the trailer
tongue.
Towing Equipment
Hitches
Use the correct hitch equipment.
See your dealer or a hitch dealer for
assistance.
.The rear bumper on the vehicle
is not intended for hitches. Do
not attach rental hitches or other
bumper-type hitches to it. Use
only a frame-mounted hitch that
does not attach to the bumper.
.Will any holes be made in the
body of the vehicle when the
trailer hitch is installed? If so,
seal the holes when the hitch is
removed. If the holes are not
sealed, dirt, water, and deadly
carbon monoxide (CO) from the exhaust can get into the vehicle.
See
Engine Exhaust on
page 9‑25.
Safety Chains
Always attach chains between the
vehicle and the trailer. Cross the
safety chains under the tongue of
the trailer to help prevent the tongue
from contacting the road if it
becomes separated from the hitch.
Leave enough slack so the rig can
turn. Never allow safety chains to
drag on the ground.
Trailer Brakes
Does the trailer have its own
brakes? Be sure to read and follow
the instructions for the trailer brakes
so they are installed, adjusted, and
maintained properly.
Because the vehicle has antilock
brakes, do not tap into the vehicle's
brake system. If this is done, both
brake systems will not work well,
or at all.
Page 247 of 394
Black plate (1,1)Chevrolet Cruze Owner Manual - 2013 - crc - 10/16/12
Vehicle Care 10-1
Vehicle Care
General Information
General Information . . . . . . . . . . 10-2
California Proposition65 Warning . . . . . . . . . . . . . . . . . 10-2
California Perchlorate Materials Requirements . . . . 10-3
Accessories and Modifications . . . . . . . . . . . . . . . 10-3
Vehicle Checks
Doing Your OwnService Work . . . . . . . . . . . . . . . 10-3
Hood . . . . . . . . . . . . . . . . . . . . . . . . 10-4
Engine Compartment Overview . . . . . . . . . . . . . . . . . . . 10-6
Engine Oil . . . . . . . . . . . . . . . . . . . 10-9
Engine Oil Life System . . . . . 10-11
Automatic Transmission Fluid . . . . . . . . . . . . . . . . . . . . . . 10-12
Manual Transmission Fluid . . . . . . . . . . . . . . . . . . . . . . 10-13
Hydraulic Clutch . . . . . . . . . . . . 10-13
Engine Air Cleaner/Filter . . . . 10-13
Cooling System . . . . . . . . . . . . 10-15
Engine Coolant . . . . . . . . . . . . . 10-15
Engine Overheating . . . . . . . . 10-19 Overheated Engine
Protection
Operating Mode . . . . . . . . . . . 10-20
Washer Fluid . . . . . . . . . . . . . . . 10-20
Brakes . . . . . . . . . . . . . . . . . . . . . 10-21
Brake Fluid . . . . . . . . . . . . . . . . . 10-22
Battery . . . . . . . . . . . . . . . . . . . . . 10-24
Starter Switch Check . . . . . . . 10-24
Automatic Transmission Shift Lock Control Function
Check . . . . . . . . . . . . . . . . . . . . . 10-25
Ignition Transmission Lock Check . . . . . . . . . . . . . . . . . . . . . 10-25
Park Brake and P (Park) Mechanism Check . . . . . . . . 10-25
Wiper Blade Replacement . . . . . . . . . . . . . . 10-26
Headlamp Aiming
Headlamp Aiming . . . . . . . . . . 10-26
Bulb Replacement
Bulb Replacement . . . . . . . . . . 10-27
Halogen Headlamps . . . . . . . . 10-27
Headlamps, Front TurnSignal and Parking
Lamps . . . . . . . . . . . . . . . . . . . . 10-27 Taillamps, Turn Signal,
Sidemarker, Stoplamps,
and Back-Up Lamps . . . . . . 10-29
License Plate Lamp . . . . . . . . 10-31
Replacement Bulbs . . . . . . . . . 10-32
Electrical System
Electrical System Overload . . . . . . . . . . . . . . . . . . 10-32
Fuses and Circuit Breakers . . . . . . . . . . . . . . . . . . 10-33
Engine Compartment Fuse Block . . . . . . . . . . . . . . . . . . . . . 10-33
Instrument Panel Fuse Block . . . . . . . . . . . . . . . . . . . . . 10-37
Wheels and Tires
Tires . . . . . . . . . . . . . . . . . . . . . . . . 10-38
All-Season Tires . . . . . . . . . . . . 10-39
Winter Tires . . . . . . . . . . . . . . . . 10-40
Low-Profile Tires . . . . . . . . . . . 10-40
Summer Tires . . . . . . . . . . . . . . 10-40
Tire Sidewall Labeling . . . . . . 10-41
Tire Designations . . . . . . . . . . . 10-43
Tire Terminology andDefinitions . . . . . . . . . . . . . . . . 10-44
Tire Pressure . . . . . . . . . . . . . . . 10-47
Tire Pressure Monitor System . . . . . . . . . . . . . . . . . . . 10-48
Page 249 of 394
Black plate (3,1)Chevrolet Cruze Owner Manual - 2013 - crc - 10/16/12
Vehicle Care 10-3
cause cancer and birth defects or
other reproductive harm. Engine
exhaust, many parts and systems,
many fluids, and some component
wear by-products contain and/or
emit these chemicals.
California Perchlorate
Materials Requirements
Certain types of automotive
applications, such as airbag
initiators, safety belt pretensioners,
and lithium batteries contained in
Remote Keyless Entry transmitters,
may contain perchlorate materials.
Special handling may be necessary.
For additional information, see
www.dtsc.ca.gov/hazardouswaste/
perchlorate.
Accessories and
Modifications
Adding non‐dealer accessories or
making modifications to the vehicle
can affect vehicle performance and
safety, including such things as
airbags, braking, stability, ride andhandling, emissions systems,
aerodynamics, durability, and
electronic systems like antilock
brakes, traction control, and stability
control. These accessories or
modifications could even cause
malfunction or damage not covered
by the vehicle warranty.
Damage to vehicle components
resulting from modifications or the
installation or use of non‐GM
certified parts, including control
module or software modifications, is
not covered under the terms of the
vehicle warranty and may affect
remaining warranty coverage for
affected parts.
GM Accessories are designed to
complement and function with other
systems on the vehicle. See your
dealer to accessorize the vehicle
using genuine GM Accessories
installed by a dealer technician.
Also, see
Adding Equipment to the
Airbag-Equipped Vehicle on
page 3‑29.
Vehicle Checks
Doing Your Own
Service Work
{WARNING
It can be dangerous to work on
your vehicle if you do not have
the proper knowledge, service
manual, tools, or parts. Always
follow owner manual procedures
and consult the service manual
for your vehicle before doing any
service work.
If doing some of your own service
work, use the proper service
manual. It tells you much more
about how to service the vehicle
than this manual can. To order the
proper service manual, see Service
Publications Ordering Information
on page 13‑11.
Page 253 of 394
Black plate (7,1)Chevrolet Cruze Owner Manual - 2013 - crc - 10/16/12
Vehicle Care 10-7
1.Engine Air Cleaner/Filter on
page 10‑13.
2. Engine Oil Dipstick. See “Checking Engine Oil” under
Engine Oil on page 10‑9.
3. Engine Cooling Fan (Out of View). See Cooling System on
page 10‑15.
4. Engine Oil Fill Cap. See “When
to Add Engine Oil” underEngine
Oil on page 10‑9.
5. Remote Negative (-) Grounding Point. See Jump Starting on
page 10‑77.
6. Brake/Clutch Fluid Reservoir. See “Brake Fluid” underBrakes
on page 10‑21 andHydraulic
Clutch on page 10‑13.
7. Battery on page 10‑24.
8. Engine Coolant Surge Tank and Pressure Cap. See Engine
Coolant on page 10‑15.
9. Remote Positive (+) Terminal. See Jump Starting on
page 10‑77. 10.
Engine Compartment Fuse
Block on page 10‑33.
11. Windshield Washer Fluid Reservoir. See “Adding Washer
Fluid” under Washer Fluid on
page 10‑20.
Page 255 of 394
Black plate (9,1)Chevrolet Cruze Owner Manual - 2013 - crc - 10/16/12
Vehicle Care 10-9
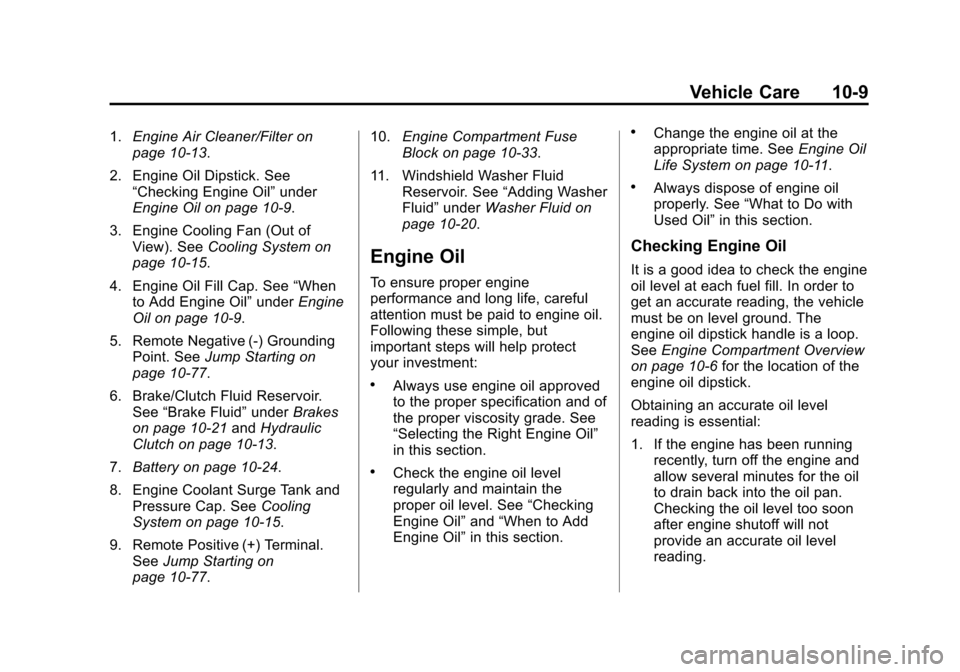
1.Engine Air Cleaner/Filter on
page 10‑13.
2. Engine Oil Dipstick. See “Checking Engine Oil” under
Engine Oil on page 10‑9.
3. Engine Cooling Fan (Out of View). See Cooling System on
page 10‑15.
4. Engine Oil Fill Cap. See “When
to Add Engine Oil” underEngine
Oil on page 10‑9.
5. Remote Negative (-) Grounding Point. See Jump Starting on
page 10‑77.
6. Brake/Clutch Fluid Reservoir. See “Brake Fluid” underBrakes
on page 10‑21 andHydraulic
Clutch on page 10‑13.
7. Battery on page 10‑24.
8. Engine Coolant Surge Tank and Pressure Cap. See Cooling
System on page 10‑15.
9. Remote Positive (+) Terminal. See Jump Starting on
page 10‑77. 10.
Engine Compartment Fuse
Block on page 10‑33.
11. Windshield Washer Fluid Reservoir. See “Adding Washer
Fluid” under Washer Fluid on
page 10‑20.
Engine Oil
To ensure proper engine
performance and long life, careful
attention must be paid to engine oil.
Following these simple, but
important steps will help protect
your investment:
.Always use engine oil approved
to the proper specification and of
the proper viscosity grade. See
“Selecting the Right Engine Oil”
in this section.
.Check the engine oil level
regularly and maintain the
proper oil level. See “Checking
Engine Oil” and“When to Add
Engine Oil” in this section.
.Change the engine oil at the
appropriate time. See Engine Oil
Life System on page 10‑11.
.Always dispose of engine oil
properly. See “What to Do with
Used Oil” in this section.
Checking Engine Oil
It is a good idea to check the engine
oil level at each fuel fill. In order to
get an accurate reading, the vehicle
must be on level ground. The
engine oil dipstick handle is a loop.
SeeEngine Compartment Overview
on page 10‑6 for the location of the
engine oil dipstick.
Obtaining an accurate oil level
reading is essential:
1. If the engine has been running recently, turn off the engine and
allow several minutes for the oil
to drain back into the oil pan.
Checking the oil level too soon
after engine shutoff will not
provide an accurate oil level
reading.
Page 259 of 394

Black plate (13,1)Chevrolet Cruze Owner Manual - 2013 - crc - 10/16/12
Vehicle Care 10-13
Change the fluid and filter at the
intervals listed inMaintenance
Schedule on page 11‑2, and be sure
to use the fluid listed in
Recommended Fluids and
Lubricants on page 11‑12.
Manual Transmission
Fluid
How to Check Manual
Transmission Fluid
It is not necessary to check the
manual transmission fluid level.
A transmission fluid leak is the only
reason for fluid loss. If a leak
occurs, take the vehicle to your
dealer and have it repaired as soon
as possible. See Recommended
Fluids and Lubricants on page 11‑12
for the proper fluid to use.
Hydraulic Clutch
For vehicles with a manual
transmission, it is not necessary to
regularly check brake/clutch fluid
unless there is a leak suspected. Adding fluid will not correct a leak.
A fluid loss in this system could
indicate a problem. Have the
system inspected and repaired.
When to Check and What
to Use
The brake/hydraulic clutch fluid
reservoir cap has either a symbol or
text specifying the type of brake
fluid. The common brake/clutch fluid
reservoir is filled with GM approved
DOT 3 brake fluid as indicated on
the reservoir cap. See
Engine
Compartment Overview on
page 10‑6 for reservoir location.
How to Check and Add Fluid
Visually check the brake/clutch fluid
reservoir to make sure the fluid level
is at the MIN (minimum) line on the side of the reservoir. The brake/
hydraulic clutch fluid system should
be closed and sealed.
Do not remove the cap to check the
fluid level or to top off the fluid level.
Remove the cap only when
necessary to add the proper fluid
until the level reaches the MIN line.
Engine Air Cleaner/Filter
See
Engine Compartment Overview
on page 10‑6 for the location of the
engine air cleaner/filter.
When to Inspect the Engine Air
Cleaner/Filter
Inspect the air cleaner/filter at the
scheduled maintenance intervals
and replace it at the first oil change
after each 80 000 km (50,000 mi)
interval. See Maintenance Schedule
on page 11‑2. If you are driving in
dusty/dirty conditions, inspect the
filter at each engine oil change.
Page 267 of 394
Black plate (21,1)Chevrolet Cruze Owner Manual - 2013 - crc - 10/16/12
Vehicle Care 10-21
Notice
.When using concentrated
washer fluid, follow the
manufacturer instructions for
adding water.
.Do not mix water with
ready-to-use washer fluid.
Water can cause the solution
to freeze and damage the
washer fluid tank and other
parts of the washer system.
.Fill the washer fluid tank only
three-quarters full when it is
very cold. This allows for
fluid expansion if freezing
occurs, which could damage
the tank if it is
completely full.
.Do not use engine coolant
(antifreeze) in the windshield
washer. It can damage the
windshield washer system
and paint.
Brakes
This vehicle has front disc brakes
and could have rear drum brakes or
rear disc brakes.
Disc brake pads have built-in wear
indicators that make a high-pitched
warning sound when the brake pads
are worn and new pads are needed.
The sound can come and go or be
heard all the time the vehicle is
moving, except when applying the
brake pedal firmly.
{WARNING
The brake wear warning sound
means that soon the brakes will
not work well. That could lead to
a crash. When the brake wear
warning sound is heard, have the
vehicle serviced.
Notice: Continuing to drive with
worn-out brake pads could result
in costly brake repair. Some driving conditions or climates
can cause a brake squeal when the
brakes are first applied or lightly
applied. This does not mean
something is wrong with the brakes.
Properly torqued wheel nuts are
necessary to help prevent brake
pulsation. When tires are rotated,
inspect brake pads for wear and
evenly tighten wheel nuts in the
proper sequence to torque
specifications in
Capacities and
Specifications on page 12‑2.
If the vehicle has rear drum brakes,
they do not have wear indicators,
but if a rear brake rubbing noise is
heard, have the rear brake linings
inspected immediately. Rear brake
drums should be removed and
inspected each time the tires are
removed for rotation or changing.
Drum brakes have an inspection
hole to inspect lining wear during
scheduled maintenance. When the
front brake pads are replaced, have
the rear brakes inspected, too.
Page 268 of 394

Black plate (22,1)Chevrolet Cruze Owner Manual - 2013 - crc - 10/16/12
10-22 Vehicle Care
Brake linings should always be
replaced as complete axle sets.
Brake Pedal Travel
See your dealer if the brake pedal
does not return to normal height,
or if there is a rapid increase in
pedal travel. This could be a sign
that brake service might be
required.
Brake Adjustment
Every time the brakes are applied,
with or without the vehicle moving,
the brakes adjust for wear.
Replacing Brake System Parts
The braking system on a vehicle is
complex. Its many parts have to be
of top quality and work well together
if the vehicle is to have really good
braking. The vehicle was designed
and tested with top-quality brake
parts. When parts of the braking
system are replaced, be sure to get
new, approved replacement parts.
If this is not done, the brakes might
not work properly. For example,installing disc brake pads that are
wrong for the vehicle, can change
the balance between the front and
rear brakes
—for the worse. The
braking performance expected can
change in many other ways if the
wrong replacement brake parts are
installed.
Brake Fluid
The brake/clutch master cylinder
reservoir is filled with DOT 3 brake
fluid as indicated on the reservoir
cap. See Engine Compartment
Overview on page 10‑6 for the
location of the reservoir. There are only two reasons why the
brake fluid level in the reservoir
might go down:
.The brake fluid level goes down
because of normal brake lining
wear. When new linings are
installed, the fluid level goes
back up.
.A fluid leak in the brake/clutch
hydraulic system can also cause
a low fluid level. Have the brake/
clutch hydraulic system fixed,
since a leak means that sooner
or later the brakes will not
work well.
Do not top off the brake/clutch fluid.
Adding fluid does not correct a leak.
If fluid is added when the linings are
worn, there will be too much fluid
when new brake linings are
installed. Add or remove fluid, as
necessary, only when work is done
on the brake/clutch hydraulic
system.