center console CHEVROLET CRUZE 2014 1.G Owners Manual
[x] Cancel search | Manufacturer: CHEVROLET, Model Year: 2014, Model line: CRUZE, Model: CHEVROLET CRUZE 2014 1.GPages: 420, PDF Size: 5.92 MB
Page 22 of 420
Black plate (16,1)Chevrolet Cruze Owner Manual (GMNA-Localizing-U.S./Canada-6007168) -
2014 - 2nd Edition - 7/15/13
1-16 In Brief
Storing a Favorite Station
Stations from all bands can be
stored in the favorite lists in any
order. Up to six stations can be
stored in each favorite page and the
number of available favorite pages
can be set.
To store the station to a position in
the list, press the corresponding
numeric button 1 to 6 until a beep is
heard.
For more information, see“Storing a
Station as a Favorite” inAM-FM
Radio on page 7-7.
Setting the Clock
Adjusting the Time or Date
To set the time and date for the
radio with navigation:
1. Press CLOCK.
2. Select Set Time or Set Date.
3. Turn the MENU/SEL knob to adjust the highlighted number.
4. Press the MENU/SEL knob to select the next number. 5. To save the settings, press
BACK on the radio faceplate.
Setting the 12/24 Hour Format
To set the 12/24 hour format for the
radio with navigation:
1. Press CLOCK.
2. Highlight 12/24 Hour Format.
3. Press the MENU/SEL knob to select the 12 hour or 24 hour
display format.
4. To save the settings, press BACK on the radio faceplate.
For detailed instructions on setting
the clock for the vehicle's specific
audio system. See Clock on
page 5-4.
Satellite Radio
If equipped, vehicles with a
SiriusXM®satellite radio tuner and a
valid SiriusXM satellite radio
subscription can receive SiriusXM
programming.
SiriusXM Satellite Radio
Service
SiriusXM is a satellite radio service
based in the 48 contiguous United
States and 10 Canadian provinces.
SiriusXM satellite radio has a wide
variety of programming and
commercial-free music, coast to
coast, and in digital-quality sound.
A fee is required to receive the
SiriusXM service.
Refer to:
.www.siriusxm.com or call
1-866-635-2349 (U.S.).
.www.xmradio.ca or call
1-877-209-0079 (Canada).
See Satellite Radio on page 7-9.
Portable Audio Devices
Some vehicles have a 3.5 mm
(1/8 in) auxiliary input and a USB
port in the center console. External
devices such as iPods
®, laptop
computers, MP3 players, CD
Page 25 of 420
Black plate (19,1)Chevrolet Cruze Owner Manual (GMNA-Localizing-U.S./Canada-6007168) -
2014 - 2nd Edition - 7/15/13
In Brief 1-19
Ultrasonic Parking Assist
If equipped, this system uses
sensors on the rear bumper to
assist with parking and avoiding
objects while in R (Reverse).
It operates at speeds less than
8 km/h (5 mph). Ultrasonic Rear
Parking Assist (URPA) uses audible
beeps to provide distance and
system information.
Keep the sensors on the vehicle's
rear bumper clean to ensure proper
operation.
SeeUltrasonic Parking Assist on
page 9-45.
Power Outlets
The accessory power outlets can be
used to plug in electrical equipment,
such as a cell phone or MP3 player.
There is one accessory power outlet
located on the center floor console
and one on the rear of the center
floor console. These outlets are
powered when the key is in ON/
RUN or ACC/ACCESSORY, or until
the driver door is opened within
10 minutes of turning off the vehicle.
See Retained Accessory Power
(RAP) on page 9-23.
See Power Outlets on page 5-6.
Performance and
Maintenance
Traction Control/
Electronic Stability
Control
The Traction Control System (TCS)
limits wheel spin. The system turns
on automatically every time the
vehicle is started.
The StabiliTrak system assists with
directional control of the vehicle in
difficult driving conditions. The
system also turns on automatically
every time the vehicle is started.
.To turn off traction control, press
and release the
gbutton on the
center console. The traction off
light
iilluminates.
.To turn off both traction control
and StabiliTrak, press and hold
the
gbutton, until the traction off
light
iand the StabiliTrak OFF
light
gilluminate.
Page 37 of 420
Black plate (7,1)Chevrolet Cruze Owner Manual (GMNA-Localizing-U.S./Canada-6007168) -
2014 - 2nd Edition - 7/15/13
Keys, Doors, and Windows 2-7
Programming with a Recognized
Transmitter (Keyless Access
Vehicles Only)
A new transmitter can be
programmed to the vehicle when
there is one recognized transmitter.
To program, the vehicle must be off
and all of the transmitters, both
currently recognized and new, must
be with you.
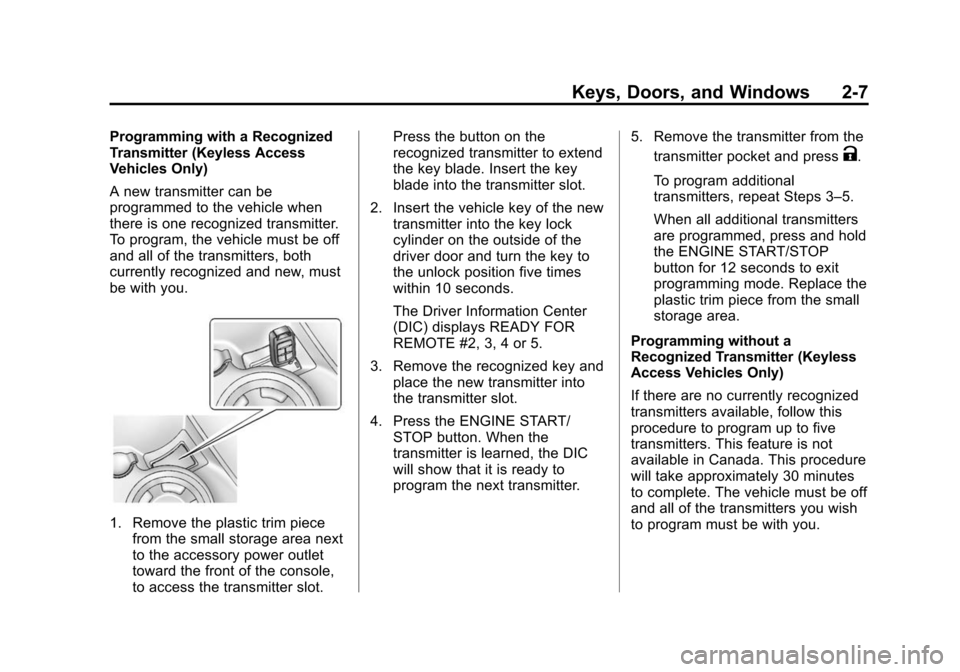
1. Remove the plastic trim piecefrom the small storage area next
to the accessory power outlet
toward the front of the console,
to access the transmitter slot. Press the button on the
recognized transmitter to extend
the key blade. Insert the key
blade into the transmitter slot.
2. Insert the vehicle key of the new transmitter into the key lock
cylinder on the outside of the
driver door and turn the key to
the unlock position five times
within 10 seconds.
The Driver Information Center
(DIC) displays READY FOR
REMOTE #2, 3, 4 or 5.
3. Remove the recognized key and place the new transmitter into
the transmitter slot.
4. Press the ENGINE START/ STOP button. When the
transmitter is learned, the DIC
will show that it is ready to
program the next transmitter. 5. Remove the transmitter from the
transmitter pocket and press
K.
To program additional
transmitters, repeat Steps 3–5.
When all additional transmitters
are programmed, press and hold
the ENGINE START/STOP
button for 12 seconds to exit
programming mode. Replace the
plastic trim piece from the small
storage area.
Programming without a
Recognized Transmitter (Keyless
Access Vehicles Only)
If there are no currently recognized
transmitters available, follow this
procedure to program up to five
transmitters. This feature is not
available in Canada. This procedure
will take approximately 30 minutes
to complete. The vehicle must be off
and all of the transmitters you wish
to program must be with you.
Page 38 of 420
Black plate (8,1)Chevrolet Cruze Owner Manual (GMNA-Localizing-U.S./Canada-6007168) -
2014 - 2nd Edition - 7/15/13
2-8 Keys, Doors, and Windows
1. Insert the vehicle key of thetransmitter into the key lock
cylinder on the outside of the
driver door and turn the key to
the unlock position five times
within 10 seconds.
The Driver Information Center
(DIC) displays REMOTE LEARN
PENDING, PLEASE WAIT.
2. Wait for 10 minutes until the DIC displays PRESS ENGINE
START BUTTON TO LEARN
and then press the ENGINE
START/STOP button.
The DIC displays will again
show REMOTE LEARN
PENDING, PLEASE WAIT.
3. Repeat Step 2 two additional times. After the third time all
previously known transmitters
will no longer work with the
vehicle. Remaining transmitters
can be relearned during the next
steps. The DIC display should now
show READY FOR REMOTE
# 1.
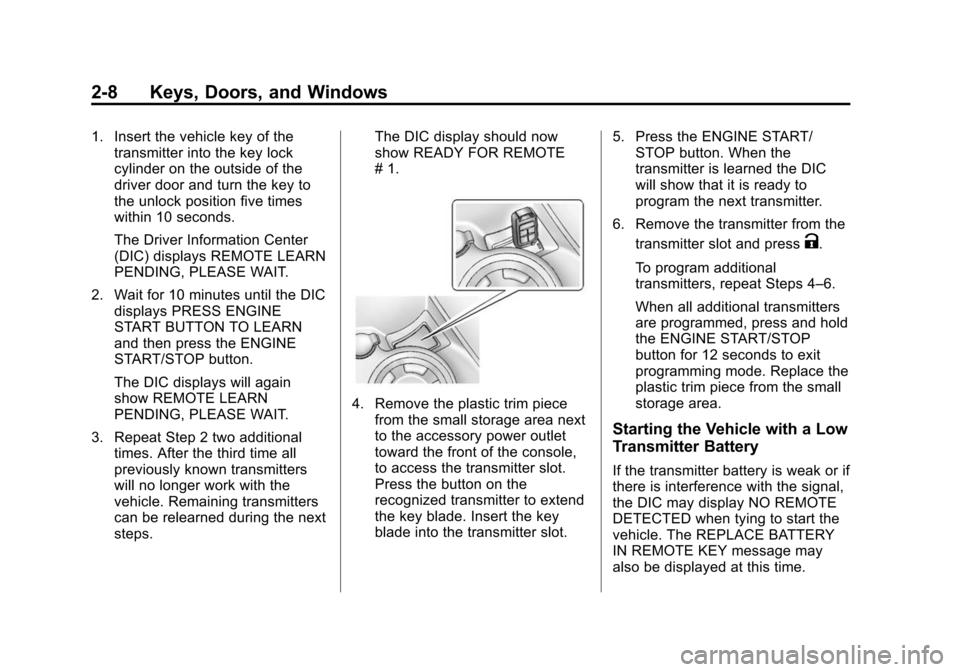
4. Remove the plastic trim piece
from the small storage area next
to the accessory power outlet
toward the front of the console,
to access the transmitter slot.
Press the button on the
recognized transmitter to extend
the key blade. Insert the key
blade into the transmitter slot. 5. Press the ENGINE START/
STOP button. When the
transmitter is learned the DIC
will show that it is ready to
program the next transmitter.
6. Remove the transmitter from the transmitter slot and press
K.
To program additional
transmitters, repeat Steps 4–6.
When all additional transmitters
are programmed, press and hold
the ENGINE START/STOP
button for 12 seconds to exit
programming mode. Replace the
plastic trim piece from the small
storage area.
Starting the Vehicle with a Low
Transmitter Battery
If the transmitter battery is weak or if
there is interference with the signal,
the DIC may display NO REMOTE
DETECTED when tying to start the
vehicle. The REPLACE BATTERY
IN REMOTE KEY message may
also be displayed at this time.
Page 105 of 420
Black plate (1,1)Chevrolet Cruze Owner Manual (GMNA-Localizing-U.S./Canada-6007168) -
2014 - 2nd Edition - 7/15/13
Storage 4-1
Storage
Storage Compartments
Storage Compartments . . . . . . . 4-1
Instrument Panel Storage . . . . . 4-1
Glove Box . . . . . . . . . . . . . . . . . . . . 4-1
Cupholders . . . . . . . . . . . . . . . . . . . 4-1
Center Console Storage . . . . . . 4-2
Additional Storage Features
Cargo Tie-Downs . . . . . . . . . . . . . 4-2
Storage
Compartments
{Warning
Do not store heavy or sharp
objects in storage compartments.
In a crash, these objects may
cause the cover to open and
could result in injury.
Instrument Panel Storage
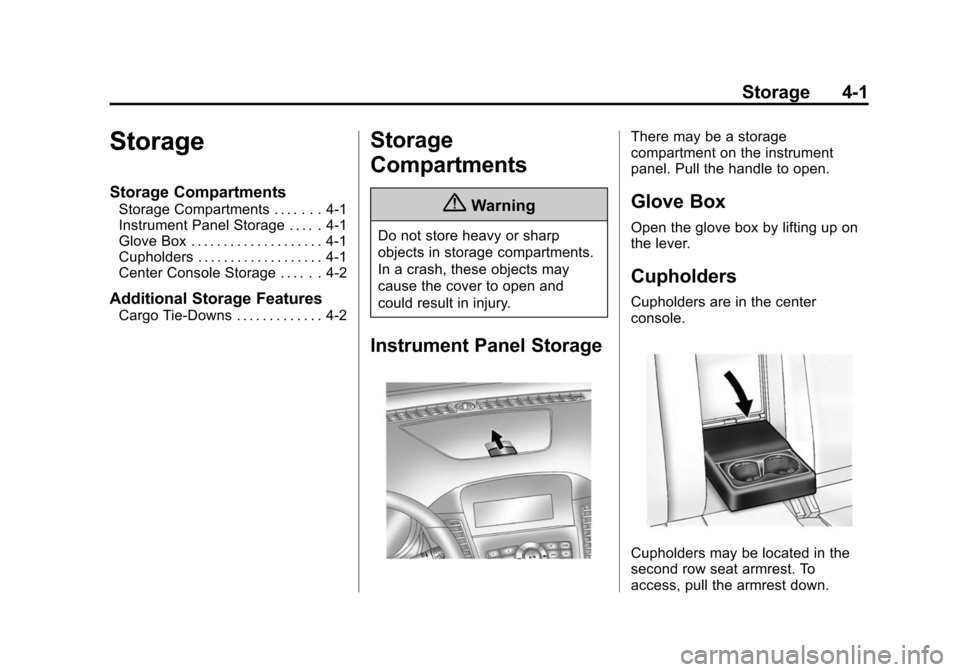
There may be a storage
compartment on the instrument
panel. Pull the handle to open.
Glove Box
Open the glove box by lifting up on
the lever.
Cupholders
Cupholders are in the center
console.
Cupholders may be located in the
second row seat armrest. To
access, pull the armrest down.
Page 106 of 420
Black plate (2,1)Chevrolet Cruze Owner Manual (GMNA-Localizing-U.S./Canada-6007168) -
2014 - 2nd Edition - 7/15/13
4-2 Storage
Center Console Storage
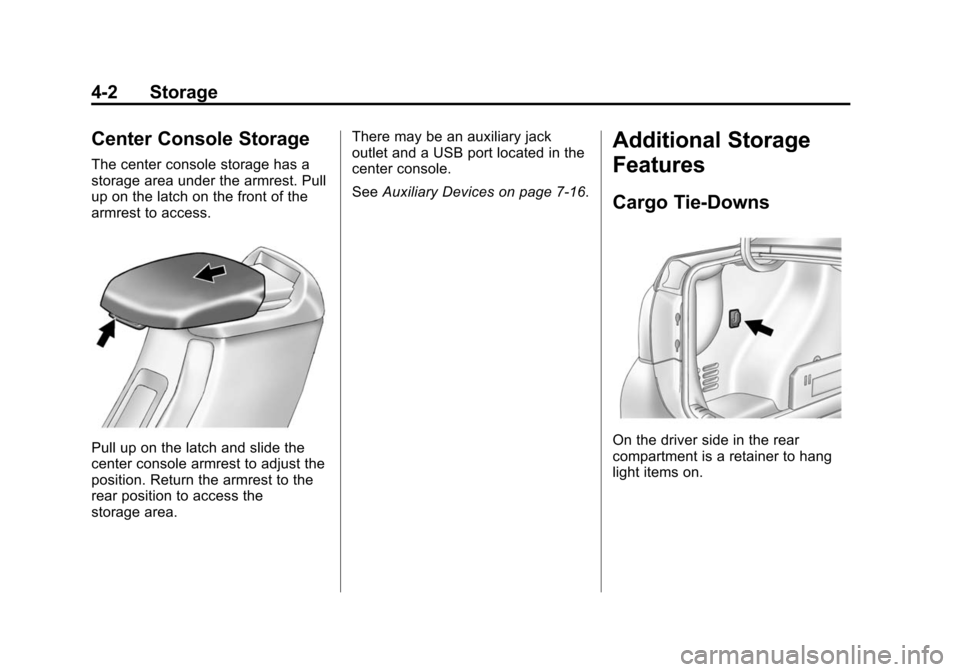
The center console storage has a
storage area under the armrest. Pull
up on the latch on the front of the
armrest to access.
Pull up on the latch and slide the
center console armrest to adjust the
position. Return the armrest to the
rear position to access the
storage area.There may be an auxiliary jack
outlet and a USB port located in the
center console.
See
Auxiliary Devices on page 7-16.
Additional Storage
Features
Cargo Tie-Downs
On the driver side in the rear
compartment is a retainer to hang
light items on.
Page 112 of 420
Black plate (6,1)Chevrolet Cruze Owner Manual (GMNA-Localizing-U.S./Canada-6007168) -
2014 - 2nd Edition - 7/15/13
5-6 Instruments and Controls
Power Outlets
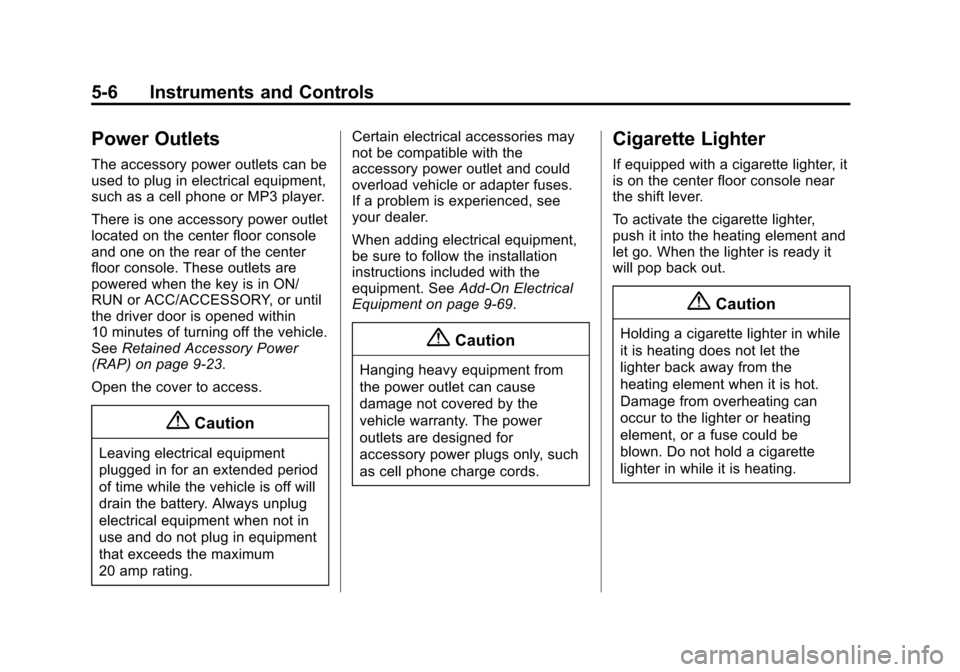
The accessory power outlets can be
used to plug in electrical equipment,
such as a cell phone or MP3 player.
There is one accessory power outlet
located on the center floor console
and one on the rear of the center
floor console. These outlets are
powered when the key is in ON/
RUN or ACC/ACCESSORY, or until
the driver door is opened within
10 minutes of turning off the vehicle.
SeeRetained Accessory Power
(RAP) on page 9-23.
Open the cover to access.
{Caution
Leaving electrical equipment
plugged in for an extended period
of time while the vehicle is off will
drain the battery. Always unplug
electrical equipment when not in
use and do not plug in equipment
that exceeds the maximum
20 amp rating. Certain electrical accessories may
not be compatible with the
accessory power outlet and could
overload vehicle or adapter fuses.
If a problem is experienced, see
your dealer.
When adding electrical equipment,
be sure to follow the installation
instructions included with the
equipment. See
Add-On Electrical
Equipment on page 9-69.
{Caution
Hanging heavy equipment from
the power outlet can cause
damage not covered by the
vehicle warranty. The power
outlets are designed for
accessory power plugs only, such
as cell phone charge cords.
Cigarette Lighter
If equipped with a cigarette lighter, it
is on the center floor console near
the shift lever.
To activate the cigarette lighter,
push it into the heating element and
let go. When the lighter is ready it
will pop back out.
{Caution
Holding a cigarette lighter in while
it is heating does not let the
lighter back away from the
heating element when it is hot.
Damage from overheating can
occur to the lighter or heating
element, or a fuse could be
blown. Do not hold a cigarette
lighter in while it is heating.
Page 168 of 420
Black plate (16,1)Chevrolet Cruze Owner Manual (GMNA-Localizing-U.S./Canada-6007168) -
2014 - 2nd Edition - 7/15/13
7-16 Infotainment System
Auxiliary Devices
If equipped, the AUX inputs are in
the center console and allow
portable devices to connect to the
vehicle using the 3.5 mm (1/8 in)
auxiliary jack or USB port.
Portable devices are controlled by
using the menu system described in
Operation on page 7-4.
3.5 mm Jack
Connect a 3.5 mm (1/8 in) cable to
the auxiliary input jack to use a
portable audio player.
Playback of an audio device that is
connected to the 3.5 mm jack can
only be controlled using the controls
on the device.
Adjusting the Volume
Turn the
Oknob to adjust the
volume of the infotainment system
after the volume level has been set
on the portable audio device.
USB Port
For vehicles with a USB port, the
following devices may be connected
and controlled by the infotainment
system.
.iPods
.PlaysForSure Devices (PFDs)
.USB Drives
.Zunes®
Not all iPods, PFDs, USB drives,
and Zunes are compatible with the
infotainment system. Devices are
also charged while plugged into the
USB port.
Connecting and Controlling
an iPod
Not all iPods can be controlled by
the infotainment system.
Connecting an iPod
Connect the iPod to the USB port. Searching for a Track
Tracks that are found can be
searched for by:
.Playlists
.Artists
.Albums
.Song Titles
.Podcasts
.Genres
.Audio Books
.Composers
To search for tracks:
1. Turn the MENU/SEL knob.
2. Select Search.
3. Select: Playlists, Artists, Albums, Song Titles, Podcasts, Genres,
Audio Books, or Composers.
4. Select the track.
Page 234 of 420
Black plate (42,1)Chevrolet Cruze Owner Manual (GMNA-Localizing-U.S./Canada-6007168) -
2014 - 2nd Edition - 7/15/13
9-42 Driving and Operating
The indicator light for both systems
is in the instrument cluster. This
light will:
.Flash when TCS is limiting
wheel spin.
.Flash when StabiliTrak is
activated.
.Turn on and stay on when either
system is not working.
If either system fails to turn on or to
activate, a message displays in the
Driver Information Center (DIC), and
dcomes on and stays on to
indicate that the system is inactive
and is not assisting the driver in
maintaining control. The vehicle is
safe to drive, but driving should be
adjusted accordingly. If
dcomes on and stays on:
1. Stop the vehicle.
2. Turn the engine off and wait 15 seconds.
3. Start the engine.
Drive the vehicle. If
dcomes on
and stays on, the vehicle may need
more time to diagnose the problem.
If the condition persists, see your
dealer.
Turning the Systems Off
and On
The button for TCS and StabiliTrak
is on the center console, behind the
shift lever.
{Caution
Do not repeatedly brake or
accelerate heavily when TCS is
off. The vehicle driveline could be
damaged.
To turn off only TCS, press and
release the
gbutton. The traction
off light
idisplays in the instrument
cluster. To turn TCS on again, press
and release the
gbutton. The
traction off light
idisplayed in the
instrument cluster will turn off.
If TCS is limiting wheel spin when
the
gbutton is pressed, the system
will not turn off until the wheels stop
spinning.
To turn off both TCS and StabiliTrak,
press and hold the
gbutton until
the traction off light
iand
StabiliTrak OFF light
gcome on
and stay on in the instrument
cluster. To turn TCS and StabiliTrak
Page 410 of 420

Black plate (2,1)Chevrolet Cruze Owner Manual (GMNA-Localizing-U.S./Canada-6007168) -
2014 - 2nd Edition - 7/15/13
i-2 INDEX
BluetoothOverview . . . . . . . . . 7-18, 7-20, 7-23
Brake System Warning Light . . . . . . . . 5-16
Brakes . . . . . . . . . . . . . . . . . . . . . . . . 10-26 Antilock . . . . . . . . . . . . . . . . . . . . . . . 9-39
Assist . . . . . . . . . . . . . . . . . . . . . . . . . 9-40
Fluid . . . . . . . . . . . . . . . . . . . . . . . . 10-27
Parking . . . . . . . . . . . . . . . . . . . . . . . 9-40
System Messages . . . . . . . . . . . . 5-27
Braking . . . . . . . . . . . . . . . . . . . . . . . . . 9-3
Break-In, New Vehicle . . . . . . . . . 9-14
Bulb Replacement . . . . . . . . . . . . 10-37
Halogen Bulbs . . . . . . . . . . . . . . 10-32
Headlamp Aiming . . . . . . . . . . . 10-32
Headlamps . . . . . . . . . . . . . . . . . 10-32
Headlamps, Front TurnSignal, and Parking
Lamps . . . . . . . . . . . . . . . . . . . . 10-32
License Plate Lamps . . . . . . . 10-36
Taillamps, Turn Signal, Sidemarker, Stoplamps,
and Backup Lamps . . . . . . . . 10-34
Buying New Tires . . . . . . . . . . . . . 10-59C
Calibration . . . . . . . . . . . . . . . . . . . . . . 5-4
California Fuel Requirements . . . . . . . . . . . 9-53
Perchlorate MaterialsRequirements . . . . . . . . . . . . . . . 10-3
Warning . . . . . . . . . . . . . . . . . . . . . . 10-2
Camera Rear Vision (RVC) . . . . . . . . . . . . 9-49
Canadian Vehicle Owners . . . . . . . . iii
Capacities and Specifications . . . . . . . . . . . . . . . . 12-2
Carbon Monoxide Engine Exhaust . . . . . . . . . . . . . . . 9-26
Trunk . . . . . . . . . . . . . . . . . . . . . . . . . 2-14
Winter Driving . . . . . . . . . . . . . . . . . 9-7
Cargo Tie-Downs . . . . . . . . . . . . . . . . . . . . . 4-2
Cautions, Danger, and Warnings . . . . . . . . . . . . . . . . . . . . . . . . iii
CD Player . . . . . . . . . . . . . . . . . . . . . 7-14
Center Console Storage . . . . . . . . 4-2
Chains, Tire . . . . . . . . . . . . . . . . . . 10-64
Charging System Light . . . . . . . . 5-13 Check
Engine Light . . . . . . . . . . . . . . . . . . 5-14
Ignition
Transmission Lock . . . . . . . . 10-30
Child Restraints Infants and YoungChildren . . . . . . . . . . . . . . . . . . . . . 3-32
Lower Anchors and Tethers for Children . . . . . . . . . 3-37
Older Children . . . . . . . . . . . . . . . . 3-30
Securing . . . . . . . . . . . . . . . . 3-44, 3-47
Systems . . . . . . . . . . . . . . . . . . . . . . 3-34
Cigarette Lighter . . . . . . . . . . . . . . . . 5-6
Circuit Breakers . . . . . . . . . . . . . . 10-38
Cleaning Exterior Care . . . . . . . . . . . . . . . 10-88
Interior Care . . . . . . . . . . . . . . . . 10-93
Climate Control Systems . . . . . . . 8-1 Air Conditioning . . . . . . . . . . . . . . . 8-1
Automatic . . . . . . . . . . . . . . . . . . . . . . 8-3
Heating . . . . . . . . . . . . . . . . . . . . . . . . 8-1
Clock . . . . . . . . . . . . . . . . . . . . . . . . . . . 5-4
Cluster, Instrument . . . . . . . . . . . . . 5-8
Clutch, Hydraulic . . . . . . . . . . . . . 10-16
Cold Weather Operation . . . . . . . 9-60
Collision Damage Repair . . . . . . 13-9