airbag off CHEVROLET CRUZE 2015 1.G User Guide
[x] Cancel search | Manufacturer: CHEVROLET, Model Year: 2015, Model line: CRUZE, Model: CHEVROLET CRUZE 2015 1.GPages: 417, PDF Size: 5.89 MB
Page 100 of 417
Black plate (47,1)Chevrolet Cruze Owner Manual (GMNA-Localizing-U.S./Canada-7707493) -
2015 - crc - 11/24/14
Seats and Restraints 3-47
In Canada, the law requires that
forward-facing child restraints have
a top tether, and that the tether be
attached.
When using the lap-shoulder belt to
secure the child restraint in this
position, follow the instructions that
came with the child restraint and the
following instructions:
1. Move the seat as far back as itwill go before securing the
forward-facing child restraint.
When the passenger sensing
system has turned off the front
outboard passenger frontal
airbag and passenger knee
airbag, the off indicator on the
passenger airbag status
indicator should light and stay lit
when you start the vehicle. See
Passenger Airbag Status
Indicator on page 5-13.
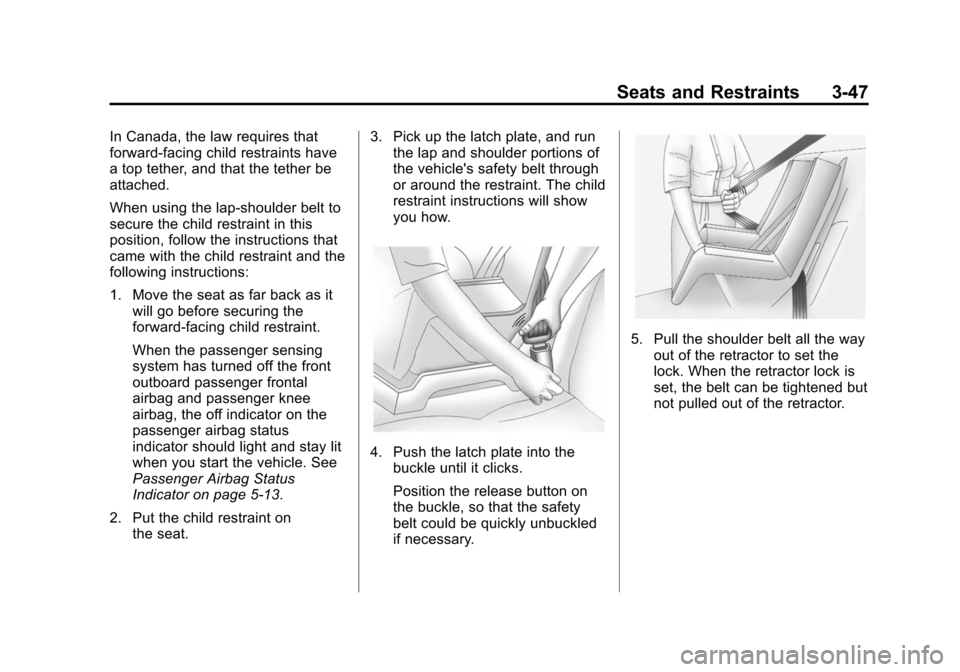
2. Put the child restraint on the seat. 3. Pick up the latch plate, and run
the lap and shoulder portions of
the vehicle's safety belt through
or around the restraint. The child
restraint instructions will show
you how.
4. Push the latch plate into thebuckle until it clicks.
Position the release button on
the buckle, so that the safety
belt could be quickly unbuckled
if necessary.
5. Pull the shoulder belt all the way
out of the retractor to set the
lock. When the retractor lock is
set, the belt can be tightened but
not pulled out of the retractor.
Page 101 of 417
Black plate (48,1)Chevrolet Cruze Owner Manual (GMNA-Localizing-U.S./Canada-7707493) -
2015 - crc - 11/24/14
3-48 Seats and Restraints
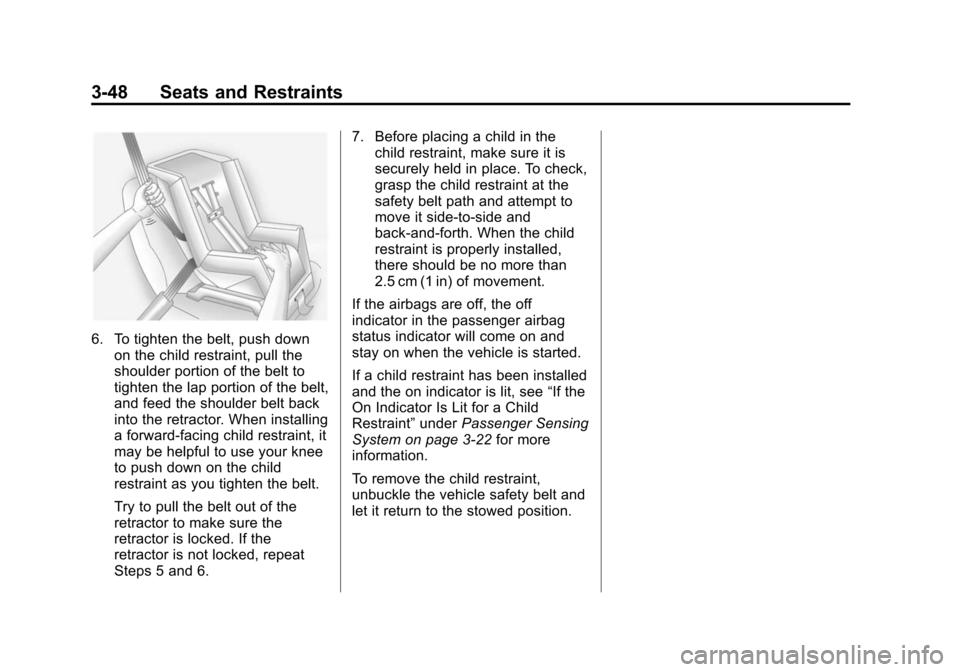
6. To tighten the belt, push downon the child restraint, pull the
shoulder portion of the belt to
tighten the lap portion of the belt,
and feed the shoulder belt back
into the retractor. When installing
a forward-facing child restraint, it
may be helpful to use your knee
to push down on the child
restraint as you tighten the belt.
Try to pull the belt out of the
retractor to make sure the
retractor is locked. If the
retractor is not locked, repeat
Steps 5 and 6. 7. Before placing a child in the
child restraint, make sure it is
securely held in place. To check,
grasp the child restraint at the
safety belt path and attempt to
move it side-to-side and
back-and-forth. When the child
restraint is properly installed,
there should be no more than
2.5 cm (1 in) of movement.
If the airbags are off, the off
indicator in the passenger airbag
status indicator will come on and
stay on when the vehicle is started.
If a child restraint has been installed
and the on indicator is lit, see “If the
On Indicator Is Lit for a Child
Restraint” underPassenger Sensing
System on page 3-22 for more
information.
To remove the child restraint,
unbuckle the vehicle safety belt and
let it return to the stowed position.
Page 104 of 417
Black plate (1,1)Chevrolet Cruze Owner Manual (GMNA-Localizing-U.S./Canada-7707493) -
2015 - crc - 12/2/14
Instruments and Controls 5-1
Instruments and
Controls
Controls
Steering Wheel Adjustment . . . 5-2
Steering Wheel Controls . . . . . . 5-2
Horn . . . . . . . . . . . . . . . . . . . . . . . . . . 5-3
Windshield Wiper/Washer . . . . . 5-3
Compass . . . . . . . . . . . . . . . . . . . . . 5-4
Clock . . . . . . . . . . . . . . . . . . . . . . . . . 5-4
Power Outlets . . . . . . . . . . . . . . . . . 5-6
Cigarette Lighter . . . . . . . . . . . . . . 5-6
Ashtrays . . . . . . . . . . . . . . . . . . . . . . 5-6
Warning Lights, Gauges, and
Indicators
Warning Lights, Gauges, andIndicators . . . . . . . . . . . . . . . . . . . . 5-7
Instrument Cluster . . . . . . . . . . . . 5-8
Speedometer . . . . . . . . . . . . . . . . 5-10
Odometer . . . . . . . . . . . . . . . . . . . . 5-10
Trip Odometer . . . . . . . . . . . . . . . 5-10
Tachometer . . . . . . . . . . . . . . . . . . 5-10
Fuel Gauge . . . . . . . . . . . . . . . . . . 5-10
Engine Coolant Temperature Gauge . . . . . . . . . . . . . . . . . . . . . . 5-11
Safety Belt Reminders . . . . . . . 5-11 Airbag Readiness Light . . . . . . 5-12
Passenger Airbag Status
Indicator . . . . . . . . . . . . . . . . . . . . 5-13
Charging System Light . . . . . . 5-13
Malfunction Indicator Lamp . . . . . . . . . . . . . 5-14
Brake System Warning Light . . . . . . . . . . . . . . . . . . . . . . . 5-16
Antilock Brake System (ABS) Warning Light . . . . . . . . . . . . . . 5-17
Up-Shift Light . . . . . . . . . . . . . . . . 5-17
Power Steering Warning Light . . . . . . . . . . . . . . . . . . . . . . . 5-18
Traction Off Light . . . . . . . . . . . . 5-18
StabiliTrak
®OFF Light . . . . . . . 5-18
Traction Control System (TCS)/StabiliTrak
®Light . . . . 5-19
Wait-to-Start Light . . . . . . . . . . . 5-19
Tire Pressure Light . . . . . . . . . . 5-19
Engine Oil Pressure Light . . . . 5-20
Low Fuel Warning Light . . . . . . 5-20
Diesel Exhaust Fluid (DEF) Warning Light . . . . . . . . . . . . . . 5-21
Security Light . . . . . . . . . . . . . . . . 5-21
Reduced Engine Power Light . . . . . . . . . . . . . . . . . . . . . . . 5-21
High-Beam On Light . . . . . . . . . 5-22
Front Fog Lamp Light . . . . . . . . 5-22 Lamps On Reminder . . . . . . . . . 5-22
Cruise Control Light . . . . . . . . . 5-22
Door Ajar Light . . . . . . . . . . . . . . 5-22
Information Displays
Driver Information
Center (DIC) . . . . . . . . . . . . . . . 5-23
Vehicle Messages
Vehicle Messages . . . . . . . . . . . 5-27
Battery Voltage and ChargingMessages . . . . . . . . . . . . . . . . . . 5-27
Brake System Messages . . . . 5-27
Compass Messages . . . . . . . . . 5-27
Cruise Control Messages . . . . 5-28
Door Ajar Messages . . . . . . . . . 5-28
Engine Cooling System Messages . . . . . . . . . . . . . . . . . . 5-28
Engine Oil Messages . . . . . . . . 5-29
Engine Power Messages . . . . 5-29
Fuel System Messages . . . . . . 5-29
Diesel Exhaust Fluid Messages . . . . . . . . . . . . . . . . . . 5-29
Diesel Particulate Filter Messages . . . . . . . . . . . . . . . . . . 5-30
Key and Lock Messages . . . . . 5-30
Lamp Messages . . . . . . . . . . . . . 5-31
Object Detection System Messages . . . . . . . . . . . . . . . . . . 5-31
Page 115 of 417
Black plate (12,1)Chevrolet Cruze Owner Manual (GMNA-Localizing-U.S./Canada-7707493) -
2015 - crc - 12/2/14
5-12 Instruments and Controls
Passenger Safety Belt
Reminder Light
There is a passenger safety belt
reminder light near the passenger
airbag status indicator. See
Passenger Sensing System on
page 3-22.
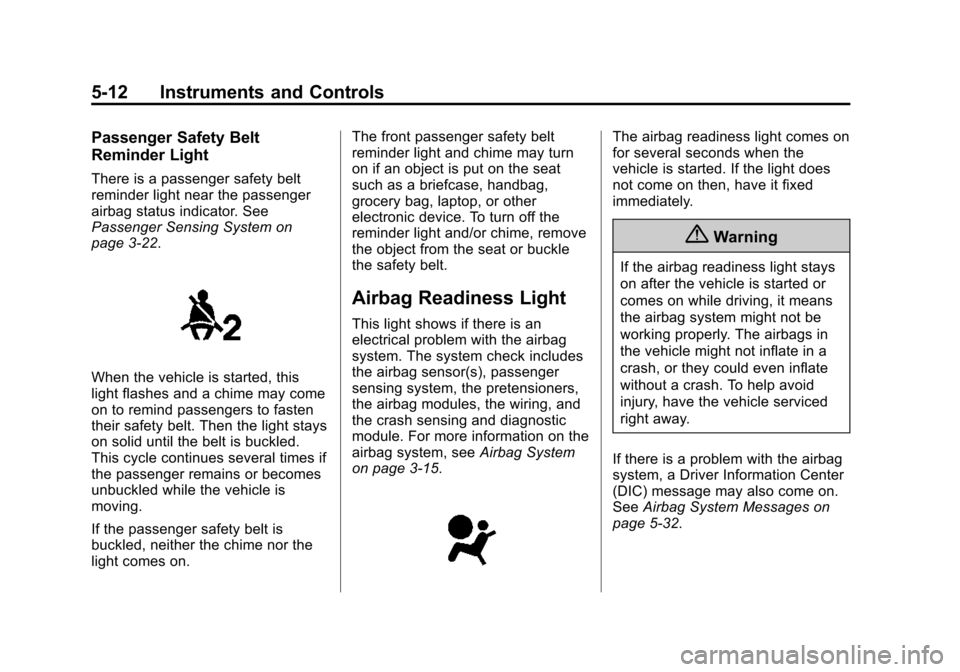
When the vehicle is started, this
light flashes and a chime may come
on to remind passengers to fasten
their safety belt. Then the light stays
on solid until the belt is buckled.
This cycle continues several times if
the passenger remains or becomes
unbuckled while the vehicle is
moving.
If the passenger safety belt is
buckled, neither the chime nor the
light comes on.The front passenger safety belt
reminder light and chime may turn
on if an object is put on the seat
such as a briefcase, handbag,
grocery bag, laptop, or other
electronic device. To turn off the
reminder light and/or chime, remove
the object from the seat or buckle
the safety belt.
Airbag Readiness Light
This light shows if there is an
electrical problem with the airbag
system. The system check includes
the airbag sensor(s), passenger
sensing system, the pretensioners,
the airbag modules, the wiring, and
the crash sensing and diagnostic
module. For more information on the
airbag system, see
Airbag System
on page 3-15.
The airbag readiness light comes on
for several seconds when the
vehicle is started. If the light does
not come on then, have it fixed
immediately.
{Warning
If the airbag readiness light stays
on after the vehicle is started or
comes on while driving, it means
the airbag system might not be
working properly. The airbags in
the vehicle might not inflate in a
crash, or they could even inflate
without a crash. To help avoid
injury, have the vehicle serviced
right away.
If there is a problem with the airbag
system, a Driver Information Center
(DIC) message may also come on.
See Airbag System Messages on
page 5-32.
Page 116 of 417
Black plate (13,1)Chevrolet Cruze Owner Manual (GMNA-Localizing-U.S./Canada-7707493) -
2015 - crc - 12/2/14
Instruments and Controls 5-13
Passenger Airbag Status
Indicator
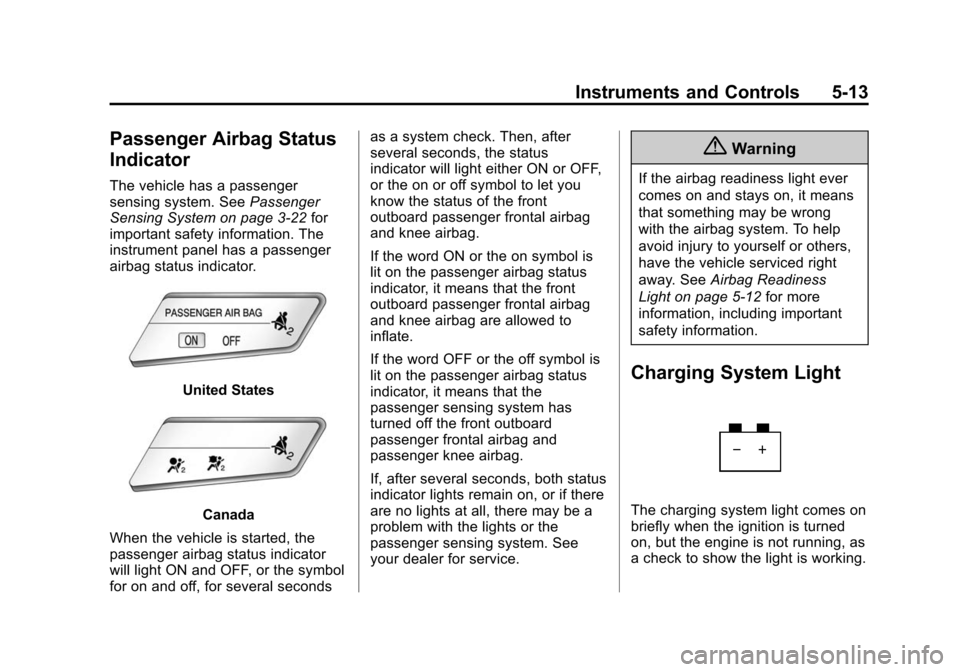
The vehicle has a passenger
sensing system. SeePassenger
Sensing System on page 3-22 for
important safety information. The
instrument panel has a passenger
airbag status indicator.
United States
Canada
When the vehicle is started, the
passenger airbag status indicator
will light ON and OFF, or the symbol
for on and off, for several seconds as a system check. Then, after
several seconds, the status
indicator will light either ON or OFF,
or the on or off symbol to let you
know the status of the front
outboard passenger frontal airbag
and knee airbag.
If the word ON or the on symbol is
lit on the passenger airbag status
indicator, it means that the front
outboard passenger frontal airbag
and knee airbag are allowed to
inflate.
If the word OFF or the off symbol is
lit on the passenger airbag status
indicator, it means that the
passenger sensing system has
turned off the front outboard
passenger frontal airbag and
passenger knee airbag.
If, after several seconds, both status
indicator lights remain on, or if there
are no lights at all, there may be a
problem with the lights or the
passenger sensing system. See
your dealer for service.
{Warning
If the airbag readiness light ever
comes on and stays on, it means
that something may be wrong
with the airbag system. To help
avoid injury to yourself or others,
have the vehicle serviced right
away. See
Airbag Readiness
Light on page 5-12 for more
information, including important
safety information.
Charging System Light
The charging system light comes on
briefly when the ignition is turned
on, but the engine is not running, as
a check to show the light is working.
Page 135 of 417
Black plate (32,1)Chevrolet Cruze Owner Manual (GMNA-Localizing-U.S./Canada-7707493) -
2015 - crc - 12/2/14
5-32 Instruments and Controls
SERVICE SIDE DETECTION
SYSTEM
If this message appears, the system
needs service. Take the vehicle to
your dealer.
SIDE BLIND ZONE ALERT OFF
This message indicates that the
driver has turned the system off.
SIDE DETECTION SYSTEM
UNAVAILABLE
This message indicates that the
Side Blind Zone Alert (SBZA)
system is disabled because the
sensor is blocked and cannot detect
vehicles in the blind zone. The
sensor may be blocked by mud, dirt,
snow, ice, or slush. This message
may also activate during heavy rain
or due to road spray. The vehicle
does not need service. For cleaning,
seeExterior Care on page 10-88.
Ride Control System
Messages
SERVICE TRACTION
CONTROL
This message displays when there
is a problem with the Traction
Control System (TCS). See Traction
Control/Electronic Stability Control
on page 9-41.
SERVICE STABILITRAK
This message displays if there is a
problem with the StabiliTrak system.
See Traction Control/Electronic
Stability Control on page 9-41.
Airbag System Messages
SERVICE AIRBAG
This message displays if there is a
problem with the airbag system.
Take the vehicle to your dealer for
service.
Safety Belt Messages
SHIFTER LOCKED. BUCKLE
SEATBELT
This message displays if the vehicle
is equipped with the Safety Belt
Assurance System and the driver
and front outboard passenger,
if present, safety belts are not
buckled. The vehicle will not shift
out of P (Park). Buckle the safety
belt(s) to unlock the shift lever.
This system may not allow the
vehicle to shift out of P (Park) if an
object - such as a briefcase,
handbag, grocery bag, laptop,
or other electronic device - is on the
front outboard passenger seat.
If this happens, remove the object
from the seat or buckle the
safety belt.
If the driver or front outboard
passenger unbuckles their safety
belt while driving, the safety belt
reminder chime and light(s) will
come on. See Safety Belt
Reminders on page 5-11.
Page 206 of 417
Black plate (15,1)Chevrolet Cruze Owner Manual (GMNA-Localizing-U.S./Canada-7707493) -
2015 - crc - 11/24/14
Driving and Operating 9-15
the message SHIFT TO PARK in
the Driver Information Center (DIC).
SeeTransmission Messages on
page 5-34. When the vehicle is
shifted into P (Park), the ignition
system will switch to OFF.
Do not turn the engine off when the
vehicle is moving. This will cause a
loss of power assist in the brake
and steering systems and disable
the airbags.
If the vehicle must be shut off in an
emergency:
1. Brake using a firm and steady pressure. Do not pump the
brakes repeatedly. This may
deplete power assist, requiring
increased brake pedal force.
2. Shift the vehicle to N (Neutral). This can be done while the
vehicle is moving. After shifting
to N (Neutral), firmly apply the
brakes and steer the vehicle to a
safe location. 3. Come to a complete stop. Shift
to P (Park) with an automatic
transmission, or Neutral with a
manual transmission. Turn the
ignition to LOCK/OFF.
4. Set the parking brake. See Parking Brake on page 9-39.
{Warning
Turning off the vehicle while
moving may cause loss of power
assist in the brake and steering
systems and disable the airbags.
While driving, only shut the
vehicle off in an emergency.
If the vehicle cannot be pulled over,
and must be shut off while driving,
press and hold the ENGINE START/
STOP button for longer than
two seconds, or press twice in
five seconds.
ACC/ACCESSORY (Amber
Indicator Light): This mode allows
you to use some electrical
accessories when the engine is off. With the ignition off, pressing the
button one time without the brake
pedal applied will place the ignition
system in ACC/ACCESSORY.
The ignition will switch from ACC/
ACCESSORY to OFF after
five minutes to prevent battery
rundown.
ON/RUN/START (Green Indicator
Light):
This mode is for driving and
starting. With the ignition off, and
the brake pedal applied, pressing
the button once will place the
ignition system in ON/RUN/START.
Once engine cranking begins,
release the button. Engine cranking
will continue until the engine starts.
See Starting the Engine on
page 9-18. The ignition will then
remain in ON/RUN.
Service Only Mode
This power mode is available for
service and diagnostics, and to
verify the proper operation of the
malfunction indicator lamp as may
be required for emission inspection
purposes. With the vehicle off, and
Page 207 of 417
Black plate (16,1)Chevrolet Cruze Owner Manual (GMNA-Localizing-U.S./Canada-7707493) -
2015 - crc - 11/24/14
9-16 Driving and Operating
the brake pedal not applied,
pressing and holding the button for
more than five seconds will place
the vehicle in Service Only Mode.
The instruments and audio systems
will operate as they do in ON/RUN,
but the vehicle will not be able to be
driven. The engine will not start in
Service Only Mode. Press the
button again to turn the vehicle off.
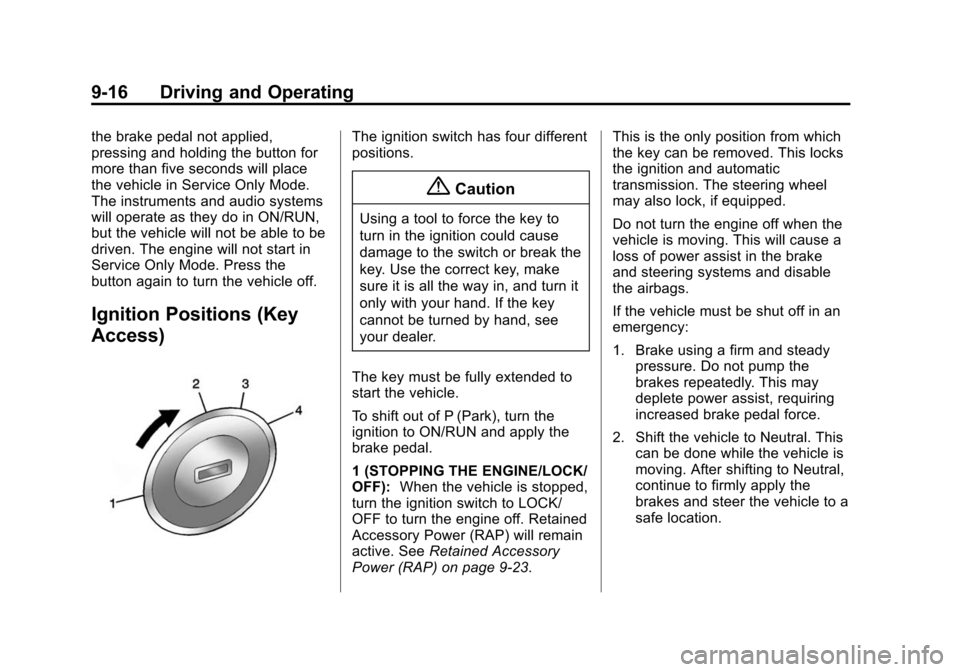
Ignition Positions (Key
Access)
The ignition switch has four different
positions.
{Caution
Using a tool to force the key to
turn in the ignition could cause
damage to the switch or break the
key. Use the correct key, make
sure it is all the way in, and turn it
only with your hand. If the key
cannot be turned by hand, see
your dealer.
The key must be fully extended to
start the vehicle.
To shift out of P (Park), turn the
ignition to ON/RUN and apply the
brake pedal.
1 (STOPPING THE ENGINE/LOCK/
OFF): When the vehicle is stopped,
turn the ignition switch to LOCK/
OFF to turn the engine off. Retained
Accessory Power (RAP) will remain
active. See Retained Accessory
Power (RAP) on page 9-23. This is the only position from which
the key can be removed. This locks
the ignition and automatic
transmission. The steering wheel
may also lock, if equipped.
Do not turn the engine off when the
vehicle is moving. This will cause a
loss of power assist in the brake
and steering systems and disable
the airbags.
If the vehicle must be shut off in an
emergency:
1. Brake using a firm and steady
pressure. Do not pump the
brakes repeatedly. This may
deplete power assist, requiring
increased brake pedal force.
2. Shift the vehicle to Neutral. This can be done while the vehicle is
moving. After shifting to Neutral,
continue to firmly apply the
brakes and steer the vehicle to a
safe location.
Page 208 of 417
Black plate (17,1)Chevrolet Cruze Owner Manual (GMNA-Localizing-U.S./Canada-7707493) -
2015 - crc - 11/24/14
Driving and Operating 9-17
3. Come to a complete stop. Shiftto P (Park) with an automatic
transmission, or Neutral with a
manual transmission. Turn the
ignition to LOCK/OFF.
4. Set the parking brake. See Parking Brake on page 9-39.
{Warning
Turning off the vehicle while
moving may cause loss of power
assist in the brake and steering
systems and disable the airbags.
While driving, only shut the
vehicle off in an emergency.
If the vehicle cannot be pulled over,
and must be shut off while driving,
turn the ignition to ACC/
ACCESSORY.
2 (ACC/ACCESSORY): This
position provides power to some of
the electrical accessories. It unlocks
the steering wheel and ignition. To
move the key from ACC/ ACCESSORY to LOCK/OFF, push
in the key and then turn it to
LOCK/OFF.
3 (ON/RUN):
The ignition switch
stays in this position when the
engine is running. This position can
be used to operate the electrical
accessories, including the
ventilation fan and 12-volt power
outlet, as well as to display some
warning and indicator lights. This
position can also be used for
service and diagnostics, and to
verify the proper operation of the
malfunction indicator lamp as may
be required for emission inspection
purposes. The transmission is also
unlocked in this position on
automatic transmission vehicles.
The battery could be drained if the
key is left in the ACC/ACCESSORY
or ON/RUN position with the engine
off. The vehicle might not start if the
battery is allowed to drain for an
extended period of time. 4 (START):
This position starts the
engine. When the engine starts,
release the key. The ignition switch
will return to ON/RUN for normal
driving.
A warning tone sounds when the
driver door is opened if the ignition
is still in ACC/ACCESSORY and the
key is in the ignition.
If the ignition becomes difficult to
turn, see Keys on page 2-1.
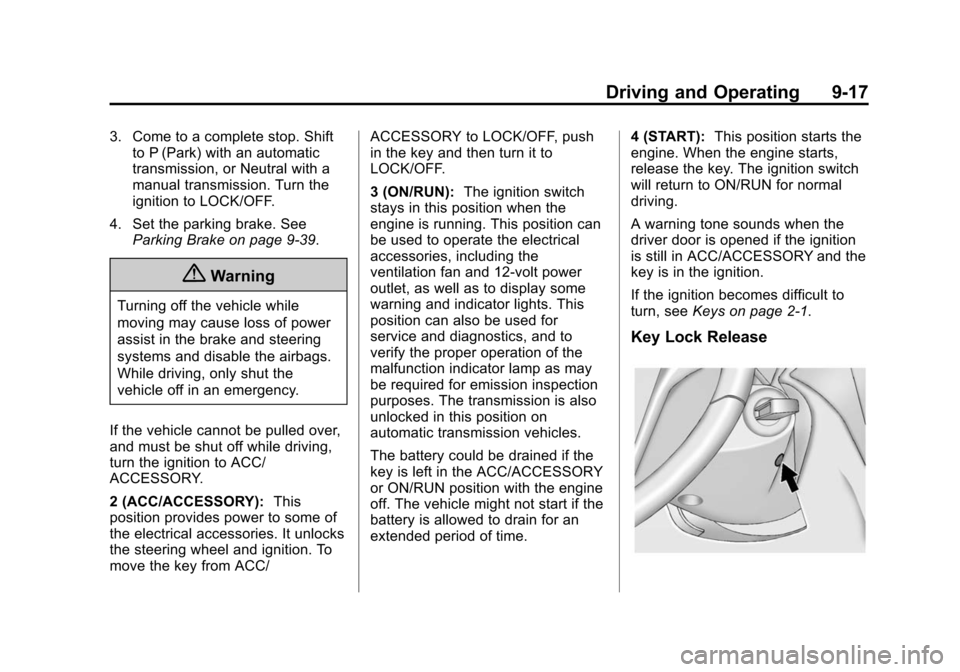
Key Lock Release
Page 387 of 417
Black plate (10,1)Chevrolet Cruze Owner Manual (GMNA-Localizing-U.S./Canada-7707493) -
2015 - crc - 11/24/14
13-10 Customer Information
If the vehicle is leased, the leasing
company may require you to have
insurance that ensures repairs with
Genuine GM Original Equipment
Manufacturer (OEM) parts or
Genuine Manufacturer replacement
parts. Read the lease carefully, as
you may be charged at the end of
the lease for poor quality repairs.
If a Crash Occurs
If there has been an injury, call
emergency services for help. Do not
leave the scene of a crash until all
matters have been taken care of.
Move the vehicle only if its position
puts you in danger, or you are
instructed to move it by a police
officer.
Give only the necessary information
to police and other parties involved
in the crash.
For emergency towing see
Roadside Assistance Program on
page 13-5.Gather the following information:
.Driver name, address, and
telephone number.
.Driver license number.
.Owner name, address, and
telephone number.
.Vehicle license plate number.
.Vehicle make, model, and
model year.
.Vehicle Identification
Number (VIN).
.Insurance company and policy
number.
.General description of the
damage to the other vehicle.
Choose a reputable repair facility
that uses quality replacement parts.
See “Collision Parts” earlier in this
section.
If the airbag has inflated, see What
Will You See after an Airbag
Inflates? on page 3-20.
Managing the Vehicle Damage
Repair Process
In the event that the vehicle requires
damage repairs, GM recommends
that you take an active role in its
repair. If you have a pre-determined
repair facility of choice, take the
vehicle there, or have it towed there.
Specify to the facility that any
required replacement collision parts
be original equipment parts, either
new Genuine GM parts or recycled
original GM parts. Remember,
recycled parts will not be covered by
the GM vehicle warranty.
Insurance pays the bill for the repair,
but you must live with the repair.
Depending on your policy limits,
your insurance company may
initially value the repair using
aftermarket parts. Discuss this with
the repair professional, and insist on
Genuine GM parts. Remember,
if the vehicle is leased, you may be
obligated to have the vehicle
repaired with Genuine GM parts,
even if your insurance coverage
does not pay the full cost.