clock setting CHEVROLET CRUZE 2016 1.G Owners Manual
[x] Cancel search | Manufacturer: CHEVROLET, Model Year: 2016, Model line: CRUZE, Model: CHEVROLET CRUZE 2016 1.GPages: 377, PDF Size: 6.35 MB
Page 108 of 377
Chevrolet Cruze Owner Manual (GMNA-Localizing-U.S./Canada/Mexico-
9234744) - 2016 - CRC - 3/9/16
Instruments and Controls 107
open area where it can receive a
GPS signal. The compass system
will automatically determine when
the GPS signal is restored and
provide a heading again. See
Compass Messages0136 for more
information on the messages that
may be displayed for the compass.
Clock
Base Radio
The infotainment system controls
are used to access the time and
date settings through the menu
system. See Operation0162 on
how to use the menu system.
Setting the Time and Date
When Auto Set is enabled the time
cannot be manually set.
1. Press
{, then touch
SETTINGS.
2. Touch Time and Date, then Set Time or Set Date.
3. Touch + or −to adjust the
value. 4. Touch
RorQto adjust AM or
PM for 12 hour format.
5. Touch
0.
Auto Set
1. Press{, then touch
SETTINGS.
2. Touch Time and Date, then Auto Set.
3. Select from the available selections.
4. Touch
0.
Setting the 12/24 Hour Format
1. Press{, then touch
SETTINGS.
2. Touch Time and Date, then select 12h or 24h format.
3. Touch
0.
Setting the Month and Day
Format
1. Press{, then touch
SETTINGS. 2. Touch Time and Date, then Set
Date Format.
3. Select DD/MM/YYYY (day/ month/year), MM/DD/YYYY
(month/day/year), or YYYY/
MM/DD (year/month/day)
format.
4. Touch
0.
Uplevel Radio Using Faceplate
Controls
To set the time or date: 1. Select Home Page, then select SETTINGS.
2. Select Time and Date, then the desired function.
3. Turn the MENU knob to increase or decrease the value.
4. Press the MENU knob to go to the next value. After the last
value is selected, the system
will update and return to the
Settings menu. Press
oBACK
to go to the last menu and
save the changes.
Auto Set requires OnStar
subscription.
Page 109 of 377
Chevrolet Cruze Owner Manual (GMNA-Localizing-U.S./Canada/Mexico-
9234744) - 2016 - CRC - 3/9/16
108 Instruments and Controls
If auto timing is set, the time
displayed on the clock may not
update immediately when driving
into a new time zone.
To set the clock display:1. Select SETTINGS from the Home Page, then select Time
and Date.
2. Select Clock Display.
3. Turn the MENU knob to Off or On.
4. Press the MENU knob to select.
Press
oBACK to go to the last
menu and save the changes.
Uplevel Radio Using
Touchscreen Controls
The infotainment system controls
are used to access the time and
date settings through the menu
system. See “Using the System”
under “Introduction” in the
infotainment manual. To set the time:
1. Touch SETTINGS from the Home Page, then touch Time
and Date.
2. Touch Set Time and touch
«
orªto increase or decrease
hours, minutes, and AM or PM.
Touch 12–24 Hr for 12 or
24 hour clock.
3. Touch
}to go back to the
previous menu.
Auto Set requires OnStar
subscription.
If auto timing is set, the time
displayed on the clock may not
update immediately when driving
into a new time zone.
To set the date: 1. Touch SETTINGS from the Home Page, then touch Time
and Date.
2. Touch Set Date and touch
«
orªto increase or decrease
month, day, or year. 3. Touch
}to go back to the
previous menu.
To set the clock display: 1. Touch SETTINGS and touch Time and Date.
2. Touch Clock Display and touch OFF or ON to turn the clock
display off or on.
3. Touch
}to go back to the
previous menu.
The clock settings can also be
accessed by touching the time
display, then touching Set.
Power Outlets
Power Outlet 12-Volt Direct
Current
The accessory power outlet can be
used to plug in electrical equipment,
such as a cell phone or MP3 player.
There is an accessory power outlet
on the center floor console in front
of the shift lever. This outlet is
powered when the ignition is in the
ON/RUN or ACC/ACCESSORY
position, or until the driver door is
Page 145 of 377
Chevrolet Cruze Owner Manual (GMNA-Localizing-U.S./Canada/Mexico-
9234744) - 2016 - CRC - 3/9/16
144 Instruments and Controls
3. PressSBACK on the
faceplate or touch
0on the
infotainment display to return to
the previous menu or exit.
Turn the vehicle to ON/RUN to
access the Settings menu, then
select SETTINGS from the Home
Page on the infotainment display.
Personalization Menus
The following list of menu items may
be available:
. Time and Date
. Language
. Valet Mode
. Radio
. Vehicle
. Bluetooth
. Apple CarPlay
. Android Auto
. USB Auto Launch
. Voice
. Display
. Rear Camera .
Return to Factory Settings
. Software Information
Detailed information for each menu
follows.
Time and Date
Manually set the time and date. See
Clock 0107.
Language
Select Language, then select from
the available language(s).
The selected language will display
on the system, and voice
recognition will reflect the selected
language.
Valet Mode (If Equipped)
This will lock the infotainment
system and steering wheel controls.
It may also limit access to vehicle
storage locations (if equipped).
To enable valet mode:
1. Enter a four-digit code on the keypad.
2. Select Enter to go to the confirmation screen. 3. Re-enter the four-digit code.
Touch LOCK or UNLOCK to lock or
unlock the system. Press Back to go
back to the previous menu.
Radio
Touch and the following may
display:
. Manage Favorites
. Number of Favorites Shown
. Audible Touch Feedback
. Text Scroll
. Tone Settings
. Auto Volume
. Maximum Startup Volume
. Audio Cue Volume
Manage Favorites
This allows favorites to be edited.
See “Storing a Station as a
Favorite” inAM-FM Radio 0163 or
“Manage Favorites” in“Settings”
under “Radio” in the infotainment
manual.
Page 182 of 377
Chevrolet Cruze Owner Manual (GMNA-Localizing-U.S./Canada/Mexico-
9234744) - 2016 - CRC - 3/9/16
Infotainment System 181
Viewing Pictures1. Connect the USB device to the USB port.
2. Touch the screen to open to full screen. Touch the screen again
to return to the previous
screen.
If the USB device is already
connected:
1. Press
{.
2. Touch GALLERY.
Some features are disabled while
the vehicle is in motion.
Viewing a Slide Show
1. Touch
zfrom the picture
screen.
2. Touch the screen to cancel the slide show during the slide
show playback.
Viewing a Previous or Next
Picture
Touch
SorTfrom the picture
screen. Rotating a Picture
Touch
wfrom the picture screen.
Enlarging a Picture
Touch
xfrom the picture screen.
Using the USB Picture Menu 1. Touch MENU from the picture screen.
2. Touch the appropriate menu: .Slide Show Time: Allows
selection of the slide show
interval.
. Clock, Temp. Display:
Allows selection of On or
Off to show the clock and
temperature on the full
screen.
. Display Settings: Adjusts
for Brightness and Contrast.
3. Touch
0to exit.
Pictures and Movies
(Movie System)
The infotainment system can play
movie files stored on a USB storage
device and devices that support
Media Transfer Protocol (MTP).
Movie System Information
. Available resolution: Lower than
1280 x 720 (W x H) pixels.
. Frame rate: Less than 30 fps.
. Playable movie file: .mp4, .avi.
The playable movie file may not
be played according to the
codec format.
. Playable codec format: H.264/
MPEG-4 AVC.
. Playable Audio format: MP3,
AC3, AAC, WMA.
. Max video bitrate:
‐MPEG-1: 8 Mbps
‐ MPEG-4 (mpg4, mp42, mp43):
4 Mbps
. Max audio bitrate:
‐MP3: 320 Kbps
Page 183 of 377
Chevrolet Cruze Owner Manual (GMNA-Localizing-U.S./Canada/Mexico-
9234744) - 2016 - CRC - 3/9/16
182 Infotainment System
‐WMA: 768 Kbps
‐ AC-3: 640 Kbps
‐ AAC: 320 Kbps
. Movie files to which Digital Right
Management (DRM) is applied
may not be played.
Playing a Movie File 1. Connect the USB device to the USB port.
2. Touch the screen to open to full screen. Touch the screen again
to return to the previous
screen.
If the USB device is already
connected:
1. Press
{.
2. Touch GALLERY.
3. Touch
z.
Movie is not available while driving.
Pause
. Touch
jto pause.
. Touch
rto resume. Changing to the Next/Previous
Movie
.
Touch
uto change to the
next file.
. Touch
twithin five seconds of
the playback time to play the
previous file.
Returning to the Beginning of the
Current Movie
Touch
tafter five seconds of the
playback time.
Scanning Forward or Backward
Touch and hold
toruduring
playback to rewind or fast forward.
Release the button to resume
playback at normal speed.
Viewing Full Screen
Touch
tfrom the movie screen.
Touch
tagain to return to the
previous screen.
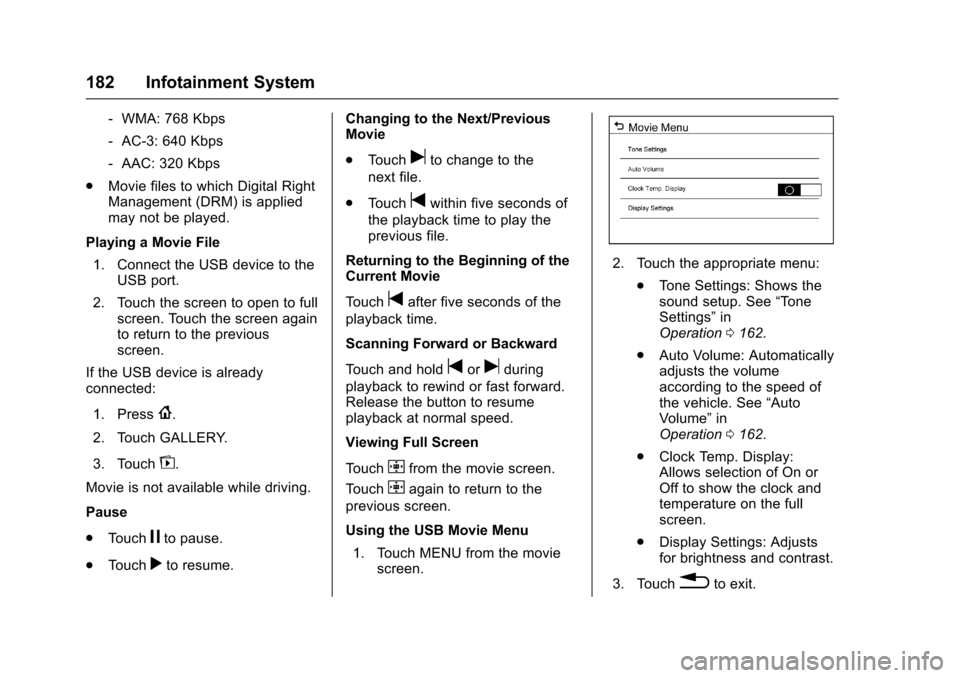
Using the USB Movie Menu
1. Touch MENU from the movie screen.
2. Touch the appropriate menu:
.Tone Settings: Shows the
sound setup. See “Tone
Settings” in
Operation 0162.
. Auto Volume: Automatically
adjusts the volume
according to the speed of
the vehicle. See “Auto
Volume” in
Operation 0162.
. Clock Temp. Display:
Allows selection of On or
Off to show the clock and
temperature on the full
screen.
. Display Settings: Adjusts
for brightness and contrast.
3. Touch
0to exit.
Page 190 of 377
Chevrolet Cruze Owner Manual (GMNA-Localizing-U.S./Canada/Mexico-
9234744) - 2016 - CRC - 3/9/16
Climate Controls 189
When AUTO is lit, all four functions
operate automatically. Each function
can also be manually set and the
setting is displayed. Functions not
manually set will continue to be
automatically controlled, even if the
AUTO indicator is not lit.
For automatic operation:1. Press AUTO.
2. Set the temperature. Allow the system time to stabilize. Then
adjust the temperature as
needed for best comfort.
To improve fuel efficiency and to
cool the vehicle faster, recirculation
may be automatically selected in
warm weather. The recirculation
light will not come on. Press
hto
select recirculation; press it again to
select outside air.
To change English units to metric
units, see “Cluster Menu” then
“Units” underInstrument Cluster
(Base Level) 0112 orInstrument
Cluster (Uplevel) 0114. Manual Operation
O:
Press to turn the climate control
system on or off.
Fan Control : Turn the knob
clockwise or counterclockwise to
increase or decrease the fan speed.
The selected fan speed is indicated
by a number on the display screen.
Press AUTO to return to automatic
operation.
Air Delivery Mode Controls :
Press to change the direction of the
airflow. The indicator light in the
button will turn on. The current
mode appears in the display screen.
Automatic operation is canceled and
manual mode is initiated. Press
AUTO to return to automatic
operation.
To change the current mode, select
one of the following:
Y: Air is directed to the instrument
panel outlets.
\: Air is divided between the
instrument panel outlets and the
floor outlets.
[: Air is directed to the floor
outlets.
-: Clears the windows of fog or
moisture. Air is directed to the
windshield and floor outlets.
0: Clears the windshield of fog or
frost more quickly. Air is directed to
the windshield.
For best results, clear all snow and
ice from the windshield before
defrosting.
Do not drive the vehicle until all
windows are clear.
A/C (Air Conditioning) : Press to
turn the air conditioning on or off.
If the fan is turned off or the outside
temperature falls below freezing, the
air conditioning will not work.
A/C (Comfort/Eco Air
Conditioning) (For Start/Stop
Vehicles) : Press to cycle between
the comfort, eco, and off air
conditioning modes. The indicator
will be lit in comfort and eco modes,
and turns off in the off air
conditioning mode. If the fan is
turned off, the air conditioner will not
run and the indicator light will
turn off.