key battery CHEVROLET CRUZE 2017 2.G Owners Manual
[x] Cancel search | Manufacturer: CHEVROLET, Model Year: 2017, Model line: CRUZE, Model: CHEVROLET CRUZE 2017 2.GPages: 405, PDF Size: 6.76 MB
Page 34 of 405

Chevrolet Cruze Owner Manual (GMNA-Localizing-U.S./Canada/Mexico-
9803785) - 2017 - CRC - 4/13/16
Keys, Doors, and Windows 33
Flip Key
Press the button on the RKE
transmitter to extend the key. Press
the button and the key blade to
retract the key.
If the vehicle has an ignition, and it
becomes difficult to turn the key,
inspect the key blade for debris.
Periodically clean with a brush
or pick.Keyless Access
Remove the key by pressing the
button on the side of the RKE
transmitter near the bottom and pull
the key out. Never pull the key out
without pressing the button.
See your dealer if a new key is
needed.
If locked out of the vehicle, see
Roadside Assistance
Program 0373.
With an active OnStar subscription,
an OnStar Advisor may remotely
unlock the vehicle. See OnStar
Overview 0383.
Remote Keyless Entry
(RKE) System
See Radio Frequency
Statement 0379.
If there is a decrease in the Remote
Keyless Entry (RKE) operating
range:
. Check the distance. The
transmitter may be too far from
the vehicle.
. Check the location. Other
vehicles or objects may be
blocking the signal.
. Check the transmitter's battery.
See “Battery Replacement” later
in this section.
. If the transmitter is still not
working correctly, see your
dealer or a qualified technician
for service.
Page 36 of 405

Chevrolet Cruze Owner Manual (GMNA-Localizing-U.S./Canada/Mexico-
9803785) - 2017 - CRC - 4/13/16
Keys, Doors, and Windows 35
purchased and programmed through
your dealer. The vehicle can be
reprogrammed so that lost or stolen
keys no longer work. Any remaining
keys will need to be reprogrammed.
Each vehicle can have up to eight
keys matched to it.
Programming with Two
Recognized Keys (Key
Vehicles Only)
This procedure is for adding a
transmitter, not replacing a
transmitter. To program:1. Insert the original, already programmed key in the ignition
and turn the key to the ON/
RUN position.
2. Turn the key to LOCK/OFF, and remove the key.
3. Quickly, within five seconds, insert the second original
already programmed key in the
ignition and turn the key to the
ON/RUN position.
4. Turn the key to LOCK/OFF, and remove the key. 5. Insert the new key to be
programmed and turn it to the
ON/RUN position within
five seconds.
The security light will turn off
once the key has been
programmed.
6. Repeat Steps 1–5 if additional keys are to be programmed.
If a key is lost or damaged, see your
dealer to have a new key made.
Programming without Two
Recognized Keys (Key
Vehicles Only)
Program a new key to the vehicle
when a recognized key is not
available. Canadian regulations
require that owners see their dealer.
If two currently recognized keys are
not available, follow this procedure
to program the first key.
This procedure will take
approximately 30 minutes to
complete for the first key. The
vehicle must be off and all of the
keys you wish to program must be
with you. 1. Insert the new vehicle key into
the ignition.
2. Turn to ON/RUN. The security light will come on.
3. Wait 10 minutes until the security light turns off.
4. Turn the ignition to LOCK/OFF.
5. Repeat Steps 2–4 two more times. After the third time, turn
to ON/RUN; the key is learned
and all previously known keys
will no longer work with the
vehicle.
6. To learn a second key, turn to LOCK/OFF, insert the second
key to be learned, and rotate to
ON/RUN.
After two keys are learned,
remaining keys can be learned by
following the procedure in
“Programming with Two Recognized
Keys (Key Vehicles Only).”
Battery Replacement
Replace the battery if the REPLACE
BATTERY IN REMOTE KEY
message displays in the DIC. See
Key and Lock Messages 0143.
Page 37 of 405
Chevrolet Cruze Owner Manual (GMNA-Localizing-U.S./Canada/Mexico-
9803785) - 2017 - CRC - 4/13/16
36 Keys, Doors, and Windows
Caution
When replacing the battery, do
not touch any of the circuitry on
the transmitter. Static from your
body could damage the
transmitter.
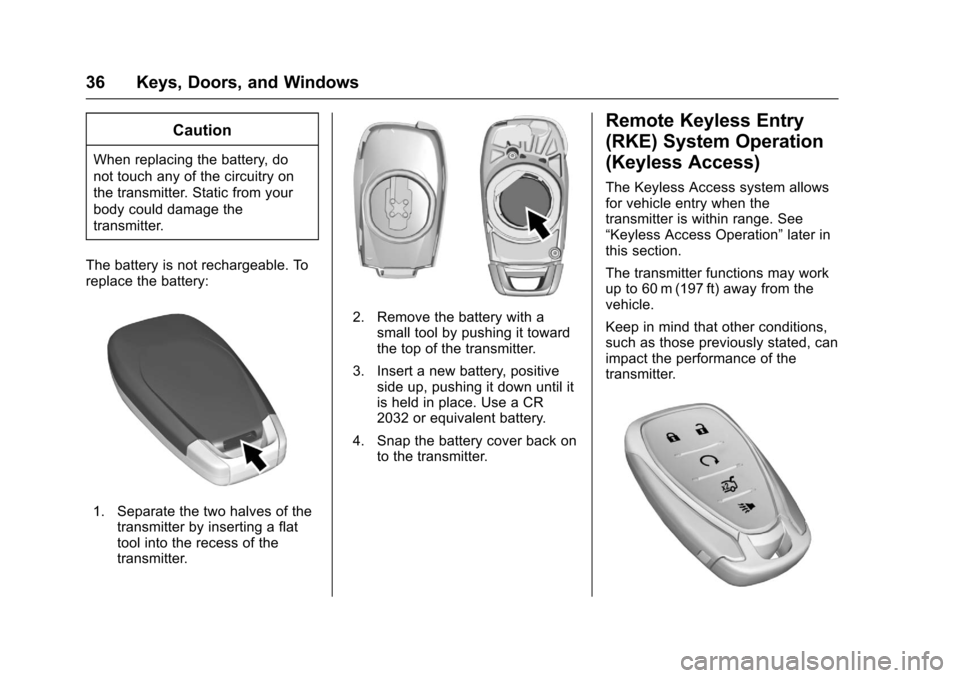
The battery is not rechargeable. To
replace the battery:
1. Separate the two halves of the transmitter by inserting a flat
tool into the recess of the
transmitter.
2. Remove the battery with asmall tool by pushing it toward
the top of the transmitter.
3. Insert a new battery, positive side up, pushing it down until it
is held in place. Use a CR
2032 or equivalent battery.
4. Snap the battery cover back on to the transmitter.
Remote Keyless Entry
(RKE) System Operation
(Keyless Access)
The Keyless Access system allows
for vehicle entry when the
transmitter is within range. See
“Keyless Access Operation” later in
this section.
The transmitter functions may work
up to 60 m (197 ft) away from the
vehicle.
Keep in mind that other conditions,
such as those previously stated, can
impact the performance of the
transmitter.
Page 40 of 405
Chevrolet Cruze Owner Manual (GMNA-Localizing-U.S./Canada/Mexico-
9803785) - 2017 - CRC - 4/13/16
Keys, Doors, and Windows 39
Keyless Trunk Opening
Press the touch pad on the rear of
the trunk above the license plate to
open the trunk when the RKE
transmitter is in range.
Keyed Access
To access a vehicle with a dead
transmitter battery, seeDoor
Locks 044.
Programming Transmitters to
the Vehicle
Only RKE transmitters programmed
to the vehicle will work. If a
transmitter is lost or stolen, a
replacement can be purchased and
programmed through your dealer.
The vehicle can be reprogrammed
so that lost or stolen transmitters no
longer work. Any remaining
transmitters will need to be
reprogrammed. Each vehicle can
have up to eight transmitters
matched to it. Programming with Recognized
Transmitters (Keyless Access
Vehicles Only)
A new transmitter can be
programmed to the vehicle when
there are two recognized
transmitters. To program, the vehicle
must be off and all of the
transmitters, both currently
recognized and new, must be
with you.
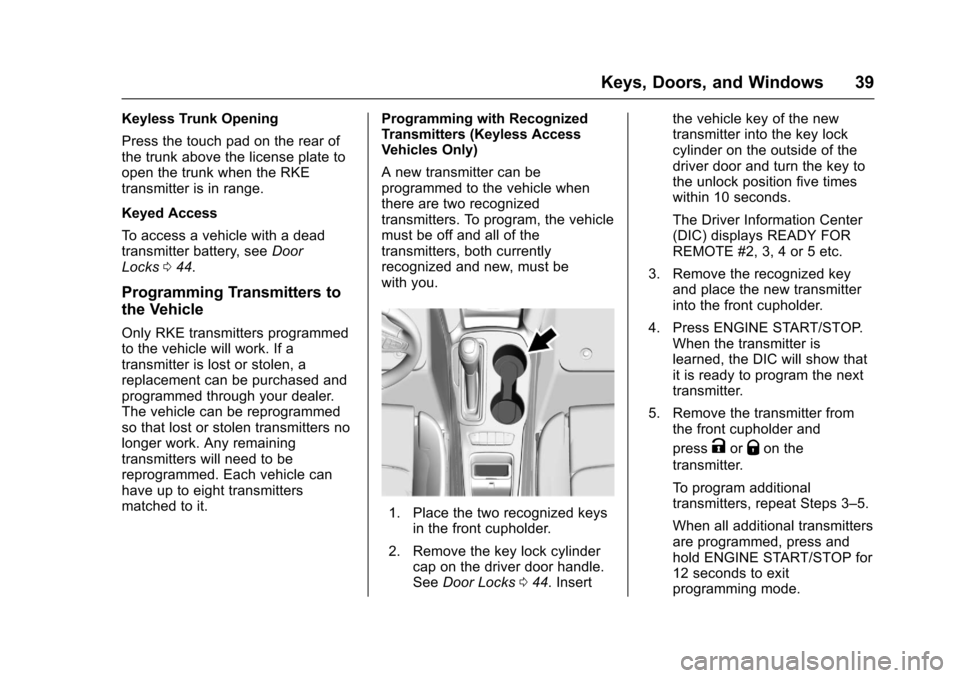
1. Place the two recognized keys
in the front cupholder.
2. Remove the key lock cylinder cap on the driver door handle.
See Door Locks 044. Insert the vehicle key of the new
transmitter into the key lock
cylinder on the outside of the
driver door and turn the key to
the unlock position five times
within 10 seconds.
The Driver Information Center
(DIC) displays READY FOR
REMOTE #2, 3, 4 or 5 etc.
3. Remove the recognized key and place the new transmitter
into the front cupholder.
4. Press ENGINE START/STOP. When the transmitter is
learned, the DIC will show that
it is ready to program the next
transmitter.
5. Remove the transmitter from the front cupholder and
press
KorQon the
transmitter.
To program additional
transmitters, repeat Steps 3–5.
When all additional transmitters
are programmed, press and
hold ENGINE START/STOP for
12 seconds to exit
programming mode.
Page 42 of 405
Chevrolet Cruze Owner Manual (GMNA-Localizing-U.S./Canada/Mexico-
9803785) - 2017 - CRC - 4/13/16
Keys, Doors, and Windows 41
When all additional transmitters
are programmed, press and
hold ENGINE START/STOP for
12 seconds to exit
programming mode.
7. Return the vehicle key back into the transmitter.
Starting the Vehicle with a Low
Transmitter Battery
If the transmitter battery is weak or if
there is interference with the signal
when tying to start the vehicle, the
DIC may display NO REMOTE
DETECTED or NO REMOTE KEY
WAS DETECTED PLACE KEY IN
TRANSMITTER POCKET THEN
START YOUR VEHICLE. The
REPLACE BATTERY IN REMOTE
KEY message may also be
displayed at this time.
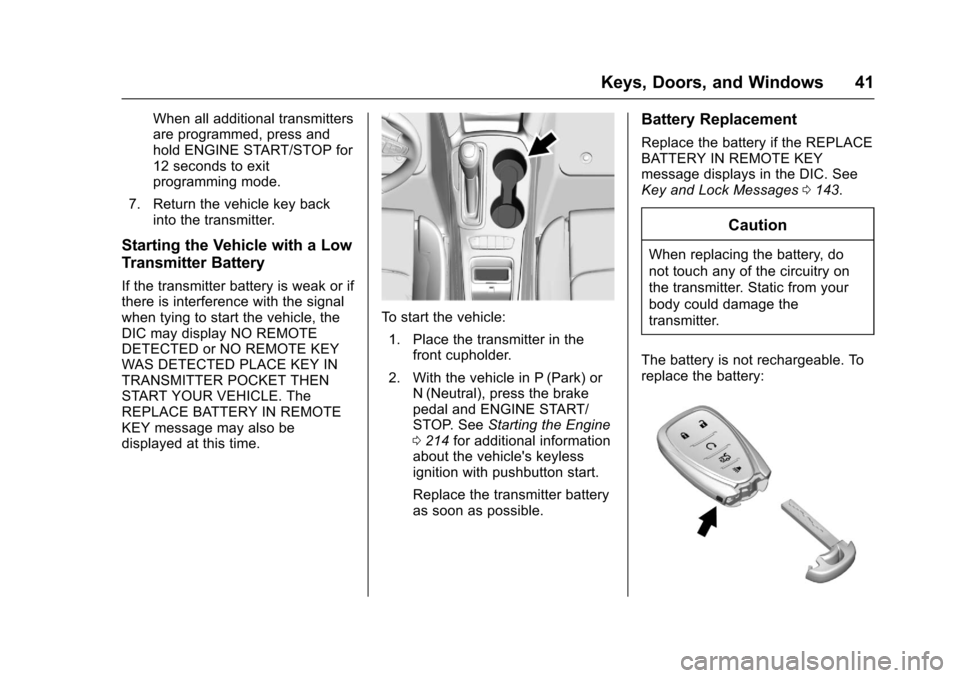
To start the vehicle:
1. Place the transmitter in the front cupholder.
2. With the vehicle in P (Park) or N (Neutral), press the brake
pedal and ENGINE START/
STOP. See Starting the Engine
0 214 for additional information
about the vehicle's keyless
ignition with pushbutton start.
Replace the transmitter battery
as soon as possible.
Battery Replacement
Replace the battery if the REPLACE
BATTERY IN REMOTE KEY
message displays in the DIC. See
Key and Lock Messages 0143.
Caution
When replacing the battery, do
not touch any of the circuitry on
the transmitter. Static from your
body could damage the
transmitter.
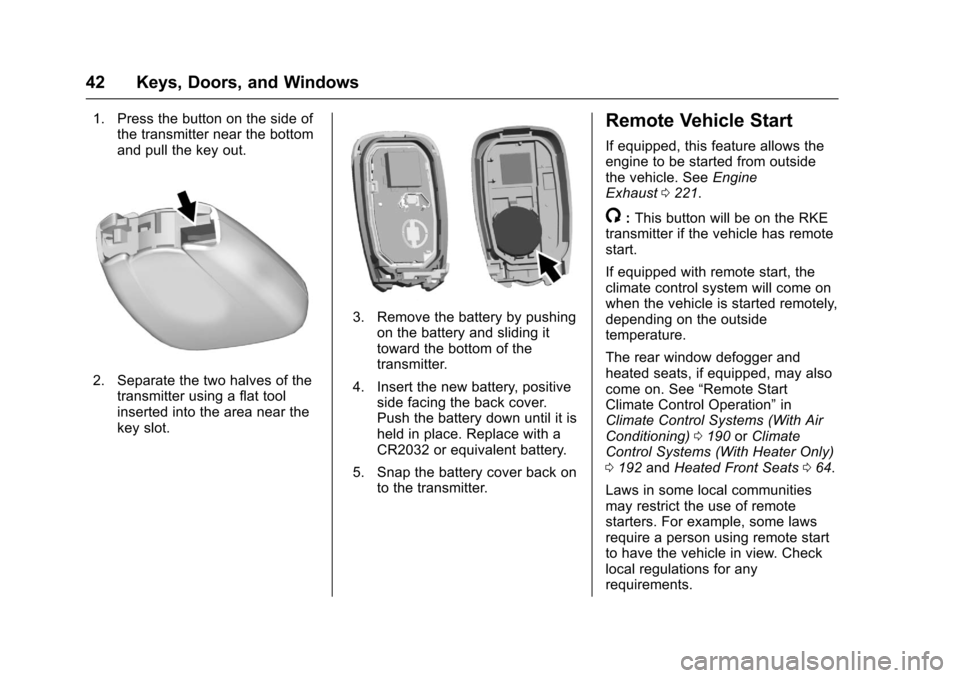
The battery is not rechargeable. To
replace the battery:
Page 43 of 405
Chevrolet Cruze Owner Manual (GMNA-Localizing-U.S./Canada/Mexico-
9803785) - 2017 - CRC - 4/13/16
42 Keys, Doors, and Windows
1. Press the button on the side ofthe transmitter near the bottom
and pull the key out.
2. Separate the two halves of the
transmitter using a flat tool
inserted into the area near the
key slot.
3. Remove the battery by pushingon the battery and sliding it
toward the bottom of the
transmitter.
4. Insert the new battery, positive side facing the back cover.
Push the battery down until it is
held in place. Replace with a
CR2032 or equivalent battery.
5. Snap the battery cover back on to the transmitter.
Remote Vehicle Start
If equipped, this feature allows the
engine to be started from outside
the vehicle. See Engine
Exhaust 0221.
/:This button will be on the RKE
transmitter if the vehicle has remote
start.
If equipped with remote start, the
climate control system will come on
when the vehicle is started remotely,
depending on the outside
temperature.
The rear window defogger and
heated seats, if equipped, may also
come on. See “Remote Start
Climate Control Operation” in
Climate Control Systems (With Air
Conditioning) 0190 orClimate
Control Systems (With Heater Only)
0 192 andHeated Front Seats 064.
Laws in some local communities
may restrict the use of remote
starters. For example, some laws
require a person using remote start
to have the vehicle in view. Check
local regulations for any
requirements.
Page 54 of 405
Chevrolet Cruze Owner Manual (GMNA-Localizing-U.S./Canada/Mexico-
9803785) - 2017 - CRC - 4/13/16
Keys, Doors, and Windows 53
If the RKE transmitter appears to be
undamaged, try another transmitter.
Or, you may try placing the
transmitter in the transmitter pocket
in the center console. See“Starting
the Vehicle with a Low Transmitter
Battery” underRemote Keyless
Entry (RKE) System Operation (Key
Access) 034 orRemote Keyless
Entry (RKE) System Operation
(Keyless Access) 036.
If the engine does not start with the
other transmitter or when the
transmitter is in the pocket in the
center console, your vehicle needs
service. See your dealer who can
service the theft-deterrent system
and have a new transmitter
programmed to the vehicle.
Do not leave the transmitter or
device that disarms or deactivates
the theft-deterrent system in the
vehicle.Exterior Mirrors
Convex Mirrors
{Warning
A convex mirror can make things,
like other vehicles, look farther
away than they really are. If you
cut too sharply into the right lane,
you could hit a vehicle on the
right. Check the inside mirror or
glance over your shoulder before
changing lanes.
The passenger side mirror is convex
shaped. A convex mirror's surface is
curved so more can be seen from
the driver seat.
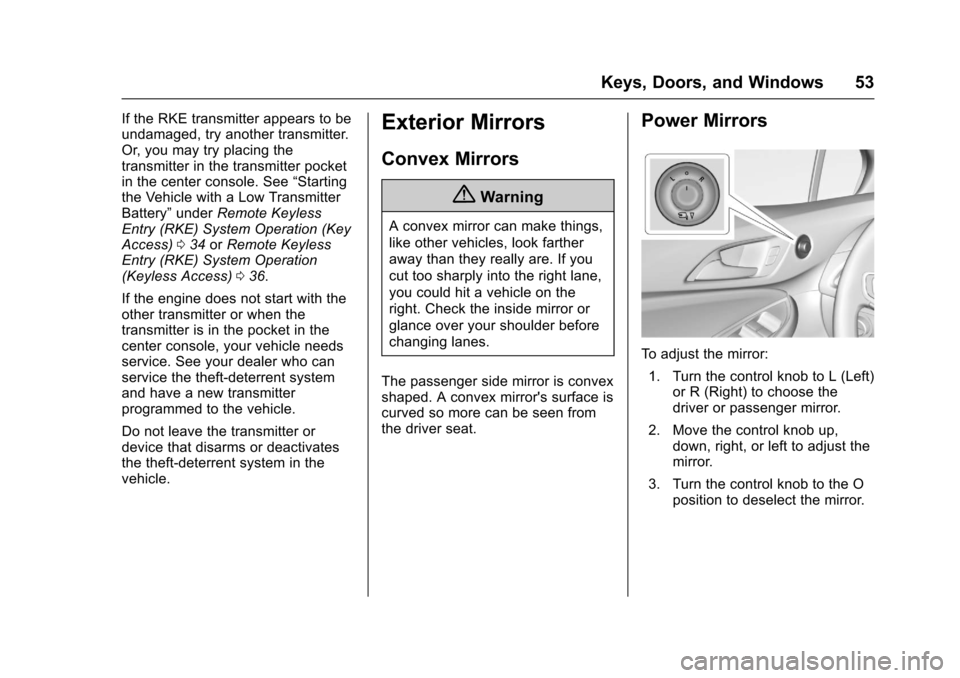
Power Mirrors
To adjust the mirror: 1. Turn the control knob to L (Left) or R (Right) to choose the
driver or passenger mirror.
2. Move the control knob up, down, right, or left to adjust the
mirror.
3. Turn the control knob to the O position to deselect the mirror.
Page 57 of 405
Chevrolet Cruze Owner Manual (GMNA-Localizing-U.S./Canada/Mexico-
9803785) - 2017 - CRC - 4/13/16
56 Keys, Doors, and Windows
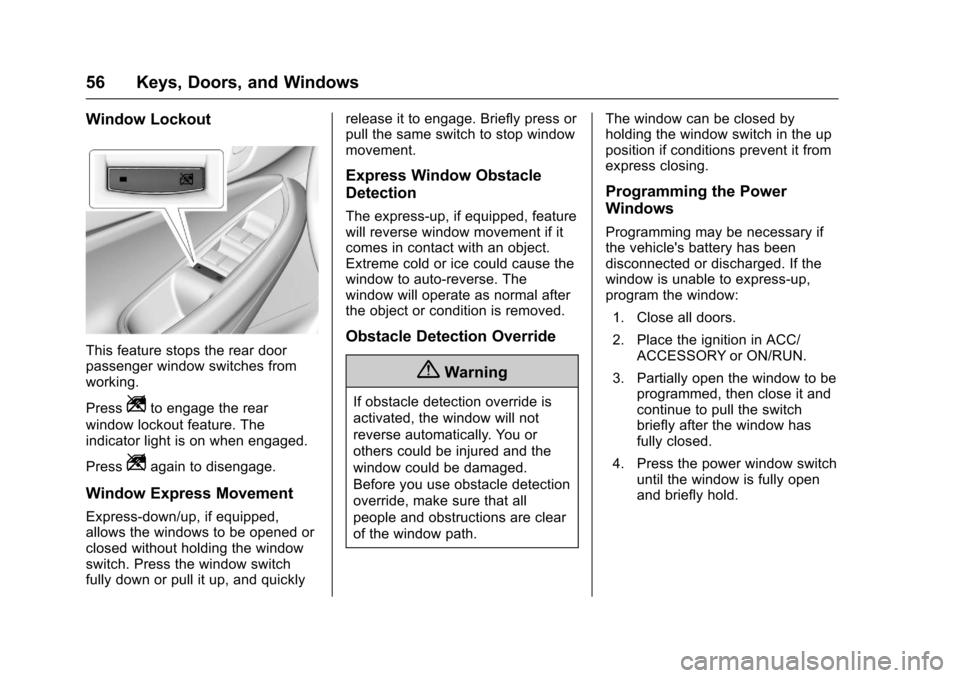
Window Lockout
This feature stops the rear door
passenger window switches from
working.
Press
Zto engage the rear
window lockout feature. The
indicator light is on when engaged.
Press
Zagain to disengage.
Window Express Movement
Express-down/up, if equipped,
allows the windows to be opened or
closed without holding the window
switch. Press the window switch
fully down or pull it up, and quickly release it to engage. Briefly press or
pull the same switch to stop window
movement.
Express Window Obstacle
Detection
The express-up, if equipped, feature
will reverse window movement if it
comes in contact with an object.
Extreme cold or ice could cause the
window to auto-reverse. The
window will operate as normal after
the object or condition is removed.
Obstacle Detection Override
{Warning
If obstacle detection override is
activated, the window will not
reverse automatically. You or
others could be injured and the
window could be damaged.
Before you use obstacle detection
override, make sure that all
people and obstructions are clear
of the window path.
The window can be closed by
holding the window switch in the up
position if conditions prevent it from
express closing.
Programming the Power
Windows
Programming may be necessary if
the vehicle's battery has been
disconnected or discharged. If the
window is unable to express-up,
program the window:
1. Close all doors.
2. Place the ignition in ACC/ ACCESSORY or ON/RUN.
3. Partially open the window to be programmed, then close it and
continue to pull the switch
briefly after the window has
fully closed.
4. Press the power window switch until the window is fully open
and briefly hold.
Page 108 of 405
Chevrolet Cruze Owner Manual (GMNA-Localizing-U.S./Canada/Mexico-
9803785) - 2017 - CRC - 4/13/16
Instruments and Controls 107
Instruments and
Controls
Controls
Steering Wheel Adjustment . . . 108
Steering Wheel Controls . . . . . . 108
Heated Steering Wheel . . . . . . . 109
Horn . . . . . . . . . . . . . . . . . . . . . . . . . . 109
Windshield Wiper/Washer . . . . 109
Compass . . . . . . . . . . . . . . . . . . . . . 110
Clock . . . . . . . . . . . . . . . . . . . . . . . . . 111
Power Outlets . . . . . . . . . . . . . . . . 112
Wireless Charging . . . . . . . . . . . . 114
Warning Lights, Gauges, and
Indicators
Warning Lights, Gauges, andIndicators . . . . . . . . . . . . . . . . . . . 115
Instrument Cluster . . . . . . . . . . . . 116
Speedometer . . . . . . . . . . . . . . . . . 121
Odometer . . . . . . . . . . . . . . . . . . . . . 121
Trip Odometer . . . . . . . . . . . . . . . . 121
Tachometer . . . . . . . . . . . . . . . . . . . 121
Fuel Gauge . . . . . . . . . . . . . . . . . . . 122
Engine Coolant Temperature Gauge . . . . . . . . . . . . . . . . . . . . . . 123
Safety Belt Reminders . . . . . . . . 124
Airbag Readiness Light . . . . . . . 125 Passenger Airbag Status
Indicator . . . . . . . . . . . . . . . . . . . . 125
Charging System Light . . . . . . . 126
Malfunction Indicator Lamp . . . 126
Brake System Warning Light . . . . . . . . . . . . . . . . . . . . . . . . 128
Antilock Brake System (ABS) Warning Light . . . . . . . . . . . . . . . 129
Up-Shift Light . . . . . . . . . . . . . . . . . 129
Lane Keep Assist (LKA) Light . . . . . . . . . . . . . . . . . . . . . . . . 129
Vehicle Ahead Indicator . . . . . . 130
Traction Off Light . . . . . . . . . . . . . 130
StabiliTrak
®OFF Light . . . . . . . . 130
Traction Control System (TCS)/ StabiliTrak
®Light . . . . . . . . . . . 131
Wait-to-Start Light . . . . . . . . . . . . 131
Tire Pressure Light . . . . . . . . . . . 131
Engine Oil Pressure Light . . . . 132
Low Fuel Warning Light . . . . . . 132
Diesel Exhaust Fluid (DEF) Warning Light . . . . . . . . . . . . . . . 132
Security Light . . . . . . . . . . . . . . . . . 133
High-Beam On Light . . . . . . . . . . 133
Front Fog Lamp Light . . . . . . . . . 133
Lamps On Reminder . . . . . . . . . 133
Cruise Control Light . . . . . . . . . . 133
Door Ajar Light . . . . . . . . . . . . . . . 134
Information Displays
Driver Information Center (DIC) (Base Level) . . . . . . . . . . . . . . . . 134
Driver Information Center (DIC) (Uplevel) . . . . . . . . . . . . . . . . . . . . 137
Vehicle Messages
Vehicle Messages . . . . . . . . . . . . 140
Battery Voltage and ChargingMessages . . . . . . . . . . . . . . . . . . . 140
Brake System Messages . . . . . 140
Compass Messages . . . . . . . . . . 140
Cruise Control Messages . . . . . 141
Door Ajar Messages . . . . . . . . . . 141
Engine Cooling System Messages . . . . . . . . . . . . . . . . . . . 141
Engine Oil Messages . . . . . . . . . 142
Engine Power Messages . . . . . 142
Fuel System Messages . . . . . . . 142
Diesel Exhaust Fluid Messages . . . . . . . . . . . . . . . . . . . 142
Diesel Particulate Filter Messages . . . . . . . . . . . . . . . . . . . 143
Key and Lock Messages . . . . . 143
Lamp Messages . . . . . . . . . . . . . . 144
Object Detection System Messages . . . . . . . . . . . . . . . . . . . 144
Ride Control System Messages . . . . . . . . . . . . . . . . . . . 146
Airbag System Messages . . . . 146
Safety Belt Messages . . . . . . . . 146
Page 127 of 405
Chevrolet Cruze Owner Manual (GMNA-Localizing-U.S./Canada/Mexico-
9803785) - 2017 - CRC - 4/13/16
126 Instruments and Controls
outboard passenger frontal airbag
and knee airbag are allowed to
inflate.
If the word OFF or the off symbol is
lit on the passenger airbag status
indicator, it means that the
passenger sensing system has
turned off the front outboard
passenger frontal airbag and knee
airbag.
If, after several seconds, both status
indicator lights remain on, or if there
are no lights at all, there may be a
problem with the lights or the
passenger sensing system. See
your dealer for service.
{Warning
If the airbag readiness light ever
comes on and stays on, it means
that something may be wrong
with the airbag system. To help
avoid injury to yourself or others,
have the vehicle serviced right
away. SeeAirbag Readiness
Light 0125 for more information,
including important safety
information.
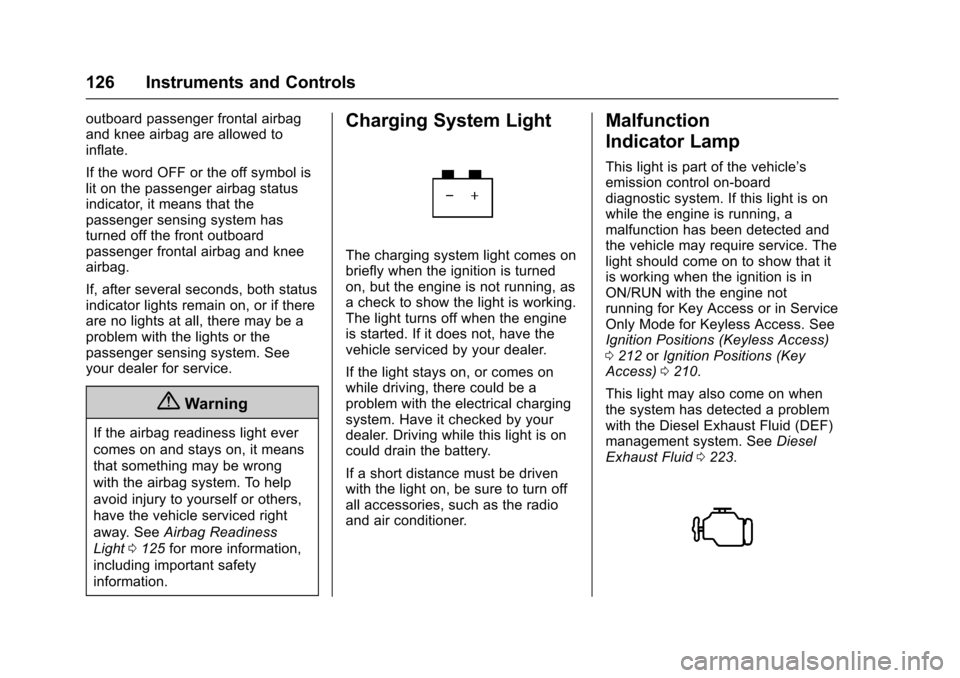
Charging System Light
The charging system light comes on
briefly when the ignition is turned
on, but the engine is not running, as
a check to show the light is working.
The light turns off when the engine
is started. If it does not, have the
vehicle serviced by your dealer.
If the light stays on, or comes on
while driving, there could be a
problem with the electrical charging
system. Have it checked by your
dealer. Driving while this light is on
could drain the battery.
If a short distance must be driven
with the light on, be sure to turn off
all accessories, such as the radio
and air conditioner.
Malfunction
Indicator Lamp
This light is part of the vehicle’s
emission control on-board
diagnostic system. If this light is on
while the engine is running, a
malfunction has been detected and
the vehicle may require service. The
light should come on to show that it
is working when the ignition is in
ON/RUN with the engine not
running for Key Access or in Service
Only Mode for Keyless Access. See
Ignition Positions (Keyless Access)
0 212 orIgnition Positions (Key
Access) 0210.
This light may also come on when
the system has detected a problem
with the Diesel Exhaust Fluid (DEF)
management system. See Diesel
Exhaust Fluid 0223.