maintenance schedule CHEVROLET CRUZE 2018 Owner's Manual
[x] Cancel search | Manufacturer: CHEVROLET, Model Year: 2018, Model line: CRUZE, Model: CHEVROLET CRUZE 2018Pages: 404, PDF Size: 4.64 MB
Page 29 of 404
Chevrolet Cruze Owner Manual (GMNA-Localizing-U.S./Canada/Mexico-
11348462) - 2018 - crc - 5/15/17
28 In Brief
2. Press and holdVon the DIC
while the Oil Life display is
active. The oil life will change
to 100%.
The oil life system can also be reset
as follows:
1. Turn the ignition on with the engine off.
See Ignition Positions (Key
Access) 0206 orIgnition
Positions (Keyless Access)
0 208.
2. Fully press and release the accelerator pedal three times
within five seconds.
See Engine Oil Life System 0268.
Driving for Better Fuel
Economy
Driving habits can affect fuel
mileage. Here are some driving tips
to get the best fuel economy
possible.
.
Avoid fast starts and accelerate
smoothly.
. Brake gradually and avoid
abrupt stops. .
Avoid idling the engine for long
periods of time.
. When road and weather
conditions are appropriate, use
cruise control.
. Always follow posted speed
limits or drive more slowly when
conditions require.
. Keep vehicle tires properly
inflated.
. Combine several trips into a
single trip.
. Replace the vehicle's tires with
the same TPC Spec number
molded into the tire's sidewall
near the size.
. Follow recommended scheduled
maintenance.Diesel Particulate Filter
The diesel engine is equipped with
a Diesel Particulate Filter (DPF)
that, by design, will filter or trap
particulates. The DPF is located in
the exhaust system. Depending on a number of factors
monitored by the engine computer,
the DPF will need to be cleaned of
accumulated solids. When a
cleaning is needed, the engine
computer will initiate a cleaning
action by warming the exhaust gas
temperature. This feature has been
designed to operate automatically,
with limited operator involvement or
awareness.
Special DPF Driver Messages
If the vehicle is used for numerous
short trips or extended slow-speed
operation, the engine computer may
not be able to adequately heat up
the exhaust system to clean the
DPF effectively. The engine
computer has been designed to
continuously monitor the condition
of the DPF. When the engine
computer detects that the DPF is full
of particulates but the vehicle is
being operated in a manner that
does not allow effective automatic
DPF cleaning, a Driver Information
Center (DIC) message will display.
Page 87 of 404
Chevrolet Cruze Owner Manual (GMNA-Localizing-U.S./Canada/Mexico-
11348462) - 2018 - crc - 5/15/17
86 Seats and Restraints
{Warning
For up to 10 seconds after the
vehicle is turned off and the
battery is disconnected, an airbag
can still inflate during improper
service. You can be injured if you
are close to an airbag when it
inflates. Avoid yellow connectors.
They are probably part of the
airbag system. Be sure to follow
proper service procedures, and
make sure the person performing
work for you is qualified to do so.
Adding Equipment to the
Airbag-Equipped Vehicle
Adding accessories that change the
vehicle's frame, bumper system,
height, front end, or side sheet
metal may keep the airbag system
from working properly. The
operation of the airbag system can
also be affected by changing any
parts of the front seats, seat belts,
airbag sensing and diagnostic
module, steering wheel, instrument
panel, inner door seals including thespeakers, any of the airbag
modules, ceiling or pillar garnish
trim, overhead console, front
sensors, side impact sensors,
or airbag wiring.
Your dealer and the service manual
have information about the location
of the airbag sensors, sensing and
diagnostic module, and airbag
wiring.
In addition, the vehicle has a
passenger sensing system for the
front outboard passenger position,
which includes sensors that are part
of the passenger seat. The
passenger sensing system may not
operate properly if the original seat
trim is replaced with non-GM
covers, upholstery, or trim; or with
GM covers, upholstery, or trim
designed for a different vehicle. Any
object, such as an aftermarket seat
heater or a comfort-enhancing pad
or device, installed under or on top
of the seat fabric, could also
interfere with the operation of the
passenger sensing system. This
could either prevent proper
deployment of the passenger
airbag(s) or prevent the passengersensing system from properly
turning off the passenger airbag(s).
See
Passenger Sensing System
0 81.
If the vehicle has rollover roof-rail
airbags, see Different Size Tires
and Wheels 0314 for additional
important information.
If you have to modify your vehicle
because you have a disability and
have questions about whether the
modifications will affect the vehicle's
airbag system, or if you have
questions about whether the airbag
system will be affected if the vehicle
is modified for any other reason, call
Customer Assistance. See
Customer Assistance Offices 0369.Airbag System Check
The airbag system does not need
regularly scheduled maintenance or
replacement. Make sure the airbag
readiness light is working. See
Airbag Readiness Light 0128.
Page 136 of 404
Chevrolet Cruze Owner Manual (GMNA-Localizing-U.S./Canada/Mexico-
11348462) - 2018 - crc - 5/15/17
Instruments and Controls 135
DIC messages to determine which
feature(s) is no longer functioning
and whether the vehicle requires
service.
If the light is on and flashing, the
TCS and/or the StabiliTrak system
is actively working.
SeeTraction Control/Electronic
Stability Control 0231.
Wait-to-Start Light
For diesel engines, the wait-to-start
light shows that the engine is
functioning properly and indicates
when the engine can be started.
The fast warm-up glow plug system
makes the wait-to-start light stay on
for a shorter amount of time than
most diesel engines.
For more information, see Starting
the Engine 0209.
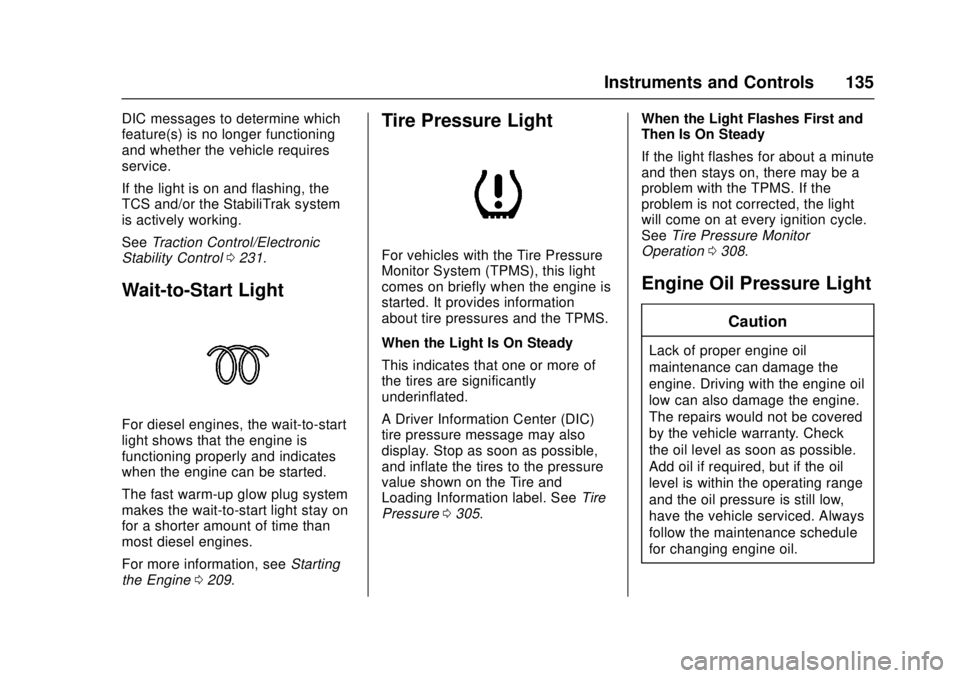
Tire Pressure Light
For vehicles with the Tire Pressure
Monitor System (TPMS), this light
comes on briefly when the engine is
started. It provides information
about tire pressures and the TPMS.
When the Light Is On Steady
This indicates that one or more of
the tires are significantly
underinflated.
A Driver Information Center (DIC)
tire pressure message may also
display. Stop as soon as possible,
and inflate the tires to the pressure
value shown on the Tire and
Loading Information label. See Tire
Pressure 0305. When the Light Flashes First and
Then Is On Steady
If the light flashes for about a minute
and then stays on, there may be a
problem with the TPMS. If the
problem is not corrected, the light
will come on at every ignition cycle.
See
Tire Pressure Monitor
Operation 0308.
Engine Oil Pressure Light
Caution
Lack of proper engine oil
maintenance can damage the
engine. Driving with the engine oil
low can also damage the engine.
The repairs would not be covered
by the vehicle warranty. Check
the oil level as soon as possible.
Add oil if required, but if the oil
level is within the operating range
and the oil pressure is still low,
have the vehicle serviced. Always
follow the maintenance schedule
for changing engine oil.
Page 140 of 404
Chevrolet Cruze Owner Manual (GMNA-Localizing-U.S./Canada/Mexico-
11348462) - 2018 - crc - 5/15/17
Instruments and Controls 139
number reflects only the
approximate fuel economy that the
vehicle has right now and changes
frequently as driving conditions
change. This display cannot be
reset.
Average Vehicle Speed :Displays
the average vehicle speed of the
vehicle in kilometers per hour (km/h)
or miles per hour (mph). This
average is based on the various
vehicle speeds recorded since the
last reset. Reset the average speed
by pressing SET/CLR when it is
displayed.
Timer : To start the timer, press
SET/CLR while Timer is displayed.
The display will show the amount of
time that has passed since the timer
was last reset, not including time the
ignition is off. Time will continue to
be counted as long as the ignition is
on, even if another display is being
shown on the DIC. The timer will
record up to 99 hours, 59 minutes,
and 59 seconds (99:59:59) after
which the display will return to zero.
To stop the timer, press SET/CLR briefly while Timer is displayed. To
reset the timer to zero, press and
hold SET/CLR.
Navigation :
Used for the OnStar
Turn-by-Turn guidance. See OnStar
Overview 0381.
Blank Display : Displays no
information.
Vehicle Information Menu
(VEHICLE) Items
Press MENU on the turn signal
lever until the VEHICLE menu is
displayed. Use
\to scroll through
the menu items. Not all items are
available on every vehicle. The
following is a list of all possible
menu items:
Remaining Oil Life : Displays an
estimate of the oil's remaining useful
life. If REMAINING OIL LIFE 99% is
displayed, that means 99% of the
current oil life remains.
When the remaining oil life is low,
the CHANGE ENGINE OIL SOON
message will appear on the display.
The oil should be changed as soon
as possible. See Engine Oil0265. In addition to the engine oil life
system monitoring the oil life,
additional maintenance is
recommended. See
Maintenance
Schedule 0350.
The Oil Life display must be reset
after each oil change. Do not reset
the Oil Life display accidentally at
any time other than when the oil has
just been changed. It cannot be
reset accurately until the next oil
change. To reset the engine oil life
system, see Engine Oil Life System
0 268.
Oil Pressure : Oil pressure is
displayed in either kilopascal (kPa)
or in pounds per square inch (psi).
Fuel Filter Life : This display shows
an estimate of the fuel filter's
remaining useful life. If 90% Fuel
Filter Life Remaining is displayed, it
means 90% of the current fuel filter
life remains. The fuel filter life
system will alert when to change the
fuel filter on a schedule consistent
with your driving conditions. When
the remaining fuel filter life is low,
the CHANGE FUEL FILTER
Page 143 of 404
Chevrolet Cruze Owner Manual (GMNA-Localizing-U.S./Canada/Mexico-
11348462) - 2018 - crc - 5/15/17
142 Instruments and Controls
L/100 km (mpg) recorded since the
last time this menu item was reset.
This number reflects only the
approximate average fuel economy
that the vehicle has right now, and
will change as driving conditions
change.
Press and hold
Vwhile this display
is active to reset the trip odometer
and the average fuel economy. Trip
A and Trip B can also be reset by
pressing
pand choosing reset.
Fuel Range : Shows the
approximate distance the vehicle
can be driven without refueling.
LOW will be displayed when the
vehicle is low on fuel. The fuel
range estimate is based on an
average of the vehicle's fuel
economy over recent driving history
and the amount of fuel remaining in
the fuel tank.
Oil Life : Shows an estimate of the
oil's remaining useful life.
If REMAINING OIL LIFE 99% is
displayed, that means 99% of the
current oil life remains. When the remaining oil life is low,
the CHANGE ENGINE OIL SOON
message will appear on the display.
The oil should be changed as soon
as possible. See
Engine Oil0265.
In addition to the engine oil life
system monitoring the oil life,
additional maintenance is
recommended. See Maintenance
Schedule 0350.
The Oil Life display must be reset
after each oil change. It will not
reset itself. Do not to reset the Oil
Life display at any time other than
when the oil has just been changed.
It cannot be reset accurately until
the next oil change. To reset the
engine oil life system, press and
hold
Vfor several seconds while
the Oil Life display is active. See
Engine Oil Life System 0268.
Tire Pressure : Shows the
approximate pressures of all four
tires. Tire pressure is displayed in
either kilopascal (kPa) or in pounds
per square inch (psi). If the pressure
is low, the value for that tire is
shown in amber. See
Tire Pressure Monitor System
0 307 andTire Pressure Monitor
Operation 0308.
Diesel Exhaust Fluid (DEF)
Level : The Diesel Exhaust Fluid
(DEF) level will be displayed as
either OK, XX%, or LOW. When
LOW appears on the display, add
DEF as soon as possible. See
Diesel Exhaust Fluid 0219.
Fuel Filter Life : This display shows
an estimate of the fuel filter's
remaining useful life. If 90% Fuel
Filter Life Remaining is displayed, it
means 90% of the current fuel filter
life remains. The fuel filter life
system will alert when to change the
fuel filter on a schedule consistent
with your driving conditions.
When the remaining fuel filter life is
low, the CHANGE FUEL FILTER
message will appear on the display.
Change the fuel filter as soon as
possible.
Instantaneous Fuel Economy :
Displays the current fuel economy in
liters per 100 kilometers (L/100 km)
or miles per gallon (mpg). This
number reflects only the
Page 195 of 404
Chevrolet Cruze Owner Manual (GMNA-Localizing-U.S./Canada/Mexico-
11348462) - 2018 - crc - 5/15/17
194 Climate Controls
Maintenance
Passenger Compartment
Air Filter
The filter reduces dust, pollen, and
other airborne irritants from outside
air that is pulled into the vehicle.
The filter should be replaced as part
of routine scheduled maintenance.
SeeMaintenance Schedule 0350.
See your dealer regarding
replacement of the filter.
Service
All vehicles have a label underhood
that identifies the refrigerant used in
the vehicle. The refrigerant system
should only be serviced by trained
and certified technicians. The air
conditioning evaporator should
never be repaired or replaced by
one from a salvage vehicle.
It should only be replaced by a new
evaporator to ensure proper and
safe operation. During service, all refrigerants
should be reclaimed with proper
equipment. Venting refrigerants
directly to the atmosphere is harmful
to the environment and may also
create unsafe conditions based on
inhalation, combustion, frostbite,
or other health-based concerns.
Page 271 of 404
Chevrolet Cruze Owner Manual (GMNA-Localizing-U.S./Canada/Mexico-
11348462) - 2018 - crc - 5/15/17
270 Vehicle Care
reason for fluid loss. If a leak
occurs, take the vehicle to your
dealer and have it repaired as soon
as possible.
The vehicle is not equipped with a
transmission fluid level dipstick.
There is a special procedure for
checking and changing the
transmission fluid. Because this
procedure is difficult, this should be
done at the dealer. Contact the
dealer for additional information.
Change the fluid at the intervals
listed inMaintenance Schedule
0 350, and be sure to use the fluid
listed in Recommended Fluids and
Lubricants 0359.
Manual Transmission
Fluid
How to Check Manual
Transmission Fluid
It is not necessary to check the
manual transmission fluid level.
A transmission fluid leak is the only
reason for fluid loss. If a leak
occurs, take the vehicle to your
dealer and have it repaired as soon as possible. See
Recommended
Fluids and Lubricants 0359 for the
proper fluid to use.
Hydraulic Clutch
For vehicles with a manual
transmission, it is not necessary to
regularly check brake/clutch fluid
unless there is a leak suspected.
Adding fluid will not correct a leak.
A fluid loss in this system could
indicate a problem. Have the
system inspected and repaired.
When to Check and What
to Use
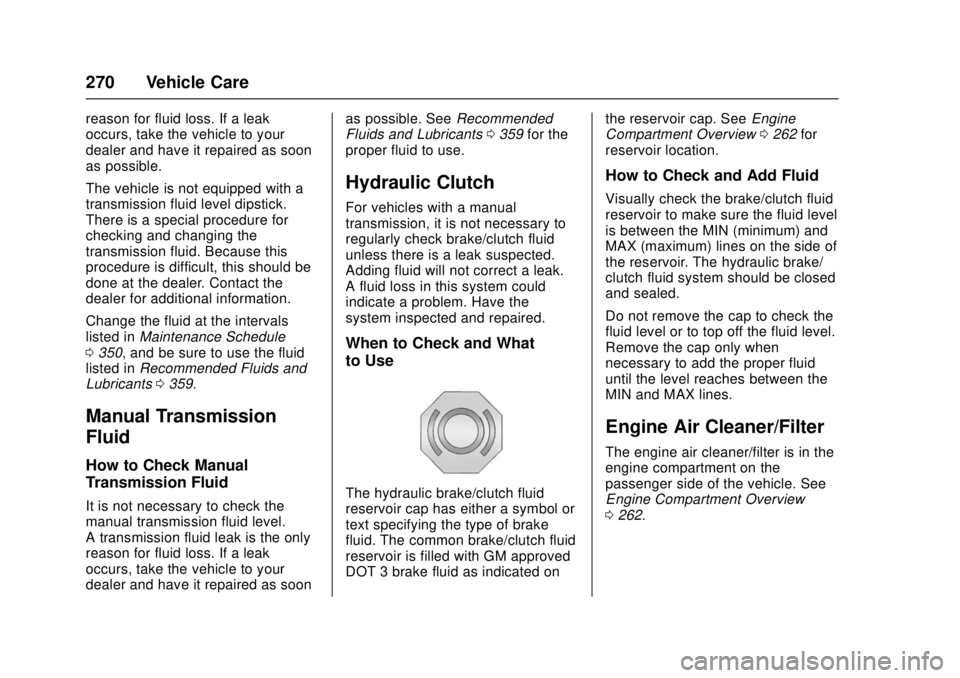
The hydraulic brake/clutch fluid
reservoir cap has either a symbol or
text specifying the type of brake
fluid. The common brake/clutch fluid
reservoir is filled with GM approved
DOT 3 brake fluid as indicated on the reservoir cap. See
Engine
Compartment Overview 0262 for
reservoir location.
How to Check and Add Fluid
Visually check the brake/clutch fluid
reservoir to make sure the fluid level
is between the MIN (minimum) and
MAX (maximum) lines on the side of
the reservoir. The hydraulic brake/
clutch fluid system should be closed
and sealed.
Do not remove the cap to check the
fluid level or to top off the fluid level.
Remove the cap only when
necessary to add the proper fluid
until the level reaches between the
MIN and MAX lines.
Engine Air Cleaner/Filter
The engine air cleaner/filter is in the
engine compartment on the
passenger side of the vehicle. See
Engine Compartment Overview
0 262.
Page 272 of 404
Chevrolet Cruze Owner Manual (GMNA-Localizing-U.S./Canada/Mexico-
11348462) - 2018 - crc - 5/15/17
Vehicle Care 271
When to Inspect the Engine Air
Cleaner/Filter
For intervals on changing and
inspecting the engine air cleaner/
filter, seeMaintenance Schedule
0 350.
How to Inspect the Engine Air
Cleaner/Filter
Do not start the engine or have the
engine running with the engine air
cleaner/filter housing open. Before
removing the engine air cleaner/
filter, make sure that the engine air
cleaner/filter housing and nearby
components are free of dirt and
debris. Remove the engine air
cleaner/filter. Lightly tap and shake
the engine air cleaner/filter (away
from the vehicle), to release loose
dust and dirt. Inspect the engine air
cleaner/filter for damage, and
replace if damaged. Do not clean
the engine air cleaner/filter or
components with water or
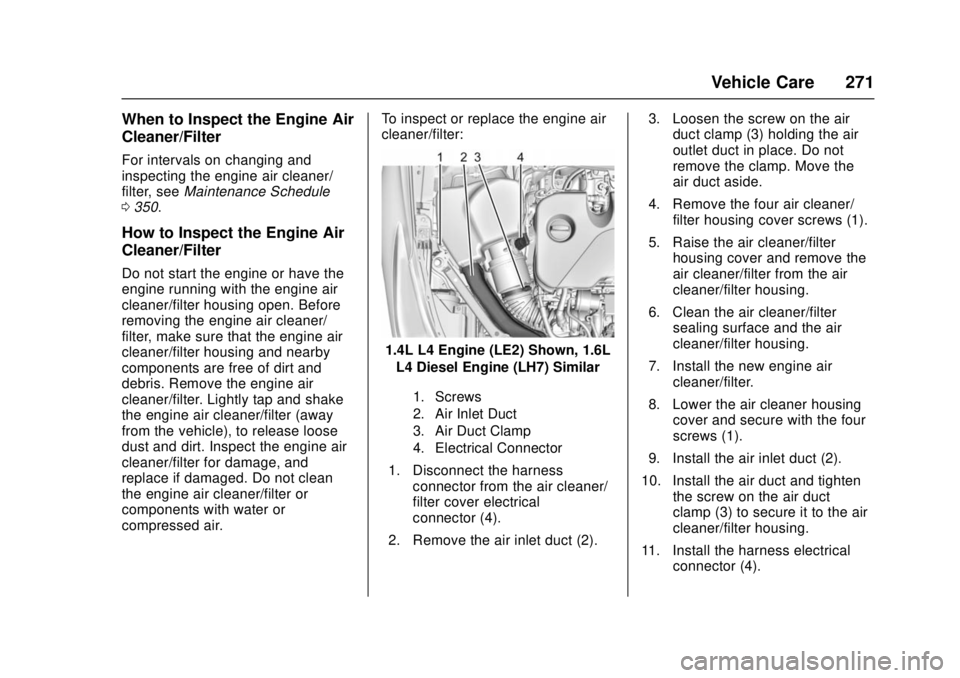
compressed air. To inspect or replace the engine air
cleaner/filter:
1.4L L4 Engine (LE2) Shown, 1.6L
L4 Diesel Engine (LH7) Similar
1. Screws
2. Air Inlet Duct
3. Air Duct Clamp
4. Electrical Connector
1. Disconnect the harness connector from the air cleaner/
filter cover electrical
connector (4).
2. Remove the air inlet duct (2). 3. Loosen the screw on the air
duct clamp (3) holding the air
outlet duct in place. Do not
remove the clamp. Move the
air duct aside.
4. Remove the four air cleaner/ filter housing cover screws (1).
5. Raise the air cleaner/filter housing cover and remove the
air cleaner/filter from the air
cleaner/filter housing.
6. Clean the air cleaner/filter sealing surface and the air
cleaner/filter housing.
7. Install the new engine air cleaner/filter.
8. Lower the air cleaner housing cover and secure with the four
screws (1).
9. Install the air inlet duct (2).
10. Install the air duct and tighten the screw on the air duct
clamp (3) to secure it to the air
cleaner/filter housing.
11. Install the harness electrical connector (4).
Page 279 of 404
Chevrolet Cruze Owner Manual (GMNA-Localizing-U.S./Canada/Mexico-
11348462) - 2018 - crc - 5/15/17
278 Vehicle Care
proper sequence to torque
specifications inCapacities and
Specifications 0364.
If the vehicle has rear drum brakes,
they do not have wear indicators,
but if a rear brake rubbing noise is
heard, have the rear brake linings
inspected immediately. Rear brake
drums should be removed and
inspected each time the tires are
removed for rotation or changing.
Drum brakes have an inspection
hole to inspect lining wear during
scheduled maintenance. When the
front brake pads are replaced, have
the rear brakes inspected, too.
Brake linings should always be
replaced as complete axle sets.
Brake Pedal Travel
See your dealer if the brake pedal
does not return to normal height,
or if there is a rapid increase in
pedal travel. This could be a sign
that brake service may be required.
Replacing Brake System Parts
Always replace brake system parts
with new, approved replacement
parts. If this is not done, the brakes may not work properly. The braking
performance expected can change
in many other ways if the wrong
replacement brake parts are
installed or parts are improperly
installed.
Brake Fluid
The brake/clutch master cylinder
reservoir is filled with GM approved
DOT 3 brake fluid as indicated on
the reservoir cap. See
Engine
Compartment Overview 0262 for
the location of the reservoir.
Checking Brake Fluid
Place the vehicle in P (Park) or
Neutral with the parking brake
applied if equipped with a manual
transmission. On a level surface,
the brake fluid level should be between the minimum and
maximum marks on the brake fluid
reservoir.
There are only two reasons why the
brake fluid level in the reservoir may
go down:
.
Normal brake lining wear. When
new linings are installed, the
fluid level goes back up.
. A fluid leak in the brake/clutch
hydraulic system. Have the
brake/clutch hydraulic system
fixed. With a leak, the brakes will
not work well.
Always clean the brake fluid
reservoir cap and the area around
the cap before removing it.
Do not top off the brake/clutch fluid.
Adding fluid does not correct a leak.
If fluid is added when the linings are
worn, there will be too much fluid
when new brake linings are
installed. Add or remove fluid, as
necessary, only when work is done
on the brake/clutch hydraulic
system.
Page 280 of 404
Chevrolet Cruze Owner Manual (GMNA-Localizing-U.S./Canada/Mexico-
11348462) - 2018 - crc - 5/15/17
Vehicle Care 279
{Warning
If too much brake fluid is added, it
can spill on the engine and burn,
if the engine is hot enough. You
or others could be burned, and
the vehicle could be damaged.
Add brake fluid only when work is
done on the brake/clutch
hydraulic system.
When the brake/clutch fluid falls to a
low level, the brake warning light
comes on. See Brake System
Warning Light 0132.
Brake fluid absorbs water over time
which degrades the effectiveness of
the brake fluid. Replace brake fluid
at the specified intervals to prevent
increased stopping distance. See
Maintenance Schedule 0350.
What to Add
Use only GM approved DOT 3
brake fluid from a clean, sealed
container. See Recommended
Fluids and Lubricants 0359.
{Warning
The wrong or contaminated brake
fluid could result in damage to the
brake system. This could result in
the loss of braking leading to a
possible injury. Always use the
proper GM approved brake fluid.
Caution
If brake fluid is spilled on the
vehicle's painted surfaces, the
paint finish can be damaged.
Immediately wash off any painted
surface.
Battery - North America
The original equipment battery is
maintenance free. Do not remove
the cap and do not add fluid.
Refer to the replacement number on
the original battery label when a
new battery is needed. Some vehicles are equipped with an
Absorbant Glass Mat (AGM) 12-volt
battery. Installation of a standard
12-volt battery will result in reduced
battery life. When using a 12-volt
battery charger, some chargers
have an AGM battery setting on the
charger. If available, use the AGM
setting on the charger when
charging an AGM battery. Follow the
charger manufacture's instructions.
{Warning
WARNING:
Battery posts,
terminals, and related
accessories contain lead and lead
compounds, chemicals known to
the State of California to cause
cancer and birth defects or other
reproductive harm. Batteries also
contain other chemicals known to
the State of California to cause
cancer. WASH HANDS AFTER
HANDLING. For more information
go to www.P65Warnings.ca.gov/
passenger-vehicle.