fuel cap CHEVROLET DURAMAX 2006 Owners Manual
[x] Cancel search | Manufacturer: CHEVROLET, Model Year: 2006, Model line: DURAMAX, Model: CHEVROLET DURAMAX 2006Pages: 100, PDF Size: 0.71 MB
Page 1 of 100
Features and Controls..................................... 2-1
Starting and Operating Your Vehicle ............. 2-2
Instrument Panel ............................................. 3-1
Warning Lights, Gages and Indicators ........... 3-2
Driving Your Vehicle ....................................... 4-1
Towing ..................................................... 4-2 Service and Appearance Care
.......................... 5-1
Diesel Fuel Requirements and Fuel System ..... 5-2
Checking Things Under the Hood ...............5-18
Capacities and Specifications .....................5-50
Maintenance Schedule ..................................... 6-1
Maintenance Schedule ................................ 6-2
2006 DURAMAX®Diesel EngineM
Index ......................................................................... 1
ProCarManuals.com
Page 20 of 100
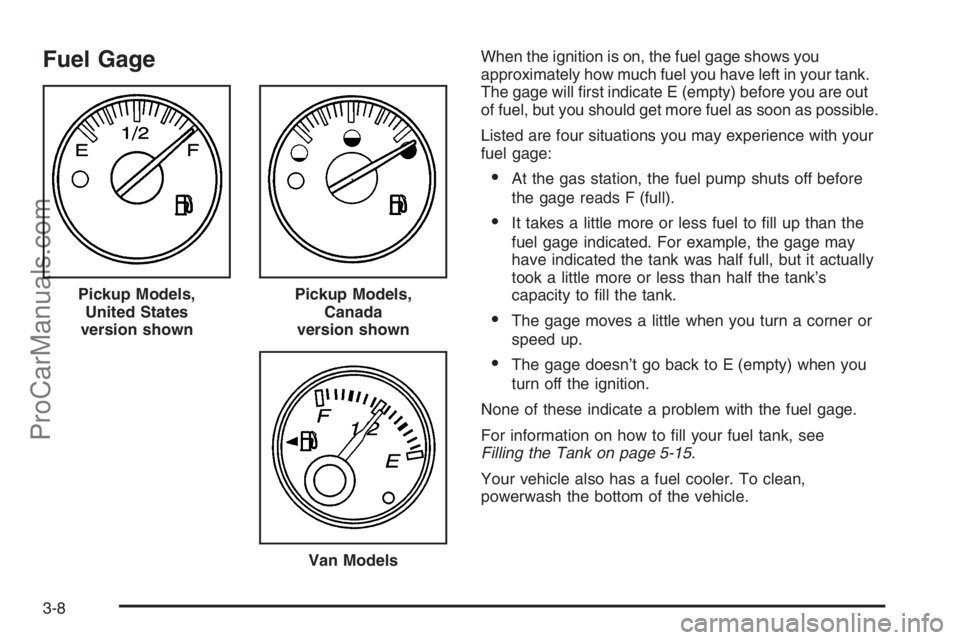
Fuel GageWhen the ignition is on, the fuel gage shows you
approximately how much fuel you have left in your tank.
The gage will first indicate E (empty) before you are out
of fuel, but you should get more fuel as soon as possible.
Listed are four situations you may experience with your
fuel gage:
•At the gas station, the fuel pump shuts off before
the gage reads F (full).
•It takes a little more or less fuel to fill up than the
fuel gage indicated. For example, the gage may
have indicated the tank was half full, but it actually
took a little more or less than half the tank’s
capacity to fill the tank.
•The gage moves a little when you turn a corner or
speed up.
•The gage doesn’t go back to E (empty) when you
turn off the ignition.
None of these indicate a problem with the fuel gage.
For information on how to fill your fuel tank, see
Filling the Tank on page 5-15.
Your vehicle also has a fuel cooler. To clean,
powerwash the bottom of the vehicle. Pickup Models,
United States
version shown
Pickup Models,
Canada
version shown
Van Models
3-8
ProCarManuals.com
Page 25 of 100
Diesel Fuel Requirements and Fuel System.......5-2
Diesel Engine Fuel.........................................5-2
What Fuel to Use...........................................5-3
Very Cold Weather Operation...........................5-5
Water in Fuel.................................................5-5
Water in Fuel Light Chart................................5-6
Running Out of Fuel.....................................5-11
Fuel Filter Replacement.................................5-12
Filling the Tank............................................5-15
Filling a Portable Fuel Container.....................5-17Checking Things Under the Hood....................5-18
Engine Compartment Overview.......................5-18
Engine Oil...................................................5-21
Engine Oil Life System..................................5-24
Engine Air Cleaner/Filter................................5-25
Automatic Transmission Fluid.........................5-29
Engine Coolant.............................................5-34
Radiator Pressure Cap..................................5-39
Coolant Surge Tank Pressure Cap..................5-39
Engine Overheating.......................................5-39
Cooling System............................................5-41
Capacities and Speci�cations..........................5-50
Specification Charts......................................5-50
Section 5 Service and Appearance Care
5-1
ProCarManuals.com
Page 31 of 100
Water In Fuel Light/Message Chart
(cont’d)
Problem Recommended Action
•Immediately after
refueling, large
amount of water
possibly pumped
into fuel tank.Fuel tank purging
required. See your
dealer for assistance.
Notice:If you drive when this warning indicator is
on, you can damage your fuel injection system and
your engine. If the indicator comes on right after you
refuel, it means water was pumped into your fuel
tank. Turn off your engine immediately. Then, have
the water drained at once.
Hard starting, hesitation or flat performance at high speed
or during hard acceleration may be an indication of
premature fuel filter plugging due to dirty or contaminated
fuel. The filter element may need to be changed if this
happens. SeeFuel Filter Replacement on page 5-12.To drain water, do the following:
1. Stop and park the vehicle in a safe place.
Turn off the engine and apply the parking brake.
2. Remove the fuel cap.
3. Place a fuel-resistant container under the fuel
filter(s). For pickup models, the filter drain valve
is located in the engine compartment, on the
passenger’s side of the vehicle, on the bottom of the
fuel filter. For van models, the filter drain valves for
the primary and secondary fuel filters are located in
the chassis (inside frame rail) compartment. They
are on the driver’s side of the vehicle, below the
fuel filters.
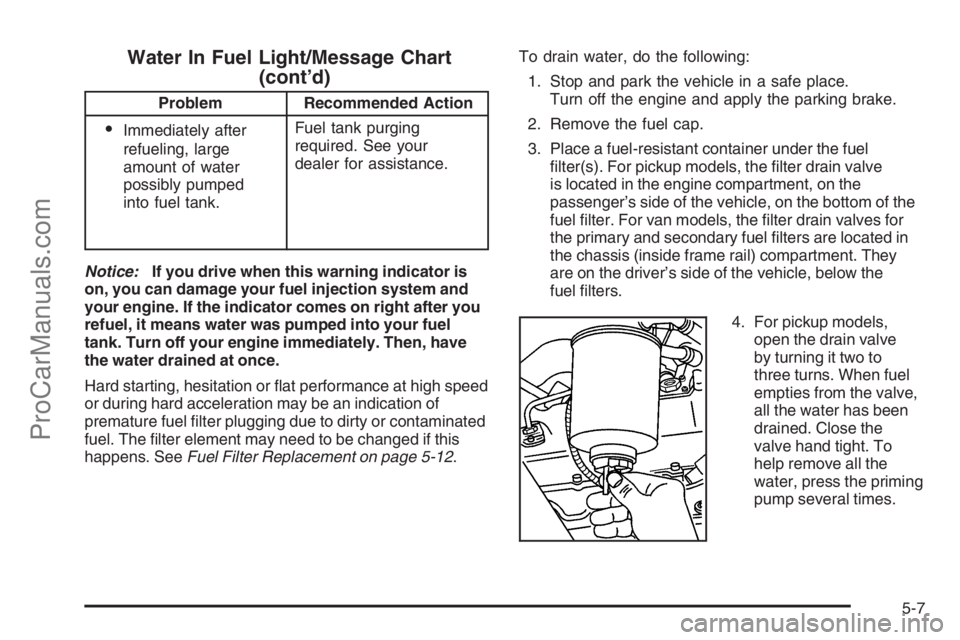
4. For pickup models,
open the drain valve
by turning it two to
three turns. When fuel
empties from the valve,
all the water has been
drained. Close the
valve hand tight. To
help remove all the
water, press the priming
pump several times.
5-7
ProCarManuals.com
Page 32 of 100
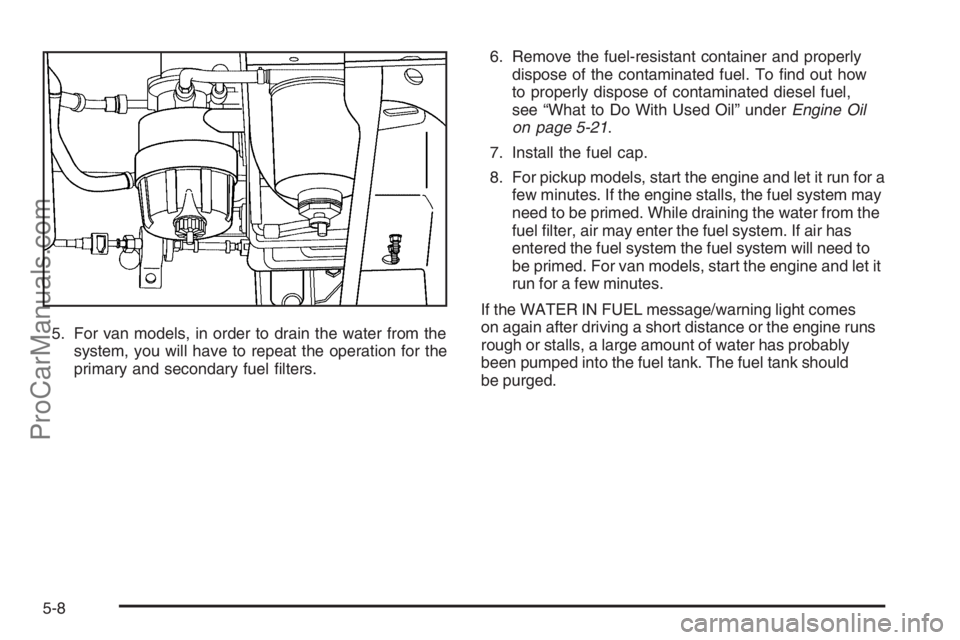
5. For van models, in order to drain the water from the
system, you will have to repeat the operation for the
primary and secondary fuel filters.6. Remove the fuel-resistant container and properly
dispose of the contaminated fuel. To find out how
to properly dispose of contaminated diesel fuel,
see “What to Do With Used Oil” underEngine Oil
on page 5-21.
7. Install the fuel cap.
8. For pickup models, start the engine and let it run for a
few minutes. If the engine stalls, the fuel system may
need to be primed. While draining the water from the
fuel filter, air may enter the fuel system. If air has
entered the fuel system the fuel system will need to
be primed. For van models, start the engine and let it
run for a few minutes.
If the WATER IN FUEL message/warning light comes
on again after driving a short distance or the engine runs
rough or stalls, a large amount of water has probably
been pumped into the fuel tank. The fuel tank should
be purged.
5-8
ProCarManuals.com
Page 38 of 100
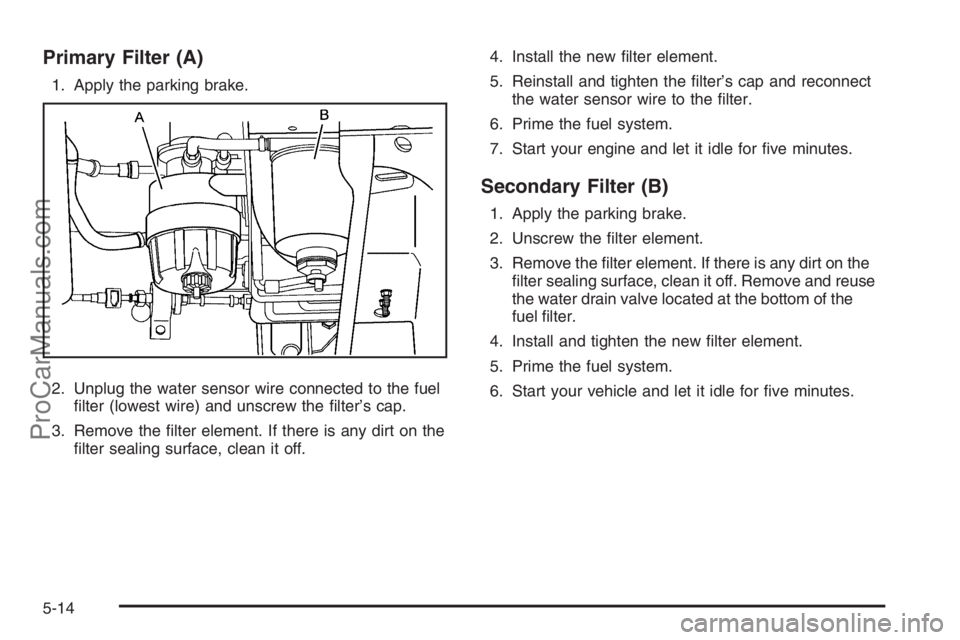
Primary Filter (A)
1. Apply the parking brake.
2. Unplug the water sensor wire connected to the fuel
filter (lowest wire) and unscrew the filter’s cap.
3. Remove the filter element. If there is any dirt on the
filter sealing surface, clean it off.4. Install the new filter element.
5. Reinstall and tighten the filter’s cap and reconnect
the water sensor wire to the filter.
6. Prime the fuel system.
7. Start your engine and let it idle for five minutes.
Secondary Filter (B)
1. Apply the parking brake.
2. Unscrew the filter element.
3. Remove the filter element. If there is any dirt on the
filter sealing surface, clean it off. Remove and reuse
the water drain valve located at the bottom of the
fuel filter.
4. Install and tighten the new filter element.
5. Prime the fuel system.
6. Start your vehicle and let it idle for five minutes.
5-14
ProCarManuals.com
Page 39 of 100
Filling the Tank
{CAUTION:
Fuel vapor burns violently and a fuel �re can
cause bad injuries. To help avoid injuries to you
and others, read and follow all the instructions
on the pump island. Turn off your engine when
you are refueling. Do not smoke if you are near
fuel or refueling your vehicle. Keep sparks,
�ames, and smoking materials away from fuel.
Do not leave the fuel pump unattended when
refueling your vehicle — this is against the law
in some places. Keep children away from the
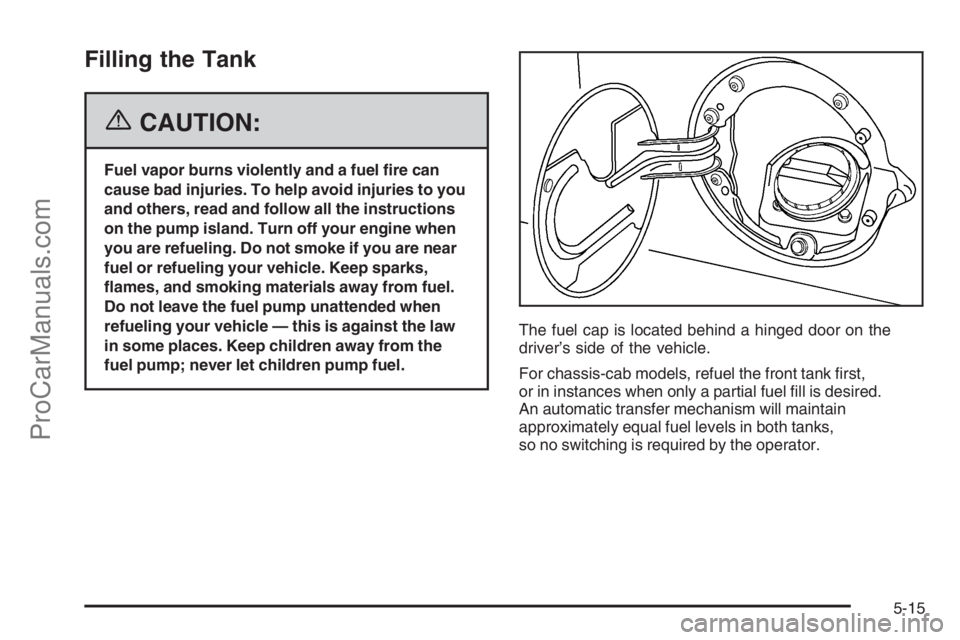
fuel pump; never let children pump fuel.The fuel cap is located behind a hinged door on the
driver’s side of the vehicle.
For chassis-cab models, refuel the front tank first,
or in instances when only a partial fuel fill is desired.
An automatic transfer mechanism will maintain
approximately equal fuel levels in both tanks,
so no switching is required by the operator.
5-15
ProCarManuals.com
Page 40 of 100
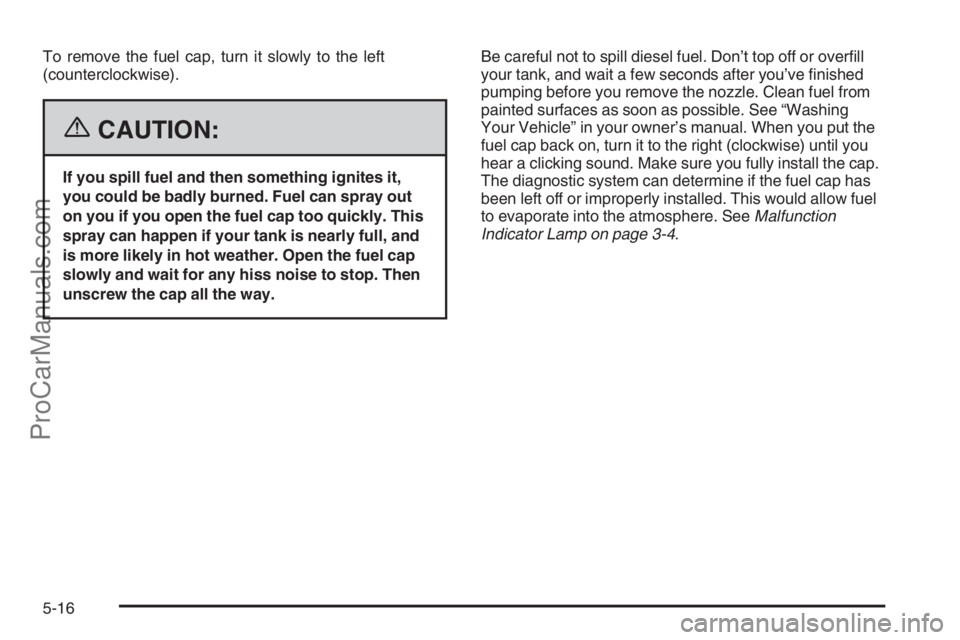
To remove the fuel cap, turn it slowly to the left
(counterclockwise).
{CAUTION:
If you spill fuel and then something ignites it,
you could be badly burned. Fuel can spray out
on you if you open the fuel cap too quickly. This
spray can happen if your tank is nearly full, and
is more likely in hot weather. Open the fuel cap
slowly and wait for any hiss noise to stop. Then
unscrew the cap all the way.Be careful not to spill diesel fuel. Don’t top off or overfill
your tank, and wait a few seconds after you’ve finished
pumping before you remove the nozzle. Clean fuel from
painted surfaces as soon as possible. See “Washing
Your Vehicle” in your owner’s manual. When you put the
fuel cap back on, turn it to the right (clockwise) until you
hear a clicking sound. Make sure you fully install the cap.
The diagnostic system can determine if the fuel cap has
been left off or improperly installed. This would allow fuel
to evaporate into the atmosphere. SeeMalfunction
Indicator Lamp on page 3-4.
5-16
ProCarManuals.com
Page 41 of 100
{CAUTION:
If a �re starts while you are refueling, do not
remove the nozzle. Shut off the �ow of fuel
by shutting off the pump or by notifying the
station attendant. Leave the area immediately.
Notice:If you need a new fuel cap, be sure to get
the right type. Your dealer can get one for you.
If you get the wrong type, it may not �t properly.
This may cause your malfunction indicator lamp to
light and may damage your fuel tank and emissions
system. SeeMalfunction Indicator Lamp on
page 3-4.
Notice:If your vehicle has been accidentally �lled
with gasoline, do not run the engine or severe engine
damage can occur. Contact your dealer to have the
fuel system �ushed.
Filling a Portable Fuel Container
{CAUTION:
Never �ll a portable fuel container while it is in
your vehicle. Static electricity discharge from
the container can ignite the gasoline vapor.
You can be badly burned and your vehicle
damaged if this occurs. To help avoid injury to
you and others:
Dispense gasoline only into approved
containers.
Do not �ll a container while it is inside a
vehicle, in a vehicle’s trunk, pickup bed,
or on any surface other than the ground.
Bring the �ll nozzle in contact with the
inside of the �ll opening before operating
the nozzle. Contact should be maintained
until the �lling is complete.
Do not smoke while pumping gasoline.
5-17
ProCarManuals.com
Page 45 of 100
A. Battery
B. Coolant Surge Tank
C. Automatic Transmission Dipstick
D. Engine Fan
E. Engine Air Cleaner/Filter
F. Engine Oil Fill Cap
G. Power Steering Fluid Reservoir
H. Brake Fluid Reservoir
I. Windshield Washer Fluid Reservoir
Engine Oil
Checking Engine Oil
It is a good idea to check your engine oil level every
time you get fuel.
The engine oil dipstick handle is a yellow loop.
SeeEngine Compartment Overview on page 5-18
for the location of the engine oil dipstick.In order to get an accurate reading, the oil must be
warm, at normal operating temperature, and the vehicle
must be on level ground.
1. Turn off the engine and give the oil at least
five minutes to drain back into the oil pan. With a
cool engine, allow 30 minutes. If you do not do this,
the oil dipstick might not show the actual level.
2. Pull out the dipstick and clean it with a paper towel
or a cloth, then push it back in all the way. Remove
it again, keeping the tip down.
When to Add Engine Oil
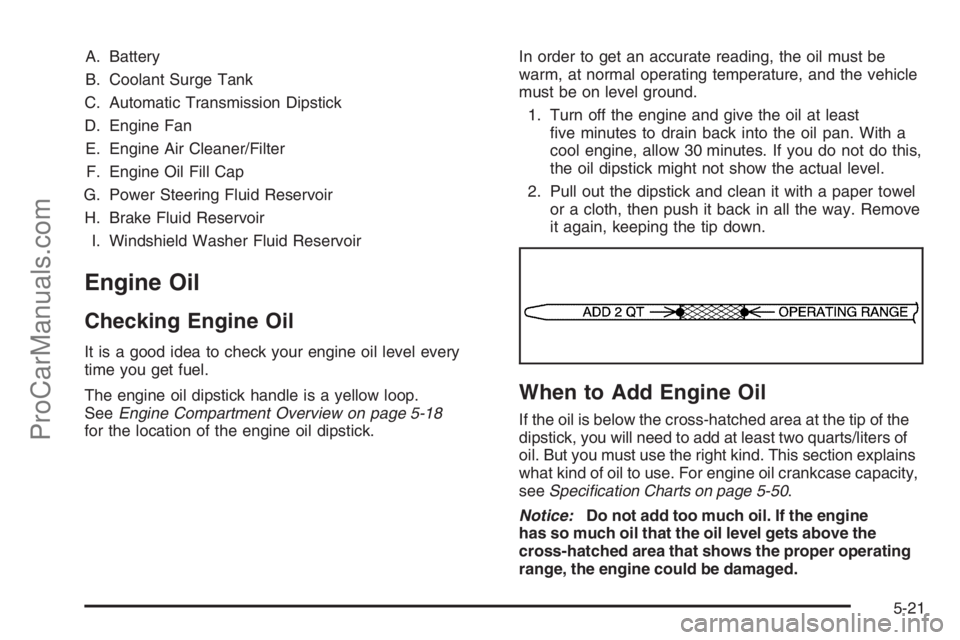
If the oil is below the cross-hatched area at the tip of the
dipstick, you will need to add at least two quarts/liters of
oil. But you must use the right kind. This section explains
what kind of oil to use. For engine oil crankcase capacity,
seeSpeci�cation Charts on page 5-50.
Notice:Do not add too much oil. If the engine
has so much oil that the oil level gets above the
cross-hatched area that shows the proper operating
range, the engine could be damaged.
5-21
ProCarManuals.com