maintenance CHEVROLET DURAMAX 2006 Owners Manual
[x] Cancel search | Manufacturer: CHEVROLET, Model Year: 2006, Model line: DURAMAX, Model: CHEVROLET DURAMAX 2006Pages: 100, PDF Size: 0.71 MB
Page 1 of 100
Features and Controls..................................... 2-1
Starting and Operating Your Vehicle ............. 2-2
Instrument Panel ............................................. 3-1
Warning Lights, Gages and Indicators ........... 3-2
Driving Your Vehicle ....................................... 4-1
Towing ..................................................... 4-2 Service and Appearance Care
.......................... 5-1
Diesel Fuel Requirements and Fuel System ..... 5-2
Checking Things Under the Hood ...............5-18
Capacities and Specifications .....................5-50
Maintenance Schedule ..................................... 6-1
Maintenance Schedule ................................ 6-2
2006 DURAMAX®Diesel EngineM
Index ......................................................................... 1
ProCarManuals.com
Page 2 of 100
General Motors, GM, GMC, CHEVROLET, the GM
Emblem, the GMC Truck Emblem, the CHEVROLET
Emblem, and the names SIERRA, SILVERADO,
SAVANA and EXPRESS are registered trademarks
of General Motors Corporation.
This manual contains information that pertains to the
operation of your diesel engine. It also contains your
Diesel Maintenance Schedule. The sections in this
manual correspond to the sections in your owner manual.
This manual, along with your owner manual, will assist
you in the proper use and maintenance of your vehicle.
Keep this manual with the owner manual in your vehicle,
so it will be there if you ever need it while you are on
the road. If you sell your vehicle, leave this manual
and the owner manual with the vehicle.
This manual includes the latest information at the time it
was printed. We reserve the rights to make changes in
the product after that time without notice.Canadian Owners
A French language copy of this manual can be obtained
from your dealer or from:
Helm, Incorporated
P.O. Box 07130
Detroit, MI 48207
Litho in U.S.A.
Part No. 15105920 B Second Printing
©2005 General Motors Corporation. All Rights Reserved.
ii
ProCarManuals.com
Page 16 of 100
Malfunction Indicator Lamp
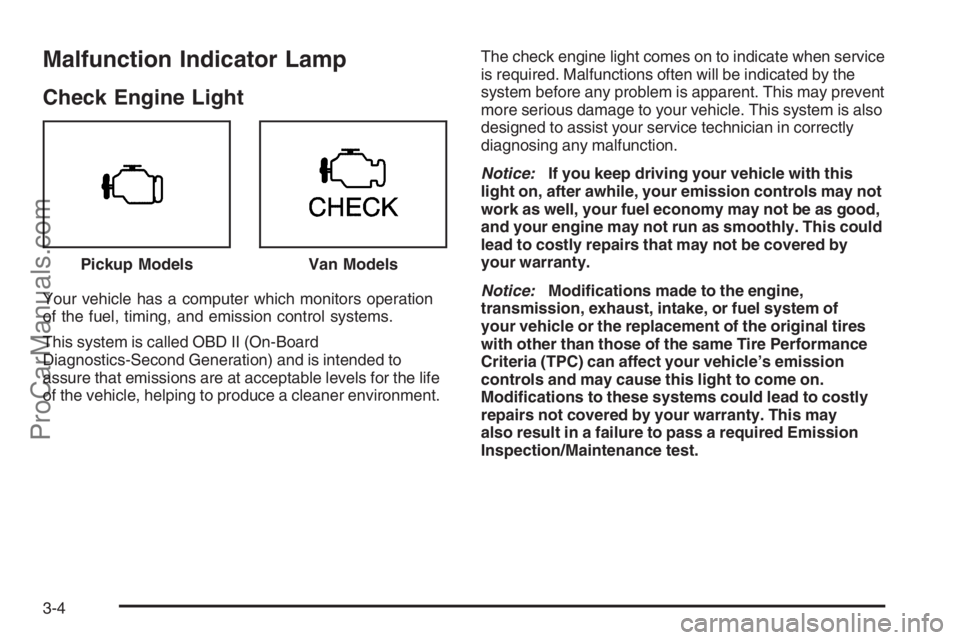
Check Engine Light
Your vehicle has a computer which monitors operation
of the fuel, timing, and emission control systems.
This system is called OBD II (On-Board
Diagnostics-Second Generation) and is intended to
assure that emissions are at acceptable levels for the life
of the vehicle, helping to produce a cleaner environment.The check engine light comes on to indicate when service
is required. Malfunctions often will be indicated by the
system before any problem is apparent. This may prevent
more serious damage to your vehicle. This system is also
designed to assist your service technician in correctly
diagnosing any malfunction.
Notice:If you keep driving your vehicle with this
light on, after awhile, your emission controls may not
work as well, your fuel economy may not be as good,
and your engine may not run as smoothly. This could
lead to costly repairs that may not be covered by
your warranty.
Notice:Modi�cations made to the engine,
transmission, exhaust, intake, or fuel system of
your vehicle or the replacement of the original tires
with other than those of the same Tire Performance
Criteria (TPC) can affect your vehicle’s emission
controls and may cause this light to come on.
Modi�cations to these systems could lead to costly
repairs not covered by your warranty. This may
also result in a failure to pass a required Emission
Inspection/Maintenance test. Pickup Models
Van Models
3-4
ProCarManuals.com
Page 17 of 100
If the Light Comes On
This light should come on, as a check to show you it is
working, when the ignition is on and the engine is not
running. If it does not, have it repaired. This light will also
come on if an emission control system malfunction has
been detected on your vehicle. Diagnosis and service
may be required.
You also may be able to correct the emission system
malfunction by considering the following:
Did you just drive through a deep puddle of water?
If so, your electrical system may be wet. The condition
will usually be corrected when the electrical system
dries out. A few driving trips should turn the light off.
Are you low on fuel?
As your engine starts to run out of fuel, your engine may
not run as efficiently as designed since small amounts of
air are sucked into the fuel line. The system can detect
this. Adding fuel should correct this condition. It will take
a few driving trips to turn the light off.
If none of the above steps have made the light turn off,
your dealer can check the vehicle. Your dealer has the
proper test equipment and diagnostic tools to fix any
mechanical or electrical problems that may have
developed.
Emissions Inspection and
Maintenance Programs
Some state/provincial and local governments have or
may begin programs to inspect the emission control
equipment on your vehicle. Failure to pass this inspection
could prevent you from getting a vehicle registration.
Here are some things you need to know in order to help
your vehicle pass an inspection:
Your vehicle will not pass this inspection if the check
engine light is on or not working properly.
Your vehicle will not pass this inspection if the OBD
(on-board diagnostic) system determines that critical
emission control systems have not been completely
diagnosed by the system. The vehicle would be
considered not ready for inspection. This can happen if
you have recently replaced your battery or if your battery
has run down. The diagnostic system is designed to
evaluate critical emission control systems during normal
driving. This may take several days of routine driving. If
you have done this and your vehicle still does not pass
the inspection for lack of OBD system readiness, your
GM dealer can prepare the vehicle for inspection.
3-5
ProCarManuals.com
Page 18 of 100
Oil Pressure GageThe oil pressure gage shows the engine oil pressure in
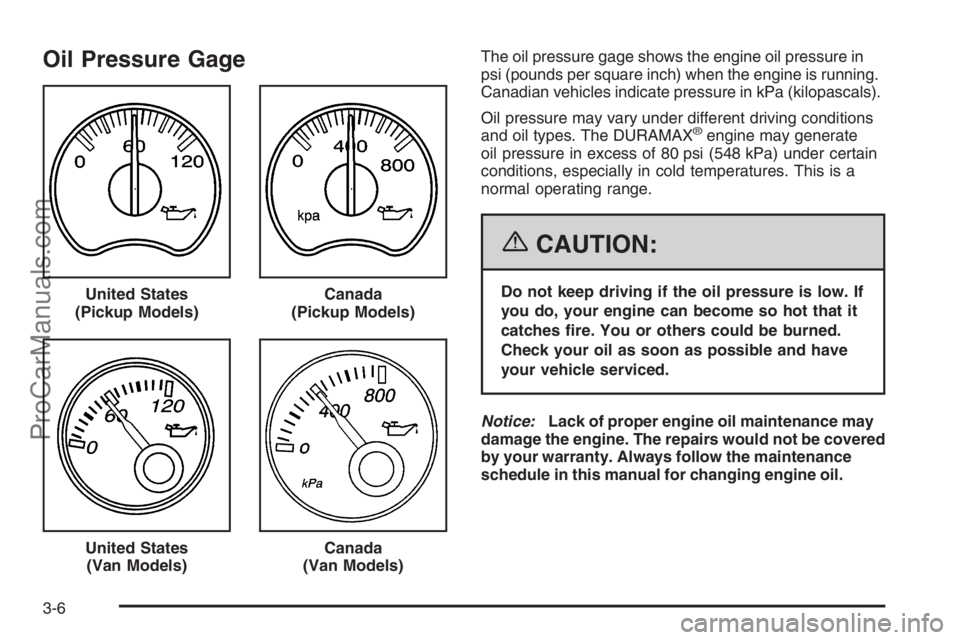
psi (pounds per square inch) when the engine is running.
Canadian vehicles indicate pressure in kPa (kilopascals).
Oil pressure may vary under different driving conditions
and oil types. The DURAMAX
®engine may generate
oil pressure in excess of 80 psi (548 kPa) under certain
conditions, especially in cold temperatures. This is a
normal operating range.
{CAUTION:
Do not keep driving if the oil pressure is low. If
you do, your engine can become so hot that it
catches �re. You or others could be burned.
Check your oil as soon as possible and have
your vehicle serviced.
Notice:Lack of proper engine oil maintenance may
damage the engine. The repairs would not be covered
by your warranty. Always follow the maintenance
schedule in this manual for changing engine oil. United States
(Pickup Models)Canada
(Pickup Models)
United States
(Van Models)Canada
(Van Models)
3-6
ProCarManuals.com
Page 50 of 100
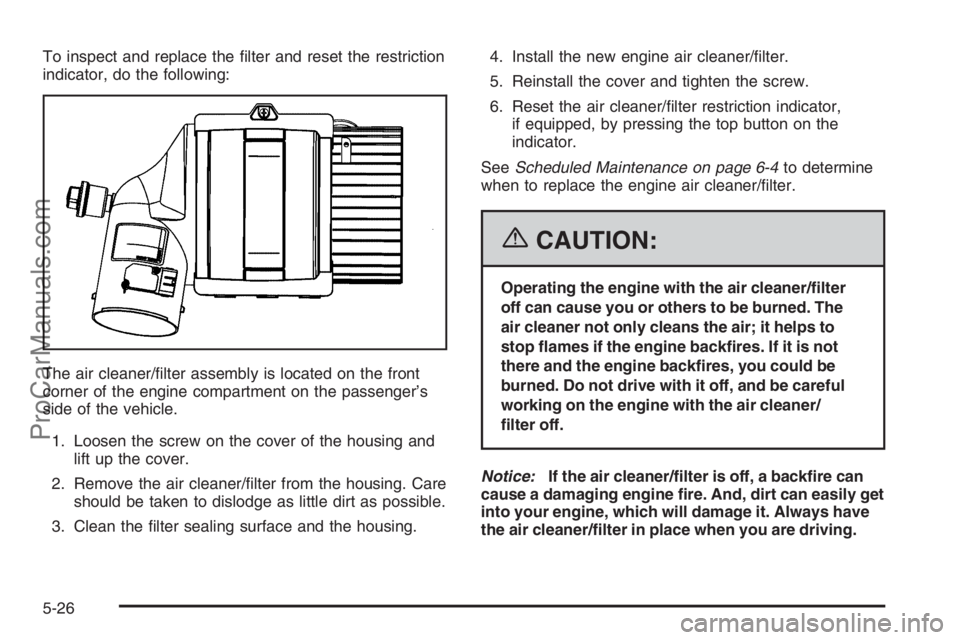
To inspect and replace the filter and reset the restriction
indicator, do the following:
The air cleaner/filter assembly is located on the front
corner of the engine compartment on the passenger’s
side of the vehicle.
1. Loosen the screw on the cover of the housing and
lift up the cover.
2. Remove the air cleaner/filter from the housing. Care
should be taken to dislodge as little dirt as possible.
3. Clean the filter sealing surface and the housing.4. Install the new engine air cleaner/filter.
5. Reinstall the cover and tighten the screw.
6. Reset the air cleaner/filter restriction indicator,
if equipped, by pressing the top button on the
indicator.
SeeScheduled Maintenance on page 6-4to determine
when to replace the engine air cleaner/filter.
{CAUTION:
Operating the engine with the air cleaner/�lter
off can cause you or others to be burned. The
air cleaner not only cleans the air; it helps to
stop �ames if the engine back�res. If it is not
there and the engine back�res, you could be
burned. Do not drive with it off, and be careful
working on the engine with the air cleaner/
�lter off.
Notice:If the air cleaner/�lter is off, a back�re can
cause a damaging engine �re. And, dirt can easily get
into your engine, which will damage it. Always have
the air cleaner/�lter in place when you are driving.
5-26
ProCarManuals.com
Page 52 of 100
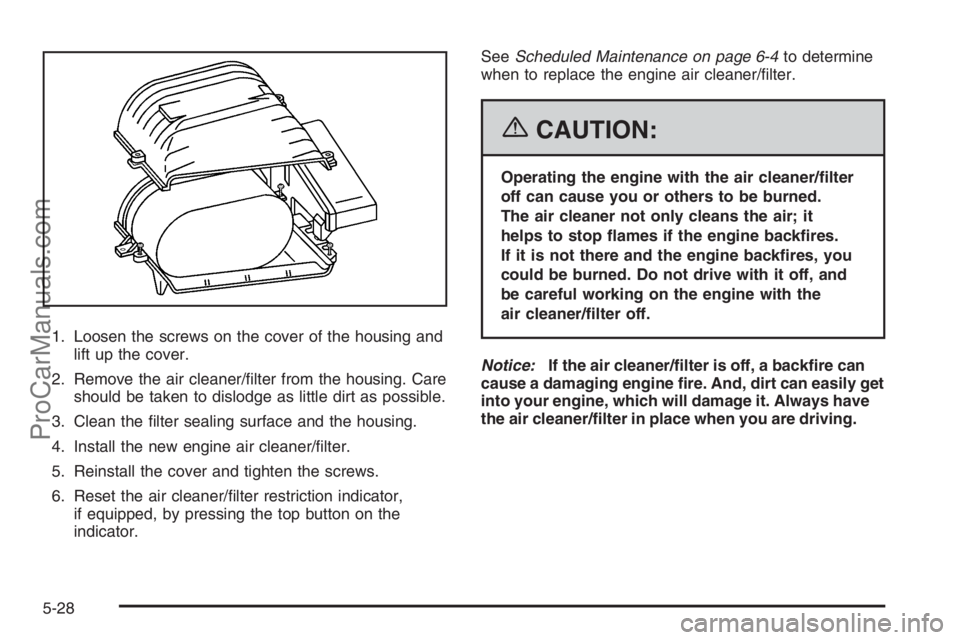
1. Loosen the screws on the cover of the housing and
lift up the cover.
2. Remove the air cleaner/filter from the housing. Care
should be taken to dislodge as little dirt as possible.
3. Clean the filter sealing surface and the housing.
4. Install the new engine air cleaner/filter.
5. Reinstall the cover and tighten the screws.
6. Reset the air cleaner/filter restriction indicator,
if equipped, by pressing the top button on the
indicator.SeeScheduled Maintenance on page 6-4to determine
when to replace the engine air cleaner/filter.
{CAUTION:
Operating the engine with the air cleaner/�lter
off can cause you or others to be burned.
The air cleaner not only cleans the air; it
helps to stop �ames if the engine back�res.
If it is not there and the engine back�res, you
could be burned. Do not drive with it off, and
be careful working on the engine with the
air cleaner/�lter off.
Notice:If the air cleaner/�lter is off, a back�re can
cause a damaging engine �re. And, dirt can easily get
into your engine, which will damage it. Always have
the air cleaner/�lter in place when you are driving.
5-28
ProCarManuals.com
Page 53 of 100
Automatic Transmission Fluid
When to Check and Change
(Pickup Models)
A good time to check your automatic transmission fluid
level is when the engine oil is changed.
Change both the fluid and filter every 25,000 miles
(41 500 km) if the vehicle is mainly driven under one
or more of these conditions:
•In heavy city traffic where the outside temperature
regularly reaches 90°F (32°C) or higher.
•In hilly or mountainous terrain.
•When doing frequent trailer towing.
•Uses such as found in taxi, police or
delivery service.
If you do not use your vehicle under any of
these conditions, change the fluid and filter
every 50,000 miles (83 000 km).
SeeScheduled Maintenance on page 6-4.
How to Check
Because this operation can be a little difficult, you may
choose to have this done at the dealership service
department.
If you do it yourself, be sure to follow all the instructions
here, or you could get a false reading on the dipstick.
Notice:Too much or too little �uid can damage your
transmission. Too much can mean that some of the
�uid could come out and fall on hot engine part or
exhaust system parts, starting a �re. Too little �uid
could cause the transmission to overheat. Be sure
to get an accurate reading if you check your
transmission �uid.
Wait at least 30 minutes before checking the
transmission fluid level if you have been driving:
•When outside temperatures are above 90°F (32°C).
•At high speed for quite a while.
•In heavy traffic — especially in hot weather.
•While pulling a trailer.
5-29
ProCarManuals.com
Page 55 of 100
5. Perform a hot check at the first opportunity after the
normal operating temperature of 160°F (71°C) to
200°F (93°C) is reached.
6. If the fluid level is in the acceptable range, push the
dipstick back in all the way.
Hot Check Procedure
The fluid must be hot to ensure an accurate check.
The fluid level rises as temperature increases.
1. Operate the transmission in DRIVE (D) until the
normal operating temperature of 160°F (71°C) to
200°F (93°C) is reached.
2. Pull out the dipstick and wipe it with a clean rag or
paper towel.
3. Push it back in all the way, wait three seconds
and then pull it back out again. Repeat the check
procedure to verify the reading.
4. Safe operating level is within the HOT RUN band
on the dipstick. The width of the HOT RUN band
represents approximately 1.06 quart (1.0 liter)
of fluid at normal operating temperature.
5. If the fluid level is not within the HOT RUN band,
add or drain fluid as necessary to bring the fluid
level to within the HOT RUN band.
6. If the fluid level is in the acceptable range, push the
dipstick back in all the way.
Consistency of Readings
Always check the fluid level at least twice using the
procedures described previously. Consistency
(repeatable readings) is important to maintaining proper
fluid level. If inconsistent readings persist, check the
transmission breather to be sure it is clean and
unclogged. If readings are still inconsistent, contact
your dealer.
How to Add Fluid
Refer to the Maintenance Schedule to determine what
kind of transmission fluid to use. SeeRecommended
Fluids and Lubricants on page 6-15.
Add fluid only after checking the transmission fluid while
it is hot. A cold check is used only as a reference. If the
fluid level is low, add only enough of the proper fluid to
bring the level up to the HOT area for a hot check. It
doesn’t take much fluid, generally less than one pint
(0.5 L).Don’t over�ll.
Notice:Use of the incorrect automatic transmission
�uid may damage your vehicle, and the damages may
not be covered by your warranty. Always use the
automatic transmission �uid listed inRecommended
Fluids and Lubricants on page 6-15.
•After adding fluid, recheck the fluid level as described
under “How to Check.”
•When the correct fluid level is obtained, push the
dipstick back in all the way.
5-31
ProCarManuals.com
Page 58 of 100
How to Add Fluid
Refer to the Maintenance Schedule to determine what
kind of transmission fluid to use. SeeRecommended
Fluids and Lubricants on page 6-15.
Using a funnel, add fluid down the transmission dipstick
tube only after checking the transmission fluid while it is
hot. A cold check is used only as a reference. If the fluid
level is low, add only enough of the proper fluid to bring
the level up to the HOT area for a hot check. It does not
take much fluid, generally less than one pint (0.5L). Do
not overfill.
Notice:Use of the incorrect automatic transmission
�uid may damage your vehicle, and the damages
may not be covered by your warranty. Always
use the automatic transmission �uid listed in
Recommended Fluids and Lubricants on page 6-15.
•After adding fluid, recheck the fluid level as
described under “How to Check” earlier in
this section.
•When the correct fluid level is obtained, push the
dipstick back in all the way. Then flip the handle
down to lock the dipstick in place.
Engine Coolant
Pickup Models
The cooling system in your vehicle is filled with
DEX-COOL®engine coolant. This coolant is designed
to remain in your vehicle for 5 years or 150,000 miles
(240 000 km), whichever occurs first, if you add only
DEX-COOL
®extended life coolant.
The following explains your cooling system and how
to add coolant when it is low. If you have a problem
with engine overheating, seeEngine Overheating
on page 5-39.
A 50/50 mixture of clean, drinkable water and
DEX-COOL
®coolant will:
•Give freezing protection down to−34°F (−37°C)
•Give boiling protection up to 265°F (129°C)
•Protect against rust and corrosion
•Help keep the proper engine temperature
•Let the warning lights and gages work as they should
Notice:Using coolant other than DEX-COOL
®may
cause premature engine, heater core, or radiator
corrosion. In addition, the engine coolant may
require changing sooner, at the �rst maintenance
service after each 30,000 miles (50 000 km) or
24 months, whichever occurs �rst. Any repairs
would not be covered by your warranty. Always use
DEX-COOL
®(silicate-free) coolant in your vehicle.
5-34
ProCarManuals.com