CD changer CHEVROLET EPICA 2004 1.G Owners Manual
[x] Cancel search | Manufacturer: CHEVROLET, Model Year: 2004, Model line: EPICA, Model: CHEVROLET EPICA 2004 1.GPages: 338, PDF Size: 2.38 MB
Page 100 of 338
Secondary Information Center (SIC).................3-46
Clock..........................................................3-46
Door Ajar Light.............................................3-47
Trunk Ajar Light............................................3-47
Audio System(s).............................................3-48
Radio with CD..............................................3-48
Trunk-Mounted CD Changer...........................3-55Theft-Deterrent Feature..................................3-58
Audio Steering Wheel Controls.......................3-59
Radio Reception...........................................3-59
Care of Your CDs.........................................3-59
Care of Your CD Player................................3-60
Backglass Antenna.......................................3-60
Section 3 Instrument Panel
3-2
Page 105 of 338
Tilt Wheel
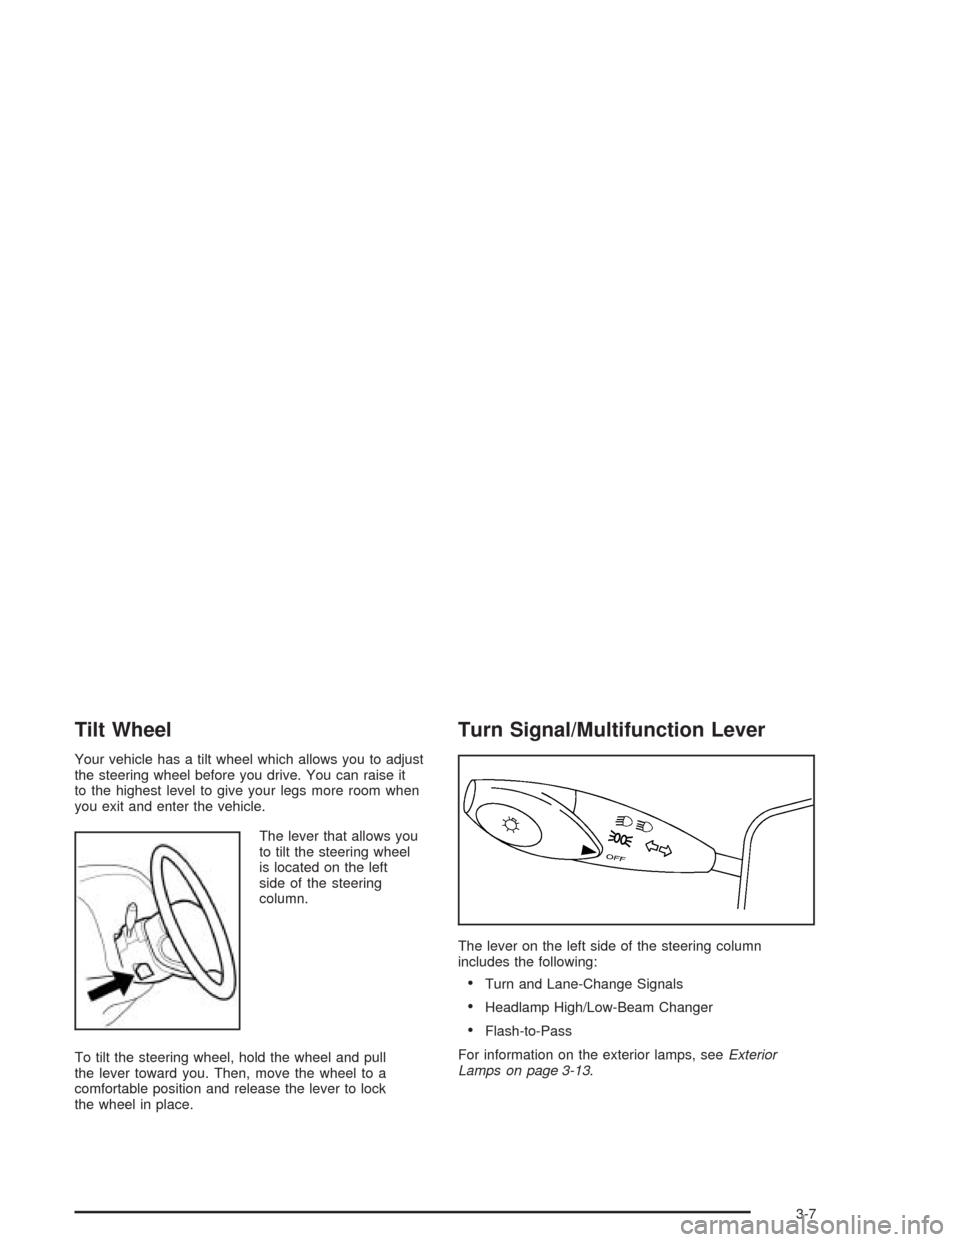
Your vehicle has a tilt wheel which allows you to adjust
the steering wheel before you drive. You can raise it
to the highest level to give your legs more room when
you exit and enter the vehicle.
The lever that allows you
to tilt the steering wheel
is located on the left
side of the steering
column.
To tilt the steering wheel, hold the wheel and pull
the lever toward you. Then, move the wheel to a
comfortable position and release the lever to lock
the wheel in place.
Turn Signal/Multifunction Lever
The lever on the left side of the steering column
includes the following:
•Turn and Lane-Change Signals
•Headlamp High/Low-Beam Changer
•Flash-to-Pass
For information on the exterior lamps, seeExterior
Lamps on page 3-13.
3-7
Page 106 of 338
Turn and Lane-Change Signals
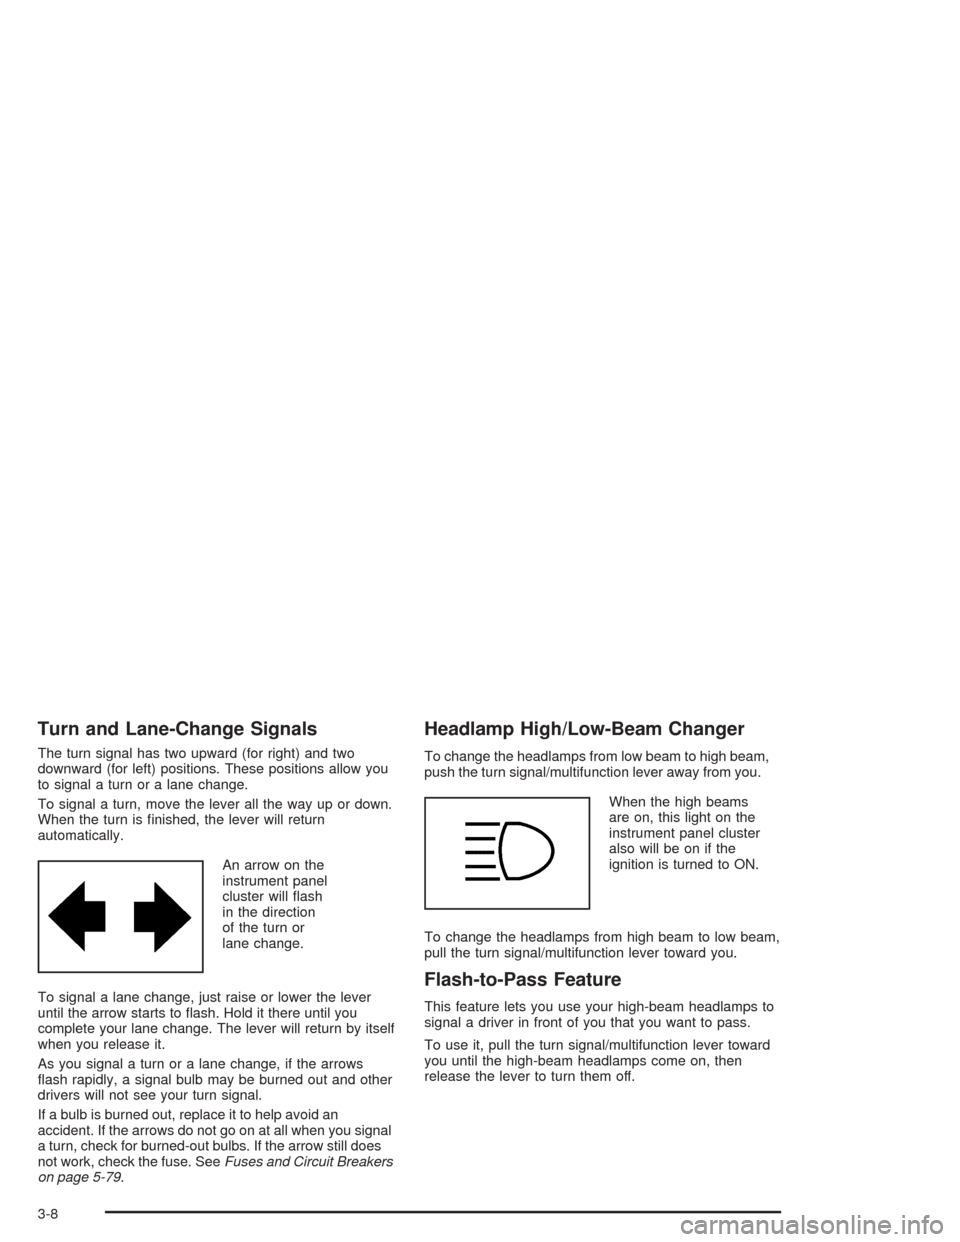
The turn signal has two upward (for right) and two
downward (for left) positions. These positions allow you
to signal a turn or a lane change.
To signal a turn, move the lever all the way up or down.
When the turn is finished, the lever will return
automatically.
An arrow on the
instrument panel
cluster will flash
in the direction
of the turn or
lane change.
To signal a lane change, just raise or lower the lever
until the arrow starts to flash. Hold it there until you
complete your lane change. The lever will return by itself
when you release it.
As you signal a turn or a lane change, if the arrows
flash rapidly, a signal bulb may be burned out and other
drivers will not see your turn signal.
If a bulb is burned out, replace it to help avoid an
accident. If the arrows do not go on at all when you signal
a turn, check for burned-out bulbs. If the arrow still does
not work, check the fuse. SeeFuses and Circuit Breakers
on page 5-79.
Headlamp High/Low-Beam Changer
To change the headlamps from low beam to high beam,
push the turn signal/multifunction lever away from you.
When the high beams
are on, this light on the
instrument panel cluster
also will be on if the
ignition is turned to ON.
To change the headlamps from high beam to low beam,
pull the turn signal/multifunction lever toward you.
Flash-to-Pass Feature
This feature lets you use your high-beam headlamps to
signal a driver in front of you that you want to pass.
To use it, pull the turn signal/multifunction lever toward
you until the high-beam headlamps come on, then
release the lever to turn them off.
3-8
Page 141 of 338
Cruise Control Light
If your vehicle has this
feature, this light will
come on briefly when the
ignition is on.
If the light does not come on, then have it fixed so it
will be ready to tell you when the system is active.
The CRUISE light comes on whenever the cruise control
is set. SeeCruise Control on page 3-10. The light will
turn off when the cruise control is turned off.
Highbeam On Light
This light comes on
whenever the high-beam
headlamps are on.
See “Headlamp High/Low-Beam Changer” under
Turn Signal/Multifunction Lever on page 3-7for
additional information.
3-43
Page 153 of 338
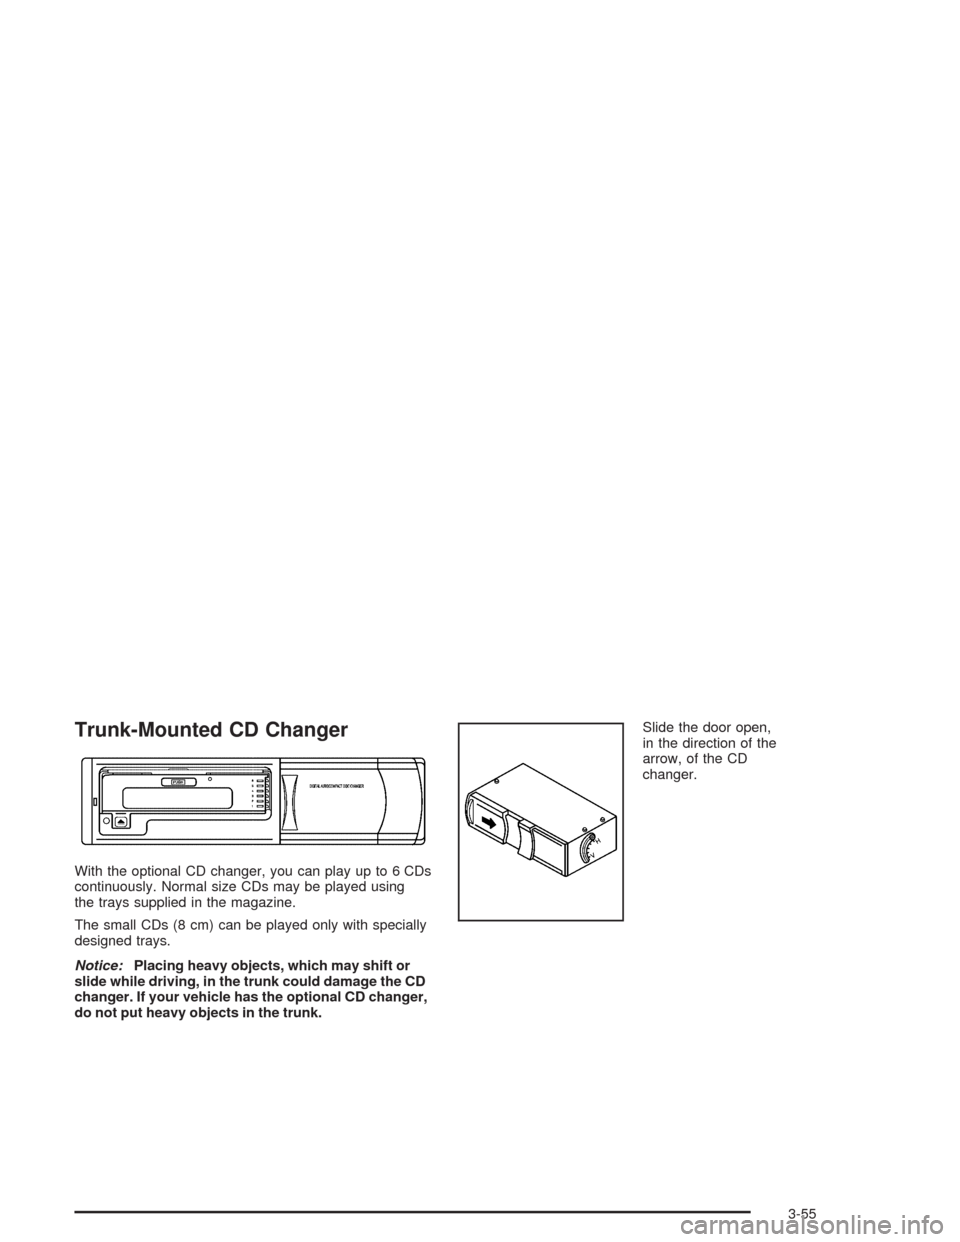
Trunk-Mounted CD Changer
With the optional CD changer, you can play up to 6 CDs
continuously. Normal size CDs may be played using
the trays supplied in the magazine.
The small CDs (8 cm) can be played only with specially
designed trays.
Notice:Placing heavy objects, which may shift or
slide while driving, in the trunk could damage the CD
changer. If your vehicle has the optional CD changer,
do not put heavy objects in the trunk.Slide the door open,
in the direction of the
arrow, of the CD
changer.
3-55
Page 154 of 338
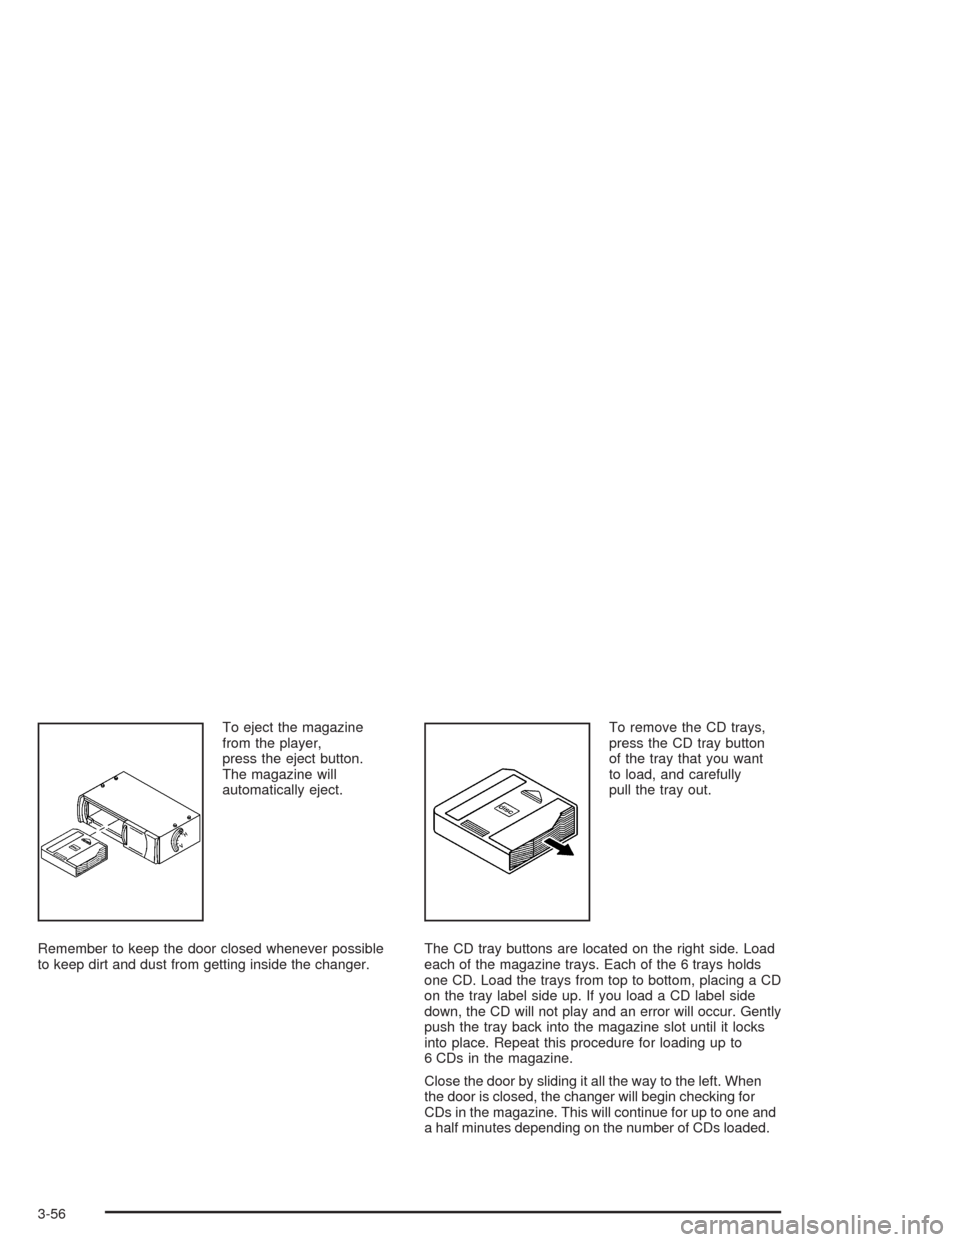
To eject the magazine
from the player,
press the eject button.
The magazine will
automatically eject.
Remember to keep the door closed whenever possible
to keep dirt and dust from getting inside the changer.To remove the CD trays,
press the CD tray button
of the tray that you want
to load, and carefully
pull the tray out.
The CD tray buttons are located on the right side. Load
each of the magazine trays. Each of the 6 trays holds
one CD. Load the trays from top to bottom, placing a CD
on the tray label side up. If you load a CD label side
down, the CD will not play and an error will occur. Gently
push the tray back into the magazine slot until it locks
into place. Repeat this procedure for loading up to
6 CDs in the magazine.
Close the door by sliding it all the way to the left. When
the door is closed, the changer will begin checking for
CDs in the magazine. This will continue for up to one and
a half minutes depending on the number of CDs loaded.
3-56
Page 155 of 338
Whenever a CD magazine with CDs is loaded in the
changer and the door is closed, the CD symbol will
appear on the radio display. If the CD changer is
checking the magazine for CDs, the CD symbol will flash
on the display until the changer is ready to play. If CD
changer mode is entered during initialization, LOADING
will appear on the display. When a CD begins playing,
a CD and track number will appear on the radio display.
The CD numbers are listed on the front of the magazine.
All of the CD functions are controlled by the radio
pushbuttons except for ejecting the magazine.
Playing a CD
If an error appears on the display, see “CD Messages”
later in this section.
The following buttons are used for the trunk-mounted
CD changer.
TRACK (Reverse/Fast Forward):Turn this knob
counterclockwise or clockwise to select the previous or
next track on the current CD.
Push and hold this knob counterclockwise to quickly
reverse or clockwise to quickly advance within a track.
As the CD advances, the elapsed time of the track
will appear on the display.
5 DN (Previous):Press and hold this pushbutton to
select the previous CD in the magazine.6 UP (Next):Press and hold this pushbutton to select
the next CD in the magazine.
2 RPT (Repeat):Press this pushbutton to repeat the
current track RPT will appear on the display. Press this
pushbutton again to turn off repeat play.
3 INT (Scan):To scan the tracks on the current CD,
press this pushbutton until INTRO appears on the
display. You will hear the first ten seconds of each track
on the CD. To stop scanning, press this pushbutton
again.
4 RDM (Random):Press this pushbutton to listen to
the tracks on the current CD in random, rather than
sequential, order. RDM will appear on the display.
Press this pushbutton again to turn off random play.
While in random, you can turn the tune knob to select
another track.
AM/FM:Press this button to listen to the radio when
playing a CD.
CD:Press this button to play a CD when listening to
the radio. CDC will appear on the display when the CD
changer has been selected.
Press this button while a CD is playing to pause the
CD. Press this button again to resume play.
3-57
Page 156 of 338
CD Messages
No Maga:An empty magazine is inserted in the CD
changer. Try the magazine again with a CD loaded
in one of the trays.
If the CD is not playing correctly, for any other reason,
try a known good CD.
If any error occurs repeatedly or if an error cannot be
corrected, contact your dealer. If your radio displays an
error message, write it down and provide it to your
dealer when reporting the problem.
Theft-Deterrent Feature
The theft-deterrent system is designed to discourage
theft of your radio. When the radio and vehicle are
turned off, your radio has a blinking red light to indicate
that the theft-deterrent system is activated.
The theft-deterrent system also activates when the
audio system has been disconnected from the battery.
When this occurs, the AF code and security code
will have to be entered in order to operate your radio.
An identification card stamped with the AF code
and security code will be provided with the vehicle.
Keep it in a safe place, not in the vehicle.To enter the security code do the following:
1. Turn the ignition to ACC or ON.
2. Turn the radio on. AF or COdE will flash on the
display. If AF flashes on the display, go to Step
2. If COdE flashes on the display, go to Step 4.
3. Enter the AF code by using the preset pushbuttons.
COdE will flash on the display.
4. Enter the security code by using the preset
pushbuttons. When the complete security code is
entered, the code will flash three times.
If the security code is not entered correctly, Err will
appear on the display for a few seconds. When
COdE appears back on the display, repeat Step 4.
If the incorrect AF code is entered, an incorrect
frequency level may be chosen and the radio
reception may be affected. If this occurs, reset the
audio system by removing and re-installing the
AUDIO fuse. See “Instrument Panel Fuse Block”
underFuses and Circuit Breakers on page 5-79for
more information. Then repeat Steps 1 through 4.
3-58
Page 323 of 338
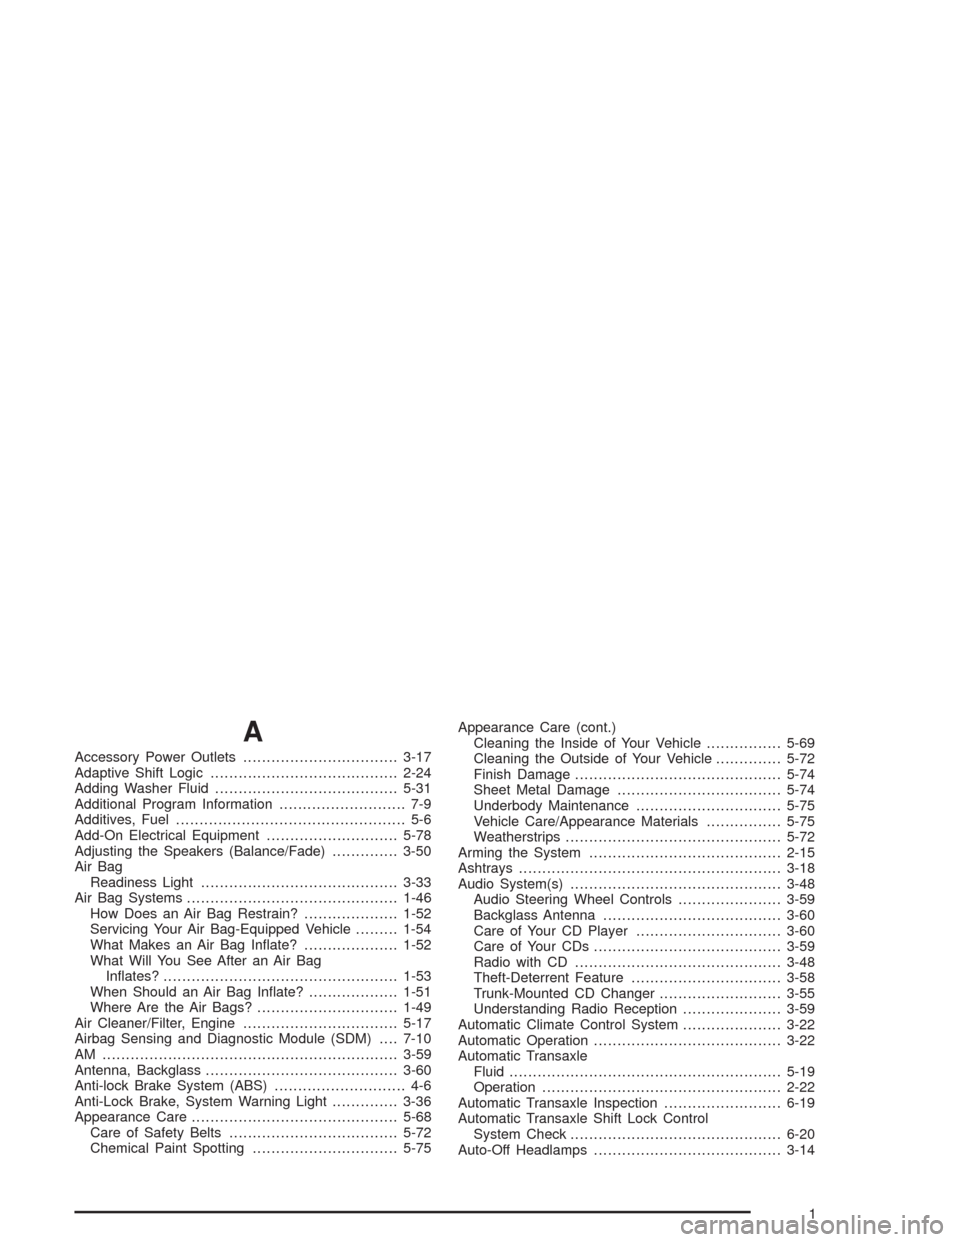
A
Accessory Power Outlets.................................3-17
Adaptive Shift Logic........................................2-24
Adding Washer Fluid.......................................5-31
Additional Program Information........................... 7-9
Additives, Fuel................................................. 5-6
Add-On Electrical Equipment............................5-78
Adjusting the Speakers (Balance/Fade)..............3-50
Air Bag
Readiness Light..........................................3-33
Air Bag Systems.............................................1-46
How Does an Air Bag Restrain?....................1-52
Servicing Your Air Bag-Equipped Vehicle.........1-54
What Makes an Air Bag Inflate?....................1-52
What Will You See After an Air Bag
Inflates?..................................................1-53
When Should an Air Bag Inflate?...................1-51
Where Are the Air Bags?..............................1-49
Air Cleaner/Filter, Engine.................................5-17
Airbag Sensing and Diagnostic Module (SDM)....7-10
AM ...............................................................3-59
Antenna, Backglass.........................................3-60
Anti-lock Brake System (ABS)............................ 4-6
Anti-Lock Brake, System Warning Light..............3-36
Appearance Care............................................5-68
Care of Safety Belts....................................5-72
Chemical Paint Spotting...............................5-75Appearance Care (cont.)
Cleaning the Inside of Your Vehicle................5-69
Cleaning the Outside of Your Vehicle..............5-72
Finish Damage............................................5-74
Sheet Metal Damage...................................5-74
Underbody Maintenance...............................5-75
Vehicle Care/Appearance Materials................5-75
Weatherstrips..............................................5-72
Arming the System.........................................2-15
Ashtrays........................................................3-18
Audio System(s).............................................3-48
Audio Steering Wheel Controls......................3-59
Backglass Antenna......................................3-60
Care of Your CD Player...............................3-60
Care of Your CDs........................................3-59
Radio with CD............................................3-48
Theft-Deterrent Feature................................3-58
Trunk-Mounted CD Changer..........................3-55
Understanding Radio Reception.....................3-59
Automatic Climate Control System.....................3-22
Automatic Operation........................................3-22
Automatic Transaxle
Fluid..........................................................5-19
Operation...................................................2-22
Automatic Transaxle Inspection.........................6-19
Automatic Transaxle Shift Lock Control
System Check.............................................6-20
Auto-Off Headlamps........................................3-14
1
Page 324 of 338
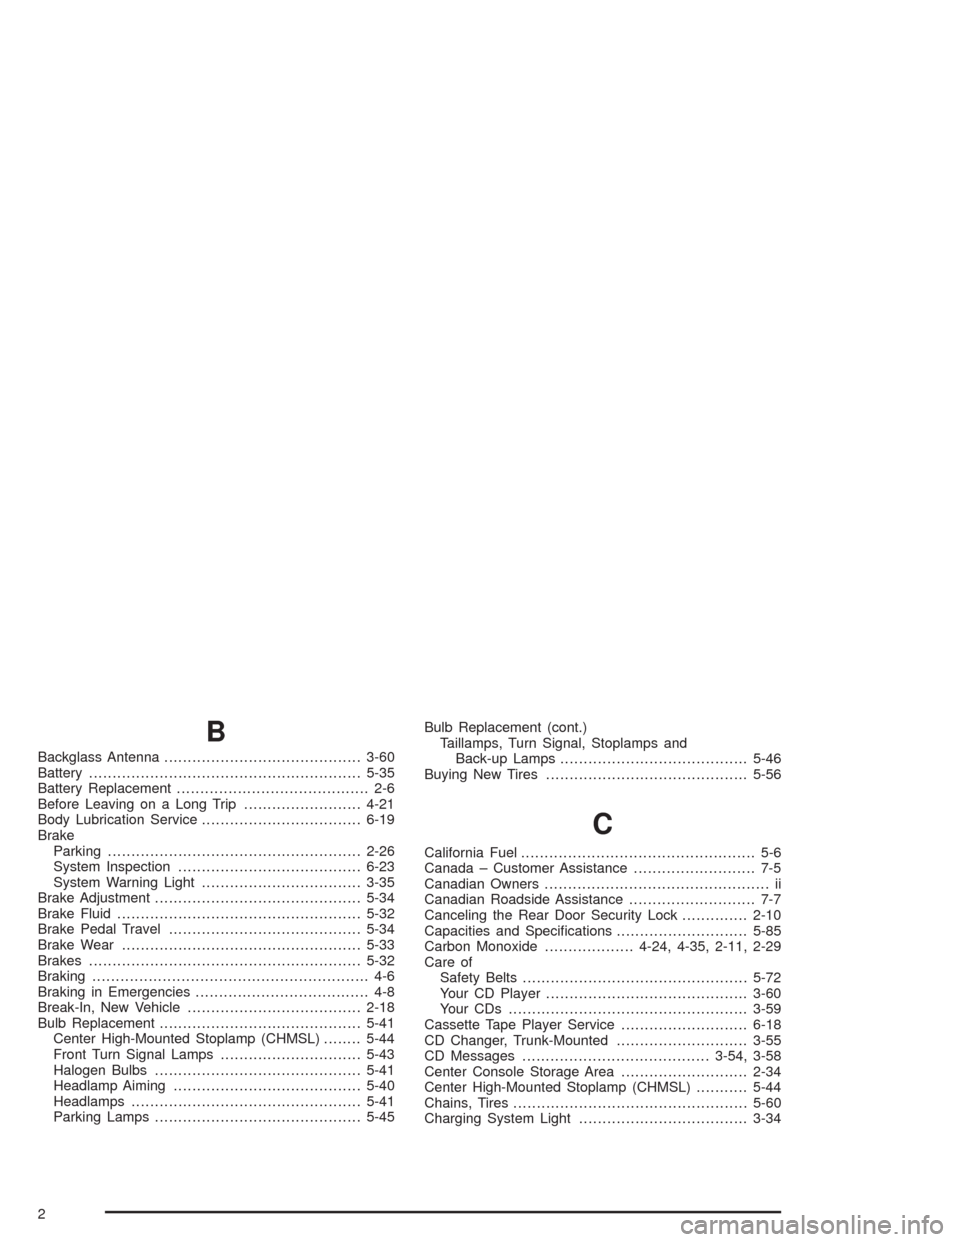
B
Backglass Antenna..........................................3-60
Battery..........................................................5-35
Battery Replacement......................................... 2-6
Before Leaving on a Long Trip.........................4-21
Body Lubrication Service..................................6-19
Brake
Parking......................................................2-26
System Inspection.......................................6-23
System Warning Light..................................3-35
Brake Adjustment............................................5-34
Brake Fluid....................................................5-32
Brake Pedal Travel.........................................5-34
Brake Wear...................................................5-33
Brakes..........................................................5-32
Braking........................................................... 4-6
Braking in Emergencies..................................... 4-8
Break-In, New Vehicle.....................................2-18
Bulb Replacement...........................................5-41
Center High-Mounted Stoplamp (CHMSL)........5-44
Front Turn Signal Lamps..............................5-43
Halogen Bulbs............................................5-41
Headlamp Aiming........................................5-40
Headlamps.................................................5-41
Parking Lamps............................................5-45Bulb Replacement (cont.)
Taillamps, Turn Signal, Stoplamps and
Back-up Lamps........................................5-46
Buying New Tires...........................................5-56
C
California Fuel.................................................. 5-6
Canada – Customer Assistance.......................... 7-5
Canadian Owners................................................ ii
Canadian Roadside Assistance........................... 7-7
Canceling the Rear Door Security Lock..............2-10
Capacities and Specifications............................5-85
Carbon Monoxide...................4-24, 4-35, 2-11, 2-29
Care of
Safety Belts................................................5-72
Your CD Player...........................................3-60
Your CDs ...................................................3-59
Cassette Tape Player Service...........................6-18
CD Changer, Trunk-Mounted............................3-55
CD Messages........................................3-54, 3-58
Center Console Storage Area...........................2-34
Center High-Mounted Stoplamp (CHMSL)...........5-44
Chains, Tires..................................................5-60
Charging System Light....................................3-34
2